
JavaScript (209)
Encrypting or Decrypting PDF Documents in React with JavaScript
2026-09-17 03:04:45 Written by Nina TangOnce a contract, a quotation or a financial statement leaves the office as a PDF, its content is essentially wide open — anyone can open it, save a copy, edit it and send it on. Setting a password, or allowing reading only while switching off printing and copying, is the most direct way to close that gap at the distribution stage. Doing this used to mean either desktop software, which is hard to embed in a web workflow, or uploading the file to a server, which means the document leaves the user's device.
Spire.PDF for JavaScript loads, modifies and saves PDF documents directly in the browser based on WebAssembly, so the whole encryption process runs locally and reads and writes files through a virtual file system (VFS), with no backend service required.
This article covers three core features:
For installation and project configuration, refer to Integrating Spire.PDF for JavaScript in a React Project. The following examples assume Spire.PDF is installed and the WebAssembly module has been initialized.
Encrypting a PDF Document
The constructor of PdfPasswordSecurityPolicy takes two arguments: a user password and an owner password. Whoever receives the document needs the first one to open it; the second stays with the document owner and is used to lift the restrictions later. The algorithm is set through EncryptionAlgorithm, here AES-128; DocumentPrivilege decides which operations are allowed once the document is open, and get_AllowAll() grants all of them.
function App() {
  const encryptPdf = async () => {
    // Get the Spire.PDF WASM module
    const pdfModule = window.wasmModule?.spirepdf;

    // Check whether the module is ready
    if (!pdfModule) {
      alert('Spire.PDF is not ready yet');
      return;
    }

    // Load the PDF file to be encrypted into the VFS
    const inputFileName = 'ContractTemplate.pdf';
    await window.spire.FetchFileToVFS(inputFileName, "", `${process.env.PUBLIC_URL}/data/`);

    // Create a PdfDocument object and load the PDF document
    let doc = new pdfModule.PdfDocument();
    doc.LoadFromFile(inputFileName);

    // Create the password security policy: the first argument is the user password, the second the owner password
    const policy = new pdfModule.PdfPasswordSecurityPolicy('spire123', 'owner123');

    // Specify the encryption algorithm
    policy.EncryptionAlgorithm = pdfModule.PdfEncryptionAlgorithm.AES_128;

    // Specify the privileges: get_AllowAll() means no operation is restricted
    policy.DocumentPrivilege = pdfModule.PdfDocumentPrivilege.get_AllowAll();

    // Apply the policy and save the document
    doc.Encrypt(policy);
    const outputFileName = 'Encrypted.pdf';
    doc.SaveToFile(outputFileName);
    doc.Close();

    // Read the generated file from the VFS and trigger the download
    const fileArray = window.dotnetRuntime.Module.FS.readFile(outputFileName);
    const blob = new Blob([fileArray], { type: 'application/pdf' });
    const url = URL.createObjectURL(blob);
    const a = document.createElement('a');
    a.href = url;
    a.download = outputFileName;
    a.click();
    URL.revokeObjectURL(url);
  };

  return (
    <div style={{ textAlign: 'center', height: '300px' }}>
      <h1>Encrypt a PDF</h1>
      <button onClick={encryptPdf}>
        Start Encrypting
      </button>
    </div>
  );
}

export default App;
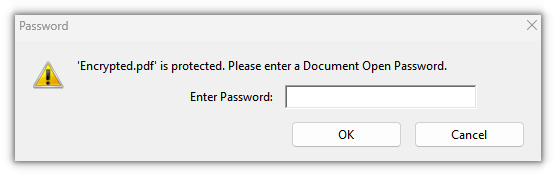
The PDF document after a user password and an owner password are set
Restricting the Permissions of a PDF Document
Leave the user password empty and set only an owner password, and the document opens without a password while printing, copying and editing are granted or forbidden item by item — a good fit for distribution scenarios where the file may be read but not taken away. The permissions themselves are described by PdfDocumentPrivilege: start from a fully permissive baseline, then switch off what is not needed. Here printing, copying content and modifying content are switched off.
function App() {
  const restrictPdfPermissions = async () => {
    // Get the Spire.PDF WASM module
    const pdfModule = window.wasmModule?.spirepdf;

    // Check whether the module is ready
    if (!pdfModule) {
      alert('Spire.PDF is not ready yet');
      return;
    }

    // Load the PDF file to be processed into the VFS
    const inputFileName = 'ContractTemplate.pdf';
    await window.spire.FetchFileToVFS(inputFileName, "", `${process.env.PUBLIC_URL}/data/`);

    // Create a PdfDocument object and load the PDF document
    let doc = new pdfModule.PdfDocument();
    doc.LoadFromFile(inputFileName);

    // Leave the user password empty: the document opens directly; the owner password lifts the restrictions later
    const policy = new pdfModule.PdfPasswordSecurityPolicy('', 'owner123');
    policy.EncryptionAlgorithm = pdfModule.PdfEncryptionAlgorithm.AES_128;

    // Start from full permissions and switch off the ones that are not needed
    const privilege = pdfModule.PdfDocumentPrivilege.get_AllowAll();
    privilege.AllowPrint = false;
    privilege.AllowContentCopying = false;
    privilege.AllowModifyContents = false;
    policy.DocumentPrivilege = privilege;

    // Apply the policy and save the document
    doc.Encrypt(policy);
    const outputFileName = 'PermissionRestricted.pdf';
    doc.SaveToFile(outputFileName);
    doc.Close();

    // Read the generated file from the VFS and trigger the download
    const fileArray = window.dotnetRuntime.Module.FS.readFile(outputFileName);
    const blob = new Blob([fileArray], { type: 'application/pdf' });
    const url = URL.createObjectURL(blob);
    const a = document.createElement('a');
    a.href = url;
    a.download = outputFileName;
    a.click();
    URL.revokeObjectURL(url);
  };

  return (
    <div style={{ textAlign: 'center', height: '300px' }}>
      <h1>Restrict PDF Permissions</h1>
      <button onClick={restrictPdfPermissions}>
        Start Restricting
      </button>
    </div>
  );
}

export default App;
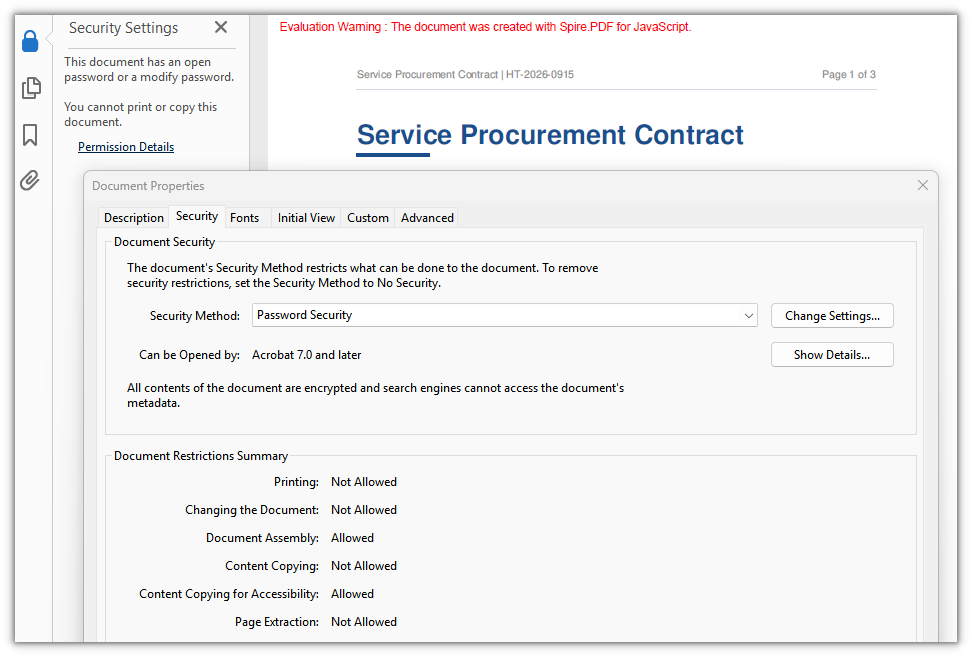
A PDF document that opens without a password but whose printing, copying and editing are forbidden
Decrypting a PDF Document
Decryption means removing the existing password protection, and it presupposes that the password is at hand. If only the user password is available, Decrypt needs the owner password as well before the restrictions can be lifted; calling the parameterless Decrypt() with just the user password is rejected.
function App() {
  const decryptPdf = async () => {
    // Get the Spire.PDF WASM module
    const pdfModule = window.wasmModule?.spirepdf;

    // Check whether the module is ready
    if (!pdfModule) {
      alert('Spire.PDF is not ready yet');
      return;
    }

    // Load the PDF file to be decrypted into the VFS
    const inputFileName = 'EncryptedContract.pdf';
    await window.spire.FetchFileToVFS(inputFileName, "", `${process.env.PUBLIC_URL}/data/`);

    // Create a PdfDocument object and load the encrypted document with its user password
    let doc = new pdfModule.PdfDocument();
    doc.LoadFromFile(inputFileName, 'spire123');

    // Confirm that the document really is password protected
    if (!doc.IsEncrypted) {
      alert('This document is not encrypted, no decryption needed');
      return;
    }

    // Remove the protection with the owner password
    doc.Decrypt('owner123');

    const outputFileName = 'Decrypted.pdf';
    doc.SaveToFile(outputFileName);
    doc.Close();

    // Read the generated file from the VFS and trigger the download
    const fileArray = window.dotnetRuntime.Module.FS.readFile(outputFileName);
    const blob = new Blob([fileArray], { type: 'application/pdf' });
    const url = URL.createObjectURL(blob);
    const a = document.createElement('a');
    a.href = url;
    a.download = outputFileName;
    a.click();
    URL.revokeObjectURL(url);
  };

  return (
    <div style={{ textAlign: 'center', height: '300px' }}>
      <h1>Decrypt a PDF</h1>
      <button onClick={decryptPdf}>
        Start Decrypting
      </button>
    </div>
  );
}

export default App;
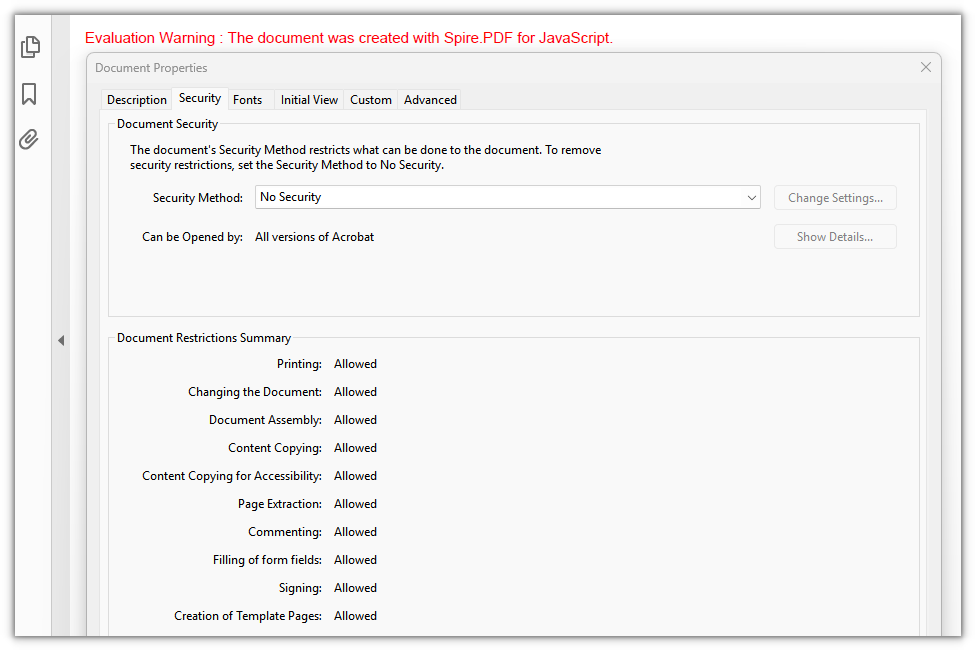
The PDF document after the password protection is removed, ready to open directly
FAQ
Opening an encrypted document reports an invalid password
Reason: LoadFromFile was called without a password, or the password passed in does not match the user password of the document. In that case Spire.PDF throws Can not open an encrypted document. The password is invalid. instead of returning an empty PdfDocument.
Solution: Pass the user password as the second argument of LoadFromFile:
// The second argument is the user password
doc.LoadFromFile(inputFileName, 'spire123');
Calling Decrypt() reports "Cannot decrypt documents without permission password"
Reason: The document was loaded with the user password, so only reading rights are available. Removing the encryption is an owner-level operation and requires the owner password (also called the permissions password).
Solution: Both forms work — load with the owner password and call the parameterless Decrypt(), or keep the user password for loading and hand the owner password to Decrypt:
// Form 1: load with the owner password, then remove the protection directly
doc.LoadFromFile(inputFileName, 'owner123');
doc.Decrypt();

// Form 2: load with the user password and pass the owner password to Decrypt
doc.LoadFromFile(inputFileName, 'spire123');
doc.Decrypt('owner123');
Which encryption algorithm should I choose
Reason: PdfEncryptionKeySize and PdfEncryptionAlgorithm list RC4_40, RC4_128, AES_128, AES_256 and more, but the WebAssembly build that runs in the browser does not support AES-256 yet — setting EncryptionAlgorithm to AES_256 throws Cryptography_AlgorithmNotSupported.
Solution: Use AES_128 on the web; when a legacy reader that only understands RC4 really has to be supported, switch to RC4_128:
// Recommended on the web: AES-128
policy.EncryptionAlgorithm = pdfModule.PdfEncryptionAlgorithm.AES_128;

// For legacy readers: RC4-128
policy.EncryptionAlgorithm = pdfModule.PdfEncryptionAlgorithm.RC4_128;
Get a Free License
If you wish to remove the evaluation message from the result document or remove feature limitations, please contact sales to obtain a temporary license valid for 30 days.
Convert Text to PDF with JavaScript: Customize Pages, Fonts & Layout
2026-09-17 03:01:29 Written by Jack Du
Converting plain text files to PDF is useful when you need to turn text-based content into a fixed-layout document that is easier to share, archive, print, or distribute. Compared with TXT files, PDF documents also provide more control over page size, margins, fonts, text alignment, and pagination.
In this article, we will demonstrate how to convert a TXT file to PDF with JavaScript in a React application using Spire.PDF for JavaScript. We will also explore several common formatting options, including setting the PDF page size and margins, using custom fonts, changing text alignment, and controlling where the text begins on the page.
On this page:
- Set Up Spire.PDF for JavaScript in React
- Convert Text to PDF with JavaScript
- Page and Text Configuration
- Conclusion
- FAQs
Set Up Spire.PDF for JavaScript in React
Before working with PDF files, make sure that Spire.PDF for JavaScript has been integrated into your React project and that its WebAssembly module can be loaded correctly.
If you haven't completed the setup yet, refer to the tutorial How to Integrate Spire.PDF for JavaScript in a React Project for detailed instructions.
The examples below assume that the required JavaScript, WebAssembly, and supporting files have already been added to the React project's public directory and that the Spire.PDF module can be accessed through:
window.wasmModule.spirepdf
The source TXT file used in this example should also be placed in a location accessible from the application's public directory.
Convert Text to PDF with JavaScript
The basic process of converting a TXT file to PDF involves several steps.
First, load the TXT file into the WebAssembly virtual file system (VFS). The file content can then be read as bytes and decoded into a JavaScript string.
Next, create a new PDF document and add a page. A PdfTextWidget can be used to draw the text onto the PDF page. By using PdfTextLayout with pagination enabled, long text can automatically flow across multiple PDF pages instead of being limited to the first page.
Finally, save the generated PDF to the virtual file system, read the resulting PDF data, and convert it into a Blob so that users can download the file directly from the browser.
The following example demonstrates the complete process:
import React, { useEffect, useState } from 'react';

function App() {
  const [ready, setReady] = useState(false);
  const [downloadUrl, setDownloadUrl] = useState(null);
  const [downloadName, setDownloadName] = useState('');

  useEffect(() => {
    (async () => {
      const publicUrl = process.env.PUBLIC_URL || '';
      await import(/* webpackIgnore: true */ `${publicUrl}/spire.common.js`);
      const spireModule = await import(/* webpackIgnore: true */ `${publicUrl}/spire.pdf.js`);
      const rawModule = spireModule.default || spireModule;

      window.wasmModule = typeof rawModule === 'function'
        ? await rawModule({ locateFile: p => p.endsWith('.wasm') ? `${publicUrl}/${p}` : p })
        : rawModule;

      setReady(true);
    })();
  }, []);

  const textToPdf = async () => {
    const wasmModule = window.wasmModule.spirepdf;
    if (!wasmModule) return;

    // 1. Load the text file into the virtual file system (VFS)
    const inputFileName = 'TextToPdf.txt';
    await window.spire.FetchFileToVFS(inputFileName, '', `${process.env.PUBLIC_URL || ''}/`);

    // 2. Read the text from the .txt file
    const textByte = window.dotnetRuntime.Module.FS.readFile(inputFileName);
    const text = new TextDecoder('utf-8').decode(textByte);

    // 3. Create a PDF document
    const doc = new wasmModule.PdfDocument();

    // 4. Add a section to the document
    const section = doc.Sections.Add();

    // 5. Add a page to the section
    const page = section.Pages.Add();

    // 6. Create a PdfFont using Microsoft YaHei at size 12
    await window.spire.FetchFileToVFS('msyh.ttc', '/Library/Fonts/', `${process.env.PUBLIC_URL}/fonts/`);
    let font = new wasmModule.PdfTrueTypeFont({
        fontFamily:'Microsoft YaHei',
        size: 12,
        style: wasmModule.PdfFontStyle.Regular,
        unicode:true
    });

    // 7. Create a PdfStringFormat for text formatting
    const format = new wasmModule.PdfStringFormat();
    format.Alignment = wasmModule.PdfTextAlignment.Left;
    format.LineSpacing = 20;

    // 8. Create a PdfBrush for text color
    const brush = wasmModule.PdfBrushes.get_Black();

    // 9. Create a PdfTextLayout for text layout options
    const textLayout = new wasmModule.PdfTextLayout();
    textLayout.Break = wasmModule.PdfLayoutBreakType.FitPage;
    textLayout.Layout = wasmModule.PdfLayoutType.Paginate;

    // 10. Define the bounds of the text widget on the page
    const bounds = new wasmModule.RectangleF({
      location: new wasmModule.PointF(0, 0),
      size: page.Canvas.ClientSize,
    });

    // 11. Create a PdfTextWidget with the given text, font, and brush
    const textWidget = new wasmModule.PdfTextWidget({ text, font, brush });
    textWidget.StringFormat = format;

    // 12. Draw the text widget on the page using the given bounds and layout options
    const layoutWidget = new wasmModule.PdfLayoutWidget(textWidget.H);
    layoutWidget.Draw({ page, layoutRectangle: bounds, format: textLayout });

    // 13. Define the output file name
    const outputFileName = 'TextToPdf_result.pdf';

    // 14. Save the document to the specified path
    doc.SaveToFile(outputFileName);
    doc.Close();

    // 15. Read the saved file and convert it to a Blob
    const bytes = window.dotnetRuntime.Module.FS.readFile(outputFileName);
    const blob = new Blob([bytes], { type: 'application/pdf' });

    // 16. Generate the download link
    setDownloadName(outputFileName);
    setDownloadUrl(URL.createObjectURL(blob));
  };

  return (
    <div style={{ textAlign: 'center', padding: 30 }}>
      <h1>Convert Text to PDF</h1>
      <span>Click the following button to convert text to PDF document.</span>
      <div style={{ marginTop: '20px' }}>
        <button onClick={textToPdf} disabled={!ready}>Convert to PDF</button>
        {downloadUrl && (
          <div style={{ marginTop: '10px' }}>
            <a href={downloadUrl} download={downloadName}>Click here to download the generated file</a>
          </div>
        )}
      </div>
    </div>
  );
}

export default App;
In this example, TextDecoder converts the UTF-8 byte data from the TXT file into a JavaScript string.
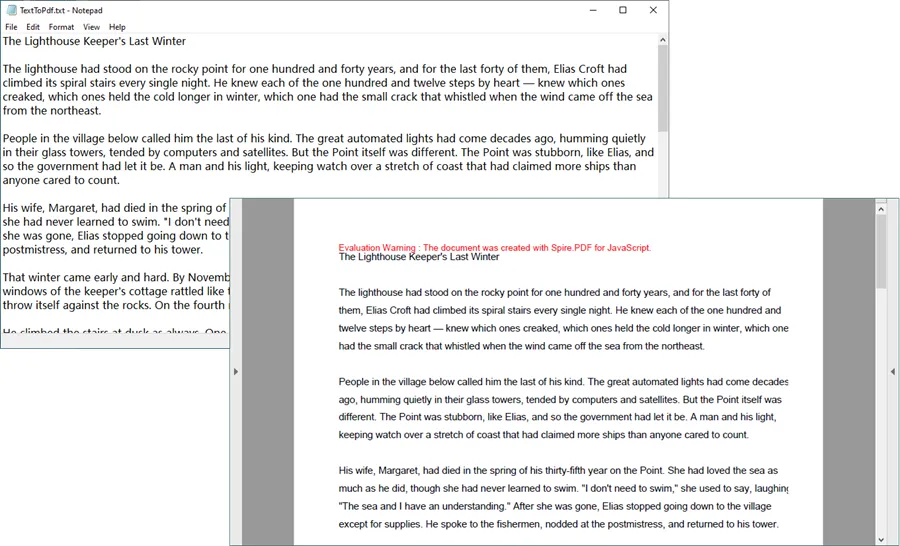
The text is then passed to PdfTextWidget, while PdfLayoutWidget.Draw() handles the actual layout process. Since PdfLayoutType.Paginate is used, text that exceeds the available space on the first page can continue onto additional pages automatically.
Output:
Page and Text Configuration
Set PDF Page Size and Margins
Page size and margins are important when converting long text documents because they determine how much content can fit on each page.
For example, you can set the page size to A4 and use 20-point margins on all four sides:
const page = section.Pages.Add();

page.PageSettings.Size = wasmModule.PdfPageSize.A4;

page.PageSettings.Margins = new wasmModule.PdfMargins({
  top: 20,
  bottom: 20,
  left: 20,
  right: 20
});
The page margins reduce the available drawing area for the text and prevent the content from being positioned too close to the edges of the PDF page.
You can adjust these values depending on the type of document being generated. Larger margins may be more appropriate for reports or printable documents, while smaller margins allow more text to fit on each page.
Use a Custom Font in the PDF
The built-in PDF fonts, such as Helvetica, are sufficient for many English documents. However, documents containing multilingual characters may require a Unicode-compatible TrueType font.
For example, you can load ARIALUNI.TTF into the virtual file system and use Arial Unicode MS when drawing text:
await window.spire.FetchFileToVFS(
  'ARIALUNI.TTF',
  '/Library/Fonts/',
  `${process.env.PUBLIC_URL}/static/font/`
);

let font = new wasmModule.PdfTrueTypeFont({
  fontFamily: 'Arial Unicode MS',
  size: 12,
  style: wasmModule.PdfFontStyle.Regular,
  unicode: true
});
In this case, the font file can be stored under:
public/static/font/
Using a Unicode-compatible font is particularly useful when the source text contains languages such as Chinese, Japanese, Korean, or other characters that are not fully covered by standard PDF fonts.
The unicode: true option enables Unicode text rendering when the TrueType font is used.
Change Text Alignment
Text alignment can be controlled through PdfStringFormat.
For example, the following code justifies the text so that it aligns with both sides of the available text area:
const format = new wasmModule.PdfStringFormat();

format.Alignment =
  wasmModule.PdfTextAlignment.Justify;
The alignment can be changed according to the layout requirements of the document.
For normal paragraphs, left alignment or justified alignment is generally the most practical choice. Other alignment options can be useful for titles, headings, or specially formatted text.
The same PdfStringFormat object can also be used to configure settings such as line spacing:
format.LineSpacing = 20;
Increasing the line spacing can improve readability, especially when converting large blocks of plain text into PDF.
Control the Starting Position of Text
When drawing text onto a PDF page, the RectangleF object determines the area in which the text is laid out.
The starting position is defined by the PointF object:
const bounds = new wasmModule.RectangleF({
  location: new wasmModule.PointF(0, y),
  size: page.Canvas.ClientSize,
});
Here, the y value determines how far the text starts from the top of the page.
For example:
location: new wasmModule.PointF(0, 30)
moves the beginning of the text downward by 30 points.
It is generally recommended to keep the x-coordinate at 0 when the drawing area uses page.Canvas.ClientSize.
Changing the x-coordinate without reducing the width of the drawing area accordingly can result in uneven left and right spacing. In some cases, text near the right edge may also extend beyond the available area and become clipped.
Therefore, when the goal is simply to create additional space above the first line of text, adjusting the y coordinate is usually the safer approach:
const bounds = new wasmModule.RectangleF({
  location: new wasmModule.PointF(0, 40),
  size: page.Canvas.ClientSize,
});
This starts the text 40 points below its default top position while preserving the full available page width.
Conclusion
Converting plain text to PDF in a React application involves more than simply changing the file extension. The text first needs to be read and decoded, after which it can be drawn onto PDF pages using appropriate fonts, formatting, and layout rules.
With Spire.PDF for JavaScript, you can create a PDF document from TXT content directly in a React application and configure important output properties such as page size, margins, fonts, text alignment, line spacing, starting position, and automatic pagination .
These options make it possible to turn basic plain-text content into a more structured and portable PDF document while keeping the entire processing workflow within the JavaScript application.
FAQs
Can JavaScript convert a TXT file to PDF in a React application?
Yes. A React application can read the contents of a TXT file and use a JavaScript PDF library such as Spire.PDF for JavaScript to create PDF pages and draw the text onto them.
How can I convert long text to multiple PDF pages?
Use PdfTextLayout together with PdfLayoutType.Paginate. This allows PdfTextWidget content to continue onto subsequent pages when the available space on the current page is exhausted.
const textLayout = new wasmModule.PdfTextLayout();

textLayout.Break =
  wasmModule.PdfLayoutBreakType.FitPage;

textLayout.Layout =
  wasmModule.PdfLayoutType.Paginate;
Can I specify the page size when converting text to PDF?
Yes. The page size can be configured through the page settings. For example, the following code creates an A4 page:
page.PageSettings.Size =
  wasmModule.PdfPageSize.A4;
You can also configure the top, bottom, left, and right margins to control the available text area.
How can I display Unicode characters in the generated PDF?
Use a Unicode-compatible TrueType font and create a PdfTrueTypeFont with Unicode support enabled:
let font = new wasmModule.PdfTrueTypeFont({
  fontFamily: 'Arial Unicode MS',
  size: 12,
  style: wasmModule.PdfFontStyle.Regular,
  unicode: true
});
The corresponding font file should also be made available to the WebAssembly virtual file system.
How can I move the text farther down from the top of the PDF page?
Change the y coordinate of the PointF used to define the text drawing area:
const bounds = new wasmModule.RectangleF({
  location: new wasmModule.PointF(0, 40),
  size: page.Canvas.ClientSize,
});
A larger y value moves the starting position of the text farther down the page.
Get a Free License
To fully experience the capabilities of Spire.PDF for JavaScript without any evaluation limitations, you can request a 30-day free trial license.
A PDF document can carry attachments — images, spreadsheets, supplementary notes — and distribute them together with the document. This "document package" form is common in contracts, quotations, and reports. Attachments in a PDF exist in two forms: document attachments, which are attached to the whole document and listed together in the reader's "Attachments" panel, and annotation attachments, which appear as paperclip icons on a page and open the attached file when double-clicked. When we receive a PDF with attachments, we often need to pull the attachments out for separate use, and these two kinds of attachments are read in different ways, requiring different APIs.
Spire.PDF for JavaScript processes PDF documents directly in the browser based on WebAssembly, managing input and output files through a virtual file system (VFS) with no backend service required. The two kinds of attachments are read through different entry points, but both yield the file name and content through FileName and Data: document attachments use PdfDocument.Attachments with PdfEmbeddedFileSpecification, while annotation attachments require visiting PdfPage.Annotations page by page and filtering out PdfAttachmentAnnotationWidget.
This article covers two core features:
For installation and project setup, see Integrate Spire.PDF for JavaScript in a React Project. The examples below assume that Spire.PDF is installed and that the WebAssembly module has been initialized.
Related Knowledge
Attachments in a PDF file come in two kinds: document-level attachments and annotation-level attachments. The table below explains the differences between them and how each is represented in Spire.PDF for JavaScript.
| Attachment Type | Representation | Definition |
|---|---|---|
| Document attachment | PdfDocument.Attachments, read through PdfEmbeddedFileSpecification |
An attachment added at the document level is not displayed on the PDF page, but can be viewed in the "Attachments" panel of a PDF reader. |
| Annotation attachment | PdfAttachmentAnnotationWidget |
A file attached as an annotation can be found on the page or in the "Attachments" panel. An annotation attachment appears as a paperclip icon on the page; you can double-click the icon to open the file while reading the document. |
Extract Attachments from a PDF Document
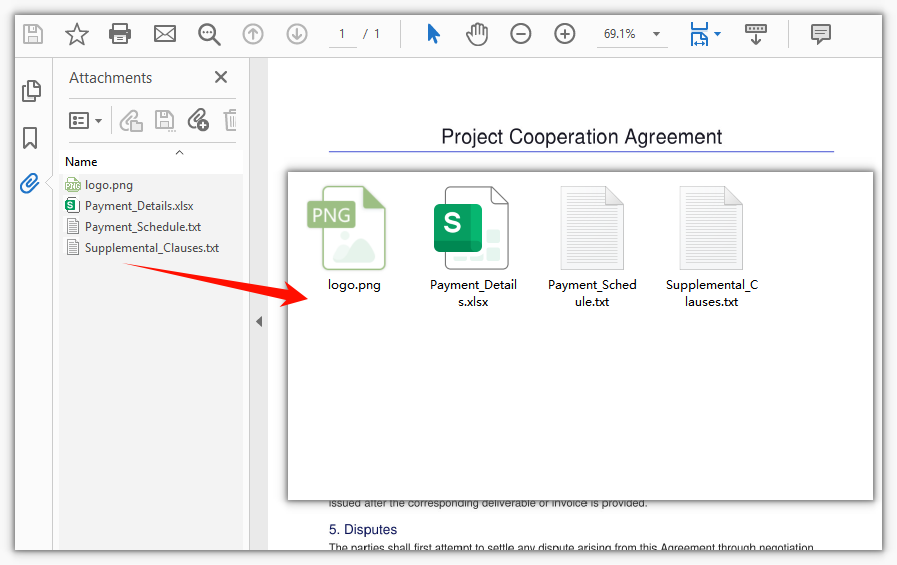
PdfDocument.Attachments returns all document-level attachments. Iterate the collection, and after wrapping each attachment with new PdfEmbeddedFileSpecification(attachment.H), write the attachment content into the VFS through its FileName and Data. Once everything has been written out, use JSZip to package the files into a single zip file for download. This approach suits saving or migrating all attachments of a document at once.
import JSZip from 'jszip';

function App() {
  const extractDocumentAttachments = async () => {
    // Get the Spire.PDF WASM module
    const pdfModule = window.wasmModule?.spirepdf;

    // Check whether the module is ready
    if (!pdfModule) {
      alert('Spire.PDF is not ready yet');
      return;
    }

    // Load the PDF file to be processed into the VFS
    const inputFileName = 'SampleWithAttachments.pdf';
    await window.spire.FetchFileToVFS(inputFileName, "", `${process.env.PUBLIC_URL}/data/`);

    // Create a PdfDocument object and load the PDF document
    let doc = new pdfModule.PdfDocument();
    doc.LoadFromFile(inputFileName);

    // Get the attachment collection of the document
    let collection = doc.Attachments;

    // Create a temporary directory in the VFS to hold the extracted attachments
    const outputDirectoryName = 'attachmentFiles/';
    window.dotnetRuntime.Module.FS.mkdirTree(outputDirectoryName);

    // Take out each attachment and write it into the temporary directory under its own file name
    for (let i = 0; i < collection.Count; i++) {
      let attachment = collection.get_Item(i);

      // Wrap the underlying handle H with PdfEmbeddedFileSpecification to read the attachment content
      let embeddedFileSpecification = new pdfModule.PdfEmbeddedFileSpecification(attachment.H);
      window.dotnetRuntime.Module.FS.writeFile(
        outputDirectoryName + embeddedFileSpecification.FileName,
        embeddedFileSpecification.Data
      );
    }

    // Release the document resources
    doc.Close();

    // Package all attachments in the temporary directory into a single zip file
    const zip = new JSZip();
    let items = await window.dotnetRuntime.Module.FS.readdir(outputDirectoryName);
    items = items.filter((item) => item !== '.' && item !== '..');
    for (const item of items) {
      const fileData = window.dotnetRuntime.Module.FS.readFile(outputDirectoryName + item);
      zip.file(item, fileData);
    }
    const zipBlob = await zip.generateAsync({ type: 'blob' });

    // Trigger the download
    const outputFileName = 'DocumentAttachments.zip';
    const url = URL.createObjectURL(zipBlob);
    const a = document.createElement('a');
    a.href = url;
    a.download = outputFileName;
    a.click();
    URL.revokeObjectURL(url);
  };

  return (
    <div style={{ textAlign: 'center', height: '300px' }}>
      <h1>Extract Attachments from a PDF Document</h1>
      <button onClick={extractDocumentAttachments}>
        Start Extraction
      </button>
    </div>
  );
}

export default App;
The zip file packaged from all document-level attachments after batch export
Extract Attachments from PDF Annotations
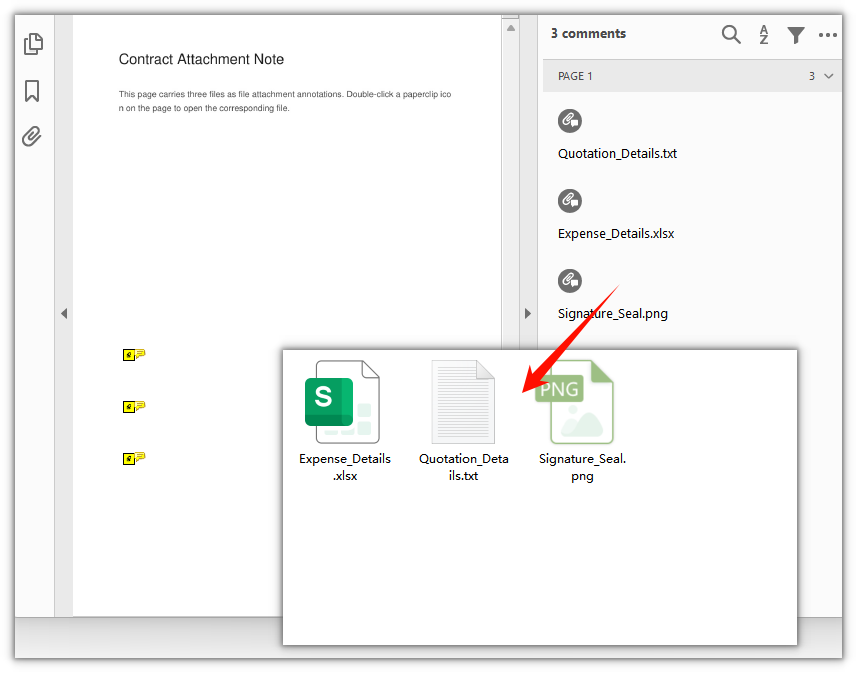
Annotation attachments are read differently from document attachments: they belong to page annotations and cannot be obtained through doc.Attachments. You first iterate doc.Pages to visit PdfPage.Annotations page by page, then use instanceof to test whether each annotation is a PdfAttachmentAnnotationWidget (an attachment annotation). For the matched annotations, FileName and Data are the name and content of the attached file. Because attachment annotations may be spread across different pages, the outer loop must cover every page to extract all annotation attachments in the document.
import JSZip from 'jszip';

function App() {
  const extractAnnotationAttachments = async () => {
    // Get the Spire.PDF WASM module
    const pdfModule = window.wasmModule?.spirepdf;

    // Check whether the module is ready
    if (!pdfModule) {
      alert('Spire.PDF is not ready yet');
      return;
    }

    // Load the PDF file to be processed into the VFS
    const inputFileName = 'AnnotationAttachmentSample.pdf';
    await window.spire.FetchFileToVFS(inputFileName, "", `${process.env.PUBLIC_URL}/data/`);

    // Create a PdfDocument object and load the PDF document
    let doc = new pdfModule.PdfDocument();
    doc.LoadFromFile(inputFileName);

    // Create a temporary directory in the VFS to hold the extracted attachments
    const outputDirectoryName = 'annotationFiles/';
    window.dotnetRuntime.Module.FS.mkdirTree(outputDirectoryName);

    // Iterate page by page and extract attachments from the annotations
    for (let p = 0; p < doc.Pages.Count; p++) {
      let page = doc.Pages.get_Item(p);

      // Get the annotation collection of the current page
      let annotations = page.Annotations;

      for (let i = 0; i < annotations.Count; i++) {
        let annotation = annotations.get_Item(i);

        // Handle only attachment annotations; skip other annotations (text, link, and so on)
        if (annotation instanceof pdfModule.PdfAttachmentAnnotationWidget) {
          // FileName is the attached file name, and Data is the binary content of the attachment
          window.dotnetRuntime.Module.FS.writeFile(
            outputDirectoryName + annotation.FileName,
            annotation.Data
          );
        }
      }
    }

    // Release the document resources
    doc.Close();

    // Package all attachments in the temporary directory into a single zip file
    const zip = new JSZip();
    let items = await window.dotnetRuntime.Module.FS.readdir(outputDirectoryName);
    items = items.filter((item) => item !== '.' && item !== '..');
    for (const item of items) {
      const fileData = window.dotnetRuntime.Module.FS.readFile(outputDirectoryName + item);
      zip.file(item, fileData);
    }
    const zipBlob = await zip.generateAsync({ type: 'blob' });

    // Trigger the download
    const outputFileName = 'AnnotationAttachments.zip';
    const url = URL.createObjectURL(zipBlob);
    const a = document.createElement('a');
    a.href = url;
    a.download = outputFileName;
    a.click();
    URL.revokeObjectURL(url);
  };

  return (
    <div style={{ textAlign: 'center', height: '300px' }}>
      <h1>Extract Attachments from PDF Annotations</h1>
      <button onClick={extractAnnotationAttachments}>
        Start Extraction
      </button>
    </div>
  );
}

export default App;
The zip file packaged from the attachments extracted from page annotations
FAQ
Why don't the paperclip attachments visible on the page show up in doc.Attachments
Cause: Attachments in a PDF fall into two levels, document-level and annotation-level. PdfDocument.Attachments returns only document-level attachments (listed in the reader's "Attachments" panel), whereas the paperclip icons on a page are annotation-level attachments — part of the page annotations — and never appear in the Attachments collection.
Solution: To extract annotation attachments, visit the page annotation collection page by page and filter for attachment annotations by type:
for (let p = 0; p < doc.Pages.Count; p++) {
  let annotations = doc.Pages.get_Item(p).Annotations;
  for (let i = 0; i < annotations.Count; i++) {
    if (annotations.get_Item(i) instanceof pdfModule.PdfAttachmentAnnotationWidget) {
      // Handle the attachment annotation
    }
  }
}
Why must the type be checked when iterating page.Annotations
Cause: A page can hold many kinds of annotations at the same time, such as text annotations, link annotations, and stamp annotations, and their properties differ. Only the attachment annotation PdfAttachmentAnnotationWidget provides FileName and Data; reading these two properties on an arbitrary annotation is not reliable.
Solution: Use instanceof PdfAttachmentAnnotationWidget to test the type first, then read the properties:
let annotation = annotations.get_Item(i);
if (annotation instanceof pdfModule.PdfAttachmentAnnotationWidget) {
  let fileName = annotation.FileName;
  let data = annotation.Data;
}
Why only some of the annotation attachments are extracted
Cause: Annotation attachments are attached to a specific page, and different pages may each carry some. If you visit only doc.Pages.get_Item(0), attachment annotations on the remaining pages are missed.
Solution: Iterate doc.Pages in an outer loop and examine the annotation collection of every page:
for (let p = 0; p < doc.Pages.Count; p++) {
  let annotations = doc.Pages.get_Item(p).Annotations;
  // Examine the annotations of this page one by one
}
Get a Free License
If you want to remove the evaluation message from the result documents or get rid of the feature limitations, please contact sales to obtain a temporary license valid for 30 days.
In Excel, formulas usually have to hard-code a specific cell range, such as =SUM(D2:D10). As such formulas multiply, maintenance costs rise: when the data range changes, every related formula must be updated one by one, and a single missed edit produces a wrong result. A named range is designed to solve exactly this problem — give a cell range a meaningful name and refer to that name in the formula. The range and the formula are thereby separated: changing the range takes a single edit, every formula that refers to it updates automatically, and the result is both less error-prone and easier to read. Spire.XLS for JavaScript ships a complete named range API and can create both global (workbook-level) and local (worksheet-level) named ranges in the browser through WebAssembly, with no backend service required.
This article covers two key features:
For installation and project setup, see Integrating Spire.XLS for JavaScript in a React Project. The examples below assume Spire.XLS is already installed and the WebAssembly module has been initialized.
Global Named Range
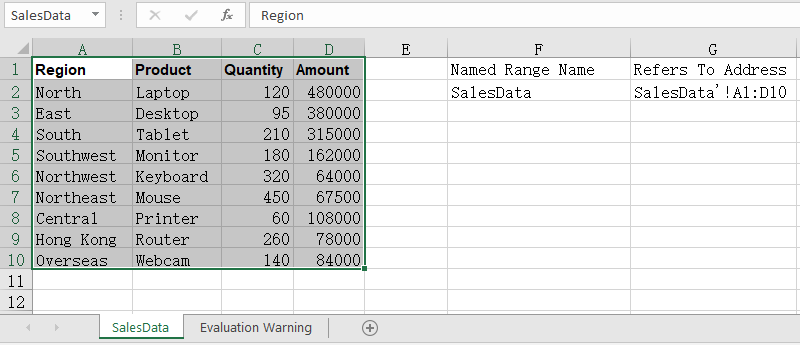
A global named range is stored in the workbook's name collection Workbook.NameRanges, its name is unique across the whole workbook, and any worksheet can refer to it directly. Create it with Workbook.NameRanges.Add() and point it at a cell range through the RefersToRange property. The steps are:
- Load the Excel file that contains the data and get the first worksheet.
- Create a global named range with
workbook.NameRanges.Add("SalesData"). - Set
namedRange.RefersToRangetosheet.Range.get("A1:D10"), that is, the range A1:D10. - Read
namedRange.NameandnamedRange.RefersToRange.RangeAddressand write the name and the referred address back into cells. - Save the workbook with the
Workbook.SaveToFile()method.
The following is a complete code example that shows how to create a global named range in React:
function App() {
  const createGlobalNamedRange = async () => {
    // Get the Spire.XLS WASM module
    const xlsModule = window.wasmModule?.spirexls;

    // Check if the module is ready
    if (!xlsModule) {
      alert('Spire.Xls is not ready yet');
      return;
    }

    // Load the font into VFS
    await window.spire.FetchFileToVFS('ARIAL.TTF', '/Library/Fonts/', `${process.env.PUBLIC_URL}/font/`);

    // Load the Excel file into VFS
    const inputFileName = 'NamedRanges.xlsx';
    await window.spire.FetchFileToVFS(inputFileName, '', `${process.env.PUBLIC_URL}/static/data/`);

    // Load the workbook
    const workbook = new xlsModule.Workbook();
    workbook.LoadFromFile(inputFileName);

    // Get the first worksheet
    let sheet = workbook.Worksheets.get(0);

    // Create a workbook-level (global) named range
    let namedRange = workbook.NameRanges.Add("SalesData");

    // Set the cell range the named range refers to
    namedRange.RefersToRange = sheet.Range.get("A1:D10");

    // Read the name and the referred address
    sheet.Range.get("F1").Text = "Named Range Name";
    sheet.Range.get("F2").Text = namedRange.Name;
    sheet.Range.get("G1").Text = "Refers To Address";
    sheet.Range.get("G2").Text = namedRange.RefersToRange.RangeAddress;

    // Auto-fit the columns
    sheet.AllocatedRange.AutoFitColumns();

    // Save the workbook
    const outputFileName = 'GlobalNamedRange.xlsx';
    workbook.SaveToFile(outputFileName);

    // Release resources
    workbook.Dispose();

    // Read the result file from VFS and trigger the download
    const fileArray = window.dotnetRuntime.Module.FS.readFile(outputFileName);
    const blob = new Blob([fileArray], { type: "application/vnd.openxmlformats-officedocument.spreadsheetml.sheet" });
    const url = URL.createObjectURL(blob);
    const a = document.createElement('a');
    a.href = url;
    a.download = outputFileName;
    a.click();
    URL.revokeObjectURL(url);
  };

  return (
    <div style={{ textAlign: 'center', height: '300px' }}>
      <h1>Create Global Named Range</h1>
      <button onClick={createGlobalNamedRange}>Start</button>
    </div>
  );
}

export default App;
After running, the effect of creating a global named range:
Local Named Range
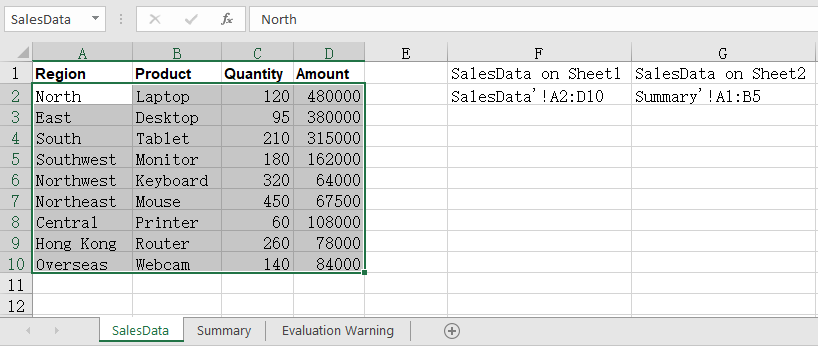
A global named range requires its name to be unique across the entire workbook. When different worksheets all want to use the same name while pointing at different data areas, switch to a local named range instead — added through Worksheet.Names.Add(), its name only takes effect inside the owning worksheet, so same-named ranges can live on several worksheets at once without interfering with each other. The steps are:
- Load the workbook and get the first worksheet.
- Create a local named range on the first worksheet with
sheet.Names.Add("SalesData"), pointing atA2:D10. - Add another worksheet with
workbook.Worksheets.Add()and create a same-named local named range on it, pointing at a different area. - Read the referred address of both ranges back into cells.
- Save the workbook.
The following is a complete code example that shows how to create a local named range in React:
function App() {
  const createLocalNamedRange = async () => {
    // Get the Spire.XLS WASM module
    const xlsModule = window.wasmModule?.spirexls;

    // Check if the module is ready
    if (!xlsModule) {
      alert('Spire.Xls is not ready yet');
      return;
    }

    // Load the font into VFS
    await window.spire.FetchFileToVFS('ARIAL.TTF', '/Library/Fonts/', `${process.env.PUBLIC_URL}/font/`);

    // Load the Excel file into VFS
    const inputFileName = 'NamedRanges.xlsx';
    await window.spire.FetchFileToVFS(inputFileName, '', `${process.env.PUBLIC_URL}/static/data/`);

    // Load the workbook
    const workbook = new xlsModule.Workbook();
    workbook.LoadFromFile(inputFileName);

    // Get the first worksheet
    let sheet = workbook.Worksheets.get(0);

    // Create a local named range on the first worksheet
    let localRange = sheet.Names.Add("SalesData");
    localRange.RefersToRange = sheet.Range.get("A2:D10");

    // Add another worksheet and create a same-named local range on it
    let sheet2 = workbook.Worksheets.Add("Summary");
    let localRange2 = sheet2.Names.Add("SalesData");
    localRange2.RefersToRange = sheet2.Range.get("A1:B5");

    // Read the addresses of the same-named ranges in both worksheets
    sheet.Range.get("F1").Text = "SalesData on Sheet1";
    sheet.Range.get("F2").Text = localRange.RefersToRange.RangeAddress;
    sheet.Range.get("G1").Text = "SalesData on Sheet2";
    sheet.Range.get("G2").Text = localRange2.RefersToRange.RangeAddress;

    // Auto-fit the columns
    sheet.AllocatedRange.AutoFitColumns();

    // Save the workbook
    const outputFileName = 'LocalNamedRange.xlsx';
    workbook.SaveToFile(outputFileName);

    // Release resources
    workbook.Dispose();

    // Read the result file from VFS and trigger the download
    const fileArray = window.dotnetRuntime.Module.FS.readFile(outputFileName);
    const blob = new Blob([fileArray], { type: "application/vnd.openxmlformats-officedocument.spreadsheetml.sheet" });
    const url = URL.createObjectURL(blob);
    const a = document.createElement('a');
    a.href = url;
    a.download = outputFileName;
    a.click();
    URL.revokeObjectURL(url);
  };

  return (
    <div style={{ textAlign: 'center', height: '300px' }}>
      <h1>Create Local Named Range</h1>
      <button onClick={createLocalNamedRange}>Start</button>
    </div>
  );
}

export default App;
After running, the effect of creating a local named range:
FAQ
How do I use a named range in a formula?
Cause: The real value of a named range is being referenced from formulas. Once the amount column is defined as a named range, the formula no longer needs a literal address, and the summed range expands automatically when rows are inserted later.
Solution: Simply write the name of the named range into the formula:
let namedRange = workbook.NameRanges.Add("SalesAmount");
namedRange.RefersToRange = sheet.Range.get("D2:D10");

// Refer to the named range in a formula
sheet.Range.get("F2").Formula = "=SUM(SalesAmount)";
How do I read the named ranges that already exist in a workbook?
Cause: A named range is saved together with the workbook, so it has to be read back before you can tell which names currently exist and which area each one points to.
Solution: Walk the NameRanges collection: take the count first, then read the name and the refers-to address of each entry by index:
// Total number of named ranges
let count = workbook.NameRanges.Count;

// Read the name and the refers-to address of each one
for (let i = 0; i < count; i++) {
  let namedRange = workbook.NameRanges.get(i);
  sheet.Range.get(`F${i + 2}`).Text = namedRange.Name;
  sheet.Range.get(`G${i + 2}`).Text = namedRange.RefersToRange.RangeAddress;
}
This walks workbook-level named ranges; worksheet-level ones are read through sheet.Names, in exactly the same way.
Get a Free License
Spire.XLS for JavaScript offers a 30-day full-featured free trial license with no functional limitations. Apply here to evaluate before purchasing.
A PDF document is organized page by page, and reading, printing and archiving all follow that structure. In practice, you often need to adjust the pages of an existing PDF: add a signature page to a contract, append a summary page at the end of a report, or remove a page that no longer belongs. Doing this with desktop software or a server-side re-layout means exporting and uploading files back and forth. Handling it directly in the browser keeps the document on the user's device and shortens the whole path.
Spire.PDF for JavaScript loads, modifies and saves PDF documents directly in the browser based on WebAssembly, managing input and output files through a virtual file system (VFS), with no backend service required.
This article covers three core features:
For installation and project configuration, refer to Integrating Spire.PDF for JavaScript in a React Project. The following examples assume Spire.PDF is installed and the WebAssembly module has been initialized.
Adding a Page to a PDF
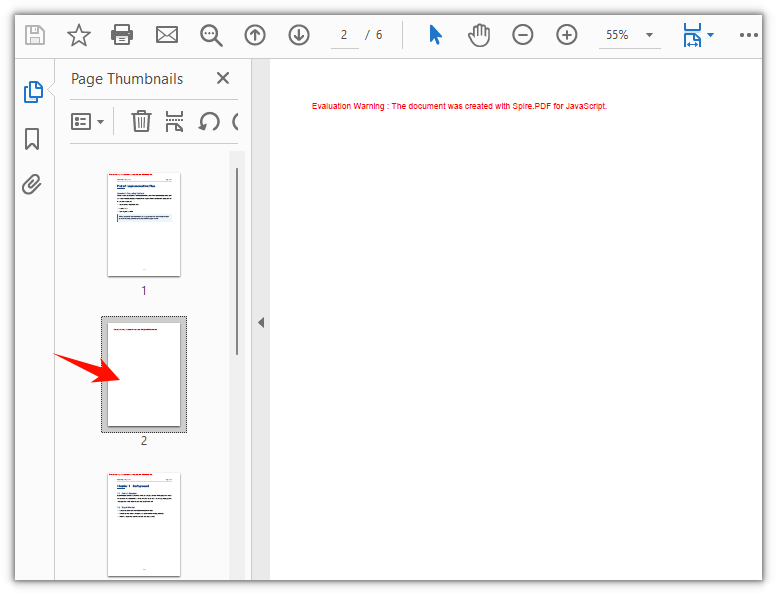
Adding a page means inserting one item into the PdfPageCollection. Use Pages.Insert(index) to insert at a specific position; the index is 0-based, and the pages after the insertion point shift back by one. Here the blank page goes into the second position and the existing pages move onward, which suits adding a page in the middle of a document.
function App() {
  const addPageToPdf = async () => {
    // Get the Spire.PDF WASM module
    const pdfModule = window.wasmModule?.spirepdf;

    // Check whether the module is ready
    if (!pdfModule) {
      alert('Spire.PDF is not ready yet');
      return;
    }

    // Load the PDF file into the VFS
    const inputFileName = 'Multipage_Document.pdf';
    await window.spire.FetchFileToVFS(inputFileName, "", `${process.env.PUBLIC_URL}/data/`);

    // Create a PdfDocument object and load the PDF document
    let doc = new pdfModule.PdfDocument();
    doc.LoadFromFile(inputFileName);

    // Insert a blank page as the second page (the index is 0-based, so index 1 is the second page)
    doc.Pages.Insert(1);

    // Define the output file name and save the document
    const outputFileName = 'Page_Inserted.pdf';
    doc.SaveToFile(outputFileName);
    doc.Close();

    // Read the generated file from the VFS and trigger the download
    const fileArray = window.dotnetRuntime.Module.FS.readFile(outputFileName);
    const blob = new Blob([fileArray], { type: 'application/pdf' });
    const url = URL.createObjectURL(blob);
    const a = document.createElement('a');
    a.href = url;
    a.download = outputFileName;
    a.click();
    URL.revokeObjectURL(url);
  };

  return (
    <div style={{ textAlign: 'center', height: '300px' }}>
      <h1>Add a Page to PDF</h1>
      <button onClick={addPageToPdf}>
        Start Adding
      </button>
    </div>
  );
}

export default App;
The PDF document after a blank page is inserted as the second page
Adding a Blank Page at the End of a Document
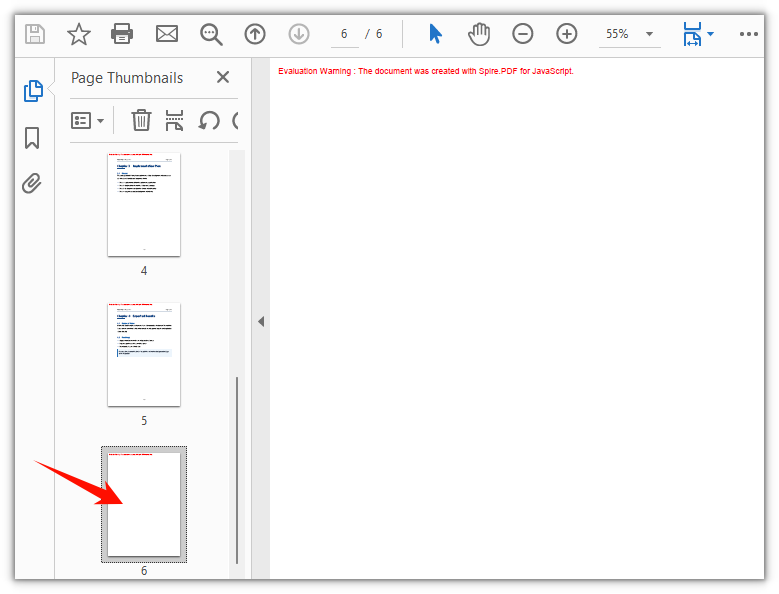
Spire.PDF for JavaScript also provides the Pages.Add() method, which appends a blank page at the end of a document. It uses A4 as the default page size and 40-point margins on all four sides; when needed, you can set the page size and margins yourself.
function App() {
  const appendPageToPdf = async () => {
    // Get the Spire.PDF WASM module
    const pdfModule = window.wasmModule?.spirepdf;

    // Check whether the module is ready
    if (!pdfModule) {
      alert('Spire.PDF is not ready yet');
      return;
    }

    // Load the PDF file into the VFS
    const inputFileName = 'Multipage_Document.pdf';
    await window.spire.FetchFileToVFS(inputFileName, "", `${process.env.PUBLIC_URL}/data/`);

    // Create a PdfDocument object and load the PDF document
    let doc = new pdfModule.PdfDocument();
    doc.LoadFromFile(inputFileName);

    // Append a blank A4 page with zero margins on all four sides
    doc.Pages.Add(pdfModule.PdfPageSize.A4(), new pdfModule.PdfMargins(0.0, 0.0));

    // Define the output file name and save the document
    const outputFileName = 'Page_Appended.pdf';
    doc.SaveToFile(outputFileName);
    doc.Close();

    // Read the generated file from the VFS and trigger the download
    const fileArray = window.dotnetRuntime.Module.FS.readFile(outputFileName);
    const blob = new Blob([fileArray], { type: 'application/pdf' });
    const url = URL.createObjectURL(blob);
    const a = document.createElement('a');
    a.href = url;
    a.download = outputFileName;
    a.click();
    URL.revokeObjectURL(url);
  };

  return (
    <div style={{ textAlign: 'center', height: '300px' }}>
      <h1>Append a Blank Page to PDF</h1>
      <button onClick={appendPageToPdf}>
        Start Adding
      </button>
    </div>
  );
}

export default App;
The PDF document after a blank A4 page is appended at the end
Deleting a Page from a PDF
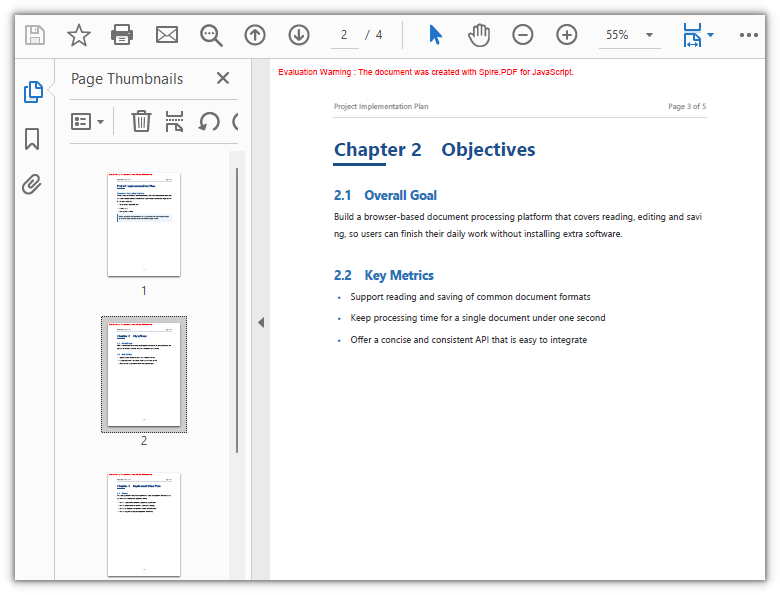
Deleting a page also works through the page collection: Pages.RemoveAt(index) removes one page by index, starting at 0, and the indexes of the pages after it shift forward by one. Before writing the delete logic, check the current page count with Pages.Count so the index stays in range. Here the second page of the sample document is removed and the remaining pages keep their original order.
function App() {
  const deletePageFromPdf = async () => {
    // Get the Spire.PDF WASM module
    const pdfModule = window.wasmModule?.spirepdf;

    // Check whether the module is ready
    if (!pdfModule) {
      alert('Spire.PDF is not ready yet');
      return;
    }

    // Load the PDF file into the VFS
    const inputFileName = 'Multipage_Document.pdf';
    await window.spire.FetchFileToVFS(inputFileName, "", `${process.env.PUBLIC_URL}/data/`);

    // Create a PdfDocument object and load the PDF document
    let doc = new pdfModule.PdfDocument();
    doc.LoadFromFile(inputFileName);

    // Delete the second page (the index is 0-based, so index 1 is the second page)
    doc.Pages.RemoveAt(1);

    // Define the output file name and save the document
    const outputFileName = 'Page_Deleted.pdf';
    doc.SaveToFile(outputFileName);
    doc.Close();

    // Read the generated file from the VFS and trigger the download
    const fileArray = window.dotnetRuntime.Module.FS.readFile(outputFileName);
    const blob = new Blob([fileArray], { type: 'application/pdf' });
    const url = URL.createObjectURL(blob);
    const a = document.createElement('a');
    a.href = url;
    a.download = outputFileName;
    a.click();
    URL.revokeObjectURL(url);
  };

  return (
    <div style={{ textAlign: 'center', height: '300px' }}>
      <h1>Delete a Page from PDF</h1>
      <button onClick={deletePageFromPdf}>
        Start Deleting
      </button>
    </div>
  );
}

export default App;
The PDF document after the second page is deleted
FAQ
How do I set the page size and margins of a new blank page
Reason: Pages.Add and Pages.Insert create blank pages of a regular size with default margins. When a new page has to match a specific paper size or margin, both values need to be passed in.
Solution: The paper size comes from PdfPageSize, such as PdfPageSize.A4() or PdfPageSize.A3(); the margins come from PdfMargins, where the two-argument form new PdfMargins(0.0, 0.0) sets both the vertical and horizontal margins to 0. To control each side separately, pass the named fields:
// A blank A4 page with zero margins on all four sides
doc.Pages.Add(pdfModule.PdfPageSize.A4(), new pdfModule.PdfMargins(0.0, 0.0));

// Set the top, bottom, left and right margins individually
doc.Pages.Add(pdfModule.PdfPageSize.A4(),
  new pdfModule.PdfMargins({ left: 40, top: 40, right: 40, bottom: 40 }));
Why does deleting a page report an index out of range
Reason: RemoveAt(index) is 0-based, and its valid range is 0 to Pages.Count - 1. Without checking the page count first, passing a value equal to or greater than Count goes out of range.
Solution: Check the page count with Pages.Count before deleting and keep the index within range. To delete the last page, for example, the index should be Count - 1:
let total = doc.Pages.Count;

if (total > 0) {
  // Delete the last page
  doc.Pages.RemoveAt(total - 1);
}
What should I watch out for when adding or deleting several pages in a row
Reason: Every insert or delete shifts the indexes of all pages after it. Deleting several pages by fixed indexes from front to back easily removes the wrong ones — once one page is gone, the later indexes recorded earlier have already moved forward.
Solution: Insert, Add and RemoveAt each handle a single page, so repeat the call for batch operations. When deleting several pages, work from back to front so the indexes do not drift:
// Delete from back to front, so the indexes do not shift after each removal
for (let i = doc.Pages.Count - 1; i >= 3; i--) {
  doc.Pages.RemoveAt(i);
}
Get a Free License
If you wish to remove the evaluation message from the result document or remove feature limitations, please contact sales to obtain a temporary license valid for 30 days.
Adding shapes to PDF documents is a common requirement in many business scenarios: marking key areas with lines and boxes, adding a prominent border around content outside a table, distinguishing sections with filled color blocks, or overlaying pie and ellipse shapes on drawings and reports. Doing this by hand in a design tool each time is slow and hard to scale. With the drawing capabilities of Spire.PDF for JavaScript, you can write various shapes directly to PDF pages in the browser and let your code handle the annotation and diagramming work automatically.
Spire.PDF for JavaScript is based on WebAssembly and loads, edits, and saves PDF documents directly in the browser, managing input and output files through a virtual file system (VFS) without any backend service. The core object for drawing shapes on a PDF is the page drawing canvas PdfPage.Canvas: it provides methods such as DrawLine, DrawPie, DrawRectangle, and DrawEllipse.
This article covers four core features:
- Draw Lines on a PDF Page
- Draw a Pie on a PDF Page
- Draw a Rectangle on a PDF Page
- Draw an Ellipse on a PDF Page
For installation and project configuration, refer to How to Integrate Spire.PDF for JavaScript in a React Project. The examples below assume Spire.PDF is installed and the WebAssembly module is initialized.
Draw Lines on a PDF Page
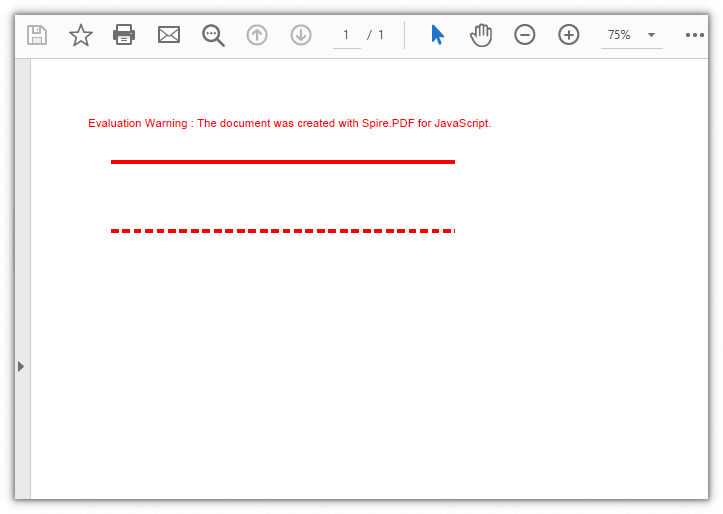
When drawing lines you can set the color and thickness, and choose between solid and dashed lines—the dash style is controlled by DashStyle and DashPattern.
function App() {
  const drawLines = async () => {
    // Get the Spire.PDF WASM module
    const pdfModule = window.wasmModule?.spirepdf;

    // Check whether the module is ready
    if (!pdfModule) {
      alert('Spire.PDF is not ready yet');
      return;
    }

    // Create a PDF document and add a blank page
    let doc = new pdfModule.PdfDocument();
    let page = doc.Pages.Add();

    // Save the current graphics state
    let state = page.Canvas.Save();

    // Create a red pen for drawing lines
    let pen = new pdfModule.PdfPen({
      pdfRGBColor: new pdfModule.PdfRGBColor({ color: pdfModule.Color.get_Red() }),
      width: 2,
    });

    // Starting coordinates and length of the lines
    let x = 30.0;
    let y = 50.0;
    let width = 300.0;

    // Draw a solid line
    page.Canvas.DrawLine({ pen: pen, x1: x, y1: y, x2: x + width, y2: y });

    // Set the dash style and dash pattern
    pen.DashStyle = pdfModule.PdfDashStyle.Dash;
    pen.DashPattern = [3.0, 2.0];

    // Draw a dashed line
    page.Canvas.DrawLine({ pen: pen, x1: x, y1: y + 60.0, x2: x + width, y2: y + 60.0 });

    // Restore the graphics state
    page.Canvas.Restore({ state: state });

    // Define the output file name and save the document
    const outputFileName = 'DrawLines_result.pdf';
    doc.SaveToFile(outputFileName);
    doc.Close();

    // Read the generated file from the VFS and trigger a download
    const fileArray = window.dotnetRuntime.Module.FS.readFile(outputFileName);
    const blob = new Blob([fileArray], { type: 'application/pdf' });
    const url = URL.createObjectURL(blob);
    const a = document.createElement('a');
    a.href = url;
    a.download = outputFileName;
    a.click();
    URL.revokeObjectURL(url);
  };

  return (
    <div style={{ textAlign: 'center', height: '300px' }}>
      <h1>Draw Lines in PDF</h1>
      <button onClick={drawLines}>
        Draw
      </button>
    </div>
  );
}

export default App;
The result of drawing one solid line and one dashed line on a PDF page
Draw a Pie on a PDF Page
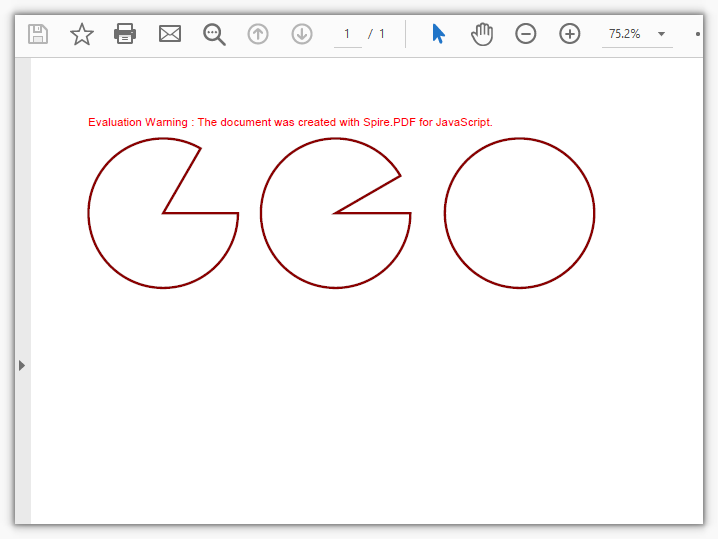
Pies express proportions: the bounding rectangle sets the position and size, while startAngle and sweepAngle set the opening angle of the sector.
function App() {
  const drawPie = async () => {
    // Get the Spire.PDF WASM module
    const pdfModule = window.wasmModule?.spirepdf;

    // Check whether the module is ready
    if (!pdfModule) {
      alert('Spire.PDF is not ready yet');
      return;
    }

    // Create a PDF document and add a blank page
    let doc = new pdfModule.PdfDocument();
    let page = doc.Pages.Add();

    // Save the current graphics state
    let state = page.Canvas.Save();

    // Create a dark red pen
    let pen = new pdfModule.PdfPen({
      pdfRGBColor: new pdfModule.PdfRGBColor({ color: pdfModule.Color.get_DarkRed() }),
      width: 2,
    });

    // Draw the first pie
    page.Canvas.DrawPie({ pen: pen, x: 10.0, y: 30.0, width: 130.0, height: 130.0, startAngle: 360.0, sweepAngle: 300.0 });

    // Draw the second pie
    page.Canvas.DrawPie({ pen: pen, x: 160.0, y: 30.0, width: 130.0, height: 130.0, startAngle: 360.0, sweepAngle: 330.0 });

    // Draw the third pie
    page.Canvas.DrawPie({ pen: pen, x: 320.0, y: 30.0, width: 130.0, height: 130.0, startAngle: 360.0, sweepAngle: 360.0 });

    // Restore the graphics state
    page.Canvas.Restore({ state: state });

    // Define the output file name and save the document
    const outputFileName = 'DrawPie_result.pdf';
    doc.SaveToFile(outputFileName);
    doc.Close();

    // Read the generated file from the VFS and trigger a download
    const fileArray = window.dotnetRuntime.Module.FS.readFile(outputFileName);
    const blob = new Blob([fileArray], { type: 'application/pdf' });
    const url = URL.createObjectURL(blob);
    const a = document.createElement('a');
    a.href = url;
    a.download = outputFileName;
    a.click();
    URL.revokeObjectURL(url);
  };

  return (
    <div style={{ textAlign: 'center', height: '300px' }}>
      <h1>Draw a Pie in PDF</h1>
      <button onClick={drawPie}>
        Draw
      </button>
    </div>
  );
}

export default App;
The result of drawing three pies on a PDF page
Draw a Rectangle on a PDF Page
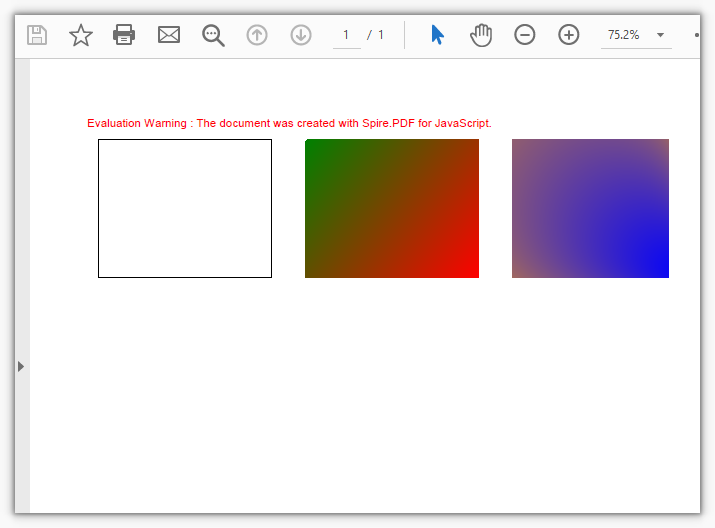
A rectangle can be drawn as an outline only, or filled. Besides a solid color (PdfSolidBrush), the fill also supports a linear gradient (PdfLinearGradientBrush) and a radial gradient (PdfRadialGradientBrush).
function App() {
  const drawRectangle = async () => {
    // Get the Spire.PDF WASM module
    const pdfModule = window.wasmModule?.spirepdf;

    // Check whether the module is ready
    if (!pdfModule) {
      alert('Spire.PDF is not ready yet');
      return;
    }

    // Create a PDF document and add a blank page
    let doc = new pdfModule.PdfDocument();
    let page = doc.Pages.Add();

    // Save the current graphics state
    let state = page.Canvas.Save();

    // Create a black pen
    let pen = new pdfModule.PdfPen({
      pdfRGBColor: new pdfModule.PdfRGBColor({ color: pdfModule.Color.get_Black() }),
      width: 1,
    });

    // Draw a rectangle outline with the pen
    page.Canvas.DrawRectangle({
      pen: pen,
      rectangle: new pdfModule.RectangleF({
        location: new pdfModule.PointF(20.0, 30.0),
        size: new pdfModule.SizeF({ width: 150.0, height: 120.0 }),
      }),
    });

    // Create a linear gradient brush
    let linearGradientBrush = new pdfModule.PdfLinearGradientBrush({
      point1: new pdfModule.PointF(200.0, 30.0),
      point2: new pdfModule.PointF(350.0, 150.0),
      color1: new pdfModule.PdfRGBColor({ color: pdfModule.Color.get_Green() }),
      color2: new pdfModule.PdfRGBColor({ color: pdfModule.Color.get_Red() }),
    });

    // Draw a filled rectangle with the linear gradient brush
    page.Canvas.DrawRectangle({
      brush: linearGradientBrush,
      rectangle: new pdfModule.RectangleF({
        location: new pdfModule.PointF(200.0, 30.0),
        size: new pdfModule.SizeF({ width: 150.0, height: 120.0 }),
      }),
    });

    // Create a radial gradient brush
    let radialGradientBrush = new pdfModule.PdfRadialGradientBrush({
      centreStart: new pdfModule.PointF(380.0, 30.0),
      radiusStart: 150.0,
      centreEnd: new pdfModule.PointF(530.0, 150.0),
      radiusEnd: 150.0,
      colorStart: new pdfModule.PdfRGBColor({ color: pdfModule.Color.get_Orange() }),
      colorEnd: new pdfModule.PdfRGBColor({ color: pdfModule.Color.get_Blue() }),
    });

    // Draw a filled rectangle with the radial gradient brush
    page.Canvas.DrawRectangle({
      brush: radialGradientBrush,
      rectangle: new pdfModule.RectangleF({
        location: new pdfModule.PointF(380.0, 30.0),
        size: new pdfModule.SizeF({ width: 150.0, height: 120.0 }),
      }),
    });

    // Restore the graphics state
    page.Canvas.Restore({ state: state });

    // Define the output file name and save the document
    const outputFileName = 'DrawRectangle_result.pdf';
    doc.SaveToFile(outputFileName);
    doc.Close();

    // Read the generated file from the VFS and trigger a download
    const fileArray = window.dotnetRuntime.Module.FS.readFile(outputFileName);
    const blob = new Blob([fileArray], { type: 'application/pdf' });
    const url = URL.createObjectURL(blob);
    const a = document.createElement('a');
    a.href = url;
    a.download = outputFileName;
    a.click();
    URL.revokeObjectURL(url);
  };

  return (
    <div style={{ textAlign: 'center', height: '300px' }}>
      <h1>Draw a Rectangle in PDF</h1>
      <button onClick={drawRectangle}>
        Draw
      </button>
    </div>
  );
}

export default App;
The result of drawing a rectangle outline and gradient-filled rectangles on a PDF page
Draw an Ellipse on a PDF Page
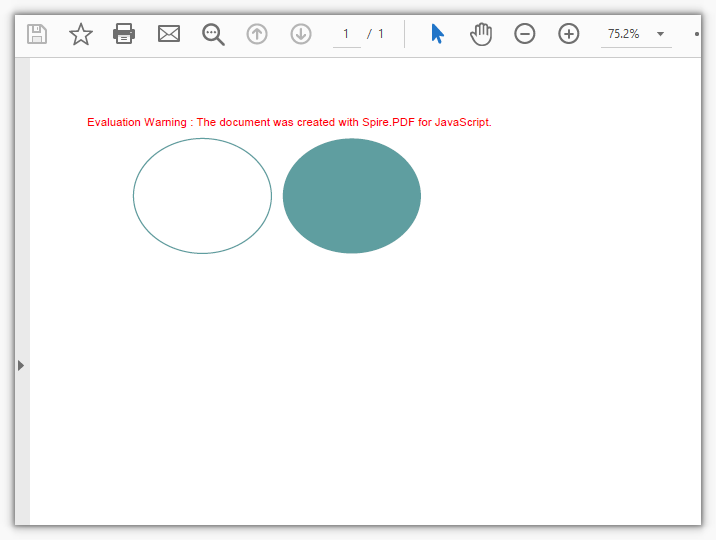
An ellipse likewise supports outlines and fills: use PdfPen for the outline and PdfSolidBrush for the fill, or take one of the preset pens from PdfPens.
function App() {
  const drawEllipse = async () => {
    // Get the Spire.PDF WASM module
    const pdfModule = window.wasmModule?.spirepdf;

    // Check whether the module is ready
    if (!pdfModule) {
      alert('Spire.PDF is not ready yet');
      return;
    }

    // Create a PDF document and add a blank page
    let doc = new pdfModule.PdfDocument();
    let page = doc.Pages.Add();

    // Save the current graphics state
    let state = page.Canvas.Save();

    // Create a CadetBlue pen
    let pen = pdfModule.PdfPens.get_CadetBlue();

    // Draw the ellipse outline
    page.Canvas.DrawEllipse({ pen: pen, x: 50.0, y: 30.0, width: 120.0, height: 100.0 });

    // Create a fill brush
    let brush = new pdfModule.PdfSolidBrush({
      pdfRGBColor: new pdfModule.PdfRGBColor({ color: pdfModule.Color.get_CadetBlue() }),
    });

    // Draw the filled ellipse
    page.Canvas.DrawEllipse({ brush: brush, x: 180.0, y: 30.0, width: 120.0, height: 100.0 });

    // Restore the graphics state
    page.Canvas.Restore({ state: state });

    // Define the output file name and save the document
    const outputFileName = 'DrawEllipse_result.pdf';
    doc.SaveToFile(outputFileName);
    doc.Close();

    // Read the generated file from the VFS and trigger a download
    const fileArray = window.dotnetRuntime.Module.FS.readFile(outputFileName);
    const blob = new Blob([fileArray], { type: 'application/pdf' });
    const url = URL.createObjectURL(blob);
    const a = document.createElement('a');
    a.href = url;
    a.download = outputFileName;
    a.click();
    URL.revokeObjectURL(url);
  };

  return (
    <div style={{ textAlign: 'center', height: '300px' }}>
      <h1>Draw an Ellipse in PDF</h1>
      <button onClick={drawEllipse}>
        Draw
      </button>
    </div>
  );
}

export default App;
The result of drawing an ellipse outline and a filled ellipse on a PDF page
FAQ
Why does the drawn shape appear at the edge of the page or outside the visible area
Cause: The coordinates used by DrawLine, DrawPie, DrawRectangle, and DrawEllipse have their origin at the bottom-left corner of the page, with the x-axis pointing right and the y-axis pointing up, in units of points. If you copy screen coordinates directly (where the origin is at the top-left), the drawn shape will end up in the opposite position or outside the page.
Solution: Convert the coordinates using the bottom-left corner of the page as the origin. You can read the page size first and then lay out the shape, for example by using PdfPage.Size to get the page width and height and calculating the shape's position from them:
// Get the page size and calculate coordinates with the bottom-left corner as the origin
let size = page.Size;
let x = size.Width / 4;
let y = size.Height / 3;
page.Canvas.DrawRectangle({ pen: pen, x: x, y: y, width: 200, height: 120 });
Why does the existing content on the page shift after drawing
Cause: Drawing modifies the canvas's current transform and graphics state. If you change the coordinate system with ScaleTransform, TranslateTransform, and similar methods before drawing, or fail to restore the state afterward, subsequent content will be affected.
Solution: Use Canvas.Save and Canvas.Restore in pairs, wrapping the drawing operations between them, to make sure the canvas state is restored to its previous level once drawing is complete:
// Save the state before drawing
let state = page.Canvas.Save();
// ... perform drawing ...
// Restore the state after drawing
page.Canvas.Restore({ state: state });
Why can't I see the drawn shape in the saved PDF
Cause: Shapes are drawn onto the canvas object. If you do not call doc.SaveToFile to write the document back to a file after drawing, or if the output file and the file read for download are not the same name, you will still see the original content.
Solution: Make sure you call doc.SaveToFile(outputFileName) to save after drawing, and read and download from the virtual file system using the same outputFileName:
// Save the document to the specified file name
doc.SaveToFile(outputFileName);
doc.Close();

// Read from the VFS using the same file name to trigger a download
const fileArray = window.dotnetRuntime.Module.FS.readFile(outputFileName);
Get a Free License
If you want to remove the evaluation message from the result documents or get rid of the feature limitations, please contact our sales team to obtain a temporary license valid for 30 days.
A bookmark in a PDF records the document's outline structure, and a bookmark can hold child bookmarks of its own, nesting level by level into a tree. Reading that information has plenty of practical uses — exporting it as a table of contents, generating site navigation from bookmark titles, or locating a specific page for further processing. All of it calls for a program that can walk the whole bookmark tree and pull out the content of each node.
Spire.PDF for JavaScript processes PDF documents directly in the browser based on WebAssembly, managing input and output files through a virtual file system (VFS), with no backend service required. The core entry point for extracting bookmarks is the PdfDocument.Bookmarks property, which returns a PdfBookmarkCollection; each PdfBookmark object in it exposes its own child bookmark collection, so together they form the complete bookmark tree. Every bookmark node provides properties such as Title and DisplayStyle for reading its appearance, and Destination.Page combined with PdfPageCollection.IndexOf gives you the page number the bookmark points to.
This article covers two core features:
For installation and project configuration, refer to Integrating Spire.PDF for JavaScript in a React Project. The following examples assume Spire.PDF is installed and the WebAssembly module has been initialized.
Extracting All PDF Bookmarks
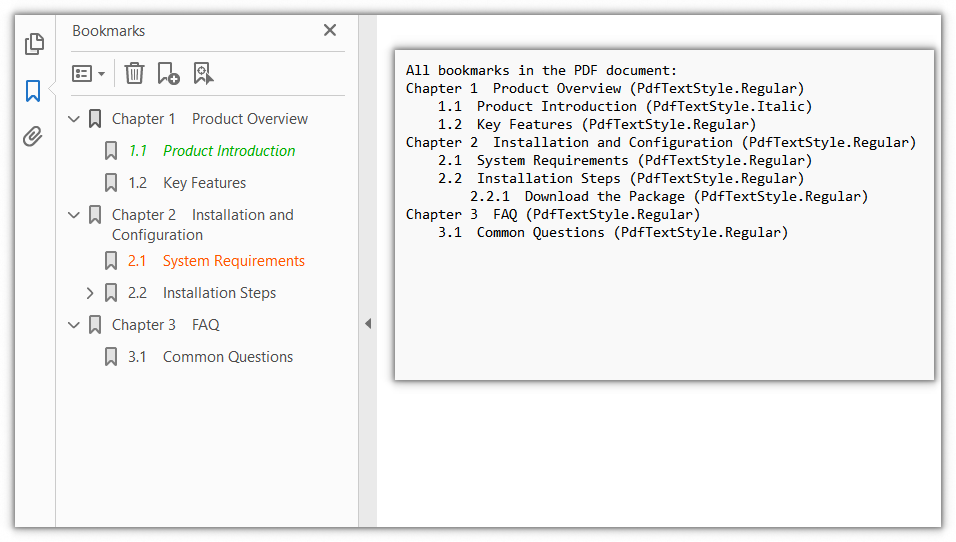
PdfDocument.Bookmarks returns only the top-level bookmark collection, while bookmarks themselves can contain child bookmarks. To read out every bookmark in the document you need a recursive function that walks the PdfBookmarkCollection level by level, reads the Title (bookmark title) and DisplayStyle (text style) of each node, and records them with indentation by level, producing a complete outline list in the end.
function App() {
  const extractAllBookmarks = async () => {
    // Get the Spire.PDF WASM module
    const pdfModule = window.wasmModule?.spirepdf;

    // Check whether the module is ready
    if (!pdfModule) {
      alert('Spire.PDF is not ready yet');
      return;
    }

    // Load the PDF file to be processed into the VFS
    const inputFileName = 'Sample.pdf';
    await window.spire.FetchFileToVFS(inputFileName, "", `${process.env.PUBLIC_URL}/data/`);

    // Create a PdfDocument object and load the PDF document
    let doc = new pdfModule.PdfDocument();
    doc.LoadFromFile(inputFileName);

    // String that holds the extracted result
    let content = 'All bookmarks in the PDF document:\r\n';

    // Recursively traverse the bookmark collection, recording each title and text style with indentation by level
    const collectBookmarks = (bookmarks, indent) => {
      for (let i = 0; i < bookmarks.Count; i++) {
        let bookmark = bookmarks.get_Item(i);

        // Record the title and text style of the current bookmark
        content += indent + bookmark.Title + ' (' + bookmark.DisplayStyle.toString() + ')\r\n';

        // If there are child bookmarks, process them recursively with more indentation
        if (bookmark.Count > 0) {
          collectBookmarks(bookmark, indent + '    ');
        }
      }
    };

    // Start extracting from the top-level bookmarks
    collectBookmarks(doc.Bookmarks, '');

    // Write the extracted result to a file and trigger the download
    const outputFileName = 'AllBookmarks.txt';
    window.dotnetRuntime.Module.FS.writeFile(outputFileName, content);
    doc.Close();

    const fileArray = window.dotnetRuntime.Module.FS.readFile(outputFileName);
    const blob = new Blob([fileArray], { type: 'text/plain' });
    const url = URL.createObjectURL(blob);
    const a = document.createElement('a');
    a.href = url;
    a.download = outputFileName;
    a.click();
    URL.revokeObjectURL(url);
  };

  return (
    <div style={{ textAlign: 'center', height: '300px' }}>
      <h1>Extract All PDF Bookmarks</h1>
      <button onClick={extractAllBookmarks}>
        Start Extracting
      </button>
    </div>
  );
}

export default App;
The list of all bookmark titles and text styles extracted recursively
Getting the Page Number of a Bookmark
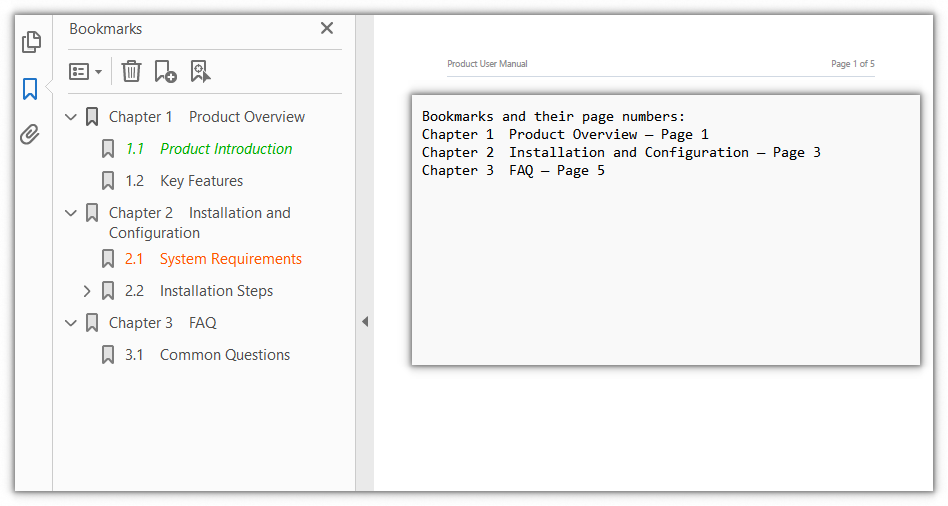
Besides its title, a bookmark also carries a jump destination. Through PdfBookmark.Destination.Page you can obtain the PdfPage object the bookmark points to, and then use PdfPageCollection.IndexOf to get its index within the document. Because the index starts from 0, adding 1 gives the page number shown in a reader. This is commonly used to export a bookmark list as a "title — page number" table of contents.
function App() {
  const getBookmarkPageNumber = async () => {
    // Get the Spire.PDF WASM module
    const pdfModule = window.wasmModule?.spirepdf;

    // Check whether the module is ready
    if (!pdfModule) {
      alert('Spire.PDF is not ready yet');
      return;
    }

    // Load the PDF file to be processed into the VFS
    const inputFileName = 'Sample.pdf';
    await window.spire.FetchFileToVFS(inputFileName, "", `${process.env.PUBLIC_URL}/data/`);

    // Create a PdfDocument object and load the PDF document
    let doc = new pdfModule.PdfDocument();
    doc.LoadFromFile(inputFileName);

    // Read the page number each top-level bookmark points to, one by one
    let content = 'Bookmarks and their page numbers:\r\n';
    for (let i = 0; i < doc.Bookmarks.Count; i++) {
      let bookmark = doc.Bookmarks.get_Item(i);

      // Destination.Page gives the page the bookmark points to; IndexOf returns its 0-based index
      let pageNumber = doc.Pages.IndexOf(bookmark.Destination.Page) + 1;

      content += bookmark.Title + ' — Page ' + pageNumber + '\r\n';
    }

    // Write the extracted result to a file and trigger the download
    const outputFileName = 'BookmarkPageNumber.txt';
    window.dotnetRuntime.Module.FS.writeFile(outputFileName, content);
    doc.Close();

    const fileArray = window.dotnetRuntime.Module.FS.readFile(outputFileName);
    const blob = new Blob([fileArray], { type: 'text/plain' });
    const url = URL.createObjectURL(blob);
    const a = document.createElement('a');
    a.href = url;
    a.download = outputFileName;
    a.click();
    URL.revokeObjectURL(url);
  };

  return (
    <div style={{ textAlign: 'center', height: '300px' }}>
      <h1>Get the Page Number of a Bookmark</h1>
      <button onClick={getBookmarkPageNumber}>
        Start Extracting
      </button>
    </div>
  );
}

export default App;
The title of each bookmark and the page number it points to
FAQ
Why is the number of extracted bookmarks smaller than the outline shown in a reader
Reason: doc.Bookmarks returns only the top-level bookmark collection, and its Count counts only the nodes at that level. Child bookmarks nested under a chapter are reached through the node's own collection and are otherwise not counted.
Solution: Traverse the whole bookmark tree recursively and add up the nodes at every level:
function countBookmarks(bookmarks) {
  let total = 0;
  for (let i = 0; i < bookmarks.Count; i++) {
    total += 1;
    // Recursively add the child bookmarks
    total += countBookmarks(bookmarks.get_Item(i));
  }
  return total;
}

const total = countBookmarks(doc.Bookmarks);
Why is the extracted DisplayStyle always Regular
Reason: PdfBookmark.DisplayStyle returns the text style a bookmark is displayed with in the outline panel. Only when the bookmark itself is explicitly set to a style such as Bold or Italic will the value read back differ from the default Regular. It reflects the bookmark's appearance setting, not the font used by the bookmark title in the page content.
Solution: Record the enum value as it is; if you only need to tell whether it is bold or italic, compare it against the PdfTextStyle values one by one:
let style = 'Regular';
if (bookmark.DisplayStyle === pdfModule.PdfTextStyle.Bold) {
  style = 'Bold';
} else if (bookmark.DisplayStyle === pdfModule.PdfTextStyle.Italic) {
  style = 'Italic';
}
Why does the page number from Destination.Page differ from the one shown in a reader
Reason: PdfPageCollection.IndexOf returns the page's index within the collection, counting from 0, while a reader shows page numbers from 1, so using the index directly is off by one.
Solution: Add 1 to the index to match what the reader shows:
// The index is 0-based, so add 1 to get the page number shown in a reader
let pageNumber = doc.Pages.IndexOf(bookmark.Destination.Page) + 1;
In addition, if a bookmark points to a page that no longer exists (for example, the target page was deleted), Destination may be empty, so check for null before reading it:
if (bookmark.Destination && bookmark.Destination.Page) {
  let pageNumber = doc.Pages.IndexOf(bookmark.Destination.Page) + 1;
}
Get a Free License
If you wish to remove the evaluation message from the result document or remove feature limitations, please contact sales to obtain a temporary license valid for 30 days.
When you need to compare several metrics across multiple dimensions at the same time, a radar chart is a very intuitive way to present them — each dimension is placed on an axis radiating out from the center, and the values on those axes are joined into a polygon, so the shape immediately shows where the strengths and weaknesses are. Spire.XLS for JavaScript provides a complete charting API that supports creating radar charts directly in the browser via WebAssembly, without requiring a backend service.
This article covers two core features:
For installation and project configuration, please refer to Integrating Spire.XLS for JavaScript in a React Project. The following examples assume Spire.XLS is already installed and the WebAssembly module has been initialized.
Create a Radar Chart
You can add a radar chart to a worksheet with the sheet.Charts.Add() method. The steps are as follows:
- Load the Excel file that contains the data and get the first worksheet.
- Add a radar chart with
Charts.Add({ chartType: ExcelChartType.Radar }). - Set the
DataRangeproperty to specify the chart data range: the first row holds the series names, the first column holds the category names for each axis, and the remaining cells hold the values. - Set
SeriesDataFromRange = falseso that the data is not taken from a row/column layout. - Set the chart title, position, and legend position.
- Save the workbook with the
Workbook.SaveToFile()method.
Below is a complete code example that shows how to create a radar chart in React:
function App() {
  const createRadarChart = async () => {
    // Get the Spire.XLS WASM module
    const xlsModule = window.wasmModule?.spirexls;

    // Check if the module is ready
    if (!xlsModule) {
      alert('Spire.Xls is not ready yet');
      return;
    }

    // Load the Excel file into VFS
    const inputFileName = 'RadarChartData.xlsx';
    await window.spire.FetchFileToVFS(inputFileName, '', `${process.env.PUBLIC_URL}/static/data/`);

    // Load the workbook
    const workbook = new xlsModule.Workbook();
    workbook.LoadFromFile(inputFileName);

    // Get the first worksheet
    let sheet = workbook.Worksheets.get(0);

    // Add a radar chart
    let chart = sheet.Charts.Add({ chartType: xlsModule.ExcelChartType.Radar });

    // Set the chart data range
    chart.DataRange = sheet.Range.get("A1:C5");
    chart.SeriesDataFromRange = false;

    // Set the chart position
    chart.LeftColumn = 7;
    chart.TopRow = 6;
    chart.RightColumn = 16;
    chart.BottomRow = 29;

    // Set the chart title
    chart.ChartTitle = "Product Sales by Region";
    chart.ChartTitleArea.IsBold = true;
    chart.ChartTitleArea.Size = 12;

    // Set the legend position
    chart.Legend.Position = xlsModule.LegendPositionType.Corner;

    // Save the workbook
    const outputFileName = 'CreateRadarChart.xlsx';
    workbook.SaveToFile(outputFileName);

    // Release resources
    workbook.Dispose();

    // Read the converted file from VFS and trigger download
    const fileArray = window.dotnetRuntime.Module.FS.readFile(outputFileName);
    const blob = new Blob([fileArray], { type: "application/vnd.openxmlformats-officedocument.spreadsheetml.sheet" });
    const url = URL.createObjectURL(blob);
    const a = document.createElement('a');
    a.href = url;
    a.download = outputFileName;
    a.click();
    URL.revokeObjectURL(url);
  };

  return (
    <div style={{ textAlign: 'center', height: '300px' }}>
      <h1>Create a Radar Chart</h1>
      <button onClick={createRadarChart}>Start</button>
    </div>
  );
}

export default App;
After running, the effect of creating a radar chart:

Style the Radar Chart
After creating the radar chart, you can further improve its appearance by setting the chart area, plot area, and series line colors. The steps are as follows:
- Get the radar chart object that has been created.
- Set the
ChartArea.Fill.ForeColorproperty to set the chart background color. - Set the
PlotArea.Fill.ForeColorproperty to set the plot area background color. - Set the
Series[i].Format.LineProperties.Colorproperty to specify the line color of each series;Series.get(0)andSeries.get(1)correspond to the two series in the data range. - Save the workbook.
Below is a complete code example that shows how to style the radar chart:
function App() {
  const styleRadarChart = async () => {
    // Get the Spire.XLS WASM module
    const xlsModule = window.wasmModule?.spirexls;

    // Check if the module is ready
    if (!xlsModule) {
      alert('Spire.Xls is not ready yet');
      return;
    }

    // Load the Excel file into VFS
    const inputFileName = 'RadarChartData.xlsx';
    await window.spire.FetchFileToVFS(inputFileName, '', `${process.env.PUBLIC_URL}/static/data/`);

    // Load the workbook
    const workbook = new xlsModule.Workbook();
    workbook.LoadFromFile(inputFileName);

    // Get the first worksheet
    let sheet = workbook.Worksheets.get(0);

    // Add a radar chart
    let chart = sheet.Charts.Add({ chartType: xlsModule.ExcelChartType.Radar });

    // Set the chart data range
    chart.DataRange = sheet.Range.get("A1:C5");
    chart.SeriesDataFromRange = false;

    // Set the chart position
    chart.LeftColumn = 7;
    chart.TopRow = 6;
    chart.RightColumn = 16;
    chart.BottomRow = 29;

    // Set the chart title
    chart.ChartTitle = "Product Sales by Region";
    chart.ChartTitleArea.IsBold = true;
    chart.ChartTitleArea.Size = 12;

    // Style the radar chart
    // Set the chart area background color
    chart.ChartArea.Fill.ForeColor = xlsModule.Color.get_LightCyan();
    // Set the plot area background color
    chart.PlotArea.Fill.ForeColor = xlsModule.Color.get_LightYellow();
    // Set the color of the first series line
    chart.Series.get(0).Format.LineProperties.Color = xlsModule.Color.get_Orange();
    // Set the color of the second series line
    chart.Series.get(1).Format.LineProperties.Color = xlsModule.Color.get_CornflowerBlue();

    // Save the workbook
    const outputFileName = 'StyledRadarChart.xlsx';
    workbook.SaveToFile(outputFileName);

    // Release resources
    workbook.Dispose();

    // Read the converted file from VFS and trigger download
    const fileArray = window.dotnetRuntime.Module.FS.readFile(outputFileName);
    const blob = new Blob([fileArray], { type: "application/vnd.openxmlformats-officedocument.spreadsheetml.sheet" });
    const url = URL.createObjectURL(blob);
    const a = document.createElement('a');
    a.href = url;
    a.download = outputFileName;
    a.click();
    URL.revokeObjectURL(url);
  };

  return (
    <div style={{ textAlign: 'center', height: '300px' }}>
      <h1>Style the Radar Chart</h1>
      <button onClick={styleRadarChart}>Start</button>
    </div>
  );
}

export default App;
After running, the effect of styling the radar chart:

Frequently Asked Questions
The radar chart does not change after setting a series color
Reason: A radar chart draws each series as a line, so setting a fill color with Series.get(i).Format.Fill has no effect.
Solution: Set the line color through Series.get(i).Format.LineProperties.Color, for example:
chart.Series.get(0).Format.LineProperties.Color = xlsModule.Color.get_Orange();
How do I adjust the legend position of a radar chart?
Reason: The legend is docked to the right of the chart by default, where it competes with the plot area for width — especially noticeable on a radar chart, which already takes up a lot of horizontal space.
Solution: Set the legend position with the chart.Legend.Position property. The available values are LegendPositionType.Bottom, Corner, Top, Right, Left, and NotDocked. For example, to move the legend to the top-right corner:
chart.Legend.Position = xlsModule.LegendPositionType.Corner;
Get a Free License
Spire.XLS for JavaScript offers a 30-day full-featured free trial license with no functional limitations. Apply here to evaluate before purchasing.
In data analysis scenarios, bubble charts help intuitively display multi-dimensional data relationships. Each data point in a bubble chart is defined by three values: X-axis value, Y-axis value, and bubble size. Spire.XLS for JavaScript provides rich charting APIs that support creating bubble charts directly in the browser via WebAssembly, without requiring a backend service.
This article covers two core features:
For installation and project configuration, please refer to Integrating Spire.XLS for JavaScript in a React Project. The following examples assume Spire.XLS is already installed and the WebAssembly module has been initialized.
Create a Bubble Chart
A bubble chart can be added to a worksheet using the sheet.Charts.Add() method. The specific steps are as follows:
- Create a
Workbookobject and get the first worksheet. - Add a bubble chart via
Charts.Add(ExcelChartType.Bubble). - Set the
DataRangeproperty to specify the chart data area. - Set
SeriesDataFromRange = falseto indicate that data is not obtained from row/column layout. - Set
Series[0].Bubblesto specify the bubble size data range. - Set the chart title, position, and dimensions.
- Save the workbook via
Workbook.SaveToFile().
The following is a complete code example that demonstrates creating a bubble chart in React:
function App() {
  const createBubbleChart = async () => {
    // Get the Spire.XLS WASM module
    const xlsModule = window.wasmModule?.spirexls;

    // Check if the module is ready
    if (!xlsModule) {
      alert('Spire.Xls is not ready yet');
      return;
    }

    // Load the Excel file into VFS
    const inputFileName = 'CreateBubbleChart.xlsx';
    await window.spire.FetchFileToVFS(inputFileName, '', `${process.env.PUBLIC_URL}/static/data/`);

    // Load the workbook
    const workbook = new xlsModule.Workbook();
    workbook.LoadFromFile(inputFileName);

    // Get the first worksheet
    let sheet = workbook.Worksheets.get(0);

    // Add a bubble chart
    let chart = sheet.Charts.Add({ chartType: xlsModule.ExcelChartType.Bubble });

    // Set the chart data range
    chart.DataRange = sheet.Range.get("A1:C5");
    chart.SeriesDataFromRange = false;

    // Set the bubble sizes
    chart.Series.get(0).Bubbles = sheet.Range.get("C2:C5");

    // Set the chart position
    chart.LeftColumn = 7;
    chart.TopRow = 6;
    chart.RightColumn = 16;
    chart.BottomRow = 29;

    // Set the chart title
    chart.ChartTitle = "Bubble Chart";
    chart.ChartTitleArea.IsBold = true;
    chart.ChartTitleArea.Size = 12;

    // Save the workbook
    const outputFileName = 'CreateBubbleChart.xlsx';
    workbook.SaveToFile(outputFileName);

    // Dispose resources
    workbook.Dispose();

    // Read the converted file from VFS and trigger download
    const fileArray = window.dotnetRuntime.Module.FS.readFile(outputFileName);
    const blob = new Blob([fileArray], { type: "application/vnd.openxmlformats-officedocument.spreadsheetml.sheet" });
    const url = URL.createObjectURL(blob);
    const a = document.createElement('a');
    a.href = url;
    a.download = outputFileName;
    a.click();
    URL.revokeObjectURL(url);
  };

  return (
    <div style={{ textAlign: 'center', height: '300px' }}>
      <h1>Create Bubble Chart</h1>
      <button onClick={createBubbleChart}>Start</button>
    </div>
  );
}

export default App;
After running the code, the effect of creating a bubble chart is as follows:

Style the Bubble Chart
After creating a bubble chart, you can enhance its appearance by setting the chart area, plot area, and series colors. The specific steps are as follows:
- Get the created bubble chart object.
- Set the
ChartArea.Fill.ForeColorproperty to set the chart background color. - Set the
PlotArea.Fill.ForeColorproperty to set the plot area background color. - Set the
Series[0].Format.Fill.ForeColorproperty to set the series color. - Set the
Series[0].HasDataLabelsproperty to enable data labels, and specify the label content throughDataPoints.DefaultDataPoint.DataLabels. - Save the workbook.
The following is a complete code example that demonstrates how to style a bubble chart:
function App() {
  const styleBubbleChart = async () => {
    // Get the Spire.XLS WASM module
    const xlsModule = window.wasmModule?.spirexls;

    // Check if the module is ready
    if (!xlsModule) {
      alert('Spire.Xls is not ready yet');
      return;
    }

    // Load the Excel file into VFS
    const inputFileName = 'CreateBubbleChart.xlsx';
    await window.spire.FetchFileToVFS(inputFileName, '', `${process.env.PUBLIC_URL}/static/data/`);

    // Load the workbook
    const workbook = new xlsModule.Workbook();
    workbook.LoadFromFile(inputFileName);

    // Get the first worksheet
    let sheet = workbook.Worksheets.get(0);

    // Add a bubble chart
    let chart = sheet.Charts.Add({ chartType: xlsModule.ExcelChartType.Bubble });

    // Set the chart data range
    chart.DataRange = sheet.Range.get("A1:C5");
    chart.SeriesDataFromRange = false;

    // Set the bubble sizes
    chart.Series.get(0).Bubbles = sheet.Range.get("C2:C5");

    // Set the chart position
    chart.LeftColumn = 7;
    chart.TopRow = 6;
    chart.RightColumn = 16;
    chart.BottomRow = 29;

    // Set the chart title
    chart.ChartTitle = "Bubble Chart";
    chart.ChartTitleArea.IsBold = true;
    chart.ChartTitleArea.Size = 12;

    // Style the bubble chart
    // Set chart area background color
    chart.ChartArea.Fill.ForeColor = xlsModule.Color.get_LightCyan();
    // Set plot area background color
    chart.PlotArea.Fill.ForeColor = xlsModule.Color.get_LightYellow();
    // Set series color
    chart.Series.get(0).Format.Fill.FillType = xlsModule.ShapeFillType.SolidColor;
    chart.Series.get(0).Format.Fill.ForeColor = xlsModule.Color.get_Orange();
    // Enable and set data labels
    chart.Series.get(0).HasDataLabels = true;
    chart.Series.get(0).DataPoints.DefaultDataPoint.DataLabels.HasCategoryName = true;
    chart.Series.get(0).DataPoints.DefaultDataPoint.DataLabels.HasValue = true;

    // Save the workbook
    const outputFileName = 'StyledBubbleChart.xlsx';
    workbook.SaveToFile(outputFileName);

    // Dispose resources
    workbook.Dispose();

    // Read the converted file from VFS and trigger download
    const fileArray = window.dotnetRuntime.Module.FS.readFile(outputFileName);
    const blob = new Blob([fileArray], { type: "application/vnd.openxmlformats-officedocument.spreadsheetml.sheet" });
    const url = URL.createObjectURL(blob);
    const a = document.createElement('a');
    a.href = url;
    a.download = outputFileName;
    a.click();
    URL.revokeObjectURL(url);
  };

  return (
    <div style={{ textAlign: 'center', height: '300px' }}>
      <h1>Style Bubble Chart</h1>
      <button onClick={styleBubbleChart}>Start</button>
    </div>
  );
}

export default App;
After running the code, the effect of styling the bubble chart is as follows:

Frequently Asked Questions
What do columns A, B, and C in DataRange represent?
Reason: Each data point in a bubble chart needs three values — an X-axis value, a Y-axis value, and a bubble size — and the three columns specified by DataRange correspond to them exactly.
Solution: Taking chart.DataRange = sheet.Range.get("A1:C5") as an example, column A serves as the category (X axis), column B as the Y-axis value, and column C is set as the bubble size through chart.Series.get(0).Bubbles = sheet.Range.get("C2:C5"). The order of these three columns cannot be swapped, or both the point positions and the bubble sizes will be wrong.
Why does the data range start at A1 instead of A2?
Reason: The first row of the data range is used as the series name.
Solution: Include the header row in DataRange. In the example, the "Sales" shown in the legend comes from cell B1, so the data range is written as A1:C5 rather than A2:C5.
Get a Free License
Spire.XLS for JavaScript offers a 30-day full-featured free trial license with no functional limitations. Apply here to evaluate before purchasing.
In data analysis scenarios, trendlines help you visually identify data trends and predict directions from Excel charts. Spire.XLS for JavaScript provides rich trendline APIs that allow you to add various types of trendlines to chart series directly in the browser via WebAssembly, without requiring a backend service.
This article covers two core features:
For installation and project configuration, please refer to Integrating Spire.XLS for JavaScript in a React Project. The following examples assume Spire.XLS is installed and the WebAssembly module has been initialized.
Add Trendline to Chart
You can add trendlines to any series in a chart through the chart.Series.get(i).TrendLines.Add() method. Spire.XLS for JavaScript supports 4 types of trendlines defined in the TrendLineType enumeration:
Linear— Linear trendline, suitable for data showing steady increase or decreaseExponential— Exponential trendline, suitable for scenarios where the growth or decline rate acceleratesLogarithmic— Logarithmic trendline, suitable for data that changes rapidly then stabilizesMoving_Average— Moving average trendline, suitable for smoothing data fluctuations
Specific steps:
- Create a
Workbookobject and get the first worksheet. - Get the chart that needs a trendline through
Worksheet.Charts.get(i). - Call
chart.Series.get(0).TrendLines.Add()with thetypeparameter specifying the trendline type. - Save the workbook through
Workbook.SaveToFile().
Below is a complete code example showing how to add four different types of trendlines to an Excel chart in React:
function App() {
  const addTrendline = async () => {
    // Get the Spire.XLS WASM module
    const xlsModule = window.wasmModule?.spirexls;

    // Check if the module is ready
    if (!xlsModule) {
      alert('Spire.Xls is not ready yet');
      return;
    }

    // Load the Excel file into VFS
    const inputFileName = 'ChartTrendline_en.xlsx';
    await window.spire.FetchFileToVFS(inputFileName, '', `${process.env.PUBLIC_URL}data/`);

    // Load the workbook
    const workbook = new xlsModule.Workbook();
    workbook.LoadFromFile({ fileName: inputFileName });

    // Get the first chart from the first worksheet
    let chart = workbook.Worksheets.get(0).Charts.get(0);

    // Add linear trendline
    chart.ChartTitle = "Linear Trendline";
    chart.Series.get(0).TrendLines.Add({ type: xlsModule.TrendLineType.Linear });

    // Add exponential trendline
    chart = workbook.Worksheets.get(0).Charts.get(0);
    chart.ChartTitle = "Exponential Trendline";
    chart.Series.get(0).TrendLines.Add({ type: xlsModule.TrendLineType.Exponential });

    // Add logarithmic trendline
    chart.ChartTitle = "Logarithmic Trendline";
    chart.Series.get(0).TrendLines.Add({ type: xlsModule.TrendLineType.Logarithmic });

    // Add moving average trendline
    chart.ChartTitle = "Moving Average Trendline";
    chart.Series.get(0).TrendLines.Add({ type: xlsModule.TrendLineType.Moving_Average });

    // Save the document
    const outputFileName = 'AddTrendline.xlsx';
    workbook.SaveToFile({ fileName: outputFileName, version: xlsModule.ExcelVersion.Version2010 });

    // Release resources
    workbook.Dispose();

    // Read the converted file from VFS and trigger download
    const fileArray = window.dotnetRuntime.Module.FS.readFile(outputFileName);
    const blob = new Blob([fileArray], { type: 'application/vnd.openxmlformats-officedocument.spreadsheetml.sheet' });
    const url = URL.createObjectURL(blob);
    const a = document.createElement('a');
    a.href = url;
    a.download = outputFileName;
    a.click();
    URL.revokeObjectURL(url);
  };

  return (
    <div style={{ textAlign: 'center', height: '300px' }}>
      <h1>Add Trendline to Chart</h1>
      <button onClick={addTrendline}>Start</button>
    </div>
  );
}

export default App;
After running the code, you get the effect of adding four different types of trendlines to a chart:

Extract Trendline Formula
You can obtain the mathematical formula of a trendline through the trendLine.Formula property, making it easy to display the trendline's analytical expression in reports.
Specific steps:
- Load the
AddTrendline.xlsxfile generated in Step 1, which contains four charts. - Use
Worksheet.Charts.get(i)to iterate through all four charts. - Read the
trendLine.Formulaproperty from each chart to obtain the formula string, then save all formulas to a text file.
Below is a complete code example showing how to extract trendline formulas in React:
function App() {
  const extractTrendlineFormula = async () => {
    // Get the Spire.XLS WASM module
    const xlsModule = window.wasmModule?.spirexls;

    // Check if the module is ready
    if (!xlsModule) {
      alert('Spire.Xls is not ready yet');
      return;
    }

    // Load the AddTrendline.xlsx file generated in Step 1 into VFS
    const inputFileName = 'AddTrendline.xlsx';
    await window.spire.FetchFileToVFS(inputFileName, '', `${process.env.PUBLIC_URL}data/`);

    // Load the workbook
    const workbook = new xlsModule.Workbook();
    workbook.LoadFromFile({ fileName: inputFileName });

    // Get the first worksheet
    let sheet = workbook.Worksheets.get(0);
    let result = "Extracted trendline formulas from four charts:\n\n";

    // Iterate through all four charts and extract trendline formulas
    for (let i = 0; i < 4; i++) {
      let chart = sheet.Charts.get(i);
      let trendLine = chart.Series.get(0).TrendLines.get(0);
      // Moving average trendline has no mathematical formula
      if (trendLine.Type === xlsModule.TrendLineType.Moving_Average) {
        result += `Chart ${i + 1} (${chart.ChartTitle}): N/A (Moving Average)\n`;
      } else {
        let formula = trendLine.Formula;
        result += `Chart ${i + 1} (${chart.ChartTitle}): ${formula}\n`;
      }
    }

    // Release resources
    workbook.Dispose();

    // Save the formulas to a text file and trigger download
    const outputFileName = 'ExtractTrendline.txt';
    const blob = new Blob([result], { type: "text/plain;charset=utf-8" });
    const url = URL.createObjectURL(blob);
    const a = document.createElement('a');
    a.href = url;
    a.download = outputFileName;
    a.click();
    URL.revokeObjectURL(url);
  };

  return (
    <div style={{ textAlign: 'center', height: '300px' }}>
      <h1>Extract Trendline Formula</h1>
      <button onClick={extractTrendlineFormula}>Start</button>
    </div>
  );
}

export default App;
After running the code, you get the effect of extracting trendline formulas:

FAQ
How to delete an added trendline from a chart?
Cause: A trendline has already been added to the chart, but it needs to be removed or replaced.
Solution: Use the TrendLines.RemoveAt(index) method to remove a trendline at a specific index. Indexing starts from 0. For example, chart.Series.get(0).TrendLines.RemoveAt(0) removes the first trendline from the first series.
How to set forward/backward prediction periods for a trendline?
Cause: A trendline can not only fit existing data, but also predict future or past values based on the trend.
Solution: Use the trendLine.Forward and trendLine.Backward properties to set the number of prediction periods forward and backward respectively. For example, trendLine.Forward = 2 predicts two periods beyond the current data, while trendLine.Backward = 1 extrapolates one period before the data.
Get Free License
Spire.XLS for JavaScript offers a 30-day full-featured free trial license with no functional limitations. Apply here to evaluate before purchasing.
