
JavaScript (53)
Convert Word to Markdown and Markdown to Word with JavaScript in React
2025-02-12 08:00:00 Written by AdministratorSeamless conversion between Word documents and Markdown files is increasingly essential in web development for boosting productivity and interoperability. Word documents dominate in complex formatting, while Markdown offers a simple, universal approach to content creation. Enabling conversion between the two within a React application allows users to work in their preferred format while ensuring compatibility across different platforms, streamlining workflows without relying on external tools. In this article, we will explore how to use Spire.Doc for JavaScript to convert Word to Markdown and Markdown to Word with JavaScript in React applications.
Install Spire.Doc for JavaScript
To get started with conversion between Word and Markdown in a React application, you can either download Spire.Doc for JavaScript from our website or install it via npm with the following command:
npm i spire.officeThe downloaded product package integrates Spire.Doc for JavaScript, Spire.XLS for JavaScript, Spire.PDF for JavaScript, and Spire.Presentation for JavaScript. To use the features of Spire.Doc for JavaScript, you need to copy the corresponding files (spire.doc.js, Spire.Doc.Wasm.zip, spire.common.js, Spire.Common.Wasm.zip, and the _framework folder) to the public folder of your project. To ensure proper text rendering, you can add relevant font files with a custom path. In the following example, the font is added to the path: public\static\font.
For more details, refer to the documentation: How to Integrate Spire.Doc for JavaScript in a React Project
Convert Word to Markdown with JavaScript
The Spire.Doc for JavaScript provides a WebAssembly module that enables loading Word documents from the VFS and converting them to Markdown. Developers can achieve this conversion by fetching the documents to the VFS, loading them using the Document.LoadFromFile() method, and saving them as Markdown with the Document.SaveToFile() method. The process involves the following steps:
- Load the spire.doc.js file to initialize the WebAssembly module.
- Fetch the Word document into the virtual file system using the window.spire.FetchFileToVFS() method.
- Create a Document instance in the WebAssembly module using the new wasmModule.Document() method.
- Load the Word document into the Document instance with the Document.LoadFromFile() method.
- Convert the document to Markdown format and save it to the VFS using the Document.SaveToFile() method.
- Read and download the file, or use it as needed.
- JavaScript
import React, { useState, useEffect } from 'react';

function App() {
  const [wasmModule, setWasmModule] = useState(null);
  // Load Spire.Doc
  useEffect(() => {
    (async () => {
      try {
        const publicUrl = process.env.PUBLIC_URL || '';
        const spireModule = await import(/* webpackIgnore: true */ `${publicUrl}/spire.doc.js`);
        const rawModule = spireModule.default || spireModule;
        window.wasmModule = typeof rawModule === 'function'
          ? await rawModule({ locateFile: p => p.endsWith('.wasm') ? `${publicUrl}/${p}` : p })
          : rawModule;
        setWasmModule(window.wasmModule);
      } catch (error) {
        console.error('Failed to load spire.doc.js WASM module:', error);
      }
    })();
  }, []);

  // Function to convert Word to Markdown
  const ConvertWordToMD = async () => {
    const wasmModule = window.wasmModule.spiredoc;

    if (wasmModule) {
      // Load the font files into the virtual file system (VFS)
      await window.spire.FetchFileToVFS('CALIBRI.ttf', '/Library/Fonts/', `${process.env.PUBLIC_URL}/static/font/`);

      // Specify the input file name and the output file name
      const inputFileName = 'sample.docx';
      const outputFileName = 'WordToMarkdown.md';

      // Fetch the input file and add it to the VFS
      await window.spire.FetchFileToVFS(inputFileName, '', `${process.env.PUBLIC_URL}/static/data/`);

      // Create an instance of the Document class
      const doc = new wasmModule.Document();

      // Load the Word document
      doc.LoadFromFile(inputFileName);

      // Save the document to a Markdown file
      doc.SaveToFile({ fileName: outputFileName, fileFormat: wasmModule.FileFormat.Markdown });

      // Release resources
      doc.Dispose();

      // Read the markdown file
      const mdContent = window.dotnetRuntime.Module.FS.readFile(outputFileName)

      // Generate a Blob from the markdown file and trigger a download
      const blob = new Blob([mdContent], { type: 'text/plain' });
      const url = URL.createObjectURL(blob);
      const a = document.createElement("a");
      a.href = url;
      a.download = outputFileName;
      document.body.appendChild(a);
      a.click();
      document.body.removeChild(a);
      URL.revokeObjectURL(url);
    }
  };

  return (
    <div style={{ textAlign: 'center', height: '300px' }}>
      <h1>Convert Word to Markdown Using JavaScript in React</h1>
      <button onClick={ConvertWordToMD} disabled={!wasmModule}>
        Convert and Download
      </button>
    </div>
  );
}

export default App;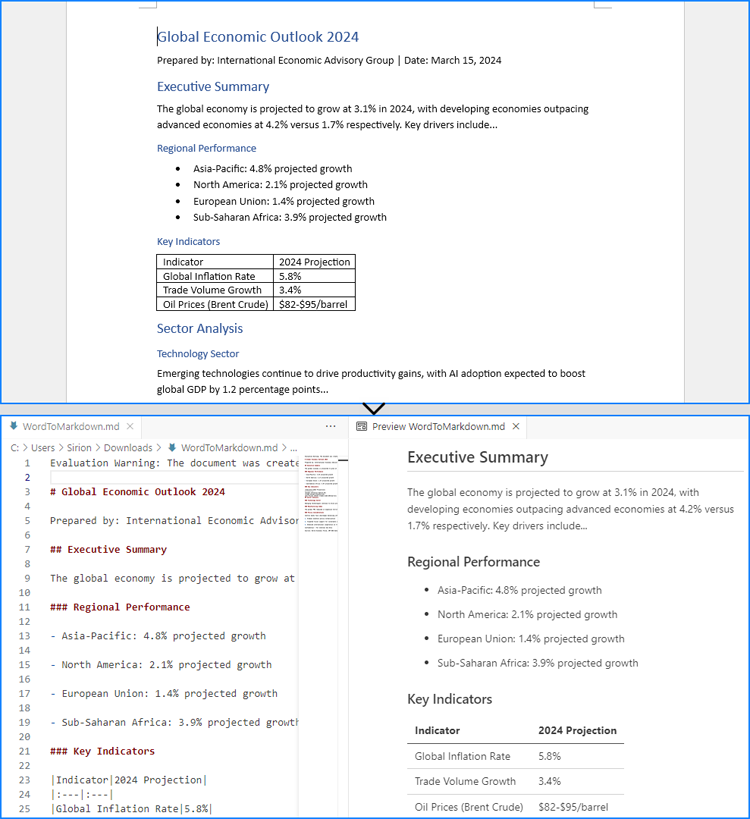
Convert Markdown to Word with JavaScript
The Document.LoadFromFile() method can also be used to load a Markdown file by specifying the file format parameter as wasmModule.FileFormat.Markdown. Then, the Markdown file can be exported as a Word document using the Document.SaveToFile() method.
For Markdown strings, developers can write them as Markdown files into the virtual file system using the window.dotnetRuntime.Module.FS.writeFile() method, and then convert them to Word documents.
The detailed steps for converting Markdown content to Word documents are as follows:
- Load the spire.doc.js file to initialize the WebAssembly module.
- Load required font files into the virtual file system using the window.spire.FetchFileToVFS() method.
- Import Markdown content:
- For files: Use the window.spire.FetchFileToVFS() method to load the Markdown file into the VFS.
- For strings: Write Markdown content to the VFS via the window.dotnetRuntime.Module.FS.writeFile() method.
- Instantiate a Document object via the new wasmModule.Document() method within the WebAssembly module.
- Load the Markdown file into the Document instance using the Document.LoadFromFile({ filename: string, fileFormat: wasmModule.FileFormat.Markdown }) method.
- Convert the Markdown file to a Word document and save it to the VFS using the Document.SaveToFile( { filename: string, fileFormat:wasmModule.FileFormat.Docx2019 }) method.
- Retrieve and download the generated Word file from the VFS, or process it further as required.
- JavaScript
import React, { useState, useEffect } from 'react';

function App() {
  const [wasmModule, setWasmModule] = useState(null);
  // Load Spire.Doc
  useEffect(() => {
    (async () => {
      try {
        const publicUrl = process.env.PUBLIC_URL || '';
        const spireModule = await import(/* webpackIgnore: true */ `${publicUrl}/spire.doc.js`);
        const rawModule = spireModule.default || spireModule;
        window.wasmModule = typeof rawModule === 'function'
          ? await rawModule({ locateFile: p => p.endsWith('.wasm') ? `${publicUrl}/${p}` : p })
          : rawModule;
        setWasmModule(window.wasmModule);
      } catch (error) {
        console.error('Failed to load spire.doc.js WASM module:', error);
      }
    })();
  }, []);

  // Function to convert Markdown to Word
  const ConvertMDToWord = async () => {
    const wasmModule = window.wasmModule.spiredoc;

    if (wasmModule) {
      // Load the font files into the virtual file system (VFS)
      await window.spire.FetchFileToVFS('CALIBRI.ttf', '/Library/Fonts/', `${process.env.PUBLIC_URL}/static/font/`);

      // Create an instance of the Document class
      const doc = new wasmModule.Document();

      // Specify the output file name
      const outputFileName = 'MarkdownStringToWord.docx';

      // Fetch the Markdown file to the VFS and load it into the Document instance
      // window.spire.FetchFileToVFS('MarkdownExample.md', '', `${process.env.PUBLIC_URL}/static/data/`);
      // doc.LoadFromFile({ fileName: 'MarkdownExample.md', fileFormat: wasmModule.FileFormat.Markdown });

      // Define the Markdown string
      const markdownString = '# Project Aurora: Next-Gen Climate Modeling System *\n' +
          '## Overview\n' +
          'A next-generation climate modeling platform leveraging AI to predict regional climate patterns with 90%+ accuracy. Built for researchers and policymakers.\n' +
          '### Key Features\n' +
          '- * Real-time atmospheric pattern recognition\n' +
          '- * Carbon sequestration impact modeling\n' +
          '- * Custom scenario simulation builder\n' +
          '- * Historical climate data cross-analysis\n' +
          '\n' +
          '## Sample Usage\n' +
          '| Command | Description | Example Output |\n' +
          '|---------|-------------|----------------|\n' +
          '| `region=asia` | Runs climate simulation for Asia | JSON with temperature/precipitation predictions |\n' +
          '| `model=co2` | Generates CO2 impact visualization | Interactive 3D heatmap |\n' +
          '| `year=2050` | Compares scenarios for 2050 | Tabular data with Δ values |\n' +
          '| `format=netcdf` | Exports data in NetCDF format | .nc file with metadata |'

      // Write the Markdown string to a file in the VFS
      await window.dotnetRuntime.Module.FS.writeFile('Markdown.md', markdownString, {encoding: 'utf8'})

      // Load the Markdown file from the VFS
      doc.LoadFromFile({ fileName: 'Markdown.md', fileFormat: wasmModule.FileFormat.Markdown });

      // Save the document to a Word file
      doc.SaveToFile({fileName: outputFileName, fileFormat: wasmModule.FileFormat.Docx2019});

      // Release resources
      doc.Dispose();

      // Read the Word file
      const outputWordFile = await window.dotnetRuntime.Module.FS.readFile(outputFileName)

      // Generate a Blob from the Word file and trigger a download
      const blob = new Blob([outputWordFile], { type: 'application/vnd.openxmlformats-officedocument.wordprocessingml.document' });
      const url = URL.createObjectURL(blob);
      const a = document.createElement("a");
      a.href = url;
      a.download = outputFileName;
      document.body.appendChild(a);
      a.click();
      document.body.removeChild(a);
      URL.revokeObjectURL(url);
    }
  };

  return (
      <div style={{ textAlign: 'center', height: '300px' }}>
        <h1>Convert Markdown to Word Using JavaScript in React</h1>
        <button onClick={ConvertMDToWord} disabled={!wasmModule}>
          Convert and Download
        </button>
      </div>
  );
}

export default App;
Get a Free License
To fully experience the capabilities of Spire.Doc for JavaScript without any evaluation limitations, you can request a free 30-day trial license.
How to Integrate Spire.PDF for JavaScript in a React Project
2025-02-11 07:14:00 Written by AdministratorIn the modern web development landscape, React has become the go-to framework for building dynamic and interactive user interfaces. When it comes to handling PDF documents within a React application, Spire.PDF for JavaScript stands out as a powerful tool.
This guide will walk you through how to integrate Spire.PDF for JavaScript into your React project, explore its benefits, and provide actionable insights to optimize your implementation.
- Benefits of Using Spire.PDF for JavaScript in React
- Set Up Your Environment
- Integrate Spire.PDF for JavaScript in Your Project
- Create and Save PDF Files Using JavaScript
Benefits of Using Spire.PDF for JavaScript in React
React, a widely used JavaScript library for crafting dynamic user interfaces, has become essential in modern web development. In tandem, Spire.PDF for JavaScript is a robust library tailored to enhance PDF document processing in web applications.
By incorporating Spire.PDF for JavaScript into your React project, you can introduce advanced PDF manipulation capabilities to your application. Here are some of the key advantages:
- Effortless PDF Generation: Spire.PDF for JavaScript facilitates the creation and editing of PDF documents directly within React, allowing for efficient management without the need for external applications.
- Cross-Platform Functionality: With Spire.PDF for JavaScript, you can generate PDFs that are accessible across various platforms, enabling users to view and edit documents from any location.
- Comprehensive Features: Spire.PDF for JavaScript provides a wide array of features, including text formatting, image embedding, and annotation capabilities, making it perfect for applications that require detailed PDF manipulation.
- Smooth Integration: Designed to work seamlessly with various JavaScript frameworks, including React, Spire.PDF for JavaScript integrates effortlessly into existing projects, ensuring a smooth development process.
Set Up Your Environment
Step 1. Install React and npm
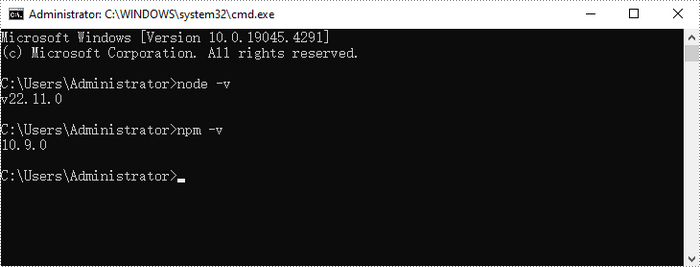
Download and install Node.js from the official website. Make sure to choose the version that matches your operating system.
After the installation is complete, you can verify that Node.js and npm are working correctly by running the following commands in your terminal:
Step 2. Create a New React Project
Create a new React project named my-app using Create React App from terminal:
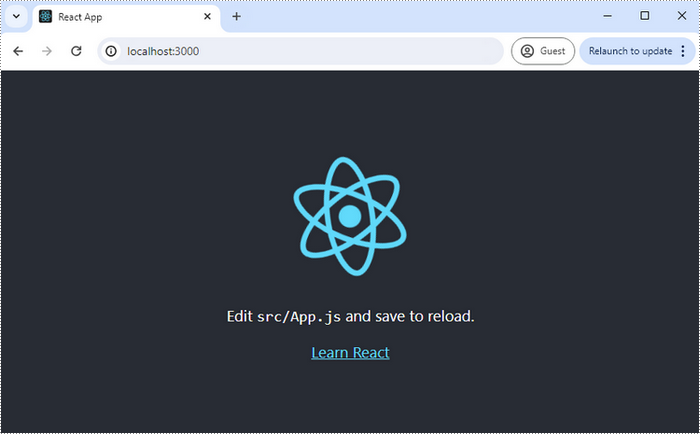
npx create-react-app my-app

If your React project is compiled successfully, the app will be served at http://localhost:3000, allowing you to view and test your application in a browser.
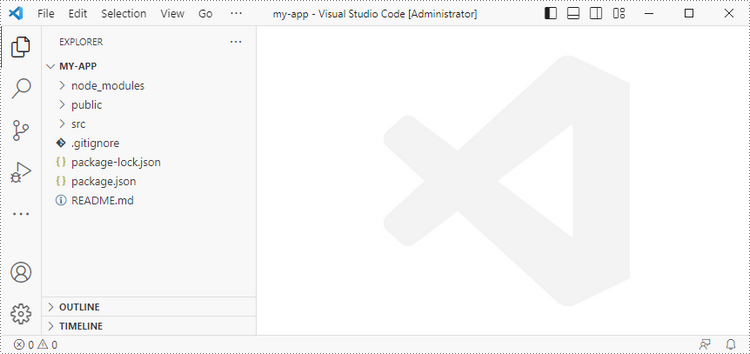
To visually browse and manage the files in your project, you can open the project using VS Code.
Integrate Spire.PDF for JavaScript in Your Project
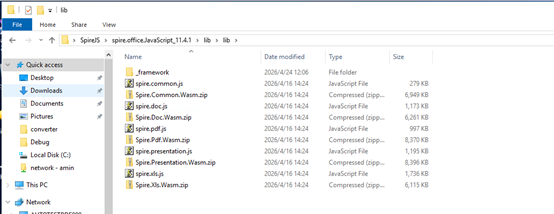
Download Spire.PDF for JavaScript from our website and unzip it to a location on your disk. The downloaded product package integrates Spire.Doc for JavaScript, Spire.XLS for JavaScript, Spire.PDF for JavaScript, and Spire.Presentation for JavaScript. When using the features of Spire.PDF for JavaScript, the required files are: spire.pdf.js, Spire.Pdf.Wasm.zip, spire.common.js, Spire.Common.Wasm.zip, and the _framework folder.
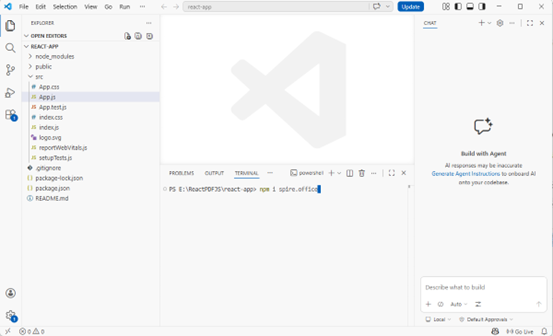
Alternatively, you can download Spire.PDF for JavaScript using npm. In the terminal within VS Code, run the following command:
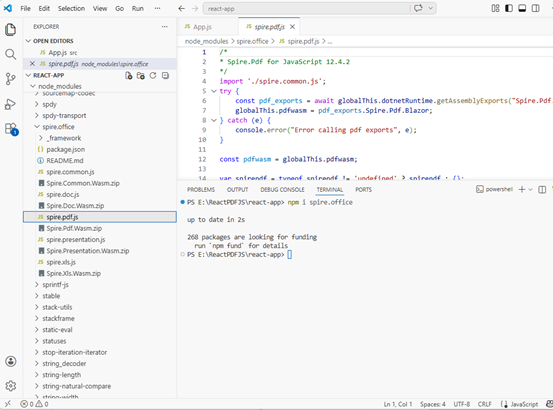
npm i spire.office
Once the installation is complete, the product packages will be saved in the node_modules/spire.office path of your project.
Copy the spire.pdf.js, Spire.Pdf.Wasm.zip, spire.common.js, Spire.Common.Wasm.zip, and the _framework folder five files into the "public" folder in your React project.
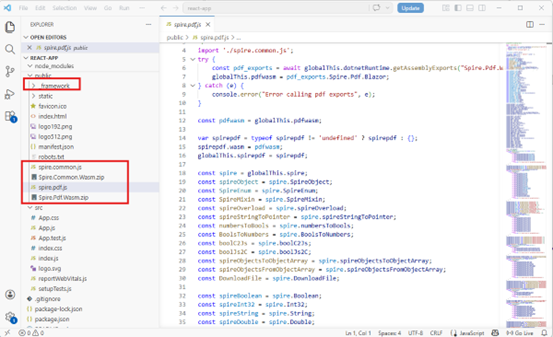
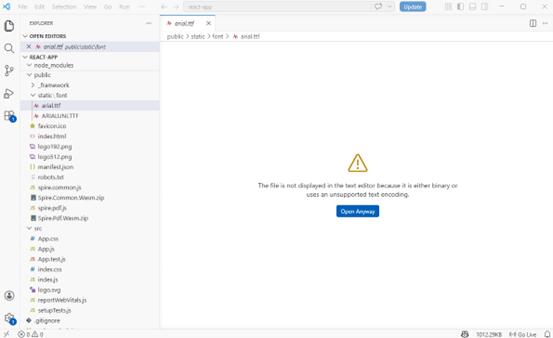
Add font files you plan to use to the "public/static/font" folder in your project. (Not always necessary)
Create and Save PDF Files Using JavaScript
Modify the code in the "App.js" file to generate a PDF file using the WebAssembly (WASM) module.
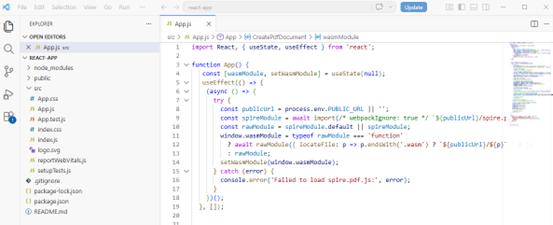
Here is the entire code:
- JavaScript
import React, { useState, useEffect } from 'react';

function App() {
   const [wasmModule, setWasmModule] = useState(null);
   useEffect(() => {
    (async () => {
      try {
        const publicUrl = process.env.PUBLIC_URL || '';
        const spireModule = await import(/* webpackIgnore: true */ `${publicUrl}/spire.pdf.js`);
        const rawModule = spireModule.default || spireModule;
        window.wasmModule = typeof rawModule === 'function'
          ? await rawModule({ locateFile: p => p.endsWith('.wasm') ? `${publicUrl}/${p}` : p })
          : rawModule;
        setWasmModule(window.wasmModule);
      } catch (error) {
        console.error('Failed to load spire.pdf.js:', error);
      }
    })();
  }, []);


  const CreatePdfDocument = async () => {
    const wasmModule = window.wasmModule.spirepdf;

    if (wasmModule) {
      // Load the ARIALUNI.TTF font file into the virtual file system (VFS)
      await window.spire.FetchFileToVFS("ARIALUNI.TTF", "/Library/Fonts/", `${import.meta.env.BASE_URL}static/font/`);

      // Create a pdf instance
      let doc = new wasmModule.PdfDocument();

      // Create one page
      let pagebase = doc.Pages.Add();

      const text = "Hello World";
      let pdffont = new wasmModule.PdfFont({fontFamily:wasmModule.PdfFontFamily.Helvetica, size:30.0});
      let pdfBrush = new wasmModule.PdfSolidBrush({pdfRGBColor: new wasmModule.PdfRGBColor({color: wasmModule.Color.get_Black()})});
      // Draw the text
      pagebase.Canvas.DrawString({s: text, font: pdffont, brush: pdfBrush, x: 10, y: 10});

      // Define the output file name
      const outputFileName = "HelloWorld_out.pdf";

      // Save the document to the specified path
      doc.SaveToFile(outputFileName);
      doc.Close();

      // Read the saved file and convert to a Blob object
      const modifiedFileArray = window.dotnetRuntime.Module.FS.readFile(outputFileName);
      const modifiedFile = new Blob([modifiedFileArray], { type: "application/pdf" });

      // Clean up resources
      doc.Dispose();

      // Create a URL for the Blob
      const url = URL.createObjectURL(modifiedFile);

      // Create an anchor element to trigger the download
      const a = document.createElement('a');
      a.href = url;
      a.download = outputFileName;
      document.body.appendChild(a);
      a.click();
      document.body.removeChild(a);
      URL.revokeObjectURL(url);

    }
  };

  return (
    <div style={{ textAlign: 'center', height: '300px' }}>
      <h1>Create a PDF Document in React</h1>
      <button onClick={CreatePdfDocument} disabled={!wasmModule}>
        Generate
      </button>
    </div>
  );
}

export default App;
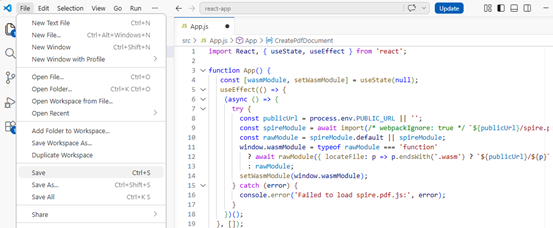
Save the changes by clicking "File" - "Save".
Start the development server by entering the following command in the terminal within VS
npm start
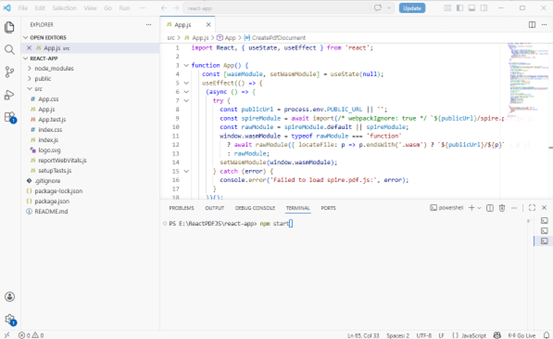
Once the React app is successfully compiled, it will open in your default web browser, typically at http://localhost:3000.

Click "Generate," and a "Save As" window will prompt you to save the output file in the designated folder.

Apply for a Temporary License
If you'd like to remove the evaluation message from the generated documents, or to get rid of the function limitations, please request a 30-day trial license for yourself.
Convert Excel to OpenXML and OpenXML to Excel with JavaScript in React
2025-02-10 01:05:26 Written by AdministratorOpenXML is a widely used format for creating and manipulating Microsoft Office documents, including Excel files. It provides a structured, XML-based representation of spreadsheet data, making it ideal for interoperability and automation. Converting an Excel file to OpenXML allows users to extract and process data programmatically, while converting OpenXML back to Excel ensures compatibility with Microsoft Excel and other spreadsheet applications. This article will guide you through the process of converting Excel to OpenXML and OpenXML back to Excel in React using Spire.XLS for JavaScript.
Install Spire.XLS for JavaScript
To get started with converting Excel to OpenXML and OpenXML to Excel in a React application, you can either download Spire.XLS for JavaScript from the official website or install it via npm with the following command:
npm i spire.office
The downloaded product package has been integrated Spire.Doc for JavaScript,Spire.XLS for JavaScript,Spire.PDF for JavaScript,Spire.Presentation for JavaScript. To use the functionality of Spire.XLS for JavaScript, you need to copy the corresponding files (spire.xls.js, Spire.Xls.Wasm.zip, spire.common.js, Spire.Common.Wasm.zip, and _framework) to the project's "public" folder. At the same time, in order to ensure text rendering, the related font files can be added with custom paths. In the following example, the font addition path is: public\static\font.
For more details, refer to the documentation: How to Integrate Spire.XLS for JavaScript in a React Project.
Convert Excel to OpenXML with JavaScript
Converting an Excel workbook to OpenXML format can be easily achieved using the Workbook.SaveAsXml() method provided by Spire.XLS for JavaScript. Below are the key steps:
- Load the font file to ensure correct text rendering.
- Create a Workbook object using the new wasmModule.Workbook() method.
- Load the Excel file using the Workbook.LoadFromFile() method.
- Save the Excel file as an OpenXML file using the Workbook.SaveAsXml() method.
Code example:
- JavaScript
import React, { useState, useEffect } from 'react';
function App() {
const [wasmModule, setWasmModule] = useState(null);
// Load Spire.XLS
useEffect(() => {
(async () => {
try {
const publicUrl = process.env.PUBLIC_URL || '';
const spireModule = await import(/* webpackIgnore: true */ `${publicUrl}/spire.xls.js`);
const rawModule = spireModule.default || spireModule;
window.wasmModule = typeof rawModule === 'function'
? await rawModule({ locateFile: p => p.endsWith('.wasm') ? `${publicUrl}/${p}` : p })
: rawModule;
setWasmModule(window.wasmModule);
} catch (error) {
console.error('Failed to load spire.xls.js WASM module:', error);
}
})();
}, []);
// Function to convert Excel to OpenXML
const ExcelToOpenXML = async () => {
const wasmModule = window.wasmModule.spirexls;
if (wasmModule) {
// Load font into Virtual File System (VFS)
await window.spire.FetchFileToVFS('Arial.ttf', '/Library/Fonts/', `${process.env.PUBLIC_URL}/static/font/`);
// Load input file into Virtual File System (VFS)
const inputFileName = 'sample.xlsx';
await window.spire.FetchFileToVFS(inputFileName, '', `${process.env.PUBLIC_URL}/static/data/`);
// Create a new workbook
const workbook = new wasmModule.Workbook();
// Load an existing HTML file
workbook.LoadFromHtml({ fileName: inputFileName });
// Specify the output OpenXML file path
const outputFileName = 'ExcelXML.xml';
// Save the workbook as an OpenXML file
workbook.SaveAsXml({ fileName: outputFileName });
// Read the saved file and convert to Blob object
const modifiedFileArray = window.dotnetRuntime.Module.FS.readFile(outputFileName);
const modifiedFile = new Blob([modifiedFileArray], { type: 'application/xml' });
// Create a URL for the Blob and initiate download
const url = URL.createObjectURL(modifiedFile);
const a = document.createElement('a');
a.href = url;
a.download = outputFileName;
document.body.appendChild(a);
a.click();
document.body.removeChild(a);
URL.revokeObjectURL(url);
// Clean up resources used by the workbook
workbook.Dispose();
}
};
return (
<div style={{ textAlign: 'center', height: '300px' }}>
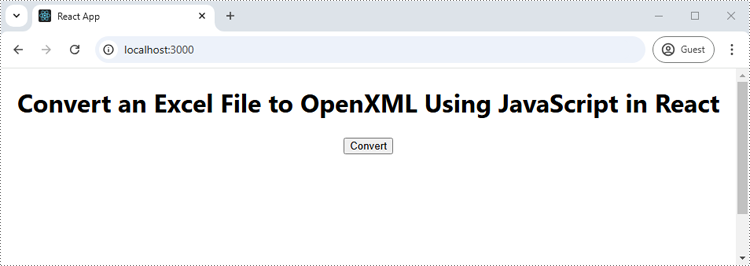
<h1>Convert an Excel File to OpenXML Using JavaScript in React</h1>
<button onClick={ExcelToOpenXML} disabled={!wasmModule}>
Convert
</button>
</div>
);
}
export default App;
Run the code to launch the React app at localhost:3000. Once it's running, click on the "Convert" button to save the Excel file as an OpenXML file:
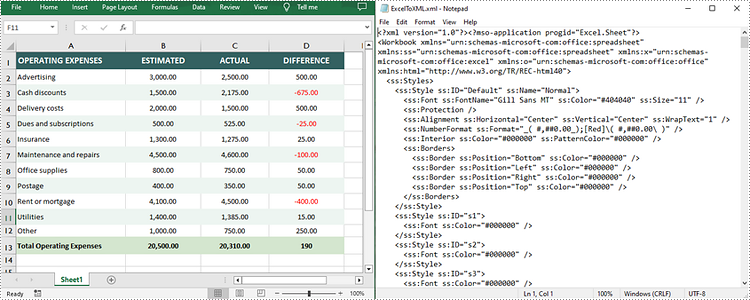
The below screenshot shows the input Excel file and the converted OpenXML file:
Convert OpenXML to Excel with JavaScript
To convert an OpenXML file back to Excel, you can use the Workbook.LoadFromXml() method to load the OpenXML file and the Workbook.SaveToFile() method to save it in Excel format. Below are the key steps:
- Load the font file to ensure correct text rendering.
- Create a Workbook object using the new wasmModule.Workbook() method.
- Read an OpenXML file into a stream using the wasmModule.Stream.CreateByFile() method.
- Load the OpenXML file from the stream using the Workbook.LoadFromXml() method.
- Save the OpenXML file as an Excel file using the Workbook.SaveToFile() method.
Code example:
- JavaScript
import React, { useState, useEffect } from 'react';
function App() {
  const [wasmModule, setWasmModule] = useState(null);
  // Load Spire.XLS
  useEffect(() => {
    (async () => {
      try {
        const publicUrl = process.env.PUBLIC_URL || '';
        const spireModule = await import(/* webpackIgnore: true */ `${publicUrl}/spire.xls.js`);
        const rawModule = spireModule.default || spireModule;
        window.wasmModule = typeof rawModule === 'function'
          ? await rawModule({ locateFile: p => p.endsWith('.wasm') ? `${publicUrl}/${p}` : p })
          : rawModule;
        setWasmModule(window.wasmModule);
      } catch (error) {
        console.error('Failed to load spire.xls.js WASM module:', error);
      }
    })();
  }, []);

  // Function to convert OpenXML to Excel
  const OpenXMLToExcel = async () => {
    const wasmModule = window.wasmModule.spirexls;

    if (wasmModule) {
      // Load font into Virtual File System (VFS)
      await window.spire.FetchFileToVFS('Arial.ttf', '/Library/Fonts/', `${process.env.PUBLIC_URL}/static/font/`);

      // Load input file into Virtual File System (VFS)
      const inputFileName = 'in.xml';
      await window.spire.FetchFileToVFS(inputFileName, '', `${process.env.PUBLIC_URL}/static/data/`);

      // Create a new workbook
      const workbook = new wasmModule.Workbook();

      // Read an OpenXML file into a stream
      let fileStream = new wasmModule.Stream(inputFileName);
      // Load the OpenXML file from the stream
      workbook.LoadFromXml({ stream: fileStream });

      // Specify the output Excel file path
      const outputFileName = 'XMLToExcel.xlsx';

      // Save the OpenXML file as an Excel file
      workbook.SaveToFile({ fileName: outputFileName, version: wasmModule.ExcelVersion.Version2013 });

      // Read the saved file and convert to Blob object
      const modifiedFileArray = window.dotnetRuntime.Module.FS.readFile(outputFileName);
      const modifiedFile = new Blob([modifiedFileArray], { type: 'application/vnd.openxmlformats-officedocument.spreadsheetml.sheet' });

      // Create a URL for the Blob and initiate download
      const url = URL.createObjectURL(modifiedFile);
      const a = document.createElement('a');
      a.href = url;
      a.download = outputFileName;
      document.body.appendChild(a);
      a.click();
      document.body.removeChild(a);
      URL.revokeObjectURL(url);

      // Clean up resources used by the workbook
      workbook.Dispose();
    }
  };

  return (
    <div style={{ textAlign: 'center', height: '300px' }}>
      <h1>Convert an OpenXML File to Excel Using JavaScript in React</h1>
      <button onClick={OpenXMLToExcel} disabled={!wasmModule}>
        Convert
      </button>
    </div>
  );
}

export default App;
Get a Free License
To fully experience the capabilities of Spire.XLS for JavaScript without any evaluation limitations, you can request a free 30-day trial license.
In modern web development, generating PDFs directly from HTML is essential for applications requiring dynamic reports, invoices, or user-specific documents. Using JavaScript to convert HTML to PDF in React applications ensures the preservation of structure, styling, and interactivity, transforming content into a portable, print-ready format. This method eliminates the need for separate PDF templates, leverages React's component-based architecture for dynamic rendering, and reduces server-side dependencies. By embedding PDF conversion into the front end, developers can provide a consistent user experience, enable instant document downloads, and maintain full control over design and layout. This article explores how to use Spire.Doc for JavaScript to convert HTML files and strings to PDF in React applications.
Install Spire.Doc for JavaScript
To get started with converting HTML to PDF in a React application, you can either download Spire.Doc for JavaScript from our website or install it via npm with the following command:
npm i spire.officeThe downloaded product package integrates Spire.Doc for JavaScript, Spire.XLS for JavaScript, Spire.PDF for JavaScript, and Spire.Presentation for JavaScript. To use the features of Spire.Doc for JavaScript, you need to copy the corresponding files (spire.doc.js, Spire.Doc.Wasm.zip, spire.common.js, Spire.Common.Wasm.zip, and the _framework folder) to the public folder of your project. To ensure proper text rendering, you can add relevant font files with a custom path. In the following example, the font is added to the path: public\static\font.
For more details, refer to the documentation: How to Integrate Spire.Doc for JavaScript in a React Project
Convert an HTML File to PDF with JavaScript
Using the Spire.Doc WASM module, developers can load HTML files into a Document object with the Document.LoadFromFile() method and then convert them to PDF documents using the Document.SaveToFile() method. This approach provides a concise and efficient solution for HTML-to-PDF conversion in web development.
The detailed steps are as follows:
- Load the Spire.Doc.Base.js file to initialize the WebAssembly module.
- Load the HTML file and the font files used in the HTML file into the virtual file system using the window.spire.FetchFileToVFS() method.
- Create an instance of the Document class using the new wasmModule.Document() method.
- Load the HTML file into the Document instance using the Document.LoadFromFile() method.
- Convert the HTML file to PDF format and save it using the Document.SaveToFile() method.
- Read the converted file as a file array and download it.
- JavaScript
import React, { useState, useEffect } from 'react';

function App() {
  const [wasmModule, setWasmModule] = useState(null);
  // Load Spire.Doc
  useEffect(() => {
    (async () => {
      try {
        const publicUrl = process.env.PUBLIC_URL || '';
        const spireModule = await import(/* webpackIgnore: true */ `${publicUrl}/spire.doc.js`);
        const rawModule = spireModule.default || spireModule;
        window.wasmModule = typeof rawModule === 'function'
          ? await rawModule({ locateFile: p => p.endsWith('.wasm') ? `${publicUrl}/${p}` : p })
          : rawModule;
        setWasmModule(window.wasmModule);
      } catch (error) {
        console.error('Failed to load spire.doc.js WASM module:', error);
      }
    })();
  }, []);

  // Function to convert HTML files to PDF document
  const ConvertHTMLFileToPDF = async () => {
    const wasmModule = window.wasmModule.spiredoc;

    if (wasmModule) {
      // Load the font files into the virtual file system (VFS)
      await window.spire.FetchFileToVFS('CALIBRI.ttf', '/Library/Fonts/', `${process.env.PUBLIC_URL}/static/font/`);

      // Specify the input file name and the output file name
      const inputFileName = 'Sample.html';
      const outputFileName = 'HTMLFileToPDF.pdf';

      // Fetch the input file and add it to the VFS
      await window.spire.FetchFileToVFS(inputFileName, '', `${process.env.PUBLIC_URL}/static/data/`);

      // Create an instance of the Document class
      const doc = new wasmModule.Document();

      // Load the Word document
      doc.LoadFromFile({ fileName: inputFileName, fileFormat: wasmModule.FileFormat.Html, validationType: wasmModule.XHTMLValidationType.None });

      // Save the document to a PDF file
      doc.SaveToFile({ fileName: outputFileName, fileFormat: wasmModule.FileFormat.PDF });

      // Release resources
      doc.Dispose();

      // Read the saved file from the VFS
      const modifiedFileArray = window.dotnetRuntime.Module.FS.readFile(outputFileName);

      // Generate a Blob from the file array and trigger a download
      const blob = new Blob([modifiedFileArray], { type: 'application/pdf' });
      const url = URL.createObjectURL(blob);
      const a = document.createElement("a");
      a.href = url;
      a.download = outputFileName;
      document.body.appendChild(a);
      a.click();
      document.body.removeChild(a);
      URL.revokeObjectURL(url);
    }
  };

  return (
    <div style={{ textAlign: 'center', height: '300px' }}>
      <h1>Convert HTML files to PDF Using JavaScript in React</h1>
      <button onClick={ConvertHTMLFileToPDF} disabled={!wasmModule}>
        Convert
      </button>
    </div>
  );
}

export default App;
Convert an HTML String to PDF with JavaScript
Spire.Doc for JavaScript offers the Paragraph.AppendHTML() method, which allows developers to insert HTML-formatted content directly into a document paragraph. Once the HTML content is added, the document can be saved as a PDF, enabling a seamless conversion from an HTML string to a PDF file.
The detailed steps are as follows:
- Load the Spire.Doc.Base.js file to initialize the WebAssembly module.
- Define the HTML string.
- Load the font files used in the HTML string using the window.spire.FetchFileToVFS() method.
- Create a new Document instance using the new wasmModule.Document() method.
- Add a section to the document using the Document.AddSection() method.
- Add a paragraph to the section using the Section.AddParagraph() method.
- Insert the HTML content into the paragraph using the Paragraph.AppendHTML() method.
- Save the document as a PDF file using the Document.SaveToFile() method.
- Read the converted file as a file array and download it.
- JavaScript
import React, { useState, useEffect } from 'react';

function App() {
  const [wasmModule, setWasmModule] = useState(null);
  // Load Spire.Doc
  useEffect(() => {
    (async () => {
      try {
        const publicUrl = process.env.PUBLIC_URL || '';
        const spireModule = await import(/* webpackIgnore: true */ `${publicUrl}/spire.doc.js`);
        const rawModule = spireModule.default || spireModule;
        window.wasmModule = typeof rawModule === 'function'
          ? await rawModule({ locateFile: p => p.endsWith('.wasm') ? `${publicUrl}/${p}` : p })
          : rawModule;
        setWasmModule(window.wasmModule);
      } catch (error) {
        console.error('Failed to load spire.doc.js WASM module:', error);
      }
    })();
  }, []);

  // Function to convert HTML string to PDF
  const ConvertHTMLStringToPDF = async () => {
    const wasmModule = window.wasmModule.spiredoc;

    if (wasmModule) {
      // Load the font files into the virtual file system (VFS)
      await window.spire.FetchFileToVFS('CALIBRI.ttf', '/Library/Fonts/', `${process.env.PUBLIC_URL}/static/font/`);

      // Create an instance of the Document class
      const doc = new wasmModule.Document();

      // Specify the output file name
      const outputFileName = 'HTMLStringToPDF.pdf';

      // Define the HTML string
      const htmlString = `
          <html lang="en">
              <head>
                  <meta charset="UTF-8">
                  <title>Sales Snippet</title>
              </head>
              <body style="font-family: Arial, sans-serif; margin: 20px;">
                  <div style="border: 1px solid #ddd; padding: 15px; max-width: 600px; margin: auto; background-color: #f9f9f9;">
                      <h1 style="color: #e74c3c; text-align: center;">Limited Time Offer!</h1>
                      <p style="font-size: 1.1em; color: #333; line-height: 1.5;">
                          Get ready to save big on all your favorites. This week only, enjoy 15% off site wide. From trendy clothing to home decor, find everything you love at unbeatable prices.
                      </p>
                      <div style="text-align: center;">
                          <button
                              style="background-color: #5cb85c; border: none; color: white; padding: 10px 20px; text-align: center; text-decoration: none; display: inline-block; font-size: 16px; margin: 4px 2px; cursor: pointer; border-radius: 8px;">
                              Shop Deals
                          </button>
                      </div>
                  </div>
              </body>
          </html>
      `;

      // Add a section to the document
      const section = doc.AddSection();

      // Add a paragraph to the section
      const paragraph = section.AddParagraph();

      // Insert the HTML content to the paragraph
      paragraph.AppendHTML(htmlString)

      // Save the document to a PDF file
      doc.SaveToFile({fileName: outputFileName, fileFormat: wasmModule.FileFormat.PDF});

      // Release resources
      doc.Dispose();

      // Read the saved file from the VFS
      const modifiedFileArray = window.dotnetRuntime.Module.FS.readFile(outputFileName);

      // Generate a Blob from the file array and trigger a download
      const blob = new Blob([modifiedFileArray], {type: 'application/pdf'});
      const url = URL.createObjectURL(blob);
      const a = document.createElement("a");
      a.href = url;
      a.download = outputFileName;
      document.body.appendChild(a);
      a.click();
      document.body.removeChild(a);
      URL.revokeObjectURL(url);
    }
  };

  return (
      <div style={{ textAlign: 'center', height: '300px' }}>
        <h1>Convert HTML Strings to PDF Using JavaScript in React</h1>
        <button onClick={ConvertHTMLStringToPDF} disabled={!wasmModule}>
          Convert and Download
        </button>
      </div>
  );
}

export default App;
Get a Free License
To fully experience the capabilities of Spire.Doc for JavaScript without any evaluation limitations, you can request a free 30-day trial license.
Protect or Unprotect Excel Workbooks with JavaScript in React
2025-01-27 07:05:58 Written by AdministratorAs businesses increasingly rely on web-based platforms for data manipulation and sharing, the ability to programmatically protect or unprotect Excel files becomes crucial. These security settings not only ensure sensitive information is shielded from unauthorized access but also facilitate seamless collaboration among team members by allowing controlled access to specific data sets. By leveraging JavaScript in React, developers can implement these features natively, providing a robust solution to manage data confidentiality and integrity directly within their applications. In this article, we will explore how to use Spire.XLS for JavaScript to protect and unprotect Excel workbooks using JavaScript in React applications.
- Password-Protect an Excel Workbook using JavaScript
- Protect an Excel Worksheet with Specific Permissions
- Set Editable Ranges when Protect an Excel Worksheet
- Unprotect an Excel Worksheet with JavaScript
- Reset or Remove the Password of an Encrypted Excel Workbook
Install Spire.XLS for JavaScript
To get started with protecting and unprotecting Excel files in a React application, you can either download Spire.XLS for JavaScript from our website or install it via npm with the following command:
npm i spire.office
The downloaded product package has been integrated Spire.Doc for JavaScript,Spire.XLS for JavaScript,Spire.PDF for JavaScript,Spire.Presentation for JavaScript. To use the functionality of Spire.XLS for JavaScript, you need to copy the corresponding files (spire.xls.js, Spire.Xls.Wasm.zip, spire.common.js, Spire.Common.Wasm.zip, and _framework) to the project's "public" folder. At the same time, in order to ensure text rendering, the related font files can be added with custom paths. In the following example, the font addition path is: public\static\font.
For more details, refer to the documentation: How to Integrate Spire.XLS for JavaScript in a React Project
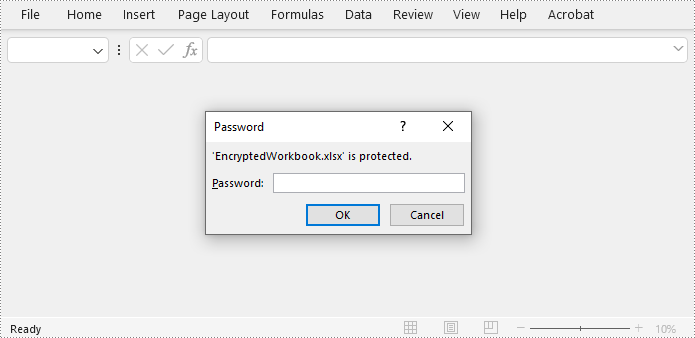
Password-Protect an Excel Workbook using JavaScript
Spire.XLS for JavaScript offers the Workbook.Protect(filename: string) method to encrypt an Excel file with a password. This functionality allows developers to secure the entire Excel workbook. Below are the steps to implement this:
- Load the Spire.Xls.Base.js file to initialize the WebAssembly module.
- Load the Excel file to the virtual file system using the window.spire.FetchFileToVFS() method
- Create an instance of the Workbook class using the new wasmModule.Workbook() method.
- Load the Excel file to the Workbook instance using the Workbook.LoadFromFile() method.
- Protect the workbook with a password using the Workbook.Protect() method.
- Save the workbook to a file using Workbook.SaveToFile() method.
- Create a download link for the result file.
- JavaScript
import React, { useState, useEffect } from 'react';
function App() {
  const [wasmModule, setWasmModule] = useState(null);
  // Load Spire.XLS
  useEffect(() => {
    (async () => {
      try {
        const publicUrl = process.env.PUBLIC_URL || '';
        const spireModule = await import(/* webpackIgnore: true */ `${publicUrl}/spire.xls.js`);
        const rawModule = spireModule.default || spireModule;
        window.wasmModule = typeof rawModule === 'function'
          ? await rawModule({ locateFile: p => p.endsWith('.wasm') ? `${publicUrl}/${p}` : p })
          : rawModule;
        setWasmModule(window.wasmModule);
      } catch (error) {
        console.error('Failed to load spire.xls.js WASM module:', error);
      }
    })();
  }, []);

  //  Function to protect an Excel workbook with a password
  const EncryptExcel  = async () => {
    const wasmModule = window.wasmModule.spirexls;

    if (wasmModule) {
      // Load font into Virtual File System (VFS)
      await window.spire.FetchFileToVFS('Arial.ttf', '/Library/Fonts/', `${process.env.PUBLIC_URL}/static/font/`);


      // Load the Excel files into the virtual file system (VFS)
      let inputFileName = 'sample.xlsx';
      await window.spire.FetchFileToVFS(inputFileName, '', `${process.env.PUBLIC_URL}/static/data/`);


      // Create a new workbook
      let workbook = new wasmModule.Workbook();

      // Load an Excel document
      workbook.LoadFromFile({ fileName: inputFileName });

      // Encrypt the workbook with a password
      workbook.Protect('password')

      //Save result file
      const outputFileName = 'EncryptedWorkbook.xlsx';
      workbook.SaveToFile({ fileName: outputFileName, version: wasmModule.ExcelVersion.Version2016 });

      // Read the saved file and convert to Blob object
      const modifiedFileArray = window.dotnetRuntime.Module.FS.readFile(outputFileName);
      const modifiedFile = new Blob([modifiedFileArray], { type: 'application/vnd.openxmlformats-officedocument.spreadsheetml.sheet' });

      // Create a URL for the Blob and initiate download
      const url = URL.createObjectURL(modifiedFile);
      const a = document.createElement('a');
      a.href = url;
      a.download = outputFileName;
      document.body.appendChild(a);
      a.click();
      document.body.removeChild(a);
      URL.revokeObjectURL(url);

      // Clean up resources used by the workbook
      workbook.Dispose();
    }
  };

  return (
      <div style={{ textAlign: 'center', height: '300px' }}>
        <h1>Protect Excel Workbook Using JavaScript in React</h1>
        <button onClick={EncryptExcel} disabled={!wasmModule}>
          Encrypt and Download
        </button>
      </div>
  );
}

export default App;
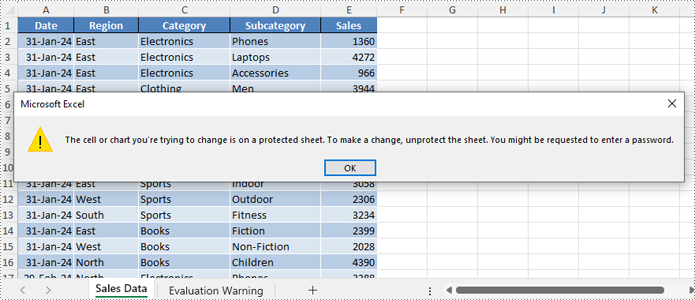
Protect an Excel Worksheet with Specific Permissions
Spire.XLS for JavaScript enables developers to secure worksheets with specific permissions using the Worksheet.Protect() method, such as restricting edits while allowing formatting or filtering, or simply restricting all changes. The permissions are specified by the SheetProtectionType Enum class.
| Protection Type | Allow users to |
| Content | Modify or insert content. |
| DeletingColumns | Delete columns. |
| DeletingRows | Delete rows. |
| Filtering | Set filters. |
| FormattingCells | Format cells. |
| FormattingColumns | Format columns. |
| FormattingRows | Format rows. |
| InsertingColumns | Insert columns. |
| InsertingRows | Insert rows. |
| InsertingHyperlinks | Insert hyperlinks. |
| LockedCells | Select locked cells. |
| UnlockedCells | Select unlocked cells. |
| Objects | Modify drawing objects. |
| Scenarios | Modify saved scenarios. |
| Sorting | Sort data. |
| UsingPivotTables | Use the pivot table and pivot chart. |
| All | Do any operations listed above on the protected worksheet. |
| None | Do nothing on the protected worksheet. |
Follow these steps to protect a worksheet with specific permissions:
- Load the Spire.Xls.Base.js file to initialize the WebAssembly module.
- Load the Excel file into the virtual file system using the window.spire.FetchFileToVFS() method.
- Create a Workbook instance with the new wasmModule.Workbook() method.
- Load the Excel file into the Workbook using the Workbook.LoadFromFile() method.
- Retrieve the desired worksheet using the Workbook.Worksheets.get(index) method.
- Protect the worksheet and allow only filtering with the Worksheet.Protect(password, SheetProtectionType.None) method.
- Save the workbook using the Workbook.SaveToFile() method.
- Create a download link for the protected file.
- JavaScript
import React, { useState, useEffect } from 'react';
function App() {
  const [wasmModule, setWasmModule] = useState(null);
  // Load Spire.XLS
  useEffect(() => {
    (async () => {
      try {
        const publicUrl = process.env.PUBLIC_URL || '';
        const spireModule = await import(/* webpackIgnore: true */ `${publicUrl}/spire.xls.js`);
        const rawModule = spireModule.default || spireModule;
        window.wasmModule = typeof rawModule === 'function'
          ? await rawModule({ locateFile: p => p.endsWith('.wasm') ? `${publicUrl}/${p}` : p })
          : rawModule;
        setWasmModule(window.wasmModule);
      } catch (error) {
        console.error('Failed to load spire.xls.js WASM module:', error);
      }
    })();
  }, []);

  //  Function to protect an Excel worksheet with a password
  const EncryptExcelWorksheet = async () => {
    const wasmModule = window.wasmModule.spirexls;

    if (wasmModule) {
      // Load font into Virtual File System (VFS)
      await window.spire.FetchFileToVFS('Arial.ttf', '/Library/Fonts/', `${process.env.PUBLIC_URL}/static/font/`);


      // Load the Excel files into the virtual file system (VFS)
      let inputFileName = 'sample.xlsx';
      await window.spire.FetchFileToVFS(inputFileName, '', `${process.env.PUBLIC_URL}/static/data/`);


      // Create a new workbook
      let workbook = new wasmModule.Workbook();

      // Load an Excel document
      workbook.LoadFromFile({ fileName: inputFileName });

      // Get a worksheet
      const sheet = workbook.Worksheets.get(0);

      // Protect the worksheet with a specific permission
      sheet.Protect({ password: '123456', options: wasmModule.SheetProtectionType.None });

      //Save result file
      const outputFileName = 'ProtectedWorksheet.xlsx';
      workbook.SaveToFile({ fileName: outputFileName, version: wasmModule.ExcelVersion.Version2016 });

      // Read the saved file and convert to Blob object
      const modifiedFileArray = window.dotnetRuntime.Module.FS.readFile(outputFileName);
      const modifiedFile = new Blob([modifiedFileArray], { type: 'application/vnd.openxmlformats-officedocument.spreadsheetml.sheet' });

      // Create a URL for the Blob and initiate download
      const url = URL.createObjectURL(modifiedFile);
      const a = document.createElement('a');
      a.href = url;
      a.download = outputFileName;
      document.body.appendChild(a);
      a.click();
      document.body.removeChild(a);
      URL.revokeObjectURL(url);

      // Clean up resources used by the workbook
      workbook.Dispose();
    }
  };

  return (
    <div style={{ textAlign: 'center', height: '300px' }}>
      <h1>Protect Excel Worksheet Using JavaScript in React</h1>
      <button onClick={EncryptExcelWorksheet} disabled={!wasmModule}>
        Encrypt and Download
      </button>
    </div>
  );
}

export default App;
Set Editable Ranges when Protect an Excel Worksheet
If certain cell ranges need to remain editable while protecting other areas, developers can use the Worksheet.AddAllowEditRange(name: string, range: CellRange) method to define editable ranges, and then protect the worksheet with specific permissions using the Worksheet.Protect({password: string, options: wasmModule.SheetProtectionType.All}) method.
The steps are as follows:
- Load the Spire.Xls.Base.js file to initialize the WebAssembly module.
- Load the Excel file into the virtual file system using the window.spire.FetchFileToVFS() method.
- Create a Workbook instance with the new wasmModule.Workbook() method.
- Load the Excel file into the Workbook using the Workbook.LoadFromFile() method.
- Obtain the desired worksheet using the Workbook.Worksheets.get(index) method.
- Get the cell ranges to allow editing using the Worksheet.Range.get() method.
- Add the cell ranges to editable ranges using the Worksheet.AddAllowEditRange() method.
- Protect the worksheet with the Worksheet.Protect({password: string, options: wasmModule.SheetProtectionType.All}) method.
- Save the workbook using the Workbook.SaveToFile() method.
- Create a download link for the protected file.
- JavaScript
import React, { useState, useEffect } from 'react';
function App() {
const [wasmModule, setWasmModule] = useState(null);
// Load Spire.XLS
useEffect(() => {
(async () => {
try {
const publicUrl = process.env.PUBLIC_URL || '';
const spireModule = await import(/* webpackIgnore: true */ `${publicUrl}/spire.xls.js`);
const rawModule = spireModule.default || spireModule;
window.wasmModule = typeof rawModule === 'function'
? await rawModule({ locateFile: p => p.endsWith('.wasm') ? `${publicUrl}/${p}` : p })
: rawModule;
setWasmModule(window.wasmModule);
} catch (error) {
console.error('Failed to load spire.xls.js WASM module:', error);
}
})();
}, []);
// Function to protect an Excel worksheet and add editable ranges
const EncryptExcelWorksheetWithEditableRange = async () => {
const wasmModule = window.wasmModule.spirexls;
if (wasmModule) {
// Load font into Virtual File System (VFS)
await window.spire.FetchFileToVFS('Arial.ttf', '/Library/Fonts/', `${process.env.PUBLIC_URL}/static/font/`);
// Load the Excel files into the virtual file system (VFS)
let inputFileName = 'sample.xlsx';
await window.spire.FetchFileToVFS(inputFileName, '', `${process.env.PUBLIC_URL}/static/data/`);
// Create a new workbook
let workbook = new wasmModule.Workbook();
// Load an Excel document
workbook.LoadFromFile({ fileName: inputFileName });
// Get a worksheet
const sheet = workbook.Worksheets.get(0);
// Add editable ranges
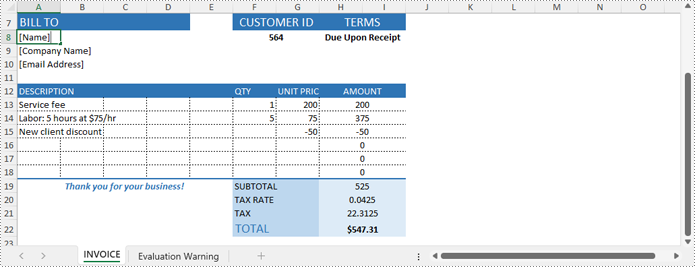
const range1 = sheet.Range.get('A8:A10');
sheet.AddAllowEditRange({ title: "Editable Range 1", range: range1 });
const range2 = sheet.Range.get('A13:G18');
sheet.AddAllowEditRange({ title: "Editable Range 2", range: range2 });
// Protect the worksheet
sheet.Protect({ password: '123456', options: wasmModule.SheetProtectionType.All });
//Save result file
const outputFileName = 'EditableRanges.xlsx';
workbook.SaveToFile({ fileName: outputFileName, version: wasmModule.ExcelVersion.Version2016 });
// Read the saved file and convert to Blob object
const modifiedFileArray = window.dotnetRuntime.Module.FS.readFile(outputFileName);
const modifiedFile = new Blob([modifiedFileArray], { type: 'application/vnd.openxmlformats-officedocument.spreadsheetml.sheet' });
// Create a URL for the Blob and initiate download
const url = URL.createObjectURL(modifiedFile);
const a = document.createElement('a');
a.href = url;
a.download = outputFileName;
document.body.appendChild(a);
a.click();
document.body.removeChild(a);
URL.revokeObjectURL(url);
// Clean up resources used by the workbook
workbook.Dispose();
}
};
return (
<div style={{ textAlign: 'center', height: '300px' }}>
<h1>Protect Excel Worksheet with Editable Ranges Using JavaScript in React</h1>
<button onClick={EncryptExcelWorksheetWithEditableRange} disabled={!wasmModule}>
Encrypt and Download
</button>
</div>
);
}
export default App;
Unprotect an Excel Worksheet with JavaScript
Developers can easily remove the password and unprotect an Excel worksheet by invoking the Worksheet.Unprotect(password: string) method, granting access and edit permissions to all users. The detailed steps are as follows:
- Load the Spire.Xls.Base.js file to initialize the WebAssembly module.
- Load the Excel file into the virtual file system using the window.spire.FetchFileToVFS() method.
- Create a Workbook instance with the new wasmModule.Workbook() method.
- Load the Excel file into the Workbook using the Workbook.LoadFromFile() method.
- Get the worksheet to unprotect using the Workbook.Worksheets.get() method.
- Remove the password protection using the Worksheet.Unprotect() method.
- Save the workbook using the Workbook.SaveToFile() method.
- Create a download link for the protected file.
- JavaScript
import React, { useState, useEffect } from 'react';
function App() {
  const [wasmModule, setWasmModule] = useState(null);
  // Load Spire.XLS
  useEffect(() => {
    (async () => {
      try {
        const publicUrl = process.env.PUBLIC_URL || '';
        const spireModule = await import(/* webpackIgnore: true */ `${publicUrl}/spire.xls.js`);
        const rawModule = spireModule.default || spireModule;
        window.wasmModule = typeof rawModule === 'function'
          ? await rawModule({ locateFile: p => p.endsWith('.wasm') ? `${publicUrl}/${p}` : p })
          : rawModule;
        setWasmModule(window.wasmModule);
      } catch (error) {
        console.error('Failed to load spire.xls.js WASM module:', error);
      }
    })();
  }, []);

  //  Function to unprotect an Excel worksheet
  const UnprotectExcelWorksheet = async () => {
    const wasmModule = window.wasmModule.spirexls;

    if (wasmModule) {
      // Load font into Virtual File System (VFS)
      await window.spire.FetchFileToVFS('Arial.ttf', '/Library/Fonts/', `${process.env.PUBLIC_URL}/static/font/`);


      // Load the Excel files into the virtual file system (VFS)
      let inputFileName = 'sample.xlsx';
      await window.spire.FetchFileToVFS(inputFileName, '', `${process.env.PUBLIC_URL}/static/data/`);


      // Create a new workbook
      let workbook = new wasmModule.Workbook();

      // Load an Excel document
      workbook.LoadFromFile({ fileName: inputFileName });

      // Get a worksheet
      const sheet = workbook.Worksheets.get(0);

      // Remove the password protection
      sheet.Unprotect('password');

      //Save result file
      const outputFileName = 'out.xlsx';
      workbook.SaveToFile({ fileName: outputFileName, version: wasmModule.ExcelVersion.Version2016 });

      // Read the saved file and convert to Blob object
      const modifiedFileArray = window.dotnetRuntime.Module.FS.readFile(outputFileName);
      const modifiedFile = new Blob([modifiedFileArray], { type: 'application/vnd.openxmlformats-officedocument.spreadsheetml.sheet' });

      // Create a URL for the Blob and initiate download
      const url = URL.createObjectURL(modifiedFile);
      const a = document.createElement('a');
      a.href = url;
      a.download = outputFileName;
      document.body.appendChild(a);
      a.click();
      document.body.removeChild(a);
      URL.revokeObjectURL(url);

      // Clean up resources used by the workbook
      workbook.Dispose();
    }
  };

  return (
    <div style={{ textAlign: 'center', height: '300px' }}>
      <h1>Unprotect Excel Worksheet Using JavaScript in React</h1>
      <button onClick={UnprotectExcelWorksheet} disabled={!wasmModule}>
        Unprotect and Download
      </button>
    </div>
  );
}

export default App;
Reset or Remove the Password of an Encrypted Excel Workbook
Spire.XLS for JavaScript provides the Workbook.OpenPassword property to specify the password for encrypted Excel workbooks, allowing developers to load and process them. After loading the encrypted workbook, developers can use the Workbook.Unprotect(password: string) method to remove the password or the Workbook.Protect(newPassword: string) method to set a new one. The steps are as follows:
- Load the Spire.Xls.Base.js file to initialize the WebAssembly module.
- Load the Excel file into the virtual file system using the window.spire.FetchFileToVFS() method.
- Create a Workbook instance with the new wasmModule.Workbook() method.
- Specify the password through the Workbook.OpenPassword property.
- Load the encrypted Excel file into the Workbook using the Workbook.LoadFromFile() method.
- Unprotect the workbook using the Workbook.Unprotect(password: string) method or set a new password using the Workbook.Protect(newPassword: string) method.
- Save the workbook using the Workbook.SaveToFile() method.
- Create a download link for the protected file.
- JavaScript
import React, { useState, useEffect } from 'react';
function App() {
  const [wasmModule, setWasmModule] = useState(null);
  // Load Spire.XLS
  useEffect(() => {
    (async () => {
      try {
        const publicUrl = process.env.PUBLIC_URL || '';
        const spireModule = await import(/* webpackIgnore: true */ `${publicUrl}/spire.xls.js`);
        const rawModule = spireModule.default || spireModule;
        window.wasmModule = typeof rawModule === 'function'
          ? await rawModule({ locateFile: p => p.endsWith('.wasm') ? `${publicUrl}/${p}` : p })
          : rawModule;
        setWasmModule(window.wasmModule);
      } catch (error) {
        console.error('Failed to load spire.xls.js WASM module:', error);
      }
    })();
  }, []);

  //  Function to unprotect an Excel workbook
  const RemoveResetExcelPassword = async () => {
    const wasmModule = window.wasmModule.spirexls;

    if (wasmModule) {
      // Load font into Virtual File System (VFS)
      await window.spire.FetchFileToVFS('Arial.ttf', '/Library/Fonts/', `${process.env.PUBLIC_URL}/static/font/`);


      // Load the Excel files into the virtual file system (VFS)
      let inputFileName = 'sample.xlsx';
      await window.spire.FetchFileToVFS(inputFileName, '', `${process.env.PUBLIC_URL}/static/data/`);


      // Create a new workbook
      let workbook = new wasmModule.Workbook();

      // Specify the password of the workbook
      workbook.OpenPassword = 'password';

      // Load an Excel document
      workbook.LoadFromFile({ fileName: inputFileName });

      // Get a worksheet
      const sheet = workbook.Worksheets.get(0);

      // Decrypt the workbook
      workbook.UnProtect('password')

      // Reset the password
      // workbook.Protect("NewPassword")

      //Save result file
      const outputFileName = 'DecryptedWorkbook.xlsx';
      workbook.SaveToFile({ fileName: outputFileName, version: wasmModule.ExcelVersion.Version2016 });

      // Read the saved file and convert to Blob object
      const modifiedFileArray = window.dotnetRuntime.Module.FS.readFile(outputFileName);
      const modifiedFile = new Blob([modifiedFileArray], { type: 'application/vnd.openxmlformats-officedocument.spreadsheetml.sheet' });

      // Create a URL for the Blob and initiate download
      const url = URL.createObjectURL(modifiedFile);
      const a = document.createElement('a');
      a.href = url;
      a.download = outputFileName;
      document.body.appendChild(a);
      a.click();
      document.body.removeChild(a);
      URL.revokeObjectURL(url);

      // Clean up resources used by the workbook
      workbook.Dispose();
    }
  };

  return (
    <div style={{ textAlign: 'center', height: '300px' }}>
      <h1>Remove the Password of Excel Workbook Using JavaScript in React</h1>
      <button onClick={RemoveResetExcelPassword} disabled={!wasmModule}>
        Decrypt and Download
      </button>
    </div>
  );
}

export default App;
Get a Free License
To fully experience the capabilities of Spire.XLS for JavaScript without any evaluation limitations, you can request a free 30-day trial license.
Convert Text to Word or Word to Text with JavaScript in React
2025-01-22 08:03:11 Written by AdministratorConverting between Word and TXT formats is a skill that can greatly enhance your productivity and efficiency in handling documents. For example, converting a Word document to a plain text file can make it easier to analyze and manipulate data using other text processing tools or programming languages. Conversely, converting a text file to Word format allows you to add formatting, graphics, and other elements to enhance the presentation of the content. In this article, you will learn how to convert text files to Word format or convert Word files to text format in React using Spire.Doc for JavaScript.
Install Spire.Doc for JavaScript
To get started with the conversion between the TXT and Word formats in a React application, you can either download Spire.Doc for JavaScript from our website or install it via npm with the following command:
npm i spire.officeThe downloaded product package integrates Spire.Doc for JavaScript, Spire.XLS for JavaScript, Spire.PDF for JavaScript, and Spire.Presentation for JavaScript. To use the features of Spire.Doc for JavaScript, you need to copy the corresponding files (spire.doc.js, Spire.Doc.Wasm.zip, spire.common.js, Spire.Common.Wasm.zip, and the _framework folder) to the public folder of your project. To ensure proper text rendering, you can add relevant font files with a custom path. In the following example, the font is added to the path: public\static\font.
For more details, refer to the documentation: How to Integrate Spire.Doc for JavaScript in a React Project
Convert Text (TXT) to Word in JavaScript
Spire.Doc for JavaScript allows you to load a TXT file and then save it to Word Doc or Docx format using the Document.SaveToFile() method. The following are the main steps.
- Create a new document using the new wasmModule.Document() method.
- Load a text file using the Document.LoadFromFile() method.
- Save the text file as a Word document using the Document.SaveToFile() method.
- JavaScript
import React, { useState, useEffect } from 'react';

function App() {
  const [wasmModule, setWasmModule] = useState(null);
  // Load Spire.Doc
  useEffect(() => {
    (async () => {
      try {
        const publicUrl = process.env.PUBLIC_URL || '';
        const spireModule = await import(/* webpackIgnore: true */ `${publicUrl}/spire.doc.js`);
        const rawModule = spireModule.default || spireModule;
        window.wasmModule = typeof rawModule === 'function'
          ? await rawModule({ locateFile: p => p.endsWith('.wasm') ? `${publicUrl}/${p}` : p })
          : rawModule;
        setWasmModule(window.wasmModule);
      } catch (error) {
        console.error('Failed to load spire.doc.js WASM module:', error);
      }
    })();
  }, []);

  // Function to convert a text file to a Word document
  const TXTtoWord = async () => {
    const wasmModule = window.wasmModule.spiredoc;

    if (wasmModule) {
      // Load the font files into the virtual file system (VFS)
      await window.spire.FetchFileToVFS('CALIBRI.ttf', '/Library/Fonts/', `${process.env.PUBLIC_URL}/static/font/`);

      // Specify the input file name and the output file name
      const inputFileName = 'input.txt';
      const outputFileName = 'TxtToWord.docx';

      // Fetch the input file and add it to the VFS
      await window.spire.FetchFileToVFS(inputFileName, '', `${process.env.PUBLIC_URL}/static/data/`);

      // Create an instance of the Document class
      const doc = new wasmModule.Document();

      // Load the text file
      doc.LoadFromFile(inputFileName);

      // Save the text file as a Word document
      doc.SaveToFile({ fileName: outputFileName, fileFormat: wasmModule.FileFormat.Docx2016 });

      // Read the generated Word document from VFS
      const modifiedFileArray = window.dotnetRuntime.Module.FS.readFile(outputFileName);

      // Create a Blog object from the Word document
      const modifiedFile = new Blob([modifiedFileArray], { type: 'application/vnd.openxmlformats-officedocument.wordprocessingml.document' });

      // Create a URL for the Blob
      const url = URL.createObjectURL(modifiedFile);

      // Create an anchor element to trigger the download
      const a = document.createElement('a');
      a.href = url;
      a.download = outputFileName;
      document.body.appendChild(a);
      a.click();
      document.body.removeChild(a);
      URL.revokeObjectURL(url);

      // Clean up resources
      doc.Dispose();
    }
  };

  return (
    <div style={{ textAlign: 'center', height: '300px' }}>
      <h1>Convert Text to Word Using JavaScript in React</h1>
      <button onClick={TXTtoWord} disabled={!wasmModule}>
        Convert
      </button>
    </div>
  );
}

export default App;
Run the code to launch the React app at localhost:3000. Once it's running, click on the "Convert" button to download the Word document converted from a TXT file:

Below is the input text file and the generated Word document:

Convert Word to Text (TXT) in JavaScript
The Document.SaveToFile() method can also be used to export a Word Doc or Docx document to a plain text file. The following are the main steps.
- Create a new document using the new wasmModule.Document() method.
- Load a Word document using the Document.LoadFromFile() method.
- Save the Word document in TXT format using the Document.SaveToFile({fileName: string, fileFormat: wasmModule.FileFormat.Txt}) method.
- JavaScript
import React, { useState, useEffect } from 'react';

function App() {
  const [wasmModule, setWasmModule] = useState(null);
  // Load Spire.Doc
  useEffect(() => {
    (async () => {
      try {
        const publicUrl = process.env.PUBLIC_URL || '';
        const spireModule = await import(/* webpackIgnore: true */ `${publicUrl}/spire.doc.js`);
        const rawModule = spireModule.default || spireModule;
        window.wasmModule = typeof rawModule === 'function'
          ? await rawModule({ locateFile: p => p.endsWith('.wasm') ? `${publicUrl}/${p}` : p })
          : rawModule;
        setWasmModule(window.wasmModule);
      } catch (error) {
        console.error('Failed to load spire.doc.js WASM module:', error);
      }
    })();
  }, []);

  // Function to convert a Word document to a text file
  const WordToTXT = async () => {
    const wasmModule = window.wasmModule.spiredoc;

    if (wasmModule) {
      // Load the font files into the virtual file system (VFS)
      await window.spire.FetchFileToVFS('CALIBRI.ttf', '/Library/Fonts/', `${process.env.PUBLIC_URL}/static/font/`);

      // Specify the input file name and the output file name
      const inputFileName = 'Data.docx';
      const outputFileName = 'WordToText.txt';

      // Fetch the input file and add it to the VFS
      await window.spire.FetchFileToVFS(inputFileName, '', `${process.env.PUBLIC_URL}/static/data/`);

      // Create an instance of the Document class
      const doc = new wasmModule.Document();

      // Load the Word document
      doc.LoadFromFile(inputFileName);

      // Save the Word document in TXT format
      doc.SaveToFile({fileName: outputFileName, fileFormat: wasmModule.FileFormat.Txt});

      // Read the generated text file from VFS
      const modifiedFileArray = window.dotnetRuntime.Module.FS.readFile(outputFileName);

      // Create a Blog object from the text file
      const modifiedFile = new Blob([modifiedFileArray], {type: 'text/plain'});

      // Create a URL for the Blob
      const url = URL.createObjectURL(modifiedFile);

      // Create an anchor element to trigger the download
      const a = document.createElement('a');
      a.href = url;
      a.download = outputFileName;
      document.body.appendChild(a);
      a.click();
      document.body.removeChild(a);
      URL.revokeObjectURL(url);

      // Clean up resources
      doc.Dispose();
    }
  };

  return (
    <div style={{ textAlign: 'center', height: '300px' }}>
      <h1>Convert a Word Document to Plain Text Using JavaScript in React</h1>
      <button onClick={WordToTXT} disabled={!wasmModule}>
        Convert
      </button>
    </div>
  );
}

export default App;
Get a Free License
To fully experience the capabilities of Spire.Doc for JavaScript without any evaluation limitations, you can request a free 30-day trial license.
Converting HTML to images allows you to transform HTML content into static images that can be easily shared on social media, embedded in emails, or used as thumbnails in search engine results. This conversion process ensures that your content is displayed consistently across different devices and browsers, improving the overall user experience. In this article, you will learn how to convert HTML to images in React using Spire.Doc for JavaScript.
Install Spire.Doc for JavaScript
To get started with converting Word documents to PDF in a React application, you can either download Spire.Doc for JavaScript from our website or install it via npm with the following command:
npm i spire.officeThe downloaded product package integrates Spire.Doc for JavaScript, Spire.XLS for JavaScript, Spire.PDF for JavaScript, and Spire.Presentation for JavaScript. To use the features of Spire.Doc for JavaScript, you need to copy the corresponding files (spire.doc.js, Spire.Doc.Wasm.zip, spire.common.js, Spire.Common.Wasm.zip, and the _framework folder) to the public folder of your project. To ensure proper text rendering, you can add relevant font files with a custom path. In the following example, the font is added to the path: public\static\font.
For more details, refer to the documentation: How to Integrate Spire.Doc for JavaScript in a React Project
Convert an HTML File to an Image in JavaScript
Spire.Doc for JavaScript allows you to load an HTML file and convert a specific page to an image stream using the Document.SaveImageToStreams() method. The image streams can then be further saved to a desired image format such as jpg, png, bmp, gif. The following are the main steps.
- Load the font file to ensure correct text rendering.
- Create a new document using the new wasmModule.Document() method.
- Load the HTML file using the Document.LoadFromFile() method.
- Convert a specific page to an image stream using the Document.SaveImageToStreams() method.
- Save the image stream to a specified image format.
- JavaScript
import React, { useState, useEffect } from 'react';

function App() {
  const [wasmModule, setWasmModule] = useState(null);
  // Load Spire.Doc
  useEffect(() => {
    (async () => {
      try {
        const publicUrl = process.env.PUBLIC_URL || '';
        const spireModule = await import(/* webpackIgnore: true */ `${publicUrl}/spire.doc.js`);
        const rawModule = spireModule.default || spireModule;
        window.wasmModule = typeof rawModule === 'function'
          ? await rawModule({ locateFile: p => p.endsWith('.wasm') ? `${publicUrl}/${p}` : p })
          : rawModule;
        setWasmModule(window.wasmModule);
      } catch (error) {
        console.error('Failed to load spire.doc.js WASM module:', error);
      }
    })();
  }, []);

  // Function to convert an HTML file to an image
  const HtmlToImage = async () => {
    const wasmModule = window.wasmModule.spiredoc;

    if (wasmModule) {
      // Load the font files into the virtual file system (VFS)
      await window.spire.FetchFileToVFS('CALIBRI.ttf', '/Library/Fonts/', `${process.env.PUBLIC_URL}/static/font/`);

      // Specify the input file name
      const inputFileName = 'sample.html';

      // Fetch the input file and add it to the VFS
      await window.spire.FetchFileToVFS(inputFileName, '', `${process.env.PUBLIC_URL}/static/data/`);

      // Create an instance of the Document class
      const doc = new wasmModule.Document();

      // Load the HTML file
      doc.LoadFromFile({ fileName: inputFileName, fileFormat: wasmModule.FileFormat.Html, validationType: wasmModule.XHTMLValidationType.None });

      // Save the first page as an image stream
      let image = doc.SaveImageToStreams({ pageIndex: 0, type: wasmModule.ImageType.Bitmap });

      // Save the image stream as a PNG file
      const outputFileName = 'HtmlToImage.png';
      image.Save(outputFileName);

      // Read the generated image from VFS
      const modifiedFileArray = window.dotnetRuntime.Module.FS.readFile(outputFileName);

      // Create a Blog object from the image file
      const modifiedFile = new Blob([modifiedFileArray], { type: 'image/png' });

      // Create a URL for the Blob
      const url = URL.createObjectURL(modifiedFile);

      // Create an anchor element to trigger the download
      const a = document.createElement("a");
      a.href = url;
      a.download = outputFileName;
      document.body.appendChild(a);
      a.click();
      document.body.removeChild(a);
      URL.revokeObjectURL(url);

      // Clean up resources
      doc.Dispose();
    }
  };

  return (
    <div style={{ textAlign: 'center', height: '300px' }}>
      <h1>Convert an HTML File to an Image Using JavaScript in React</h1>
      <button onClick={HtmlToImage} disabled={!wasmModule}>
        Convert
      </button>
    </div>
  );
}

export default App;
Run the code to launch the React app at localhost:3000. Once it's running, click on the "Convert" button to download the image converted from an HTML file:

Below is the converted image file:

Convert an HTML String to an Image in JavaScript
To convert HTML strings to images, you'll need to first add HTML strings to the paragraphs of a Word page through the Paragraph.AppendHTML() method, and then convert the page to an image. The following are the main steps.
- Load the font file to ensure correct text rendering.
- Specify the HTML string.
- Create a new document using the new wasmModule.Document() method.
- Add a new section using the Document.AddSection() method.
- Add a paragraph to the section using the Section.AddParagraph() method.
- Append the HTML string to the paragraph using the Paragraph.AppendHTML() method.
- Convert a specific page to an image stream using the Document.SaveImageToStreams() method.
- Save the image stream to a specified image format.
- JavaScript
import React, { useState, useEffect } from 'react';

function App() {
  const [wasmModule, setWasmModule] = useState(null);
  // Load Spire.Doc
  useEffect(() => {
    (async () => {
      try {
        const publicUrl = process.env.PUBLIC_URL || '';
        const spireModule = await import(/* webpackIgnore: true */ `${publicUrl}/spire.doc.js`);
        const rawModule = spireModule.default || spireModule;
        window.wasmModule = typeof rawModule === 'function'
          ? await rawModule({ locateFile: p => p.endsWith('.wasm') ? `${publicUrl}/${p}` : p })
          : rawModule;
        setWasmModule(window.wasmModule);
      } catch (error) {
        console.error('Failed to load spire.doc.js WASM module:', error);
      }
    })();
  }, []);

  // Function to convert an HTML string to an image
  const HtmlStringToImage = async () => {
    const wasmModule = window.wasmModule.spiredoc;

    if (wasmModule) {
      // Load the font files into the virtual file system (VFS)
      await window.spire.FetchFileToVFS('CALIBRI.ttf', '/Library/Fonts/', `${process.env.PUBLIC_URL}/static/font/`);

      // Create an instance of the Document class
      const doc = new wasmModule.Document();

      // Specify the output file path
      const outputFileName = 'HtmlStringToImage.png';

      // Specify the HTML string
      let HTML = "<html><head><title>HTML to Word Example</title><style>, body {font-family: 'Calibri';}, h1 {color: #FF5733; font-size: 24px; margin-bottom: 20px;}, p {color: #333333; font-size: 16px; margin-bottom: 10px;}";
      HTML += "ul {list-style-type: disc; margin-left: 20px; margin-bottom: 15px;}, li {font-size: 14px; margin-bottom: 5px;}, table {border-collapse: collapse; width: 100%; margin-bottom: 20px;}";
      HTML += "th, td {border: 1px solid #CCCCCC; padding: 8px; text-align: left;}, th {background-color: #F2F2F2; font-weight: bold;}, td {color: #0000FF;}</style></head>";
      HTML += "<body><h1>This is a Heading</h1><p>This is a paragraph demonstrating the conversion of HTML to Word document.</p><p>Here's an example of an unordered list:</p><ul><li>Item 1</li><li>Item 2</li><li>Item 3</li></ul>";
      HTML += "<p>Here's a table:</p><table><tr><th>Product</th><th>Quantity</th><th>Price</th></tr><tr><td>Jacket</td><td>30</td><td>$150</td></tr><tr><td>Sweater</td><td>25</td><td>$99</td></tr></table></body></html>";

      // Add a section to the document
      let section = doc.AddSection();

      // Add a paragraph to the section
      let paragraph = section.AddParagraph();

      // Append the HTML string to the paragraph
      paragraph.AppendHTML(HTML.toString('utf8', 0, HTML.length));

      // Save the first page as an image stream
      let image = doc.SaveImageToStreams({ pageIndex: 0, type: wasmModule.ImageType.Bitmap });

      // Save the image stream as a PNG file
      image.Save(outputFileName);

      // Read the generated image from VFS
      const modifiedFileArray = window.dotnetRuntime.Module.FS.readFile(outputFileName);

      // Create a Blog object from the image file
      const modifiedFile = new Blob([modifiedFileArray], { type: 'image/png' });

      // Create a URL for the Blob
      const url = URL.createObjectURL(modifiedFile);

      // Create an anchor element to trigger the download
      const a = document.createElement("a");
      a.href = url;
      a.download = outputFileName;
      document.body.appendChild(a);
      a.click();
      document.body.removeChild(a);
      URL.revokeObjectURL(url);

      // Clean up resources
      doc.Dispose();
    }
  };

  return (
    <div style={{ textAlign: 'center', height: '300px' }}>
      <h1>Convert an HTML String to an Image Using JavaScript in React</h1>
      <button onClick={HtmlStringToImage} disabled={!wasmModule}>
        Convert
      </button>
    </div>
  );
}

export default App;
Get a Free License
To fully experience the capabilities of Spire.Doc for JavaScript without any evaluation limitations, you can request a free 30-day trial license.
Extract Text from Word Documents with JavaScript in React
2025-01-16 00:53:41 Written by AdministratorThe seamless integration of document processing capabilities into web applications has become increasingly vital for enhancing user experience and streamlining workflows. For developers working within the React ecosystem, the ability to extract text from Word documents using JavaScript allows for the dynamic presentation of content, enabling users to easily import, edit, and interact with text data directly within a web interface. In this article, we will explore how to use Spire.Doc for JavaScript to extract text from Word documents in React applications.
- Extract All Text from a Word Document Using JavaScript
- Extract Text from Specific Sections or Paragraphs in a Word Document
- Extract Text from a Word Document Based on Paragraph Styles
Install Spire.Doc for JavaScript
To get started with extracting text from Word documents in a React application, you can either download Spire.Doc for JavaScript from our website or install it via npm with the following command:
npm i spire.officeThe downloaded product package integrates Spire.Doc for JavaScript, Spire.XLS for JavaScript, Spire.PDF for JavaScript, and Spire.Presentation for JavaScript. To use the features of Spire.Doc for JavaScript, you need to copy the corresponding files (spire.doc.js, Spire.Doc.Wasm.zip, spire.common.js, Spire.Common.Wasm.zip, and the _framework folder) to the public folder of your project. To ensure proper text rendering, you can add relevant font files with a custom path. In the following example, the font is added to the path: public\static\font.
For more details, refer to the documentation: How to Integrate Spire.Doc for JavaScript in a React Project
Extract All Text from a Word Document Using JavaScript
To extract the complete text content from a Word document, Spire.Doc for JavaScript offers the Document.GetText() method. This method retrieves all the text in a document and returns it as a string, enabling efficient access to the content. The implementation steps are as follows:
- Load the spire.doc.js file to initialize the WebAssembly module.
- Load the Word file into the virtual file system using the window.spire.FetchFileToVFS method.
- Create a Document instance in the WebAssembly module using the new wasmModule.Document() method.
- Load the Word document into the Document instance with the Document.LoadFromFile() method.
- Retrieve the document's text as a string using the Document.GetText() method.
- Process the extracted text, such as downloading it as a text file or performing additional operations.
- JavaScript
import React, { useState, useEffect } from 'react';

function App() {
  const [wasmModule, setWasmModule] = useState(null);
  // Load Spire.Doc
  useEffect(() => {
    (async () => {
      try {
        const publicUrl = process.env.PUBLIC_URL || '';
        const spireModule = await import(/* webpackIgnore: true */ `${publicUrl}/spire.doc.js`);
        const rawModule = spireModule.default || spireModule;
        window.wasmModule = typeof rawModule === 'function'
          ? await rawModule({ locateFile: p => p.endsWith('.wasm') ? `${publicUrl}/${p}` : p })
          : rawModule;
        setWasmModule(window.wasmModule);
      } catch (error) {
        console.error('Failed to load spire.doc.js WASM module:', error);
      }
    })();
  }, []);

  // Function to extract all text from a Word document
  const ExtractAllTextFromWord = async () => {
    const wasmModule = window.wasmModule.spiredoc;

    if (wasmModule) {
      // Load the font files into the virtual file system (VFS)
      await window.spire.FetchFileToVFS('Arial.ttf', '/Library/Fonts/', `${process.env.PUBLIC_URL}/static/font/`);

      // Specify the input file name and the output file name
      const inputFileName = 'Sample.docx';
      const outputFileName = 'ExtractWordText.txt';

      // Fetch the input file and add it to the VFS
      await window.spire.FetchFileToVFS(inputFileName, '', `${process.env.PUBLIC_URL}/static/data/`);

      // Create an instance of the Document class
      const doc = new wasmModule.Document();

      // Load the Word document
      doc.LoadFromFile({ fileName: inputFileName });

      // Get all text from the document
      const documentText = doc.GetText();

      // Release resources
      doc.Dispose();

      // Generate a Blob from the extracted text and trigger a download
      const blob = new Blob([documentText], { type: 'text/plain' });
      const url = URL.createObjectURL(blob);
      const a = document.createElement("a");
      a.href = url;
      a.download = outputFileName;
      document.body.appendChild(a);
      a.click();
      document.body.removeChild(a);
      URL.revokeObjectURL(url);
    }
  };

  return (
      <div style={{ textAlign: 'center', height: '300px' }}>
        <h1>Extract All Text from Word Documents Using JavaScript in React</h1>
        <button onClick={ExtractAllTextFromWord} disabled={!wasmModule}>
          Convert and Download
        </button>
      </div>
  );
}

export default App;
Extract Text from Specific Sections or Paragraphs in a Word Document
When only specific sections or paragraphs of a Word document are needed, Spire.Doc for JavaScript offers the Section.Paragraphs.get_Item(index).Text method to extract text from individual paragraphs. The following steps outline the process:
- Load the spire.doc.js file to initialize the WebAssembly module.
- Use the window.spire.FetchFileToVFS method to load the Word file into the virtual file system.
- Create a Document instance using the new wasmModule.Document() method.
- Load the Word document into the Document instance with the Document.LoadFromFile() method.
- Access a specific section using the Document.Sections.get_Item() method.
- Extract text from a specific paragraph with the Section.Paragraphs.get_Item().Text property.
- To retrieve all text within a section, iterate through the section's paragraphs and concatenate their text into a single string.
- Process the extracted text, such as saving it to a file or performing further analysis.
- JavaScript
import React, { useState, useEffect } from 'react';

function App() {
  const [wasmModule, setWasmModule] = useState(null);
  // Load Spire.Doc
  useEffect(() => {
    (async () => {
      try {
        const publicUrl = process.env.PUBLIC_URL || '';
        const spireModule = await import(/* webpackIgnore: true */ `${publicUrl}/spire.doc.js`);
        const rawModule = spireModule.default || spireModule;
        window.wasmModule = typeof rawModule === 'function'
          ? await rawModule({ locateFile: p => p.endsWith('.wasm') ? `${publicUrl}/${p}` : p })
          : rawModule;
        setWasmModule(window.wasmModule);
      } catch (error) {
        console.error('Failed to load spire.doc.js WASM module:', error);
      }
    })();
  }, []);

  // Function to extract text from a specific part of a Word document
  const ExtractTextFromWordPart = async () => {
    const wasmModule = window.wasmModule.spiredoc;

    if (wasmModule) {
      // Load the font files into the virtual file system (VFS)
      await window.spire.FetchFileToVFS('Arial.ttf', '/Library/Fonts/', `${process.env.PUBLIC_URL}/static/font/`);

      // Specify the input file name and the output file name
      const inputFileName = 'Sample.docx';
      const outputFileName = 'ExtractWordText.txt';

      // Fetch the input file and add it to the VFS
      await window.spire.FetchFileToVFS(inputFileName, '', `${process.env.PUBLIC_URL}/static/data/`);

      // Create an instance of the Document class
      const doc = new wasmModule.Document();

      // Load the Word document
      doc.LoadFromFile({ fileName: inputFileName });

      // Get a specific section from the document
      const section = doc.Sections.get_Item(1);

      // Get the text of a specific paragraph in the section
      //const paragraphText = section.Paragraphs.get_Item(1).Text;

      // Extract all text from the section
      let sectionText = "";
      for (let i = 0; i < section.Paragraphs.Count; i++) {
        // Extract the text from the paragraphs
        const text = section.Paragraphs.get_Item(i).Text;
        sectionText += text + "\n";
      }

      // Release resources
      doc.Dispose();

      // Generate a Blob from the extracted text and trigger a download
      const blob = new Blob([sectionText], { type: 'text/plain' });
      const url = URL.createObjectURL(blob);
      const a = document.createElement("a");
      a.href = url;
      a.download = outputFileName;
      document.body.appendChild(a);
      a.click();
      document.body.removeChild(a);
      URL.revokeObjectURL(url);
    }
  };

  return (
      <div style={{ textAlign: 'center', height: '300px' }}>
        <h1>Extract Text from a Specific Part of a Word Document Using JavaScript in React</h1>
        <button onClick={ExtractTextFromWordPart} disabled={!wasmModule}>
          Convert and Download
        </button>
      </div>
  );
}

export default App;
Extract Text from a Word Document Based on Paragraph Styles
When extracting text formatted with specific paragraph styles, the Paragraph.StyleName property can be utilized to identify and filter paragraphs by their styles. This approach is beneficial for structured documents with distinct headings or other styled elements. The implementation process is as follows:
- Load the spire.doc.js file to initialize the WebAssembly module.
- Load the Word file into the virtual file system using the window.spire.FetchFileToVFS() method.
- Create a Document instance in the WebAssembly module with the new wasmModule.Document() method.
- Load the Word document into the Document instance using the Document.LoadFromFile() method.
- Define the target style name or retrieve one from the document.
- Iterate through the document's sections and their paragraphs:
- Use the Paragraph.StyleName property to identify each paragraph's style.
- Compare the paragraph's style name with the target style. If they match, retrieve the paragraph's text using the Paragraph.Text property.
- Process the retrieved text, such as saving it to a file or using it for further operations.
- JavaScript
import React, { useState, useEffect } from 'react';

function App() {
  const [wasmModule, setWasmModule] = useState(null);
  // Load Spire.Doc
  useEffect(() => {
    (async () => {
      try {
        const publicUrl = process.env.PUBLIC_URL || '';
        const spireModule = await import(/* webpackIgnore: true */ `${publicUrl}/spire.doc.js`);
        const rawModule = spireModule.default || spireModule;
        window.wasmModule = typeof rawModule === 'function'
          ? await rawModule({ locateFile: p => p.endsWith('.wasm') ? `${publicUrl}/${p}` : p })
          : rawModule;
        setWasmModule(window.wasmModule);
      } catch (error) {
        console.error('Failed to load spire.doc.js WASM module:', error);
      }
    })();
  }, []);

  // Function to extract text from a Word document based on paragraph styles
  const ExtractTextByParagraphStyle = async () => {
    const wasmModule = window.wasmModule.spiredoc;

    if (wasmModule) {
      // Load the font files into the virtual file system (VFS)
      await window.spire.FetchFileToVFS('Arial.ttf', '/Library/Fonts/', `${process.env.PUBLIC_URL}/static/font/`);

      // Specify the input file name and the output file name
      const inputFileName = 'Sample.docx';
      const outputFileName = 'ExtractWordText.txt';

      // Fetch the input file and add it to the VFS
      await window.spire.FetchFileToVFS(inputFileName, '', `${process.env.PUBLIC_URL}/static/data/`);

      // Create an instance of the Document class
      const doc = new wasmModule.Document();

      // Load the Word document
      doc.LoadFromFile({ fileName: inputFileName });

      // Define the style name or get the style name of the target paragraph style
      const styleName = 'Heading2';
      // const styleName = doc.Sections.get_Item(2).Paragraphs.get_Item(2).StyleName;

      // Array to store extracted text
      let paragraphStyleText = [];
      // Iterate through the sections in the document
      for (let sectionIndex = 0; sectionIndex < doc.Sections.Count; sectionIndex++) {
        // Get the current section
        const section = doc.Sections.get_Item(sectionIndex);
        // Iterate through the paragraphs in the section
        for (let paragraphIndex = 0; paragraphIndex < section.Paragraphs.Count; paragraphIndex++) {
          // Get the current paragraph
          const paragraph = section.Paragraphs.get_Item(paragraphIndex);
          // Get the style name of the paragraph
          const paraStyleName = paragraph.StyleName;
          // Check if the style name matches the target style
          if (paraStyleName === styleName) {
            // Extract the text from the paragraph
            const paragraphText = paragraph.Text;
            console.log(paragraphText);
            // Append the extracted text to the array
            paragraphStyleText.push(paragraphText);
          }
        }
      }

      // Release resources
      doc.Dispose();

      // Generate a Blob from the extracted text and trigger a download
      const text = paragraphStyleText.join('\n');
      const blob = new Blob([text], { type: 'text/plain' });
      const url = URL.createObjectURL(blob);
      const a = document.createElement("a");
      a.href = url;
      a.download = outputFileName;
      document.body.appendChild(a);
      a.click();
      document.body.removeChild(a);
      URL.revokeObjectURL(url);
    }
  };

  return (
    <div style={{ textAlign: 'center', height: '300px' }}>
      <h1>Extract Text from Word Documents by Paragraph Style Using JavaScript in React</h1>
      <button onClick={ExtractTextByParagraphStyle} disabled={!wasmModule}>
        Convert and Download
      </button>
    </div>
  );
}

export default App;
Get a Free License
To fully experience the capabilities of Spire.Doc for JavaScript without any evaluation limitations, you can request a free 30-day trial license.
Apply Fonts in a Word Document with JavaScript in React
2025-01-15 00:59:57 Written by AdministratorApplying fonts in a Word document significantly enhances its visual appeal and readability. The choice of font can influence how the content is perceived, allowing you to convey tone and mood effectively. By selecting appropriate fonts, you can emphasize key points, guide the reader's attention, and create a cohesive and polished presentation.
In this article, you will learn how to apply fonts in a Word document in React using Spire.Doc for JavaScript.
- Apply a Font Style to a Paragraph in Word
- Apply Multiple Font Styles to a Paragraph in Word
- Apply a Private Font in a Word Document
Install Spire.Doc for JavaScript
To get started with applying fonts in Word in a React application, you can either download Spire.Doc for JavaScript from our website or install it via npm with the following command:
npm i spire.officeThe downloaded product package integrates Spire.Doc for JavaScript, Spire.XLS for JavaScript, Spire.PDF for JavaScript, and Spire.Presentation for JavaScript. To use the features of Spire.Doc for JavaScript, you need to copy the corresponding files (spire.doc.js, Spire.Doc.Wasm.zip, spire.common.js, Spire.Common.Wasm.zip, and the _framework folder) to the public folder of your project. To ensure proper text rendering, you can add relevant font files with a custom path. In the following example, the font is added to the path: public\static\font.
For more details, refer to the documentation: How to Integrate Spire.Doc for JavaScript in a React Project
Apply a Font Style to a Paragraph in Word
Applying a font style to a paragraph in Microsoft Word is a fundamental skill that enhances the readability and overall appearance of your document.
Spire.Doc for JavaScript provides the ParagraphStyle class, enabling developers to define multiple text attributes, including font name, size, style, and color, all within a single object. After the style object is created, you can easily format a paragraph by using the Paragraph.ApplyStyle() method.
The following are the steps to apply a font style to a paragraph with JavaScript in React:
- Create a Document object using the new wasmModule.Document() method.
- Load the Word file using the Document.LoadFromFile() method.
- Add a paragraph to the document using the Document.LastSection.AddParagraph() method.
- Create a ParagraphStyle object, specifying the font name, font size, font style, and text color.
- Add the style to the document using the Document.Styles.Add() method.
- Apply the style to the paragraph using the Paragraph.ApplyStyle() method.
- Save the document to a different Word file.
- JavaScript
import React, { useState, useEffect } from 'react';

function App() {
  const [wasmModule, setWasmModule] = useState(null);
  // Load Spire.Doc
  useEffect(() => {
    (async () => {
      try {
        const publicUrl = process.env.PUBLIC_URL || '';
        const spireModule = await import(/* webpackIgnore: true */ `${publicUrl}/spire.doc.js`);
        const rawModule = spireModule.default || spireModule;
        window.wasmModule = typeof rawModule === 'function'
          ? await rawModule({ locateFile: p => p.endsWith('.wasm') ? `${publicUrl}/${p}` : p })
          : rawModule;
        setWasmModule(window.wasmModule);
      } catch (error) {
        console.error('Failed to load spire.doc.js WASM module:', error);
      }
    })();
  }, []);

  // Function to set font
  const SetFont = async () => {
    const wasmModule = window.wasmModule.spiredoc;

    if (wasmModule) {
      // Load the font files into the virtual file system (VFS)
      await window.spire.FetchFileToVFS('times.ttf', '/Library/Fonts/', `${process.env.PUBLIC_URL}/static/font/`);
      await window.spire.FetchFileToVFS('timesbd.ttf', '/Library/Fonts/', `${process.env.PUBLIC_URL}/static/font/`);
      await window.spire.FetchFileToVFS('timesbi.ttf', '/Library/Fonts/', `${process.env.PUBLIC_URL}/static/font/`);
      await window.spire.FetchFileToVFS('timesi.ttf', '/Library/Fonts/', `${process.env.PUBLIC_URL}/static/font/`);

      // Specify the input file name and the output file name
      const inputFileName = 'input.docx';
      const outputFileName = 'output.docx';

      // Fetch the input file and add it to the VFS
      await window.spire.FetchFileToVFS(inputFileName, '', `${process.env.PUBLIC_URL}/static/data/`);

      // Create an instance of the Document class
      const doc = new wasmModule.Document();

      // Load the Word file
      doc.LoadFromFile(inputFileName);

      // Add a section
      let section = doc.LastSection;

      // Add a paragraph
      let paragraph = section.AddParagraph();

      // Append text to the paragraph
      paragraph.AppendText('JavaScript is essential for modern web development, offering a rich ecosystem and ' +
        'a wide range of applications. Its ability to create responsive, interactive experiences ' +
        'makes it a favored choice among developers.');

      // Create a paragraph style,specifying font name, font size, and text color
      let paragraphStyle = new wasmModule.ParagraphStyle(doc);
      paragraphStyle.Name = 'newStyle';
      paragraphStyle.CharacterFormat.FontName = 'Times New Roman'
      paragraphStyle.CharacterFormat.FontSize = 13;
      paragraphStyle.CharacterFormat.TextColor = wasmModule.Color.get_Blue();

      // Add the style to the document
      doc.Styles.Add(paragraphStyle);

      // Apply the style to the paragraph
      paragraph.ApplyStyle(paragraphStyle.Name);


      // Save the document to the specified path
      doc.SaveToFile({ fileName: outputFileName, fileFormat: wasmModule.FileFormat.Docx2013 });

      // Read the generated Word file
      const modifiedFileArray = window.dotnetRuntime.Module.FS.readFile(outputFileName);

      // Create a Blob object from the Word file
      const modifiedFile = new Blob([modifiedFileArray], { type: 'application/vnd.openxmlformats-officedocument.wordprocessingml.document' });

      // Create a URL for the Blob
      const url = URL.createObjectURL(modifiedFile);

      // Create an anchor element to trigger the download
      const a = document.createElement('a');
      a.href = url;
      a.download = outputFileName;
      document.body.appendChild(a);
      a.click();
      document.body.removeChild(a);
      URL.revokeObjectURL(url);

      // Clean up resources
      doc.Dispose();
    }
  };

  return (
    <div style={{ textAlign: 'center', height: '300px' }}>
      <h1>Apply Fonts in a Word Document in React</h1>
      <button onClick={SetFont} disabled={!wasmModule}>
        Apply
      </button>
    </div>
  );
}

export default App;
Run the code to launch the React app at localhost:3000. Click "Apply", and a "Save As" window will appear, prompting you to save the output file in your chosen folder.
Below is a screenshot of the generated Word document:

Apply Multiple Font Styles to a Paragraph in Word
Applying multiple font styles to different parts of a paragraph allows you to highlight key points or sections, making your content more engaging for readers.
The Paragraph.AppendText() method returns a TextRange object, which offers simple APIs for formatting text within that range. When you call AppendText() multiple times, the paragraph's text is divided into distinct text ranges, allowing for individual styling with different fonts.
The following are the steps to apply multiple font styles to a paragraph using JavaScript in React:
- Load the font files you plan to use and the input Word file into the virtual file system (VFS).
- Create a Document object using the new wasmModule.Document() method.
- Load the Word file using the Document.LoadFromFile() method.
- Add a paragraph to the document using the Document.LastSection.AddParagraph() method.
- Append text to the paragraph using the Paragraph.AppendText() method, which returns a TextRange object.
- Append more text that needs to be styled differently to the paragraph and return different TextRange objects.
- Create a ParagraphStyle object with the basic font information and apply it to the paragraph.
- Change the font name, style, size and text color of the specified text range using the properties under the specific TextRange object.
- Save the document to a different Word file.
- JavaScript
import React, { useState, useEffect } from 'react';

function App() {
  const [wasmModule, setWasmModule] = useState(null);
  // Load Spire.Doc
  useEffect(() => {
    (async () => {
      try {
        const publicUrl = process.env.PUBLIC_URL || '';
        const spireModule = await import(/* webpackIgnore: true */ `${publicUrl}/spire.doc.js`);
        const rawModule = spireModule.default || spireModule;
        window.wasmModule = typeof rawModule === 'function'
          ? await rawModule({ locateFile: p => p.endsWith('.wasm') ? `${publicUrl}/${p}` : p })
          : rawModule;
        setWasmModule(window.wasmModule);
      } catch (error) {
        console.error('Failed to load spire.doc.js WASM module:', error);
      }
    })();
  }, []);

  // Function to set font
  const SetFont = async () => {
    const wasmModule = window.wasmModule.spiredoc;

    if (wasmModule) {
      // Load the font files into the virtual file system (VFS)
      await window.spire.FetchFileToVFS('times.ttf', '/Library/Fonts/', `${process.env.PUBLIC_URL}/static/font/`);
      await window.spire.FetchFileToVFS('timesbd.ttf', '/Library/Fonts/', `${process.env.PUBLIC_URL}/static/font/`);
      await window.spire.FetchFileToVFS('timesbi.ttf', '/Library/Fonts/', `${process.env.PUBLIC_URL}/static/font/`);
      await window.spire.FetchFileToVFS('timesi.ttf', '/Library/Fonts/', `${process.env.PUBLIC_URL}/static/font/`);

      // Specify the input file name and the output file name
      const inputFileName = 'input.docx';
      const outputFileName = 'output.docx';

      // Fetch the input file and add it to the VFS
      await window.spire.FetchFileToVFS(inputFileName, '', `${process.env.PUBLIC_URL}/static/data/`);

      // Create an instance of the Document class
      const doc = new wasmModule.Document();

      // Load the Word file
      doc.LoadFromFile(inputFileName);

      // Add a section
      let section = doc.LastSection;

      // Add a paragraph
      let paragraph = section.AddParagraph();

      // Append text to the paragraph
      let range_one = paragraph.AppendText('JavaScript is essential for ');
      let range_two = paragraph.AppendText('modern web development');
      let range_three = paragraph.AppendText(', offering a rich ecosystem and a wide range of applications. Its ability to create ');
      let range_four = paragraph.AppendText('responsive, interactive experiences')
      let range_five = paragraph.AppendText(' makes it a favored choice among developers.')

      // Create a paragraph style
      let paragraphStyle = new wasmModule.ParagraphStyle(doc);
      paragraphStyle.Name = 'newStyle';
      paragraphStyle.CharacterFormat.FontName = 'Times New Roman'
      paragraphStyle.CharacterFormat.FontSize = 13;
      paragraphStyle.CharacterFormat.TextColor = wasmModule.Color.get_Black();

      // Add the style to the document
      doc.Styles.Add(paragraphStyle);

      // Apply the style to the paragraph
      paragraph.ApplyStyle(paragraphStyle.Name);

      // Change the font style of the second text range
      range_two.CharacterFormat.TextColor = wasmModule.Color.get_Blue();
      range_two.CharacterFormat.Bold = true;
      range_two.CharacterFormat.UnderlineStyle = wasmModule.UnderlineStyle.Single;

      // Change the font style of the fourth text range
      range_four.CharacterFormat.TextColor = wasmModule.Color.get_Blue();
      range_four.CharacterFormat.Italic = true;

      // Save the document to the specified path
      doc.SaveToFile({ fileName: outputFileName, fileFormat: wasmModule.FileFormat.Docx2013 });

      // Read the generated Word file
      const modifiedFileArray = window.dotnetRuntime.Module.FS.readFile(outputFileName);

      // Create a Blob object from the Word file
      const modifiedFile = new Blob([modifiedFileArray], { type: 'application/vnd.openxmlformats-officedocument.wordprocessingml.document' });

      // Create a URL for the Blob
      const url = URL.createObjectURL(modifiedFile);

      // Create an anchor element to trigger the download
      const a = document.createElement('a');
      a.href = url;
      a.download = outputFileName;
      document.body.appendChild(a);
      a.click();
      document.body.removeChild(a);
      URL.revokeObjectURL(url);

      // Clean up resources
      doc.Dispose();
    }
  };

  return (
    <div style={{ textAlign: 'center', height: '300px' }}>
      <h1>Set Fonts in a Word Document in React</h1>
      <button onClick={SetFont} disabled={!wasmModule}>
        Apply Multiple Fonts
      </button>
    </div>
  );
}

export default App;
Apply a Private Font in a Word Document
Using a private font in a Word document can give your project a unique flair and reflect your personal or brand identity.
To apply a private font, use the TextRange.CharacterFormat.FontName property. To maintain a uniform look on various devices, it's advisable to embed the font within the document. You can do this by first loading the font file into the virtual file system using window.spire.FetchFileToVFS.
Then, employ the Document.AddPrivateFont() method to include the font in the document. Additionally, activate font embedding by setting Document.EmbedFontsInFile to true, which ensures the private font is retained in the final document.
The following are the steps to apply a private font in Word using JavaScript:
- Load the font files you plan to use and the input Word file into the virtual file system (VFS).
- Create a Document object using the new wasmModule.Document() method.
- Load the Word file using the Document.LoadFromFile() method.
- Add a paragraph to the document using the Document.LastSection.AddParagraph() method.
- Append text to the paragraph using the Paragraph.AppendText() method, which returns a TextRange object.
- Apply the font to the paragraph using the TextRange.CharacterFormat.FontName property.
- Add the font to document using the Document.AddPrivateFont() method.
- Embed the font in the document by setting Document.EmbedFontsInFile to true.
- Save the document to a different Word file.
- JavaScript
import React, { useState, useEffect } from 'react';

function App() {
  const [wasmModule, setWasmModule] = useState(null);
  // Load Spire.Doc
  useEffect(() => {
    (async () => {
      try {
        const publicUrl = process.env.PUBLIC_URL || '';
        const spireModule = await import(/* webpackIgnore: true */ `${publicUrl}/spire.doc.js`);
        const rawModule = spireModule.default || spireModule;
        window.wasmModule = typeof rawModule === 'function'
          ? await rawModule({ locateFile: p => p.endsWith('.wasm') ? `${publicUrl}/${p}` : p })
          : rawModule;
        setWasmModule(window.wasmModule);
      } catch (error) {
        console.error('Failed to load spire.doc.js WASM module:', error);
      }
    })();
  }, []);

  // Function to set font
  const SetFont = async () => {
    const wasmModule = window.wasmModule.spiredoc;

    if (wasmModule) {
      // Load the font files into the virtual file system (VFS)
      await window.spire.FetchFileToVFS('FreebrushScriptPLng.ttf', '/Library/Fonts/', `${process.env.PUBLIC_URL}/static/font/`);

      // Specify the input file name and the output file name
      const inputFileName = 'input.docx';
      const outputFileName = 'output.docx';

      // Fetch the input file and add it to the VFS
      await window.spire.FetchFileToVFS(inputFileName, '', `${process.env.PUBLIC_URL}/static/data/`);

      // Create an instance of the Document class
      const doc = new wasmModule.Document();

      // Load the Word file
      doc.LoadFromFile(inputFileName);

      // Add a section
      let section = doc.LastSection;

      // Add a paragraph
      let paragraph = section.AddParagraph();

      // Append text to the paragraph
      let textRange = paragraph.AppendText('JavaScript is essential for modern web development, offering a rich ecosystem and '+
                          'a wide range of applications. Its ability to create responsive, interactive experiences '+
                          'makes it a favored choice among developers.');

      // Apply the private font to the text range
      textRange.CharacterFormat.FontName = 'Freebrush Script'
      textRange.CharacterFormat.FontSize = 13;
      textRange.CharacterFormat.TextColor = wasmModule.Color.get_Blue();

      // Embed the private font in the document
      doc.AddPrivateFont(new wasmModule.PrivateFontPath("Freebrush Script",  "FreebrushScriptPLng.ttf"))

      // Allow embedding font in document
      doc.EmbedFontsInFile = true;

      // Save the document to the specified path
      doc.SaveToFile({fileName: outputFileName, fileFormat: wasmModule.FileFormat.Docx2013});

      // Read the generated Word file
      const modifiedFileArray =window.dotnetRuntime.Module.FS.readFile(outputFileName);

      // Create a Blob object from the Word file
      const modifiedFile = new Blob([modifiedFileArray], { type: 'application/vnd.openxmlformats-officedocument.wordprocessingml.document' });

      // Create a URL for the Blob
      const url = URL.createObjectURL(modifiedFile);

      // Create an anchor element to trigger the download
      const a = document.createElement('a');
      a.href = url;
      a.download = outputFileName;
      document.body.appendChild(a);
      a.click();
      document.body.removeChild(a);
      URL.revokeObjectURL(url);

      // Clean up resources
      doc.Dispose();
    }
  };

  return (
    <div style={{ textAlign: 'center', height: '300px' }}>
      <h1>Apply Fonts in a Word Document in React</h1>
      <button onClick={SetFont} disabled={!wasmModule}>
        Apply
      </button>
    </div>
  );
}

export default App;
Get a Free License
To fully experience the capabilities of Spire.Doc for JavaScript without any evaluation limitations, you can request a free 30-day trial license.
Delete Rows and Columns from Excel with JavaScript in React
2025-01-10 02:46:07 Written by AdministratorWhen working with Excel, you might occasionally find your worksheets cluttered with unnecessary rows and columns. These might be leftover data from previous versions, temporary calculations, or placeholders that no longer serve a purpose. Removing these unnecessary or unwanted rows and columns can keep your data organized and your sheets neat. In this article, you will learn how to delete rows and columns from an Excel Worksheet in React using Spire.XLS for JavaScript.
- Delete a Specific Row and Column from Excel
- Delete Multiple Rows and Columns from Excel
- Delete Blank Rows and Columns from Excel
Install Spire.XLS for JavaScript
To get started with deleting Excel rows and columns in a React application, you can either download Spire.XLS for JavaScript from our website or install it via npm with the following command:
npm i spire.office
The downloaded product package has been integrated Spire.Doc for JavaScript,Spire.XLS for JavaScript,Spire.PDF for JavaScript,Spire.Presentation for JavaScript. To use the functionality of Spire.XLS for JavaScript, you need to copy the corresponding files (spire.xls.js, Spire.Xls.Wasm.zip, spire.common.js, Spire.Common.Wasm.zip, and _framework) to the project's "public" folder. At the same time, in order to ensure text rendering, the related font files can be added with custom paths. In the following example, the font addition path is: public\static\font.
For more details, refer to the documentation: How to Integrate Spire.XLS for JavaScript in a React Project
Delete a Specific Row and Column from Excel
Spire.XLS for JavaScript provides the Worksheet.DeleteRow() and Worksheet.DeleteColumn() methods to delete a specific row and column by index. The following are the main steps.
- Create a Workbook object using the new wasmModule.Workbook() method.
- Load an Excel file using the Workbook.LoadFromFile() method.
- Get a specific worksheet using the Workbook.Worksheets.get() method.
- Delete a specified row by its index (1-based) using the Worksheet.DeleteRow() method.
- Delete a specified column by its index (1-based) using the Worksheet.DeleteColumn() method.
- Save the result file using the Workbook.SaveToFile() method.
- JavaScript
import React, { useState, useEffect } from 'react';
function App() {
  const [wasmModule, setWasmModule] = useState(null);
  // Load Spire.XLS
  useEffect(() => {
    (async () => {
      try {
        const publicUrl = process.env.PUBLIC_URL || '';
        const spireModule = await import(/* webpackIgnore: true */ `${publicUrl}/spire.xls.js`);
        const rawModule = spireModule.default || spireModule;
        window.wasmModule = typeof rawModule === 'function'
          ? await rawModule({ locateFile: p => p.endsWith('.wasm') ? `${publicUrl}/${p}` : p })
          : rawModule;
        setWasmModule(window.wasmModule);
      } catch (error) {
        console.error('Failed to load spire.xls.js WASM module:', error);
      }
    })();
  }, []);

  // Function to delete a specified row and column
  const DeleteRowColumn = async () => {
    const wasmModule = window.wasmModule.spirexls;

    if (wasmModule) {
      // Load font into Virtual File System (VFS)
      await window.spire.FetchFileToVFS('Arial.ttf', '/Library/Fonts/', `${process.env.PUBLIC_URL}/static/font/`);


      // Load the Excel files into the virtual file system (VFS)
      let inputFileName = 'sample.xlsx';
      await window.spire.FetchFileToVFS(inputFileName, '', `${process.env.PUBLIC_URL}/static/data/`);


      // Create a new workbook
      let workbook = new wasmModule.Workbook();


      // Load an Excel document
      workbook.LoadFromFile({ fileName: inputFileName });

      // Get the first worksheet
      let sheet = workbook.Worksheets.get(0);

      //Delete the 18th row
      sheet.DeleteRow({ index: 18 });

      //Delete the 5th
      sheet.DeleteColumn({ index: 5 });

      //Save result file
      const outputFileName = 'DeleteRowAndColumn.xlsx';
      workbook.SaveToFile({ fileName: outputFileName, version: wasmModule.ExcelVersion.Version2016 });

      // Read the saved file and convert to Blob object
      const modifiedFileArray = window.dotnetRuntime.Module.FS.readFile(outputFileName);
      const modifiedFile = new Blob([modifiedFileArray], { type: 'application/vnd.openxmlformats-officedocument.spreadsheetml.sheet' });

      // Create a URL for the Blob and initiate download
      const url = URL.createObjectURL(modifiedFile);
      const a = document.createElement('a');
      a.href = url;
      a.download = outputFileName;
      document.body.appendChild(a);
      a.click();
      document.body.removeChild(a);
      URL.revokeObjectURL(url);

      // Clean up resources used by the workbook
      workbook.Dispose();
    }
  };

  return (
    <div style={{ textAlign: 'center', height: '300px' }}>
      <h1>Delete a Specified Row and Column Using JavaScript in React
      <button onClick={DeleteRowColumn} disabled={!wasmModule}>
        Delete
      </button>
    </div>
  );
}

export default App;
Run the code to launch the React app at localhost:3000. Once it's running, click the "Delete" button to delete the specific row and column:
Below is the input Excel file and the result file:

Delete Multiple Rows and Columns from Excel
Spire.XLS for JavaScript also allows you to delete multiple adjacent rows and columns from an Excel worksheet at once through the Worksheet.DeleteRow(index, count) and Worksheet.DeleteColumn(index, count) methods. The following are the main steps.
- Create a Workbook object using the new wasmModule.Workbook() method.
- Load an Excel file using the Workbook.LoadFromFile() method.
- Get a specific worksheet using the Workbook.Worksheets.get() method.
- Delete multiple rows from the worksheet using the Worksheet.DeleteRow(index, count) method.
- Delete multiple columns from the worksheet using the Worksheet.DeleteColumn(index, count) method.
- Save the result file using the Workbook.SaveToFile() method.
- JavaScript
import React, { useState, useEffect } from 'react';
function App() {
  const [wasmModule, setWasmModule] = useState(null);
  // Load Spire.XLS
  useEffect(() => {
    (async () => {
      try {
        const publicUrl = process.env.PUBLIC_URL || '';
        const spireModule = await import(/* webpackIgnore: true */ `${publicUrl}/spire.xls.js`);
        const rawModule = spireModule.default || spireModule;
        window.wasmModule = typeof rawModule === 'function'
          ? await rawModule({ locateFile: p => p.endsWith('.wasm') ? `${publicUrl}/${p}` : p })
          : rawModule;
        setWasmModule(window.wasmModule);
      } catch (error) {
        console.error('Failed to load spire.xls.js WASM module:', error);
      }
    })();
  }, []);

  // Function to delete multiple rows and columns
  const DeleteMultiRowsColumns = async () => {
    const wasmModule = window.wasmModule.spirexls;

    if (wasmModule) {
      // Load font into Virtual File System (VFS)
      await window.spire.FetchFileToVFS('Arial.ttf', '/Library/Fonts/', `${process.env.PUBLIC_URL}/static/font/`);


      // Load the Excel files into the virtual file system (VFS)
      let inputFileName = 'sample.xlsx';
      await window.spire.FetchFileToVFS(inputFileName, '', `${process.env.PUBLIC_URL}/static/data/`);


      // Create a new workbook
      let workbook = new wasmModule.Workbook();

      // Load an Excel document
      workbook.LoadFromFile({ fileName: inputFileName });

      // Get the first worksheet
      let sheet = workbook.Worksheets.get(0);

      //Delete 5 rows from the 8th row
      sheet.DeleteRow({ index: 8, count: 5 });

      //Delete 2 columns from the 4th column
      sheet.DeleteColumn({ index: 4, count: 2 });

      //Save result file
      const outputFileName = 'DeleteMultiRowsAndColumns.xlsx';
      workbook.SaveToFile({ fileName: outputFileName, version: wasmModule.ExcelVersion.Version2016 });

      // Read the saved file and convert to Blob object
      const modifiedFileArray = window.dotnetRuntime.Module.FS.readFile(outputFileName);
      const modifiedFile = new Blob([modifiedFileArray], { type: 'application/vnd.openxmlformats-officedocument.spreadsheetml.sheet' });

      // Create a URL for the Blob and initiate download
      const url = URL.createObjectURL(modifiedFile);
      const a = document.createElement('a');
      a.href = url;
      a.download = outputFileName;
      document.body.appendChild(a);
      a.click();
      document.body.removeChild(a);
      URL.revokeObjectURL(url);

      // Clean up resources used by the workbook
      workbook.Dispose();
    }
  };

  return (
    <div style={{ textAlign: 'center', height: '300px' }}>
      <h1>Delete Multiple Rows and Columns Using JavaScript in React
      <button onClick={DeleteMultiRowsColumns} disabled={!wasmModule}>
        Delete
      </button>
    </div>
  );
}

export default App;
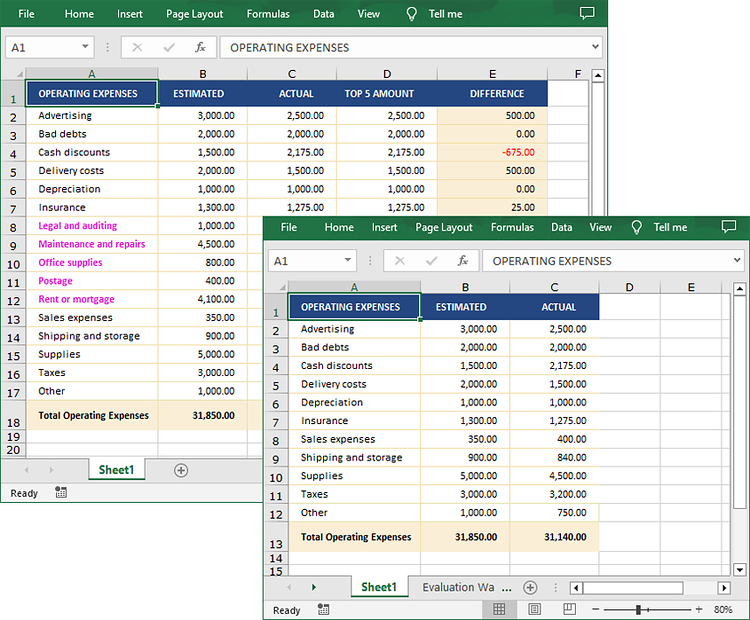
Delete Blank Rows and Columns from Excel
To remove the blank rows and column, you need to iterate over each row and column to detect whether they are blank or not. If yes, then remove them from the worksheet. The following are the main steps.
- Create a Workbook object using the new wasmModule.Workbook() method.
- Load an Excel file using the Workbook.LoadFromFile() method.
- Get a specific worksheet using the Workbook.Worksheets.get() method.
- Iterate through the used rows in the worksheet.
- Find the blank rows using the Worksheet.Rows.get().IsBlank property, and then delete them using the Worksheet.DeleteRow() method.
- Iterate through the used columns in the worksheet.
- Find the blank columns using the Worksheet.Columns.get().IsBlank property, and then delete them using the Worksheet.DeleteColumn() method.
- Save the result file using the Workbook.SaveToFile() method.
- JavaScript
import React, { useState, useEffect } from 'react';
function App() {
  const [wasmModule, setWasmModule] = useState(null);
  // Load Spire.XLS
  useEffect(() => {
    (async () => {
      try {
        const publicUrl = process.env.PUBLIC_URL || '';
        const spireModule = await import(/* webpackIgnore: true */ `${publicUrl}/spire.xls.js`);
        const rawModule = spireModule.default || spireModule;
        window.wasmModule = typeof rawModule === 'function'
          ? await rawModule({ locateFile: p => p.endsWith('.wasm') ? `${publicUrl}/${p}` : p })
          : rawModule;
        setWasmModule(window.wasmModule);
      } catch (error) {
        console.error('Failed to load spire.xls.js WASM module:', error);
      }
    })();
  }, []);

  // Function to delete blank rows and columns
  const DeleteBlankRowsColumns = async () => {
    const wasmModule = window.wasmModule.spirexls;

    if (wasmModule) {
      // Load font into Virtual File System (VFS)
      await window.spire.FetchFileToVFS('Arial.ttf', '/Library/Fonts/', `${process.env.PUBLIC_URL}/static/font/`);


      // Load the Excel files into the virtual file system (VFS)
      let inputFileName = 'sample.xlsx';
      await window.spire.FetchFileToVFS(inputFileName, '', `${process.env.PUBLIC_URL}/static/data/`);


      // Create a new workbook
      let workbook = new wasmModule.Workbook();


      // Load an Excel document
      workbook.LoadFromFile({ fileName: inputFileName });

      // Get the first worksheet
      let sheet = workbook.Worksheets.get(0);

      //Delete blank rows from the worksheet.
      for (let i = sheet.Rows.Count - 1; i >= 0; i--) {
        if (sheet.Rows.get(i).IsBlank) {
          sheet.DeleteRow(i + 1);
        }
      }

      //Delete blank columns from the worksheet.
      for (let j = sheet.Columns.Count - 1; j >= 0; j--) {
        if (sheet.Columns.get(j).IsBlank) {
          sheet.DeleteColumn(j + 1);
        }
      }

      //Save result file
      const outputFileName = 'DeleteBlankRowsAndColumns.xlsx';
      workbook.SaveToFile({ fileName: outputFileName, version: wasmModule.ExcelVersion.Version2016 });

      // Read the saved file and convert to Blob object
      const modifiedFileArray = window.dotnetRuntime.Module.FS.readFile(outputFileName);
      const modifiedFile = new Blob([modifiedFileArray], { type: 'application/vnd.openxmlformats-officedocument.spreadsheetml.sheet' });

      // Create a URL for the Blob and initiate download
      const url = URL.createObjectURL(modifiedFile);
      const a = document.createElement('a');
      a.href = url;
      a.download = outputFileName;
      document.body.appendChild(a);
      a.click();
      document.body.removeChild(a);
      URL.revokeObjectURL(url);

      // Clean up resources used by the workbook
      workbook.Dispose();
    }
  };

  return (
    <div style={{ textAlign: 'center', height: '300px' }}>
      <h1>Delete Blank Rows and Columns Using JavaScript in React
      <button onClick={DeleteBlankRowsColumns} disabled={!wasmModule}>
        Delete
      </button>
    </div>
  );
}

export default App;
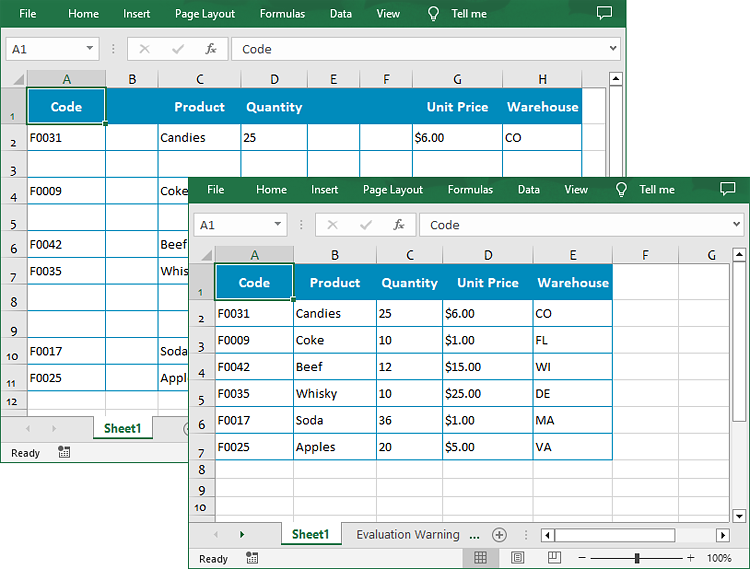
Get a Free License
To fully experience the capabilities of Spire.XLS for JavaScript without any evaluation limitations, you can request a free 30-day trial license.
