
Spire.Presentation for JavaScript (5)
Children categories
Protect or Unprotect PowerPoint Presentations with JavaScript in React
2025-02-27 01:06:09 Written by AdministratorPowerPoint presentations often contain sensitive or proprietary information, making it essential to secure them from unauthorized access or modifications. Whether you're sharing a presentation with colleagues, clients, or stakeholders, protecting your slides ensures that your content remains intact and confidential. On the other hand, there may be times when you need to unprotect a presentation to make edits or updates. In this guide, we'll explore how to protect and unprotect PowerPoint presentations programmatically in React using Spire.Presentation for JavaScript.
- Protect a PowerPoint Presentation with a Password
- Make a PowerPoint Presentation Read-Only
- Remove Password Protection from a PowerPoint Presentation
- Remove Read-Only Setting from a PowerPoint Presentation
Install Spire.Presentation for JavaScript
To get started with protecting and unprotecting PowerPoint presentations in a React application, you can either download Spire.Presentation for JavaScript from the official website or install it via npm with the following command:
npm i spire.office
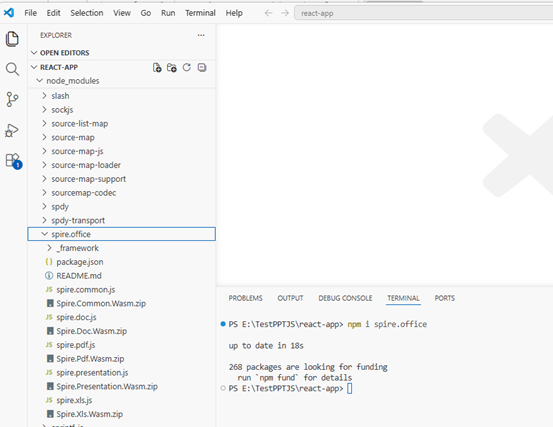
The downloaded product package integrates Spire.Doc for JavaScript, Spire.XLS for JavaScript, Spire.PDF for JavaScript, and Spire.Presentation for JavaScript. To use Spire.Presentation for JavaScript functionality, you need to copy the corresponding files (spire.presentation.js, Spire.Presentation.Wasm.zip, spire.common.js, Spire.Common.Wasm.zip, and the _framework folder) to the public folder of your project. Additionally, to ensure proper text rendering, font files can be added to a custom path of your choice. In the following example, the font addition path is: public\static\font.
For more details, refer to the documentation: How to Integrate Spire.Presentation for JavaScript in a React Project.
Protect a PowerPoint Presentation with a Password
Setting a password on a PowerPoint presentation is an effective way to ensure that only authorized users can access its content. By using the Presentation.Encrypt() method of Spire.Presentation for JavaScript, developers can encrypt a PowerPoint presentation with ease. The key steps are as follows.
- Create an object of the Presentation class.
- Load a PowerPoint presentation using the Presentation.LoadFromFile() method.
- Encrypt the presentation with a password using the Presentation.Encrypt() method.
- Save the resulting presentation using the Presentation.SaveToFile() method.
- JavaScript
import React, { useState, useEffect } from 'react';
function App() {
const [wasmModule, setWasmModule] = useState(null);
useEffect(() => {
(async () => {
try {
const publicUrl = process.env.PUBLIC_URL || '';
const spireModule = await import(/* webpackIgnore: true */ `${publicUrl}/spire.presentation.js`);
const rawModule = spireModule.default || spireModule;
window.wasmModule = typeof rawModule === 'function'
? await rawModule({ locateFile: p => p.endsWith('.wasm') ? `${publicUrl}/${p}` : p })
: rawModule;
setWasmModule(window.wasmModule);
} catch (error) {
console.error('Failed to load spire.presentation.js:', error);
}
})();
}, []);
const ProtectPowerPointPresentation = async () => {
const wasmModule = window.wasmModule.spirepresentation;
if (wasmModule) {
// Specify the input file paths
let inputFileName = "Sample.pptx";
await window.spire.FetchFileToVFS(inputFileName , '', `${process.env.PUBLIC_URL}static/data/`);
await window.spire.FetchFileToVFS("arial.ttf","/Library/Fonts/",`${process.env.PUBLIC_URL}static/font/`);
// Create a Presentation instance and load the PowerPoint file from the virtual file system
const ppt =new wasmModule.Presentation();
ppt.LoadFromFile(inputFileName);
// Define the password
let password = "e-iceblue";
// Protect the PowerPoint file with the password
ppt.Encrypt(password);
// Define the output file name
const outputFileName = "Encrypted.pptx";
// Save the resulting PowerPoint file
ppt.SaveToFile({ file: outputFileName, fileFormat: wasmModule.FileFormat.Pptx2013 });
// Read the generated image file from VFS
const imageFileArray = window.dotnetRuntime.Module.FS.readFile(outputFileName);
// Create a Blog object from the image file
const imageBlob = new Blob([imageFileArray], { type: "application/vnd.openxmlformats-officedocument.presentationml.presentation" });
// Create a URL for the Blob
const url = URL.createObjectURL(imageBlob);
// Create an anchor element to trigger the download
const a = document.createElement('a');
a.href = url;
a.download = outputFileName;
document.body.appendChild(a);
a.click();
document.body.removeChild(a);
URL.revokeObjectURL(url);
// Clean up resources
ppt.Dispose();
}
};
return (
<div style={{ textAlign: 'center', height: '300px' }}>
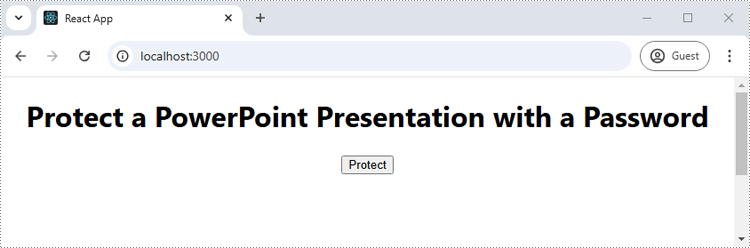
<h1>Protect a PowerPoint Presentation with a Password</h1>
<button onClick={ProtectPowerPointPresentation} disabled={!wasmModule}>
Protect
</button>
</div>
);
}
export default App;
Run the code to launch the React app at localhost:3000. Once it's running, click on the "Protect" button to protect the PowerPoint presentation with a password:
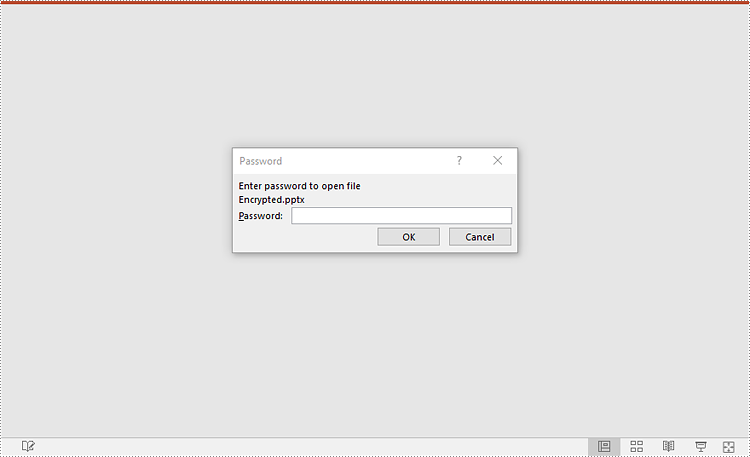
Upon opening the output presentation, a dialog box will appear, prompting you to enter a password to gain access to the file:
Make a PowerPoint Presentation Read-Only
Enabling the read-only setting prevents others from making changes to a PowerPoint presentation while still allowing them to view it. Spire.Presentation for JavaScript offers the Presentation.Protect() method to achieve this purpose. The key steps are as follows.
- Create an object of the Presentation class.
- Load a PowerPoint presentation using the Presentation.LoadFromFile() method.
- Make the presentation read-only using the Presentation.Protect() method.
- Save the resulting presentation using the Presentation.SaveToFile() method.
- JavaScript
import React, { useState, useEffect } from 'react';

function App() {
   const [wasmModule, setWasmModule] = useState(null);
   useEffect(() => {
    (async () => {
      try {
        const publicUrl = process.env.PUBLIC_URL || '';
        const spireModule = await import(/* webpackIgnore: true */ `${publicUrl}/spire.presentation.js`);
        const rawModule = spireModule.default || spireModule;
        window.wasmModule = typeof rawModule === 'function'
          ? await rawModule({ locateFile: p => p.endsWith('.wasm') ? `${publicUrl}/${p}` : p })
          : rawModule;
        setWasmModule(window.wasmModule);
      } catch (error) {
        console.error('Failed to load spire.presentation.js:', error);
      }
    })();
  }, []);


  const MakePresentationReadOnly = async () => {
    const wasmModule = window.wasmModule.spirepresentation;

    if (wasmModule) {
      // Specify the input file paths
      let inputFileName  = "Sample.pptx";
      await window.spire.FetchFileToVFS(inputFileName , '',  `${process.env.PUBLIC_URL}static/data/`);
      await window.spire.FetchFileToVFS("arial.ttf","/Library/Fonts/",`${process.env.PUBLIC_URL}static/font/`);

      // Create a Presentation instance and load the PowerPoint file from the virtual file system
      const ppt =new wasmModule.Presentation();
      ppt.LoadFromFile(inputFileName);

      // Define the password
      let password = "e-iceblue";

      // Protect the PowerPoint file with the password
      ppt.Protect(password);

      // Define the output file name
      const outputFileName = "ReadOnly.pptx";

      // Save the resulting PowerPoint file
      ppt.SaveToFile({ file: outputFileName, fileFormat: wasmModule.FileFormat.Pptx2013 });

      // Read the generated image file from VFS
      const imageFileArray = window.dotnetRuntime.Module.FS.readFile(outputFileName);

      // Create a Blog object from the image file
      const imageBlob = new Blob([imageFileArray], { type: "application/vnd.openxmlformats-officedocument.presentationml.presentation" });

      // Create a URL for the Blob
      const url = URL.createObjectURL(imageBlob);

      // Create an anchor element to trigger the download
      const a = document.createElement('a');
      a.href = url;
      a.download = outputFileName;
      document.body.appendChild(a);
      a.click();
      document.body.removeChild(a);
      URL.revokeObjectURL(url);

      // Clean up resources
      ppt.Dispose();
    }
  };

  return (
    <div style={{ textAlign: 'center', height: '300px' }}>
      <h1>Make a PowerPoint Presentation Read-Only</h1>
      <button onClick={MakePresentationReadOnly} disabled={!wasmModule}>
        Start
      </button>
    </div>
  );
}

export default App;

Remove Password Protection from a PowerPoint Presentation
If password protection is no longer needed, it can be easily removed to allow unrestricted access to the presentation using the Presentation.RemoveEncryption() method. The key steps are as follows.
- Create an object of the Presentation class.
- Load a password-protected PowerPoint presentation with its password using the Presentation.LoadFromFile() method.
- Remove password protection from the presentation using the Presentation.RemoveEncryption() method.
- Save the resulting presentation using the Presentation.SaveToFile() method.
- JavaScript
import React, { useState, useEffect } from 'react';

function App() {
   const [wasmModule, setWasmModule] = useState(null);
   useEffect(() => {
    (async () => {
      try {
        const publicUrl = process.env.PUBLIC_URL || '';
        const spireModule = await import(/* webpackIgnore: true */ `${publicUrl}/spire.presentation.js`);
        const rawModule = spireModule.default || spireModule;
        window.wasmModule = typeof rawModule === 'function'
          ? await rawModule({ locateFile: p => p.endsWith('.wasm') ? `${publicUrl}/${p}` : p })
          : rawModule;
        setWasmModule(window.wasmModule);
      } catch (error) {
        console.error('Failed to load spire.presentation.js:', error);
      }
    })();
  }, []);


  const RemoveEncryptionFromPresentation = async () => {
    const wasmModule = window.wasmModule.spirepresentation;

    if (wasmModule) {
      // Specify the input file paths
      let inputFileName  = "Encrypted.pptx";
      await window.spire.FetchFileToVFS(inputFileName , '',  `${process.env.PUBLIC_URL}static/data/`);
      await window.spire.FetchFileToVFS("arial.ttf","/Library/Fonts/",`${process.env.PUBLIC_URL}static/font/`);

      // Create a Presentation instance and load the PowerPoint file from the virtual file system
      const ppt =new wasmModule.Presentation();
      ppt.LoadFromFile({file: inputFileName, password: "e-iceblue"});

      //Remove the password encryption
      ppt.RemoveEncryption();

      // Define the output file name
      const outputFileName = "Decrypted.pptx";

      // Save the resulting PowerPoint file
      ppt.SaveToFile({ file: outputFileName, fileFormat: wasmModule.FileFormat.Pptx2013 });

      // Read the generated image file from VFS
      const imageFileArray = window.dotnetRuntime.Module.FS.readFile(outputFileName);

      // Create a Blog object from the image file
      const imageBlob = new Blob([imageFileArray], { type: "application/vnd.openxmlformats-officedocument.presentationml.presentation" });

      // Create a URL for the Blob
      const url = URL.createObjectURL(imageBlob);

      // Create an anchor element to trigger the download
      const a = document.createElement('a');
      a.href = url;
      a.download = outputFileName;
      document.body.appendChild(a);
      a.click();
      document.body.removeChild(a);
      URL.revokeObjectURL(url);

      // Clean up resources
      ppt.Dispose();
    }
  };

  return (
    <div style={{ textAlign: 'center', height: '300px' }}>
      <h1>Remove Password Protection from a PowerPoint Presentation</h1>
      <button onClick={RemoveEncryptionFromPresentation} disabled={!wasmModule}>
        Start
      </button>
    </div>
  );
}

export default App;

Remove Read-Only Setting from a PowerPoint Presentation
Disabling the read-only setting allows others to edit the presentation and make necessary changes. By using the Presentation.RemoveProtect() method, developers can remove the read-only setting from a PowerPoint presentation. The key steps are as follows.
- Create an object of the Presentation class.
- Load a PowerPoint presentation that has been made as read-only using the Presentation.LoadFromFile() method.
- Remove the read-only setting from the presentation using the Presentation.RemoveProtect() method.
- Save the resulting presentation using the Presentation.SaveToFile() method.
- JavaScript
import React, { useState, useEffect } from 'react';

function App() {
   const [wasmModule, setWasmModule] = useState(null);
   useEffect(() => {
    (async () => {
      try {
        const publicUrl = process.env.PUBLIC_URL || '';
        const spireModule = await import(/* webpackIgnore: true */ `${publicUrl}/spire.presentation.js`);
        const rawModule = spireModule.default || spireModule;
        window.wasmModule = typeof rawModule === 'function'
          ? await rawModule({ locateFile: p => p.endsWith('.wasm') ? `${publicUrl}/${p}` : p })
          : rawModule;
        setWasmModule(window.wasmModule);
      } catch (error) {
        console.error('Failed to load spire.presentation.js:', error);
      }
    })();
  }, []);


  const RemoveReadOnlyFromPresentation = async () => {
    const wasmModule = window.wasmModule.spirepresentation;

    if (wasmModule) {
      // Specify the input file paths
      let inputFileName  = "ReadOnly.pptx";
      await window.spire.FetchFileToVFS(inputFileName , '',  `${process.env.PUBLIC_URL}static/data/`);
      await window.spire.FetchFileToVFS("arial.ttf","/Library/Fonts/",`${process.env.PUBLIC_URL}static/font/`);

      // Create a Presentation instance and load the PowerPoint file from the virtual file system
      const ppt =new wasmModule.Presentation();
      ppt.LoadFromFile({file: inputFileName, password: "e-iceblue"});

      // Remove the read-only setting from the presentation
      ppt.RemoveProtect();

      // Define the output file name
      const outputFileName = "RemoveReadOnly.pptx";

      // Save the resulting PowerPoint file
      ppt.SaveToFile({ file: outputFileName, fileFormat: wasmModule.FileFormat.Pptx2013 });

      // Read the generated image file from VFS
      const imageFileArray = window.dotnetRuntime.Module.FS.readFile(outputFileName);

      // Create a Blog object from the image file
      const imageBlob = new Blob([imageFileArray], { type: "application/vnd.openxmlformats-officedocument.presentationml.presentation" });

      // Create a URL for the Blob
      const url = URL.createObjectURL(imageBlob);

      // Create an anchor element to trigger the download
      const a = document.createElement('a');
      a.href = url;
      a.download = outputFileName;
      document.body.appendChild(a);
      a.click();
      document.body.removeChild(a);
      URL.revokeObjectURL(url);

      // Clean up resources
      ppt.Dispose();
    }
  };

    return (
    <div style={{ textAlign: 'center', height: '300px' }}>
      <h1>Remove Read-Only Setting from a PowerPoint Presentation</h1>
      <button onClick={RemoveReadOnlyFromPresentation} disabled={!wasmModule}>
        Start
      </button>
    </div>
  );
}

export default App;

Get a Free License
To fully experience the capabilities of Spire.Presentation for JavaScript without any evaluation limitations, you can request a free 30-day trial license.
Transforming PowerPoint presentations into image formats such as JPG or PNG is an effective method for enhancing the way you share visual content. By converting slides into images, you maintain the integrity of the design and layout, making it suitable for a wide range of uses, from online sharing to embedding in documents.
In this article, you will discover how to convert PowerPoint slides to images in React using Spire.Presentation for JavaScript. We will guide you through the process step-by-step, ensuring you can effortlessly create high-quality images from your presentations.
Install Spire.Presentation for JavaScript
To get started with converting PowerPoint to images in a React application, you can either download Spire.Presentation for JavaScript from the official website or install it via npm with the following command:
npm i spire.office
The downloaded product package integrates Spire.Doc for JavaScript, Spire.XLS for JavaScript, Spire.PDF for JavaScript, and Spire.Presentation for JavaScript. To use Spire.Presentation for JavaScript functionality, you need to copy the corresponding files (spire.presentation.js, Spire.Presentation.Wasm.zip, spire.common.js, Spire.Common.Wasm.zip, and the _framework folder) to the public folder of your project. Additionally, to ensure proper text rendering, font files can be added to a custom path of your choice. In the following example, the font addition path is: public\static\font.
For more details, refer to the documentation: How to Integrate Spire.Presentation for JavaScript in a React Project.
Convert PowerPoint to PNG or JPG with JavaScript
Using Spire.Presentation for JavaScript, you can access a specific slide with the Presentation.Slides.get_Item() method. Once you have the slide, convert it to image data using ISlide.SaveAsImage(). You can then save the image in PNG or JPG format. To convert each slide into a separate image file, simply iterate through the slides and perform the conversion for each one.
The steps to convert PowerPoint to PNG or JPG using JavaScript are as follows:
- Load required font files into the virtual file system (VFS).
- Instantiate a new document using the wasmModule.Presentation() method
- Load the PowerPoint document using the Presentation.LoadFromFile() method.
- Loop through the slides in the document:
- Get a specific slide using the Presentation.Slides.get_Item() method.
- Convert the slide into image data using the ISlide.SaveAsImage() method.
- Save the image data to a PNG or JPG file using the Save() method of the image data object.
- Create a Blob object from the generated image file.
- Trigger the download of the image file.
- JavaScript
import React, { useState, useEffect } from 'react';
function App() {
const [wasmModule, setWasmModule] = useState(null);
useEffect(() => {
(async () => {
try {
const publicUrl = process.env.PUBLIC_URL || '';
const spireModule = await import(/* webpackIgnore: true */ `${publicUrl}/spire.presentation.js`);
const rawModule = spireModule.default || spireModule;
window.wasmModule = typeof rawModule === 'function'
? await rawModule({ locateFile: p => p.endsWith('.wasm') ? `${publicUrl}/${p}` : p })
: rawModule;
setWasmModule(window.wasmModule);
} catch (error) {
console.error('Failed to load spire.presentation.js:', error);
}
})();
}, []);
const PowerPointToPNG = async () => {
const wasmModule = window.wasmModule.spirepresentation;
if (wasmModule) {
// Specify the input file paths
let inputFileName = "Sample.pptx";
await window.spire.FetchFileToVFS(inputFileName , '', `${process.env.PUBLIC_URL}static/data/`);
await window.spire.FetchFileToVFS("arial.ttf","/Library/Fonts/",`${process.env.PUBLIC_URL}static/font/`);
// Create a Presentation instance and load the PowerPoint file from the virtual file system
const presentation =new wasmModule.Presentation();
presentation.LoadFromFile(inputFileName);
// Iterate through the slides
for (let i = 0; i < presentation.Slides.Count; i++) {
// Convert a specific slide into image data
let image = presentation.Slides.get_Item(i).SaveAsImage();
// Specify the output file name
let outputFileName = `ToImage_img_${i}.png`;
// Save each image in virtual storage
image.Save(outputFileName);
// Read the generated image file from VFS
const imageFileArray = window.dotnetRuntime.Module.FS.readFile(outputFileName);
// Create a Blog object from the image file
const imageBlob = new Blob([imageFileArray], { type: "image/png" });
// Create a URL for the Blob
const url = URL.createObjectURL(imageBlob);
// Create an anchor element to trigger the download
const a = document.createElement('a');
a.href = url;
a.download = outputFileName;
document.body.appendChild(a);
a.click();
document.body.removeChild(a);
URL.revokeObjectURL(url);
};
// Clean up resources
presentation.Dispose();
}
};
return (
<div style={{ textAlign: 'center', height: '300px' }}>
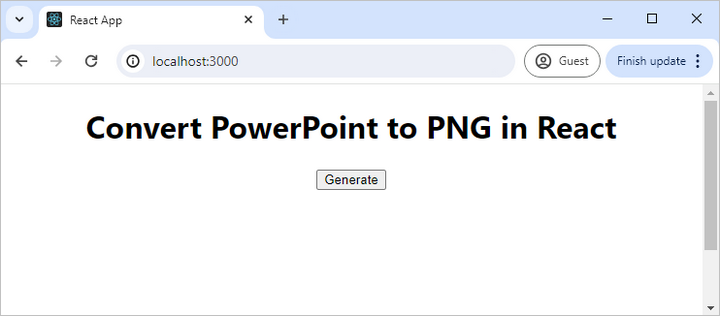
<h1>Convert PowerPoint to PNG in React</h1>
<button onClick={PowerPointToPNG} disabled={!wasmModule}>
Generate
</button>
</div>
);
}
export default App;
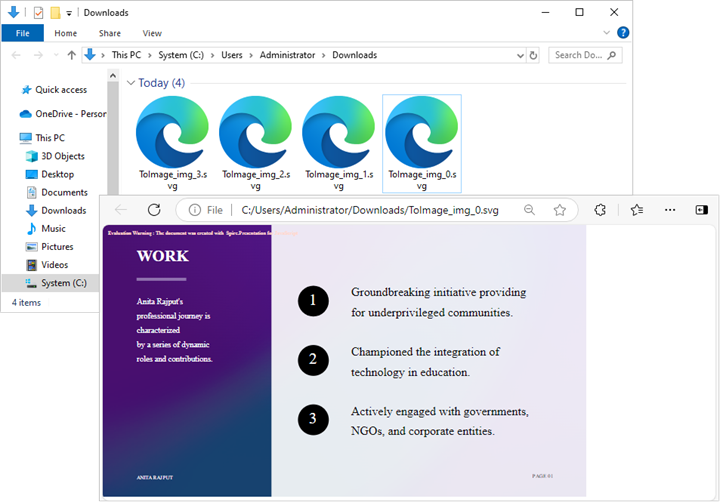
Run the code to launch the React app at localhost:3000. Click "Generate", and a "Save As" window will appear, prompting you to save the output file in your chosen folder.
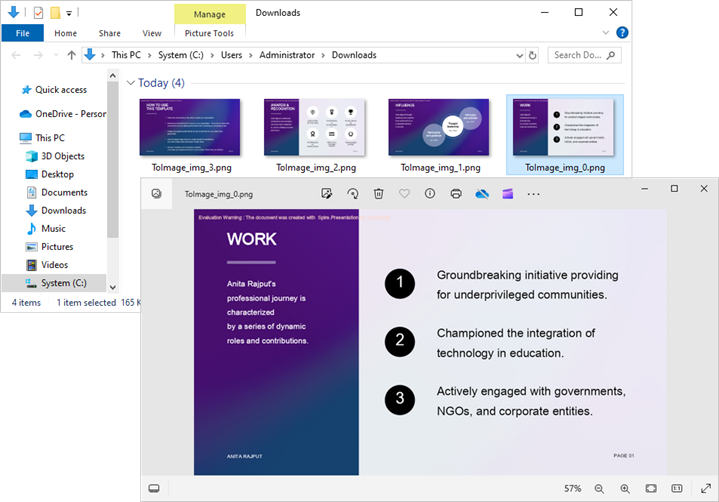
Below is a screenshot of the generated PNG image files:
Convert PowerPoint to SVG with JavaScript
Spire.Presentation for JavaScript provides the ISlide.SaveToSVG() method, allowing you to convert a slide into SVG byte data. This byte data can then be saved as an SVG file using the Save() method.
The following are the steps to convert PowerPoint to SVG using JavaScript:
- Load required font files into the virtual file system (VFS).
- Instantiate a new document using the wasmModule.Presentation() method
- Load the PowerPoint document using the Presentation.LoadFromFile() method.
- Loop through the slides in the document:
- Get a specific slide using the Presentation.Slides.get_Item() method.
- Convert the slide into SVG byte data using the ISlide.SaveToSVG() method.
- Save the byte data to an SVG file using the Save() method.
- Create a Blob object from the generated image file.
- Trigger the download of the image file.
- JavaScript
import React, { useState, useEffect } from 'react';

function App() {
   const [wasmModule, setWasmModule] = useState(null);
   useEffect(() => {
    (async () => {
      try {
        const publicUrl = process.env.PUBLIC_URL || '';
        const spireModule = await import(/* webpackIgnore: true */ `${publicUrl}/spire.presentation.js`);
        const rawModule = spireModule.default || spireModule;
        window.wasmModule = typeof rawModule === 'function'
          ? await rawModule({ locateFile: p => p.endsWith('.wasm') ? `${publicUrl}/${p}` : p })
          : rawModule;
        setWasmModule(window.wasmModule);
      } catch (error) {
        console.error('Failed to load spire.presentation.js:', error);
      }
    })();
  }, []);


  const PowerPointToSVG = async () => {
    const wasmModule = window.wasmModule.spirepresentation;

    if (wasmModule) {
      // Specify the input file paths
      let inputFileName  = "Sample.pptx";
      await window.spire.FetchFileToVFS(inputFileName , '',  `${process.env.PUBLIC_URL}static/data/`);
      await window.spire.FetchFileToVFS("arial.ttf","/Library/Fonts/",`${process.env.PUBLIC_URL}static/font/`);

      // Create a Presentation instance and load the PowerPoint file from the virtual file system
      const presentation =new wasmModule.Presentation();
      presentation.LoadFromFile(inputFileName);

      // Iterate through the slides
      for (let i = 0; i < presentation.Slides.Count; i++) {
        let svgBytes = presentation.Slides.get_Item(i).SaveToSVG();
        let outputFileName = `ToSVG-${i}.svg`;

        // Save each image in virtual storage
        let stream = new wasmModule.Stream(svgBytes);
        stream.Save(outputFileName);
        const imageFileArray = window.dotnetRuntime.Module.FS.readFile(outputFileName);
        const imageBlob = new Blob([imageFileArray], { type: "image/svg" });

        // Create a URL for the Blob
        const url = URL.createObjectURL(imageBlob);

        // Create an anchor element to trigger the download
        const a = document.createElement('a');
        a.href = url;
        a.download = outputFileName;
        document.body.appendChild(a);
        a.click();
        document.body.removeChild(a);
        URL.revokeObjectURL(url);
          stream.Dispose();
        }
      // Clean up resources
      presentation.Dispose();
    }
  };

  return (
    <div style={{ textAlign: 'center', height: '300px' }}>
      <h1>Convert PowerPoint to SVG in React</h1>
      <button onClick={PowerPointToSVG} disabled={!wasmModule}>
        Generate
      </button>
    </div>
  );
}


export default App;
Convert PowerPoint to TIFF with JavaScript
Spire.Presentation for JavaScript includes the Presentation.SaveToFile() method, which allows you to convert an entire PowerPoint document into a multi-frame TIFF image seamlessly.
The following are the steps to convert PowerPoint to TIFF using JavaScript:
- Load required font files into the virtual file system (VFS).
- Instantiate a new document using the wasmModule.Presentation() method
- Load the PowerPoint document using the Presentation.LoadFromFile() method.
- Convert the document to a TIFF image file using the Presenatation.SaveToFile() method.
- Create a Blob object from the generated image file.
- Trigger the download of the image file.
- JavaScript
import React, { useState, useEffect } from 'react';
function App() {
const [wasmModule, setWasmModule] = useState(null);
useEffect(() => {
(async () => {
try {
const publicUrl = process.env.PUBLIC_URL || '';
const spireModule = await import(/* webpackIgnore: true */ `${publicUrl}/spire.presentation.js`);
const rawModule = spireModule.default || spireModule;
window.wasmModule = typeof rawModule === 'function'
? await rawModule({ locateFile: p => p.endsWith('.wasm') ? `${publicUrl}/${p}` : p })
: rawModule;
setWasmModule(window.wasmModule);
} catch (error) {
console.error('Failed to load spire.presentation.js:', error);
}
})();
}, []);
const PowerPointToTIFF = async () => {
const wasmModule = window.wasmModule.spirepresentation;
if (wasmModule) {
// Specify the input file paths
let inputFileName = "Sample.pptx";
await window.spire.FetchFileToVFS(inputFileName , '', `${process.env.PUBLIC_URL}static/data/`);
await window.spire.FetchFileToVFS("arial.ttf","/Library/Fonts/",`${process.env.PUBLIC_URL}static/font/`);
// Create a Presentation instance and load the PowerPoint file from the virtual file system
const presentation =new wasmModule.Presentation();
// Load the PowerPoint file
presentation.LoadFromFile(inputFileName);
// Specify the output file name
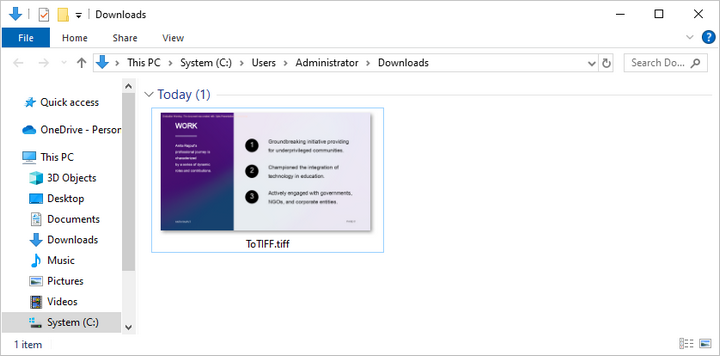
const outputFileName = "ToTIFF.tiff"
// Save the document to TIFF
presentation.SaveToFile({ file: outputFileName, fileFormat: wasmModule.FileFormat.Tiff });
// Read the generated image file from VFS
const imageFileArray = window.dotnetRuntime.Module.FS.readFile(outputFileName);
// Create a Blog object from the image file
const imageBlob = new Blob([imageFileArray], { type: "image/tiff" });
// Create a URL for the Blob
const url = URL.createObjectURL(imageBlob);
// Create an anchor element to trigger the download
const a = document.createElement('a');
a.href = url;
a.download = outputFileName;
document.body.appendChild(a);
a.click();
document.body.removeChild(a);
URL.revokeObjectURL(url);
// Clean up resources
presentation.Dispose();
}
};
return (
<div style={{ textAlign: 'center', height: '300px' }}>
<h1>Convert PowerPoint to TIFF in React</h1>
<button onClick={PowerPointToTIFF} disabled={!wasmModule}>
Generate
</button>
</div>
);
}
export default App;
Get a Free License
To fully experience the capabilities of Spire.Presentation for JavaScript without any evaluation limitations, you can request a free 30-day trial license.
Converting PowerPoint presentations to PDF ensures that slide content remains intact while making the file easier to share and view across different devices. The PDF format preserves the original layout, text, and images, preventing unintended modifications and ensuring consistent formatting. This conversion is especially useful for professional and academic settings, where maintaining document integrity and accessibility is essential. Additionally, PDFs offer enhanced security features, such as restricted editing and password protection, making them a reliable choice for distributing important presentations. In this article, we will demonstrate how to convert PowerPoint presentations to PDF in React using Spire.Presentation for JavaScript.
- Convert a PowerPoint Presentation to PDF
- Convert a PowerPoint Presentation to PDF with a Custom Page Size
- Convert a PowerPoint Slide to PDF
Install Spire.Presentation for JavaScript
To get started with converting PowerPoint to PDF in a React application, you can either download Spire.Presentation for JavaScript from the official website or install it via npm with the following command:
npm i spire.office
The downloaded product package integrates Spire.Doc for JavaScript, Spire.XLS for JavaScript, Spire.PDF for JavaScript, and Spire.Presentation for JavaScript. To use Spire.Presentation for JavaScript functionality, you need to copy the corresponding files (spire.presentation.js, Spire.Presentation.Wasm.zip, spire.common.js, Spire.Common.Wasm.zip, and the _framework folder) to the public folder of your project. Additionally, to ensure proper text rendering, font files can be added to a custom path of your choice. In the following example, the font addition path is: public\static\font.
For more details, refer to the documentation: How to Integrate Spire.Presentation for JavaScript in a React Project.
Convert a PowerPoint Presentation to PDF
Converting a PowerPoint presentation to PDF allows you to share the entire document while preserving its original layout. Using the Presentation.SaveToFile() method, developers can export the full presentation to a PDF file. Below are the detailed steps to perform this operation.
- Create an object of Presentation class.
- Load a presentation file using Presentation.LoadFromFile() method.
- Save the presentation to a PDF document using Presentation.SaveToFile() method.
- JavaScript
import React, { useState, useEffect } from 'react';

function App() {
   const [wasmModule, setWasmModule] = useState(null);
   useEffect(() => {
    (async () => {
      try {
        const publicUrl = process.env.PUBLIC_URL || '';
        const spireModule = await import(/* webpackIgnore: true */ `${publicUrl}/spire.presentation.js`);
        const rawModule = spireModule.default || spireModule;
        window.wasmModule = typeof rawModule === 'function'
          ? await rawModule({ locateFile: p => p.endsWith('.wasm') ? `${publicUrl}/${p}` : p })
          : rawModule;
        setWasmModule(window.wasmModule);
      } catch (error) {
        console.error('Failed to load spire.presentation.js:', error);
      }
    })();
  }, []);

  const ConvertPowerPointToPDF = async () => {
    const wasmModule = window.wasmModule.spirepresentation;

    if (wasmModule) {
      // Specify the input file paths
      let inputFileName  = "Sample.pptx";
      await window.spire.FetchFileToVFS(inputFileName , '',  `${process.env.PUBLIC_URL}static/data/`);
      await window.spire.FetchFileToVFS("arial.ttf","/Library/Fonts/",`${process.env.PUBLIC_URL}static/font/`);

      // Create a Presentation instance and load the PowerPoint file from the virtual file system
      const ppt =new wasmModule.Presentation();
      ppt.LoadFromFile(inputFileName);

      // Define the output file name
      const outputFileName = "PowerPointToPDF.pdf";

      // Save the PowerPoint file to PDF format
      ppt.SaveToFile({ file: outputFileName, fileFormat: wasmModule.FileFormat.PDF });

      // Read the generated PDF file
      const modifiedFileArray = window.dotnetRuntime.Module.FS.readFile(outputFileName);

      // Create a Blob object from the PDF file
      const modifiedFile = new Blob([modifiedFileArray], { type: "application/pdf" });

      // Create a URL for the Blob
      const url = URL.createObjectURL(modifiedFile);

      // Create an anchor element to trigger the download
      const a = document.createElement('a');
      a.href = url;
      a.download = outputFileName;
      document.body.appendChild(a);
      a.click();
      document.body.removeChild(a);
      URL.revokeObjectURL(url);
    }
  };

  return (
    <div style={{ textAlign: 'center', height: '300px' }}>
      <h1>Convert a PowerPoint Presentation to PDF in React</h1>
      <button onClick={ConvertPowerPointToPDF} disabled={!wasmModule}>
        Convert
      </button>
    </div>
  );
}


export default App;
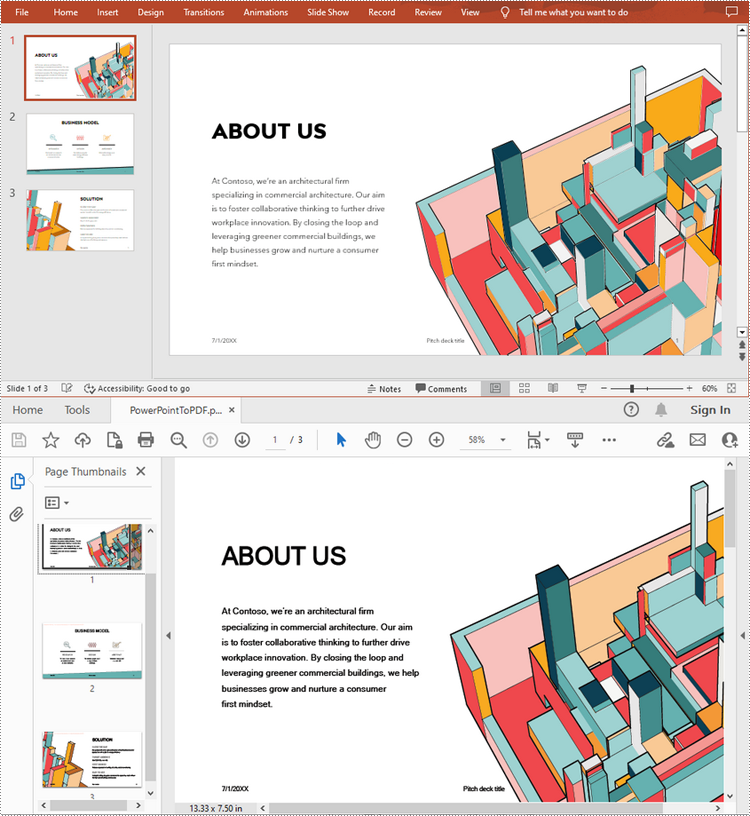
Run the code to launch the React app at localhost:3000. Once it's running, click on the "Convert" button to convert the PowerPoint presentation to PDF:
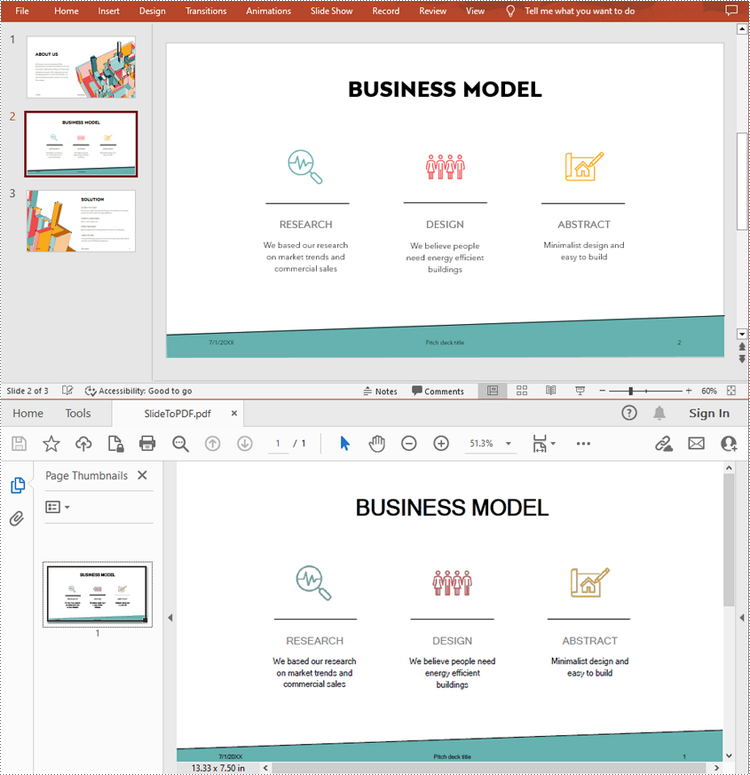
The below screenshot shows the input PowerPoint presentation and the converted PDF:
Convert a PowerPoint Presentation to PDF with a Custom Page Size
Developers can customize the page size of the resulting PDF by adjusting the slide size using the Presentation.SlideSize.Type property during conversion. This ensures that the converted PDF meets specific formatting or printing needs. Here are the detailed steps for this operation.
- Create an object of Presentation class.
- Load a presentation file using Presentation.LoadFromFile() method.
- Set the slide size to A4 using Presentation.SlideSize.Type property.
- Save the presentation to a PDF document using Presentation.SaveToFile() method.
- JavaScript
import React, { useState, useEffect } from 'react';

function App() {
   const [wasmModule, setWasmModule] = useState(null);
   useEffect(() => {
    (async () => {
      try {
        const publicUrl = process.env.PUBLIC_URL || '';
        const spireModule = await import(/* webpackIgnore: true */ `${publicUrl}/spire.presentation.js`);
        const rawModule = spireModule.default || spireModule;
        window.wasmModule = typeof rawModule === 'function'
          ? await rawModule({ locateFile: p => p.endsWith('.wasm') ? `${publicUrl}/${p}` : p })
          : rawModule;
        setWasmModule(window.wasmModule);
      } catch (error) {
        console.error('Failed to load spire.presentation.js:', error);
      }
    })();
  }, []);

  const ConvertPowerPointToPDF = async () => {
    const wasmModule = window.wasmModule.spirepresentation;

    if (wasmModule) {
      // Specify the input file paths
      let inputFileName  = "Sample.pptx";
      await window.spire.FetchFileToVFS(inputFileName , '',  `${process.env.PUBLIC_URL}static/data/`);
      await window.spire.FetchFileToVFS("arial.ttf","/Library/Fonts/",`${process.env.PUBLIC_URL}static/font/`);

      // Create a Presentation instance and load the PowerPoint file from the virtual file system
      const ppt =new wasmModule.Presentation();
      ppt.LoadFromFile(inputFileName);

      //Set A4 page size
      ppt.SlideSize.Type = wasmModule.SlideSizeType.A4;

      // Define the output file name
      const outputFileName = "ToPdfWithSpecificPageSize.pdf";

      // Save the PowerPoint file to PDF format
      ppt.SaveToFile({ file: outputFileName, fileFormat: wasmModule.FileFormat.PDF });

      // Read the generated PDF file
      const modifiedFileArray = window.dotnetRuntime.Module.FS.readFile(outputFileName);

      // Create a Blob object from the PDF file
      const modifiedFile = new Blob([modifiedFileArray], { type: "application/pdf" });

      // Create a URL for the Blob
      const url = URL.createObjectURL(modifiedFile);

      // Create an anchor element to trigger the download
      const a = document.createElement('a');
      a.href = url;
      a.download = outputFileName;
      document.body.appendChild(a);
      a.click();
      document.body.removeChild(a);
      URL.revokeObjectURL(url);
    }
  };

  return (
    <div style={{ textAlign: 'center', height: '300px' }}>
      <h1>Convert a PowerPoint Presentation to PDF with a Custom Page Size in React</h1>
      <button onClick={ConvertPowerPointToPDF} disabled={!wasmModule}>
        Convert
      </button>
    </div>
  );
}


export default App;

Convert a PowerPoint Slide to PDF
Converting a single PowerPoint slide to PDF allows for easy extraction and sharing of individual slides without exporting the entire presentation. Using the ISlide.SaveToFile() method, developers can convert individual slides to PDF with ease. The detailed steps for this operation are as follows.
- Create an object of the Presentation class.
- Load a presentation file using Presentation.LoadFromFile() method.
- Get a slide using Presentation.Slides.get_Item() method.
- Save the slide as a PDF document using ISlide.SaveToFile() method.
- JavaScript
import React, { useState, useEffect } from 'react';

function App() {
   const [wasmModule, setWasmModule] = useState(null);
   useEffect(() => {
    (async () => {
      try {
        const publicUrl = process.env.PUBLIC_URL || '';
        const spireModule = await import(/* webpackIgnore: true */ `${publicUrl}/spire.presentation.js`);
        const rawModule = spireModule.default || spireModule;
        window.wasmModule = typeof rawModule === 'function'
          ? await rawModule({ locateFile: p => p.endsWith('.wasm') ? `${publicUrl}/${p}` : p })
          : rawModule;
        setWasmModule(window.wasmModule);
      } catch (error) {
        console.error('Failed to load spire.presentation.js:', error);
      }
    })();
  }, []);

  const ConvertPowerPointSlideToPDF = async () => {
    const wasmModule = window.wasmModule.spirepresentation;

    if (wasmModule) {
      // Specify the input file paths
      let inputFileName  = "Sample.pptx";
      await window.spire.FetchFileToVFS(inputFileName , '',  `${process.env.PUBLIC_URL}static/data/`);
      await window.spire.FetchFileToVFS("arial.ttf","/Library/Fonts/",`${process.env.PUBLIC_URL}static/font/`);

      // Create a Presentation instance and load the PowerPoint file from the virtual file system
      const ppt =new wasmModule.Presentation();
      ppt.LoadFromFile(inputFileName);

      // Get the second slide
      let slide = ppt.Slides.get_Item(1);

      // Define the output file name
      const outputFileName = "SlideToPdf.pdf";

      // Save the slide to PDF format
      slide.SaveToFile( outputFileName, wasmModule.FileFormat.PDF);

      // Read the generated PDF file
      const modifiedFileArray = window.dotnetRuntime.Module.FS.readFile(outputFileName);

      // Create a Blob object from the PDF file
      const modifiedFile = new Blob([modifiedFileArray], { type: "application/pdf" });

      // Create a URL for the Blob
      const url = URL.createObjectURL(modifiedFile);

      // Create an anchor element to trigger the download
      const a = document.createElement('a');
      a.href = url;
      a.download = outputFileName;
      document.body.appendChild(a);
      a.click();
      document.body.removeChild(a);
      URL.revokeObjectURL(url);
    }
  };

  return (
    <div style={{ textAlign: 'center', height: '300px' }}>
      <h1>Convert a PowerPoint Slide to PDF in React</h1>
      <button onClick={ConvertPowerPointSlideToPDF} disabled={!wasmModule}>
        Convert
      </button>
    </div>
  );
}


export default App;
Get a Free License
To fully experience the capabilities of Spire.Presentation for JavaScript without any evaluation limitations, you can request a free 30-day trial license.
Spire.Presentation for JavaScript Program Guide Content - React
2025-02-17 01:22:00 Written by KoohjiSpire.Presentation for JavaScript is a powerful presentation processing library designed for developers in JavaScript applications. It is fully compatible with popular JavaScript frameworks like Vue, React, and Angular. This compatibility allows developers to effortlessly integrate Spire.Presentation into their applications, enabling seamless creation, editing, conversion, and distribution of PowerPoint presentations directly within web-based projects.
As a standalone API, Spire.Presentation for JavaScript eliminates the need for Microsoft PowerPoint, making it highly efficient and flexible. Spire.Presentation for JavaScript supports Microsoft PowerPoint 97-2003 and Microsoft PowerPoint 2007, 2010, 2016, and 2019 (PPTX, PPSX).
How to Integrate Spire.Presentation for JavaScript in a React Project
2025-02-21 00:55:01 Written by AdministratorIn the ever-evolving world of web development, React continues to be the preferred framework for creating engaging and responsive user interfaces. For developers looking to enhance their applications with robust presentation capabilities, Spire.Presentation for JavaScript emerges as an invaluable resource.
In this guide, we'll explore the steps to effectively integrate Spire.Presentation for JavaScript into your React application, ensuring you can leverage its robust features for tasks such as generating slides, editing content, and exporting presentations in various formats.
- Benefits of Using Spire.Presentation for JavaScript in React
- Set Up Your Environment
- Integrate Spire.Presentation for JavaScript in Your Project
- Create and Save PowerPoint Files Using JavaScript
Benefits of Using Spire.Presentation for JavaScript in React
React, a powerful JavaScript library for building interactive user interfaces, has become a cornerstone in modern web development. Complementing this is Spire.Presentation for JavaScript, a specialized library designed to enhance PowerPoint presentation management within web applications.
By integrating Spire.Presentation for JavaScript into your React project, you can unlock advanced features for creating and manipulating presentations easily. Here are some of the key benefits:
- Rich Functionality: Spire.Presentation for JavaScript offers a comprehensive range of features for managing PowerPoint files, including creating slides, adding text, images, charts, and shapes. This rich functionality allows developers to build robust presentation applications without needing to rely on external tools.
- Seamless Integration: Designed to work harmoniously with various JavaScript frameworks, including React, Spire.Presentation for JavaScript integrates smoothly into existing projects, facilitating an efficient and enjoyable development experience.
- Cross-Platform Compatibility: Spire.Presentation for JavaScript is designed to work across different platforms and devices. Whether your application is run on desktop, tablet, or mobile devices, you can expect consistent performance and functionality.
- High-Quality Output: Spire.Presentation for JavaScript ensures that the presentations you create are of high quality, maintaining the integrity of fonts, images, and layouts. This quality is crucial for professional presentations and business-related use cases.
Set Up Your Environment
Step 1. Install React and npm
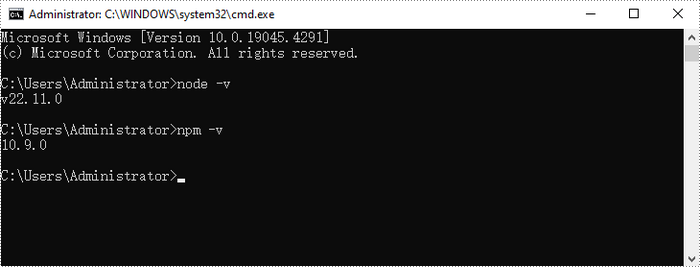
Download and install Node.js from the official website. Make sure to choose the version that matches your operating system.
After the installation is complete, you can verify that Node.js and npm are working correctly by running the following commands in your terminal:
Step 2. Create a New React Project
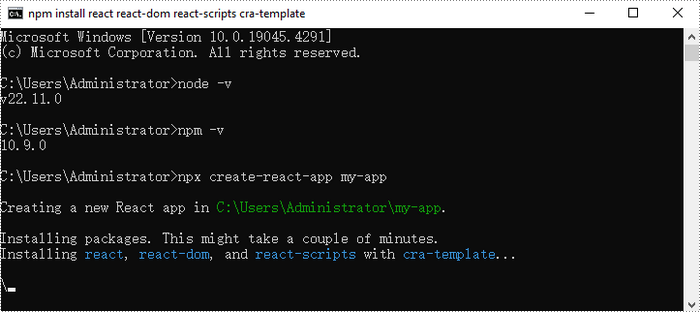
Create a new React project named my-app using Create React App from terminal:
npx create-react-app my-app
If your React project is compiled successfully, the app will be served at http://localhost:3000, allowing you to view and test your application in a browser.

To visually browse and manage the files in your project, you can open the project using VS Code.

Integrate Spire.Presentation for JavaScript in Your Project
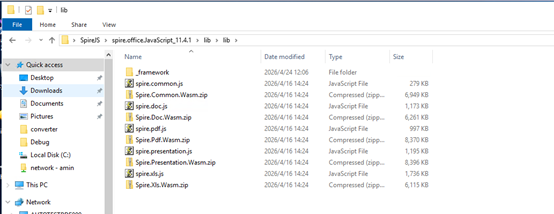
Download Spire.Presentation for JavaScript from our website and unzip it to a location on your disk. The downloaded product package integrates Spire.Doc for JavaScript, Spire.XLS for JavaScript, Spire.PDF for JavaScript, and Spire.Presentation for JavaScript. When using the features of Spire.Presentation for JavaScript, the required files are: spire.presentation.js, Spire.Presentation.Wasm.zip, spire.common.js, Spire.Common.Wasm.zip, and the _framework folder.
Alternatively, you can download Spire.Presentation for JavaScript using npm. In the terminal within VS Code, run the following command:
npm i spire.office
Once the installation is complete, the product packages will be saved in the node_modules/spire.office path of your project.
Copy the spire.presentation.js, Spire.Presentation.Wasm.zip, spire.common.js, Spire.Common.Wasm.zip, and the _framework folder five files into the "public" folder in your React project.
Add font files you plan to use to the "public/static/font" folder in your project. (Not always necessary)
Create and Save Presentation Files Using JavaScript
Modify the code in the "App.js" file to generate a PowerPoint file using the WebAssembly (WASM) module.
Here is the entire code:
- JavaScript
import React, { useState, useEffect } from 'react';

function App() {
   const [wasmModule, setWasmModule] = useState(null);
   useEffect(() => {
    (async () => {
      try {
        const publicUrl = process.env.PUBLIC_URL || '';
        const spireModule = await import(/* webpackIgnore: true */ `${publicUrl}/spire.presentation.js`);
        const rawModule = spireModule.default || spireModule;
        window.wasmModule = typeof rawModule === 'function'
          ? await rawModule({ locateFile: p => p.endsWith('.wasm') ? `${publicUrl}/${p}` : p })
          : rawModule;
        setWasmModule(window.wasmModule);
      } catch (error) {
        console.error('Failed to load spire.presentation.js:', error);
      }
    })();
  }, []);


  const CreatePowerPoint = async () => {
    const wasmModule = window.wasmModule.spirepresentation;

    if (wasmModule) {
       // Load the ARIALUNI.TTF font file into the virtual file system (VFS)
        await window.spire.FetchFileToVFS("ARIALUNI.TTF", "/Library/Fonts/", `${import.meta.env.BASE_URL}static/font/`);

        // Create a PPT document
        const ppt = new wasmModule.Presentation();

        // Add a new shape to the PPT document
        let rec = wasmModule.RectangleF.FromLTRB(ppt.SlideSize.Size.Width / 2 - 250,80,(500 + ppt.SlideSize.Size.Width / 2 - 250),230);
        let shape = ppt.Slides.get_Item(0).Shapes.AppendShape({shapeType:wasmModule.ShapeType.Rectangle,rectangle:rec});

        shape.ShapeStyle.LineColor.Color = wasmModule.Color.get_White();
        shape.Fill.FillType = wasmModule.FillFormatType.None;

        // Add text to the shape
        shape.AppendTextFrame("Hello World!");

        // Set the font and fill style of the text
        let textRange = shape.TextFrame.TextRange;
        textRange.Fill.FillType = wasmModule.FillFormatType.Solid;
        textRange.Fill.SolidColor.Color = wasmModule.Color.get_CadetBlue();
        textRange.FontHeight = 66;
        textRange.LatinFont = wasmModule.TextFont;

        // Define the output file name
        const outputFileName = "HelloWorld.pptx";

        // Save to file
        ppt.SaveToFile({file:outputFileName,fileFormat:wasmModule.FileFormat.Pptx2013});

        // Read the saved file and convert to a Blob object
        const modifiedFileArray = window.dotnetRuntime.Module.FS.readFile(outputFileName);
        const modifiedFile = new Blob([modifiedFileArray], { type: "application/vnd.openxmlformats-officedocument.presentationml.presentation" });

        // Clean up resources
        ppt.Dispose();

      // Create a URL for the Blob
      const url = URL.createObjectURL(modifiedFile);

      // Create an anchor element to trigger the download
      const a = document.createElement('a');
      a.href = url;
      a.download = outputFileName;
      document.body.appendChild(a);
      a.click();
      document.body.removeChild(a);
      URL.revokeObjectURL(url);
    }
  };

  return (
    <div style={{ textAlign: 'center', height: '300px' }}>
      <h1>Create a PowerPoint Document in React</h1>
      <button onClick={CreatePowerPoint} disabled={!wasmModule}>
        Generate
      </button>
    </div>
  );
}

export default App;
Save the changes by clicking "File" - "Save".
Start the development server by entering the following command in the terminal within VS
npm start
Once the React app is successfully compiled, it will open in your default web browser, typically at http://localhost:3000.
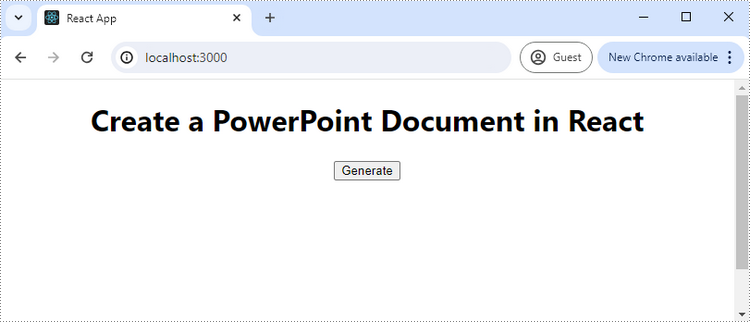
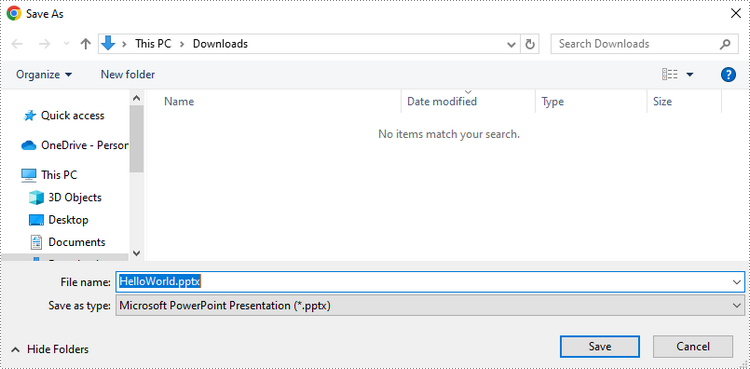
Click "Generate," and a "Save As" window will prompt you to save the output file in the designated folder.
Apply for a Temporary License
If you'd like to remove the evaluation message from the generated documents, or to get rid of the function limitations, please request a 30-day trial license for yourself.
