
Conversion (3)
PowerPoint keeps content locked inside slides. Each page is its own canvas, and titles and body text sit in scattered shape frames. To move that content into documentation, a knowledge base, or an LLM pipeline, you first need to turn it back into editable plain text. Markdown is a good fit for that layer, and a Markdown file in a Git repository shows line-by-line diffs.
This article uses Spire.Presentation for JavaScript to convert PowerPoint to Markdown in the browser. You can convert the whole presentation, or export just one slide. Conversion runs locally on WebAssembly: the deck is read through a virtual file system (VFS), so the file never has to be uploaded to a server.
This article covers two core features:
For installation and project setup, see Integrate Spire.Presentation for JavaScript in a React project. The examples below assume Spire.Presentation is installed and the WebAssembly module is initialized.
Convert a whole PowerPoint to Markdown
Spire.Presentation for JavaScript provides the Presentation.SaveToFile() method. With FileFormat.Markdown, it exports the whole presentation to a single Markdown file.
The steps are:
- Get the Spire.Presentation WASM module and make sure it is ready.
- Fetch the sample presentation and font into the VFS, then create a
Presentationobject and load the file. - Call
Presentation.SaveToFile()withfileFormatset toFileFormat.Markdownto save it as a Markdown file. - Read the result from the VFS and trigger a browser download.
- Dispose of the
Presentationobject.
The following code converts a whole PowerPoint to Markdown:
function App() {
  const convertToMarkdown = async () => {
    // Get the Spire.Presentation WASM module
    const pptModule = window.wasmModule?.spirepresentation;

    // Make sure the module is ready
    if (!pptModule) {
      alert('Spire.Presentation is not ready yet');
      return;
    }

    // Load the sample presentation and font
    await window.spire.FetchFileToVFS('DataBriefing.pptx', "", `${process.env.PUBLIC_URL}/data/`);
    await window.spire.FetchFileToVFS('ARIALUNI.TTF', "/Library/Fonts/", `${process.env.PUBLIC_URL}/font/`);

    // Create a Presentation instance and load the presentation
    const ppt = new pptModule.Presentation();
    ppt.LoadFromFile('DataBriefing.pptx');

    // Save the whole presentation as a Markdown file
    const outputFileName = 'DataBriefing.md';
    ppt.SaveToFile({ file: outputFileName, fileFormat: pptModule.FileFormat.Markdown });
    ppt.Dispose();

    // Read the generated file from the VFS and trigger a download
    const fileArray = window.dotnetRuntime.Module.FS.readFile(outputFileName);
    const blob = new Blob([fileArray], { type: 'text/markdown' });
    const url = URL.createObjectURL(blob);
    const a = document.createElement('a');
    a.href = url;
    a.download = outputFileName;
    a.click();
    URL.revokeObjectURL(url);
  };

  return (
    <div style={{ textAlign: 'center', height: '300px' }}>
      <h1>Convert PowerPoint to Markdown</h1>
      <button onClick={convertToMarkdown}>
        Convert to Markdown
      </button>
    </div>
  );
}

export default App;
The Markdown file produced from the whole presentation:

Export a specific slide as Markdown
Spire.Presentation for JavaScript also provides the ISlide.SaveToFile() method, which exports a single slide to Markdown on its own.
The steps are:
- Get the Spire.Presentation WASM module and make sure it is ready.
- Fetch the sample presentation and font into the VFS, then create a
Presentationobject and load the file. - Take the target slide with
Presentation.Slides.get_Item(index). The index starts at 0. - Call
ISlide.SaveToFile()withfileFormatset toFileFormat.Markdownto save it as a Markdown file. - Read the result from the VFS and trigger a browser download, then release the resources.
The following code exports a specific slide as Markdown:
function App() {
  const convertSlideToMarkdown = async () => {
    // Get the Spire.Presentation WASM module
    const pptModule = window.wasmModule?.spirepresentation;

    // Make sure the module is ready
    if (!pptModule) {
      alert('Spire.Presentation is not ready yet');
      return;
    }

    // Load the sample presentation and font
    await window.spire.FetchFileToVFS('DataBriefing.pptx', "", `${process.env.PUBLIC_URL}/data/`);
    await window.spire.FetchFileToVFS('ARIALUNI.TTF', "/Library/Fonts/", `${process.env.PUBLIC_URL}/font/`);

    // Create a Presentation instance and load the presentation
    const ppt = new pptModule.Presentation();
    ppt.LoadFromFile('DataBriefing.pptx');

    // Get the second slide (index starts at 0)
    const slide = ppt.Slides.get_Item(1);

    // Save this single slide as a Markdown file
    const outputFileName = 'Slide-2.md';
    slide.SaveToFile(outputFileName, pptModule.FileFormat.Markdown);
    ppt.Dispose();

    // Read the generated file from the VFS and trigger a download
    const fileArray = window.dotnetRuntime.Module.FS.readFile(outputFileName);
    const blob = new Blob([fileArray], { type: 'text/markdown' });
    const url = URL.createObjectURL(blob);
    const a = document.createElement('a');
    a.href = url;
    a.download = outputFileName;
    a.click();
    URL.revokeObjectURL(url);
  };

  return (
    <div style={{ textAlign: 'center', height: '300px' }}>
      <h1>Export a specific slide as Markdown</h1>
      <button onClick={convertSlideToMarkdown}>
        Export slide 2
      </button>
    </div>
  );
}

export default App;
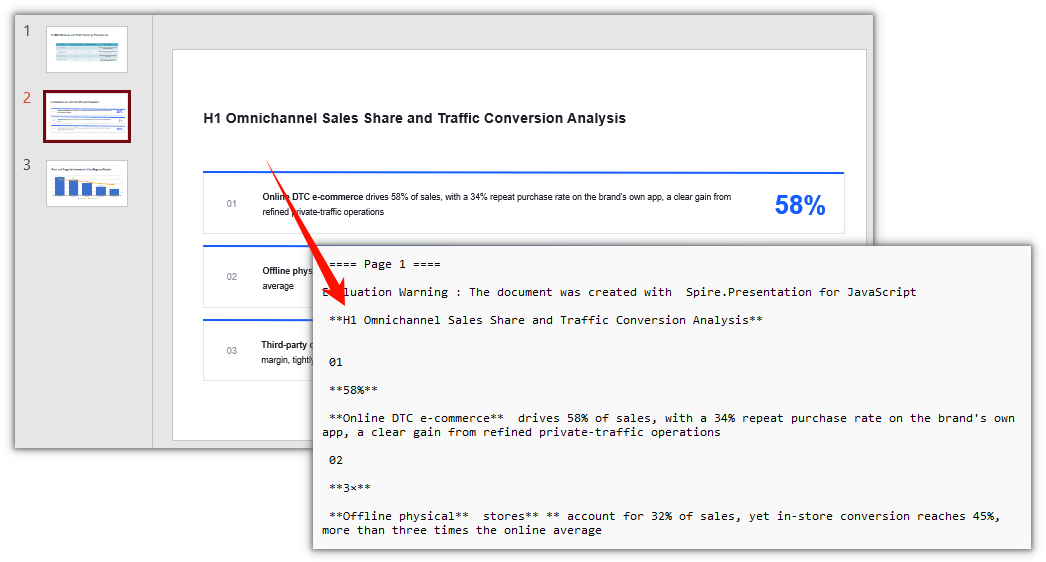
The Markdown file exported from slide 2:
Export multiple slides to Markdown at once
ISlide.SaveToFile() handles one slide per call. To split a deck into several files, loop over Slides and write one Markdown file per page:
// Loop over all slides and export each one to its own Markdown file
for (let i = 0; i < ppt.Slides.Count; i++) {
  const slide = ppt.Slides.get_Item(i);
  slide.SaveToFile(`Slide-${i + 1}.md`, pptModule.FileFormat.Markdown);
}
FAQ
Do I need Microsoft PowerPoint installed to convert
No. Spire.Presentation for JavaScript reads and writes presentations in the browser on WebAssembly. The conversion does not call a local PowerPoint installation and does not depend on Office components. The browser only needs to be able to load the WASM module.
How do the page separators differ between whole and single-slide export
When you convert the whole presentation, every slide is written into the same file in order, with separators running from ==== Page 1 ==== upward and matching the real page numbers. When you export one slide, the file contains only that page, the separator always starts at ==== Page 1 ====, and the original page number is not kept.
Why is there an evaluation warning line at the top of the exported Markdown
Without a license, Spire.Presentation writes an Evaluation Warning line at the start of each page. The line stays for the duration of the trial. Convert again after applying a license to remove it; see the free license note at the end of this article.
Are images and charts written to the Markdown
No. The conversion outputs the text layer: titles, paragraphs, lists, and tables are turned into the matching Markdown syntax. Images and charts on a slide keep only their extractable text, and the graphics themselves are not written to the file. If you need the images, export the page as an image separately with Slide.SaveAsImage().
Get a free license
To remove the evaluation message from result files or lift the feature limits, contact sales for a 30-day temporary license.
Transforming PowerPoint presentations into image formats such as JPG or PNG is an effective method for enhancing the way you share visual content. By converting slides into images, you maintain the integrity of the design and layout, making it suitable for a wide range of uses, from online sharing to embedding in documents.
In this article, you will discover how to convert PowerPoint slides to images in React using Spire.Presentation for JavaScript. We will guide you through the process step-by-step, ensuring you can effortlessly create high-quality images from your presentations.
Install Spire.Presentation for JavaScript
To get started with converting PowerPoint to images in a React application, you can either download Spire.Presentation for JavaScript from the official website or install it via npm with the following command:
npm i spire.office
The downloaded product package integrates Spire.Doc for JavaScript, Spire.XLS for JavaScript, Spire.PDF for JavaScript, and Spire.Presentation for JavaScript. To use Spire.Presentation for JavaScript functionality, you need to copy the corresponding files (spire.presentation.js, Spire.Presentation.Wasm.zip, spire.common.js, Spire.Common.Wasm.zip, and the _framework folder) to the public folder of your project. Additionally, to ensure proper text rendering, font files can be added to a custom path of your choice. In the following example, the font addition path is: public\static\font.
For more details, refer to the documentation: How to Integrate Spire.Presentation for JavaScript in a React Project.
Convert PowerPoint to PNG or JPG with JavaScript
Using Spire.Presentation for JavaScript, you can access a specific slide with the Presentation.Slides.get_Item() method. Once you have the slide, convert it to image data using ISlide.SaveAsImage(). You can then save the image in PNG or JPG format. To convert each slide into a separate image file, simply iterate through the slides and perform the conversion for each one.
The steps to convert PowerPoint to PNG or JPG using JavaScript are as follows:
- Load required font files into the virtual file system (VFS).
- Instantiate a new document using the wasmModule.Presentation() method
- Load the PowerPoint document using the Presentation.LoadFromFile() method.
- Loop through the slides in the document:
- Get a specific slide using the Presentation.Slides.get_Item() method.
- Convert the slide into image data using the ISlide.SaveAsImage() method.
- Save the image data to a PNG or JPG file using the Save() method of the image data object.
- Create a Blob object from the generated image file.
- Trigger the download of the image file.
- JavaScript
import React, { useState, useEffect } from 'react';

function App() {
   const [wasmModule, setWasmModule] = useState(null);
   useEffect(() => {
    (async () => {
      try {
        const publicUrl = process.env.PUBLIC_URL || '';
        const spireModule = await import(/* webpackIgnore: true */ `${publicUrl}/spire.presentation.js`);
        const rawModule = spireModule.default || spireModule;
        window.wasmModule = typeof rawModule === 'function'
          ? await rawModule({ locateFile: p => p.endsWith('.wasm') ? `${publicUrl}/${p}` : p })
          : rawModule;
        setWasmModule(window.wasmModule);
      } catch (error) {
        console.error('Failed to load spire.presentation.js:', error);
      }
    })();
  }, []);

  const PowerPointToPNG = async () => {
    const wasmModule = window.wasmModule.spirepresentation;

    if (wasmModule) {
      // Specify the input file paths
      let inputFileName  = "Sample.pptx";
      await window.spire.FetchFileToVFS(inputFileName , '',  `${process.env.PUBLIC_URL}static/data/`);
      await window.spire.FetchFileToVFS("arial.ttf","/Library/Fonts/",`${process.env.PUBLIC_URL}static/font/`);

      // Create a Presentation instance and load the PowerPoint file from the virtual file system
      const presentation =new wasmModule.Presentation();
      presentation.LoadFromFile(inputFileName);

      // Iterate through the slides
      for (let i = 0; i < presentation.Slides.Count; i++) {

        // Convert a specific slide into image data
        let image = presentation.Slides.get_Item(i).SaveAsImage();

        // Specify the output file name
        let outputFileName = `ToImage_img_${i}.png`;

        // Save each image in virtual storage
        image.Save(outputFileName);

        // Read the generated image file from VFS
        const imageFileArray =  window.dotnetRuntime.Module.FS.readFile(outputFileName);

        // Create a Blog object from the image file
        const imageBlob = new Blob([imageFileArray], { type: "image/png" });

        // Create a URL for the Blob
        const url = URL.createObjectURL(imageBlob);

        // Create an anchor element to trigger the download
        const a = document.createElement('a');
        a.href = url;
        a.download = outputFileName;
        document.body.appendChild(a);
        a.click();
        document.body.removeChild(a);
        URL.revokeObjectURL(url);
      };

      // Clean up resources
      presentation.Dispose();
    }
  };

  return (
    <div style={{ textAlign: 'center', height: '300px' }}>
      <h1>Convert PowerPoint to PNG in React</h1>
      <button onClick={PowerPointToPNG} disabled={!wasmModule}>
        Generate
      </button>
    </div>
  );
}

export default App;
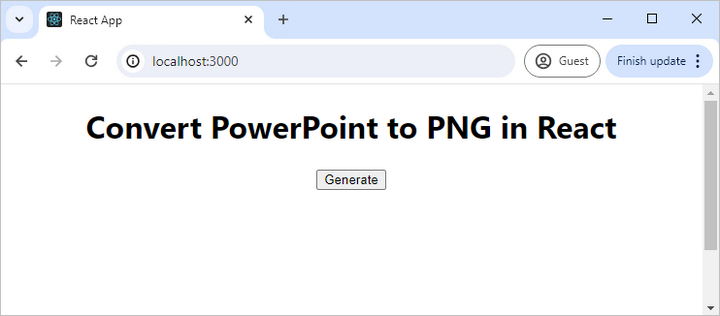
Run the code to launch the React app at localhost:3000. Click "Generate", and a "Save As" window will appear, prompting you to save the output file in your chosen folder.
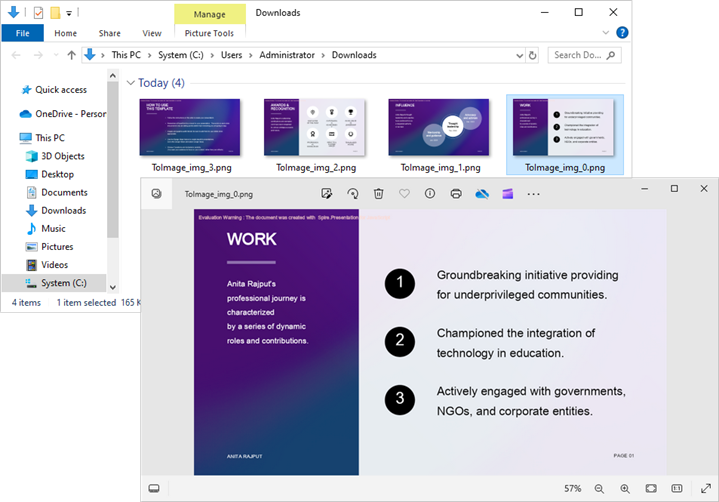
Below is a screenshot of the generated PNG image files:
Convert PowerPoint to SVG with JavaScript
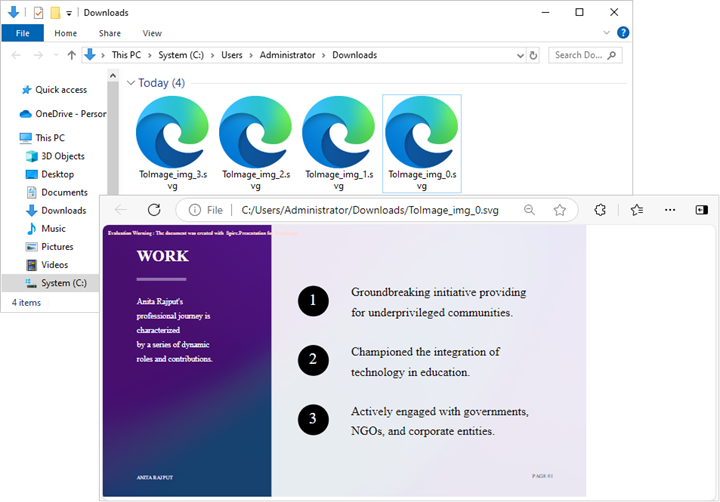
Spire.Presentation for JavaScript provides the ISlide.SaveToSVG() method, allowing you to convert a slide into SVG byte data. This byte data can then be saved as an SVG file using the Save() method.
The following are the steps to convert PowerPoint to SVG using JavaScript:
- Load required font files into the virtual file system (VFS).
- Instantiate a new document using the wasmModule.Presentation() method
- Load the PowerPoint document using the Presentation.LoadFromFile() method.
- Loop through the slides in the document:
- Get a specific slide using the Presentation.Slides.get_Item() method.
- Convert the slide into SVG byte data using the ISlide.SaveToSVG() method.
- Save the byte data to an SVG file using the Save() method.
- Create a Blob object from the generated image file.
- Trigger the download of the image file.
- JavaScript
import React, { useState, useEffect } from 'react';

function App() {
   const [wasmModule, setWasmModule] = useState(null);
   useEffect(() => {
    (async () => {
      try {
        const publicUrl = process.env.PUBLIC_URL || '';
        const spireModule = await import(/* webpackIgnore: true */ `${publicUrl}/spire.presentation.js`);
        const rawModule = spireModule.default || spireModule;
        window.wasmModule = typeof rawModule === 'function'
          ? await rawModule({ locateFile: p => p.endsWith('.wasm') ? `${publicUrl}/${p}` : p })
          : rawModule;
        setWasmModule(window.wasmModule);
      } catch (error) {
        console.error('Failed to load spire.presentation.js:', error);
      }
    })();
  }, []);


  const PowerPointToSVG = async () => {
    const wasmModule = window.wasmModule.spirepresentation;

    if (wasmModule) {
      // Specify the input file paths
      let inputFileName  = "Sample.pptx";
      await window.spire.FetchFileToVFS(inputFileName , '',  `${process.env.PUBLIC_URL}static/data/`);
      await window.spire.FetchFileToVFS("arial.ttf","/Library/Fonts/",`${process.env.PUBLIC_URL}static/font/`);

      // Create a Presentation instance and load the PowerPoint file from the virtual file system
      const presentation =new wasmModule.Presentation();
      presentation.LoadFromFile(inputFileName);

      // Iterate through the slides
      for (let i = 0; i < presentation.Slides.Count; i++) {
        let svgBytes = presentation.Slides.get_Item(i).SaveToSVG();
        let outputFileName = `ToSVG-${i}.svg`;

        // Save each image in virtual storage
        let stream = new wasmModule.Stream(svgBytes);
        stream.Save(outputFileName);
        const imageFileArray = window.dotnetRuntime.Module.FS.readFile(outputFileName);
        const imageBlob = new Blob([imageFileArray], { type: "image/svg" });

        // Create a URL for the Blob
        const url = URL.createObjectURL(imageBlob);

        // Create an anchor element to trigger the download
        const a = document.createElement('a');
        a.href = url;
        a.download = outputFileName;
        document.body.appendChild(a);
        a.click();
        document.body.removeChild(a);
        URL.revokeObjectURL(url);
          stream.Dispose();
        }
      // Clean up resources
      presentation.Dispose();
    }
  };

  return (
    <div style={{ textAlign: 'center', height: '300px' }}>
      <h1>Convert PowerPoint to SVG in React</h1>
      <button onClick={PowerPointToSVG} disabled={!wasmModule}>
        Generate
      </button>
    </div>
  );
}


export default App;
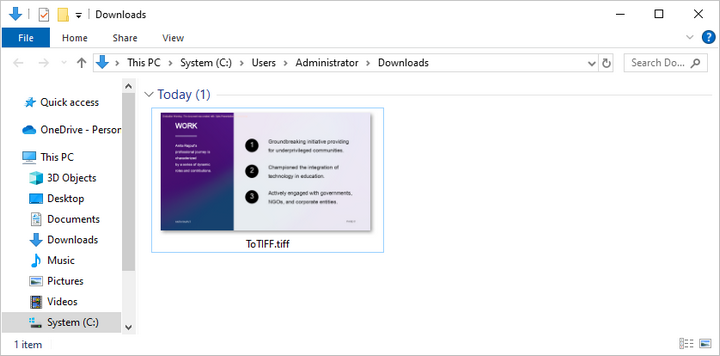
Convert PowerPoint to TIFF with JavaScript
Spire.Presentation for JavaScript includes the Presentation.SaveToFile() method, which allows you to convert an entire PowerPoint document into a multi-frame TIFF image seamlessly.
The following are the steps to convert PowerPoint to TIFF using JavaScript:
- Load required font files into the virtual file system (VFS).
- Instantiate a new document using the wasmModule.Presentation() method
- Load the PowerPoint document using the Presentation.LoadFromFile() method.
- Convert the document to a TIFF image file using the Presenatation.SaveToFile() method.
- Create a Blob object from the generated image file.
- Trigger the download of the image file.
- JavaScript
import React, { useState, useEffect } from 'react';

function App() {
   const [wasmModule, setWasmModule] = useState(null);
   useEffect(() => {
    (async () => {
      try {
        const publicUrl = process.env.PUBLIC_URL || '';
        const spireModule = await import(/* webpackIgnore: true */ `${publicUrl}/spire.presentation.js`);
        const rawModule = spireModule.default || spireModule;
        window.wasmModule = typeof rawModule === 'function'
          ? await rawModule({ locateFile: p => p.endsWith('.wasm') ? `${publicUrl}/${p}` : p })
          : rawModule;
        setWasmModule(window.wasmModule);
      } catch (error) {
        console.error('Failed to load spire.presentation.js:', error);
      }
    })();
  }, []);


  const PowerPointToTIFF = async () => {
    const wasmModule = window.wasmModule.spirepresentation;

    if (wasmModule) {
      // Specify the input file paths
      let inputFileName  = "Sample.pptx";
      await window.spire.FetchFileToVFS(inputFileName , '',  `${process.env.PUBLIC_URL}static/data/`);
      await window.spire.FetchFileToVFS("arial.ttf","/Library/Fonts/",`${process.env.PUBLIC_URL}static/font/`);

      // Create a Presentation instance and load the PowerPoint file from the virtual file system
      const presentation =new wasmModule.Presentation();
      // Load the PowerPoint file
      presentation.LoadFromFile(inputFileName);

      // Specify the output file name
      const outputFileName = "ToTIFF.tiff"

      // Save the document to TIFF
      presentation.SaveToFile({ file: outputFileName, fileFormat: wasmModule.FileFormat.Tiff });

      // Read the generated image file from VFS
      const imageFileArray = window.dotnetRuntime.Module.FS.readFile(outputFileName);

      // Create a Blog object from the image file
      const imageBlob = new Blob([imageFileArray], { type: "image/tiff" });

      // Create a URL for the Blob
      const url = URL.createObjectURL(imageBlob);

      // Create an anchor element to trigger the download
      const a = document.createElement('a');
      a.href = url;
      a.download = outputFileName;
      document.body.appendChild(a);
      a.click();
      document.body.removeChild(a);
      URL.revokeObjectURL(url);

      // Clean up resources
      presentation.Dispose();
    }
  };

  return (
    <div style={{ textAlign: 'center', height: '300px' }}>
      <h1>Convert PowerPoint to TIFF in React</h1>
      <button onClick={PowerPointToTIFF} disabled={!wasmModule}>
        Generate
      </button>
    </div>
  );
}


export default App;
Get a Free License
To fully experience the capabilities of Spire.Presentation for JavaScript without any evaluation limitations, you can request a free 30-day trial license.
Converting PowerPoint presentations to PDF ensures that slide content remains intact while making the file easier to share and view across different devices. The PDF format preserves the original layout, text, and images, preventing unintended modifications and ensuring consistent formatting. This conversion is especially useful for professional and academic settings, where maintaining document integrity and accessibility is essential. Additionally, PDFs offer enhanced security features, such as restricted editing and password protection, making them a reliable choice for distributing important presentations. In this article, we will demonstrate how to convert PowerPoint presentations to PDF in React using Spire.Presentation for JavaScript.
- Convert a PowerPoint Presentation to PDF
- Convert a PowerPoint Presentation to PDF with a Custom Page Size
- Convert a PowerPoint Slide to PDF
Install Spire.Presentation for JavaScript
To get started with converting PowerPoint to PDF in a React application, you can either download Spire.Presentation for JavaScript from the official website or install it via npm with the following command:
npm i spire.office
The downloaded product package integrates Spire.Doc for JavaScript, Spire.XLS for JavaScript, Spire.PDF for JavaScript, and Spire.Presentation for JavaScript. To use Spire.Presentation for JavaScript functionality, you need to copy the corresponding files (spire.presentation.js, Spire.Presentation.Wasm.zip, spire.common.js, Spire.Common.Wasm.zip, and the _framework folder) to the public folder of your project. Additionally, to ensure proper text rendering, font files can be added to a custom path of your choice. In the following example, the font addition path is: public\static\font.
For more details, refer to the documentation: How to Integrate Spire.Presentation for JavaScript in a React Project.
Convert a PowerPoint Presentation to PDF
Converting a PowerPoint presentation to PDF allows you to share the entire document while preserving its original layout. Using the Presentation.SaveToFile() method, developers can export the full presentation to a PDF file. Below are the detailed steps to perform this operation.
- Create an object of Presentation class.
- Load a presentation file using Presentation.LoadFromFile() method.
- Save the presentation to a PDF document using Presentation.SaveToFile() method.
- JavaScript
import React, { useState, useEffect } from 'react';

function App() {
   const [wasmModule, setWasmModule] = useState(null);
   useEffect(() => {
    (async () => {
      try {
        const publicUrl = process.env.PUBLIC_URL || '';
        const spireModule = await import(/* webpackIgnore: true */ `${publicUrl}/spire.presentation.js`);
        const rawModule = spireModule.default || spireModule;
        window.wasmModule = typeof rawModule === 'function'
          ? await rawModule({ locateFile: p => p.endsWith('.wasm') ? `${publicUrl}/${p}` : p })
          : rawModule;
        setWasmModule(window.wasmModule);
      } catch (error) {
        console.error('Failed to load spire.presentation.js:', error);
      }
    })();
  }, []);

  const ConvertPowerPointToPDF = async () => {
    const wasmModule = window.wasmModule.spirepresentation;

    if (wasmModule) {
      // Specify the input file paths
      let inputFileName  = "Sample.pptx";
      await window.spire.FetchFileToVFS(inputFileName , '',  `${process.env.PUBLIC_URL}static/data/`);
      await window.spire.FetchFileToVFS("arial.ttf","/Library/Fonts/",`${process.env.PUBLIC_URL}static/font/`);

      // Create a Presentation instance and load the PowerPoint file from the virtual file system
      const ppt =new wasmModule.Presentation();
      ppt.LoadFromFile(inputFileName);

      // Define the output file name
      const outputFileName = "PowerPointToPDF.pdf";

      // Save the PowerPoint file to PDF format
      ppt.SaveToFile({ file: outputFileName, fileFormat: wasmModule.FileFormat.PDF });

      // Read the generated PDF file
      const modifiedFileArray = window.dotnetRuntime.Module.FS.readFile(outputFileName);

      // Create a Blob object from the PDF file
      const modifiedFile = new Blob([modifiedFileArray], { type: "application/pdf" });

      // Create a URL for the Blob
      const url = URL.createObjectURL(modifiedFile);

      // Create an anchor element to trigger the download
      const a = document.createElement('a');
      a.href = url;
      a.download = outputFileName;
      document.body.appendChild(a);
      a.click();
      document.body.removeChild(a);
      URL.revokeObjectURL(url);
    }
  };

  return (
    <div style={{ textAlign: 'center', height: '300px' }}>
      <h1>Convert a PowerPoint Presentation to PDF in React</h1>
      <button onClick={ConvertPowerPointToPDF} disabled={!wasmModule}>
        Convert
      </button>
    </div>
  );
}


export default App;
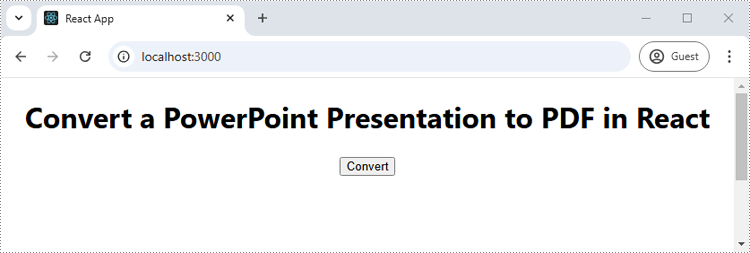
Run the code to launch the React app at localhost:3000. Once it's running, click on the "Convert" button to convert the PowerPoint presentation to PDF:
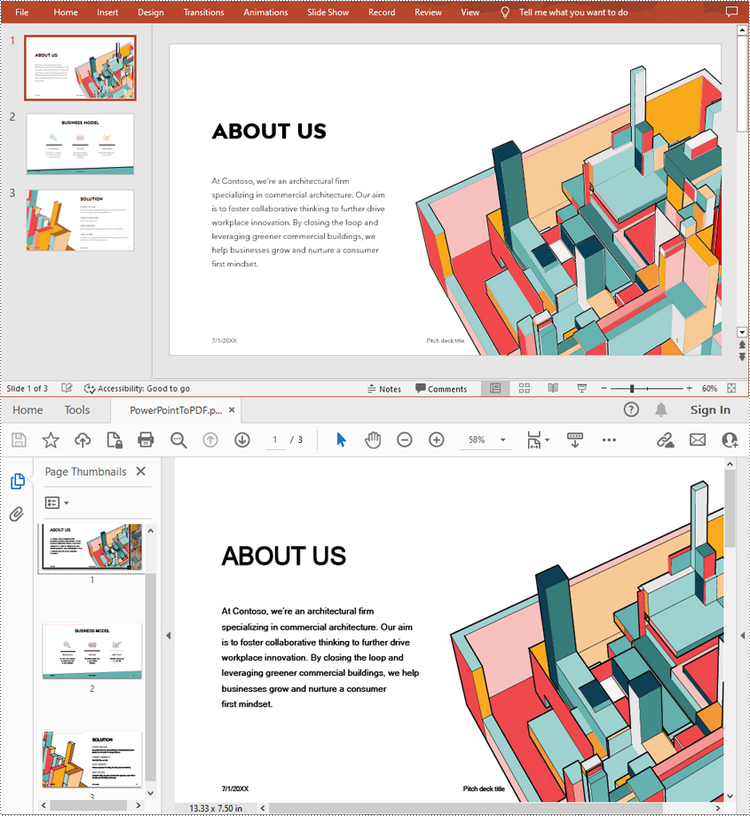
The below screenshot shows the input PowerPoint presentation and the converted PDF:
Convert a PowerPoint Presentation to PDF with a Custom Page Size
Developers can customize the page size of the resulting PDF by adjusting the slide size using the Presentation.SlideSize.Type property during conversion. This ensures that the converted PDF meets specific formatting or printing needs. Here are the detailed steps for this operation.
- Create an object of Presentation class.
- Load a presentation file using Presentation.LoadFromFile() method.
- Set the slide size to A4 using Presentation.SlideSize.Type property.
- Save the presentation to a PDF document using Presentation.SaveToFile() method.
- JavaScript
import React, { useState, useEffect } from 'react';

function App() {
   const [wasmModule, setWasmModule] = useState(null);
   useEffect(() => {
    (async () => {
      try {
        const publicUrl = process.env.PUBLIC_URL || '';
        const spireModule = await import(/* webpackIgnore: true */ `${publicUrl}/spire.presentation.js`);
        const rawModule = spireModule.default || spireModule;
        window.wasmModule = typeof rawModule === 'function'
          ? await rawModule({ locateFile: p => p.endsWith('.wasm') ? `${publicUrl}/${p}` : p })
          : rawModule;
        setWasmModule(window.wasmModule);
      } catch (error) {
        console.error('Failed to load spire.presentation.js:', error);
      }
    })();
  }, []);

  const ConvertPowerPointToPDF = async () => {
    const wasmModule = window.wasmModule.spirepresentation;

    if (wasmModule) {
      // Specify the input file paths
      let inputFileName  = "Sample.pptx";
      await window.spire.FetchFileToVFS(inputFileName , '',  `${process.env.PUBLIC_URL}static/data/`);
      await window.spire.FetchFileToVFS("arial.ttf","/Library/Fonts/",`${process.env.PUBLIC_URL}static/font/`);

      // Create a Presentation instance and load the PowerPoint file from the virtual file system
      const ppt =new wasmModule.Presentation();
      ppt.LoadFromFile(inputFileName);

      //Set A4 page size
      ppt.SlideSize.Type = wasmModule.SlideSizeType.A4;

      // Define the output file name
      const outputFileName = "ToPdfWithSpecificPageSize.pdf";

      // Save the PowerPoint file to PDF format
      ppt.SaveToFile({ file: outputFileName, fileFormat: wasmModule.FileFormat.PDF });

      // Read the generated PDF file
      const modifiedFileArray = window.dotnetRuntime.Module.FS.readFile(outputFileName);

      // Create a Blob object from the PDF file
      const modifiedFile = new Blob([modifiedFileArray], { type: "application/pdf" });

      // Create a URL for the Blob
      const url = URL.createObjectURL(modifiedFile);

      // Create an anchor element to trigger the download
      const a = document.createElement('a');
      a.href = url;
      a.download = outputFileName;
      document.body.appendChild(a);
      a.click();
      document.body.removeChild(a);
      URL.revokeObjectURL(url);
    }
  };

  return (
    <div style={{ textAlign: 'center', height: '300px' }}>
      <h1>Convert a PowerPoint Presentation to PDF with a Custom Page Size in React</h1>
      <button onClick={ConvertPowerPointToPDF} disabled={!wasmModule}>
        Convert
      </button>
    </div>
  );
}


export default App;

Convert a PowerPoint Slide to PDF
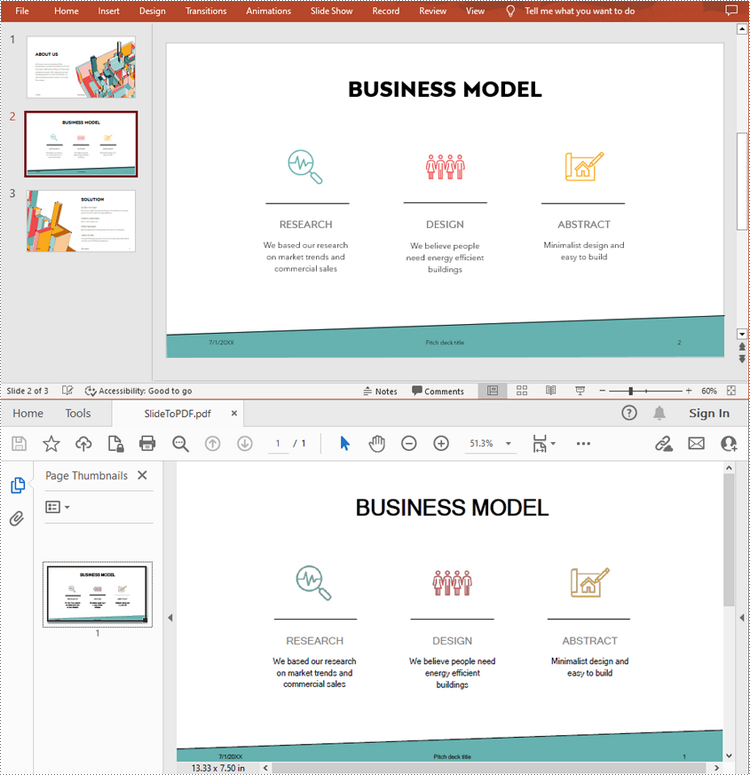
Converting a single PowerPoint slide to PDF allows for easy extraction and sharing of individual slides without exporting the entire presentation. Using the ISlide.SaveToFile() method, developers can convert individual slides to PDF with ease. The detailed steps for this operation are as follows.
- Create an object of the Presentation class.
- Load a presentation file using Presentation.LoadFromFile() method.
- Get a slide using Presentation.Slides.get_Item() method.
- Save the slide as a PDF document using ISlide.SaveToFile() method.
- JavaScript
import React, { useState, useEffect } from 'react';

function App() {
   const [wasmModule, setWasmModule] = useState(null);
   useEffect(() => {
    (async () => {
      try {
        const publicUrl = process.env.PUBLIC_URL || '';
        const spireModule = await import(/* webpackIgnore: true */ `${publicUrl}/spire.presentation.js`);
        const rawModule = spireModule.default || spireModule;
        window.wasmModule = typeof rawModule === 'function'
          ? await rawModule({ locateFile: p => p.endsWith('.wasm') ? `${publicUrl}/${p}` : p })
          : rawModule;
        setWasmModule(window.wasmModule);
      } catch (error) {
        console.error('Failed to load spire.presentation.js:', error);
      }
    })();
  }, []);

  const ConvertPowerPointSlideToPDF = async () => {
    const wasmModule = window.wasmModule.spirepresentation;

    if (wasmModule) {
      // Specify the input file paths
      let inputFileName  = "Sample.pptx";
      await window.spire.FetchFileToVFS(inputFileName , '',  `${process.env.PUBLIC_URL}static/data/`);
      await window.spire.FetchFileToVFS("arial.ttf","/Library/Fonts/",`${process.env.PUBLIC_URL}static/font/`);

      // Create a Presentation instance and load the PowerPoint file from the virtual file system
      const ppt =new wasmModule.Presentation();
      ppt.LoadFromFile(inputFileName);

      // Get the second slide
      let slide = ppt.Slides.get_Item(1);

      // Define the output file name
      const outputFileName = "SlideToPdf.pdf";

      // Save the slide to PDF format
      slide.SaveToFile( outputFileName, wasmModule.FileFormat.PDF);

      // Read the generated PDF file
      const modifiedFileArray = window.dotnetRuntime.Module.FS.readFile(outputFileName);

      // Create a Blob object from the PDF file
      const modifiedFile = new Blob([modifiedFileArray], { type: "application/pdf" });

      // Create a URL for the Blob
      const url = URL.createObjectURL(modifiedFile);

      // Create an anchor element to trigger the download
      const a = document.createElement('a');
      a.href = url;
      a.download = outputFileName;
      document.body.appendChild(a);
      a.click();
      document.body.removeChild(a);
      URL.revokeObjectURL(url);
    }
  };

  return (
    <div style={{ textAlign: 'center', height: '300px' }}>
      <h1>Convert a PowerPoint Slide to PDF in React</h1>
      <button onClick={ConvertPowerPointSlideToPDF} disabled={!wasmModule}>
        Convert
      </button>
    </div>
  );
}


export default App;
Get a Free License
To fully experience the capabilities of Spire.Presentation for JavaScript without any evaluation limitations, you can request a free 30-day trial license.
