
Knowledgebase (2337)
Children categories
Converting Word documents to OFD (Open Fixed-layout Document) is a common requirement in many C++ applications, especially for projects serving the Chinese market, where OFD is a national standard for fixed-layout electronic documents in China (GB/T 33190). Whether you're building backend services, report generators, or document processing systems, implementing reliable C++ conversion Word to OFD functionality helps ensure documents can be shared, archived, or submitted to government systems while preserving their original formatting. However, implementing this feature isn't always easy. Traditional solutions often depend on Microsoft Office automation, which can introduce deployment issues and isn't ideal for server-side environments.
In this article, we'll demonstrate how to use Spire.Doc for C++ to convert Word to OFD programmatically. We'll cover basic document conversion as well as more advanced scenarios such as exporting specific pages to OFD format.
- Why Convert Word to OFD?
- Why Choose Spire.Doc for C++
- Setting Up Spire.Doc for C++
- Basic Word to OFD Conversion in C++
- Advanced Word to OFD Conversion Settings
- Frequently Asked Questions
Why Convert Word to OFD?
Although Word documents are convenient for editing, OFD is often preferred for official document archiving and distribution in China. Converting Word to OFD offers several advantages:
- National standard compliance: OFD is China's national standard for fixed-layout electronic documents, making it essential for government submissions and official archives.
- Consistent layout: OFD preserves the original formatting, ensuring the document looks the same across devices and operating systems.
- Document standardization: OFD files are designed to ensure consistent rendering across different platforms and viewers.
- Long-term archiving: OFD is well-suited for archiving and official record-keeping, making it ideal for legal and financial records.
- Improved document integrity: OFD files support digital signatures and document integrity protection, making them more resistant to tampering.
- Automation support: Applications can convert Word to OFD programmatically in document workflows.
Why Choose Spire.Doc for C++
There are a few ways to approach converting Word to OFD in C++ - COM automation, shelling out to external tools, or parsing the .docx format manually. Each comes with trade-offs: platform lock-in, environment dependencies, or significant implementation overhead.
Spire.Doc for C++ sidesteps most of these issues:
- No Office installation required - the library handles conversion internally, which makes it viable for server-side deployment
- Cross-platform - works on both Windows and Linux, which matters if your service runs in a containerized or Linux-based environment
- Faithful formatting - tables, images, headers, footers, and font styles are preserved reliably in the output OFD
- Straightforward API - the core conversion logic is concise, without needing to understand the full document object model upfront
- Support several Word document formats - including DOC, DOCX, DOCM, DOTX / DOTM.
It's not a perfect tool for every edge case, but for most production conversion needs, it covers the ground well.
Setting Up Spire.Doc for C++
Before starting the conversion, make sure your development environment and project are properly configured.
Install via NuGet Package Manager
- Open your project in Visual Studio.
- Go to Tools -> NuGet Package Manager -> Manage NuGet Packages for Solution...
- Search for "Spire.Doc.Cpp".
- Click "Install".
Manual Installation
- Download the latest version of Spire.Doc for C++ from the official website.
- Unzip the package.
- Configure your Visual Studio project to include the Include directory path and link the lib directory. Ensure the DLL files are placed in the same directory as your executable or in a system path.
For detailed installation instructions, see: Integrate Spire.Doc for C++ in a C++ Application
Basic C++ Project Setup
Once installed, make sure the following are in place before writing any code:
Include the header:
#include "Spire.Doc.o.h"
Add the required using namespace:
using namespace Spire::Doc;
Basic Word to OFD Conversion in C++
Once the project is ready, converting a Word document to OFD only requires a few lines of code.
Here is a complete C++ example:
#include "Spire.Doc.o.h"
#include <iostream>

using namespace Spire::Doc;

int main()
{
    Document* document = new Document();

    try {
        document->LoadFromFile(L"C:\\Users\\Tommy\\Desktop\\BusinessReport.docx");

        document->SaveToFile(L"C:\\Users\\Tommy\\Desktop\\BusinessReport.ofd", FileFormat::OFD);

        document->Close();

        std::cout << "success!" << std::endl;

    }
    catch (const std::exception& ex) {
        std::cerr << "error: " << ex.what() << std::endl;
        delete document;
        return -1;
    }

    delete document;
    return 0;
}
Key Code Explanations:
- Create a Document object.
- LoadFromFile() loads the Word document.
- SaveToFile() converts and saves the document as an OFD file using FileFormat::OFD.
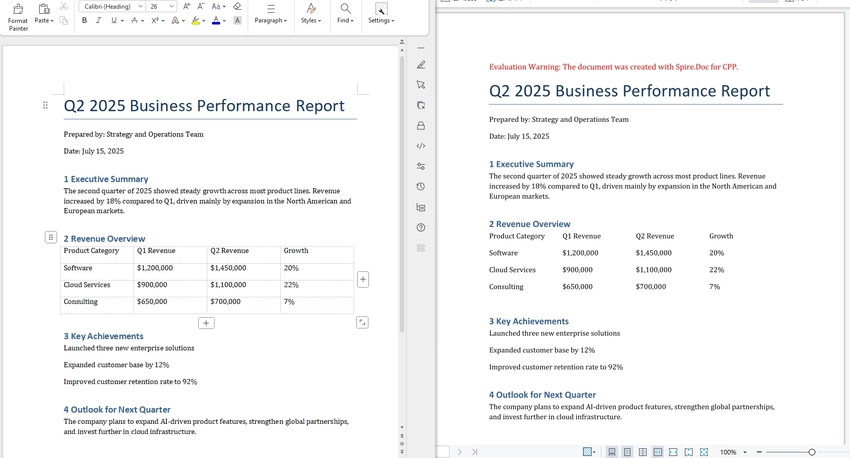
Word to OFD conversion result:
Advanced Word to OFD Conversion Settings
Beyond basic Word-to-OFD conversion, Spire.Doc for C++ also provides options for more specific needs. For example, you can export specific pages to OFD or customize the conversion process by adjusting image compression and embedding fonts.
Convert Specific Pages to OFD
In some workflows, you may only need to convert specific pages of a Word document to OFD format. The following example demonstrates how to extract specific pages and save them as a separate OFD file.
Code example:
#include "Spire.Doc.o.h"
#include <iostream>

using namespace Spire::Doc;

int main()
{
    intrusive_ptr<Document> document = new Document();

    try {
        document->LoadFromFile(L"C:\\Users\\Tommy\\Desktop\\Agreement.docx");

        // Extract pages 1-3 (page index starts from 0)
        intrusive_ptr<Document> newDoc = document->ExtractPages(0, 3);

        newDoc->SaveToFile(L"C:\\Users\\Tommy\\Desktop\\Agreement_Partial.ofd", FileFormat::OFD);

        document->Close();
        newDoc->Close();

        std::cout << "Partial OFD Success!" << std::endl;

    }
    catch (const std::exception& ex) {
        std::cerr << "error: " << ex.what() << std::endl;
        return -1;
    }

    return 0;
}

Code Explanation:
- intrusive_ptr is a smart pointer that automatically manages the memory of the Document object, ensuring it is properly destroyed when no longer needed, which helps prevent memory leaks and simplifies code.
- ExtractPages(0, 3) — Extracts pages 1-3 (0-based index) into a new Document.
- Saving the new document with FileFormat::OFD generates an OFD file containing only the selected pages.
Customize OFD Conversion Settings
In some situations, you may want to adjust conversion settings-for example, to reduce the size of the generated OFD or ensure fonts display correctly across different systems. Spire.Doc for C++ provides options for customizing the export process.
The code below shows how to enable image compression and font embedding during conversion.
#include "Spire.Doc.o.h"
#include <iostream>

using namespace Spire::Doc;

int main()
{
    intrusive_ptr<Document> document = new Document();

        try {
            document->LoadFromFile(L"C:\\Users\\Tommy\\Desktop\\MarketingProposal.docx");

            document->SetJPEGQuality(75);

            intrusive_ptr<ToPdfParameterList> parameters = new ToPdfParameterList();
            parameters->SetIsEmbeddedAllFonts(true);

            document->SaveToFile(L"C:\\Users\\Tommy\\Desktop\\MarketingProposal.ofd", FileFormat::OFD);
            document->Close();

            std::cout << "success" << std::endl;
        }
        catch (const std::exception& ex) {
            std::cerr << "error: " << ex.what() << std::endl;
            return -1;
        }
        return 0;
}

- SetJPEGQuality(75) sets the compression quality of JPEG images in the document to 75%. (value range 0-100).
- SetIsEmbeddedAllFonts(true) embeds all fonts used in the document, ensuring the OFD displays correctly even if the viewer's system does not have those fonts installed.
Frequently Asked Questions
Q1. Do I need Microsoft Word installed to perform the conversion?
A: No. Spire.Doc for C++ works independently of Microsoft Office and does not require Word to be installed on the system.
Q2. How can I convert only specific pages of a Word document to OFD?
A: As mentioned previously, you can extract the required pages from the document using intrusive_ptr<Document> newDoc = document->ExtractPages();, and then save the extracted content as an OFD file. Alternatively, you can copy the desired sections into a new document and then perform the conversion.
Q3. Why do some fonts appear different in the converted OFD?
A: This usually happens when the required fonts are not installed on the system. You can enable this by calling SetIsEmbeddedAllFonts(true) before saving the document.
Q4. How can I reduce the size of the generated OFD?
A: You can enable image compression or lower the JPEG quality (SetJPEGQuality(75))during the conversion process to reduce the file size.
Q5. What is the difference between OFD and PDF?
A: OFD (Open Fixed-layout Document) is China's national standard for electronic documents, while PDF is an international standard. OFD is widely adopted in China for e-government and official document workflows. Both formats preserve document layout and formatting.
Conclusion
Implementing a C++ conversion of Word documents to OFD is essential for applications that require reliable document sharing, archiving, or compliance with Chinese national standards. With Spire.Doc for C++, developers can perform Word-to-OFD conversion programmatically without relying on Microsoft Office automation. As demonstrated in this guide, the library supports not only full document conversion but also advanced scenarios such as exporting specific pages and customizing conversion settings, making it a practical solution for C++ document processing tasks.
The Open Fixed-layout Document (OFD) format is a national standard in China, widely used for electronic invoicing and official documentation. For developers working in C++, converting PDF to OFD efficiently is a common requirement. This tutorial demonstrates how to use the Spire.PDF for C++ library to handle three common scenarios: direct file conversion, extracting specific page ranges, and batch processing entire directories. By following these examples, you can integrate robust conversion logic into your applications with minimal overhead.
Converting a Single PDF to OFD
When converting PDF files to OFD, the most common task is a direct PDF-to-OFD conversion. This process involves only three main steps: initializing the document engine, loading the source PDF file from a disk, and exporting the PDF to OFD.
Key Steps:
- Create a PdfDocument instance.
- Load a PDF file using PdfDocument->LoadFromFile() method.
- Save the PDF as an OFD document using PdfDocument->SaveToFile(filename, FileFormat::OFD) method.
Here's the sample code showing how to directly convert a PDF file to an OFD document:
#include "Spire.Pdf.o.h"

using namespace Spire::Pdf;

int main()
{
    //  Create a PdfDocument instance
    PdfDocument* pdf = new PdfDocument();

    // Load a PDF
    pdf->LoadFromFile(L"/input/Booklet.pdf");

    // Save  the PDF as an OFD document
    pdf->SaveToFile(L"/output/ToOFD.ofd", FileFormat::OFD);

    pdf->Close();
    delete pdf;

    return 0;
}
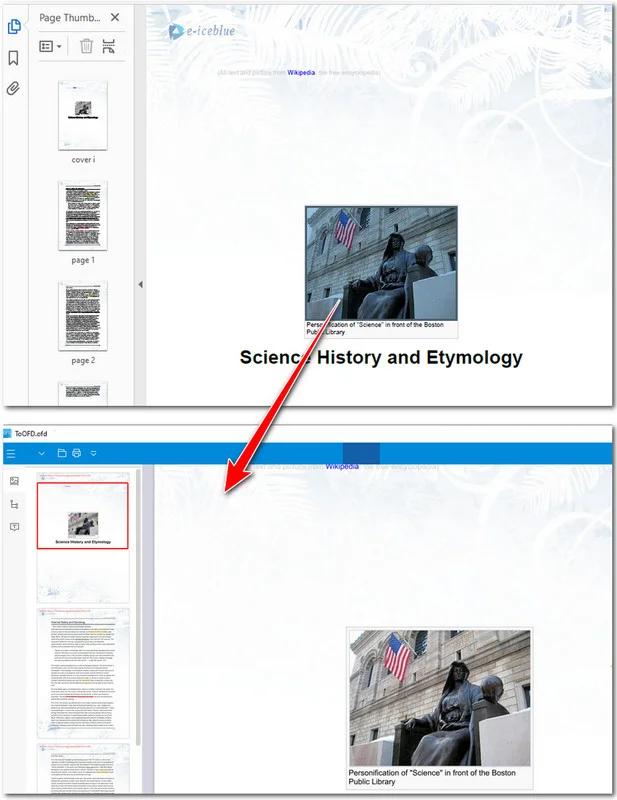
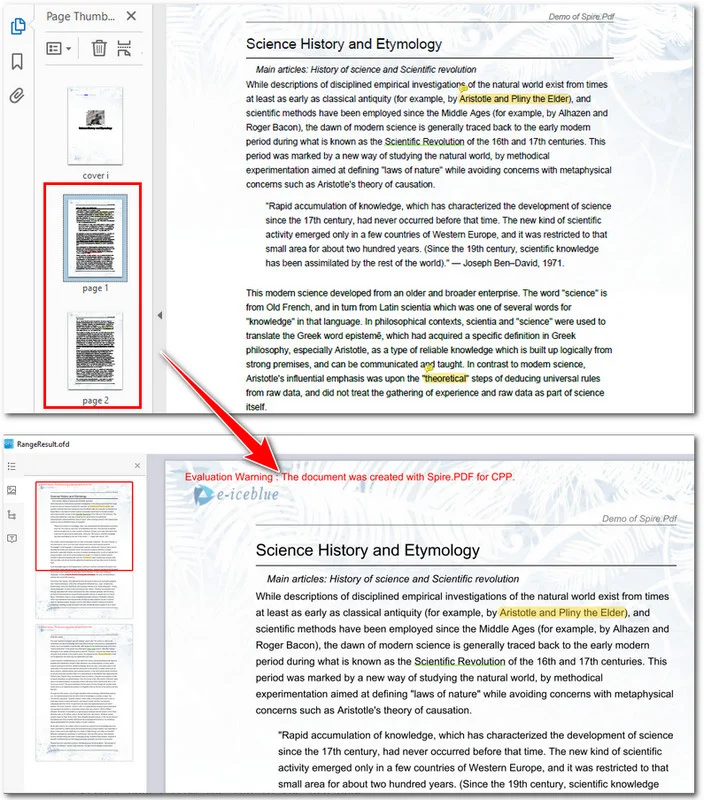
The preview of the original PDF and the converted OFD document:
Beyond OFD, you can also streamline your office workflows by converting PDF to Excel for data analysis or converting PDF to Word for document editing.
Converting a Specific Page Range to OFD
In many cases, you may only need to convert a portion of a PDF document, such as extracting specific chapters from a report or invoice pages for archiving. To fulfill this requirement, you can precisely define a page range for conversion—or alternatively, split the PDF into multiple files first and then perform the conversion. In this chapter, we will focus on the former option, which is ideal for optimizing file sizes and ensuring the output OFD contains only the data relevant to your business workflow.
Key Steps:
- Initialize two PdfDocument instances.
- Load the source PDF and determine the total page count.
- Iterate through the desired range (e.g., indices 1 to 2 for the 2nd and 3rd pages).
- Add a blank page to the new document and draw the source page content onto it using CreateTemplate()->Draw().
- Save the newly constructed document to the OFD format with PdfDocument->SaveToFile(filename, FileFormat::OFD) method.
The following example shows how to convert the 2nd and the 3rd pages of a PDF to an OFD file:
#include "Spire.Pdf.o.h"
#include <iostream>

using namespace Spire::Pdf;

int main()
{
    // 1. Use intrusive_ptr to create a PdfDocument instance and load a PDF file
    intrusive_ptr<PdfDocument> oldPdf = new PdfDocument();
    oldPdf->LoadFromFile(L"/input/Booklet.pdf");

    // Create a new PdfDocument object
    intrusive_ptr<PdfDocument> newPdf = new PdfDocument();

    // Get the page count of the source file
    int pageCount = oldPdf->GetPages()->GetCount();
    std::cout << "Total pages: " << pageCount << std::endl;

    // Extract pages from the 2nd to the 3rd page
    if (pageCount >= 3)
    {
        for (int i = 1; i <= 2; i++)
        {
            // Create a new page with the same size in the destination document
            intrusive_ptr<PdfMargins> margins = new PdfMargins(0);
            intrusive_ptr<PdfPageBase> newPage = newPdf->GetPages()->Add(oldPdf->GetPages()->GetItem(i)->GetSize(), margins);

            // Create a template from the source page and draw it onto the new page
            oldPdf->GetPages()->GetItem(i)->CreateTemplate()->Draw(newPage, new PointF(0, 0));
        }

        // Save the result as an OFD document
        newPdf->SaveToFile(L"/output/RangeResult.ofd", FileFormat::OFD);
        std::cout << "OFD saved successfully via Drawing Template logic." << std::endl;
    }

    // Close the documents
    newPdf->Close();
    oldPdf->Close();

    return 0;
}
Here's the preview of the PDF file and the OFD document:
Batch Converting Multiple PDF Files
For large-scale industrial applications or document management systems, processing PDF files individually is often inefficient. Automating the conversion of entire directories is a vital requirement for high-volume workflows, such as migrating legacy archives or synchronizing cloud storage folders. By leveraging the Spire.PDF library, you can implement a robust solution that automatically detects and converts every PDF within a target directory, ensuring consistent output while saving significant manual labor.
Key Steps:
- Define the input and output directory paths.
- Initialize a single PdfDocument instance.
- Loop through the input folder to access each PDF file.
- Convert the current PDF document to OFD using PdfDocument->SaveToFile(filename, FileFormat::OFD) method.
#include "Spire.Pdf.o.h"
#include <iostream>
#include <filesystem>
#include <string>
namespace fs = std::filesystem;
using namespace Spire::Pdf;
int main()
{
// Define input and output directories
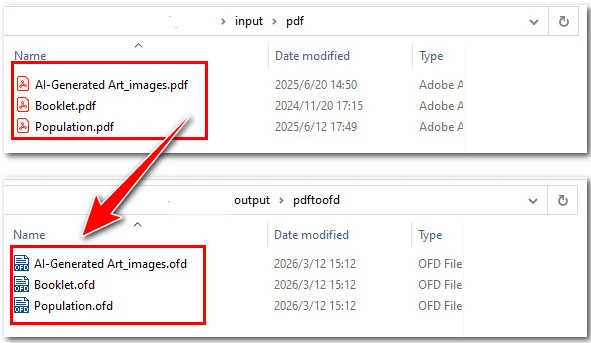
std::string inputDir = "E:/input/pdf/";
std::string outputDir = "/output/pdftoofd/";
// Create a PdfDocument instance
intrusive_ptr<PdfDocument> pdf = new PdfDocument();
// Iterate through the input directory
for (const auto& entry : fs::directory_iterator(inputDir))
{
// Process only .pdf files
if (entry.path().extension() == ".pdf")
{
// Get the current file path
std::wstring inputPath = entry.path().wstring();
// Construct the output file path (change extension to .ofd)
std::wstring outputFileName = entry.path().stem().wstring() + L".ofd";
std::wstring outputPath = fs::path(outputDir).wstring() + outputFileName;
// Load the PDF file
pdf->LoadFromFile(inputPath.c_str());
// Save as OFD format
pdf->SaveToFile(outputPath.c_str(), FileFormat::OFD);
std::wcout << L"Converted: " << outputFileName << std::endl;
}
}
// Close the document and release resources
pdf->Close();
std::cout << "Batch conversion completed." << std::endl;
return 0;
}
Once you have mastered batch conversion, you can further optimize your document pipeline by learning how to merge multiple PDF files into a single PDF in C++ before or after processing.
FAQs about Converting PDF to OFD
Q: Does the OFD format support all elements from the original PDF?
A: Yes, the conversion process via Spire.PDF preserves text, vector graphics, and images. By using the CreateTemplate() and Draw() methods for page extraction, the library ensures that the layout and visual integrity of the original PDF are accurately mapped to the OFD fixed-layout standard.
Q: How does the conversion handle high-resolution images within a PDF?
A: The conversion engine maintains the DPI and compression settings of the original PDF images. If you are performing batch conversions, the output OFD files will remain optimized for high-quality rendering without excessive file size increases.
Q: Is it possible to convert PDF forms or interactive elements to OFD?
A: OFD is primarily a fixed-layout format meant for standardized viewing and printing. During conversion, interactive form fields are typically flattened into the visual layer of the OFD, ensuring the data remains visible even if the interactivity is no longer required in the final document.
Conclusion
In conclusion, Spire.PDF for C++ offers a flexible and powerful API for handling OFD conversions. Whether you are performing a simple file format swap or executing page conversions, the library ensures high fidelity and document integrity. By automating these tasks with batch processing and modern C++ features, developers can significantly reduce manual effort and streamline document workflows.
If you are looking to enhance your document processing capabilities, we encourage you to explore the full potential of Spire.PDF. Should you encounter any challenges or have specific technical questions during your implementation, please feel free to contact us for professional technical assistance!
Page Content:
- Differences between PowerPoint and OFD Format
- How to Convert PowerPoint to OFD with Spire.Presentation for C++
- Batch Convert PowerPoint Files into OFD Format with C++
- Convert a Single Slide of PowerPoint to OFD with C++
- FAQs
PowerPoint presentations are widely used for business reports and technical documentation. In some industries, especially in government and enterprise systems, documents are often required to be distributed in OFD instead of standard Office formats. Because PowerPoint files can include complex layouts and interactive elements, they are not always suitable for standardized document distribution.
In this tutorial, you will learn how to convert PowerPoint to OFD in C++ using Spire.Presentation for C++. The guide walks through simple code examples for converting an entire .ppt/.pptx file, exporting a single slide, and performing batch PPT to OFD conversion for multiple files.
Differences between PowerPoint and OFD Format
Before implementing the conversion, it helps to first understand the key differences between PowerPoint and OFD formats. Each format is designed for a different purpose and usage scenario, which is why some organizations require documents to be converted before distribution. Knowing these differences can make it clearer why converting PowerPoint to OFD is often necessary in enterprise or government document workflows.
1. File Structure and Purpose
PowerPoint files (PPT/PPTX) are designed for interactive presentations and support animations, transitions, embedded media, and editable slide elements.
OFD, in contrast, is a fixed layout document format like PDF, designed to preserve the exact visual layout of a document across different systems. Because of this, OFD is commonly used for official document distribution and long-term digital archiving.
OFD, in contrast, is a fixed layout document format like PDF, designed to preserve the exact visual layout of a document across different systems. Because of this, OFD is commonly used for official document distribution and long-term digital archiving, similar to scenarios where organizations convert PowerPoint to PDF to ensure consistent document formatting.
2. Compatibility and Standardization
PowerPoint belongs to the Microsoft Office ecosystem and typically requires compatible presentation software to view or edit.
OFD is an open national standard created for electronic document exchange, allowing organizations to share and store documents with consistent formatting regardless of the software environment.
3. Security and Compliance
In many enterprise and government workflows, documents must follow standardized formats to meet regulatory requirements. OFD supports features such as digital signatures, fixed layout rendering, and secure document exchange, making it suitable for compliant document distribution.
How to Convert PowerPoint to OFD with Spire.Presentation for C++
Understanding the differences between PowerPoint and OFD is the first step in ensuring documents are properly formatted for distribution. OFD’s fixed layout and standardized features make it ideal for official and long-term archival use.
To handle the conversion in C++, Spire.Presentation for C++ provides a simple and reliable solution. It lets developers load, edit, and export PowerPoint files to OFD while preserving the original layout and content. It also supports other tasks such as editing slides, extracting images, and converting PowerPoint files to images and other formats.
Read on to learn how to use Spire.Presentation for C++ to convert PowerPoint to OFD format.
Install Spire.Presentation for C++:
Before using the sample code in Visual Studio, make sure to add the library to your C++ project. You can either download it from the official download link and add it to your project manually, or install it automatically via NuGet.
For a more detailed tutorial on how to integrate Spire.Presentation for C++, see: How to Integrate Spire.Presentation for C++ in a C++ Application.
PowerPoint to OFD Conversion Workflow:
- Specify the input and output file paths.
- Create a Presentation object.
- Load the PowerPoint file using Presentation.LoadFromFile(String).
- Save the presentation as an OFD file using Presentation.SaveToFile(String, FileFormat).
- Dispose of the Presentation object to release resources.
Sample Code:
#include "Spire.Presentation.o.h";

using namespace Spire::Presentation;
using namespace std;

int main()
{
    // Specify the input and output file paths
    std::wstring inputFile = L"powerpoint-sample.pptx";
    std::wstring outputFile = L"output\\PowerPointToOFD.ofd";

    // Create a Presentation object
    intrusive_ptr<Presentation> presentation = new Presentation();

    // Load a PowerPoint document from disk
    presentation->LoadFromFile(inputFile.c_str());

    // Save the document to OFD format
    presentation->SaveToFile(outputFile.c_str(), FileFormat::OFD);

    presentation->Dispose();

}
Conversion Result:

Note: If you want to remove the evaluation warning message of the converted OFD file or gain full access to all features of Spire.Presentation for C++, please contact us to request a 30-day trial license.
Batch Convert PowerPoint Files into OFD Format with C++
In real-world development scenarios, developers often need to process multiple PowerPoint files at once rather than converting them individually. For example, a document management system may need to convert a folder of PPT files into OFD format for standardized archiving or distribution.
Using Spire.Presentation for C++, you can easily iterate through a directory, load each PowerPoint file, and export it to OFD format automatically. This approach greatly improves efficiency when handling large numbers of presentations.
Batch PowerPoint to OFD Conversion Workflow
- Specify the input folder containing PowerPoint files and the output folder for the converted OFD files.
- Iterate through all files in the input directory.
- Load each PowerPoint file using the Presentation object.
- Generate a corresponding OFD output file path.
- Save the presentation as an OFD file.
- Dispose of the Presentation object to release resources.
Sample Code:
#include "Spire.Presentation.o.h"
#include <filesystem>

using namespace Spire::Presentation;
using namespace std;
namespace fs = std::filesystem;

int main()
{
    // Specify folder paths
    wstring inputFolder = L"InputPPT";
    wstring outputFolder = L"batchoutputOFD";

    for (auto& file : fs::directory_iterator(inputFolder))
    {
        if (file.path().extension() == L".pptx")
        {
            intrusive_ptr<Presentation> presentation = new Presentation();

            // Load PowerPoint file
            presentation->LoadFromFile(file.path().wstring().c_str());

            // Generate output OFD file path
            wstring outputFile = outputFolder + L"\\" + file.path().stem().wstring() + L".ofd";

            // Convert to OFD
            presentation->SaveToFile(outputFile.c_str(), FileFormat::OFD);

            presentation->Dispose();
        }
    }

    return 0;
}
Convert a Single Slide of PowerPoint to OFD with C++
In some scenarios, developers may only need to export selected slides instead of converting the entire presentation. For example, a reporting system may generate an OFD document from only a few important slides in a PowerPoint file.
Using Spire.Presentation, you can create a new presentation, copy the required slides from the original PowerPoint file, and then export them to OFD format.
Single Slide to OFD Conversion Workflow
- Load the source PowerPoint file.
- Create a new Presentation object.
- Copy the required slides from the original presentation to the new presentation.
- Save the new presentation as an OFD file.
- Dispose of the Presentation objects to release resources.
Note: In Spire.Presentation, slide indexing starts from 0, so index 4 refers to the fifth slide in the presentation.
Sample Code:
#include "Spire.Presentation.o.h"

using namespace Spire::Presentation;
using namespace std;

int main()
{
    // Specify input and output paths
    wstring inputFile = L"Input.pptx";
    wstring outputFile = L"SingleSlide.ofd";

    // Load the source presentation
    intrusive_ptr<Presentation> presentation = new Presentation();
    presentation->LoadFromFile(inputFile.c_str());

    // Create a new presentation
    intrusive_ptr<Presentation> newPresentation = new Presentation();

    // Get the specific slide (for example: slide 5)
    intrusive_ptr<ISlide> slide = presentation->GetSlides()->GetItem(4);

    // Add the slide to the new presentation
    newPresentation->GetSlides()->Append(slide);

    // Save the slide as OFD
    newPresentation->SaveToFile(outputFile.c_str(), FileFormat::OFD);

    // Release resources
    presentation->Dispose();
    newPresentation->Dispose();

    return 0;
}
RESULT:

FAQs
1. Can I export PowerPoint files directly to OFD format with Microsoft PowerPoint?
No. Microsoft PowerPoint does not provide built-in support for exporting presentations to OFD format. Developers usually rely on document processing libraries or third-party tools to perform this conversion programmatically.
2. Why convert PowerPoint to OFD instead of PDF?
While PDF is widely used, some government and industry platforms specifically require OFD because it is a national standard document format designed for secure and long-term document storage.
3. Does Spire.Presentation require Microsoft Office?
No. Spire.Presentation for C++ is a standalone library that does not require Microsoft PowerPoint to be installed.
4. Can I convert multiple PowerPoint files to OFD at once?
Yes. By looping through multiple files in a directory and applying the same conversion method, you can easily build a batch conversion tool in C++ with Spire.Presentation.
Wrap-Up
In this tutorial, we showed how to perform PowerPoint to OFD conversion in C++ using Spire.Presentation for C++. With just a few lines of code, developers can load PPT or PPTX files and export them to OFD while preserving the original layout.
We also covered scenarios such as converting an entire presentation, exporting a single slide, and performing batch PPT to OFD conversion, making it easier to integrate this feature into automated workflows or enterprise systems. Download Spire.Presentation for C++ to try these examples and start converting PowerPoint files to OFD in your C++ applications.
