
Image and Shapes (8)
Laying out a slide often means adjusting the rotation angle, position, and stacking order of shapes over and over: a tilted label adds movement, an element pushed into a corner unbalances the page, and when shapes overlap, a shape added later can hide content that should stand out. Dragging by hand is intuitive, but it is hard to reproduce the same angle and coordinates exactly, and batch changes take even longer.
Spire.Presentation for JavaScript controls a shape's orientation, position, and overlap through its rotation angle, top-left coordinates, and stacking order. The whole process runs locally in the browser through WebAssembly, requires no Office installation and no back-end service, and the presentation never leaves the user's device.
The article covers three features:
For installation and project configuration, see Integrating Spire.Presentation for JavaScript in a React Project. The examples below assume that Spire.Presentation for JavaScript is installed and the WebAssembly module has been initialized.
Rotate PowerPoint Shapes
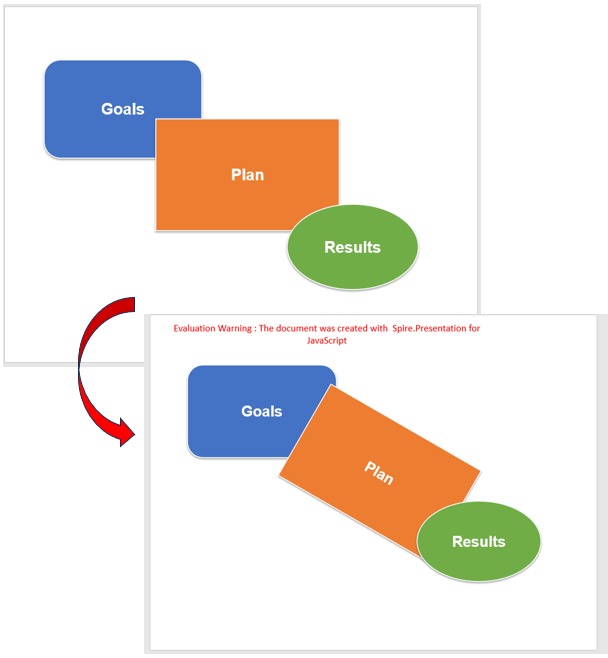
Rotating a shape is a common way to emphasize an element or add a sense of movement. Reproducing the same angle by hand is difficult, and adjusting shapes one by one takes time. The Rotation property sets the angle in degrees; positive values rotate clockwise, the shape turns around its own center, and any text inside the shape tilts with it.
| Code | Result |
|---|---|
Shapes.get_Item(index) |
Gets a shape on the slide by index |
shape.Rotation |
Sets the rotation angle in degrees; positive values rotate clockwise |
The steps are:
- Get the Spire.Presentation WASM module and confirm it is ready, then load the font file and the presentation into the VFS.
- Create a
Presentationobject, load the presentation withLoadFromFile(), and get the first slide withSlides.get_Item(0). - Get the shape to rotate with
Shapes.get_Item(index); the index starts at0. - Assign the angle in degrees to
shape.Rotation; positive values rotate clockwise. Rotation happens around the shape center, whileLeft,Top,Width, andHeightstay unchanged. - Call
SaveToFile()to save the presentation, callPresentation.Dispose()to release resources, then read the file from the VFS and trigger the download.
The code for rotating a PowerPoint shape is shown below:
function App() {
  const rotateShape = async () => {
    // Get the Spire.Presentation WASM module
    const pptModule = window.wasmModule?.spirepresentation;

    // Check that the module is ready
    if (!pptModule) {
      alert('Spire.Presentation is not ready yet');
      return;
    }

    // Load the font file and the presentation into the VFS
    await window.spire.FetchFileToVFS('ARIAL.TTF', '/Library/Fonts/', `${process.env.PUBLIC_URL}/font/`);
    const inputFileName = 'ShapeLayout.pptx';
    await window.spire.FetchFileToVFS(inputFileName, '', `${process.env.PUBLIC_URL}data/`);

    // Load the presentation and get the first slide
    const ppt = new pptModule.Presentation();
    ppt.LoadFromFile(inputFileName);
    const slide = ppt.Slides.get_Item(0);

    // Get the shape to rotate
    const shape = slide.Shapes.get_Item(1);

    // Rotate 30 degrees clockwise
    shape.Rotation = 30;

    // Save the presentation
    const outputFileName = 'RotateShape_result.pptx';
    ppt.SaveToFile({ file: outputFileName, fileFormat: pptModule.FileFormat.Pptx2013 });

    // Release the presentation
    ppt.Dispose();

    // Read the result file from the VFS and trigger the download
    const fileArray = window.dotnetRuntime.Module.FS.readFile(outputFileName);
    const blob = new Blob([fileArray], { type: 'application/vnd.openxmlformats-officedocument.presentationml.presentation' });
    const url = URL.createObjectURL(blob);
    const a = document.createElement('a');
    a.href = url;
    a.download = outputFileName;
    a.click();
    URL.revokeObjectURL(url);
  };

  return (
    <div style={{ textAlign: 'center', height: '300px' }}>
      <h1>Rotate Shape</h1>
      <button onClick={rotateShape}>
        Rotate
      </button>
    </div>
  );
}

export default App;
Presentation after rotating a shape clockwise:
Move PowerPoint Shapes
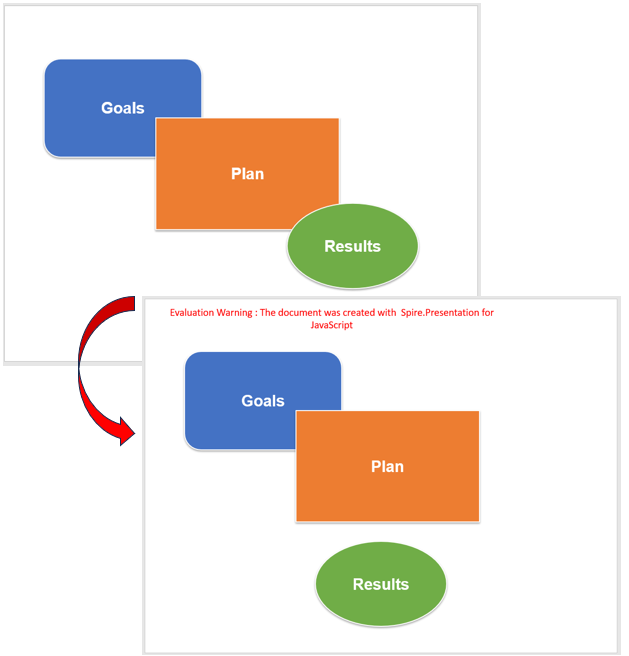
A shape's position is determined by its top-left coordinates in points, with the origin at the top-left corner of the slide. Compared with dragging, setting coordinates directly makes alignment exact and lets you compute centered or edge-aligned positions from the slide size, without drift caused by canvas zoom.
| Code | Result |
|---|---|
shape.Left |
Distance from the shape's left edge to the slide's left edge |
shape.Top |
Distance from the shape's top edge to the slide's top edge |
ppt.SlideSize.Size.Width |
Slide width |
ppt.SlideSize.Size.Height |
Slide height |
shape.Width / shape.Height |
Shape dimensions, used to compute the centered position |
The steps are:
- Get the Spire.Presentation WASM module and confirm it is ready, then load the font file and the presentation into the VFS.
- Create a
Presentationobject, load the presentation withLoadFromFile(), and get the first slide withSlides.get_Item(0). - Get the shape to move with
Shapes.get_Item(index). - Read the slide size with
ppt.SlideSize.Size.Widthandppt.SlideSize.Size.Height, then use the shape'sWidthandHeightto compute the horizontally centered position and the bottom margin. - Assign the results to
shape.Leftandshape.Top, save the presentation, release resources, and download the result.
The code for moving a PowerPoint shape is shown below:
function App() {
  const moveShape = async () => {
    // Get the Spire.Presentation WASM module
    const pptModule = window.wasmModule?.spirepresentation;

    // Check that the module is ready
    if (!pptModule) {
      alert('Spire.Presentation is not ready yet');
      return;
    }

    // Load the font file and the presentation into the VFS
    await window.spire.FetchFileToVFS('ARIAL.TTF', '/Library/Fonts/', `${process.env.PUBLIC_URL}/font/`);
    const inputFileName = 'ShapeLayout.pptx';
    await window.spire.FetchFileToVFS(inputFileName, '', `${process.env.PUBLIC_URL}data/`);

    // Load the presentation and get the first slide
    const ppt = new pptModule.Presentation();
    ppt.LoadFromFile(inputFileName);
    const slide = ppt.Slides.get_Item(0);

    // Get the shape to move
    const shape = slide.Shapes.get_Item(2);

    // Compute a horizontally centered position with a 40-point bottom margin from the slide size
    const margin = 40;
    shape.Left = (ppt.SlideSize.Size.Width - shape.Width) / 2;
    shape.Top = ppt.SlideSize.Size.Height - shape.Height - margin;

    // Save the presentation
    const outputFileName = 'MoveShape_result.pptx';
    ppt.SaveToFile({ file: outputFileName, fileFormat: pptModule.FileFormat.Pptx2013 });

    // Release the presentation
    ppt.Dispose();

    // Read the result file from the VFS and trigger the download
    const fileArray = window.dotnetRuntime.Module.FS.readFile(outputFileName);
    const blob = new Blob([fileArray], { type: 'application/vnd.openxmlformats-officedocument.presentationml.presentation' });
    const url = URL.createObjectURL(blob);
    const a = document.createElement('a');
    a.href = url;
    a.download = outputFileName;
    a.click();
    URL.revokeObjectURL(url);
  };

  return (
    <div style={{ textAlign: 'center', height: '300px' }}>
      <h1>Move Shape</h1>
      <button onClick={moveShape}>
        Move
      </button>
    </div>
  );
}

export default App;
Presentation after moving a shape to the bottom center:
Reorder PowerPoint Shapes
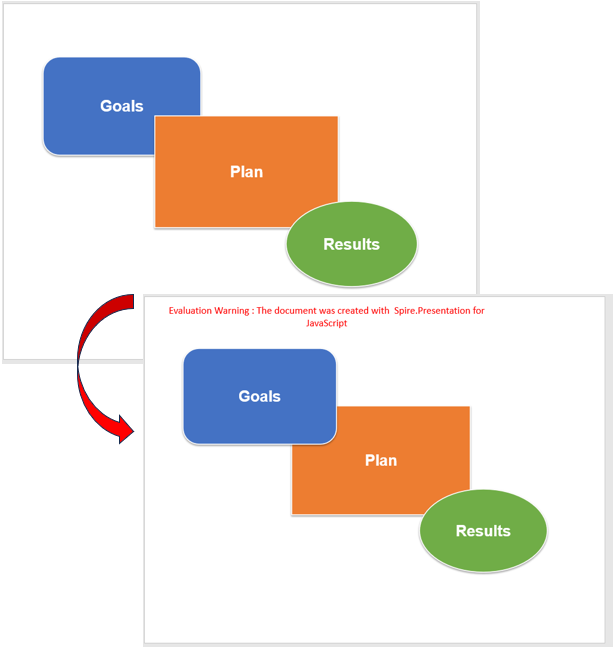
Shapes on a slide are stacked in the order they were added, so a later shape covers an earlier one. When elements overlap, content that should stand out can end up underneath, and a background block can hide text. SetShapeArrange() provides four adjustments—bring forward, send backward, bring to front, and send to back—for fine-grained control over the stacking order.
| Code | Result |
|---|---|
shape.SetShapeArrange(ShapeArrange.BringForward) |
Moves the shape one layer forward |
shape.SetShapeArrange(ShapeArrange.SendBackward) |
Moves the shape one layer backward |
shape.SetShapeArrange(ShapeArrange.BringToFront) |
Moves the shape to the front |
shape.SetShapeArrange(ShapeArrange.SendToBack) |
Moves the shape to the back |
The steps are:
- Get the Spire.Presentation WASM module and confirm it is ready, then load the font file and the presentation into the VFS.
- Create a
Presentationobject, load the presentation withLoadFromFile(), and get the first slide withSlides.get_Item(0). - Get the shape whose stacking order should change with
Shapes.get_Item(index), then callSetShapeArrange()with the requiredShapeArrangevalue. - Call
SaveToFile()to save the presentation, callPresentation.Dispose()to release resources, then read the file from the VFS and trigger the download.
The code for bringing a PowerPoint shape to the front is shown below:
function App() {
  const bringShapeToFront = async () => {
    // Get the Spire.Presentation WASM module
    const pptModule = window.wasmModule?.spirepresentation;

    // Check that the module is ready
    if (!pptModule) {
      alert('Spire.Presentation is not ready yet');
      return;
    }

    // Load the font file and the presentation into the VFS
    await window.spire.FetchFileToVFS('ARIAL.TTF', '/Library/Fonts/', `${process.env.PUBLIC_URL}/font/`);
    const inputFileName = 'ShapeLayout.pptx';
    await window.spire.FetchFileToVFS(inputFileName, '', `${process.env.PUBLIC_URL}data/`);

    // Load the presentation and get the first slide
    const ppt = new pptModule.Presentation();
    ppt.LoadFromFile(inputFileName);
    const slide = ppt.Slides.get_Item(0);

    // Get the shape whose stacking order should change and bring it to the front
    const shape = slide.Shapes.get_Item(0);
    shape.SetShapeArrange(pptModule.ShapeArrange.BringToFront);

    // Save the presentation
    const outputFileName = 'BringToFront_result.pptx';
    ppt.SaveToFile({ file: outputFileName, fileFormat: pptModule.FileFormat.Pptx2013 });

    // Release the presentation
    ppt.Dispose();

    // Read the result file from the VFS and trigger the download
    const fileArray = window.dotnetRuntime.Module.FS.readFile(outputFileName);
    const blob = new Blob([fileArray], { type: 'application/vnd.openxmlformats-officedocument.presentationml.presentation' });
    const url = URL.createObjectURL(blob);
    const a = document.createElement('a');
    a.href = url;
    a.download = outputFileName;
    a.click();
    URL.revokeObjectURL(url);
  };

  return (
    <div style={{ textAlign: 'center', height: '300px' }}>
      <h1>Adjust Stacking Order</h1>
      <button onClick={bringShapeToFront}>
        Bring to Front
      </button>
    </div>
  );
}

export default App;
Presentation after bringing a shape to the front:
FAQ
Does a shape's position change after rotation
Reason: Rotation only changes the rotation angle; it does not modify Left, Top, Width, or Height. The shape rotates around its center, so the rotated footprint can extend beyond the original rectangle.
Solution: When reserving space for a rotated shape, estimate margins from the rotated footprint rather than the original width and height.
What happens when the rotation angle exceeds 360 degrees
Reason: Rotation is normalized modulo 360. Setting 390 reads back as 30, setting 360 reads back as 0, and the normalized angle is what gets saved in the presentation.
Solution: Set the required angle in the 0–360 range directly; there is no need to add whole turns.
Does the text rotate with the shape
Reason: Rotation applies to the whole shape. Text inside the shape is part of it, so it tilts along with the shape.
Solution: Reserve space for the tilted text when laying out the slide. If the text must stay horizontal, do not put it inside the shape being rotated; use a separate text box and handle it independently from the graphic.
Get a Free License
If you wish to delete the evaluation message from the resulting documents, or to get rid of function limitations, please contact sales to obtain a valid 30-day temporary license.
Product intros and quarterly reports often need pictures on the slides. Adding one to a single page is a page-by-page job; to put a company logo on every slide, you have to edit the slide master. In desktop software, that means switching to master view and aligning the position by hand; running it on the server means uploading the file first.
This article adds images to PowerPoint directly in the browser with Spire.Presentation for JavaScript. A picture can go onto one slide, or onto the slide master so every slide using that master shows it. The whole process runs in the browser via WebAssembly, with no Office installation and no backend dependency, and the file always stays on the user's device.
This article covers two core tasks:
For installation and project setup, see Integrate Spire.Presentation for JavaScript in a React project. The examples below assume Spire.Presentation is installed and the WebAssembly module is initialized.
Insert a picture into a slide
Spire.Presentation for JavaScript provides Shapes.AppendEmbedImage() to add a picture directly to a slide.
The steps are:
- Get the Spire.Presentation WASM module and make sure it is ready.
- Load the scenery image and fonts, create a
Presentationobject as a new blank presentation. - Define the picture rectangle with
RectangleF.FromLTRB(); the four values are left, top, right, bottom. - Call
Shapes.AppendEmbedImage()on the blank slide that comes with the new presentation, passingShapeType.Rectangle, the image file name, and the rectangle; it returns the picture shape. - Save the result, read it from the VFS, and trigger a browser download.
The code to insert a picture into a slide is as follows:
function App() {
  const insertPicture = async () => {
    // Get the Spire.Presentation WASM module
    const pptModule = window.wasmModule?.spirepresentation;

    // Check that the module is ready
    if (!pptModule) {
      alert('Spire.Presentation is not ready yet');
      return;
    }

    // Load the scenery image and fonts
    await window.spire.FetchFileToVFS('Scenery.png', "", `${process.env.PUBLIC_URL}/data/`);
    await window.spire.FetchFileToVFS('ARIALUNI.TTF', "/Library/Fonts/", `${process.env.PUBLIC_URL}/font/`);

    // Create a new blank presentation (it comes with one blank slide) and set it to 16:9
    const ppt = new pptModule.Presentation();
    ppt.SlideSize.Type = pptModule.SlideSizeType.Screen16x9;

    // Rectangle is in points, origin at the top-left of the slide
    const rect = pptModule.RectangleF.FromLTRB(300, 135, 660, 405);

    // Append a picture shape to the new blank slide
    const slide = ppt.Slides.get_Item(0);
    const picture = slide.Shapes.AppendEmbedImage({
      shapeType: pptModule.ShapeType.Rectangle,
      fileName: 'Scenery.png',
      rectangle: rect,
    });

    // Remove the border that comes with the picture shape
    picture.Line.FillType = pptModule.FillFormatType.None;

    // Save the result file
    const outputFileName = 'Inserted-Image.pptx';
    ppt.SaveToFile({ file: outputFileName, fileFormat: pptModule.FileFormat.Pptx2013 });
    ppt.Dispose();

    // Read the generated file from the VFS and trigger a download
    const fileArray = window.dotnetRuntime.Module.FS.readFile(outputFileName);
    const blob = new Blob([fileArray], { type: 'application/vnd.openxmlformats-officedocument.presentationml.presentation' });
    const url = URL.createObjectURL(blob);
    const a = document.createElement('a');
    a.href = url;
    a.download = outputFileName;
    a.click();
    URL.revokeObjectURL(url);
  };

  return (
    <div style={{ textAlign: 'center', height: '300px' }}>
      <h1>Insert a picture into a slide</h1>
      <button id="btn-1" onClick={insertPicture}>
        Insert picture
      </button>
    </div>
  );
}

export default App;
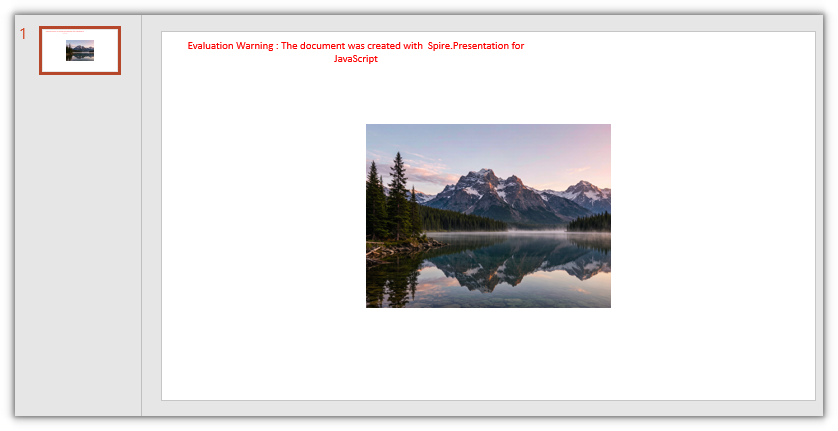
The picture now sits in the center of the slide:
Add an image to the slide master
Slide masters are managed by Presentation.Masters. Adding a picture to the master with Shapes.AppendEmbedImage() makes every slide using that master show it.
The steps are:
- Get the Spire.Presentation WASM module and make sure it is ready.
- Load the logo image and fonts, create a
Presentationobject as a new blank presentation. - Get the default slide master with
Presentation.Masters.get_Item(0). - Define the picture area with
RectangleF.FromLTRB(), callAppendEmbedImage()on the master'sShapes, and remove the picture border. - Call
Slides.Append()to add a slide, save the result, read it from the VFS, and trigger a browser download.
The code to add an image to the slide master is as follows:
function App() {
  const addImageToSlideMaster = async () => {
    // Get the Spire.Presentation WASM module
    const pptModule = window.wasmModule?.spirepresentation;

    // Check that the module is ready
    if (!pptModule) {
      alert('Spire.Presentation is not ready yet');
      return;
    }

    // Load the logo image and fonts
    await window.spire.FetchFileToVFS('Logo.png', "", `${process.env.PUBLIC_URL}/data/`);
    await window.spire.FetchFileToVFS('ARIALUNI.TTF', "/Library/Fonts/", `${process.env.PUBLIC_URL}/font/`);

    // Create a new blank presentation and set it to 16:9
    const ppt = new pptModule.Presentation();
    ppt.SlideSize.Type = pptModule.SlideSizeType.Screen16x9;

    // Get the default slide master
    const master = ppt.Masters.get_Item(0);

    // Append a picture shape to the master; rectangle is in points
    const rect = pptModule.RectangleF.FromLTRB(40, 40, 130, 130);
    const picture = master.Shapes.AppendEmbedImage({
      shapeType: pptModule.ShapeType.Rectangle,
      fileName: 'Logo.png',
      rectangle: rect,
    });

    // Remove the border that comes with the picture shape
    picture.Line.FillFormat.FillType = pptModule.FillFormatType.None;

    // Add a slide to see the master image in effect
    ppt.Slides.Append();

    // Save the result file
    const outputFileName = 'Master-Image.pptx';
    ppt.SaveToFile({ file: outputFileName, fileFormat: pptModule.FileFormat.Pptx2013 });
    ppt.Dispose();

    // Read the generated file from the VFS and trigger a download
    const fileArray = window.dotnetRuntime.Module.FS.readFile(outputFileName);
    const blob = new Blob([fileArray], { type: 'application/vnd.openxmlformats-officedocument.presentationml.presentation' });
    const url = URL.createObjectURL(blob);
    const a = document.createElement('a');
    a.href = url;
    a.download = outputFileName;
    a.click();
    URL.revokeObjectURL(url);
  };

  return (
    <div style={{ textAlign: 'center', height: '300px' }}>
      <h1>Add an image to the slide master</h1>
      <button id="btn-2" onClick={addImageToSlideMaster}>
        Add image to master
      </button>
    </div>
  );
}

export default App;
The master image now appears on the newly added slide:
FAQ
Why does the inserted picture appear somewhere else on the slide
The four values of RectangleF.FromLTRB() are in points, with the origin at the top-left of the slide, and they are left, top, right, bottom — not width and height. The picture's top-left corner lands at (left, top), and its size is right - left by bottom - top. Convert coordinates against the slide size first; a 16:9 page is 960 × 540 points.
What is the difference between a master image and a regular picture
A picture on the master is part of the layout: every slide using that master shows it, its position is fixed, and it cannot be selected or deleted on an individual slide. A regular picture belongs only to the slide it was inserted on and can be moved or removed there.
Why is the master image hidden behind slide content
Master pictures render below slide content, so text and shapes on the slide cover them. Place the master image in an empty area of the page, or adjust the layout of the slide content.
Can I add more than one image at a time
Yes. Call AppendEmbedImage() once per image, on a slide or a master. When adding several to the same slide or master, pass a different rectangle each time so they do not overlap. The output is still one PPTX file, saved once.
Get a Free License
If you want to remove the evaluation message from the result documents or lift feature limits, contact sales for a temporary license valid for 30 days.
Product shots, icons, and screenshots inside a presentation often need to be reused on their own: as web assets, for archiving an old project, or for bulk-exporting images while migrating dozens of decks to a new template. Right-clicking and saving each one by hand is slow and easy to miss. Running a script on the server means uploading the file first.
This article extracts images from PowerPoint directly in the browser with Spire.Presentation for JavaScript. You can export every image in the presentation at once, or extract only the images on a specific slide. The whole process runs in the browser via WebAssembly, with no Office installation and no backend dependency, and the file always stays on the user's device.
This article covers two core tasks:
For installation and project setup, see Integrate Spire.Presentation for JavaScript in a React project. The examples below assume Spire.Presentation is installed and the WebAssembly module is initialized.
Extract all images from a PowerPoint presentation
Spire.Presentation for JavaScript provides the Presentation.Images property to access the image resources stored in a presentation.
The steps are:
- Get the Spire.Presentation WASM module and make sure it is ready.
- Load the sample presentation and fonts, create a
Presentationobject, and open the file. - Get the image collection with
Presentation.Imagesand accessget_Item(i)for each entry up toCount. - Read the image stream with
IImageData.Imageand callSave()to save it as a PNG. - Read each image from the VFS, turn it into a Blob, and trigger a browser download.
The code to extract all images is as follows:
function App() {
  const downloadFile = (blob, fileName) => {
    const url = URL.createObjectURL(blob);
    const a = document.createElement('a');
    a.href = url;
    a.download = fileName;
    a.click();
    URL.revokeObjectURL(url);
  };

  const extractAllImages = async () => {
    // Get the Spire.Presentation WASM module
    const pptModule = window.wasmModule?.spirepresentation;

    // Check that the module is ready
    if (!pptModule) {
      alert('Spire.Presentation is not ready yet');
      return;
    }

    // Load the sample presentation and fonts
    await window.spire.FetchFileToVFS('Introduce.pptx', '', `${process.env.PUBLIC_URL}/data/`);
    await window.spire.FetchFileToVFS('ARIALUNI.TTF', '/Library/Fonts/', `${process.env.PUBLIC_URL}/font/`);

    // Create a Presentation instance and load the presentation
    const ppt = new pptModule.Presentation();
    ppt.LoadFromFile('Introduce.pptx');

    // Walk the image collection and save and download each image
    for (let i = 0; i < ppt.Images.Count; i++) {
      const image = ppt.Images.get_Item(i).Image;
      const imageName = `Image_${i}.png`;

      // Write the image to the virtual file system
      image.Save(imageName);
      const fileArray = window.dotnetRuntime.Module.FS.readFile(imageName);
      const blob = new Blob([fileArray], { type: 'image/png' });

      // Leave a gap between consecutive downloads so the browser does not block them
      await new Promise((resolve) => setTimeout(resolve, 300));
      downloadFile(blob, imageName);

      image.Dispose();
    }

    ppt.Dispose();
  };

  return (
    <div style={{ textAlign: 'center', height: '300px' }}>
      <h1>Extract all images from PowerPoint</h1>
      <button id="btn-1" onClick={extractAllImages}>
        Extract all images
      </button>
    </div>
  );
}

export default App;
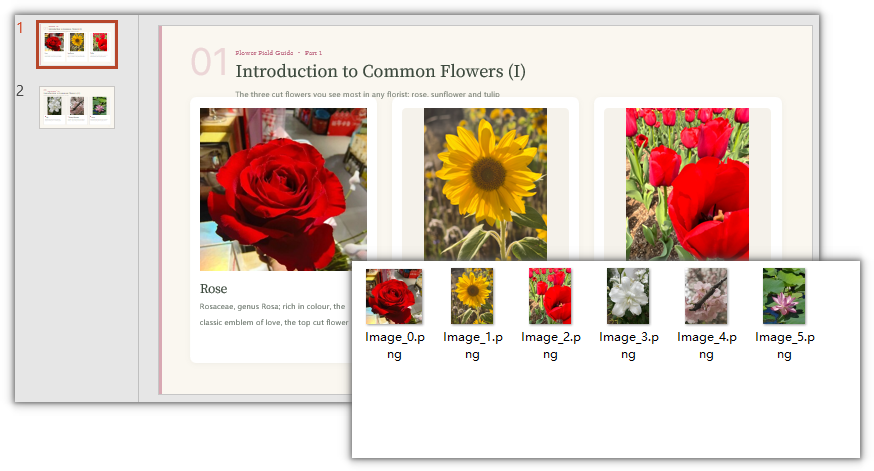
All the images that were downloaded:
Extract images from a specific slide
When you only need the images on one slide, get that slide with Slides.get_Item(index) and then walk its shapes to pull out the images.
The steps are:
- Get the Spire.Presentation WASM module and make sure it is ready.
- Load the sample presentation and fonts, create a
Presentationobject, and open the file. - Get the second slide with
Slides.get_Item(1)and walk itsShapescollection. - Filter for picture shapes with
instanceof SlidePicture, read the image stream fromPictureFill.Picture.EmbedImage.Image, and callSave(). - Read each image from the VFS, turn it into a Blob, and trigger a browser download.
The code to extract images from a specific slide is as follows:
function App() {
  const downloadFile = (blob, fileName) => {
    const url = URL.createObjectURL(blob);
    const a = document.createElement('a');
    a.href = url;
    a.download = fileName;
    a.click();
    URL.revokeObjectURL(url);
  };

  const extractSlideImages = async () => {
    // Get the Spire.Presentation WASM module
    const pptModule = window.wasmModule?.spirepresentation;

    // Check that the module is ready
    if (!pptModule) {
      alert('Spire.Presentation is not ready yet');
      return;
    }

    // Load the sample presentation and fonts
    await window.spire.FetchFileToVFS('Introduce.pptx', '', `${process.env.PUBLIC_URL}/data/`);
    await window.spire.FetchFileToVFS('ARIALUNI.TTF', '/Library/Fonts/', `${process.env.PUBLIC_URL}/font/`);

    // Create a Presentation instance and load the presentation
    const ppt = new pptModule.Presentation();
    ppt.LoadFromFile('Introduce.pptx');

    // Get the second slide
    const slide = ppt.Slides.get_Item(1);
    let count = 0;

    // Walk every shape on the slide
    for (let j = 0; j < slide.Shapes.Count; j++) {
      const shape = slide.Shapes.get_Item(j);

      // Handle picture shapes only
      if (shape instanceof pptModule.SlidePicture) {
        const image = shape.PictureFill.Picture.EmbedImage.Image;
        const imageName = `Slide-Image_${count}.png`;

        // Write the image to the virtual file system
        image.Save(imageName);
        const fileArray = window.dotnetRuntime.Module.FS.readFile(imageName);
        const blob = new Blob([fileArray], { type: 'image/png' });

        // Leave a gap between consecutive downloads so the browser does not block them
        await new Promise((resolve) => setTimeout(resolve, 300));
        downloadFile(blob, imageName);

        image.Dispose();
        count++;
      }
    }

    ppt.Dispose();
  };

  return (
    <div style={{ textAlign: 'center', height: '300px' }}>
      <h1>Extract images from a specific slide</h1>
      <button id="btn-2" onClick={extractSlideImages}>
        Extract images from the second slide
      </button>
    </div>
  );
}

export default App;
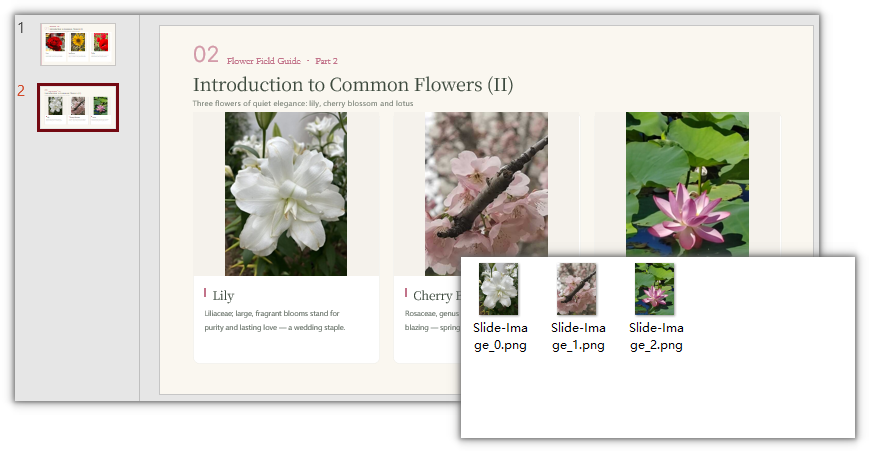
Only the images on the second slide were downloaded:
FAQ
What is the difference between Presentation.Images and walking slide shapes for images
Presentation.Images is the image resource collection of the whole document, suited to exporting everything at once; walking Shapes filters by slide and handles only picture shapes, so its scope is narrower. Both return the original embedded images, not the rendered slide.
Why are some images on a slide not extracted
The second example only recognizes SlidePicture shapes. Images inside a background, table, or chart, or images referenced through external links, are outside its scope.
What if triggering several downloads at once does nothing
Browsers block consecutive downloads from the same page. The code already leaves a 300 ms gap between downloads; if downloads are still blocked, allow multiple downloads for the site in the address bar.
Why do the extracted images differ in size from what is shown on the slide
The extracted images are the originals embedded in the document; the display size, cropping, and scaling on the slide do not affect them. To match what the slide shows, crop by shape first or export by rendering the slide instead.
Get a Free License
If you want to remove the evaluation message from the result documents or lift feature limits, contact sales for a temporary license valid for 30 days.
When preparing training material, product handbooks or web illustrations, a single graphic from a slide often needs to be reused on its own. A full-slide screenshot brings the title, the background and every other element along with it, and cropping by hand rarely produces a clean edge. Rendering each shape as a separate image keeps only the shape itself and makes later layout and composition much easier.
This article uses Spire.Presentation for JavaScript to save PowerPoint shapes as images in the browser. PNG keeps the shape's picture and its transparent areas, while SVG records lines and text as vectors that stay sharp at any scale. The whole process runs locally on the user's device through WebAssembly, requires no Office installation and no back-end service, and the presentation never leaves the browser.
The article covers three features:
- Export All Shapes on a Slide as PNG Images
- Export a Specific Shape as an SVG Image
- Export a Group Shape as a Single Image
For installation and project configuration, see Integrating Spire.Presentation for JavaScript in a React Project. The examples below assume that Spire.Presentation for JavaScript is installed and the WebAssembly module has been initialized.
Export All Shapes on a Slide as PNG Images
A slide usually combines several shapes: rectangles, charts, pictures and other elements. When each one is needed separately, taking screenshots one by one is slow and produces images of inconsistent size. Iterating over the shape collection renders every shape into its own PNG image. The image contains only the shape, transparent areas stay transparent, and the result can be placed into other documents or web pages.
| Code | Result |
|---|---|
slide.Shapes.Count |
The total number of shapes on the current slide |
slide.Shapes.get_Item(i) |
The shape at index i |
shape.SaveAsImage() |
Renders the shape to an image stream |
image.Save(fileName) |
Saves the image stream as a PNG file |
image.Dispose() |
Releases the resources held by the image stream |
The steps are:
- Get the Spire.Presentation WASM module and confirm it is ready, then load the font file and the presentation into the VFS.
- Create a
Presentationobject, load the presentation withLoadFromFile(), and get the first slide withSlides.get_Item(0). - Loop from
0toShapes.Count - 1and get each shape withShapes.get_Item(i). - Call
SaveAsImage()on each shape to get an image stream, write it to a PNG file withimage.Save(), and release the stream withDispose(). - Call
Presentation.Dispose(), then read each image from the VFS and trigger its download.
The code for exporting all shapes on a slide as PNG images is shown below:
function App() {
  const exportAllShapesToPng = async () => {
    // Get the Spire.Presentation WASM module
    const pptModule = window.wasmModule?.spirepresentation;

    // Check that the module is ready
    if (!pptModule) {
      alert('Spire.Presentation is not ready yet');
      return;
    }

    // Load the font and the presentation into the VFS
    await window.spire.FetchFileToVFS('ARIAL.TTF', '/Library/Fonts/', `${process.env.PUBLIC_URL}/font/`);
    const inputFileName = 'Shapes.pptx';
    await window.spire.FetchFileToVFS(inputFileName, '', `${process.env.PUBLIC_URL}data/`);

    // Load the presentation and get the first slide
    const ppt = new pptModule.Presentation();
    ppt.LoadFromFile(inputFileName);
    const slide = ppt.Slides.get_Item(0);

    // Save every shape as a PNG image
    const outputNames = [];
    for (let i = 0; i < slide.Shapes.Count; i++) {
      const shape = slide.Shapes.get_Item(i);
      const image = shape.SaveAsImage();
      const outputFileName = `Shape-${i + 1}.png`;
      image.Save(outputFileName);
      image.Dispose();
      outputNames.push(outputFileName);
    }

    ppt.Dispose();

    // Read each image from the VFS and trigger the downloads
    const fsModule = window.dotnetRuntime.Module.FS;
    for (const outputFileName of outputNames) {
      const fileArray = fsModule.readFile(outputFileName);
      const blob = new Blob([fileArray], { type: 'image/png' });
      const url = URL.createObjectURL(blob);
      const a = document.createElement('a');
      a.href = url;
      a.download = outputFileName;
      a.click();
      URL.revokeObjectURL(url);
    }
  };

  return (
    <div style={{ textAlign: 'center', height: '300px' }}>
      <h1>Export Shapes as Images</h1>
      <button onClick={exportAllShapesToPng}>
        Export All Shapes
      </button>
    </div>
  );
}

export default App;
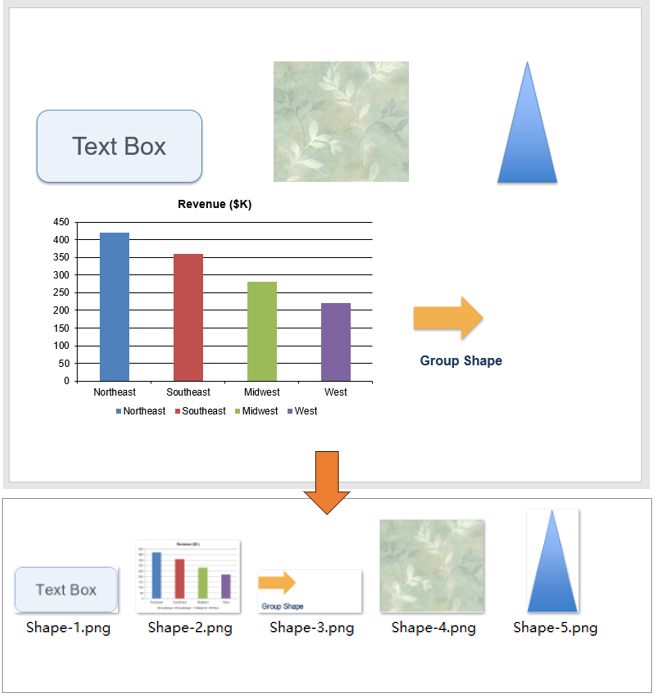
PNG images after exporting each shape on the slide:
Export a Specific Shape as an SVG Image
PNG is made of pixels, so its edges soften when enlarged, especially for text and charts at projection or print size. SVG describes a picture with paths and text, stays sharp at any scale, and is easier to reference from a web page or edit further. SaveAsSvg() exports a single shape as a standalone SVG document and returns the file content as bytes, which can be written to the virtual file system and downloaded.
| Code | Result |
|---|---|
shape.SaveAsSvg() |
Exports the shape as SVG and returns the file content as bytes |
FS.writeFile(fileName, bytes) |
Writes the bytes to a file in the VFS |
The steps are:
- Get the Spire.Presentation WASM module and confirm it is ready, then load the font file and the presentation into the VFS.
- Create a
Presentationobject, load the presentation withLoadFromFile(), and get the first slide withSlides.get_Item(0). - Get the target shape with
Shapes.get_Item(index); the index starts at0. - Call
shape.SaveAsSvg(); the method returns the SVG file content as aUint8Array. - Write the bytes to a
.svgfile withFS.writeFile(), callPresentation.Dispose(), then read the file from the VFS and trigger its download.
The code for exporting a specific shape as an SVG image is shown below:
function App() {
  const exportShapeToSvg = async () => {
    // Get the Spire.Presentation WASM module
    const pptModule = window.wasmModule?.spirepresentation;

    // Check that the module is ready
    if (!pptModule) {
      alert('Spire.Presentation is not ready yet');
      return;
    }

    // Load the font and the presentation into the VFS
    await window.spire.FetchFileToVFS('ARIAL.TTF', '/Library/Fonts/', `${process.env.PUBLIC_URL}/font/`);
    const inputFileName = 'Shapes.pptx';
    await window.spire.FetchFileToVFS(inputFileName, '', `${process.env.PUBLIC_URL}data/`);

    // Load the presentation and get the first slide
    const ppt = new pptModule.Presentation();
    ppt.LoadFromFile(inputFileName);
    const slide = ppt.Slides.get_Item(0);

    // Get the shape to export by its index
    const shape = slide.Shapes.get_Item(1);

    // Export the shape as SVG; the method returns the SVG file content
    const svgBytes = shape.SaveAsSvg();
    const outputFileName = 'Chart.svg';
    window.dotnetRuntime.Module.FS.writeFile(outputFileName, svgBytes);

    ppt.Dispose();

    // Read the SVG from the VFS and trigger the download
    const fileArray = window.dotnetRuntime.Module.FS.readFile(outputFileName);
    const blob = new Blob([fileArray], { type: 'image/svg+xml' });
    const url = URL.createObjectURL(blob);
    const a = document.createElement('a');
    a.href = url;
    a.download = outputFileName;
    a.click();
    URL.revokeObjectURL(url);
  };

  return (
    <div style={{ textAlign: 'center', height: '300px' }}>
      <h1>Export Shapes as Images</h1>
      <button onClick={exportShapeToSvg}>
        Export as SVG
      </button>
    </div>
  );
}

export default App;
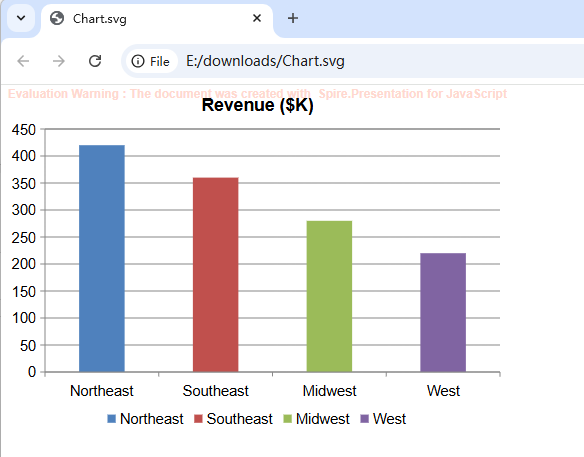
The SVG image after exporting the specific shape:
Export a Group Shape as a Single Image
A group shape binds multiple elements, such as an arrow and a caption, into one unit, so they move and resize together and keep their relative positions. Exporting a group renders all of its elements into a single image, which is convenient for lifting one step of a process or a callout from the page. If only one element is needed, a child shape can also be taken out of the group and exported on its own.
| Code | Result |
|---|---|
group.SaveAsImage() |
Renders the whole group as one image |
group.Shapes.Count |
The number of child shapes in the group |
group.Shapes.get_Item(i) |
The child shape at index i in the group |
child.SaveAsImage() |
Renders a single child shape as an image |
The steps are:
- Get the Spire.Presentation WASM module and confirm it is ready, then load the font file and the presentation into the VFS.
- Create a
Presentationobject, load the presentation withLoadFromFile(), and get the first slide withSlides.get_Item(0). - Get the group shape with
Shapes.get_Item(index);group.Shapes.Countgives the number of child shapes it contains. - Call
SaveAsImage()on the group to render the whole group as one PNG image and save it, then callDispose(). - Take a child out with
group.Shapes.get_Item(0)and export it on its own withSaveAsImage(). - Call
Presentation.Dispose(), then read both images from the VFS and trigger their downloads.
The code for exporting a group shape as a single image is shown below:
function App() {
  const exportGroupShapeToPng = async () => {
    // Get the Spire.Presentation WASM module
    const pptModule = window.wasmModule?.spirepresentation;

    // Check that the module is ready
    if (!pptModule) {
      alert('Spire.Presentation is not ready yet');
      return;
    }

    // Load the font and the presentation into the VFS
    await window.spire.FetchFileToVFS('ARIAL.TTF', '/Library/Fonts/', `${process.env.PUBLIC_URL}/font/`);
    const inputFileName = 'Shapes.pptx';
    await window.spire.FetchFileToVFS(inputFileName, '', `${process.env.PUBLIC_URL}data/`);

    // Load the presentation and get the first slide
    const ppt = new pptModule.Presentation();
    ppt.LoadFromFile(inputFileName);
    const slide = ppt.Slides.get_Item(0);

    // Get the group shape by its index and export it as one image
    const group = slide.Shapes.get_Item(2);
    const groupImage = group.SaveAsImage();
    groupImage.Save('Group.png');
    groupImage.Dispose();

    // A single child of the group can also be exported on its own
    const child = group.Shapes.get_Item(0);
    const childImage = child.SaveAsImage();
    childImage.Save('GroupChild.png');
    childImage.Dispose();

    ppt.Dispose();

    // Read the images from the VFS and trigger the downloads
    const fsModule = window.dotnetRuntime.Module.FS;
    for (const outputFileName of ['Group.png', 'GroupChild.png']) {
      const fileArray = fsModule.readFile(outputFileName);
      const blob = new Blob([fileArray], { type: 'image/png' });
      const url = URL.createObjectURL(blob);
      const a = document.createElement('a');
      a.href = url;
      a.download = outputFileName;
      a.click();
      URL.revokeObjectURL(url);
    }
  };

  return (
    <div style={{ textAlign: 'center', height: '300px' }}>
      <h1>Export Shapes as Images</h1>
      <button onClick={exportGroupShapeToPng}>
        Export Group Shape
      </button>
    </div>
  );
}

export default App;
PNG images after exporting the group shape and one of its children:

FAQ
Why does the text in an exported image show as boxes
Reason: The font file has to be in the VFS before the presentation is created and loaded. SaveAsImage() lays out the text when the presentation is opened; adding the font afterwards does not re-layout shapes that are already loaded.
Solution: Call FetchFileToVFS() for the font used in the presentation before LoadFromFile().
Are hidden shapes exported as well
Reason: IsHidden only controls whether a shape appears on the slide; it does not stop SaveAsImage().
Solution: If hidden shapes should be left out of the export, check IsHidden while iterating and skip them:
for (let i = 0; i < slide.Shapes.Count; i++) {
  const shape = slide.Shapes.get_Item(i);

  // Skip hidden shapes
  if (shape.IsHidden) continue;

  const image = shape.SaveAsImage();
  image.Save(`Shape-${i + 1}.png`);
  image.Dispose();
}
What is the difference between SaveAsSvg() and SaveAsSvgInSlide()
Reason: The two methods use different canvases. SaveAsSvg() crops to the shape's own bounds, so the SVG is only as large as the shape; SaveAsSvgInSlide() keeps the full slide canvas and places the shape at its position on the slide.
Solution: Use SaveAsSvg() for an isolated graphic, and SaveAsSvgInSlide() when the position relative to the page matters, for example when overlaying the result on a slide background. Both return SVG bytes and are written to the VFS in the same way.
Get a Free License
If you wish to delete the evaluation message from the resulting documents, or to get rid of function limitations, please contact sales to obtain a valid 30-day temporary license.
Set, Get and Find Alternative Text of PowerPoint Shapes in React
2026-11-12 07:39:33 Written by liu taliaA shape on a slide carries no description of its own: when a screen reader reaches a rectangle or an oval, it can only announce the shape type, which says nothing about what the shape represents. Adding alternative text gives every shape a short caption, so the reading experience is clearer and automation scripts can identify a shape by its text. Filling in and checking these captions by hand becomes slow and error-prone as a deck grows.
This article uses Spire.Presentation for JavaScript to set and get the alternative text of PowerPoint shapes in the browser. The whole process runs locally on the user's device through WebAssembly, requires no Office installation and no back-end service, and the presentation never leaves the browser.
The article covers four features:
- Set Alternative Text for PowerPoint Shapes
- Get Alternative Text from PowerPoint Shapes
- Find PowerPoint Shapes by Alternative Text
- Read Alternative Text Inside Group Shapes
For installation and project configuration, see Integrating Spire.Presentation for JavaScript in a React Project. The examples below assume that Spire.Presentation for JavaScript is installed and the WebAssembly module has been initialized.
Set Alternative Text for PowerPoint Shapes
A shape carries visual information only, and a screen reader cannot infer its meaning from the shape type. Setting alternative text attaches a description to the shape, so it can explain what the shape stands for when read aloud; the same text also serves as a stable identifier for scripts that need to locate a shape by content. Besides the description, a shape can carry a short title, and the two together make up its accessible description.
| Syntax | Result |
|---|---|
slide.Shapes.Count |
The total number of shapes on the current slide |
slide.Shapes.get_Item(i) |
Gets a shape by index |
shape.AlternativeText = '…' |
Sets the alternative text of a shape |
shape.AlternativeTitle = '…' |
Sets the alternative title of a shape |
The steps are:
- Get the Spire.Presentation WASM module and make sure it is ready, then load the font file and the presentation into the VFS.
- Create a
Presentationobject, load the presentation withLoadFromFile(), and get the first slide withSlides.get_Item(0). - Loop from 0 to
Shapes.Countand get each shape on the slide withShapes.get_Item(i). - Assign the prepared descriptions and titles to the
AlternativeTextandAlternativeTitleproperties of the shapes in turn. - Save the result with
Presentation.SaveToFile()and release the presentation withDispose(). - Read the result file from the VFS and trigger the browser download.
The code for setting alternative text for PowerPoint shapes is as follows:
function App() {
  const setAlternativeText = async () => {
    // Get the Spire.Presentation WASM module
    const pptModule = window.wasmModule?.spirepresentation;

    // Check whether the module is ready
    if (!pptModule) {
      alert('Spire.Presentation is not ready yet');
      return;
    }

    // Load the font and the presentation into the VFS
    await window.spire.FetchFileToVFS('ARIAL.TTF', '/Library/Fonts/', `${process.env.PUBLIC_URL}/font/`);
    const inputFileName = 'AlternativeText.pptx';
    await window.spire.FetchFileToVFS(inputFileName, '', `${process.env.PUBLIC_URL}data/`);

    // Load the presentation and get the first slide
    const ppt = new pptModule.Presentation();
    ppt.LoadFromFile(inputFileName);
    const slide = ppt.Slides.get_Item(0);

    // Set the alternative text and its title for the four process shapes in turn
    const labels = ['Step 1: Plan', 'Step 2: Do', 'Step 3: Check', 'Step 4: Act'];
    const titles = ['Plan progress', 'Execution', 'Check results', 'Improvement'];
    for (let i = 0; i < slide.Shapes.Count; i++) {
      const shape = slide.Shapes.get_Item(i);
      if (i < labels.length) {
        shape.AlternativeText = labels[i];
        shape.AlternativeTitle = titles[i];
      }
    }

    // Save the result file
    const outputFileName = 'SetAlternativeText.pptx';
    ppt.SaveToFile({ file: outputFileName, fileFormat: pptModule.FileFormat.Pptx2013 });
    ppt.Dispose();

    // Read the generated file from the VFS and trigger the download
    const fileArray = window.dotnetRuntime.Module.FS.readFile(outputFileName);
    const blob = new Blob([fileArray], { type: 'application/vnd.openxmlformats-officedocument.presentationml.presentation' });
    const url = URL.createObjectURL(blob);
    const a = document.createElement('a');
    a.href = url;
    a.download = outputFileName;
    a.click();
    URL.revokeObjectURL(url);
  };

  return (
    <div style={{ textAlign: 'center', height: '300px' }}>
      <h1>Alternative Text</h1>
      <button onClick={setAlternativeText}>
        Set Alternative Text
      </button>
    </div>
  );
}

export default App;
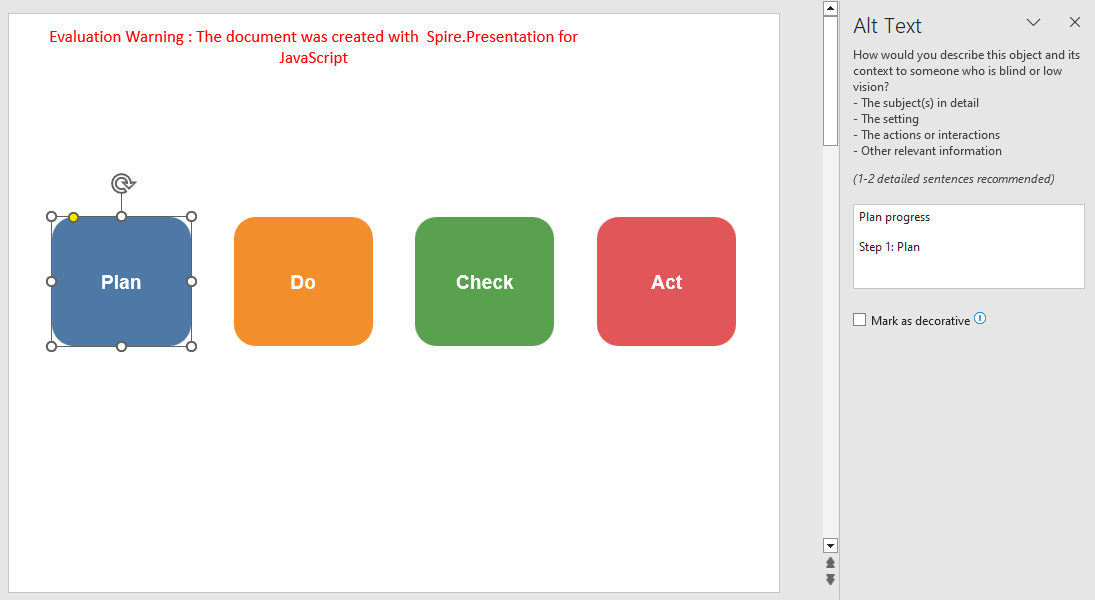
The presentation after setting alternative text for the shapes on the slide:
Get Alternative Text from PowerPoint Shapes
Alternative text can be reviewed one shape at a time, or read in bulk by a script. Looping over the shape collection and gathering the descriptions in one place makes it easy to see which shapes already have text and which are still blank, so gaps can be filled before publishing.
| Syntax | Result |
|---|---|
shape.AlternativeText |
Reads the alternative text of a shape; empty when none is set |
shape.AlternativeTitle |
Reads the alternative title of a shape; empty when none is set |
new TextEncoder().encode(text) |
Encodes the text into bytes for writing |
window.dotnetRuntime.Module.FS.writeFile(fileName, bytes) |
Writes the bytes to a file in the VFS |
The steps are:
- Get the Spire.Presentation WASM module and make sure it is ready, then load the presentation into the VFS.
- Create a
Presentationobject, load the presentation withLoadFromFile(), and get the second slide that holds the shapes withSlides.get_Item(1). - Loop over
Shapes.Count, get each shape withShapes.get_Item(i), read itsAlternativeTextandAlternativeTitle, and collect the non-empty values. - Join the collected texts by line breaks, encode them with
TextEncoder, and write them toGetAlternativeText.txtwithFS.writeFile(). - Release the presentation with
Dispose(), then read the text file from the VFS and trigger the download.
The code for getting alternative text from PowerPoint shapes is as follows:
function App() {
  const getAlternativeText = async () => {
    // Get the Spire.Presentation WASM module
    const pptModule = window.wasmModule?.spirepresentation;

    if (!pptModule) {
      alert('Spire.Presentation is not ready yet');
      return;
    }

    const inputFileName = 'AlternativeText.pptx';
    await window.spire.FetchFileToVFS(inputFileName, '', `${process.env.PUBLIC_URL}data/`);

    // Load the presentation and get the second slide
    const ppt = new pptModule.Presentation();
    ppt.LoadFromFile(inputFileName);
    const slide = ppt.Slides.get_Item(1);

    // Read the alternative text of each shape, skipping shapes without one
    const lines = [];
    for (let i = 0; i < slide.Shapes.Count; i++) {
      const shape = slide.Shapes.get_Item(i);
      if (shape.AlternativeText) {
        const title = shape.AlternativeTitle ? ` (Title: ${shape.AlternativeTitle})` : '';
        lines.push(`Shape ${i + 1}: ${shape.AlternativeText}${title}`);
      }
    }

    // Write the result into a text file
    const outputFileName = 'GetAlternativeText.txt';
    window.dotnetRuntime.Module.FS.writeFile(outputFileName, new TextEncoder().encode(lines.join('\n')));
    ppt.Dispose();

    // Read the generated text file from the VFS and trigger the download
    const fileArray = window.dotnetRuntime.Module.FS.readFile(outputFileName);
    const blob = new Blob([fileArray], { type: 'text/plain;charset=utf-8' });
    const url = URL.createObjectURL(blob);
    const a = document.createElement('a');
    a.href = url;
    a.download = outputFileName;
    a.click();
    URL.revokeObjectURL(url);
  };

  return (
    <div style={{ textAlign: 'center', height: '300px' }}>
      <h1>Alternative Text</h1>
      <button onClick={getAlternativeText}>
        Get Alternative Text
      </button>
    </div>
  );
}

export default App;
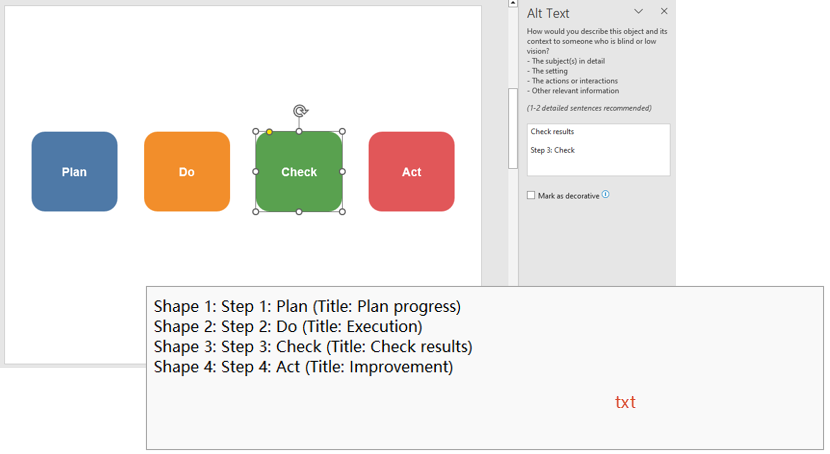
The text file generated after reading the alternative text of each shape:
Find PowerPoint Shapes by Alternative Text
The order of shapes in a collection changes as shapes are added or removed, so locating one by index is not reliable. When a shape has alternative text, the text can be used as the search key: look up the shape in the collection first, then process it, for example by changing its fill and outline to flag a position that needs review.
| Syntax | Result |
|---|---|
slide.Shapes.get_Item(i) |
Gets a shape by index |
shape.AlternativeText === target |
Checks whether a shape's alternative text matches the target value |
shape.Fill.FillType and Fill.SolidColor.Color |
Changes the fill of the found shape |
shape.Line.Width and Line.SolidFillColor.Color |
Changes the outline of the found shape |
The steps are:
- Get the Spire.Presentation WASM module and make sure it is ready, then load the font file and the presentation into the VFS.
- Create a
Presentationobject, load the presentation withLoadFromFile(), and get the third slide withSlides.get_Item(2). - Loop from 0 to
Shapes.Count, get each shape withShapes.get_Item(i), compare itsAlternativeTextwith the target text, and keep the shape and stop the loop once it matches. - Set the
FillTypeof the found shape toFillFormatType.Solidand change its color withFill.SolidColor.Color; then set theLine.FillTypeto solid and adjust the outline withLine.WidthandLine.SolidFillColor.Color. - Save the result with
Presentation.SaveToFile(), release the presentation withDispose(), then read the file from the VFS and trigger the download.
The code for finding PowerPoint shapes by alternative text is as follows:
function App() {
  const findShapeByAlternativeText = async () => {
    // Get the Spire.Presentation WASM module
    const pptModule = window.wasmModule?.spirepresentation;

    if (!pptModule) {
      alert('Spire.Presentation is not ready yet');
      return;
    }

    await window.spire.FetchFileToVFS('ARIAL.TTF', '/Library/Fonts/', `${process.env.PUBLIC_URL}/font/`);
    const inputFileName = 'AlternativeText.pptx';
    await window.spire.FetchFileToVFS(inputFileName, '', `${process.env.PUBLIC_URL}data/`);

    // Load the presentation and get the third slide
    const ppt = new pptModule.Presentation();
    ppt.LoadFromFile(inputFileName);
    const slide = ppt.Slides.get_Item(2);

    // Find the logo shape by its alternative text
    const target = 'Brand logo';
    let found = null;
    for (let i = 0; i < slide.Shapes.Count; i++) {
      const shape = slide.Shapes.get_Item(i);
      if (shape.AlternativeText === target) {
        found = shape;
        break;
      }
    }

    // Recolor the found shape so the result is easy to confirm
    if (found) {
      found.Fill.FillType = pptModule.FillFormatType.Solid;
      found.Fill.SolidColor.Color = pptModule.Color.get_Purple();
      found.Line.FillType = pptModule.FillFormatType.Solid;
      found.Line.Width = 4;
      found.Line.SolidFillColor.Color = pptModule.Color.get_LightGray();
    }

    // Save the result file
    const outputFileName = 'FindShapeByAlternativeText.pptx';
    ppt.SaveToFile({ file: outputFileName, fileFormat: pptModule.FileFormat.Pptx2013 });
    ppt.Dispose();

    // Read the generated file from the VFS and trigger the download
    const fileArray = window.dotnetRuntime.Module.FS.readFile(outputFileName);
    const blob = new Blob([fileArray], { type: 'application/vnd.openxmlformats-officedocument.presentationml.presentation' });
    const url = URL.createObjectURL(blob);
    const a = document.createElement('a');
    a.href = url;
    a.download = outputFileName;
    a.click();
    URL.revokeObjectURL(url);
  };

  return (
    <div style={{ textAlign: 'center', height: '300px' }}>
      <h1>Alternative Text</h1>
      <button onClick={findShapeByAlternativeText}>
        Find by Alternative Text
      </button>
    </div>
  );
}

export default App;
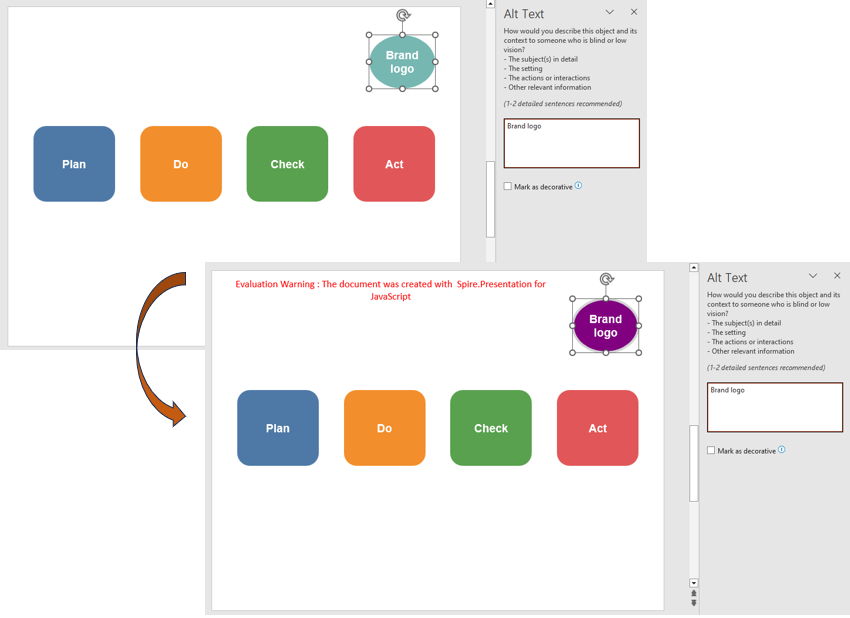
The presentation after locating and marking the target shape by alternative text:
Read Alternative Text Inside Group Shapes
A group shape gathers several shapes into one unit, while each child shape keeps its own alternative text. Reading the property on the outer group does not return these descriptions: the group's shape collection has to be traversed so that every description inside the group is collected.
| Syntax | Result |
|---|---|
shape instanceof pptModule.GroupShape |
Checks whether a shape is a group |
shape.Shapes.Count |
The number of shapes inside the group |
shape.Shapes.get_Item(j) |
Gets the j-th shape inside the group |
shape.Shapes.get_Item(j).AlternativeText |
Reads the alternative text of a shape inside the group |
shape.Shapes.get_Item(j).AlternativeTitle |
Reads the alternative title of a shape inside the group |
new TextEncoder().encode(text) |
Encodes the collected text into bytes |
window.dotnetRuntime.Module.FS.writeFile(fileName, bytes) |
Writes the collected result to a text file in the VFS |
The steps are:
- Get the Spire.Presentation WASM module and make sure it is ready, then load the presentation into the VFS.
- Create a
Presentationobject, load the presentation withLoadFromFile(), and get the fourth slide withSlides.get_Item(3). - Loop from 0 to
Shapes.Count, get each shape withShapes.get_Item(i), and test whether it is a group withshape instanceof pptModule.GroupShape. - Inside the group, loop from 0 to
shape.Shapes.Count, get each child withshape.Shapes.get_Item(j)and read itsAlternativeTextandAlternativeTitle. - Join the collected texts by line breaks, encode them with
TextEncoder, and write them toGetGroupAlternativeText.txtwithFS.writeFile(). - Release the presentation with
Dispose(), then read the text file from the VFS and trigger the download.
The code for reading alternative text inside group shapes is as follows:
function App() {
  const getGroupAlternativeText = async () => {
    // Get the Spire.Presentation WASM module
    const pptModule = window.wasmModule?.spirepresentation;

    if (!pptModule) {
      alert('Spire.Presentation is not ready yet');
      return;
    }

    const inputFileName = 'AlternativeText.pptx';
    await window.spire.FetchFileToVFS(inputFileName, '', `${process.env.PUBLIC_URL}data/`);

    // Load the presentation and get the fourth slide
    const ppt = new pptModule.Presentation();
    ppt.LoadFromFile(inputFileName);
    const slide = ppt.Slides.get_Item(3);

    // Find the group shape and read the alternative text of its children
    const lines = [];
    for (let i = 0; i < slide.Shapes.Count; i++) {
      const shape = slide.Shapes.get_Item(i);
      if (shape instanceof pptModule.GroupShape) {
        for (let j = 0; j < shape.Shapes.Count; j++) {
          const child = shape.Shapes.get_Item(j);
          const title = child.AlternativeTitle ? ` (Title: ${child.AlternativeTitle})` : '';
          lines.push(`Child ${j + 1}: ${child.AlternativeText}${title}`);
        }
      }
    }

    // Write the result into a text file
    const outputFileName = 'GetGroupAlternativeText.txt';
    window.dotnetRuntime.Module.FS.writeFile(outputFileName, new TextEncoder().encode(lines.join('\n')));
    ppt.Dispose();

    // Read the generated text file from the VFS and trigger the download
    const fileArray = window.dotnetRuntime.Module.FS.readFile(outputFileName);
    const blob = new Blob([fileArray], { type: 'text/plain;charset=utf-8' });
    const url = URL.createObjectURL(blob);
    const a = document.createElement('a');
    a.href = url;
    a.download = outputFileName;
    a.click();
    URL.revokeObjectURL(url);
  };

  return (
    <div style={{ textAlign: 'center', height: '300px' }}>
      <h1>Alternative Text</h1>
      <button onClick={getGroupAlternativeText}>
        Get Group Alternative Text
      </button>
    </div>
  );
}

export default App;
The text file generated after reading the alternative text inside the group:
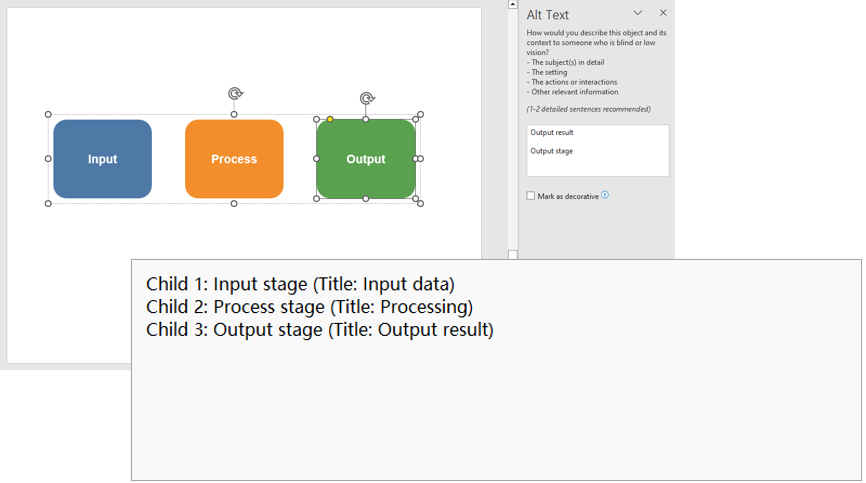
FAQ
What is the difference between alternative text and the shape name
Solution: AlternativeText is the description read by screen readers and used for searching, matching the "Alt Text" setting in PowerPoint; Name is the internal name of the shape in the file and is mainly used for programmatic reference. They are independent, so changing one does not affect the other.
What is the difference between the alternative text and its title
Solution: AlternativeText is the full description read aloud by screen readers; AlternativeTitle is a short title that summarizes the shape. They are stored as two separate properties of the shape and are independent, so you can set either one or both.
Can alternative text still be read from a hidden shape
Cause: Hiding only changes the display state, and the shape itself stays on the slide.
Solution: After IsHidden is set to true, the shape remains in the Shapes collection, and both AlternativeText and AlternativeTitle can still be read. The hidden state is saved with the file, and the text stays unchanged when the shape is shown again.
Can the group shape itself have alternative text
Cause: A group is also a kind of shape, while the descriptions of its children belong to each child shape.
Solution: You can assign AlternativeText and AlternativeTitle directly to the GroupShape; the child shapes are still read and written one by one through group.Shapes, and the two levels do not affect each other.
Get a Free License
If you wish to delete the evaluation message from the resulting documents, or to get rid of function limitations, please contact sales to obtain a valid 30-day temporary license.
Delete and Hide Shapes in PowerPoint with JavaScript in React
2026-11-12 07:36:48 Written by liu taliaWhen a presentation is generated from a template, the pages often still carry material from the previous version: outdated logos, temporary decoration, or diagrams that are no longer needed. Deleting them by hand page by page takes time and is easy to miss; shapes that are only hidden for now are even harder to find once they have been deleted.
This article uses Spire.Presentation for JavaScript to delete and hide shapes in PowerPoint in the browser. The whole process runs locally on the user's device through WebAssembly, requires no Office installation and no back-end service.
This article covers two core features:
For installation and project configuration, see Integrating Spire.Presentation for JavaScript in a React Project. The examples below assume that Spire.Presentation for JavaScript is installed and the WebAssembly module has been initialized.
Delete PowerPoint Shapes
There are two common ways to delete shapes on a slide: when the target shape's index in the collection is known, delete it by index directly; when the index is not known and the shape has alternative text, loop over the shape collection and delete it by matching that text.
| Usage | Result |
|---|---|
slide.Shapes.Count |
The total number of shapes on the current slide |
slide.Shapes.RemoveAt(index) |
Delete the shape at the given index (indexes start at 0) |
slide.Shapes.get_Item(i) |
Get the i-th shape by index |
shape.AlternativeText |
Read the alternative text of a shape |
slide.Shapes.Remove(shape) |
Delete the given shape object |
The steps are:
- Get the Spire.Presentation WASM module and make sure it is ready, then load the font file and the presentation into the VFS.
- Create a
Presentationobject, load the presentation withLoadFromFile(), and get the first slide withSlides.get_Item(0). - Delete the shape at the given index with
Shapes.RemoveAt(). - Loop from
Shapes.Count - 1backwards, get each shape withShapes.get_Item(i), check whetherAlternativeTextcontains the marker, and callShapes.Remove(shape)when it matches. - Save the result file with
Presentation.SaveToFile()and release the presentation withDispose(). - Read the result file from the VFS and trigger the browser download.
The following code deletes PowerPoint shapes:
function App() {
  const removeShapes = async () => {
    // Get the Spire.Presentation WASM module
    const pptModule = window.wasmModule?.spirepresentation;

    // Check that the module is ready
    if (!pptModule) {
      alert('Spire.Presentation is not ready yet');
      return;
    }

    // Load the font and the presentation into the VFS
    await window.spire.FetchFileToVFS('ARIAL.TTF', '/Library/Fonts/', `${process.env.PUBLIC_URL}/font/`);
    const inputFileName = 'Shapes.pptx';
    await window.spire.FetchFileToVFS(inputFileName, '', `${process.env.PUBLIC_URL}data/`);

    // Load the presentation and get the first slide
    const ppt = new pptModule.Presentation();
    ppt.LoadFromFile(inputFileName);
    const slide = ppt.Slides.get_Item(0);

    // Delete the shape at index 1 (the second shape; the index starts at 0)
    slide.Shapes.RemoveAt(1);

    // Delete the shapes whose alternative text contains "Deco"
    for (let i = slide.Shapes.Count - 1; i >= 0; i--) {
      const shape = slide.Shapes.get_Item(i);
      if (shape.AlternativeText.includes('Deco')) {
        slide.Shapes.Remove(shape);
      }
    }

    // Save the result file
    const outputFileName = 'RemoveShapes.pptx';
    ppt.SaveToFile({ file: outputFileName, fileFormat: pptModule.FileFormat.Pptx2013 });
    ppt.Dispose();

    // Read the generated file from the VFS and trigger the download
    const fileArray = window.dotnetRuntime.Module.FS.readFile(outputFileName);
    const blob = new Blob([fileArray], { type: 'application/vnd.openxmlformats-officedocument.presentationml.presentation' });
    const url = URL.createObjectURL(blob);
    const a = document.createElement('a');
    a.href = url;
    a.download = outputFileName;
    a.click();
    URL.revokeObjectURL(url);
  };

  return (
    <div style={{ textAlign: 'center', height: '300px' }}>
      <h1>Delete Shapes</h1>
      <button onClick={removeShapes}>
        Delete Shape
      </button>
    </div>
  );
}

export default App;
Presentation after deleting shapes by index and by alternative text:
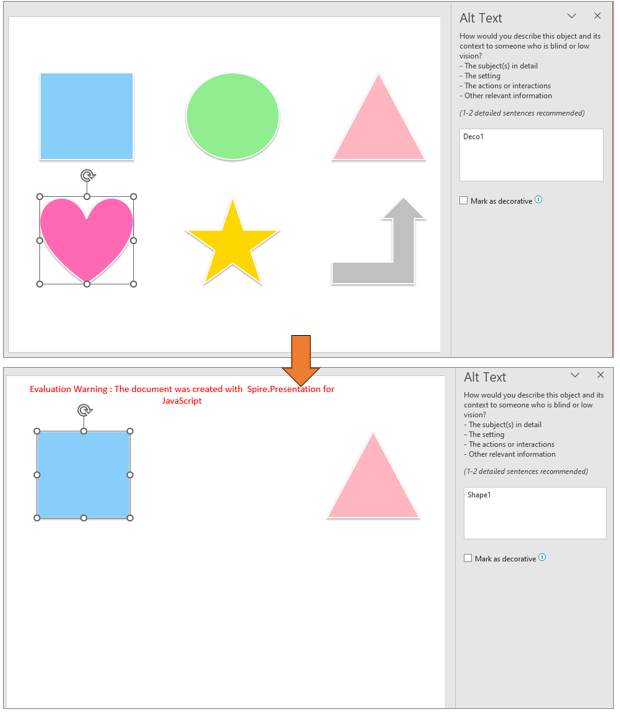
Hide and Show PowerPoint Shapes
Some shapes are only temporarily unwanted in the current version, and deleting them makes them inconvenient to restore. In that case, keep the shape and hide only its display: set the shape's IsHidden to true, and the shape stays in the file; set it back to false later to restore it. The difference from deletion is that hiding keeps the shape itself and its styles.
| Usage | Result |
|---|---|
slide.Shapes.get_Item(index) |
Get the shape object at the given index |
shape.IsHidden = true |
Hide the shape; it stays in the file |
shape.IsHidden = false |
Show a hidden shape again |
The steps are:
- Get the Spire.Presentation WASM module and make sure it is ready, then load the font file and the presentation into the VFS.
- Create a
Presentationobject, load the presentation withLoadFromFile(), and get the first slide withSlides.get_Item(0). - Get the shape to hide with
Shapes.get_Item()by index, and setIsHiddentotrue. - Save the result file with
Presentation.SaveToFile(), release the presentation withDispose(), and read the file from the VFS to trigger the download.
The following code hides shapes:
function App() {
  const hideShapes = async () => {
    // Get the Spire.Presentation WASM module
    const pptModule = window.wasmModule?.spirepresentation;

    // Check that the module is ready
    if (!pptModule) {
      alert('Spire.Presentation is not ready yet');
      return;
    }

    // Load the font and the presentation into the VFS
    await window.spire.FetchFileToVFS('ARIAL.TTF', '/Library/Fonts/', `${process.env.PUBLIC_URL}/font/`);
    const inputFileName = 'Shapes.pptx';
    await window.spire.FetchFileToVFS(inputFileName, '', `${process.env.PUBLIC_URL}data/`);

    // Load the presentation and get the first slide
    const ppt = new pptModule.Presentation();
    ppt.LoadFromFile(inputFileName);
    const slide = ppt.Slides.get_Item(0);

    // Get the shape at index 1 (the second shape) and hide it
    const shape = slide.Shapes.get_Item(1);
    shape.IsHidden = true;

    // Save the result file
    const outputFileName = 'HideShapes.pptx';
    ppt.SaveToFile({ file: outputFileName, fileFormat: pptModule.FileFormat.Pptx2013 });
    ppt.Dispose();

    // Read the generated file from the VFS and trigger the download
    const fileArray = window.dotnetRuntime.Module.FS.readFile(outputFileName);
    const blob = new Blob([fileArray], { type: 'application/vnd.openxmlformats-officedocument.presentationml.presentation' });
    const url = URL.createObjectURL(blob);
    const a = document.createElement('a');
    a.href = url;
    a.download = outputFileName;
    a.click();
    URL.revokeObjectURL(url);
  };

  return (
    <div style={{ textAlign: 'center', height: '300px' }}>
      <h1>Hide Shapes</h1>
      <button onClick={hideShapes}>
        Hide Shapes
      </button>
    </div>
  );
}

export default App;
Presentation after hiding the specified shape:
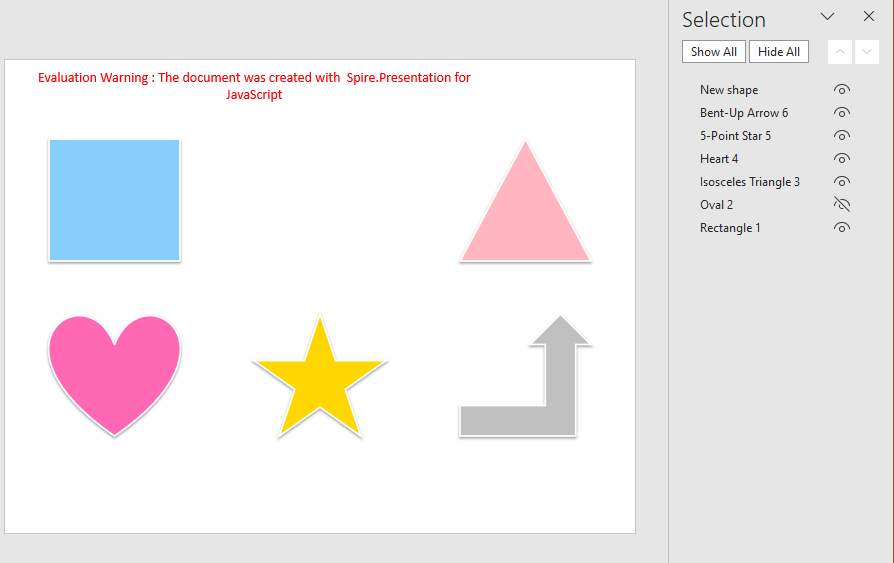
To show a shape again, set IsHidden back to false on the same shape; its content and styles are kept:
shape.IsHidden = false;
FAQ
What is the difference between hiding and deleting a shape
Cause: The two operations affect the file in different ways.
Solution: Shapes.Remove() / Shapes.RemoveAt() take the shape away from the slide, and it can no longer be found through the collection; IsHidden = true only changes the display state, so the shape and its styles stay in the file and can be restored by setting it back to false.
How to delete every shape on a slide
Cause: When clearing a page, deleting by ascending index skips shapes because the indexes move forward.
Solution: Loop from the end and delete without any condition:
for (let i = slide.Shapes.Count - 1; i >= 0; i--) {
  slide.Shapes.RemoveAt(i);
}
Can hidden shapes still be read
Cause: Hiding only changes the display state; the shape object still belongs to the slide's shape collection.
Solution: The shape can still be retrieved while looping over Shapes. Check shape.IsHidden to see whether it is hidden, and then decide whether to show it or skip it.
Get a Free License
If you wish to delete the evaluation message from the resulting documents, or to get rid of function limitations, please contact sales to obtain a valid 30-day temporary license.
Add Shapes to PowerPoint Presentations with JavaScript in React
2026-11-10 08:58:20 Written by liu taliaExplanatory content in a presentation is often hard to convey with text alone: the order of steps, the relationships between parts, and the boundaries of key information all become clearer once they are marked with a graphic. Drawing and styling shapes by hand on every slide takes time and is difficult to keep consistent across batch-generated documents.
This article uses Spire.Presentation for JavaScript to add shapes to PowerPoint presentations in the browser. The whole process runs locally on the user's device through WebAssembly, requires no Office installation and no back-end service, and keeps the presentation from leaving the browser.
This article covers two core features:
For installation and project configuration, see Integrating Spire.Presentation for JavaScript in a React Project. The examples below assume that Spire.Presentation is installed and the WebAssembly module has been initialized.
Add Basic Shapes to PowerPoint Slides
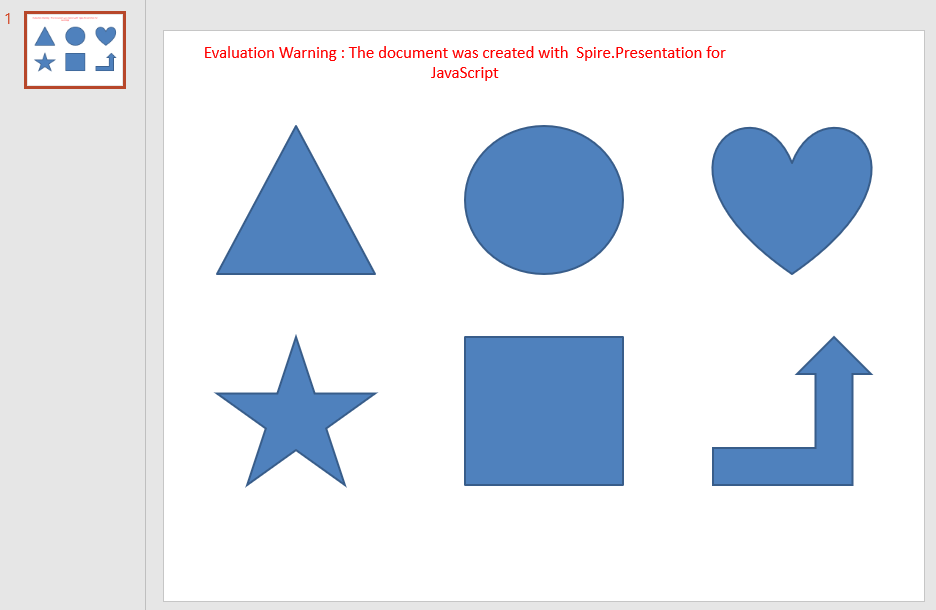
Triangles, ellipses, hearts, five-pointed stars, rectangles and bent-up arrows are common building blocks on a slide; they divide areas, mark key points or support a text explanation. Adding a shape to a slide requires the shape type first, and then the position and size expressed in coordinates, so that the graphic lands exactly where it is expected.
| Usage | Result |
|---|---|
slide.Shapes.AppendShape({ shapeType, rectangle }) |
Add a shape of the given type inside the specified area |
RectangleF.FromLTRB(left, top, right, bottom) |
Define the position and size of a shape with its top-left and bottom-right coordinates |
ShapeType.Rectangle, ShapeType.Ellipse, ShapeType.Triangle, ShapeType.Heart, ShapeType.FivePointedStar, ShapeType.BentUpArrow |
The shape types for a rectangle, an ellipse, a triangle, a heart, a five-pointed star and a bent-up arrow |
The steps are:
- Get the Spire.Presentation WASM module and make sure it is ready, load the font file into the VFS, and create a
Presentationobject. - Get the first slide with
Presentation.Slides.get_Item(0). - Define the area of each shape with the top-left and bottom-right coordinates of
RectangleF.FromLTRB(). - Add a triangle, an ellipse, a heart, a five-pointed star, a rectangle and a bent-up arrow with
Shapes.AppendShape(), selecting the matchingShapeTypemember inshapeType. - Save the result file with
Presentation.SaveToFile()and release the presentation withDispose(). - Read the result file from the VFS and trigger the browser download.
The following code adds basic shapes to PowerPoint slides:
function App() {
  const addBasicShapes = async () => {
    // Get the Spire.Presentation WASM module
    const pptModule = window.wasmModule?.spirepresentation;

    // Check that the module is ready
    if (!pptModule) {
      alert('Spire.Presentation is not ready yet');
      return;
    }

    // Load the font into the VFS
    await window.spire.FetchFileToVFS('ARIAL.TTF', '/Library/Fonts/', `${process.env.PUBLIC_URL}/font/`);

    // Create a presentation; it already contains one blank slide
    const ppt = new pptModule.Presentation();
    const slide = ppt.Slides.get_Item(0);

    // Add a triangle
    slide.Shapes.AppendShape({
      shapeType: pptModule.ShapeType.Triangle,
      rectangle: pptModule.RectangleF.FromLTRB(50, 90, 200, 230),
    });

    // Add an ellipse
    slide.Shapes.AppendShape({
      shapeType: pptModule.ShapeType.Ellipse,
      rectangle: pptModule.RectangleF.FromLTRB(285, 90, 435, 230),
    });

    // Add a heart
    slide.Shapes.AppendShape({
      shapeType: pptModule.ShapeType.Heart,
      rectangle: pptModule.RectangleF.FromLTRB(520, 90, 670, 230),
    });

    // Add a five-pointed star
    slide.Shapes.AppendShape({
      shapeType: pptModule.ShapeType.FivePointedStar,
      rectangle: pptModule.RectangleF.FromLTRB(50, 290, 200, 430),
    });

    // Add a rectangle
    slide.Shapes.AppendShape({
      shapeType: pptModule.ShapeType.Rectangle,
      rectangle: pptModule.RectangleF.FromLTRB(285, 290, 435, 430),
    });

    // Add a bent-up arrow
    slide.Shapes.AppendShape({
      shapeType: pptModule.ShapeType.BentUpArrow,
      rectangle: pptModule.RectangleF.FromLTRB(520, 290, 670, 430),
    });

    // Save the result file
    const outputFileName = 'AddBasicShapes.pptx';
    ppt.SaveToFile({ file: outputFileName, fileFormat: pptModule.FileFormat.Pptx2013 });
    ppt.Dispose();

    // Read the generated file from the VFS and trigger the download
    const fileArray = window.dotnetRuntime.Module.FS.readFile(outputFileName);
    const blob = new Blob([fileArray], { type: 'application/vnd.openxmlformats-officedocument.presentationml.presentation' });
    const url = URL.createObjectURL(blob);
    const a = document.createElement('a');
    a.href = url;
    a.download = outputFileName;
    a.click();
    URL.revokeObjectURL(url);
  };

  return (
    <div style={{ textAlign: 'center', height: '300px' }}>
      <h1>Add Shapes</h1>
      <button onClick={addBasicShapes}>
        Add Basic Shapes
      </button>
    </div>
  );
}

export default App;
Presentation after adding six basic shapes to a blank slide:
Style Shapes in PowerPoint
A newly added shape follows the theme colors of the presentation, which often need adjustment on a concrete slide: change the fill and outline so the graphic matches the page palette, adjust the outline width to emphasize a part, or switch to a gradient fill to give the graphic more depth. Style changes are applied to the shape object, so a look defined once can be reused and the colors stay consistent.
| Usage | Result |
|---|---|
shape.Fill.FillType = FillFormatType.Solid |
Set the shape fill to a solid color |
shape.Fill.SolidColor.Color = Color.get_xxx() |
Set the fill color inside the shape |
shape.Fill.FillType = FillFormatType.Gradient |
Set the shape fill to a gradient |
shape.Fill.Gradient.GradientStops.Append({ position, knownColor }) |
Add color stops to the gradient and define the effect |
shape.Line.FillType = FillFormatType.Solid |
Set the shape outline to a solid line |
shape.Line.SolidFillColor.Color = Color.get_xxx() |
Set the outline color of the shape |
shape.Line.Width = n |
Set the outline width of the shape |
The steps are:
- Get the Spire.Presentation WASM module and make sure it is ready, load the font file into the VFS, and create a
Presentationobject and get the first slide. - Add the shapes to style with
Shapes.AppendShape(). - Set
Fill.FillTypetoFillFormatType.Solidand choose the fill color withFill.SolidColor.Color. - Set
Line.FillTypetoFillFormatType.Solid, choose the outline color withLine.SolidFillColor.Color, and adjust the outline width withLine.Width. - For a gradient effect, change
Fill.FillTypetoFillFormatType.Gradientand add color stops withFill.Gradient.GradientStops.Append(). - Save the result file with
Presentation.SaveToFile(), release the presentation withDispose(), and read the file from the VFS to trigger the download.
The following code styles the shapes in PowerPoint:
function App() {
  const styleShapes = async () => {
    // Get the Spire.Presentation WASM module
    const pptModule = window.wasmModule?.spirepresentation;

    // Check that the module is ready
    if (!pptModule) {
      alert('Spire.Presentation is not ready yet');
      return;
    }

    // Load the font into the VFS
    await window.spire.FetchFileToVFS('ARIAL.TTF', '/Library/Fonts/', `${process.env.PUBLIC_URL}/font/`);

    // Create a presentation and get the first slide
    const ppt = new pptModule.Presentation();
    const slide = ppt.Slides.get_Item(0);

    // Add a rectangle with a solid fill, an outline color and a line width
    let shape = slide.Shapes.AppendShape({
      shapeType: pptModule.ShapeType.Rectangle,
      rectangle: pptModule.RectangleF.FromLTRB(60, 180, 240, 420),
    });
    shape.Fill.FillType = pptModule.FillFormatType.Solid;
    shape.Fill.SolidColor.Color = pptModule.Color.get_LightSkyBlue();
    shape.Line.FillType = pptModule.FillFormatType.Solid;
    shape.Line.SolidFillColor.Color = pptModule.Color.get_SteelBlue();
    shape.Line.Width = 3;

    // Add an ellipse with a solid fill and an outline color
    shape = slide.Shapes.AppendShape({
      shapeType: pptModule.ShapeType.Ellipse,
      rectangle: pptModule.RectangleF.FromLTRB(270, 180, 450, 420),
    });
    shape.Fill.FillType = pptModule.FillFormatType.Solid;
    shape.Fill.SolidColor.Color = pptModule.Color.get_LightGreen();
    shape.Line.FillType = pptModule.FillFormatType.Solid;
    shape.Line.SolidFillColor.Color = pptModule.Color.get_SeaGreen();
    shape.Line.Width = 3;

    // Add a triangle with a gradient fill and an outline color
    shape = slide.Shapes.AppendShape({
      shapeType: pptModule.ShapeType.Triangle,
      rectangle: pptModule.RectangleF.FromLTRB(480, 180, 660, 420),
    });
    shape.Fill.FillType = pptModule.FillFormatType.Gradient;
    shape.Fill.Gradient.GradientStops.Append({ position: 0, knownColor: pptModule.KnownColors.PowderBlue });
    shape.Fill.Gradient.GradientStops.Append({ position: 1, knownColor: pptModule.KnownColors.DarkOrange });
    shape.Line.FillType = pptModule.FillFormatType.Solid;
    shape.Line.SolidFillColor.Color = pptModule.Color.get_White();
    shape.Line.Width = 3;

    // Save the result file
    const outputFileName = 'AddShapeStyles.pptx';
    ppt.SaveToFile({ file: outputFileName, fileFormat: pptModule.FileFormat.Pptx2013 });
    ppt.Dispose();

    // Read the generated file from the VFS and trigger the download
    const fileArray = window.dotnetRuntime.Module.FS.readFile(outputFileName);
    const blob = new Blob([fileArray], { type: 'application/vnd.openxmlformats-officedocument.presentationml.presentation' });
    const url = URL.createObjectURL(blob);
    const a = document.createElement('a');
    a.href = url;
    a.download = outputFileName;
    a.click();
    URL.revokeObjectURL(url);
  };

  return (
    <div style={{ textAlign: 'center', height: '300px' }}>
      <h1>Style Shapes</h1>
      <button onClick={styleShapes}>
        Style Shapes
      </button>
    </div>
  );
}

export default App;
Presentation after applying fills, outlines and gradient styles:
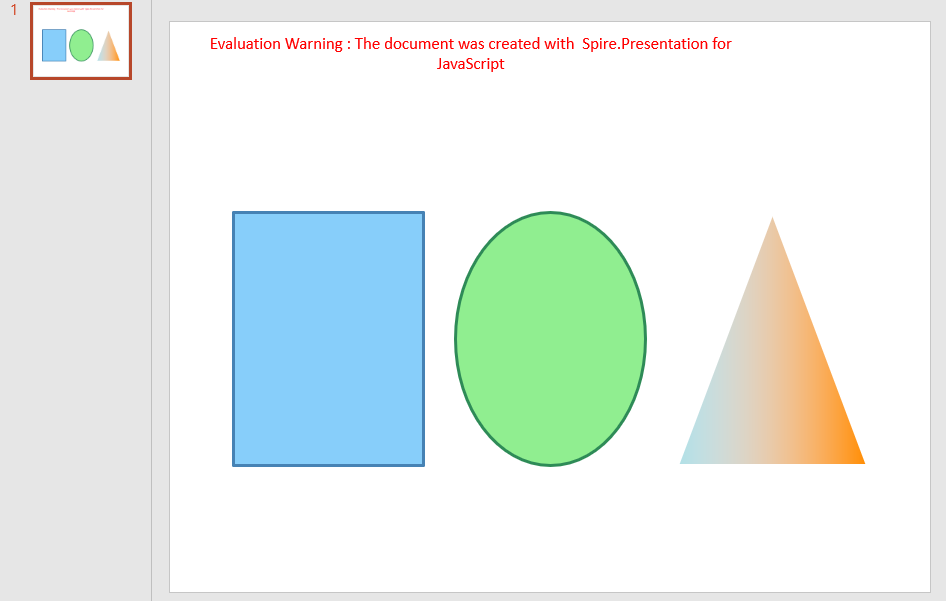
FAQ
How to make a shape unfilled and keep only its outline
Cause: Newly added shapes have a fill by default. For an outline-only figure, or to let content underneath show through, set the fill to none explicitly.
Solution: Set Fill.FillType to FillFormatType.None, and define the outline with Line.FillType and Line.SolidFillColor.Color:
shape.Fill.FillType = pptModule.FillFormatType.None;
shape.Line.FillType = pptModule.FillFormatType.Solid;
shape.Line.SolidFillColor.Color = pptModule.Color.get_SlateBlue();
How to change a shape's position and size after adding it
Cause: The position and size of a shape remain editable after it is added; there is no need to create it again.
Solution: Set the Left, Top, Width and Height properties on the shape object:
const shape = slide.Shapes.get_Item(0);
shape.Left = 160;
shape.Top = 260;
shape.Width = 300;
shape.Height = 200;
How to add a shadow to a shape
Cause: A shadow gives a shape more depth, but the fill and outline only control the shape itself; the shadow is set through a separate effect object.
Solution: Create an InnerShadowEffect, set BlurRadius, Direction, Distance and ColorFormat.Color, then assign it to shape.EffectDag.InnerShadowEffect:
const innerShadow = new pptModule.InnerShadowEffect();
innerShadow.BlurRadius = 20;
innerShadow.Direction = 0;
innerShadow.Distance = 0;
innerShadow.ColorFormat.Color = pptModule.Color.get_Black();
shape.EffectDag.InnerShadowEffect = innerShadow;
Get a Free License
If you wish to delete the evaluation message from the resulting documents, or to get rid of function limitations, please contact sales to obtain a valid 30-day temporary license.
Group and Ungroup PowerPoint Shapes with JavaScript in React
2026-11-10 08:57:56 Written by liu taliaOnce a slide holds more than a handful of shapes, moving and aligning them one by one becomes slow, and a single misclick can break the spacing. Grouping related shapes into a unit lets them move and scale together while keeping their relative positions; ungrouping restores them as independent shapes when one of them needs a change.
This article uses Spire.Presentation for JavaScript to group and ungroup PowerPoint shapes in the browser. The whole process runs locally on the user's device through WebAssembly, requires no Office installation and no back-end service, and keeps the presentation from leaving the browser.
This article covers two core features:
For installation and project configuration, see Integrating Spire.Presentation for JavaScript in a React Project. The examples below assume that Spire.Presentation for JavaScript is installed and the WebAssembly module has been initialized.
Group PowerPoint Shapes
Diagrams often rely on a set of shapes that should be placed as one block: a cluster of callouts, a row of arrows, a small illustration. Selecting them one by one and operating on them together is awkward, and one slip moves the wrong shape. Grouping collects these shapes into a single unit, so later moves and scaling apply to the whole group while the relative positions inside stay unchanged.
| Usage | Result |
|---|---|
slide.Shapes.Count |
The total number of shapes on the current slide |
slide.Shapes.get_Item(i) |
Get the i-th shape by index |
slide.GroupShapes(shapes) |
Group the shapes in the array into one unit and return a GroupShape object |
The steps are:
- Get the Spire.Presentation WASM module and make sure it is ready, then load the font file and the presentation into the VFS.
- Create a
Presentationobject, callLoadFromFile()to load the presentation, and get the first slide withSlides.get_Item(0). - Loop over the slide with
Shapes.CountandShapes.get_Item(), adding the shapes to be grouped to an array. - Call
slide.GroupShapes()with the array; it returns the resultingGroupShapeobject. - Call
Presentation.SaveToFile()to save the result file andDispose()to release the presentation. - Read the result file from the VFS and trigger the browser download.
The code for grouping PowerPoint shapes is as follows:
function App() {
  const groupShapes = async () => {
    // Get the Spire.Presentation WASM module
    const pptModule = window.wasmModule?.spirepresentation;

    // Check that the module is ready
    if (!pptModule) {
      alert('Spire.Presentation is not ready yet');
      return;
    }

    // Load the font and the presentation into the VFS
    await window.spire.FetchFileToVFS('ARIAL.TTF', '/Library/Fonts/', `${process.env.PUBLIC_URL}/font/`);
    const inputFileName = 'Shapes.pptx';
    await window.spire.FetchFileToVFS(inputFileName, '', `${process.env.PUBLIC_URL}data/`);

    // Load the presentation and get the first slide
    const ppt = new pptModule.Presentation();
    ppt.LoadFromFile(inputFileName);
    const slide = ppt.Slides.get_Item(0);

    // Collect every shape on the slide
    const shapes = [];
    for (let i = 0; i < slide.Shapes.Count; i++) {
      shapes.push(slide.Shapes.get_Item(i));
    }

    // Group these shapes into a single unit
    slide.GroupShapes(shapes);

    // Save the result file
    const outputFileName = 'GroupShapes.pptx';
    ppt.SaveToFile({ file: outputFileName, fileFormat: pptModule.FileFormat.Pptx2013 });
    ppt.Dispose();

    // Read the generated file from the VFS and trigger the download
    const fileArray = window.dotnetRuntime.Module.FS.readFile(outputFileName);
    const blob = new Blob([fileArray], { type: 'application/vnd.openxmlformats-officedocument.presentationml.presentation' });
    const url = URL.createObjectURL(blob);
    const a = document.createElement('a');
    a.href = url;
    a.download = outputFileName;
    a.click();
    URL.revokeObjectURL(url);
  };

  return (
    <div style={{ textAlign: 'center', height: '300px' }}>
      <h1>Group and Ungroup Shapes</h1>
      <button onClick={groupShapes}>
        Group Shapes
      </button>
    </div>
  );
}

export default App;
Presentation after grouping all shapes on the slide:
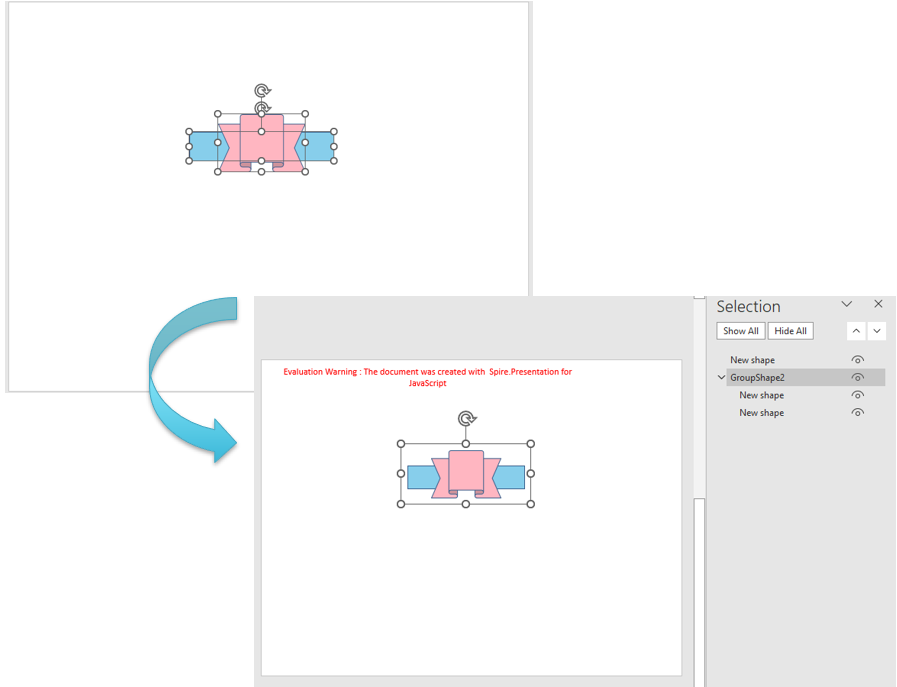
Ungroup PowerPoint Shapes
After a group is created, changing one member—its color, text, or position—requires ungrouping first. Ungrouping returns the member shapes to the slide's shape collection, removes the group itself, and leaves each shape at its original position and size.
| Usage | Result |
|---|---|
slide.Shapes.Count |
The total number of shapes on the current slide |
slide.Shapes.get_Item(i) |
Get the i-th shape by index |
shape instanceof pptModule.GroupShape |
Check whether the shape is a group shape |
slide.Ungroup(shape) |
Ungroup the shapes, return them to the slide, and remove the group itself |
The steps are:
- Get the Spire.Presentation WASM module and make sure it is ready, then load the font file and the presentation into the VFS.
- Create a
Presentationobject, callLoadFromFile()to load the presentation, and useSlides.get_Item()to get the slide that holds the group. - Loop from 0 over
Shapes.Countand get each shape on the slide withShapes.get_Item(i). - Check whether the shape is a group with
shape instanceof pptModule.GroupShape, and callslide.Ungroup()when it matches. - Call
Presentation.SaveToFile()to save the result file andDispose()to release the presentation, then read the file from the VFS and trigger the download.
The code for ungrouping PowerPoint shapes is as follows:
function App() {
  const ungroupShapes = async () => {
    // Get the Spire.Presentation WASM module
    const pptModule = window.wasmModule?.spirepresentation;

    // Check that the module is ready
    if (!pptModule) {
      alert('Spire.Presentation is not ready yet');
      return;
    }

    // Load the font and the presentation into the VFS
    await window.spire.FetchFileToVFS('ARIAL.TTF', '/Library/Fonts/', `${process.env.PUBLIC_URL}/font/`);
    const inputFileName = 'Shapes.pptx';
    await window.spire.FetchFileToVFS(inputFileName, '', `${process.env.PUBLIC_URL}data/`);

    // Load the presentation and get the second slide
    const ppt = new pptModule.Presentation();
    ppt.LoadFromFile(inputFileName);
    const slide = ppt.Slides.get_Item(1);

    // Loop over the shapes on the slide and ungroup any group
    for (let i = 0; i < slide.Shapes.Count; i++) {
      const shape = slide.Shapes.get_Item(i);
      if (shape instanceof pptModule.GroupShape) {
        slide.Ungroup(shape);
      }
    }

    // Save the result file
    const outputFileName = 'UngroupShapes.pptx';
    ppt.SaveToFile({ file: outputFileName, fileFormat: pptModule.FileFormat.Pptx2013 });
    ppt.Dispose();

    // Read the generated file from the VFS and trigger the download
    const fileArray = window.dotnetRuntime.Module.FS.readFile(outputFileName);
    const blob = new Blob([fileArray], { type: 'application/vnd.openxmlformats-officedocument.presentationml.presentation' });
    const url = URL.createObjectURL(blob);
    const a = document.createElement('a');
    a.href = url;
    a.download = outputFileName;
    a.click();
    URL.revokeObjectURL(url);
  };

  return (
    <div style={{ textAlign: 'center', height: '300px' }}>
      <h1>Group and Ungroup Shapes</h1>
      <button onClick={ungroupShapes}>
        Ungroup Shapes
      </button>
    </div>
  );
}

export default App;
Presentation after ungrouping the shapes:
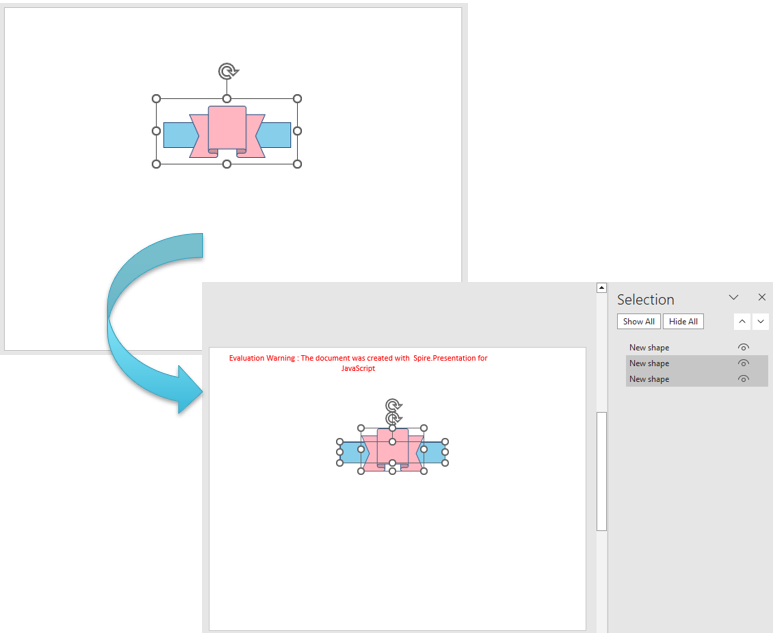
FAQ
Why does the number of shapes in the collection decrease after grouping
Cause: GroupShapes() collects the given shapes into a single group shape, and the group occupies only one position in the slide's shape collection, so the number of shapes in the collection decreases.
Solution: The member shapes are still there. Retrieve them one by one through the GroupShape.Shapes collection:
const group = slide.Shapes.get_Item(0);
const innerCount = group.Shapes.Count;
Can a single shape be grouped
Cause: Grouping merges multiple shapes into one unit; with only one shape there is nothing to merge.
Solution: Put at least two shapes into the array before calling GroupShapes(). Passing a single shape does not create a group, and the number of shapes on the slide stays the same.
How can only some of the shapes on a slide be grouped
Cause: GroupShapes() processes only the shapes in the array that is passed to it; the other shapes are not affected.
Solution: Pick the shapes you need by index, put them in an array, and pass it to GroupShapes():
slide.GroupShapes([slide.Shapes.get_Item(0), slide.Shapes.get_Item(2)]);
Get a Free License
If you wish to delete the evaluation message from the resulting documents, or to get rid of function limitations, please contact sales to obtain a valid 30-day temporary license.
