
Knowledgebase (2340)
Children categories
XML (Extensible Markup Language) is widely used for its structured format and readability on different platforms and systems. Its self-descriptive tags enable you to process data more easily. Meanwhile, Word XML focuses specifically on storing and exchanging Microsoft Word documents. It allows Word documents to transfer without loss. They both show flexibility under various scenarios that Word documents cannot achieve.
On the page, you will learn how to convert Word to XML and Word XML formats using Python with Spire.Doc for Python.
Install Spire.Doc for Python
This scenario requires Spire.Doc for Python and plum-dispatch v1.7.4. They can be easily installed in your Windows through the following pip command.
pip install Spire.Doc
If you are unsure how to install, please refer to this tutorial: How to Install Spire.Doc for Python on Windows.
Convert Word to XML in Python with Spire.Doc for Python
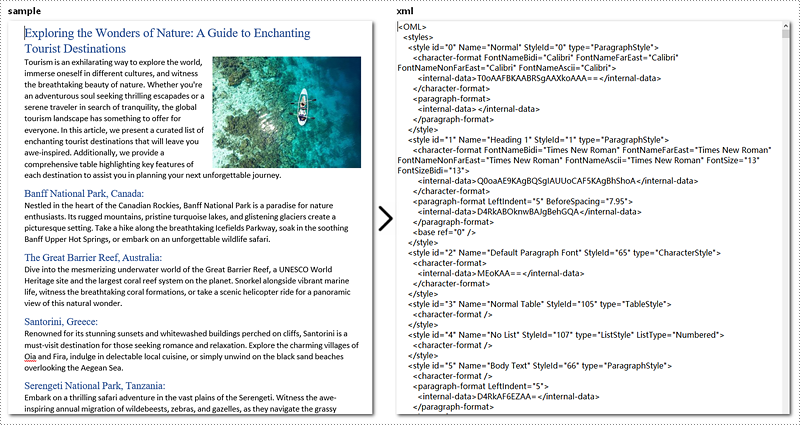
This part will explain how to convert Word documents to XML in Python with step-by-step instructions and a code example. Spire.Doc for Python provides the Document.SaveToFile() method to make it easy to save Word as XML. Check out the steps below and start processing your Word documents without effort!
Steps to Convert Word to XML:
- Create a new Document object.
- Load the Word document that you wish to be operated using Document.LoadFromFile() method.
- Covert it to XML by calling Document.SaveToFile() method.
Here's the code example:
- Python
from spire.doc import *
from spire.doc.common import *

# Create a Word document object
document = Document()

# Load the file from the disk
document.LoadFromFile("sample.docx")

# Save the document to an XML file
document.SaveToFile("WordtoXML.xml", FileFormat.Xml)

document.Close()
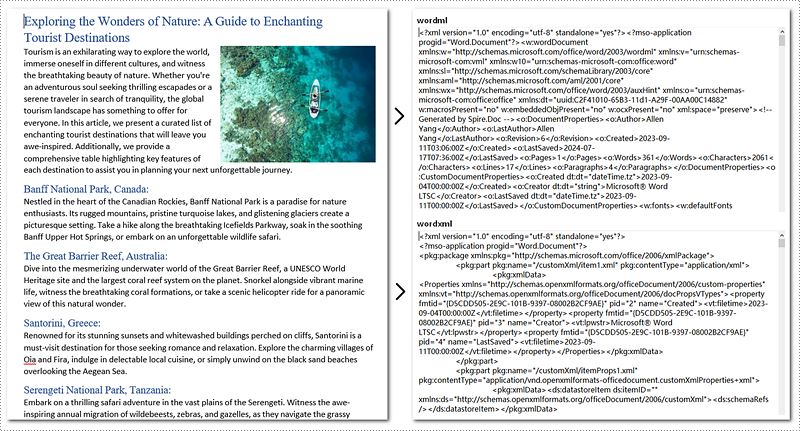
Convert Word to Word XML in Python
To convert Word to Word XML, you can utilize the Document.SaveToFile() method provided by Spire.Doc for Python. It not only helps to convert Word documents to Word XML but also to many other formats, such as PDF, XPS, HTML, RTF, etc.
Steps to Convert Word to Word XML:
- Create a new Document object.
- Load the Word document by Document.LoadFromFile() method.
- Convert it to Word XML using Document.SaveToFile() method.
Here's the code example for you:
- Python
from spire.doc import *
from spire.doc.common import *

# Create a Word document object
document = Document()

# Load the file from the disk
document.LoadFromFile("sample.docx")

# For Word 2003
document.SaveToFile("WordtoWordML.wordml", FileFormat.WordML)

# For Word 2007-2013
document.SaveToFile("WordtoWordXML.wordxml", FileFormat.WordXml)
document.Close()
Get a Free License
To fully experience the capabilities of Spire.Doc for Python without any evaluation limitations, you can request a free 30-day trial license.
Formatting plays a crucial role in making your Excel spreadsheets clean, organized, and visually appealing. Often, you may want to apply the same formatting to multiple cells or ranges in your workbook. Instead of manually formatting each cell individually, Excel provides a convenient feature called "Copy Cell Formatting" that allows you to quickly replicate the formatting from one cell to others.
Here in this article, you will learn how to programmatically copy cell formatting in Excel using Spire.XLS for Python.
Install Spire.XLS for Python
This scenario requires Spire.XLS for Python and plum-dispatch v1.7.4. They can be easily installed in your system through the following pip command.
pip install Spire.XLS
If you are unsure how to install, please refer to this tutorial: How to Install Spire.XLS for Python on Windows
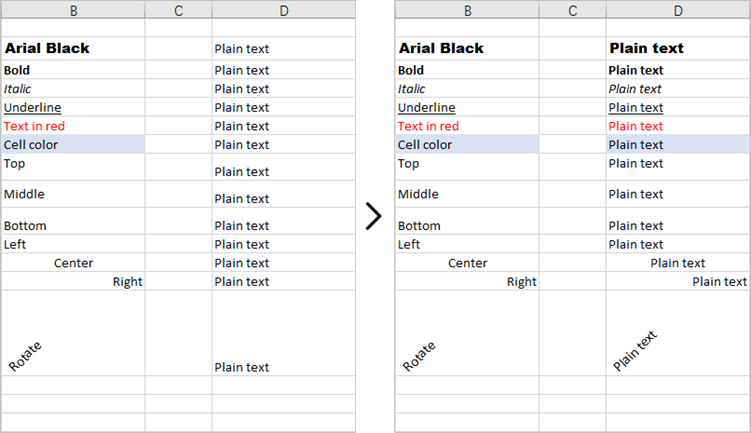
Copy Formatting from One Cell to Another in Python
You can access a specific cell by using the Worksheet.Range[row:int, column:int] property. The formatting of that cell can be retrieved through the CellRange.Style property, and this formatting can then be applied to a different cell.
The steps to copy formatting from one to cell to anther are as follows.
- Create a Workbook object.
- Load an Excel document from a give path.
- Get a specific worksheet within the workbook.
- Get a specific cell through Worksheet.Range[row:int, column:int] property.
- Get the cell formatting through CellRange.Style property, and apply it to another cell through the same property.
- Save the workbook to a different Excel file.
This code example loads an existing Excel document, copies the formatting (style) from the cells in the second column to the cells in the fourth column for rows 2 through 14, and then saves the modified workbook to a new Excel file.
- Python
from spire.xls import *
from spire.xls.common import *

# Create a Workbook object
workbook = Workbook()

# Load an Excel document
workbook.LoadFromFile("C:\\Users\\Administrator\\Desktop\\Input.xlsx")

# Get a specific worksheet
worksheet = workbook.Worksheets[0]

# Loop through the selected rows
for i in range(2, 15):

    # Get style (formatting) of a specific cell
    style = worksheet.Range[i, 2].Style

    # Apply the style to a different cell
    worksheet.Range[i, 4].Style = style

# Save the workbook to file
workbook.SaveToFile("output/CopyFormatting.xlsx",ExcelVersion.Version2016)

# Dispose resources
workbook.Dispose()
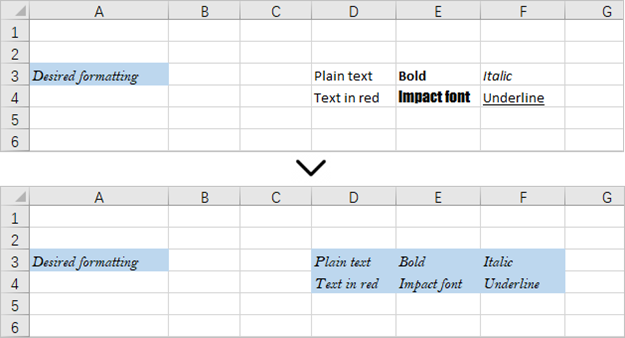
Copy Formatting from One Cell to a Cell Range in Python
Once you get the style (formatting) of a certain cell, you can apply it to a cell rang which is retrieved through the Worksheet.Range[row:int, column:int, endRow:int, endColumn:int] property.
Here are the steps to copy formatting from once cell to a cell range.
- Create a Workbook object.
- Load an Excel document from a give path.
- Get a specific worksheet within the workbook.
- Get a specific cell through Worksheet.Range[row:int, column:int] property.
- Get the formatting of the cell through CellRange.Style property.
- Get a cell range through Worksheet.Range[row:int, column:int, endRow:int, endColumn:int] property.
- Apply the formatting to the cell range through CellRange.Style property.
- Save the workbook to a different Excel file.
This code example loads an existing Excel document, retrieves the style of a cell located in the third row and first column, and then applies that style to a range of cells from the third row, fourth column to the fourth row, sixth column.
- Python
from spire.xls import *
from spire.xls.common import *

# Create a Workbook object
workbook = Workbook()

# Load an Excel document
workbook.LoadFromFile("C:\\Users\\Administrator\\Desktop\\Input.xlsx")

# Get a specific worksheet
worksheet = workbook.Worksheets[0]

# Get style (formatting) of a specific cell
style = worksheet.Range[3, 1].Style

# Apply the style to a cell range
worksheet.Range[3, 4, 4, 6].Style = style

# Save the workbook to file
workbook.SaveToFile("output/ApplyFormatToCellRange.xlsx",ExcelVersion.Version2016)

# Dispose resources
workbook.Dispose()
Apply for a Temporary License
If you'd like to remove the evaluation message from the generated documents, or to get rid of the function limitations, please request a 30-day trial license for yourself.
C#: Extract Text from Images using the New Model of Spire.OCR for .NET
2024-07-18 01:09:12 Written by AdministratorSpire.OCR for .NET offers developers a new model to extract text from images. In this article, we will demonstrate how to extract text from images in C# using the new model of Spire.OCR for .NET.
The detailed steps are as follows.
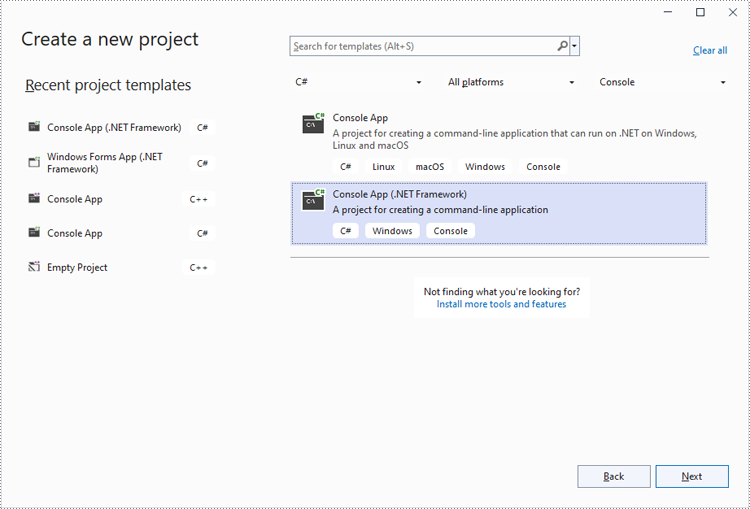
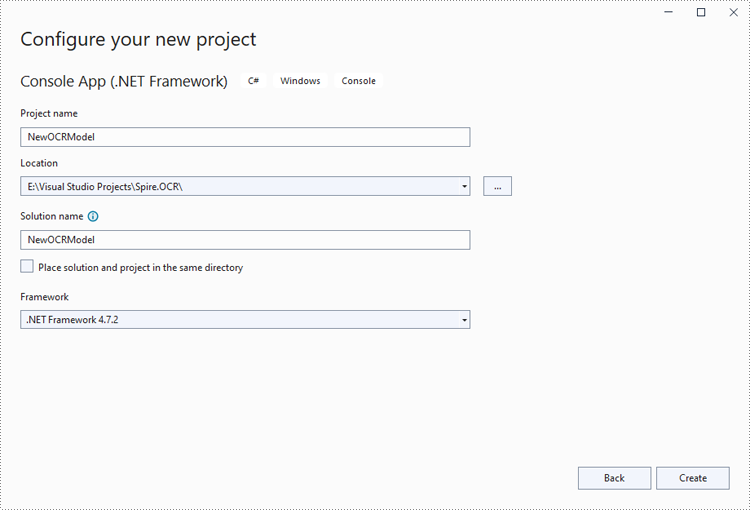
Step 1: Create a Console App (.NET Framework) in Visual Studio.
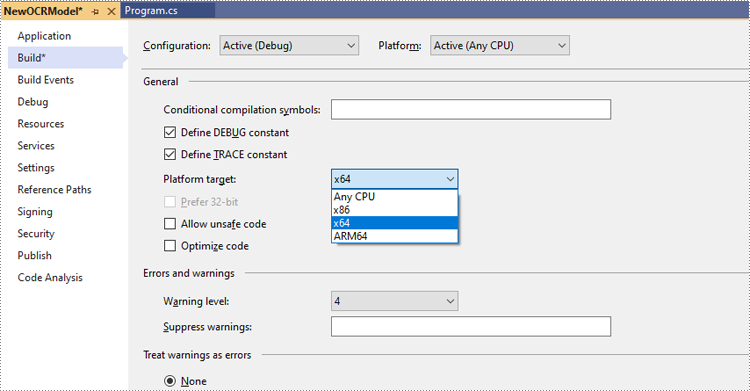
Step 2: Change the platform target of the application to x64.
In the application's Solution Explorer, right-click on the project's name and then select "Properties".
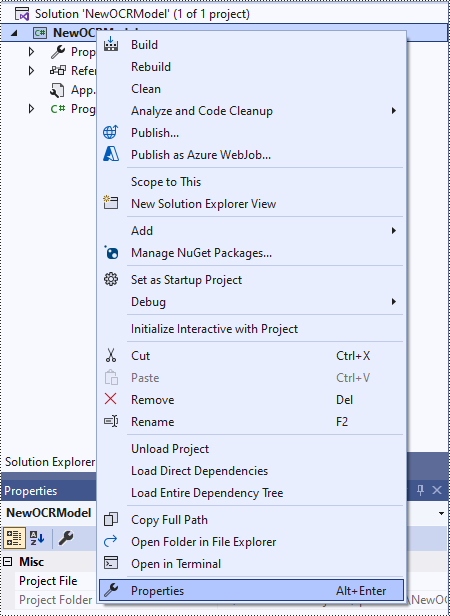
Change the platform target of the application to x64. This step must be performed since Spire.OCR only supports 64-bit platforms.
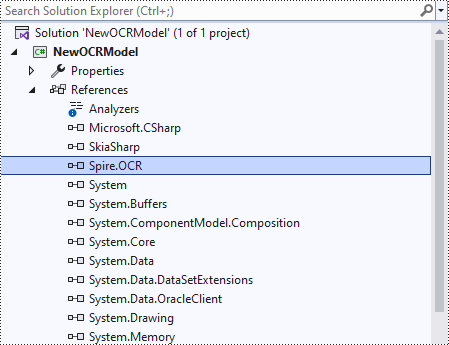
Step 3: Install Spire.OCR for .NET in your application.
Install Spire.OCR for .NET through NuGet by executing the following command in the NuGet Package Manager Console:
Install-Package Spire.OCR
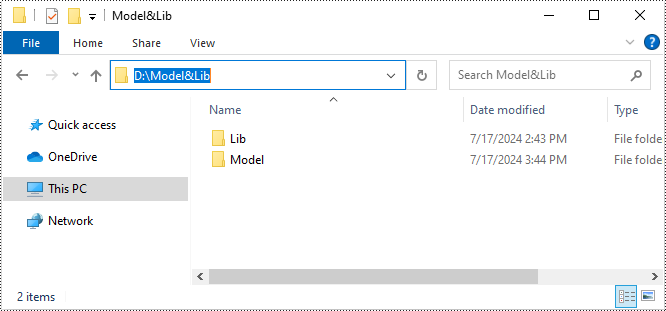
Step 4: Download the new model of Spire.OCR for .NET.
Download the model that fits in with your operating system from one of the following links.
Then extract the package and save it to a specific directory on your computer. In this example, we saved the package to "D:\".
Step 5: Use the new model of Spire.OCR for .NET to extract text from images in C#.
The following code example shows how to extract text from an image using C# and the new model of Spire.OCR for .NET:
- C#
using Spire.OCR;
using System.IO;

namespace NewOCRModel
{
    internal class Program
    {
        static void Main(string[] args)
        {
            // Set license key
            // Spire.OCR.License.LicenseProvider.SetLicenseKey("your-license-key");

            // Create an instance of the OcrScanner class
            OcrScanner scanner = new OcrScanner();

            // Create an instance of the ConfigureOptions class to set up the scanner configuration
            ConfigureOptions configureOptions = new ConfigureOptions();

            // Set the path to the new model
            configureOptions.ModelPath = "D:\\win-x64";

            // Set the language for text recognition. The default is English.
            // Supported languages include English, Chinese, Chinesetraditional, French, German, Japanese, and Korean.
            configureOptions.Language = "English";

            // Apply the configuration options to the scanner
            scanner.ConfigureDependencies(configureOptions);

            // Extract text from an image
            scanner.Scan("test.png");

            //Save the extracted text to a text file
            string text = scanner.Text.ToString();
            File.WriteAllText("Output.txt", text);
        }
    }
}
Apply for a Temporary License
If you'd like to remove the evaluation message from the generated documents, or to get rid of the function limitations, please request a 30-day trial license for yourself.
