Turn Documents into PowerPoint Presentations with AI in C#

Turning documents into PowerPoint presentations with AI in C# is more than format conversion. A 30-page report becoming a 10-slide deck means someone read the full document, decided which 90% to leave out, reorganized what remained into a narrative, and applied visual design. That is editorial synthesis — the part traditional PowerPoint libraries do not do.
The interesting part is what gets synthesized. In real workflows the source is rarely a single file. A quarterly business review pulls numbers from an Excel workbook, narrative from a Word report, and a signature invoice from a PDF. The value of an AI document agent is not "convert one .docx to .pptx" — it is "read all three, and give me one deck that tells the story across them." This article shows the simplest way to do exactly that with Spire.Agent.Office in C#: hand the agent every document plus one instruction, and let it generate the deck in a single call.
1. One Instruction, Many Sources
Traditional Spire.Office code treats each format as an island. To build a deck from a Word report plus an Excel sheet you would:
- Use
Spire.Docto open the.docxand pull the text you want. - Use
Spire.XLSto read the workbook and compute the figures. - Use
Spire.Pdfif a source is a PDF. - Use
Spire.Presentationto create slides one by one, position every text box and chart, and calculate layouts by hand.
That is four API surfaces, a parser per format, and a manual layout engine. The moment a document's structure changes, the code breaks.
Spire.Agent.Office collapses that into one instruction. You hand the agent all your source files and tell it what story the deck should tell. The agent reads each format, decides what matters across them, and produces the slides — no manual layout code.
The mental model is a single step:
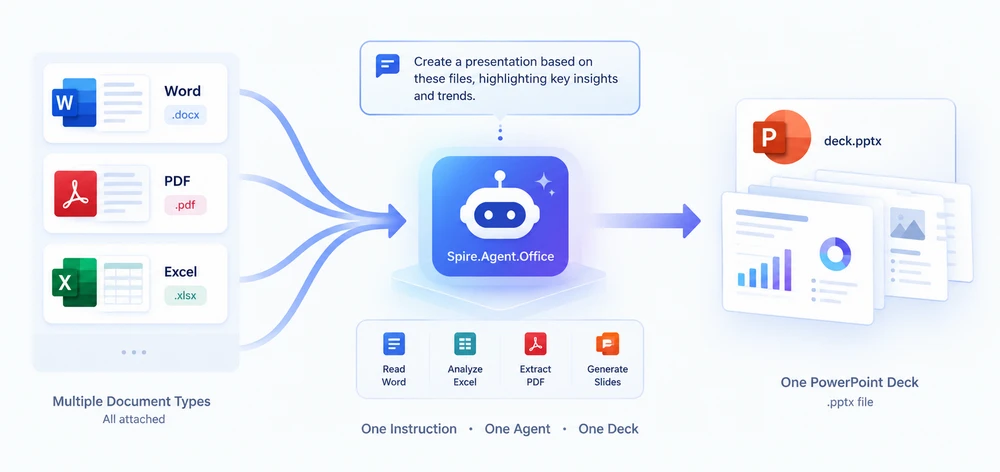
Instead of writing a parser per format, you let the agent read every file and generate the deck directly. One call, one instruction string, one .pptx file.
2. What You Need
- .NET 6+ (the sample targets
net10.0). - The
Spire.Agent.OfficeNuGet package. It transitively brings inSpire.Doc,Spire.Pdf,Spire.XLS, andSpire.Presentation, so you do not install them separately. - A
SpireToken(Spire.Agent.Office API key). The agent talks to the AI service, so a valid token is required for the actual generation. - Namespace imports:
using Spire.Agent.Office.AI;        // AIOptions, AIDocumentProcessor, AIResult
using Spire.Agent.Office.Extensions;// presentation.AI(...) extension
using Spire.Presentation;           // Presentation
3. The Simple Recipe: One Call, One Deck
The core idea is radical simplicity: pass every source document as attachments, write one natural-language instruction, and let the agent do everything — reading, understanding, synthesis, layout — in a single ExecuteInstruction call.
string[] sources = new[]
{
    Path.Combine(sampleDir, "AI-Powered Document Processing Report.docx"),
    Path.Combine(sampleDir, "purchase-orders.xlsx"),
    Path.Combine(sampleDir, "invoice_INV-2026-0815.pdf")
};

string instruction =
    "Create a concise Q3 business review summary from the provided documents. " +
    "1. Use a clean blue theme; " +
    "2. Summarize business review, project status, customer pilot research, and platform performance; " +
    "3. Keep each slide focused on one key finding or metric; " +
    "4. Generate 5 slides.";

AIResult result = processor.ExecuteInstruction(
    ppt, instruction, savePath, sources,
    autonomousOutput: true, maxTurns: null);
That is the whole recipe: one method call, one instruction string. No per-format parsers, no intermediate files, no manual layout code. The agent reads each format, decides what matters across them, and writes the deck directly to savePath.
The autonomousOutput: true flag is what makes this work — it tells the agent it may write files (including the final .pptx) without asking for confirmation at each step. Set maxTurns to null (or a large number) so the agent has enough turns to finish.
4. Full Example: One Deck from Word + PDF + Excel
Here is the complete program. Point it at a file or a folder, and it builds the deck in a single AI call:
using System;
using System.IO;
using System.Linq;
using Spire.Agent.Office.AI;
using Spire.Agent.Office.Extensions;
using Spire.Presentation;

class Program
{
    static void Main()
    {
        string instruction =
            "Create a concise Q3 business review summary from the provided documents. " +
            "1. Use a clean blue theme; " +
            "2. Summarize business review, project status, customer pilot research, and platform performance; " +
            "3. Keep each slide focused on one key finding or metric; " +
            "4. Generate 5 slides.";

        AIOptions options = new AIOptions { SpireToken = "sk-YourSpireToken", TimeoutMs = 1000000 };

        using (Presentation ppt = new Presentation())
        {
            AIResult result = ppt.AI(options).ExecuteInstruction(
                ppt, instruction, @"C:\Samples\Q3_Review.pptx", ResolveInputs(@"C:\Samples"),
                autonomousOutput: true, maxTurns: null);

            Console.WriteLine(result.Success ? "Success" : $"Error={result.ErrorMessage}");
        }
    }

    // Point at a file or a folder; a folder is filtered to supported document formats.
    static string[] ResolveInputs(string path) =>
        File.Exists(path) ? new[] { path }
        : Directory.GetFiles(path).Where(IsSupported).OrderBy(f => f).ToArray();

    static bool IsSupported(string file) =>
        new[] { ".doc", ".docx", ".xls", ".xlsx", ".ppt", ".pptx", ".pdf", ".txt", ".md" }
            .Contains(Path.GetExtension(file).ToLowerInvariant());
}
That is the whole program. Apart from the Agent call itself, the only code is ResolveInputs, which just decides which files to attach: it never reads or parses a document. The instruction is the only part that describes the design (theme, slide count, focus); the reading, deciding, and layout are the agent's job.
One call, five slides — the deck the program above produces:

5. How It Works Under the Hood
AIDocumentProcessoris obtained from aPresentationviappt.AI(options). ThePresentationobject is the canvas the agent draws slides onto.AIOptionscarries the configuration:SpireToken(your key) andTimeoutMs(set it large for real documents — AI analysis of big docs takes time).ExecuteInstructionruns the agent. You pass thePresentation, a natural-languageinstruction, thesavePathfor the output.pptx, and astring[]of source file paths (any mix of Word, PDF, Excel, Markdown). WithautonomousOutput: truethe agent may write files — including the final deck — without asking for confirmation. It returns anAIResultwithSuccess,ErrorMessage, andOutputFiles(everything the agent created).maxTurnscontrols how many agent steps are allowed. Set it tonullfor no limit, or a large number (e.g.80) for big document sets.GeneratePresentation(sourcePath, instruction, savePath)is the dedicated shortcut when you have exactly one source document. It returns aPPTGenerationResult(Success,GeneratedPages,TotalPages,OutputPath,ErrorMessage) instead of anAIResult. ItssourcePathis a single file, which is exactly why this article uses the multi-attachmentExecuteInstructionpath: that is what lets one deck draw on several sources in a single call.
Why not merge into Markdown first? You can — see Variant B in Section 6. But for most use cases the single-call approach is simpler, faster, and produces the same result. The intermediate Markdown is useful only when you want to inspect or edit the consolidated content before spending tokens on the deck.
6. Precise Control
The recipe above is deliberately minimal. When you need more control, these variations build on the same ExecuteInstruction call.
Tune the instruction. The deck's structure, length, theme, and charts are all controlled by the instruction string. Be explicit:
// e.g. ask for a specific page count, theme, and a chart on a given slide
"Create a 12-slide deck. Light minimalist theme, accent colour #2E5AAC. " +
"Include a bar chart of monthly revenue on slide 5. Keep each slide to one key message.";
Variant A — summarize each source yourself (more predictable). If you would rather prompt each document individually than trust one cross-document instruction, loop SummarizeDocument, which returns the agent's summary of a single file as a string:
var sb = new StringBuilder();
foreach (var file in sources)
    sb.AppendLine($"## {Path.GetFileName(file)}\n\n{processor.SummarizeDocument(file)}");
File.WriteAllText(Path.Combine(workDir, "consolidated.md"), sb.ToString());
Then pass the consolidated Markdown to ExecuteInstruction as the sole source — you get a separate, per-document summary you can read and edit before generation.
Variant B — consolidate into Markdown, then generate (two-step). For cases where you want an inspectable intermediate file, split the work into two calls. Step 1 uses ExecuteInstruction in autonomous mode to merge all sources into one Markdown file; Step 2 feeds that Markdown to ExecuteInstruction again to build the deck:
// Step 1 — merge all documents into one Markdown file
string consolidateInstruction =
    "Read all the attached files. Merge their content into a SINGLE Markdown " +
    "document named 'output_consolidated.md'. Use one top-level heading per source, " +
    "preserve key facts / figures / tables, and drop boilerplate. Output ONLY that file.";
processor.ExecuteInstruction(ppt, consolidateInstruction,
    Path.Combine(workDir, "output_consolidated.pptx"), sources,
    autonomousOutput: true, maxTurns: 40);

string consolidatedMd = Path.Combine(workDir, "output_consolidated.md");

// Step 2 — generate the deck from the consolidated Markdown
string genInstruction =
    "Create a 9-slide quarterly business review deck from the consolidated material. " +
    "Professional corporate blue, clear hierarchy, speaker notes per slide.";
processor.ExecuteInstruction(ppt, genInstruction,
    Path.Combine(workDir, "QBR_Deck.pptx"), new[] { consolidatedMd },
    autonomousOutput: true, maxTurns: 40);
The trade-off: Variant B gives you an inspectable Markdown file between the two calls, which is useful for debugging or when the consolidation needs human review. The single-call recipe in Section 3 is the recommended default because it is simpler and faster.
You may also like: Automate Invoice Processing with an AI Agent in .NET — another document-heavy workflow that hands the agent a folder of files and gets a finished document back.
7. Read Back and Inspect the Result
After generation, reopen the deck and verify it programmatically:
using (Presentation deck = new Presentation())
{
    deck.LoadFromFile(savePath);
    Console.WriteLine($"Total slides: {deck.Slides.Count}");

    for (int i = 0; i < deck.Slides.Count; i++)
    {
        ISlide slide = deck.Slides[i];
        string title = slide.Title ?? "(no title)";
        Console.WriteLine($"Slide {i + 1}: {title}");
    }
}
This is also where a human review step fits: load the generated deck, check the titles, and refine the instruction if something is off.
8. FAQ
The generated deck has the wrong number of slides.
If a source is large, analysis can take longer than the default timeout and the agent stops early. Set AIOptions.TimeoutMs to a large value (e.g. 1000000 for ~17 minutes) and state a page range in the instruction, e.g. "Keep the final deck to 8–12 slides."
The agent does not include content from one of the documents. Complex documents can confuse a single pass. Name the content you want explicitly in the instruction ("include the findings from the Word report", "preserve the table in the Excel sheet"). If the problem persists, try the two-step approach (Variant B in Section 6) to inspect the consolidated Markdown before generation.
The call fails with "401 Invalid token".
The SpireToken is rejected — confirm it is valid, not expired, and copied correctly into AIOptions.SpireToken.
How do I pass multiple documents?
ExecuteInstruction accepts a string[] of file paths as its fourth argument. Pass every source file — any mix of .docx, .pdf, .xlsx, .md, and more — and the agent reads them all in one call. With a single source document, the dedicated shortcut is GeneratePresentation(sourcePath, instruction, savePath); the multi-attachment call above is what makes one deck from several sources possible.
Get Your SpireToken Key Contact us to request a trial or commercial API key, or apply for a temporary license. Configure it in code:
AIOptions options = new AIOptions();
options.SpireToken = "sk-YourSpireToken";
options.TimeoutMs  = 1000000;
See Also
- Spire.Agent.Office product overview — the AI agent SDK for Word, Excel, PowerPoint, and PDF
- Getting Started with Spire.Agent.Office — install the SDK and run your first instruction
- Generate PPT from Documents — the official tutorial for the presentation API used in this article
- Batch Contract Generation with Spire.Agent.Office — the same instruction-driven pattern applied to bulk document generation
Convertendo Imagens para PDF em JavaScript (React)

Uma pasta de imagens é incômoda de entregar a alguém. Um PDF é um único arquivo, abre em qualquer lugar, imprime de forma previsível e — a parte que realmente importa — mantém uma ordem fixa. É por isso que páginas digitalizadas, conjuntos de fotos, fotos de recibos e quadros de design exportados costumam ser reunidos em um PDF antes de serem enviados a qualquer lugar.
Construir esse PDF no navegador é um problema diferente de renderizar um PDF como imagem. Você não está decodificando algo que já existe; você está tomando decisões que um formato de documento normalmente tomaria por você: qual o tamanho da página, onde a imagem se posiciona nela, o que acontece quando uma imagem tem formato diferente da página e em que ordem as páginas saem.
Spire.PDF for JavaScript expõe essas decisões por meio de uma tela de página. Você adiciona uma página, carrega uma imagem, desenha-a nessa página em um tamanho que você calcula e salva. Tudo é executado no lado do cliente via WebAssembly, então as imagens nunca são enviadas.
Por que imagens acabam em PDFs
Os cenários compartilham uma mesma característica: várias imagens que precisam se comportar como um único documento.
- Documentos de várias páginas digitalizados ou fotografados — um contrato fotografado página por página, remontado em um único arquivo que pode ser arquivado ou enviado por e-mail.
- Conjuntos de fotos e portfólios — uma imagem por página, em uma ordem escolhida por alguém.
- Recibos e relatórios de despesas — uma dúzia de fotos de celular que o departamento financeiro quer como um único anexo.
- Exportações de design e diagramas — quadros exportados de uma ferramenta, reunidos em algo revisável.
Em cada caso, o PDF não é realmente sobre o formato PDF. É sobre obter um artefato estável, de arquivo único e ordenado a partir de uma pilha de imagens.
Pré-requisitos
Este tutorial pressupõe um projeto React com o Spire.PDF for JavaScript instalado e o módulo WASM inicializado. Para a configuração, consulte Integrating Spire.PDF for JavaScript in a React Project.
Você precisará de:
- Um ou mais arquivos de imagem carregados no VFS
- O módulo WASM acessível em
window.wasmModule.spirepdf
Uma imagem, uma página
O fluxo básico tem quatro etapas: criar um documento, adicionar uma página, carregar a imagem e desenhá-la. A parte interessante é o desenho — você precisa decidir o quão grande a imagem deve ser na página.
function App() {
  const convertImageToPDF = async () => {
    // Get the Spire.PDF WASM module
    const pdfModule = window.wasmModule?.spirepdf;

    // Check if the WASM module is ready
    if (!pdfModule) {
      alert('Spire.PDF is not ready yet');
      return;
    }

    // Load the image file into VFS
    const inputFileName = 'Scenery.png';
    await window.spire.FetchFileToVFS(inputFileName, "", `${process.env.PUBLIC_URL}/data/`);

    // Create a PdfDocument object
    let doc = new pdfModule.PdfDocument();

    // Add a page
    let page = doc.Pages.Add();

    // Load the image
    let image = pdfModule.PdfImage.FromFile(inputFileName);

    // Calculate the scale ratio so the image fits the page completely
    let widthFitRate = image.PhysicalDimension.Width / page.Canvas.ClientSize.Width;
    let heightFitRate = image.PhysicalDimension.Height / page.Canvas.ClientSize.Height;
    let fitRate = Math.max(widthFitRate, heightFitRate);

    // Calculate the scaled dimensions of the image
    let fitWidth = image.PhysicalDimension.Width / fitRate;
    let fitHeight = image.PhysicalDimension.Height / fitRate;

    // Center the image on the page
    let x = (page.Canvas.ClientSize.Width - fitWidth) / 2;
    let y = (page.Canvas.ClientSize.Height - fitHeight) / 2;

    // Draw the image onto the page
    page.Canvas.DrawImage({ image: image, x: x, y: y, width: fitWidth, height: fitHeight });

    const outputFileName = 'ImageToPDF.pdf';

    // Save as PDF format
    doc.SaveToFile({ fileName: outputFileName, fileFormat: pdfModule.FileFormat.PDF });
    doc.Close();

    // Read the converted file from VFS and trigger download
    const fileArray = window.dotnetRuntime.Module.FS.readFile(outputFileName);
    const blob = new Blob([fileArray], { type: 'application/pdf' });
    const url = URL.createObjectURL(blob);
    const a = document.createElement('a');
    a.href = url;
    a.download = outputFileName;
    a.click();
    URL.revokeObjectURL(url);
  };

  return (
    <div style={{ textAlign: 'center', height: '300px' }}>
      <h1>Convert Image To PDF</h1>
      <button onClick={convertImageToPDF}>
        Generate
      </button>
    </div>
  );
}

export default App;
Documento PDF gerado após carregar uma imagem via PdfImage.FromFile e desenhá-la com Canvas.DrawImage
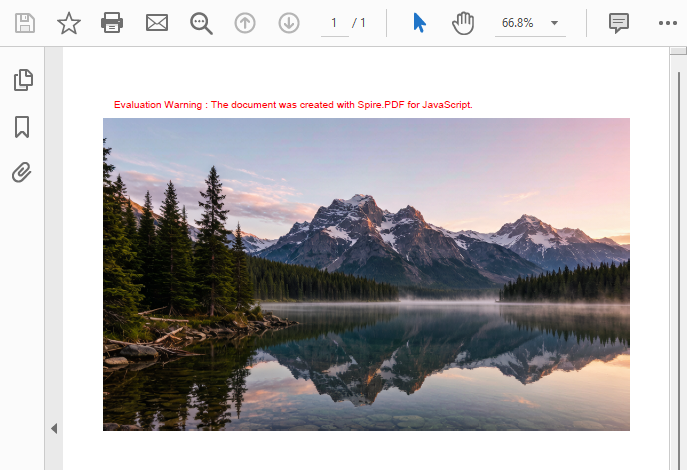
Extraia o dimensionamento para um helper, pois é a única parte deste código que você reutilizará em todas as outras receitas abaixo. A matemática: pegue page.Canvas.ClientSize — a área desenhável da página, em pontos — como seu orçamento, compare-a com a PhysicalDimension natural da imagem e divida ambas as dimensões por uma única razão para que a proporção seja preservada. Esconda isso em uma função para que a parte propensa a bugs fique em exatamente um lugar:
// Contain: scale until the whole image fits inside the page
function fitContain(imgW, imgH, pageW, pageH) {
  const rate = Math.max(imgW / pageW, imgH / pageH);
  const width = imgW / rate;
  const height = imgH / rate;
  return { width, height, x: (pageW - width) / 2, y: (pageH - height) / 2 };
}
Agora a chamada de desenho no exemplo acima se reduz a três linhas, e a decisão de "contain ou cover" sai da matemática e passa para o nome de uma função:
let page = doc.Pages.Add();
let box = fitContain(
  image.PhysicalDimension.Width, image.PhysicalDimension.Height,
  page.Canvas.ClientSize.Width, page.Canvas.ClientSize.Height
);
page.Canvas.DrawImage({ image: image, x: box.x, y: box.y, width: box.width, height: box.height });
Math.max é a escolha "contain" — dimensiona pelo eixo mais restritivo para que a imagem inteira permaneça visível. Se, em vez disso, você quiser preencher a página e cortar o excesso, troque por Math.min; a seção sobre dimensionamento fornece a contraparte fitCover e uma variante com margem.
Muitas imagens, um documento
Uma imagem por página significa um Pages.Add() e um DrawImage por imagem. Percorra um array de nomes de arquivo e a ordem do array se torna a ordem das páginas — que é exatamente o que você quer quando o usuário acabou de arrastar miniaturas para colocá-las em sequência.
const combineImagesToPdf = async () => {
  const pdfModule = window.wasmModule?.spirepdf;
  if (!pdfModule) return;

  // The order of this array is the order of pages in the PDF
  const imageFiles = ['scan_01.png', 'scan_02.png', 'scan_03.png', 'scan_04.png'];

  for (const fileName of imageFiles) {
    await window.spire.FetchFileToVFS(fileName, "", `${process.env.PUBLIC_URL}/data/`);
  }

  let doc = new pdfModule.PdfDocument();

  for (const fileName of imageFiles) {
    let page = doc.Pages.Add();
    let image = pdfModule.PdfImage.FromFile(fileName);

    let box = fitContain(
      image.PhysicalDimension.Width, image.PhysicalDimension.Height,
      page.Canvas.ClientSize.Width, page.Canvas.ClientSize.Height
    );

    page.Canvas.DrawImage({ image: image, x: box.x, y: box.y, width: box.width, height: box.height });
  }

  const outputFileName = 'ScannedDocument.pdf';
  doc.SaveToFile({ fileName: outputFileName, fileFormat: pdfModule.FileFormat.PDF });
  doc.Close();

  const fileArray = window.dotnetRuntime.Module.FS.readFile(outputFileName);
  const blob = new Blob([fileArray], { type: 'application/pdf' });
  const url = URL.createObjectURL(blob);
  const a = document.createElement('a');
  a.href = url;
  a.download = outputFileName;
  a.click();
  URL.revokeObjectURL(url);
};
Duas observações práticas. Como cada página é dimensionada de forma independente, imagens de dimensões diferentes não são problema — uma foto em paisagem e uma digitalização em retrato podem ficar no mesmo documento sem nenhum tratamento especial. E como todo o documento é construído na memória antes de SaveToFile, o download acontece uma única vez no final, independentemente de quantas imagens foram incluídas.
Você também pode gostar: Montar imagens é o inverso da renderização. Se você já tem um PDF e quer cada uma de suas páginas como imagem, consulte How to Convert PDF Pages to Images in JavaScript (React).
Dimensionamento: ajustar a imagem à página
Há duas maneiras razoáveis de colocar uma imagem em uma página, e qual delas você quer depende de se perder parte da imagem é aceitável.
Contain (Math.max) |
Cover (Math.min) |
|
|---|---|---|
| O que faz | Dimensiona até que a imagem inteira caiba | Dimensiona até que a página seja preenchida |
| Imagem inteira visível | Sim | Não — o excesso é cortado |
| Espaço vazio | Possível, em um dos eixos | Nenhum |
| Ideal para | Digitalizações, documentos, qualquer coisa que precise permanecer completa | Fotos de página inteira, capas, slides |
O primeiro exemplo usa contain — o helper fitContain. Mudar para cover é o espelho dessa função: Math.min em vez de Math.max, preenchendo a página e deixando a tela cortar o que transbordar, com deslocamentos de centralização que ficam negativos:
// Cover: fill the page, clipping whatever overflows
function fitCover(imgW, imgH, pageW, pageH) {
  const rate = Math.min(imgW / pageW, imgH / pageH);
  const width = imgW / rate;
  const height = imgH / rate;
  return {
    width, height,
    x: (pageW - width) / 2,   // negative when the image is wider than the page
    y: (pageH - height) / 2   // negative when it is taller
  };
}
Se você quiser uma margem visível em vez de uma saída de borda a borda, reduza a área utilizável em vez da imagem — passe o orçamento ajustado pela margem para o mesmo helper fitContain:
const margin = 36; // 36 points = 0.5 inch
let usableWidth = page.Canvas.ClientSize.Width - margin * 2;
let usableHeight = page.Canvas.ClientSize.Height - margin * 2;

let box = fitContain(
  image.PhysicalDimension.Width, image.PhysicalDimension.Height,
  usableWidth, usableHeight
);
page.Canvas.DrawImage({ image: image, x: box.x, y: box.y, width: box.width, height: box.height });
Uma coisa que vale saber sobre PhysicalDimension: ela reflete o tamanho físico da imagem, que nem sempre é o tamanho em pixels. Uma foto de 4000 × 3000 salva com uma tag de DPI diferente reportará números diferentes do que você poderia esperar. É por isso que a abordagem baseada em razão acima é mais segura do que codificar dimensões em pixels — ela funciona independentemente de como a imagem foi marcada.
Carregar imagens da memória
PdfImage.FromFile espera que a imagem já esteja no VFS. Nem sempre é aí que suas imagens estão — uma resposta de API, um blob de banco de dados ou uma exportação de canvas fornecem bytes na memória em vez disso. PdfImage.FromStream recebe esses bytes diretamente.
// Read image bytes from VFS and build a memory stream
let bytes = window.dotnetRuntime.Module.FS.readFile(inputFileName);
let stream = new pdfModule.Stream(bytes);

// Load the image from the memory stream
let image = pdfModule.PdfImage.FromStream(stream);
A partir daí, é o mesmo que qualquer outra imagem — calcule o tamanho e desenhe-a:
let page = doc.Pages.Add();
let box = fitContain(
  image.PhysicalDimension.Width, image.PhysicalDimension.Height,
  page.Canvas.ClientSize.Width, page.Canvas.ClientSize.Height
);
page.Canvas.DrawImage({ image: image, x: box.x, y: box.y, width: box.width, height: box.height });
A mesma forma de bytes funciona independentemente de onde ela veio. Se suas imagens chegam como um ArrayBuffer de fetch, envolva-o em um Uint8Array antes de construir o stream:
const response = await fetch('/api/images/invoice-001');
const bytes = new Uint8Array(await response.arrayBuffer());
let stream = new pdfModule.Stream(bytes);
let image = pdfModule.PdfImage.FromStream(stream);
Este é o padrão a usar quando o PDF é montado a partir de imagens acionadas pelo servidor, uploads de usuário mantidos em estado ou qualquer coisa gerada em tempo de execução por um canvas — sem necessidade de ida e volta pelo VFS.
Artigo recomendado: O Spire.PDF também pode desenhar nas páginas de um PDF que você já tem aberto, não apenas nos novos documentos acima. Para inserir imagens em um documento existente, consulte How to Add Images to a PDF in JavaScript (React).
Problemas comuns
A imagem sai esticada ou achatada.
Isso quase sempre é o uso de dois fatores de escala diferentes. Calcule um único fitRate e divida tanto a largura quanto a altura por ele — nunca dimensione os eixos independentemente.
A imagem fica minúscula no meio de uma grande página vazia. Esperado, quando a proporção da imagem é muito diferente da proporção da página. Uma foto panorâmica em uma página retrato sempre deixará faixas acima e abaixo. Ou aceite isso (correto para documentos), mude para cover, ou use a versão ajustada com margem para pelo menos manter o espaço em branco simétrico.
A imagem fica cortada nas bordas.
Você está usando o comportamento cover, intencionalmente ou não. Verifique se o fitRate usou Math.min; troque para Math.max se a imagem inteira precisar estar visível.
Uma foto de alta resolução produz um PDF enorme.
A imagem é incorporada na sua própria resolução. Se o tamanho do arquivo importa, reduza a escala antes de desenhar — desenhe-a em um canvas no tamanho desejado, exporte e use esses bytes com PdfImage.FromStream.
Nada acontece no primeiro clique.
O módulo WASM carrega de forma assíncrona. A verificação if (!pdfModule) return; existe por esse motivo; em um aplicativo real, condicione o botão à prontidão do módulo em vez de exibir um alerta.
Perguntas frequentes
Posso inserir imagens em um PDF existente em vez de criar um novo?
Sim. Os exemplos aqui criam um novo documento, mas você pode abrir um PDF existente e desenhar em suas páginas da mesma forma. Consulte How to Add Images to a PDF in JavaScript (React) para esse fluxo de trabalho.
Quais formatos de imagem posso carregar?
Formatos bitmap comuns — PNG, JPEG, BMP e similares — são suportados por PdfImage.FromFile e PdfImage.FromStream. Use FromStream quando o formato for desconhecido em tempo de compilação ou quando os bytes vierem de uma resposta de rede.
Posso controlar a ordem das páginas?
Sim. As páginas são criadas na ordem em que você chama Pages.Add(), então ordenar seu array de nomes de arquivo ordena a saída. Esse é o mecanismo por trás das interfaces de arrastar para reordenar: reordene o array, reconstrua o PDF.
Isso exige um backend?
Não. O documento é montado no navegador pelo módulo WebAssembly, e o PDF finalizado é retornado como bytes que você transforma em um Blob. As imagens nunca saem do dispositivo.
Posso misturar imagens em retrato e paisagem em um mesmo PDF?
Sim. Cada página é dimensionada e desenhada de forma independente, então uma digitalização em retrato e uma foto em paisagem podem ficar lado a lado. Se você quer orientação de página uniforme, esse é um motivo para usar um tamanho de página fixo e deixar as imagens se dimensionarem a ele.
Tenho um PDF e quero suas páginas como imagens, não o contrário.
Essa é a operação inversa — renderização em vez de montagem. Consulte How to Convert PDF Pages to Images in JavaScript (React).
Preciso da imagem no VFS?
Apenas para FromFile. FromStream aceita bytes de qualquer lugar — uma resposta de fetch, uma exportação de canvas ou estado — e ignora o VFS completamente.
Veja também
As receitas de montagem aqui criam um documento totalmente novo. Se suas imagens precisam ir para dentro de um PDF existente — desenhando em páginas que você já tem — consulte How to Add Images to a PDF in JavaScript (React). As outras peças úteis do pipeline de imagem-PDF:
JavaScript(React)에서 이미지를 PDF로 변환하기
폴더에 있는 이미지들은 다른 사람에게 건네기 번거롭습니다. PDF는 파일 하나로 어디서든 열리고, 예측 가능하게 인쇄되며 — 사람들이 실제로 신경 쓰는 부분인 — 고정된 순서를 유지합니다. 그래서 스캔한 페이지, 사진 세트, 영수증 사진, 내보낸 디자인 프레임은 어디로 보내기 전에 PDF로 조립되는 경우가 많습니다.
브라우저에서 그 PDF를 만드는 것은 PDF를 이미지로 렌더링하는 것과는 다른 문제입니다. 이미 존재하는 것을 디코딩하는 것이 아니라, 일반적으로 문서 형식이 대신 내려 주는 결정을 직접 내려야 합니다: 페이지는 얼마나 커야 하는지, 이미지는 페이지 어디에 놓이는지, 이미지가 페이지와 다른 모양일 때 어떻게 되는지, 페이지는 어떤 순서로 나오는지.
Spire.PDF for JavaScript는 페이지 캔버스를 통해 이러한 결정을 드러냅니다. 페이지를 추가하고, 이미지를 로드한 뒤, 계산한 크기로 해당 페이지에 그린 다음, 저장합니다. 모든 것이 WebAssembly를 통해 클라이언트 측에서 실행되므로 이미지는 업로드되지 않습니다.
PDF에 이미지가 들어가는 이유
이 시나리오들은 한 가지 형태를 공유합니다: 하나의 문서처럼 동작해야 하는 여러 이미지입니다.
- 스캔하거나 촬영한 여러 페이지 문서 — 계약서를 페이지별로 촬영해 파일로 보관하거나 이메일로 보낼 수 있는 단일 파일로 다시 조립한 경우.
- 사진 세트와 포트폴리오 — 누군가 선택한 순서대로 페이지당 이미지 하나.
- 영수증 및 경비 보고서 — 회계에서 하나의 첨부 파일로 원하는 휴대폰 사진 여러 장.
- 디자인 및 다이어그램 내보내기 — 도구에서 내보낸 프레임을 검토 가능한 무언가로 모은 경우.
각 경우에서 PDF는 사실 PDF 형식 자체에 관한 것이 아닙니다. 이미지 더미에서 안정적이고 단일 파일이며 순서가 있는 결과물을 얻는 것이 핵심입니다.
사전 요구 사항
이 안내는 Spire.PDF for JavaScript가 설치되고 WASM 모듈이 초기화된 React 프로젝트를 가정합니다. 설정 방법은 React 프로젝트에 Spire.PDF for JavaScript 통합하기를 참조하세요.
필요한 항목:
- VFS에 로드된 하나 이상의 이미지 파일
window.wasmModule.spirepdf에서 접근 가능한 WASM 모듈
이미지 하나, 페이지 하나
기본 흐름은 네 단계입니다: 문서를 만들고, 페이지를 추가하고, 이미지를 로드하고, 그립니다. 흥미로운 부분은 그리기입니다 — 페이지에서 이미지가 얼마나 커야 하는지 결정해야 합니다.
function App() {
  const convertImageToPDF = async () => {
    // Get the Spire.PDF WASM module
    const pdfModule = window.wasmModule?.spirepdf;

    // Check if the WASM module is ready
    if (!pdfModule) {
      alert('Spire.PDF is not ready yet');
      return;
    }

    // Load the image file into VFS
    const inputFileName = 'Scenery.png';
    await window.spire.FetchFileToVFS(inputFileName, "", `${process.env.PUBLIC_URL}/data/`);

    // Create a PdfDocument object
    let doc = new pdfModule.PdfDocument();

    // Add a page
    let page = doc.Pages.Add();

    // Load the image
    let image = pdfModule.PdfImage.FromFile(inputFileName);

    // Calculate the scale ratio so the image fits the page completely
    let widthFitRate = image.PhysicalDimension.Width / page.Canvas.ClientSize.Width;
    let heightFitRate = image.PhysicalDimension.Height / page.Canvas.ClientSize.Height;
    let fitRate = Math.max(widthFitRate, heightFitRate);

    // Calculate the scaled dimensions of the image
    let fitWidth = image.PhysicalDimension.Width / fitRate;
    let fitHeight = image.PhysicalDimension.Height / fitRate;

    // Center the image on the page
    let x = (page.Canvas.ClientSize.Width - fitWidth) / 2;
    let y = (page.Canvas.ClientSize.Height - fitHeight) / 2;

    // Draw the image onto the page
    page.Canvas.DrawImage({ image: image, x: x, y: y, width: fitWidth, height: fitHeight });

    const outputFileName = 'ImageToPDF.pdf';

    // Save as PDF format
    doc.SaveToFile({ fileName: outputFileName, fileFormat: pdfModule.FileFormat.PDF });
    doc.Close();

    // Read the converted file from VFS and trigger download
    const fileArray = window.dotnetRuntime.Module.FS.readFile(outputFileName);
    const blob = new Blob([fileArray], { type: 'application/pdf' });
    const url = URL.createObjectURL(blob);
    const a = document.createElement('a');
    a.href = url;
    a.download = outputFileName;
    a.click();
    URL.revokeObjectURL(url);
  };

  return (
    <div style={{ textAlign: 'center', height: '300px' }}>
      <h1>Convert Image To PDF</h1>
      <button onClick={convertImageToPDF}>
        Generate
      </button>
    </div>
  );
}

export default App;
PdfImage.FromFile로 이미지를 로드하고 Canvas.DrawImage로 그린 후 생성된 PDF 문서
크기 계산을 헬퍼로 분리하세요. 아래의 다른 모든 레시피에서 재사용하게 될 코드 조각이기 때문입니다. 계산 방식: page.Canvas.ClientSize — 페이지에서 그릴 수 있는 영역(포인트 단위) — 를 예산으로 삼고, 이미지의 자연스러운 PhysicalDimension과 비교한 뒤, 가로세로 비율이 유지되도록 두 치수를 하나의 비율로 나눕니다. 버그가 생기기 쉬운 부분이 정확히 한 곳에 있도록 함수로 감싸 두세요:
// Contain: scale until the whole image fits inside the page
function fitContain(imgW, imgH, pageW, pageH) {
  const rate = Math.max(imgW / pageW, imgH / pageH);
  const width = imgW / rate;
  const height = imgH / rate;
  return { width, height, x: (pageW - width) / 2, y: (pageH - height) / 2 };
}
이제 위 예제의 그리기 호출은 세 줄로 줄어들고, "contain 또는 cover" 결정은 수학에서 빠져나와 함수 이름으로 이동합니다:
let page = doc.Pages.Add();
let box = fitContain(
  image.PhysicalDimension.Width, image.PhysicalDimension.Height,
  page.Canvas.ClientSize.Width, page.Canvas.ClientSize.Height
);
page.Canvas.DrawImage({ image: image, x: box.x, y: box.y, width: box.width, height: box.height });
Math.max는 "contain" 선택입니다 — 더 제한적인 축을 기준으로 크기를 조정하여 전체 이미지가 보이게 유지합니다. 대신 페이지를 채우고 넘치는 부분을 잘라내고 싶다면 Math.min으로 바꾸세요. 크기 조정 섹션에서 fitCover 대응 버전과 여백 변형을 확인할 수 있습니다.
여러 이미지, 하나의 문서
페이지당 이미지 하나는 이미지마다 Pages.Add() 하나와 DrawImage 하나를 의미합니다. 파일 이름 배열을 반복하면 배열 순서가 페이지 순서가 됩니다 — 사용자가 방금 썸네일을 순서대로 드래그해 놓았을 때 정확히 원하는 동작입니다.
const combineImagesToPdf = async () => {
  const pdfModule = window.wasmModule?.spirepdf;
  if (!pdfModule) return;

  // The order of this array is the order of pages in the PDF
  const imageFiles = ['scan_01.png', 'scan_02.png', 'scan_03.png', 'scan_04.png'];

  for (const fileName of imageFiles) {
    await window.spire.FetchFileToVFS(fileName, "", `${process.env.PUBLIC_URL}/data/`);
  }

  let doc = new pdfModule.PdfDocument();

  for (const fileName of imageFiles) {
    let page = doc.Pages.Add();
    let image = pdfModule.PdfImage.FromFile(fileName);

    let box = fitContain(
      image.PhysicalDimension.Width, image.PhysicalDimension.Height,
      page.Canvas.ClientSize.Width, page.Canvas.ClientSize.Height
    );

    page.Canvas.DrawImage({ image: image, x: box.x, y: box.y, width: box.width, height: box.height });
  }

  const outputFileName = 'ScannedDocument.pdf';
  doc.SaveToFile({ fileName: outputFileName, fileFormat: pdfModule.FileFormat.PDF });
  doc.Close();

  const fileArray = window.dotnetRuntime.Module.FS.readFile(outputFileName);
  const blob = new Blob([fileArray], { type: 'application/pdf' });
  const url = URL.createObjectURL(blob);
  const a = document.createElement('a');
  a.href = url;
  a.download = outputFileName;
  a.click();
  URL.revokeObjectURL(url);
};
실용적인 참고 사항 두 가지. 각 페이지의 크기가 독립적으로 조정되므로 서로 다른 크기의 이미지도 문제없습니다 — 가로 사진과 세로 스캔이 특별한 처리 없이 같은 문서에 들어갈 수 있습니다. 또한 전체 문서가 SaveToFile 전에 메모리에서 만들어지므로 이미지가 몇 장 들어갔든 다운로드는 마지막에 한 번만 발생합니다.
이런 글도 좋아할 수 있습니다: 이미지를 조립하는 것은 렌더링의 반대입니다. 이미 PDF가 있고 각 페이지를 그림으로 원한다면, JavaScript(React)에서 PDF 페이지를 이미지로 변환하는 방법을 참조하세요.
크기 조정: 페이지에 이미지 맞추기
페이지에 이미지를 넣는 합리적인 방법은 두 가지이며, 어느 쪽을 원할지는 이미지의 일부가 잘려도 괜찮은지에 달려 있습니다.
Contain (Math.max) |
Cover (Math.min) |
|
|---|---|---|
| 수행하는 작업 | 전체 이미지가 들어갈 때까지 크기를 조정합니다 | 페이지가 채워질 때까지 크기를 조정합니다 |
| 전체 이미지 표시 | 예 | 아니요 — 넘치는 부분이 잘립니다 |
| 빈 공간 | 한 축에 생길 수 있음 | 없음 |
| 적합한 용도 | 스캔, 문서, 완전하게 유지되어야 하는 모든 것 | 전면 인쇄 사진, 표지 페이지, 슬라이드 |
첫 번째 예제는 contain — fitContain 헬퍼 — 를 사용합니다. cover로 전환하는 것은 해당 함수의 거울상입니다: Math.max 대신 Math.min을 사용하고, 페이지를 채우며 넘치는 부분은 캔버스가 잘라내도록 하고, 중앙 정렬 오프셋은 음수가 됩니다:
// Cover: fill the page, clipping whatever overflows
function fitCover(imgW, imgH, pageW, pageH) {
  const rate = Math.min(imgW / pageW, imgH / pageH);
  const width = imgW / rate;
  const height = imgH / rate;
  return {
    width, height,
    x: (pageW - width) / 2,   // negative when the image is wider than the page
    y: (pageH - height) / 2   // negative when it is taller
  };
}
가장자리까지 꽉 찬 출력 대신 눈에 보이는 여백을 원한다면 이미지가 아니라 사용 가능한 영역을 줄이세요 — 여백을 조정한 예산을 같은 fitContain 헬퍼에 넣습니다:
const margin = 36; // 36 points = 0.5 inch
let usableWidth = page.Canvas.ClientSize.Width - margin * 2;
let usableHeight = page.Canvas.ClientSize.Height - margin * 2;

let box = fitContain(
  image.PhysicalDimension.Width, image.PhysicalDimension.Height,
  usableWidth, usableHeight
);
page.Canvas.DrawImage({ image: image, x: box.x, y: box.y, width: box.width, height: box.height });
PhysicalDimension에 대해 알아 둘 만한 점: 이 값은 이미지의 물리적 크기를 반영하며, 항상 픽셀 크기와 같지는 않습니다. 다른 DPI 태그로 저장된 4000 × 3000 사진은 예상과 다른 숫자를 보고할 수 있습니다. 그래서 위의 비율 기반 접근 방식이 픽셀 치수를 하드코딩하는 것보다 더 안전합니다 — 이미지에 어떤 태그가 붙었든 작동합니다.
메모리에서 이미지 로드
PdfImage.FromFile은 이미지가 이미 VFS에 있기를 기대합니다. 이미지가 항상 그곳에 있는 것은 아닙니다 — API 응답, 데이터베이스 blob, 캔버스 내보내기는 모두 대신 메모리에 바이트를 제공합니다. PdfImage.FromStream은 그 바이트를 직접 받습니다.
// Read image bytes from VFS and build a memory stream
let bytes = window.dotnetRuntime.Module.FS.readFile(inputFileName);
let stream = new pdfModule.Stream(bytes);

// Load the image from the memory stream
let image = pdfModule.PdfImage.FromStream(stream);
그다음부터는 다른 이미지와 동일합니다 — 크기를 계산하고 그리면 됩니다:
let page = doc.Pages.Add();
let box = fitContain(
  image.PhysicalDimension.Width, image.PhysicalDimension.Height,
  page.Canvas.ClientSize.Width, page.Canvas.ClientSize.Height
);
page.Canvas.DrawImage({ image: image, x: box.x, y: box.y, width: box.width, height: box.height });
동일한 bytes 형태는 어디에서 왔든 작동합니다. 이미지가 fetch에서 ArrayBuffer로 도착한다면 스트림을 만들기 전에 Uint8Array로 감싸세요:
const response = await fetch('/api/images/invoice-001');
const bytes = new Uint8Array(await response.arrayBuffer());
let stream = new pdfModule.Stream(bytes);
let image = pdfModule.PdfImage.FromStream(stream);
PDF가 서버에서 트리거된 이미지, 상태에 보관된 사용자 업로드, 또는 캔버스가 런타임에 생성한 모든 것으로 조립될 때 사용할 패턴입니다 — VFS를 거치는 왕복이 필요하지 않습니다.
추천 문서: Spire.PDF는 위의 새 문서뿐만 아니라 이미 열어 둔 PDF의 페이지에도 그릴 수 있습니다. 기존 문서에 이미지를 배치하려면 JavaScript(React)에서 PDF에 이미지를 추가하는 방법을 참조하세요.
일반적인 문제
이미지가 늘어나거나 찌그러져 나옵니다.
거의 항상 두 가지 서로 다른 배율 인자 때문입니다. 하나의 fitRate를 계산하고 너비와 높이를 모두 그 값으로 나누세요 — 축을 독립적으로 조정하지 마세요.
이미지가 크고 빈 페이지 중앙에 아주 작게 나타납니다. 이미지의 가로세로 비율이 페이지와 크게 다를 때 예상되는 결과입니다. 세로 페이지에 파노라마 사진을 넣으면 항상 위아래에 띠가 생깁니다. 이를 받아들이거나(문서에는 올바름), cover로 전환하거나, 최소한 여백이 대칭을 이루도록 여백 조정 버전을 사용하세요.
이미지 가장자리가 잘립니다.
의도했든 아니든 cover 동작을 사용 중입니다. fitRate가 Math.min을 사용했는지 확인하고, 전체 이미지가 보여야 한다면 Math.max로 바꾸세요.
고해상도 사진이 거대한 PDF를 만듭니다.
이미지는 자체 해상도로 삽입됩니다. 파일 크기가 중요하다면 그리기 전에 축소하세요 — 대상 크기의 캔버스에 그린 뒤 내보내고, 그 바이트를 PdfImage.FromStream과 함께 사용하세요.
첫 클릭에 아무 일도 일어나지 않습니다.
WASM 모듈은 비동기로 로드됩니다. if (!pdfModule) return; 가드는 그 때문에 존재합니다. 실제 앱에서는 경고를 띄우기보다 모듈 준비 상태에 따라 버튼을 활성화하세요.
자주 묻는 질문
새 PDF를 만드는 대신 기존 PDF에 이미지를 삽입할 수 있나요?
예. 여기의 예제는 새 문서를 만들지만, 기존 PDF를 열고 같은 방식으로 해당 페이지에 그릴 수 있습니다. 그 작업 흐름은 JavaScript(React)에서 PDF에 이미지를 추가하는 방법을 참조하세요.
어떤 이미지 형식을 로드할 수 있나요?
일반적인 비트맵 형식 — PNG, JPEG, BMP 및 유사 형식 — 은 PdfImage.FromFile과 PdfImage.FromStream에서 지원됩니다. 빌드 시점에 형식을 모르거나 바이트가 네트워크 응답에서 오는 경우 FromStream을 사용하세요.
페이지 순서를 제어할 수 있나요?
예. 페이지는 Pages.Add()를 호출한 순서대로 생성되므로 파일 이름 배열을 정렬하면 출력도 정렬됩니다. 이것이 드래그로 순서를 바꾸는 인터페이스의 메커니즘입니다: 배열을 다시 정렬하고 PDF를 다시 만드세요.
백엔드가 필요한가요?
아니요. 문서는 WebAssembly 모듈에 의해 브라우저에서 조립되고, 완성된 PDF는 Blob으로 변환할 바이트로 반환됩니다. 이미지는 기기를 떠나지 않습니다.
한 PDF에 세로 및 가로 이미지를 섞을 수 있나요?
예. 각 페이지는 독립적으로 크기가 조정되고 그려지므로 세로 스캔과 가로 사진이 나란히 있을 수 있습니다. 페이지 방향을 통일하고 싶다면 고정 페이지 크기를 사용하고 이미지가 그 크기에 맞게 조정되도록 하는 것이 좋습니다.
PDF가 있고 그 페이지들을 이미지로 원합니다. 반대 방향은 아닙니다.
그것은 반대 작업입니다 — 조립이 아니라 렌더링입니다. JavaScript(React)에서 PDF 페이지를 이미지로 변환하는 방법을 참조하세요.
이미지를 VFS에 넣어야 하나요?
FromFile에만 필요합니다. FromStream은 어디에서든 바이트를 받습니다 — fetch 응답, 캔버스 내보내기, 또는 상태 — 그리고 VFS를 완전히 건너뜁니다.
같이 보기
여기의 조립 레시피는 완전히 새로운 문서를 만듭니다. 이미지가 기존 PDF 안으로 들어가야 한다면 — 이미 가지고 있는 페이지에 그리는 경우 — JavaScript(React)에서 PDF에 이미지를 추가하는 방법을 참조하세요. 이미지-PDF 파이프라인의 다른 유용한 부분:
Convertire immagini in PDF in JavaScript (React)
Una cartella di immagini è scomoda da consegnare a qualcuno. Un PDF è un unico file, si apre ovunque, si stampa in modo prevedibile e — la parte che interessa davvero alle persone — mantiene un ordine fisso. Ecco perché pagine scansionate, set di foto, foto di ricevute e fotogrammi di progettazione esportati vengono così spesso assemblati in un PDF prima di essere inviati da qualche parte.
Costruire quel PDF nel browser è un problema diverso dal rendering di un PDF in un'immagine. Non stai decodificando qualcosa che esiste già; stai prendendo decisioni che un formato di documento normalmente prenderebbe per te: quanto è grande la pagina, dove si trova l'immagine su di essa, cosa succede quando un'immagine ha una forma diversa dalla pagina e in quale ordine vengono generate le pagine.
Spire.PDF for JavaScript espone queste decisioni tramite un canvas di pagina. Aggiungi una pagina, carica un'immagine, disegnala su quella pagina a una dimensione che calcoli e salva. Tutto viene eseguito lato client tramite WebAssembly, quindi le immagini non vengono mai caricate.
Perché le immagini finiscono nei PDF
Gli scenari condividono un unico schema: diverse immagini che devono comportarsi come un unico documento.
- Documenti multipagina scansionati o fotografati — un contratto fotografato pagina per pagina, riassemblato in un unico file che può essere archiviato o inviato via email.
- Set di foto e portfolio — un'immagine per pagina, in un ordine scelto da qualcuno.
- Ricevute e note spese — una dozzina di foto scattate con il telefono che la contabilità vuole come un unico allegato.
- Esportazioni di progetti e diagrammi — fotogrammi esportati da uno strumento, raccolti in qualcosa di revisionabile.
In ogni caso il PDF non riguarda davvero il formato PDF. Si tratta di ottenere un artefatto stabile, in un unico file e ordinato da un mucchio di immagini.
Prerequisiti
Questa guida presuppone un progetto React con Spire.PDF for JavaScript installato e il modulo WASM inizializzato. Per la configurazione, vedere Integrazione di Spire.PDF for JavaScript in un progetto React.
Ti serviranno:
- Uno o più file immagine caricati nel VFS
- Il modulo WASM raggiungibile all'indirizzo
window.wasmModule.spirepdf
Un'immagine, una pagina
Il flusso di base prevede quattro passaggi: creare un documento, aggiungere una pagina, caricare l'immagine, disegnarla. La parte interessante è il disegno — devi decidere quanto grande debba essere l'immagine sulla pagina.
function App() {
  const convertImageToPDF = async () => {
    // Get the Spire.PDF WASM module
    const pdfModule = window.wasmModule?.spirepdf;

    // Check if the WASM module is ready
    if (!pdfModule) {
      alert('Spire.PDF is not ready yet');
      return;
    }

    // Load the image file into VFS
    const inputFileName = 'Scenery.png';
    await window.spire.FetchFileToVFS(inputFileName, "", `${process.env.PUBLIC_URL}/data/`);

    // Create a PdfDocument object
    let doc = new pdfModule.PdfDocument();

    // Add a page
    let page = doc.Pages.Add();

    // Load the image
    let image = pdfModule.PdfImage.FromFile(inputFileName);

    // Calculate the scale ratio so the image fits the page completely
    let widthFitRate = image.PhysicalDimension.Width / page.Canvas.ClientSize.Width;
    let heightFitRate = image.PhysicalDimension.Height / page.Canvas.ClientSize.Height;
    let fitRate = Math.max(widthFitRate, heightFitRate);

    // Calculate the scaled dimensions of the image
    let fitWidth = image.PhysicalDimension.Width / fitRate;
    let fitHeight = image.PhysicalDimension.Height / fitRate;

    // Center the image on the page
    let x = (page.Canvas.ClientSize.Width - fitWidth) / 2;
    let y = (page.Canvas.ClientSize.Height - fitHeight) / 2;

    // Draw the image onto the page
    page.Canvas.DrawImage({ image: image, x: x, y: y, width: fitWidth, height: fitHeight });

    const outputFileName = 'ImageToPDF.pdf';

    // Save as PDF format
    doc.SaveToFile({ fileName: outputFileName, fileFormat: pdfModule.FileFormat.PDF });
    doc.Close();

    // Read the converted file from VFS and trigger download
    const fileArray = window.dotnetRuntime.Module.FS.readFile(outputFileName);
    const blob = new Blob([fileArray], { type: 'application/pdf' });
    const url = URL.createObjectURL(blob);
    const a = document.createElement('a');
    a.href = url;
    a.download = outputFileName;
    a.click();
    URL.revokeObjectURL(url);
  };

  return (
    <div style={{ textAlign: 'center', height: '300px' }}>
      <h1>Convert Image To PDF</h1>
      <button onClick={convertImageToPDF}>
        Generate
      </button>
    </div>
  );
}

export default App;
Documento PDF generato dopo aver caricato un'immagine tramite PdfImage.FromFile e averla disegnata con Canvas.DrawImage
Estrai il dimensionamento in una funzione di supporto, perché è l'unico pezzo di questo codice che riutilizzerai in ogni altra ricetta di seguito. La matematica: prendi page.Canvas.ClientSize — l'area disegnabile della pagina, in punti — come budget, confrontala con la PhysicalDimension naturale dell'immagine e dividi entrambe le dimensioni per un unico rapporto, così le proporzioni si mantengono. Inseriscila in una funzione, in modo che la parte soggetta a errori viva in un solo posto:
// Contain: scale until the whole image fits inside the page
function fitContain(imgW, imgH, pageW, pageH) {
  const rate = Math.max(imgW / pageW, imgH / pageH);
  const width = imgW / rate;
  const height = imgH / rate;
  return { width, height, x: (pageW - width) / 2, y: (pageH - height) / 2 };
}
Ora la chiamata di disegno nell'esempio sopra si riduce a tre righe, e la decisione "contain o cover" esce dalla matematica ed entra nel nome di una funzione:
let page = doc.Pages.Add();
let box = fitContain(
  image.PhysicalDimension.Width, image.PhysicalDimension.Height,
  page.Canvas.ClientSize.Width, page.Canvas.ClientSize.Height
);
page.Canvas.DrawImage({ image: image, x: box.x, y: box.y, width: box.width, height: box.height });
Math.max è la scelta "contain" — scala sull'asse più restrittivo in modo che l'intera immagine rimanga visibile. Se invece vuoi riempire la pagina e ritagliare l'eccesso, sostituisci con Math.min; la sezione sul dimensionamento fornisce la controparte fitCover e una variante con margine.
Molte immagini, un documento
Un'immagine per pagina significa una chiamata a Pages.Add() e una a DrawImage per ogni immagine. Itera su un array di nomi di file e l'ordine dell'array diventa l'ordine delle pagine — esattamente ciò che vuoi quando l'utente ha appena finito di trascinare le miniature in sequenza.
const combineImagesToPdf = async () => {
  const pdfModule = window.wasmModule?.spirepdf;
  if (!pdfModule) return;

  // The order of this array is the order of pages in the PDF
  const imageFiles = ['scan_01.png', 'scan_02.png', 'scan_03.png', 'scan_04.png'];

  for (const fileName of imageFiles) {
    await window.spire.FetchFileToVFS(fileName, "", `${process.env.PUBLIC_URL}/data/`);
  }

  let doc = new pdfModule.PdfDocument();

  for (const fileName of imageFiles) {
    let page = doc.Pages.Add();
    let image = pdfModule.PdfImage.FromFile(fileName);

    let box = fitContain(
      image.PhysicalDimension.Width, image.PhysicalDimension.Height,
      page.Canvas.ClientSize.Width, page.Canvas.ClientSize.Height
    );

    page.Canvas.DrawImage({ image: image, x: box.x, y: box.y, width: box.width, height: box.height });
  }

  const outputFileName = 'ScannedDocument.pdf';
  doc.SaveToFile({ fileName: outputFileName, fileFormat: pdfModule.FileFormat.PDF });
  doc.Close();

  const fileArray = window.dotnetRuntime.Module.FS.readFile(outputFileName);
  const blob = new Blob([fileArray], { type: 'application/pdf' });
  const url = URL.createObjectURL(blob);
  const a = document.createElement('a');
  a.href = url;
  a.download = outputFileName;
  a.click();
  URL.revokeObjectURL(url);
};
Due note pratiche. Poiché ogni pagina viene dimensionata in modo indipendente, immagini di dimensioni diverse vanno bene — una foto orizzontale e una scansione verticale possono stare nello stesso documento senza alcuna gestione speciale. E poiché l'intero documento viene costruito in memoria prima di SaveToFile, il download avviene una sola volta alla fine, indipendentemente da quante immagini sono state inserite.
Potrebbe interessarti anche: assemblare immagini è l'operazione inversa del rendering. Se hai già un PDF e vuoi invece ogni sua pagina come immagine, vedi Come convertire le pagine PDF in immagini in JavaScript (React).
Dimensionamento: adattare l'immagine alla pagina
Ci sono due modi ragionevoli per inserire un'immagine in una pagina, e quale scegliere dipende dal fatto che perdere parte dell'immagine sia accettabile.
Contain (Math.max) |
Cover (Math.min) |
|
|---|---|---|
| Cosa fa | Ridimensiona finché l'intera immagine non entra | Ridimensiona finché la pagina non è riempita |
| Immagine intera visibile | Sì | No — l'eccesso viene ritagliato |
| Spazio vuoto | Possibile, su un asse | Nessuno |
| Adatto per | Scansioni, documenti, qualsiasi cosa che debba rimanere completa | Foto a tutta pagina, copertine, diapositive |
Il primo esempio usa contain — la funzione di supporto fitContain. Passare a cover è lo specchio di quella funzione: Math.min invece di Math.max, riempiendo la pagina e lasciando che il canvas ritagli ciò che eccede, con offset di centratura che diventano negativi:
// Cover: fill the page, clipping whatever overflows
function fitCover(imgW, imgH, pageW, pageH) {
  const rate = Math.min(imgW / pageW, imgH / pageH);
  const width = imgW / rate;
  const height = imgH / rate;
  return {
    width, height,
    x: (pageW - width) / 2,   // negative when the image is wider than the page
    y: (pageH - height) / 2   // negative when it is taller
  };
}
Se desideri un margine visibile invece di un output a filo pagina, riduci l'area utilizzabile anziché l'immagine — passa il budget corretto per il margine alla stessa funzione di supporto fitContain:
const margin = 36; // 36 points = 0.5 inch
let usableWidth = page.Canvas.ClientSize.Width - margin * 2;
let usableHeight = page.Canvas.ClientSize.Height - margin * 2;

let box = fitContain(
  image.PhysicalDimension.Width, image.PhysicalDimension.Height,
  usableWidth, usableHeight
);
page.Canvas.DrawImage({ image: image, x: box.x, y: box.y, width: box.width, height: box.height });
Una cosa da sapere su PhysicalDimension: riflette la dimensione fisica dell'immagine, che non sempre corrisponde alla sua dimensione in pixel. Una foto 4000 × 3000 salvata con un tag DPI diverso riporterà numeri diversi da quelli che potresti aspettarti. Ecco perché l'approccio basato sul rapporto descritto sopra è più sicuro che codificare a mano le dimensioni in pixel — funziona indipendentemente da come è stata taggata l'immagine.
Caricare immagini dalla memoria
PdfImage.FromFile si aspetta che l'immagine sia già nel VFS. Non è sempre lì che risiedono le tue immagini — una risposta API, un blob di database o un'esportazione canvas ti forniscono invece byte in memoria. PdfImage.FromStream prende direttamente quei byte.
// Read image bytes from VFS and build a memory stream
let bytes = window.dotnetRuntime.Module.FS.readFile(inputFileName);
let stream = new pdfModule.Stream(bytes);

// Load the image from the memory stream
let image = pdfModule.PdfImage.FromStream(stream);
Da lì in poi è lo stesso di qualsiasi altra immagine — calcola la dimensione e disegnala:
let page = doc.Pages.Add();
let box = fitContain(
  image.PhysicalDimension.Width, image.PhysicalDimension.Height,
  page.Canvas.ClientSize.Width, page.Canvas.ClientSize.Height
);
page.Canvas.DrawImage({ image: image, x: box.x, y: box.y, width: box.width, height: box.height });
La stessa forma di bytes funziona indipendentemente da dove proviene. Se le tue immagini arrivano come ArrayBuffer da fetch, avvolgilo in un Uint8Array prima di costruire lo stream:
const response = await fetch('/api/images/invoice-001');
const bytes = new Uint8Array(await response.arrayBuffer());
let stream = new pdfModule.Stream(bytes);
let image = pdfModule.PdfImage.FromStream(stream);
Questo è il pattern da usare quando il PDF viene assemblato da immagini attivate dal server, da caricamenti utente mantenuti nello stato o da qualsiasi cosa generata a runtime da un canvas — non è richiesto alcun passaggio attraverso il VFS.
Articolo consigliato: Spire.PDF può anche disegnare sulle pagine di un PDF che hai già aperto, non solo sui nuovi documenti di cui sopra. Per inserire immagini in un documento esistente, vedi Come aggiungere immagini a un PDF in JavaScript (React).
Problemi comuni
L'immagine risulta allungata o schiacciata.
Quasi sempre dipende da due fattori di scala diversi. Calcola un unico fitRate e dividi sia la larghezza sia l'altezza per esso — non scalare mai gli assi in modo indipendente.
L'immagine è minuscola al centro di una grande pagina vuota. È previsto, quando le proporzioni dell'immagine sono molto diverse da quelle della pagina. Una foto panoramica su una pagina verticale lascerà sempre bande sopra e sotto. O lo accetti (corretto per i documenti), o passi a cover, oppure usi la versione con margine regolato per mantenere almeno simmetrico lo spazio bianco.
L'immagine viene tagliata ai bordi.
Stai usando il comportamento cover, intenzionalmente o no. Controlla se fitRate ha usato Math.min; passa a Math.max se l'intera immagine deve essere visibile.
Una foto ad alta risoluzione produce un PDF enorme.
L'immagine viene incorporata alla sua risoluzione. Se la dimensione del file è importante, ridimensionala prima di disegnarla — disegnala su un canvas alla dimensione target, esporta e usa quei byte con PdfImage.FromStream.
Non succede nulla al primo clic.
Il modulo WASM si carica in modo asincrono. Il controllo if (!pdfModule) return; esiste per questo motivo; in un'app reale, abilita il pulsante solo quando il modulo è pronto invece di mostrare un avviso.
Domande frequenti
Posso inserire immagini in un PDF esistente invece di crearne uno nuovo?
Sì. Gli esempi qui creano un nuovo documento, ma puoi aprire un PDF esistente e disegnare sulle sue pagine allo stesso modo. Vedi Come aggiungere immagini a un PDF in JavaScript (React) per quel flusso di lavoro.
Quali formati di immagine posso caricare?
I formati bitmap comuni — PNG, JPEG, BMP e simili — sono supportati da PdfImage.FromFile e PdfImage.FromStream. Usa FromStream quando il formato è sconosciuto in fase di build o i byte provengono da una risposta di rete.
Posso controllare l'ordine delle pagine?
Sì. Le pagine vengono create nell'ordine in cui chiami Pages.Add(), quindi ordinare l'array dei nomi di file ordina l'output. Questo è il meccanismo alla base delle interfacce con trascinamento per riordinare: riordina l'array, ricostruisci il PDF.
Questo richiede un backend?
No. Il documento viene assemblato nel browser dal modulo WebAssembly e il PDF finito viene restituito come byte che trasformi in un Blob. Le immagini non lasciano mai il dispositivo.
Posso mescolare immagini verticali e orizzontali in un unico PDF?
Sì. Ogni pagina viene dimensionata e disegnata in modo indipendente, quindi una scansione verticale e una foto orizzontale possono stare una accanto all'altra. Se vuoi un orientamento uniforme delle pagine, questo è un motivo per usare una dimensione di pagina fissa e lasciare che le immagini si adattino a essa.
Ho un PDF e voglio le sue pagine come immagini, non il contrario.
Questa è l'operazione inversa — rendering anziché assemblaggio. Vedi Come convertire le pagine PDF in immagini in JavaScript (React).
Devo avere l'immagine nel VFS?
Solo per FromFile. FromStream accetta byte da qualsiasi origine — una risposta fetch, un'esportazione canvas o lo stato — e salta completamente il VFS.
Vedi anche
Le ricette di assemblaggio qui costruiscono un documento nuovo di zecca. Se le tue immagini devono andare in un PDF esistente — disegnando su pagine che hai già — vedi Come aggiungere immagini a un PDF in JavaScript (React). Gli altri pezzi utili della pipeline immagini-PDF:
Conversion d'images en PDF en JavaScript (React)
Table des matières
Un dossier d'images est peu pratique à transmettre à quelqu'un. Un PDF est un seul fichier, s'ouvre partout, s'imprime de manière prévisible et — la partie qui intéresse réellement les gens — conserve un ordre fixe. C'est pourquoi les pages numérisées, les ensembles de photos, les photos de reçus et les cadres de conception exportés sont si souvent assemblés dans un PDF avant d'être envoyés où que ce soit.
Construire ce PDF dans le navigateur est un problème différent du rendu d'un PDF en image. Vous ne décodez pas quelque chose qui existe déjà ; vous prenez des décisions qu'un format de document prendrait normalement pour vous : quelle taille fait la page, où l'image se place-t-elle dessus, ce qui se passe lorsqu'une image n'a pas la même forme que la page, et dans quel ordre les pages sont produites.
Spire.PDF pour JavaScript expose ces décisions via un canevas de page. Vous ajoutez une page, chargez une image, la dessinez sur cette page à une taille que vous calculez, puis enregistrez. Tout s'exécute côté client via WebAssembly, donc les images ne sont jamais téléversées.
Pourquoi les images se retrouvent dans les PDF
Les scénarios ont une même forme : plusieurs images qui doivent se comporter comme un seul document.
- Documents multipages numérisés ou photographiés — un contrat photographié page par page, réassemblé en un seul fichier pouvant être classé ou envoyé par e-mail.
- Ensembles de photos et portfolios — une image par page, dans un ordre choisi par quelqu'un.
- Reçus et notes de frais — une douzaine de photos prises au téléphone que la comptabilité veut en une seule pièce jointe.
- Exports de conception et de diagrammes — des cadres exportés depuis un outil, rassemblés dans un ensemble consultable.
Dans chaque cas, le PDF ne concerne pas vraiment le format PDF. Il s'agit d'obtenir un artefact stable, unique et ordonné à partir d'un tas d'images.
Prérequis
Ce didacticiel suppose un projet React avec Spire.PDF pour JavaScript installé et le module WASM initialisé. Pour la configuration, consultez Intégration de Spire.PDF pour JavaScript dans un projet React.
Vous aurez besoin de :
- Un ou plusieurs fichiers image chargés dans le VFS
- Le module WASM accessible à
window.wasmModule.spirepdf
Une image, une page
Le flux de base comporte quatre étapes : créer un document, ajouter une page, charger l'image, la dessiner. La partie intéressante est le dessin — vous devez décider de la taille que l'image doit avoir sur la page.
function App() {
  const convertImageToPDF = async () => {
    // Get the Spire.PDF WASM module
    const pdfModule = window.wasmModule?.spirepdf;

    // Check if the WASM module is ready
    if (!pdfModule) {
      alert('Spire.PDF is not ready yet');
      return;
    }

    // Load the image file into VFS
    const inputFileName = 'Scenery.png';
    await window.spire.FetchFileToVFS(inputFileName, "", `${process.env.PUBLIC_URL}/data/`);

    // Create a PdfDocument object
    let doc = new pdfModule.PdfDocument();

    // Add a page
    let page = doc.Pages.Add();

    // Load the image
    let image = pdfModule.PdfImage.FromFile(inputFileName);

    // Calculate the scale ratio so the image fits the page completely
    let widthFitRate = image.PhysicalDimension.Width / page.Canvas.ClientSize.Width;
    let heightFitRate = image.PhysicalDimension.Height / page.Canvas.ClientSize.Height;
    let fitRate = Math.max(widthFitRate, heightFitRate);

    // Calculate the scaled dimensions of the image
    let fitWidth = image.PhysicalDimension.Width / fitRate;
    let fitHeight = image.PhysicalDimension.Height / fitRate;

    // Center the image on the page
    let x = (page.Canvas.ClientSize.Width - fitWidth) / 2;
    let y = (page.Canvas.ClientSize.Height - fitHeight) / 2;

    // Draw the image onto the page
    page.Canvas.DrawImage({ image: image, x: x, y: y, width: fitWidth, height: fitHeight });

    const outputFileName = 'ImageToPDF.pdf';

    // Save as PDF format
    doc.SaveToFile({ fileName: outputFileName, fileFormat: pdfModule.FileFormat.PDF });
    doc.Close();

    // Read the converted file from VFS and trigger download
    const fileArray = window.dotnetRuntime.Module.FS.readFile(outputFileName);
    const blob = new Blob([fileArray], { type: 'application/pdf' });
    const url = URL.createObjectURL(blob);
    const a = document.createElement('a');
    a.href = url;
    a.download = outputFileName;
    a.click();
    URL.revokeObjectURL(url);
  };

  return (
    <div style={{ textAlign: 'center', height: '300px' }}>
      <h1>Convert Image To PDF</h1>
      <button onClick={convertImageToPDF}>
        Generate
      </button>
    </div>
  );
}

export default App;
Document PDF généré après le chargement d'une image via PdfImage.FromFile et son dessin avec Canvas.DrawImage
Extrayez le dimensionnement dans une fonction utilitaire, car c'est le seul élément de ce code que vous réutiliserez dans toutes les autres recettes ci-dessous. Les mathématiques : prenez page.Canvas.ClientSize — la zone dessinable de la page, en points — comme budget, comparez-la à la PhysicalDimension naturelle de l'image, et divisez les deux dimensions par un même ratio afin que le rapport d'aspect soit préservé. Enfouissez-le dans une fonction pour que la partie sujette aux bogues vive à un seul endroit :
// Contain: scale until the whole image fits inside the page
function fitContain(imgW, imgH, pageW, pageH) {
  const rate = Math.max(imgW / pageW, imgH / pageH);
  const width = imgW / rate;
  const height = imgH / rate;
  return { width, height, x: (pageW - width) / 2, y: (pageH - height) / 2 };
}
Maintenant, l'appel de dessin dans l'exemple ci-dessus se réduit à trois lignes, et la décision « contenir ou couvrir » sort des mathématiques pour aller dans un nom de fonction :
let page = doc.Pages.Add();
let box = fitContain(
  image.PhysicalDimension.Width, image.PhysicalDimension.Height,
  page.Canvas.ClientSize.Width, page.Canvas.ClientSize.Height
);
page.Canvas.DrawImage({ image: image, x: box.x, y: box.y, width: box.width, height: box.height });
Math.max est le choix « contain » — mettre à l'échelle selon l'axe le plus restrictif afin que toute l'image reste visible. Si vous voulez plutôt remplir la page et rogner le débordement, utilisez Math.min ; la section sur le dimensionnement vous donne l'équivalent fitCover et une variante avec marges.
Plusieurs images, un document
Une image par page signifie un appel à Pages.Add() et un DrawImage par image. Parcourez un tableau de noms de fichiers et l'ordre du tableau devient l'ordre des pages — exactement ce que vous voulez lorsque l'utilisateur vient de terminer de faire glisser des vignettes pour les mettre en séquence.
const combineImagesToPdf = async () => {
  const pdfModule = window.wasmModule?.spirepdf;
  if (!pdfModule) return;

  // The order of this array is the order of pages in the PDF
  const imageFiles = ['scan_01.png', 'scan_02.png', 'scan_03.png', 'scan_04.png'];

  for (const fileName of imageFiles) {
    await window.spire.FetchFileToVFS(fileName, "", `${process.env.PUBLIC_URL}/data/`);
  }

  let doc = new pdfModule.PdfDocument();

  for (const fileName of imageFiles) {
    let page = doc.Pages.Add();
    let image = pdfModule.PdfImage.FromFile(fileName);

    let box = fitContain(
      image.PhysicalDimension.Width, image.PhysicalDimension.Height,
      page.Canvas.ClientSize.Width, page.Canvas.ClientSize.Height
    );

    page.Canvas.DrawImage({ image: image, x: box.x, y: box.y, width: box.width, height: box.height });
  }

  const outputFileName = 'ScannedDocument.pdf';
  doc.SaveToFile({ fileName: outputFileName, fileFormat: pdfModule.FileFormat.PDF });
  doc.Close();

  const fileArray = window.dotnetRuntime.Module.FS.readFile(outputFileName);
  const blob = new Blob([fileArray], { type: 'application/pdf' });
  const url = URL.createObjectURL(blob);
  const a = document.createElement('a');
  a.href = url;
  a.download = outputFileName;
  a.click();
  URL.revokeObjectURL(url);
};
Deux remarques pratiques. Comme chaque page est dimensionnée indépendamment, les images de dimensions différentes ne posent aucun problème — une photo en paysage et un scan en portrait peuvent figurer dans le même document sans traitement particulier. Et comme le document entier est construit en mémoire avant SaveToFile, le téléchargement n'a lieu qu'une fois à la fin, quel que soit le nombre d'images ajoutées.
Vous aimerez peut-être aussi : Assembler des images est l'inverse du rendu. Si vous avez déjà un PDF et voulez plutôt chacune de ses pages sous forme d'image, consultez Comment convertir des pages PDF en images en JavaScript (React).
Dimensionnement : adapter l'image à la page
Il existe deux manières raisonnables de placer une image sur une page, et celle que vous voulez dépend de si la perte d'une partie de l'image est acceptable.
Contenir (Math.max) |
Couvrir (Math.min) |
|
|---|---|---|
| Ce que cela fait | Met à l'échelle jusqu'à ce que l'image entière tienne | Met à l'échelle jusqu'à ce que la page soit remplie |
| Image entière visible | Oui | Non — le débordement est rogné |
| Espace vide | Possible, sur un axe | Aucun |
| Adapté à | Scans, documents, tout ce qui doit rester complet | Photos en fond perdu, pages de couverture, diapositives |
Le premier exemple utilise contenir — la fonction utilitaire fitContain. Passer à couvrir est le miroir de cette fonction : Math.min au lieu de Math.max, remplir la page et laisser le canevas rogner tout ce qui déborde, avec des décalages de centrage qui deviennent négatifs :
// Cover: fill the page, clipping whatever overflows
function fitCover(imgW, imgH, pageW, pageH) {
  const rate = Math.min(imgW / pageW, imgH / pageH);
  const width = imgW / rate;
  const height = imgH / rate;
  return {
    width, height,
    x: (pageW - width) / 2,   // negative when the image is wider than the page
    y: (pageH - height) / 2   // negative when it is taller
  };
}
Si vous voulez une marge visible au lieu d'une sortie bord à bord, réduisez la zone utilisable plutôt que l'image — transmettez le budget ajusté en fonction de la marge à la même fonction utilitaire fitContain :
const margin = 36; // 36 points = 0.5 inch
let usableWidth = page.Canvas.ClientSize.Width - margin * 2;
let usableHeight = page.Canvas.ClientSize.Height - margin * 2;

let box = fitContain(
  image.PhysicalDimension.Width, image.PhysicalDimension.Height,
  usableWidth, usableHeight
);
page.Canvas.DrawImage({ image: image, x: box.x, y: box.y, width: box.width, height: box.height });
Une chose à savoir sur PhysicalDimension : elle reflète la taille physique de l'image, qui n'est pas toujours sa taille en pixels. Une photo 4000 × 3000 enregistrée avec une balise DPI différente signalera des nombres différents de ce que vous pourriez attendre. C'est pourquoi l'approche basée sur le ratio ci-dessus est plus sûre que de coder en dur les dimensions en pixels — elle fonctionne indépendamment de la façon dont l'image a été balisée.
Charger des images depuis la mémoire
PdfImage.FromFile s'attend à ce que l'image soit déjà dans le VFS. Ce n'est pas toujours là que se trouvent vos images — une réponse d'API, un blob de base de données ou un export de canevas vous fournissent plutôt des octets en mémoire. PdfImage.FromStream prend directement ces octets.
// Read image bytes from VFS and build a memory stream
let bytes = window.dotnetRuntime.Module.FS.readFile(inputFileName);
let stream = new pdfModule.Stream(bytes);

// Load the image from the memory stream
let image = pdfModule.PdfImage.FromStream(stream);
À partir de là, c'est comme pour n'importe quelle autre image — calculez la taille et dessinez-la :
let page = doc.Pages.Add();
let box = fitContain(
  image.PhysicalDimension.Width, image.PhysicalDimension.Height,
  page.Canvas.ClientSize.Width, page.Canvas.ClientSize.Height
);
page.Canvas.DrawImage({ image: image, x: box.x, y: box.y, width: box.width, height: box.height });
La même forme de bytes fonctionne quelle que soit sa provenance. Si vos images arrivent sous forme d'ArrayBuffer depuis fetch, encapsulez-le dans un Uint8Array avant de construire le flux :
const response = await fetch('/api/images/invoice-001');
const bytes = new Uint8Array(await response.arrayBuffer());
let stream = new pdfModule.Stream(bytes);
let image = pdfModule.PdfImage.FromStream(stream);
C'est le modèle à utiliser lorsque le PDF est assemblé à partir d'images déclenchées par le serveur, de téléversements utilisateur conservés dans l'état, ou de tout élément généré à l'exécution par un canevas — aucun aller-retour par le VFS n'est nécessaire.
Article recommandé : Spire.PDF peut également dessiner sur les pages d'un PDF que vous avez déjà ouvert, pas seulement sur les nouveaux documents ci-dessus. Pour placer des images dans un document existant, consultez Comment ajouter des images à un PDF en JavaScript (React).
Problèmes courants
L'image ressort étirée ou écrasée.
C'est presque toujours dû à deux facteurs d'échelle différents. Calculez un seul fitRate et divisez à la fois la largeur et la hauteur par celui-ci — ne mettez jamais les axes à l'échelle indépendamment.
L'image est minuscule au milieu d'une grande page vide. C'est attendu lorsque le rapport d'aspect de l'image est très éloigné de celui de la page. Une photo panoramique sur une page portrait laissera toujours des bandes en haut et en bas. Acceptez-le (correct pour les documents), passez à couvrir, ou utilisez la version ajustée avec marges pour au moins garder les espaces blancs symétriques.
L'image est coupée sur les bords.
Vous utilisez un comportement de couverture, intentionnellement ou non. Vérifiez si fitRate a utilisé Math.min ; passez à Math.max si toute l'image doit être visible.
Une photo haute résolution produit un PDF énorme.
L'image est intégrée à sa propre résolution. Si la taille du fichier compte, réduisez l'échelle avant de dessiner — dessinez-la sur un canevas à la taille cible, exportez, et utilisez ces octets avec PdfImage.FromStream.
Rien ne se passe au premier clic.
Le module WASM se charge de manière asynchrone. La garde if (!pdfModule) return; existe pour cette raison ; dans une vraie application, conditionnez le bouton à la disponibilité du module plutôt que d'afficher une alerte.
FAQ
Puis-je insérer des images dans un PDF existant au lieu d'en créer un nouveau ?
Oui. Les exemples ici créent un nouveau document, mais vous pouvez ouvrir un PDF existant et dessiner sur ses pages de la même manière. Consultez Comment ajouter des images à un PDF en JavaScript (React) pour ce flux de travail.
Quels formats d'image puis-je charger ?
Les formats bitmap courants — PNG, JPEG, BMP et similaires — sont pris en charge par PdfImage.FromFile et PdfImage.FromStream. Utilisez FromStream lorsque le format est inconnu au moment de la compilation ou que les octets proviennent d'une réponse réseau.
Puis-je contrôler l'ordre des pages ?
Oui. Les pages sont créées dans l'ordre dans lequel vous appelez Pages.Add(), donc trier votre tableau de noms de fichiers trie la sortie. C'est le mécanisme derrière les interfaces de glisser-déposer pour réorganiser : réorganisez le tableau, reconstruisez le PDF.
Cela nécessite-t-il un backend ?
Non. Le document est assemblé dans le navigateur par le module WebAssembly, et le PDF fini est renvoyé sous forme d'octets que vous transformez en Blob. Les images ne quittent jamais l'appareil.
Puis-je mélanger des images en portrait et en paysage dans un même PDF ?
Oui. Chaque page est dimensionnée et dessinée indépendamment, donc un scan en portrait et une photo en paysage peuvent se côtoyer. Si vous voulez une orientation de page uniforme, c'est une raison d'utiliser une taille de page fixe et de laisser les images s'y adapter.
J'ai un PDF et je veux ses pages sous forme d'images, et non l'inverse.
C'est l'opération inverse — un rendu plutôt qu'un assemblage. Consultez Comment convertir des pages PDF en images en JavaScript (React).
Ai-je besoin de l'image dans le VFS ?
Uniquement pour FromFile. FromStream accepte des octets de n'importe où — une réponse fetch, un export de canevas ou un état — et contourne entièrement le VFS.
Voir aussi
Les recettes d'assemblage ici construisent un tout nouveau document. Si vos images doivent aller dans un PDF existant — dessiner sur des pages que vous avez déjà — consultez Comment ajouter des images à un PDF en JavaScript (React). Les autres éléments utiles du pipeline image-PDF :
Convertir imágenes a PDF en JavaScript (React)
Tabla de contenidos
Una carpeta de imágenes es incómoda de entregar a alguien. Un PDF es un solo archivo, se abre en todas partes, se imprime de forma predecible y —la parte que realmente importa a la gente— mantiene un orden fijo. Por eso las páginas escaneadas, los conjuntos de fotos, las fotos de recibos y los fotogramas de diseño exportados tan a menudo se ensamblan en un PDF antes de enviarse a cualquier parte.
Construir ese PDF en el navegador es un problema distinto al de renderizar un PDF a una imagen. No estás decodificando algo que ya existe; estás tomando decisiones que un formato de documento normalmente tomaría por ti: qué tan grande es la página, dónde se sitúa la imagen en ella, qué sucede cuando una imagen tiene una forma distinta a la de la página y en qué orden salen las páginas.
Spire.PDF for JavaScript expone esas decisiones mediante un lienzo de página. Añades una página, cargas una imagen, la dibujas en esa página con un tamaño que calculas y guardas. Todo se ejecuta en el lado del cliente a través de WebAssembly, por lo que las imágenes nunca se suben.
Por qué las imágenes terminan en PDFs
Los escenarios comparten una misma forma: varias imágenes que necesitan comportarse como un solo documento.
- Documentos de varias páginas escaneados o fotografiados — un contrato fotografiado página por página, reensamblado en un solo archivo que se puede archivar o enviar por correo electrónico.
- Conjuntos de fotos y portafolios — una imagen por página, en un orden elegido por alguien.
- Recibos e informes de gastos — una docena de fotos del teléfono que contabilidad quiere como un solo archivo adjunto.
- Exportaciones de diseño y diagramas — fotogramas exportados de una herramienta, reunidos en algo revisable.
En cada caso, el PDF no se trata realmente del formato PDF. Se trata de obtener un artefacto estable, de un solo archivo y ordenado a partir de un montón de imágenes.
Requisitos previos
Este tutorial asume un proyecto de React con Spire.PDF for JavaScript instalado y el módulo WASM inicializado. Para la configuración, consulta Integrar Spire.PDF for JavaScript en un proyecto de React.
Necesitarás:
- Uno o más archivos de imagen cargados en el VFS
- El módulo WASM accesible en
window.wasmModule.spirepdf
Una imagen, una página
El flujo básico consta de cuatro pasos: crear un documento, añadir una página, cargar la imagen y dibujarla. La parte interesante es el dibujo: tienes que decidir qué tan grande debe ser la imagen en la página.
function App() {
  const convertImageToPDF = async () => {
    // Get the Spire.PDF WASM module
    const pdfModule = window.wasmModule?.spirepdf;

    // Check if the WASM module is ready
    if (!pdfModule) {
      alert('Spire.PDF is not ready yet');
      return;
    }

    // Load the image file into VFS
    const inputFileName = 'Scenery.png';
    await window.spire.FetchFileToVFS(inputFileName, "", `${process.env.PUBLIC_URL}/data/`);

    // Create a PdfDocument object
    let doc = new pdfModule.PdfDocument();

    // Add a page
    let page = doc.Pages.Add();

    // Load the image
    let image = pdfModule.PdfImage.FromFile(inputFileName);

    // Calculate the scale ratio so the image fits the page completely
    let widthFitRate = image.PhysicalDimension.Width / page.Canvas.ClientSize.Width;
    let heightFitRate = image.PhysicalDimension.Height / page.Canvas.ClientSize.Height;
    let fitRate = Math.max(widthFitRate, heightFitRate);

    // Calculate the scaled dimensions of the image
    let fitWidth = image.PhysicalDimension.Width / fitRate;
    let fitHeight = image.PhysicalDimension.Height / fitRate;

    // Center the image on the page
    let x = (page.Canvas.ClientSize.Width - fitWidth) / 2;
    let y = (page.Canvas.ClientSize.Height - fitHeight) / 2;

    // Draw the image onto the page
    page.Canvas.DrawImage({ image: image, x: x, y: y, width: fitWidth, height: fitHeight });

    const outputFileName = 'ImageToPDF.pdf';

    // Save as PDF format
    doc.SaveToFile({ fileName: outputFileName, fileFormat: pdfModule.FileFormat.PDF });
    doc.Close();

    // Read the converted file from VFS and trigger download
    const fileArray = window.dotnetRuntime.Module.FS.readFile(outputFileName);
    const blob = new Blob([fileArray], { type: 'application/pdf' });
    const url = URL.createObjectURL(blob);
    const a = document.createElement('a');
    a.href = url;
    a.download = outputFileName;
    a.click();
    URL.revokeObjectURL(url);
  };

  return (
    <div style={{ textAlign: 'center', height: '300px' }}>
      <h1>Convert Image To PDF</h1>
      <button onClick={convertImageToPDF}>
        Generate
      </button>
    </div>
  );
}

export default App;
Documento PDF generado después de cargar una imagen mediante PdfImage.FromFile y dibujarla con Canvas.DrawImage
Extrae el cálculo de tamaño a una función auxiliar, porque es la única pieza de este código que reutilizarás en todas las demás recetas a continuación. La matemática: toma page.Canvas.ClientSize —el área dibujable de la página, en puntos— como tu presupuesto, compárala con la PhysicalDimension natural de la imagen y divide ambas dimensiones por una única proporción para que la relación de aspecto se conserve. Escóndelo en una función para que la parte propensa a errores viva exactamente en un solo lugar:
// Contain: scale until the whole image fits inside the page
function fitContain(imgW, imgH, pageW, pageH) {
  const rate = Math.max(imgW / pageW, imgH / pageH);
  const width = imgW / rate;
  const height = imgH / rate;
  return { width, height, x: (pageW - width) / 2, y: (pageH - height) / 2 };
}
Ahora la llamada de dibujo del ejemplo anterior se reduce a tres líneas, y la decisión de "contener o cubrir" sale de las matemáticas y pasa al nombre de una función:
let page = doc.Pages.Add();
let box = fitContain(
  image.PhysicalDimension.Width, image.PhysicalDimension.Height,
  page.Canvas.ClientSize.Width, page.Canvas.ClientSize.Height
);
page.Canvas.DrawImage({ image: image, x: box.x, y: box.y, width: box.width, height: box.height });
Math.max es la opción de "contener": escala por el eje más restrictivo para que toda la imagen permanezca visible. Si en cambio quieres llenar la página y recortar el desbordamiento, cambia a Math.min; la sección sobre ajuste de tamaño te da la contraparte fitCover y una variante con margen.
Muchas imágenes, un documento
Una imagen por página significa un Pages.Add() y un DrawImage por imagen. Recorre en bucle un arreglo de nombres de archivo y el orden del arreglo se convierte en el orden de las páginas, que es exactamente lo que quieres cuando el usuario acaba de terminar de arrastrar miniaturas para ponerlas en secuencia.
const combineImagesToPdf = async () => {
  const pdfModule = window.wasmModule?.spirepdf;
  if (!pdfModule) return;

  // The order of this array is the order of pages in the PDF
  const imageFiles = ['scan_01.png', 'scan_02.png', 'scan_03.png', 'scan_04.png'];

  for (const fileName of imageFiles) {
    await window.spire.FetchFileToVFS(fileName, "", `${process.env.PUBLIC_URL}/data/`);
  }

  let doc = new pdfModule.PdfDocument();

  for (const fileName of imageFiles) {
    let page = doc.Pages.Add();
    let image = pdfModule.PdfImage.FromFile(fileName);

    let box = fitContain(
      image.PhysicalDimension.Width, image.PhysicalDimension.Height,
      page.Canvas.ClientSize.Width, page.Canvas.ClientSize.Height
    );

    page.Canvas.DrawImage({ image: image, x: box.x, y: box.y, width: box.width, height: box.height });
  }

  const outputFileName = 'ScannedDocument.pdf';
  doc.SaveToFile({ fileName: outputFileName, fileFormat: pdfModule.FileFormat.PDF });
  doc.Close();

  const fileArray = window.dotnetRuntime.Module.FS.readFile(outputFileName);
  const blob = new Blob([fileArray], { type: 'application/pdf' });
  const url = URL.createObjectURL(blob);
  const a = document.createElement('a');
  a.href = url;
  a.download = outputFileName;
  a.click();
  URL.revokeObjectURL(url);
};
Dos notas prácticas. Como cada página se dimensiona de forma independiente, las imágenes de distintas dimensiones no son problema: una foto horizontal y un escaneo vertical pueden estar en el mismo documento sin ningún manejo especial. Y como todo el documento se construye en memoria antes de SaveToFile, la descarga ocurre una sola vez al final, sin importar cuántas imágenes se incluyeron.
También te puede interesar: Ensamblar imágenes es lo inverso de renderizar. Si ya tienes un PDF y quieres cada una de sus páginas como imagen, consulta Cómo convertir páginas de PDF a imágenes en JavaScript (React).
Ajuste de tamaño: adaptar la imagen a la página
Hay dos formas razonables de poner una imagen en una página, y cuál quieres depende de si es aceptable perder parte de la imagen.
Contener (Math.max) |
Cubrir (Math.min) |
|
|---|---|---|
| Qué hace | Escala hasta que la imagen completa encaja | Escala hasta que la página se llena |
| Imagen completa visible | Sí | No: el desbordamiento se recorta |
| Espacio vacío | Posible, en un eje | Ninguno |
| Adecuado para | Escaneos, documentos, cualquier cosa que deba permanecer completa | Fotos a sangre, portadas, diapositivas |
El primer ejemplo usa contener: la función auxiliar fitContain. Cambiar a cubrir es el espejo de esa función: Math.min en lugar de Math.max, llenando la página y dejando que el lienzo recorte lo que se desborde, con desplazamientos de centrado que se vuelven negativos:
// Cover: fill the page, clipping whatever overflows
function fitCover(imgW, imgH, pageW, pageH) {
  const rate = Math.min(imgW / pageW, imgH / pageH);
  const width = imgW / rate;
  const height = imgH / rate;
  return {
    width, height,
    x: (pageW - width) / 2,   // negative when the image is wider than the page
    y: (pageH - height) / 2   // negative when it is taller
  };
}
Si quieres un margen visible en lugar de una salida de borde a borde, reduce el área utilizable en vez de la imagen: introduce el presupuesto ajustado por margen en la misma función auxiliar fitContain:
const margin = 36; // 36 points = 0.5 inch
let usableWidth = page.Canvas.ClientSize.Width - margin * 2;
let usableHeight = page.Canvas.ClientSize.Height - margin * 2;

let box = fitContain(
  image.PhysicalDimension.Width, image.PhysicalDimension.Height,
  usableWidth, usableHeight
);
page.Canvas.DrawImage({ image: image, x: box.x, y: box.y, width: box.width, height: box.height });
Algo que vale la pena saber sobre PhysicalDimension: refleja el tamaño físico de la imagen, que no siempre es su tamaño en píxeles. Una foto de 4000 × 3000 guardada con una etiqueta DPI diferente reportará números distintos de los que podrías esperar. Por eso el enfoque basado en proporciones anterior es más seguro que codificar las dimensiones en píxeles: funciona independientemente de cómo se etiquetó la imagen.
Cargar imágenes desde memoria
PdfImage.FromFile espera que la imagen ya esté en el VFS. No siempre es ahí donde residen tus imágenes: una respuesta de API, un blob de base de datos o una exportación de lienzo te dan bytes en memoria en su lugar. PdfImage.FromStream toma esos bytes directamente.
// Read image bytes from VFS and build a memory stream
let bytes = window.dotnetRuntime.Module.FS.readFile(inputFileName);
let stream = new pdfModule.Stream(bytes);

// Load the image from the memory stream
let image = pdfModule.PdfImage.FromStream(stream);
A partir de ahí, es igual que cualquier otra imagen: calcula el tamaño y dibújala:
let page = doc.Pages.Add();
let box = fitContain(
  image.PhysicalDimension.Width, image.PhysicalDimension.Height,
  page.Canvas.ClientSize.Width, page.Canvas.ClientSize.Height
);
page.Canvas.DrawImage({ image: image, x: box.x, y: box.y, width: box.width, height: box.height });
La misma forma de bytes funciona independientemente de dónde provenga. Si tus imágenes llegan como un ArrayBuffer de fetch, envuélvelo en un Uint8Array antes de construir el flujo:
const response = await fetch('/api/images/invoice-001');
const bytes = new Uint8Array(await response.arrayBuffer());
let stream = new pdfModule.Stream(bytes);
let image = pdfModule.PdfImage.FromStream(stream);
Este es el patrón al que recurrir cuando el PDF se ensambla con imágenes desencadenadas por el servidor, cargas de usuario mantenidas en el estado o cualquier cosa generada en tiempo de ejecución por un lienzo: no se requiere un viaje de ida y vuelta a través del VFS.
Artículo recomendado: Spire.PDF también puede dibujar en las páginas de un PDF que ya tengas abierto, no solo en los documentos nuevos anteriores. Para colocar imágenes en un documento existente, consulta Cómo añadir imágenes a un PDF en JavaScript (React).
Problemas comunes
La imagen sale estirada o aplastada.
Esto casi siempre se debe a dos factores de escala diferentes. Calcula un único fitRate y divide tanto el ancho como el alto por él; nunca escales los ejes de forma independiente.
La imagen es diminuta en el medio de una gran página vacía. Es de esperar cuando la relación de aspecto de la imagen difiere mucho de la de la página. Una foto panorámica en una página vertical siempre dejará franjas arriba y abajo. O lo aceptas (correcto para documentos), cambias a cubrir, o usas la versión ajustada por margen para al menos mantener simétrico el espacio en blanco.
La imagen se corta en los bordes.
Estás usando el comportamiento de cubrir, intencionalmente o no. Comprueba si fitRate usó Math.min; cambia a Math.max si la imagen completa debe ser visible.
Una foto de alta resolución produce un PDF enorme.
La imagen se incrusta con su propia resolución. Si el tamaño del archivo importa, reduce la escala antes de dibujar: dibújala en un lienzo al tamaño objetivo, expórtala y usa esos bytes con PdfImage.FromStream.
No ocurre nada en el primer clic.
El módulo WASM se carga de forma asíncrona. La guarda if (!pdfModule) return; existe por esa razón; en una aplicación real, habilita el botón según la preparación del módulo en lugar de mostrar una alerta.
Preguntas frecuentes
¿Puedo insertar imágenes en un PDF existente en lugar de crear uno nuevo?
Sí. Los ejemplos aquí crean un documento nuevo, pero puedes abrir un PDF existente y dibujar en sus páginas de la misma manera. Consulta Cómo añadir imágenes a un PDF en JavaScript (React) para ese flujo de trabajo.
¿Qué formatos de imagen puedo cargar?
Los formatos de mapa de bits comunes —PNG, JPEG, BMP y similares— son compatibles con PdfImage.FromFile y PdfImage.FromStream. Usa FromStream cuando el formato se desconoce en tiempo de compilación o los bytes provienen de una respuesta de red.
¿Puedo controlar el orden de las páginas?
Sí. Las páginas se crean en el orden en que llamas a Pages.Add(), por lo que ordenar tu arreglo de nombres de archivo ordena la salida. Ese es el mecanismo detrás de las interfaces de arrastrar para reordenar: reordena el arreglo, reconstruye el PDF.
¿Esto requiere un backend?
No. El documento se ensambla en el navegador mediante el módulo WebAssembly, y el PDF terminado se devuelve como bytes que conviertes en un Blob. Las imágenes nunca salen del dispositivo.
¿Puedo mezclar imágenes verticales y horizontales en un mismo PDF?
Sí. Cada página se dimensiona y se dibuja de forma independiente, por lo que un escaneo vertical y una foto horizontal pueden estar uno junto al otro. Si quieres una orientación de página uniforme, esa es una razón para usar un tamaño de página fijo y dejar que las imágenes se escalen a él.
Tengo un PDF y quiero sus páginas como imágenes, no al revés.
Esa es la operación inversa: renderizar en lugar de ensamblar. Consulta Cómo convertir páginas de PDF a imágenes en JavaScript (React).
¿Necesito la imagen en el VFS?
Solo para FromFile. FromStream acepta bytes de cualquier lugar —una respuesta de fetch, una exportación de lienzo o el estado— y omite el VFS por completo.
Ver también
Las recetas de ensamblaje aquí crean un documento completamente nuevo. Si tus imágenes necesitan ir a un PDF existente —dibujando en páginas que ya tienes—, consulta Cómo añadir imágenes a un PDF en JavaScript (React). Las otras piezas útiles del flujo de trabajo de imagen a PDF:
Bilder in PDF in JavaScript (React) umwandeln
Einen Ordner voller Bilder jemandem zu übergeben, ist umständlich. Ein PDF ist eine einzige Datei, öffnet sich überall, lässt sich vorhersehbar drucken und – der Teil, der wirklich zählt – behält eine feste Reihenfolge bei. Deshalb werden gescannte Seiten, Fotoserien, Belegfotos und exportierte Design-Frames so oft zu einem PDF zusammengefügt, bevor sie irgendwohin gehen.
Dieses PDF im Browser zu erstellen, ist ein anderes Problem als das Rendern eines PDFs in ein Bild. Du dekodierst nicht etwas, das bereits existiert; du triffst Entscheidungen, die ein Dokumentformat normalerweise für dich treffen würde: Wie groß ist die Seite, wo sitzt das Bild darauf, was passiert, wenn ein Bild eine andere Form hat als die Seite, und in welcher Reihenfolge erscheinen die Seiten.
Spire.PDF for JavaScript macht diese Entscheidungen über eine Seiten-Leinwand zugänglich. Du fügst eine Seite hinzu, lädst ein Bild, zeichnest es in einer von dir berechneten Größe auf diese Seite und speicherst. Alles läuft clientseitig über WebAssembly, sodass die Bilder niemals hochgeladen werden.
Warum Bilder in PDFs landen
Die Szenarien haben alle dieselbe Form: mehrere Bilder, die sich wie ein einziges Dokument verhalten sollen.
- Gescannte oder fotografierte mehrseitige Dokumente — ein Vertrag, Seite für Seite fotografiert und zu einer einzigen Datei zusammengesetzt, die abgelegt oder per E-Mail versendet werden kann.
- Fotoserien und Portfolios — ein Bild pro Seite, in einer selbst gewählten Reihenfolge.
- Belege und Spesenabrechnungen — ein Dutzend Handyfotos, die die Buchhaltung als einen Anhang haben möchte.
- Design- und Diagramm-Exporte — Frames, die aus einem Tool exportiert und zu etwas Überprüfbarem zusammengestellt werden.
In jedem Fall geht es beim PDF nicht wirklich um das PDF-Format. Es geht darum, aus einem Haufen Bilder ein stabiles, einteiliges, geordnetes Artefakt zu machen.
Voraussetzungen
Diese Anleitung setzt ein React-Projekt mit installiertem Spire.PDF for JavaScript und initialisiertem WASM-Modul voraus. Zur Einrichtung siehe Integrating Spire.PDF for JavaScript in a React Project.
Du benötigst:
- Eine oder mehrere in das VFS geladene Bilddateien
- Das WASM-Modul, erreichbar unter
window.wasmModule.spirepdf
Ein Bild, eine Seite
Der grundlegende Ablauf besteht aus vier Schritten: ein Dokument erstellen, eine Seite hinzufügen, das Bild laden, es zeichnen. Der interessante Teil ist das Zeichnen — du musst entscheiden, wie groß das Bild auf der Seite sein soll.
function App() {
  const convertImageToPDF = async () => {
    // Get the Spire.PDF WASM module
    const pdfModule = window.wasmModule?.spirepdf;

    // Check if the WASM module is ready
    if (!pdfModule) {
      alert('Spire.PDF is not ready yet');
      return;
    }

    // Load the image file into VFS
    const inputFileName = 'Scenery.png';
    await window.spire.FetchFileToVFS(inputFileName, "", `${process.env.PUBLIC_URL}/data/`);

    // Create a PdfDocument object
    let doc = new pdfModule.PdfDocument();

    // Add a page
    let page = doc.Pages.Add();

    // Load the image
    let image = pdfModule.PdfImage.FromFile(inputFileName);

    // Calculate the scale ratio so the image fits the page completely
    let widthFitRate = image.PhysicalDimension.Width / page.Canvas.ClientSize.Width;
    let heightFitRate = image.PhysicalDimension.Height / page.Canvas.ClientSize.Height;
    let fitRate = Math.max(widthFitRate, heightFitRate);

    // Calculate the scaled dimensions of the image
    let fitWidth = image.PhysicalDimension.Width / fitRate;
    let fitHeight = image.PhysicalDimension.Height / fitRate;

    // Center the image on the page
    let x = (page.Canvas.ClientSize.Width - fitWidth) / 2;
    let y = (page.Canvas.ClientSize.Height - fitHeight) / 2;

    // Draw the image onto the page
    page.Canvas.DrawImage({ image: image, x: x, y: y, width: fitWidth, height: fitHeight });

    const outputFileName = 'ImageToPDF.pdf';

    // Save as PDF format
    doc.SaveToFile({ fileName: outputFileName, fileFormat: pdfModule.FileFormat.PDF });
    doc.Close();

    // Read the converted file from VFS and trigger download
    const fileArray = window.dotnetRuntime.Module.FS.readFile(outputFileName);
    const blob = new Blob([fileArray], { type: 'application/pdf' });
    const url = URL.createObjectURL(blob);
    const a = document.createElement('a');
    a.href = url;
    a.download = outputFileName;
    a.click();
    URL.revokeObjectURL(url);
  };

  return (
    <div style={{ textAlign: 'center', height: '300px' }}>
      <h1>Convert Image To PDF</h1>
      <button onClick={convertImageToPDF}>
        Generate
      </button>
    </div>
  );
}

export default App;
PDF-Dokument, das nach dem Laden eines Bildes über PdfImage.FromFile und dem Zeichnen mit Canvas.DrawImage erzeugt wurde
Lagere die Größenberechnung in einen Helfer aus, denn das ist der eine Teil dieses Codes, den du in jedem weiteren Rezept unten wiederverwenden wirst. Die Mathematik: Nimm page.Canvas.ClientSize — die zeichenbare Fläche der Seite, in Punkten — als dein Budget, vergleiche es mit der natürlichen PhysicalDimension des Bildes und teile beide Dimensionen durch einen einzigen Faktor, damit das Seitenverhältnis erhalten bleibt. Vergrabe es in einer Funktion, damit der fehleranfällige Teil an genau einer Stelle lebt:
// Contain: scale until the whole image fits inside the page
function fitContain(imgW, imgH, pageW, pageH) {
  const rate = Math.max(imgW / pageW, imgH / pageH);
  const width = imgW / rate;
  const height = imgH / rate;
  return { width, height, x: (pageW - width) / 2, y: (pageH - height) / 2 };
}
Jetzt schrumpft der Zeichenaufruf im obigen Beispiel auf drei Zeilen, und die Entscheidung „contain oder cover“ wandert aus der Mathematik heraus und in einen Funktionsnamen:
let page = doc.Pages.Add();
let box = fitContain(
  image.PhysicalDimension.Width, image.PhysicalDimension.Height,
  page.Canvas.ClientSize.Width, page.Canvas.ClientSize.Height
);
page.Canvas.DrawImage({ image: image, x: box.x, y: box.y, width: box.width, height: box.height });
Math.max ist die „Contain“-Wahl — skaliere anhand der restriktiveren Achse, damit das gesamte Bild sichtbar bleibt. Wenn du stattdessen die Seite füllen und den Überlauf abschneiden möchtest, ersetze es durch Math.min; der Abschnitt über Größenanpassung liefert dir das fitCover-Gegenstück und eine Variante mit Rand.
Viele Bilder, ein Dokument
Ein Bild pro Seite bedeutet ein Pages.Add() und ein DrawImage pro Bild. Durchlaufe ein Array von Dateinamen in einer Schleife, und die Array-Reihenfolge wird zur Seitenreihenfolge — genau das, was du willst, wenn der Benutzer gerade Miniaturansichten in eine Reihenfolge gezogen hat.
const combineImagesToPdf = async () => {
  const pdfModule = window.wasmModule?.spirepdf;
  if (!pdfModule) return;

  // The order of this array is the order of pages in the PDF
  const imageFiles = ['scan_01.png', 'scan_02.png', 'scan_03.png', 'scan_04.png'];

  for (const fileName of imageFiles) {
    await window.spire.FetchFileToVFS(fileName, "", `${process.env.PUBLIC_URL}/data/`);
  }

  let doc = new pdfModule.PdfDocument();

  for (const fileName of imageFiles) {
    let page = doc.Pages.Add();
    let image = pdfModule.PdfImage.FromFile(fileName);

    let box = fitContain(
      image.PhysicalDimension.Width, image.PhysicalDimension.Height,
      page.Canvas.ClientSize.Width, page.Canvas.ClientSize.Height
    );

    page.Canvas.DrawImage({ image: image, x: box.x, y: box.y, width: box.width, height: box.height });
  }

  const outputFileName = 'ScannedDocument.pdf';
  doc.SaveToFile({ fileName: outputFileName, fileFormat: pdfModule.FileFormat.PDF });
  doc.Close();

  const fileArray = window.dotnetRuntime.Module.FS.readFile(outputFileName);
  const blob = new Blob([fileArray], { type: 'application/pdf' });
  const url = URL.createObjectURL(blob);
  const a = document.createElement('a');
  a.href = url;
  a.download = outputFileName;
  a.click();
  URL.revokeObjectURL(url);
};
Zwei praktische Hinweise. Da jede Seite unabhängig dimensioniert wird, sind Bilder mit unterschiedlichen Abmessungen kein Problem — ein Querformatfoto und ein Hochformat-Scan können ohne spezielle Behandlung im selben Dokument stehen. Und da das gesamte Dokument vor SaveToFile im Speicher aufgebaut wird, erfolgt der Download am Ende nur einmal, unabhängig davon, wie viele Bilder hineingegangen sind.
Das könnte dir auch gefallen: Das Zusammensetzen von Bildern ist die Umkehrung des Renderns. Wenn du bereits ein PDF hast und jede seiner Seiten stattdessen als Bild möchtest, siehe How to Convert PDF Pages to Images in JavaScript (React).
Größenanpassung: Das Bild an die Seite anpassen
Es gibt zwei sinnvolle Möglichkeiten, ein Bild auf eine Seite zu setzen, und welche du willst, hängt davon ab, ob der Verlust eines Teils des Bildes akzeptabel ist.
Contain (Math.max) |
Cover (Math.min) |
|
|---|---|---|
| Was es tut | Skaliert, bis das gesamte Bild passt | Skaliert, bis die Seite gefüllt ist |
| Gesamtes Bild sichtbar | Ja | Nein — der Überlauf wird abgeschnitten |
| Leerraum | Möglich, auf einer Achse | Keiner |
| Geeignet für | Scans, Dokumente, alles, was vollständig bleiben muss | Randlose Fotos, Titelbilder, Folien |
Das erste Beispiel verwendet Contain — den fitContain-Helfer. Der Wechsel zu Cover ist das Spiegelbild dieser Funktion: Math.min statt Math.max, die Seite füllend und die Leinwand alles abschneiden lassend, was überläuft, mit Zentrierungs-Offsets, die negativ werden:
// Cover: fill the page, clipping whatever overflows
function fitCover(imgW, imgH, pageW, pageH) {
  const rate = Math.min(imgW / pageW, imgH / pageH);
  const width = imgW / rate;
  const height = imgH / rate;
  return {
    width, height,
    x: (pageW - width) / 2,   // negative when the image is wider than the page
    y: (pageH - height) / 2   // negative when it is taller
  };
}
Wenn du einen sichtbaren Rand anstelle einer randlosen Ausgabe möchtest, verkleinere den nutzbaren Bereich statt das Bild — führe das um den Rand reduzierte Budget in denselben fitContain-Helfer ein:
const margin = 36; // 36 points = 0.5 inch
let usableWidth = page.Canvas.ClientSize.Width - margin * 2;
let usableHeight = page.Canvas.ClientSize.Height - margin * 2;

let box = fitContain(
  image.PhysicalDimension.Width, image.PhysicalDimension.Height,
  usableWidth, usableHeight
);
page.Canvas.DrawImage({ image: image, x: box.x, y: box.y, width: box.width, height: box.height });
Eine Sache, die man über PhysicalDimension wissen sollte: Sie spiegelt die physische Größe des Bildes wider, die nicht immer seiner Pixelgröße entspricht. Ein Foto mit 4000 × 3000 Pixeln, das mit einem anderen DPI-Tag gespeichert wurde, meldet andere Zahlen als erwartet. Deshalb ist der oben beschriebene verhältnisbasierte Ansatz sicherer als fest codierte Pixelabmessungen — er funktioniert unabhängig davon, wie das Bild getaggt wurde.
Bilder aus dem Speicher laden
PdfImage.FromFile erwartet, dass sich das Bild bereits im VFS befindet. Dort liegen deine Bilder aber nicht immer — eine API-Antwort, ein Datenbank-Blob oder ein Canvas-Export liefern dir stattdessen Bytes im Speicher. PdfImage.FromStream nimmt diese Bytes direkt entgegen.
// Read image bytes from VFS and build a memory stream
let bytes = window.dotnetRuntime.Module.FS.readFile(inputFileName);
let stream = new pdfModule.Stream(bytes);

// Load the image from the memory stream
let image = pdfModule.PdfImage.FromStream(stream);
Von dort aus ist es wie bei jedem anderen Bild — die Größe berechnen und es zeichnen:
let page = doc.Pages.Add();
let box = fitContain(
  image.PhysicalDimension.Width, image.PhysicalDimension.Height,
  page.Canvas.ClientSize.Width, page.Canvas.ClientSize.Height
);
page.Canvas.DrawImage({ image: image, x: box.x, y: box.y, width: box.width, height: box.height });
Dieselbe bytes-Form funktioniert unabhängig davon, woher sie stammt. Wenn deine Bilder als ArrayBuffer von fetch ankommen, packe ihn in ein Uint8Array, bevor du den Stream konstruierst:
const response = await fetch('/api/images/invoice-001');
const bytes = new Uint8Array(await response.arrayBuffer());
let stream = new pdfModule.Stream(bytes);
let image = pdfModule.PdfImage.FromStream(stream);
Dies ist das Muster, zu dem du greifen solltest, wenn es sich um serverausgelöste Bilder, im State gehaltene Benutzer-Uploads oder etwas handelt, das zur Laufzeit von einem Canvas generiert wird — kein Umweg über das VFS erforderlich.
Empfohlener Artikel: Spire.PDF kann auch auf die Seiten eines PDFs zeichnen, das du bereits geöffnet hast, nicht nur auf die neuen Dokumente oben. Zum Platzieren von Bildern in einem bestehenden Dokument siehe How to Add Images to a PDF in JavaScript (React).
Häufige Probleme
Das Bild kommt gestreckt oder gestaucht heraus.
Das sind fast immer zwei verschiedene Skalierungsfaktoren. Berechne einen einzigen fitRate und teile sowohl Breite als auch Höhe durch ihn — skaliere die Achsen niemals unabhängig voneinander.
Das Bild ist winzig in der Mitte einer großen leeren Seite. Das ist zu erwarten, wenn das Seitenverhältnis des Bildes stark von dem der Seite abweicht. Ein Panoramafoto auf einer Hochformatseite hinterlässt immer Streifen oben und unten. Akzeptiere es entweder (korrekt für Dokumente), wechsle zu Cover oder verwende die randangepasste Version, um wenigstens den Leerraum symmetrisch zu halten.
Das Bild ist an den Rändern abgeschnitten.
Du verwendest absichtlich oder unabsichtlich das Cover-Verhalten. Prüfe, ob fitRate Math.min verwendet hat; wechsle zu Math.max, wenn das gesamte Bild sichtbar sein muss.
Ein hochauflösendes Foto erzeugt ein riesiges PDF.
Das Bild wird in seiner eigenen Auflösung eingebettet. Wenn die Dateigröße wichtig ist, skaliere vor dem Zeichnen herunter — zeichne es in Zielgröße auf ein Canvas, exportiere es und verwende diese Bytes mit PdfImage.FromStream.
Beim ersten Klick passiert nichts.
Das WASM-Modul lädt asynchron. Die Prüfung if (!pdfModule) return; existiert aus diesem Grund; in einer echten App solltest du den Button an die Bereitschaft des Moduls koppeln, statt eine Warnung anzuzeigen.
FAQ
Kann ich Bilder in ein bestehendes PDF einfügen, anstatt ein neues zu erstellen?
Ja. Die Beispiele hier erstellen ein neues Dokument, aber du kannst ein bestehendes PDF öffnen und auf dieselbe Weise auf seine Seiten zeichnen. Siehe How to Add Images to a PDF in JavaScript (React) für diesen Workflow.
Welche Bildformate kann ich laden?
Gängige Bitmap-Formate — PNG, JPEG, BMP und ähnliche — werden von PdfImage.FromFile und PdfImage.FromStream unterstützt. Verwende FromStream, wenn das Format zur Build-Zeit unbekannt ist oder die Bytes aus einer Netzwerkantwort stammen.
Kann ich die Seitenreihenfolge steuern?
Ja. Seiten werden in der Reihenfolge erstellt, in der du Pages.Add() aufrufst, also sortiert das Sortieren deines Dateinamen-Arrays die Ausgabe. Das ist der Mechanismus hinter Drag-and-Drop-Oberflächen zum Umsortieren: Ordne das Array um, baue das PDF neu.
Ist dafür ein Backend erforderlich?
Nein. Das Dokument wird im Browser durch das WebAssembly-Modul zusammengesetzt, und das fertige PDF wird als Bytes zurückgegeben, die du in einen Blob umwandelst. Die Bilder verlassen niemals das Gerät.
Kann ich Hoch- und Querformatbilder in einem PDF mischen?
Ja. Jede Seite wird unabhängig dimensioniert und gezeichnet, sodass ein Hochformat-Scan und ein Querformatfoto nebeneinander stehen können. Wenn du eine einheitliche Seitenausrichtung möchtest, ist das ein Grund, eine feste Seitengröße zu verwenden und die Bilder darauf skalieren zu lassen.
Ich habe ein PDF und möchte seine Seiten als Bilder, nicht umgekehrt.
Das ist die umgekehrte Operation — Rendern statt Zusammensetzen. Siehe How to Convert PDF Pages to Images in JavaScript (React).
Muss das Bild im VFS liegen?
Nur für FromFile. FromStream akzeptiert Bytes von überall — eine Fetch-Antwort, ein Canvas-Export oder ein State — und umgeht das VFS vollständig.
Siehe auch
Die Zusammenbau-Rezepte hier erstellen ein brandneues Dokument. Wenn deine Bilder in ein bestehendes PDF eingefügt werden sollen — auf Seiten zeichnen, die du bereits hast —, siehe How to Add Images to a PDF in JavaScript (React). Die anderen nützlichen Teile der Bild-zu-PDF-Pipeline:
Преобразование изображений в PDF на JavaScript (React)
Содержание
Папку с изображениями неудобно передавать кому-либо. PDF — это один файл, который открывается везде, предсказуемо печатается и — что на самом деле важно людям — сохраняет фиксированный порядок. Именно поэтому отсканированные страницы, наборы фотографий, фото чеков и экспортированные макеты дизайна так часто собираются в PDF, прежде чем куда-либо отправиться.
Создание такого PDF в браузере — задача иная, чем рендеринг PDF в изображение. Вы не декодируете что-то уже существующее; вы принимаете решения, которые обычно за вас принимает формат документа: каков размер страницы, где на ней расположено изображение, что происходит, если форма изображения отличается от формы страницы, и в каком порядке идут страницы.
Spire.PDF for JavaScript предоставляет доступ к этим решениям через холст страницы. Вы добавляете страницу, загружаете изображение, рисуете его на этой странице в вычисленном вами размере и сохраняете. Всё выполняется на стороне клиента через WebAssembly, поэтому изображения никуда не загружаются.
Почему изображения попадают в PDF
Все эти сценарии объединяет одно: несколько изображений, которые должны вести себя как один документ.
- Отсканированные или сфотографированные многостраничные документы — договор, сфотографированный страница за страницей и собранный в один файл, который можно подшить в дело или отправить по электронной почте.
- Наборы фотографий и портфолио — одно изображение на страницу, в выбранном кем-то порядке.
- Чеки и отчёты о расходах — дюжина фотографий с телефона, которые бухгалтерия хочет получить одним вложением.
- Экспорт макетов и диаграмм — кадры, экспортированные из инструмента и собранные во что-то, что можно просмотреть.
В каждом случае дело не столько в самом формате PDF. Речь о том, чтобы получить из груды изображений стабильный, единый упорядоченный артефакт.
Предварительные требования
В этом руководстве предполагается, что у вас есть проект на React с установленным Spire.PDF for JavaScript и инициализированным модулем WASM. О настройке см. Интеграция Spire.PDF for JavaScript в проект React.
Вам понадобится:
- Один или несколько файлов изображений, загруженных в VFS
- Модуль WASM, доступный по адресу
window.wasmModule.spirepdf
Одно изображение — одна страница
Базовый процесс состоит из четырёх шагов: создать документ, добавить страницу, загрузить изображение, нарисовать его. Самое интересное — это рисование: нужно решить, какого размера изображение должно быть на странице.
function App() {
  const convertImageToPDF = async () => {
    // Get the Spire.PDF WASM module
    const pdfModule = window.wasmModule?.spirepdf;

    // Check if the WASM module is ready
    if (!pdfModule) {
      alert('Spire.PDF is not ready yet');
      return;
    }

    // Load the image file into VFS
    const inputFileName = 'Scenery.png';
    await window.spire.FetchFileToVFS(inputFileName, "", `${process.env.PUBLIC_URL}/data/`);

    // Create a PdfDocument object
    let doc = new pdfModule.PdfDocument();

    // Add a page
    let page = doc.Pages.Add();

    // Load the image
    let image = pdfModule.PdfImage.FromFile(inputFileName);

    // Calculate the scale ratio so the image fits the page completely
    let widthFitRate = image.PhysicalDimension.Width / page.Canvas.ClientSize.Width;
    let heightFitRate = image.PhysicalDimension.Height / page.Canvas.ClientSize.Height;
    let fitRate = Math.max(widthFitRate, heightFitRate);

    // Calculate the scaled dimensions of the image
    let fitWidth = image.PhysicalDimension.Width / fitRate;
    let fitHeight = image.PhysicalDimension.Height / fitRate;

    // Center the image on the page
    let x = (page.Canvas.ClientSize.Width - fitWidth) / 2;
    let y = (page.Canvas.ClientSize.Height - fitHeight) / 2;

    // Draw the image onto the page
    page.Canvas.DrawImage({ image: image, x: x, y: y, width: fitWidth, height: fitHeight });

    const outputFileName = 'ImageToPDF.pdf';

    // Save as PDF format
    doc.SaveToFile({ fileName: outputFileName, fileFormat: pdfModule.FileFormat.PDF });
    doc.Close();

    // Read the converted file from VFS and trigger download
    const fileArray = window.dotnetRuntime.Module.FS.readFile(outputFileName);
    const blob = new Blob([fileArray], { type: 'application/pdf' });
    const url = URL.createObjectURL(blob);
    const a = document.createElement('a');
    a.href = url;
    a.download = outputFileName;
    a.click();
    URL.revokeObjectURL(url);
  };

  return (
    <div style={{ textAlign: 'center', height: '300px' }}>
      <h1>Convert Image To PDF</h1>
      <button onClick={convertImageToPDF}>
        Generate
      </button>
    </div>
  );
}

export default App;
PDF-документ, созданный после загрузки изображения через PdfImage.FromFile и его отрисовки с помощью Canvas.DrawImage
Вынесите расчёт размера в отдельную вспомогательную функцию, потому что это единственная часть этого кода, которую вы будете переиспользовать во всех остальных рецептах ниже. Математика: возьмите page.Canvas.ClientSize — область страницы, доступную для рисования, в пунктах — в качестве вашего бюджета, сравните её с естественным PhysicalDimension изображения и разделите оба измерения на единый коэффициент, чтобы сохранить соотношение сторон. Спрячьте это в функцию, чтобы подверженная ошибкам часть находилась ровно в одном месте:
// Contain: scale until the whole image fits inside the page
function fitContain(imgW, imgH, pageW, pageH) {
  const rate = Math.max(imgW / pageW, imgH / pageH);
  const width = imgW / rate;
  const height = imgH / rate;
  return { width, height, x: (pageW - width) / 2, y: (pageH - height) / 2 };
}
Теперь вызов отрисовки из примера выше сокращается до трёх строк, а решение «contain или cover» переходит из математики прямо в имя функции:
let page = doc.Pages.Add();
let box = fitContain(
  image.PhysicalDimension.Width, image.PhysicalDimension.Height,
  page.Canvas.ClientSize.Width, page.Canvas.ClientSize.Height
);
page.Canvas.DrawImage({ image: image, x: box.x, y: box.y, width: box.width, height: box.height });
Math.max — это выбор «contain»: масштабирование по более ограничивающей оси, чтобы всё изображение оставалось видимым. Если же вы хотите заполнить страницу и обрезать выходящее за края, замените на Math.min; в разделе о подгонке размера приведён аналог fitCover и вариант с полями.
Много изображений — один документ
Одно изображение на страницу означает один Pages.Add() и один DrawImage на каждое изображение. Пройдитесь циклом по массиву имён файлов — и порядок массива станет порядком страниц, что как раз то, что нужно, когда пользователь только что закончил перетаскивать миниатюры в нужную последовательность.
const combineImagesToPdf = async () => {
  const pdfModule = window.wasmModule?.spirepdf;
  if (!pdfModule) return;

  // The order of this array is the order of pages in the PDF
  const imageFiles = ['scan_01.png', 'scan_02.png', 'scan_03.png', 'scan_04.png'];

  for (const fileName of imageFiles) {
    await window.spire.FetchFileToVFS(fileName, "", `${process.env.PUBLIC_URL}/data/`);
  }

  let doc = new pdfModule.PdfDocument();

  for (const fileName of imageFiles) {
    let page = doc.Pages.Add();
    let image = pdfModule.PdfImage.FromFile(fileName);

    let box = fitContain(
      image.PhysicalDimension.Width, image.PhysicalDimension.Height,
      page.Canvas.ClientSize.Width, page.Canvas.ClientSize.Height
    );

    page.Canvas.DrawImage({ image: image, x: box.x, y: box.y, width: box.width, height: box.height });
  }

  const outputFileName = 'ScannedDocument.pdf';
  doc.SaveToFile({ fileName: outputFileName, fileFormat: pdfModule.FileFormat.PDF });
  doc.Close();

  const fileArray = window.dotnetRuntime.Module.FS.readFile(outputFileName);
  const blob = new Blob([fileArray], { type: 'application/pdf' });
  const url = URL.createObjectURL(blob);
  const a = document.createElement('a');
  a.href = url;
  a.download = outputFileName;
  a.click();
  URL.revokeObjectURL(url);
};
Два практических замечания. Поскольку каждая страница подгоняется независимо, изображения с разными размерами — не проблема: горизонтальная фотография и вертикальный скан могут находиться в одном документе без какой-либо особой обработки. А поскольку весь документ собирается в памяти до SaveToFile, скачивание происходит один раз в конце, независимо от того, сколько изображений было добавлено.
Вам также может понравиться: Сборка изображений — это обратная операция по отношению к рендерингу. Если у вас уже есть PDF и вы хотите получить каждую его страницу в виде картинки, см. Как преобразовать страницы PDF в изображения в JavaScript (React).
Подгонка размера: как вписать изображение в страницу
Есть два разумных способа разместить изображение на странице, и выбор зависит от того, допустима ли потеря части изображения.
Contain (Math.max) |
Cover (Math.min) |
|
|---|---|---|
| Что делает | Масштабирует, пока всё изображение не поместится | Масштабирует, пока страница не заполнится |
| Всё изображение видно | Да | Нет — выходящее за края обрезается |
| Пустое пространство | Возможно, по одной оси | Отсутствует |
| Подходит для | Сканов, документов, всего, что должно оставаться целым | Фотографий на всю страницу, обложек, слайдов |
В первом примере используется contain — вспомогательная функция fitContain. Переход к cover — это зеркальное отражение этой функции: Math.min вместо Math.max, заполнение страницы и предоставление холсту обрезать всё, что выходит за края, при этом смещения центрирования становятся отрицательными:
// Cover: fill the page, clipping whatever overflows
function fitCover(imgW, imgH, pageW, pageH) {
  const rate = Math.min(imgW / pageW, imgH / pageH);
  const width = imgW / rate;
  const height = imgH / rate;
  return {
    width, height,
    x: (pageW - width) / 2,   // negative when the image is wider than the page
    y: (pageH - height) / 2   // negative when it is taller
  };
}
Если вместо вывода от края до края вы хотите видимые поля, уменьшайте не изображение, а полезную область — передайте бюджет с учётом полей в ту же вспомогательную функцию fitContain:
const margin = 36; // 36 points = 0.5 inch
let usableWidth = page.Canvas.ClientSize.Width - margin * 2;
let usableHeight = page.Canvas.ClientSize.Height - margin * 2;

let box = fitContain(
  image.PhysicalDimension.Width, image.PhysicalDimension.Height,
  usableWidth, usableHeight
);
page.Canvas.DrawImage({ image: image, x: box.x, y: box.y, width: box.width, height: box.height });
Об PhysicalDimension стоит знать одно: оно отражает физический размер изображения, который не всегда совпадает с его размером в пикселях. Фотография 4000 × 3000, сохранённая с другим значением DPI, вернёт не те числа, которых вы могли бы ожидать. Именно поэтому подход на основе коэффициентов, описанный выше, надёжнее жёсткого задания размеров в пикселях — он работает независимо от того, как было помечено изображение.
Загрузка изображений из памяти
PdfImage.FromFile ожидает, что изображение уже находится в VFS. Но ваши изображения не всегда там — ответ API, blob из базы данных или экспорт из canvas дают вам байты в памяти. PdfImage.FromStream принимает эти байты напрямую.
// Read image bytes from VFS and build a memory stream
let bytes = window.dotnetRuntime.Module.FS.readFile(inputFileName);
let stream = new pdfModule.Stream(bytes);

// Load the image from the memory stream
let image = pdfModule.PdfImage.FromStream(stream);
Далее всё так же, как с любым другим изображением — вычислите размер и нарисуйте его:
let page = doc.Pages.Add();
let box = fitContain(
  image.PhysicalDimension.Width, image.PhysicalDimension.Height,
  page.Canvas.ClientSize.Width, page.Canvas.ClientSize.Height
);
page.Canvas.DrawImage({ image: image, x: box.x, y: box.y, width: box.width, height: box.height });
Одна и та же форма bytes подходит независимо от источника. Если ваши изображения приходят как ArrayBuffer из fetch, оберните его в Uint8Array перед созданием потока:
const response = await fetch('/api/images/invoice-001');
const bytes = new Uint8Array(await response.arrayBuffer());
let stream = new pdfModule.Stream(bytes);
let image = pdfModule.PdfImage.FromStream(stream);
Это шаблон, к которому стоит прибегать, когда PDF собирается из изображений, инициированных на сервере, загруженных пользователем файлов, хранящихся в состоянии, или чего-либо, сгенерированного во время выполнения на canvas — без обращения к VFS.
Рекомендуемая статья: Spire.PDF умеет также рисовать на страницах уже открытого PDF, а не только в новых документах, как выше. О размещении изображений в существующем документе см. Как добавить изображения в PDF в JavaScript (React).
Типичные проблемы
Изображение получается растянутым или сжатым.
Почти всегда причина в двух разных коэффициентах масштабирования. Вычислите единый fitRate и разделите на него и ширину, и высоту — никогда не масштабируйте оси независимо.
Изображение крошечное посреди большой пустой страницы. Это ожидаемо, когда соотношение сторон изображения сильно отличается от соотношения сторон страницы. Панорамная фотография на вертикальной странице всегда оставит полосы сверху и снизу. Либо смиритесь с этим (правильно для документов), либо переключитесь на cover, либо используйте вариант с полями, чтобы хотя бы пустое пространство оставалось симметричным.
Изображение обрезано по краям.
Вы используете поведение cover — намеренно или нет. Проверьте, использовал ли fitRate функцию Math.min; переключитесь на Math.max, если всё изображение должно быть видно.
Фотография высокого разрешения даёт огромный PDF.
Изображение встраивается со своим собственным разрешением. Если размер файла важен, уменьшите масштаб перед отрисовкой — нарисуйте его на canvas нужного размера, экспортируйте и используйте эти байты с PdfImage.FromStream.
При первом нажатии ничего не происходит.
Модуль WASM загружается асинхронно. Проверка if (!pdfModule) return; существует именно для этого; в настоящем приложении блокируйте кнопку до готовности модуля, а не показывайте alert.
Часто задаваемые вопросы
Можно ли вставлять изображения в существующий PDF вместо создания нового?
Да. Примеры здесь создают новый документ, но вы можете открыть существующий PDF и рисовать на его страницах точно так же. См. Как добавить изображения в PDF в JavaScript (React) для этого сценария.
Какие форматы изображений можно загружать?
Распространённые растровые форматы — PNG, JPEG, BMP и подобные — поддерживаются PdfImage.FromFile и PdfImage.FromStream. Используйте FromStream, когда формат неизвестен на этапе сборки или байты приходят из сетевого ответа.
Можно ли управлять порядком страниц?
Да. Страницы создаются в том порядке, в котором вы вызываете Pages.Add(), поэтому сортировка массива имён файлов сортирует и результат. Именно на этом механизме основаны интерфейсы с перетаскиванием для изменения порядка: измените порядок массива — пересоберите PDF.
Требуется ли здесь серверная часть?
Нет. Документ собирается в браузере модулем WebAssembly, а готовый PDF возвращается в виде байтов, которые вы превращаете в Blob. Изображения никогда не покидают устройство.
Можно ли смешивать вертикальные и горизонтальные изображения в одном PDF?
Да. Каждая страница подгоняется и рисуется независимо, поэтому вертикальный скан и горизонтальная фотография могут стоять рядом. Если вам нужна единая ориентация страниц, это повод использовать фиксированный размер страницы и позволить изображениям масштабироваться под него.
У меня есть PDF, и я хочу получить его страницы в виде изображений, а не наоборот.
Это обратная операция — рендеринг, а не сборка. См. Как преобразовать страницы PDF в изображения в JavaScript (React).
Нужно ли помещать изображение в VFS?
Только для FromFile. FromStream принимает байты из любого источника — ответа fetch, экспорта из canvas или состояния — и полностью обходится без VFS.
См. также
Рецепты сборки здесь создают совершенно новый документ. Если ваши изображения нужно поместить в существующий PDF — нарисовать на уже имеющихся страницах — см. Как добавить изображения в PDF в JavaScript (React). Другие полезные части конвейера «изображение → PDF»:
Converting Images to PDF in JavaScript (React)
A folder of images is awkward to hand to someone. A PDF is one file, opens everywhere, prints predictably, and — the part people actually care about — holds a fixed order. That is why scanned pages, photo sets, receipt photos, and exported design frames so often get assembled into a PDF before they go anywhere.
Building that PDF in the browser is a different problem from rendering a PDF to an image. You are not decoding something that already exists; you are making decisions a document format would normally make for you: how big is the page, where does the image sit on it, what happens when an image is a different shape from the page, and in what order do the pages come out.
Spire.PDF for JavaScript exposes those decisions through a page canvas. You add a page, load an image, draw it onto that page at a size you compute, and save. Everything runs client-side through WebAssembly, so the images never get uploaded.
Why images end up in PDFs
The scenarios share one shape: several images that need to behave like one document.
- Scanned or photographed multipage documents — a contract photographed page by page, reassembled into a single file that can be filed or emailed.
- Photo sets and portfolios — one image per page, in an order someone chose.
- Receipts and expense reports — a dozen phone photos that accounting wants as one attachment.
- Design and diagram exports — frames exported from a tool, collected into something reviewable.
In each case the PDF is not really about the PDF format. It is about getting a stable, single-file, ordered artifact out of a pile of images.
Prerequisites
This walkthrough assumes a React project with Spire.PDF for JavaScript installed and the WASM module initialized. For setup, see Integrating Spire.PDF for JavaScript in a React Project.
You will need:
- One or more image files loaded into the VFS
- The WASM module reachable at
window.wasmModule.spirepdf
One image, one page
The basic flow is four steps: create a document, add a page, load the image, draw it. The interesting part is the drawing — you have to decide how large the image should be on the page.
function App() {
  const convertImageToPDF = async () => {
    // Get the Spire.PDF WASM module
    const pdfModule = window.wasmModule?.spirepdf;

    // Check if the WASM module is ready
    if (!pdfModule) {
      alert('Spire.PDF is not ready yet');
      return;
    }

    // Load the image file into VFS
    const inputFileName = 'Scenery.png';
    await window.spire.FetchFileToVFS(inputFileName, "", `${process.env.PUBLIC_URL}/data/`);

    // Create a PdfDocument object
    let doc = new pdfModule.PdfDocument();

    // Add a page
    let page = doc.Pages.Add();

    // Load the image
    let image = pdfModule.PdfImage.FromFile(inputFileName);

    // Calculate the scale ratio so the image fits the page completely
    let widthFitRate = image.PhysicalDimension.Width / page.Canvas.ClientSize.Width;
    let heightFitRate = image.PhysicalDimension.Height / page.Canvas.ClientSize.Height;
    let fitRate = Math.max(widthFitRate, heightFitRate);

    // Calculate the scaled dimensions of the image
    let fitWidth = image.PhysicalDimension.Width / fitRate;
    let fitHeight = image.PhysicalDimension.Height / fitRate;

    // Center the image on the page
    let x = (page.Canvas.ClientSize.Width - fitWidth) / 2;
    let y = (page.Canvas.ClientSize.Height - fitHeight) / 2;

    // Draw the image onto the page
    page.Canvas.DrawImage({ image: image, x: x, y: y, width: fitWidth, height: fitHeight });

    const outputFileName = 'ImageToPDF.pdf';

    // Save as PDF format
    doc.SaveToFile({ fileName: outputFileName, fileFormat: pdfModule.FileFormat.PDF });
    doc.Close();

    // Read the converted file from VFS and trigger download
    const fileArray = window.dotnetRuntime.Module.FS.readFile(outputFileName);
    const blob = new Blob([fileArray], { type: 'application/pdf' });
    const url = URL.createObjectURL(blob);
    const a = document.createElement('a');
    a.href = url;
    a.download = outputFileName;
    a.click();
    URL.revokeObjectURL(url);
  };

  return (
    <div style={{ textAlign: 'center', height: '300px' }}>
      <h1>Convert Image To PDF</h1>
      <button onClick={convertImageToPDF}>
        Generate
      </button>
    </div>
  );
}

export default App;
PDF document generated after loading an image via PdfImage.FromFile and drawing it with Canvas.DrawImage
Extract the sizing into a helper, because it is the one piece of this code you will reuse in every other recipe below. The math: take page.Canvas.ClientSize — the drawable area of the page, in points — as your budget, compare it against the image's natural PhysicalDimension, and divide both dimensions by a single ratio so the aspect ratio survives. Bury it in a function so the bug-prone part lives in exactly one place:
// Contain: scale until the whole image fits inside the page
function fitContain(imgW, imgH, pageW, pageH) {
  const rate = Math.max(imgW / pageW, imgH / pageH);
  const width = imgW / rate;
  const height = imgH / rate;
  return { width, height, x: (pageW - width) / 2, y: (pageH - height) / 2 };
}
Now the draw call in the example above shrinks to three lines, and the "contain or cover" decision moves out of the math and into a function name:
let page = doc.Pages.Add();
let box = fitContain(
  image.PhysicalDimension.Width, image.PhysicalDimension.Height,
  page.Canvas.ClientSize.Width, page.Canvas.ClientSize.Height
);
page.Canvas.DrawImage({ image: image, x: box.x, y: box.y, width: box.width, height: box.height });
Math.max is the "contain" choice — scale by the more restrictive axis so the whole image stays visible. If you instead want to fill the page and clip the overflow, swap in Math.min; the section on sizing gives you the fitCover counterpart and a margin variant.
Many images, one document
One image per page means one Pages.Add() and one DrawImage per image. Loop over an array of filenames and the array order becomes the page order — which is exactly what you want when the user has just finished dragging thumbnails into sequence.
const combineImagesToPdf = async () => {
  const pdfModule = window.wasmModule?.spirepdf;
  if (!pdfModule) return;

  // The order of this array is the order of pages in the PDF
  const imageFiles = ['scan_01.png', 'scan_02.png', 'scan_03.png', 'scan_04.png'];

  for (const fileName of imageFiles) {
    await window.spire.FetchFileToVFS(fileName, "", `${process.env.PUBLIC_URL}/data/`);
  }

  let doc = new pdfModule.PdfDocument();

  for (const fileName of imageFiles) {
    let page = doc.Pages.Add();
    let image = pdfModule.PdfImage.FromFile(fileName);

    let box = fitContain(
      image.PhysicalDimension.Width, image.PhysicalDimension.Height,
      page.Canvas.ClientSize.Width, page.Canvas.ClientSize.Height
    );

    page.Canvas.DrawImage({ image: image, x: box.x, y: box.y, width: box.width, height: box.height });
  }

  const outputFileName = 'ScannedDocument.pdf';
  doc.SaveToFile({ fileName: outputFileName, fileFormat: pdfModule.FileFormat.PDF });
  doc.Close();

  const fileArray = window.dotnetRuntime.Module.FS.readFile(outputFileName);
  const blob = new Blob([fileArray], { type: 'application/pdf' });
  const url = URL.createObjectURL(blob);
  const a = document.createElement('a');
  a.href = url;
  a.download = outputFileName;
  a.click();
  URL.revokeObjectURL(url);
};
Two practical notes. Because each page is sized independently, images of different dimensions are fine — a landscape photo and a portrait scan can sit in the same document without any special handling. And because the whole document is built in memory before SaveToFile, the download happens once at the end regardless of how many images went in.
You may also like: Assembling images is the reverse of rendering. If you already have a PDF and want each of its pages as a picture instead, see How to Convert PDF Pages to Images in JavaScript (React).
Sizing: fit the image to the page
There are two reasonable ways to put an image on a page, and which one you want depends on whether losing part of the image is acceptable.
Contain (Math.max) |
Cover (Math.min) |
|
|---|---|---|
| What it does | Scales until the entire image fits | Scales until the page is filled |
| Whole image visible | Yes | No — the overflow is clipped |
| Empty space | Possible, on one axis | None |
| Right for | Scans, documents, anything that must stay complete | Full-bleed photos, cover pages, slides |
The first example uses contain — the fitContain helper. Switching to cover is the mirror of that function: Math.min instead of Math.max, filling the page and letting the canvas clip whatever overflows, with centering offsets that go negative:
// Cover: fill the page, clipping whatever overflows
function fitCover(imgW, imgH, pageW, pageH) {
  const rate = Math.min(imgW / pageW, imgH / pageH);
  const width = imgW / rate;
  const height = imgH / rate;
  return {
    width, height,
    x: (pageW - width) / 2,   // negative when the image is wider than the page
    y: (pageH - height) / 2   // negative when it is taller
  };
}
If you want a visible margin instead of edge-to-edge output, shrink the usable area rather than the image — feed the margin-adjusted budget into the same fitContain helper:
const margin = 36; // 36 points = 0.5 inch
let usableWidth = page.Canvas.ClientSize.Width - margin * 2;
let usableHeight = page.Canvas.ClientSize.Height - margin * 2;

let box = fitContain(
  image.PhysicalDimension.Width, image.PhysicalDimension.Height,
  usableWidth, usableHeight
);
page.Canvas.DrawImage({ image: image, x: box.x, y: box.y, width: box.width, height: box.height });
One thing worth knowing about PhysicalDimension: it reflects the image's physical size, which is not always its pixel size. A 4000 × 3000 photo saved with a different DPI tag will report different numbers than you might expect. This is why the ratio-based approach above is safer than hardcoding pixel dimensions — it works regardless of how the image was tagged.
Load images from memory
PdfImage.FromFile expects the image to already be in the VFS. That is not always where your images live — an API response, a database blob, or a canvas export all give you bytes in memory instead. PdfImage.FromStream takes those bytes directly.
// Read image bytes from VFS and build a memory stream
let bytes = window.dotnetRuntime.Module.FS.readFile(inputFileName);
let stream = new pdfModule.Stream(bytes);

// Load the image from the memory stream
let image = pdfModule.PdfImage.FromStream(stream);
From there it is the same as any other image — compute the size and draw it:
let page = doc.Pages.Add();
let box = fitContain(
  image.PhysicalDimension.Width, image.PhysicalDimension.Height,
  page.Canvas.ClientSize.Width, page.Canvas.ClientSize.Height
);
page.Canvas.DrawImage({ image: image, x: box.x, y: box.y, width: box.width, height: box.height });
The same bytes shape works regardless of where it came from. If your images arrive as an ArrayBuffer from fetch, wrap it in a Uint8Array before constructing the stream:
const response = await fetch('/api/images/invoice-001');
const bytes = new Uint8Array(await response.arrayBuffer());
let stream = new pdfModule.Stream(bytes);
let image = pdfModule.PdfImage.FromStream(stream);
This is the pattern to reach for when the PDF is assembled server-triggered images, user uploads held in state, or anything generated at runtime by a canvas — no round trip through the VFS required.
Recommended article: Spire.PDF can also draw onto the pages of a PDF you already have open, not just the new documents above. For placing images into an existing document, see How to Add Images to a PDF in JavaScript (React).
Common issues
The image comes out stretched or squashed.
This is almost always two different scale factors. Compute a single fitRate and divide both width and height by it — never scale the axes independently.
The image is tiny in the middle of a big empty page. Expected, when the image's aspect ratio is far from the page's. A panoramic photo on a portrait page will always leave bands above and below. Either accept it (correct for documents), switch to cover, or use the margin-adjusted version to at least keep the whitespace symmetric.
The image is cut off at the edges.
You are using cover behaviour, intentionally or not. Check whether fitRate used Math.min; switch to Math.max if the whole image must be visible.
A high-resolution photo produces a huge PDF.
The image is embedded at its own resolution. If file size matters, downscale before drawing — draw it to a canvas at the target size, export, and use those bytes with PdfImage.FromStream.
Nothing happens on the first click.
The WASM module loads asynchronously. The if (!pdfModule) return; guard exists for that reason; in a real app, gate the button on module readiness rather than alerting.
FAQ
Can I insert images into an existing PDF instead of creating a new one?
Yes. The examples here create a new document, but you can open an existing PDF and draw onto its pages the same way. See How to Add Images to a PDF in JavaScript (React) for that workflow.
Which image formats can I load?
Common bitmap formats — PNG, JPEG, BMP and similar — are supported by PdfImage.FromFile and PdfImage.FromStream. Use FromStream when the format is unknown at build time or the bytes come from a network response.
Can I control the page order?
Yes. Pages are created in the order you call Pages.Add(), so sorting your filename array sorts the output. That is the mechanism behind drag-to-reorder interfaces: reorder the array, rebuild the PDF.
Does this require a backend?
No. The document is assembled in the browser by the WebAssembly module, and the finished PDF is returned as bytes you turn into a Blob. Images never leave the device.
Can I mix portrait and landscape images in one PDF?
Yes. Each page is sized and drawn independently, so a portrait scan and a landscape photo can sit next to each other. If you want uniform page orientation, that is a reason to use a fixed page size and let the images scale to it.
I have a PDF and want its pages as images, not the other way round.
That is the reverse operation — rendering rather than assembling. See How to Convert PDF Pages to Images in JavaScript (React).
Do I need the image in the VFS?
Only for FromFile. FromStream accepts bytes from anywhere — a fetch response, a canvas export, or state — and skips the VFS entirely.
See Also
The assembly recipes here build a brand-new document. If your images need to go into an existing PDF — drawing onto pages you already have — see How to Add Images to a PDF in JavaScript (React). The other useful pieces of the image-PDF pipeline:
Agente de IA vs. API LLM Pura: Camada de Documentos no .NET
Índice
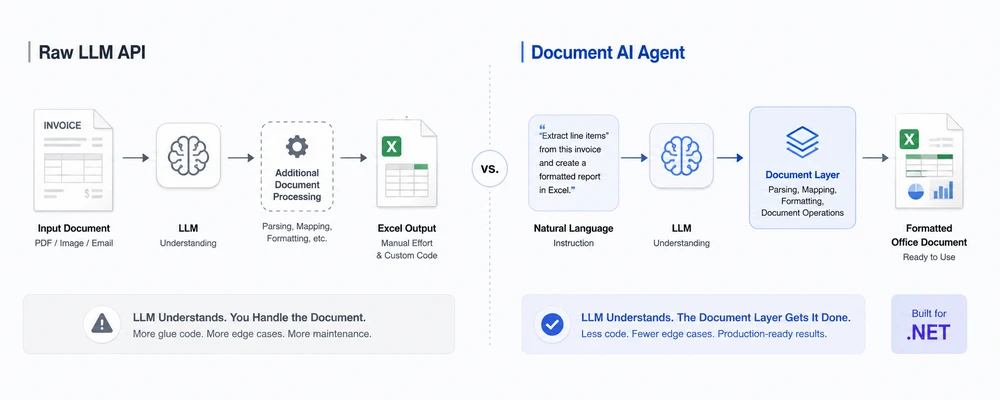
Um usuário envia um PDF de fatura e pergunta:
"Extraia os itens de linha, calcule o total e crie um relatório Excel formatado."
Um LLM moderno consegue entender a fatura e identificar as informações de que você precisa. Mas isso é apenas metade do problema. Sua aplicação ainda precisa transformar esse entendimento em um arquivo .xlsx real e formatado, com a estrutura documental necessária.
Esta é a lacuna entre entender um documento e operar sobre um documento. Uma API LLM bruta fornece capacidades de linguagem e raciocínio, mas não oferece, por si só, um fluxo de trabalho completo de manipulação de documentos do Office. Um agente de IA para documentos conecta o LLM a um SDK determinístico de processamento de documentos, de modo que o LLM determina o que deve acontecer e a camada de documentos realiza as operações de arquivo.
Navegação rápida
- O Problema: APIs de LLM brutas e arquivos de documento
- O que um agente de IA para documentos agrega
- Comparação lado a lado
- Quando usar cada abordagem
- Um exemplo mínimo em C#
- Por que usar o Spire.Agent.Office para equipes .NET
- Perguntas frequentes
1. O Problema: APIs de LLM brutas e arquivos de documento
Chamar gpt-4 ou claude diretamente para "processar este documento" falha de três maneiras que importam em produção. Essas preocupações tornam-se importantes assim que um fluxo de trabalho documental vai além da simples extração de texto e exige manipulação, validação e formatação confiáveis de arquivos.
1.1 LLMs não conseguem ler ou gravar arquivos do Office de forma confiável
Modelos de linguagem de grande porte conseguem entender o conteúdo de um documento quando o modelo e a API suportam o arquivo relevante ou a entrada multimodal, mas isso não fornece manipulação determinística de documentos. Um modelo pode ser capaz de analisar o texto, as tabelas ou o conteúdo visual de um PDF, mas isso não significa que ele possa modificar deterministicamente uma pasta de trabalho, preservar cada propriedade específica do Office e salvar o resultado como um arquivo .xlsx pronto para produção através da própria API do LLM. Quando um arquivo do Office é fornecido a uma API LLM bruta, o modelo pode receber conteúdo extraído ou transformado em vez de um objeto de pasta de trabalho nativo e editável. Mesmo quando o modelo consegue entender o conteúdo da pasta de trabalho, a API não oferece, por si só, operações determinísticas para preservar e modificar a estrutura nativa da pasta de trabalho (planilhas, intervalos nomeados, fórmulas, formatação condicional, células mescladas, formatos numéricos).
A análise de documentos por LLM bruto pode extrair informações semânticas úteis, mas a análise semântica é diferente de preservar e manipular a estrutura nativa do documento.
Escrever é o mesmo problema ao contrário. Uma API LLM bruta não fornece, por si só, uma camada determinística de manipulação de documentos do Office. Um LLM pode descrever o que um relatório deve conter, mas produzir um arquivo .docx ou .xlsx válido exige ferramentas adicionais. Para gerar saída real do Office a partir de um LLM bruto, você precisa construir um pipeline de reconstrução: interpretar a resposta de texto do modelo, mapear campos para células ou parágrafos, aplicar formatação e gravar o arquivo você mesmo. Esse pipeline não é trivial — e é a parte que quebra em produção.
1.2 A formatação não é garantida
Os fluxos de trabalho documentais carregam formatação que importa: cabeçalhos de coluna em um relatório de fatura, formatos numéricos em uma planilha financeira, preenchimentos condicionais que sinalizam discrepâncias, estilos de tabela em um relatório gerencial. Uma API LLM bruta retorna conteúdo gerado pelo modelo, como texto, JSON ou chamadas de ferramenta; ela não fornece, inerentemente, um documento do Office formatado como saída. A formatação pode ser difícil de preservar quando a resposta do modelo precisa ser reconstruída em um arquivo do Office — uma planilha do Excel sem formatos numéricos é uma planilha que alguém precisa corrigir manualmente antes que possa seguir para a contabilidade.
Mesmo quando o LLM produz saída estruturada (JSON, tabelas Markdown), saída estruturada não é saída de documento estruturado. JSON fornece dados estruturados, não um documento do Office estruturado. Uma resposta JSON pode descrever células, parágrafos, tabelas ou instruções de formatação, mas ainda é necessária uma camada adicional de processamento de documentos para aplicar essas instruções a um arquivo .xlsx, .docx, .pptx ou .pdf real. Você agora mantém um formatador, um mapeador de campos e um aplicador de estilos — nenhum dos quais o LLM ajuda.
1.3 Você reimplementa toda a orquestração
Um pipeline de documentos com LLM bruto não é uma única chamada de API. É uma pilha:
- Design de prompt — prompts modelados por templates que quebram quando o layout do documento muda
- Extração — ferramentas adicionais de processamento de documentos podem ser necessárias para extrair conteúdo estruturado de arquivos PDF, Word e Excel antes que o LLM o veja
- Análise (parsing) — lógica de análise de JSON para transformar a resposta do LLM em dados estruturados
- Lógica de nova tentativa — lidar com saídas alucinadas, limites de taxa e rejeições do filtro de conteúdo
- E/S de arquivos — ler entradas, gravar saídas, gerenciar arquivos temporários
- Validação de saída — verificar se o arquivo produzido é válido e bem formado antes de devolvê-lo ao usuário
Nesse ponto, você está construindo uma solução de processamento de documentos — com um LLM como um componente, não a solução em si. Cada novo tipo de documento, mudança de esquema ou formato de saída significa reajustar prompts e retestar peculiaridades específicas do modelo. A carga de manutenção cresce linearmente com o número de tipos de documento que você suporta.
2. O que um agente de IA para documentos agrega
Um agente de IA para documentos resolve os três problemas acima ao combinar o LLM com uma camada determinística de processamento de documentos. A divisão de trabalho é clara:
- O LLM cuida do entendimento. Ele lê a instrução em linguagem natural, decide o que extrair ou gerar e determina a estrutura da saída.
- A camada de documentos cuida da execução. Ela lê e grava arquivos reais do Office e PDF, preserva a formatação, aplica estilos e usa operações documentais determinísticas para produzir um arquivo estruturalmente válido.
Em vez de pedir ao LLM para "descobrir" a estrutura do documento, o agente invoca operações documentais determinísticas. O modelo não precisa construir o formato do arquivo do Office por conta própria; ele produz a intenção, e a camada de documentos executa as operações de arquivo correspondentes.
As duas arquiteturas lado a lado:
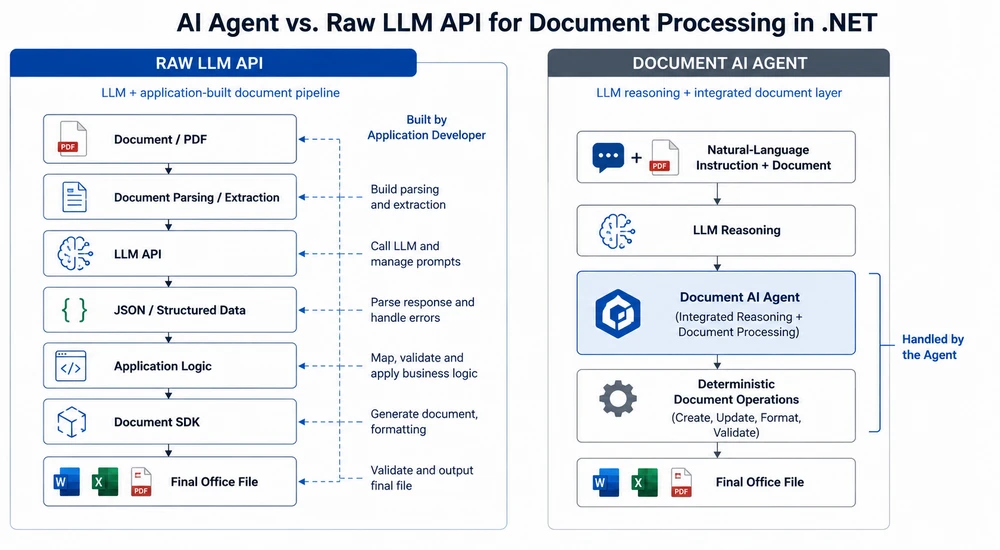
Como isso se parece na prática
| Problema com LLM bruto | Como o agente resolve |
|---|---|
Sem manipulação nativa de .xlsx |
A camada de documentos lê e manipula a pasta de trabalho nativamente |
| Sem geração determinística de arquivos do Office | A camada de documentos cria o arquivo de saída |
| A formatação pode ser perdida durante a reconstrução | A camada de documentos lida com estilos e formatos numéricos |
| A estrutura gerada pelo modelo pode ser inconsistente | As operações documentais são determinísticas |
| Você constrói o pipeline ao redor | O SDK do agente fornece o fluxo de trabalho de processamento de documentos |
A principal percepção: o LLM é o cérebro, a camada de documentos é as mãos. Uma API LLM bruta oferece o cérebro e espera que você construa as mãos. Um agente de IA para documentos oferece ambos, integrados, em uma única chamada de SDK.
Um SDK de documentos sozinho pode manipular arquivos, mas não entende a intenção em linguagem natural. Um agente de IA combina essa camada documental determinística com um LLM para que os usuários possam descrever o fluxo de trabalho desejado em vez de implementar cada operação documental manualmente. O valor não é "SDK de documentos + IA" — é o pipeline: instrução em linguagem natural → raciocínio do LLM → operações documentais determinísticas.
Leitura recomendada: Agente de IA para Processamento de Documentos: O Que É e Como Funciona — o conceito de agente de IA para documentos explicado.
3. Comparação lado a lado
| Dimensão | API LLM bruta | Agente de IA para documentos |
|---|---|---|
| Entendimento de arquivo | Depende do modelo/API e do tipo de arquivo | A camada de documentos fornece acesso nativo ao documento |
| Manipulação de arquivo | Exige ferramentas ou bibliotecas documentais adicionais | Integrada à camada de processamento de documentos |
| Fidelidade de formatação | Depende da lógica de reconstrução | Tratada por APIs documentais determinísticas |
| Tratamento da saída | A resposta do LLM deve ser analisada e convertida em um arquivo | A camada de documentos realiza criação determinística de arquivos |
| Volume de código | Mais orquestração no lado da aplicação | Instrução em linguagem natural + configuração do SDK |
| Manutenção | Prompts, analisadores, mapeamentos e lógica de arquivos | Mais comportamento do fluxo de trabalho pode ser expresso em instruções |
| Processamento multiformato | Exige suporte específico por formato | Fluxo de trabalho unificado de processamento de documentos |
| Precisão semântica | Depende do modelo e do prompt | Ainda depende do modelo e da instrução |
| Validação de arquivo | Responsabilidade da aplicação | O SDK informa sucesso/falha do processamento |
| Integração .NET | SDK .NET ou integração HTTP, além de bibliotecas de processamento de documentos conforme necessário | SDK C# nativo com processamento de documentos |
| Melhor para | Tarefas de IA centradas em texto | Fluxos de trabalho documentais orientados por IA |
4. Quando usar cada abordagem
A comparação não é "o agente é sempre melhor". APIs LLM brutas e agentes de IA para documentos atendem a intenções diferentes, e escolher a ferramenta certa depende do que o fluxo de trabalho produz.
Use uma API LLM bruta quando
- A saída é texto, não um arquivo. Resumo, perguntas e respostas, classificação e redação são tarefas de texto para texto. Nenhuma camada de documentos é necessária.
- Você já tem uma pilha de LLM. Se sua equipe investiu em engenharia de prompts, RAG e infraestrutura de orquestração, adicionar um SDK de documentos pode ser desnecessário para fluxos de trabalho somente de texto.
- A entrada é texto simples ou Markdown. Se o material de origem já é texto — não
.pdfou.xlsx— o problema de extração desaparece, e uma chamada de LLM bruto é o caminho mais simples.
Use um agente de IA para documentos quando
- A saída deve ser um arquivo real do Office ou PDF. Se a entrega for uma pasta de trabalho
.xlsxpara contabilidade, um relatório.docxpara a gerência ou um.pdfpara distribuição, uma camada de processamento de documentos torna-se importante quando o fluxo de trabalho precisa produzir um arquivo do Office válido e formatado de forma confiável. - A entrada abrange vários formatos. PDFs, documentos do Word, arquivos do Excel e imagens digitalizadas chegando no mesmo fluxo de trabalho. Um LLM bruto precisa de uma biblioteca de extração separada por formato; um agente lida com todos eles em uma única instrução.
- A formatação é importante. Cabeçalhos de coluna, formatos numéricos, preenchimentos condicionais, estilos de tabela, fontes — se a equipe de negócios se preocupa com a aparência do arquivo, a camada de documentos é o que a preserva.
- Você está em .NET. Um SDK C# nativo que combina orquestração de IA com processamento de documentos pode reduzir a quantidade de integração no lado da aplicação em comparação com combinar um SDK de LLM com bibliotecas separadas de processamento de documentos.
- O fluxo de trabalho muda com frequência. Novos fornecedores, novos layouts de relatório, novas regras de validação — quando o gargalo é recodificar a cada mudança, editar uma instrução é mais rápido e mais barato.
Resumo da decisão
| Pergunta | API LLM bruta | Agente de IA para documentos |
|---|---|---|
| A saída é um arquivo real (Excel, Word, PDF)? | Exige ferramentas adicionais | Sim |
| A formatação precisa ser preservada? | Depende do seu pipeline de reconstrução | Tratada pela camada de documentos |
| As entradas estão em vários formatos do Office? | Exige extração específica por formato | Sim |
| É uma tarefa somente de texto (resumir, perguntas e respostas)? | Sim | Possível, mas desnecessário |
| Você precisa de manipulação nativa de documentos em .NET? | Exige uma biblioteca documental adicional | Integrada ao fluxo de trabalho |
| As regras do fluxo de trabalho mudarão com frequência? | Prompts e analisadores precisam ser reajustados | Mude o comportamento editando a instrução |
5. Um exemplo mínimo em C#
A diferença fica mais clara no código. Abaixo está a mesma tarefa — extrair dados de um PDF de fatura e produzir um relatório Excel formatado — implementada das duas maneiras.
Abordagem com API LLM bruta
// Simplified raw LLM pipeline — illustrative architecture, not production code.

// 1. Obtain document content using a document-processing tool
//    (This example uses extracted text to illustrate one common raw-LLM architecture;
//    some modern LLM APIs can also accept PDFs directly.)
string documentText = ExtractTextFromPdf(@"C:\invoices\supplier-a.pdf");

// 2. Send the extracted content to the LLM
string json = await CallLlmAsync(
    "Extract vendor, invoice date, line items, and total as JSON.",
    documentText);

// 3. Deserialize and validate the model response
InvoiceData data = JsonSerializer.Deserialize<InvoiceData>(json)
    ?? throw new InvalidOperationException("Invalid LLM response.");

// 4. Create the Excel file using a document library
using var workbook = new Workbook();
var sheet = workbook.AddWorksheet("Invoice");

// ... map data to cells and apply formatting
workbook.SaveToFile(@"C:\output\report.xlsx");
Pipeline ilustrativo: as chamadas de API e de biblioteca documental foram simplificadas para focar na arquitetura, em vez de um SDK específico de fornecedor.
Abordagem com agente de IA para documentos
// Document AI agent: one instruction, real file output
using Spire.Agent.Office.AI;
using Spire.Agent.Office.Extensions;
using Spire.Xls;

string? spireToken = Environment.GetEnvironmentVariable("SPIRE_TOKEN");
if (string.IsNullOrEmpty(spireToken))
    throw new InvalidOperationException("SPIRE_TOKEN is not set.");

AIOptions agentOptions = new AIOptions();
agentOptions.WorkDir = @"C:\output";
agentOptions.SpireToken = spireToken;

string instruction =
    "Read the attached invoice PDF, extract vendor name, invoice date, " +
    "line items (description, quantity, unit price, amount), and total. " +
    "Create a workbook with formatted headers, number formats for currency " +
    "columns, and a summary row. Save as a .xlsx file.";

string[] attachments = { @"C:\invoices\supplier-a.pdf" };

using (Workbook wb = new Workbook())
{
    AIResult result = wb.AI(agentOptions).ExecuteInstruction(
        wb,
        instruction,
        @"C:\output\report.xlsx",
        attachments);

    if (result == null || !result.Success)
        throw new InvalidOperationException(
            $"Processing failed: {result?.ErrorMessage}");
}
O agente lê o PDF da fatura e produz um relatório Excel formatado:
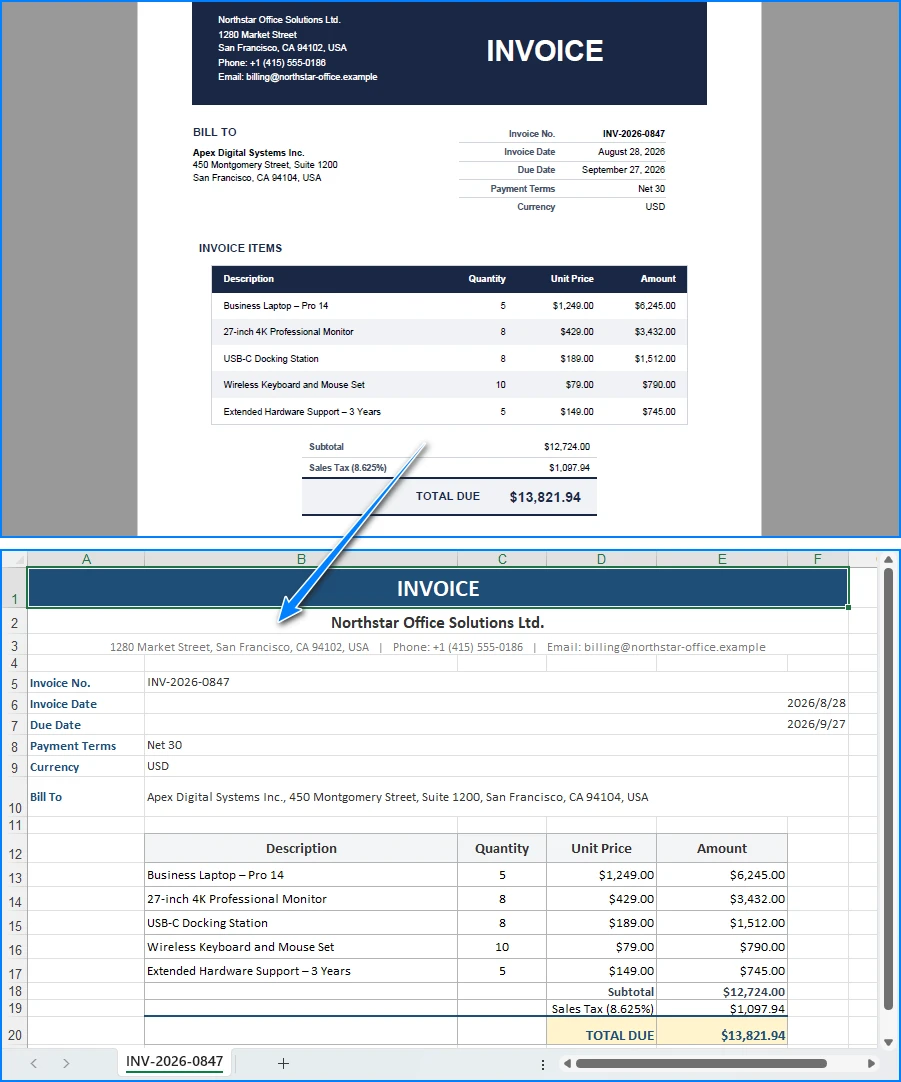
Principais chamadas de API
Workbook.AI(agentOptions)— anexa o processador de documentos de IA a um objeto de pasta de trabalhoExecuteInstruction(doc, instruction, savePath, attachments)— executa a instrução e grava o arquivo de saídaAIResult.Success/AIResult.ErrorMessage— verifica o resultado e expõe erros
A abordagem com LLM bruto são quatro problemas separados (extração, prompts, análise e gravação de arquivo) costurados. A abordagem com agente é uma instrução e uma verificação de resultado. Ambas as abordagens podem, em última análise, produzir um arquivo .xlsx, mas a abordagem com LLM bruto exige que você construa e mantenha a camada de geração de documentos por conta própria. O agente integra essa camada de processamento de documentos ao fluxo de trabalho, de modo que o LLM se concentra em interpretar a instrução enquanto o SDK cuida das operações documentais.
Você também pode gostar: Automatize o Processamento de Faturas com um Agente de IA em .NET — um fluxo de trabalho completo de extração, validação e geração de relatórios.
6. Por que usar o Spire.Agent.Office para equipes .NET
A comparação acima é deliberadamente neutra em relação a produtos; a mesma arquitetura (LLM + camada de documentos) funciona com qualquer modelo capaz e qualquer SDK de documentos. Onde o Spire.Agent.Office conquista seu lugar para equipes .NET é em três áreas específicas:
-
Processamento nativo multiformato. PDFs, documentos do Word, arquivos do Excel e fluxos de trabalho documentais baseados em imagens podem ser incorporados ao fluxo de trabalho do agente. O agente lê, extrai e gera nesses formatos em uma única instrução — sem biblioteca de extração por formato, sem formatador de saída por formato.
-
A formatação de documentos pode ser preservada por meio de operações documentais determinísticas. A camada de documentos mantém cabeçalhos de coluna, formatos numéricos, preenchimentos condicionais, estilos de tabela e fontes intactos. Ao trabalhar a partir de um modelo existente, instrua explicitamente o agente a preservar o layout e o estilo originais, e a saída permanecerá fiel ao modelo sem código extra.
-
Integração nativa com .NET. É um SDK C# que se encaixa em uma aplicação .NET existente. Sem serviço separado de processamento de documentos para construir ou manter, sem integração entre serviços, sem camada de orquestração HTTP. O exemplo acima captura a superfície principal de integração: configuração do SDK, uma instrução e uma verificação de resultado.
Se você já usa o Spire.Office para processamento de documentos, o agente é a próxima camada natural: o mesmo objeto Workbook ganha um processador AI() que transforma instruções em fluxos de trabalho executados. O SDK determinístico que você já conhece torna-se a camada de documentos que o agente chama.
7. Perguntas frequentes
Não posso simplesmente enviar o PDF diretamente para a API do LLM?
Pode. APIs modernas de LLM conseguem aceitar alguns tipos de documento diretamente, incluindo PDFs. A distinção importante é que a entrada de arquivo dá ao modelo acesso ao conteúdo do documento; ela não dá automaticamente à sua aplicação uma API determinística para modificar a estrutura original do Office e salvar um arquivo de saída pronto para produção. Por exemplo, um modelo pode identificar corretamente as tabelas de uma fatura em PDF, mas transformar esse entendimento em um .xlsx formatado ainda exige lógica de geração de documentos.
O que exatamente é uma "camada de documentos"?
Uma camada de documentos é um SDK determinístico que lê e grava arquivos do Office e PDF enquanto trabalha com suas estruturas documentais nativas. Ela cuida das operações que um LLM não consegue: abrir um .xlsx e preservar suas planilhas e fórmulas, gravar um .docx com estilos e cabeçalhos corretos, mesclar células, aplicar formatação condicional e criar saídas do Office/PDF estruturalmente válidas por meio de APIs documentais determinísticas. No Spire.Agent.Office, a camada de documentos é o SDK do Spire.Office; o LLM decide o que fazer, e a camada de documentos executa.
Isso é apenas RAG com etapas extras?
Não. RAG (geração aumentada por recuperação) concentra-se principalmente em recuperar informações relevantes para fundamentar as respostas do modelo. Um agente de IA para documentos adiciona outra responsabilidade: executar operações documentais e produzir ou modificar arquivos reais. Um agente de documentos lê e grava arquivos reais, preserva a formatação e produz saída estruturada que é um documento do Office válido, não uma resposta de texto.
Quais modelos de IA o Spire.Agent.Office suporta?
O Spire.Agent.Office conecta-se a um modelo de linguagem de grande porte por trás de uma chave SpireToken e suporta APIs de modelo hospedadas, bem como endpoints de modelo personalizados. Para dúvidas sobre quais provedores e protocolos de modelo são suportados em sua implantação, entre em contato com vendas.
Meus dados permanecem dentro do meu ambiente?
O SDK, os modelos e o processamento de documentos são executados dentro da sua aplicação — os arquivos não são enviados a um serviço documental de terceiros para armazenamento ou conversão. Para analisar o conteúdo, a IA precisa do texto relevante, e ele é enviado ao modelo para processamento. Se o endpoint do modelo estiver implantado dentro da sua própria rede e sua configuração não enviar conteúdo documental externamente, o conteúdo documental pode permanecer dentro da sua infraestrutura. Se você se conectar por meio de uma API de modelo hospedada, como OpenAI ou Azure OpenAI, o conteúdo relevante é transmitido a esse provedor de acordo com sua configuração.
Quando uma API LLM bruta é a escolha certa?
Para tarefas somente de texto em que nenhuma saída de arquivo é necessária: resumir um documento, responder perguntas sobre seu conteúdo, classificá-lo em uma categoria ou redigir uma resposta de e-mail. Se a entrada já é texto simples e a saída é texto simples, uma camada de documentos adiciona complexidade sem valor. O agente conquista seu lugar quando o fluxo de trabalho produz arquivos reais que precisam ser válidos e formatados.
Pronto para adicionar uma camada de documentos aos seus fluxos de trabalho com LLM?
Se sua aplicação processa faturas, contratos, relatórios ou qualquer fluxo de trabalho com documentos do Office, um agente de IA para documentos transforma uma instrução em linguagem natural em um arquivo real e formatado — sem construir um pipeline de extração e reconstrução. Siga o tutorial Introdução para executar seu primeiro fluxo de trabalho em .NET.
Leitura adicional
- Gerar documentos do Word a partir de dados do Excel em C# — geração de documentos orientada por dados com o SDK determinístico
- Crie um assistente de relatórios Excel com IA em C# — geração e análise automatizadas de relatórios
- Visão geral do produto Spire.Agent.Office — SDKs de agente de IA para cada formato de documento do Office