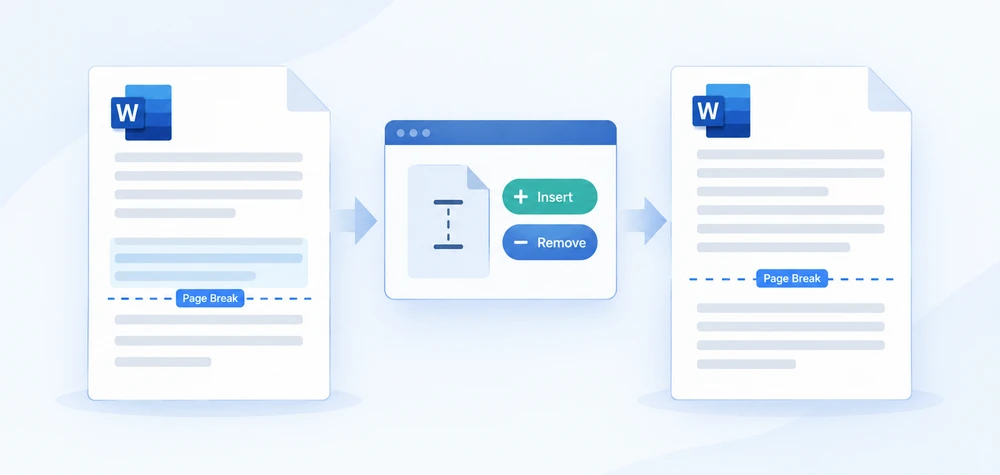
브라우저에서 긴 Word 문서의 서식을 지정해 본 사람이라면 누구나 그 고충을 압니다: 섹션 제목이 페이지 하단에 외롭게 남아 있고 본문 텍스트는 다음 페이지에서 시작하거나, 다른 파일에서 붙여넣은 내용이 원치 않는 빈 페이지 체인을 끌고 오는 경우입니다. 두 문제 모두 거의 항상 페이지 나누기 때문입니다. 있어야 할 곳에 없거나, 없어야 할 곳에 남아 있는 것입니다.
Spire.Doc for JavaScript는 WebAssembly를 통해 전적으로 브라우저에서 실행되며, 파일 I/O를 처리하기 위해 VFS(가상 파일 시스템)를 사용합니다. 즉, 백엔드 왕복 없이 페이지 나누기를 삽입하고 제거할 수 있습니다. 이 가이드에서는 두 작업을 모두 다루고 실제 문서에서 자주 나타나는 두 가지 에지 케이스를 해결합니다:
설치 및 프로젝트 설정은 React 프로젝트에 Spire.Doc for JavaScript 통합하기를 참조하세요. 아래 예제는 WASM 모듈이 이미 초기화되었다고 가정합니다.
특정 단락에 페이지 나누기 삽입
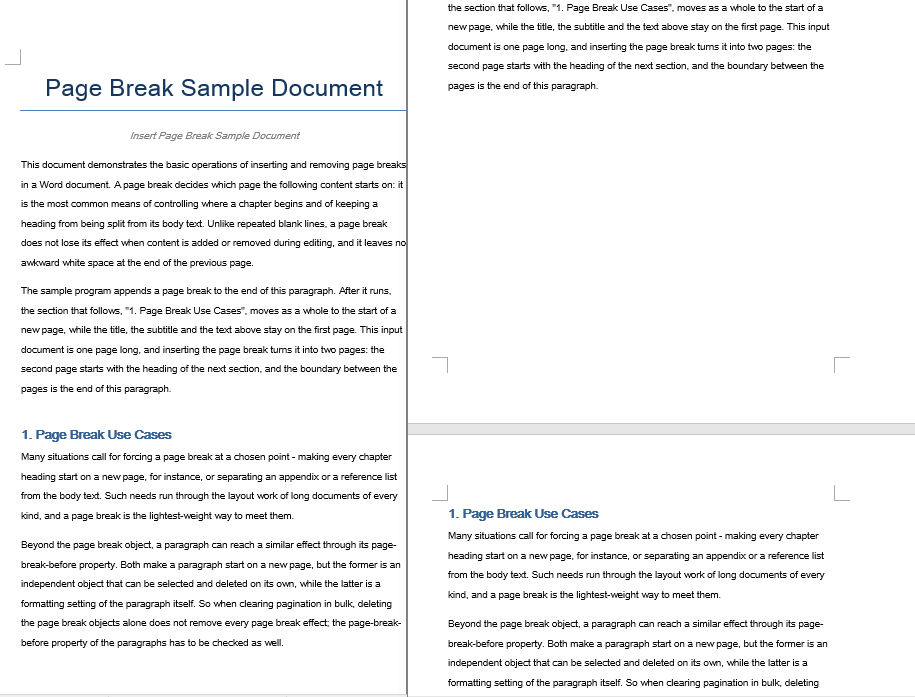
워크플로는 세 단계입니다: FetchFileToVFS를 통해 대상 문서를 WASM 가상 파일 시스템에 로드하고, Document 개체로 연 다음, 분할할 단락을 찾아 BreakType.PageBreak와 함께 AppendBreak를 호출합니다. 나누기는 해당 단락의 끝에 자식 개체로 추가되므로 그 뒤의 모든 내용이 다음 페이지로 흘러갑니다. 마지막으로 VFS에서 저장된 파일을 읽어 Blob으로 감싸고 브라우저 다운로드를 트리거합니다.
function App() {
  const InsertPageBreak = async () => {
    const docModule = window.wasmModule?.spiredoc;
    if (!docModule) {
      alert('Spire.Doc is not ready yet');
      return;
    }

    // Load the target Word document into VFS
    const inputFileName = "Template_Docx_1.docx";
    await window.spire.FetchFileToVFS(inputFileName, "", `${process.env.PUBLIC_URL}static/data/`);

    // Create a Document instance and load the document
    const doc = new docModule.Document();
    doc.LoadFromFile(inputFileName);

    // Locate the fourth paragraph of the first section and append a page break to its end
    doc.Sections.get_Item(0).Paragraphs.get_Item(3).AppendBreak(docModule.BreakType.PageBreak);

    // Define the output file name
    const outputFileName = "InsertPageBreak_out.docx";

    // Save the document to VFS
    doc.SaveToFile({ fileName: outputFileName, fileFormat: docModule.FileFormat.Docx2013 });

    doc.Dispose();

    const modifiedFileArray = window.dotnetRuntime.Module.FS.readFile(outputFileName);
    const blob = new Blob([modifiedFileArray], { type: 'application/vnd.openxmlformats-officedocument.wordprocessingml.document' });
    const url = URL.createObjectURL(blob);
    const a = document.createElement('a');
    a.href = url;
    a.download = outputFileName;
    a.click();
    URL.revokeObjectURL(url);
  };

 return (
    <div style={{ textAlign: 'center', height: '300px' }}>
      <h1>Insert a Page Break into a Word Document</h1>
      <button onClick={InsertPageBreak}>Generate</button>
    </div>
  );
}
export default App;
페이지 나누기가 네 번째 단락 끝에 추가된 후의 문서
한 번에 모든 페이지 나누기 제거
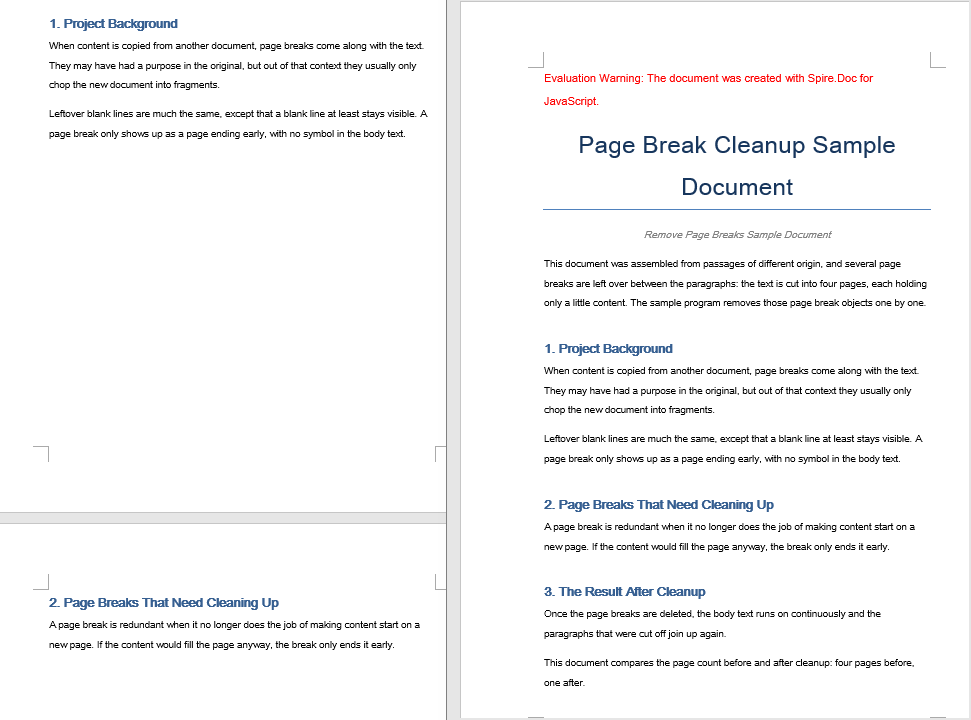
문서가 반복된 편집이나 복사-붙여넣기 작업으로 페이지 나누기를 수집한 경우, 종종 모두 제거하고 콘텐츠가 자연스럽게 다시 흐르도록 해야 합니다. 접근 방식은 다음과 같습니다: 대상 섹션의 모든 단락을 반복하고 각 자식 개체를 검사합니다. 자식이 BreakType.PageBreak인 Break로 식별되면 ChildObjects.Remove를 통해 제거합니다.
내부 루프의 중요한 세부 사항 — 자식 개체는 마지막 인덱스부터 0까지 역방향으로 순회됩니다. 앞으로 순회되는 컬렉션에서 요소를 제거하면 이후 모든 요소의 인덱스가 이동하여 항목 건너뛰기나 범위를 벗어난 접근이 발생할 수 있습니다. 역방향 순회는 각 제거가 이미 처리한 인덱스에만 영향을 미치므로 이 문제를 완전히 피할 수 있습니다.
function App() {
  const RemovePageBreaks = async () => {
    const docModule = window.wasmModule?.spiredoc;
    if (!docModule) {
      alert('Spire.Doc is not ready yet');
      return;
    }

    // Load the target Word document into VFS
    const inputFileName = "Template_Docx_4.docx";
    await window.spire.FetchFileToVFS(inputFileName, "", `${process.env.PUBLIC_URL}static/data/`);

    // Create a Document instance and load the document
    const doc = new docModule.Document();
    doc.LoadFromFile(inputFileName);

    // Get the first section
    const section = doc.Sections.get_Item(0);

    // Walk through every paragraph in the section
    for (let j = 0; j < section.Paragraphs.Count; j++) {
        const p = section.Paragraphs.get_Item(j);

        // Walk the paragraph's child objects backwards, so that removing an element does not shift the indices still to come
        for (let i = p.ChildObjects.Count - 1; i >= 0; i--) {
            const obj = p.ChildObjects.get_Item(i);

            // Test whether the object is a page break
            if (obj.DocumentObjectType == docModule.DocumentObjectType.Break
                && obj.BreakType == docModule.BreakType.PageBreak) {
                // Remove the page break from the paragraph
                p.ChildObjects.Remove(obj);
            }
        }
    }

    // Define the output file name
    const outputFileName = "RemovePageBreaks_out.docx";

    // Save the document to VFS
    doc.SaveToFile({ fileName: outputFileName, fileFormat: docModule.FileFormat.Docx2013 });
    doc.Dispose();

    const modifiedFileArray = window.dotnetRuntime.Module.FS.readFile(outputFileName);
    const blob = new Blob([modifiedFileArray], { type: 'application/vnd.openxmlformats-officedocument.wordprocessingml.document' });
    const url = URL.createObjectURL(blob);
    const a = document.createElement('a');
    a.href = url;
    a.download = outputFileName;
    a.click();
    URL.revokeObjectURL(url);
  };

 return (
    <div style={{ textAlign: 'center', height: '300px' }}>
      <h1>Remove Page Breaks from a Word Document</h1>
      <button onClick={RemovePageBreaks}>Generate</button>
    </div>
  );
}
export default App;
모든 페이지 나누기가 제거된 후의 문서
페이지 나누기 삽입 후 추가된 빈 줄
AppendBreak를 호출한 후 새 페이지 상단에 원치 않는 빈 띠가 보일 수 있습니다. 이는 AppendBreak가 나누기를 대상 단락의 끝에 연결하고, 해당 단락의 "단락 뒤 간격" 설정이 다음 페이지 시작 부분으로 이어지기 때문에 발생합니다. 자동 간격이 활성화된 경우 간격은 글꼴 크기에 따라 조정되어 큰 제목 뒤에서 특히 눈에 띕니다.
해결 방법은 나누기를 추가하기 전에 단락의 뒤쪽 간격을 무효화하는 것입니다:
const para = document.Sections.get_Item(0).Paragraphs.get_Item(3);

// Turn off automatic spacing after the paragraph and set the space after it to 0
para.Format.AfterAutoSpacing = false;
para.Format.AfterSpacing = 0;

// Then insert the page break
para.AppendBreak(wasmModule.BreakType.PageBreak);
AfterAutoSpacing를 false로, AfterSpacing을 0으로 설정하면 단락이 나누기 뒤에 수직 간격을 추가하지 않도록 하므로 새 페이지가 위쪽 여백에 딱 맞게 시작됩니다.
나누기 제거 후에도 문서가 여전히 페이지로 나뉨
모든 페이지 나누기 개체를 성공적으로 제거한 후에도 문서가 동일한 위치에서 계속 나뉠 수 있습니다. 그 이유는 페이지 나누기가 "앞에 페이지 나누기"라는 단락 수준 속성에서 비롯될 수도 있기 때문입니다. 이 플래그가 단락에 설정되면 해당 단락은 Break 개체가 있는지 여부에 관계없이 항상 새 페이지에서 시작합니다. 위의 제거 루프는 나누기 개체만 대상으로 하므로 이 플래그가 있는 단락은 그대로 남습니다.
강제 페이지 나누기를 완전히 제거하려면 나누기 개체 정리와 함께 모든 단락의 PageBreakBefore 플래그를 재설정하세요:
const section = document.Sections.get_Item(0);

for (let j = 0; j < section.Paragraphs.Count; j++) {
  const p = section.Paragraphs.get_Item(j);

  // Clear the page-break-before property set on the paragraph
  if (p.Format.PageBreakBefore) {
    p.Format.PageBreakBefore = false;
  }
}
이 루프는 나누기 개체 제거와 동일한 패스에서 실행하거나 이후 별도 단계로 실행할 수 있습니다. 두 작업은 서로 독립적인 속성을 대상으로 하므로 순서는 중요하지 않습니다.
자주 묻는 질문
Spire.Doc for JavaScript의 무료 라이선스는 어떻게 받나요?
Spire.Doc for JavaScript는 기능 제한 없이 30일 동안 모든 기능을 사용할 수 있는 무료 평가판 라이선스를 제공합니다. 구매 전에 제품을 평가하려면 여기에서 신청할 수 있습니다.