KI-Dokumentenübersetzer: Word-, Excel- und PowerPoint-Dateien in C# übersetzen
Inhaltsverzeichnis
- Was ist ein KI-Dokumentenübersetzer?
- Spire.Agent.Office für .NET einrichten
- Word-Dokumente mit KI übersetzen
- Excel-Arbeitsmappen mit KI übersetzen
- PowerPoint-Präsentationen mit KI übersetzen
- Umgang mit Schriftarten und sprachspezifischer Formatierung
- Wie KI die Dokumentstruktur und Formatierung beibehält
- Fazit
- Häufig gestellte Fragen
Ein Office-Dokument zu übersetzen bedeutet mehr, als nur Sätze von einer Sprache in eine andere zu übertragen. Eine Word-Datei kann Überschriften, Tabellen, Bilder, Hyperlinks, Kopf- und Fußzeilen enthalten. Eine Excel-Arbeitsmappe kann Formeln, Zahlen, Diagramme und formatierte Zellen umfassen. Eine PowerPoint-Präsentation kann stark auf Textfelder, Formen, Designs und sorgfältig angeordnete Folienlayouts angewiesen sein.
Wenn der Text einfach extrahiert, übersetzt und ohne Berücksichtigung dieser Strukturen wieder eingefügt wird, kann das resultierende Dokument leicht sein ursprüngliches Aussehen verlieren oder sogar wichtige Inhalte wie Formeln und Layouts beschädigen.
Dieser Artikel zeigt, wie man mit Spire.Agent.Office für .NET einen KI-gestützten Dokumentenübersetzer in C# erstellt. Wir werden Word-, Excel- und PowerPoint-Dateien übersetzen und dabei ihre native Office-Struktur und Formatierung so weit wie möglich beibehalten.
Die Beispiele decken drei verschiedene Übersetzungsszenarien ab:
- Word: Englisch → Vereinfachtes Chinesisch
- Excel: Englisch → Französisch
- PowerPoint: Japanisch → Englisch
1. Was ist ein KI-Dokumentenübersetzer?
Ein herkömmlicher Übersetzungs-Workflow konzentriert sich üblicherweise allein auf den Text. Der Inhalt wird aus einem Dokument extrahiert, in eine andere Sprache übersetzt und dann als reiner Text zurückgegeben oder in eine neue Datei eingefügt.
Dieser Ansatz funktioniert gut, wenn die Formatierung nicht wichtig ist. Office-Dokumente enthalten jedoch oft viel mehr als nur Text. Word-Dateien können Überschriften, Tabellen, Bilder, Hyperlinks, Kopf- und Fußzeilen enthalten. Excel-Arbeitsmappen können Formeln, numerische Daten, verbundene Zellen, Diagramme und formatierte Bereiche enthalten. PowerPoint-Präsentationen können auf Textfeldern, Formen, Designs und sorgfältig gestalteten Folienlayouts beruhen.
Ein KI-Dokumentenübersetzer geht einen Schritt weiter. Anstatt die Datei als einfachen Textcontainer zu behandeln, übersetzt er den bearbeitbaren Inhalt und bewahrt dabei die native Struktur und visuelle Organisation des Dokuments so weit wie möglich.
Das folgende Diagramm veranschaulicht den Unterschied zwischen herkömmlicher Textübersetzung und KI-gestützter Dokumentenübersetzung:
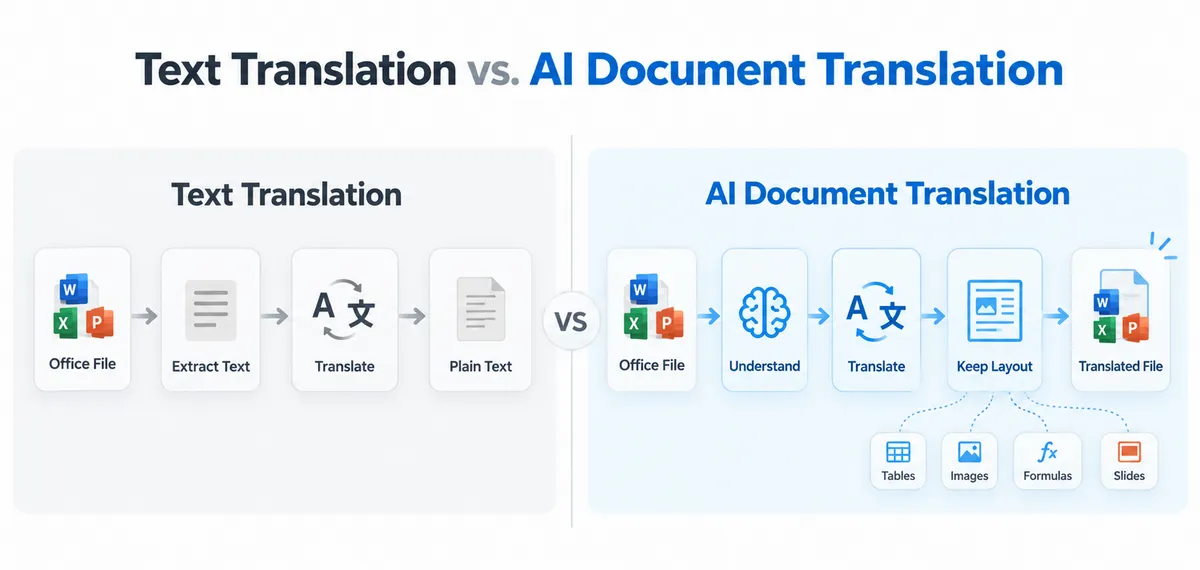
Bei der KI-gestützten Dokumentenübersetzung ist das erwartete Ergebnis nicht nur übersetzter Text. Die Ausgabe bleibt eine bearbeitbare Office-Datei, wie etwa eine übersetzte .docx, .xlsx oder .pptx, bei der die ursprüngliche Struktur, Formatierung, Tabellen, Bilder, Formeln und das Layout nach Möglichkeit erhalten bleiben.
Dies macht den Workflow besonders nützlich, wenn übersetzte Dokumente weiterhin für Bearbeitung, Weitergabe, Veröffentlichung oder weiterführende Geschäftsprozesse bereit sein müssen.
2. Spire.Agent.Office für .NET einrichten
Bevor Sie die Beispiele ausführen, erstellen Sie ein .NET-Projekt und installieren Sie Spire.Agent.Office über NuGet.
Sie können das Paket mit der .NET-CLI installieren:
dotnet add package Spire.Agent.Office
Die KI-Funktionen erfordern ein SpireToken. Konfigurieren Sie eine AIOptions-Instanz und weisen Sie das Token zu:
AIOptions options = new AIOptions
{
    SpireToken = "your spireToken"
};
Ein temporäres SpireToken für Evaluierung und Tests kann auf der Seite für die temporäre Spire-Lizenz angefordert werden.
Das allgemeine Verarbeitungsmuster ist bei Word, Excel und PowerPoint ähnlich:
Load Office file
      ↓
Create AI processor
      ↓
Execute natural-language instruction
      ↓
Save translated Office file
Der Hauptunterschied zwischen den drei Beispielen ist das verarbeitete Office-Dokumentobjekt und die in der Anweisung definierten Übersetzungsregeln.
3. Word-Dokumente mit KI übersetzen
Word-Dokumente können viel mehr als nur gewöhnliche Absätze enthalten. Ein typisches Geschäftsdokument kann Überschriften, Tabellen, Bilder, Hyperlinks, Kopf- und Fußzeilen, Listen und verschiedene Textstile enthalten.
In diesem Beispiel übersetzen wir ein englisches Word-Dokument in Vereinfachtes Chinesisch und bitten die KI dabei, die Dokumentstruktur und visuelle Formatierung beizubehalten.
Ein zusätzlicher Aspekt ist die Schriftartenkompatibilität. Schriftarten, die üblicherweise für englischen Text verwendet werden, enthalten möglicherweise nicht alle Schriftzeichen des vereinfachten Chinesischen. Die Anweisung erlaubt es der KI daher, eine geeignete chinesische Schriftart zu verwenden, wenn die Originalschriftart die übersetzten Zeichen nicht unterstützt.
using System;
using Spire.Agent.Office.AI;
using Spire.Agent.Office.Extensions;
using Spire.Doc;

string inputPath = @"E:\Documents\Input.docx";
string outputPath = @"E:\Documents\Translated.docx";
string spireToken = "your spireToken";

string instruction = """
Translate all English text in this Word document into Simplified Chinese.

Requirements:
1. Preserve the original document structure, layout, styles, tables, images, headers, footers, and other elements.
2. Preserve the original formatting as much as possible, including font size, color, bold, alignment, and spacing.
3. Keep the original font if it supports Simplified Chinese. Otherwise, use an appropriate Chinese font such as Microsoft YaHei or SimSun.
4. Translate text in paragraphs, headings, tables, headers, footers, and other editable text areas.
5. Do not translate URLs, email addresses, product names, API names, code, model numbers, or technical identifiers.
6. Do not add explanations, comments, or extra content.
7. Ensure the translated Chinese text displays correctly and keep the final document visually close to the original.
""";

AIOptions options = new AIOptions
{
    SpireToken = spireToken
};

using (Document doc = new Document())
{
    doc.LoadFromFile(inputPath);
    AIDocumentProcessor processor = doc.AI(options);
    AIResult result = processor.ExecuteInstruction(
        doc,
        instruction,
        outputPath
    );

    if (result.Success)
    {
        Console.WriteLine($"Translation completed: {outputPath}");
    }
    else
    {
        Console.WriteLine($"Translation failed: {result.ErrorMessage}");
    }
}
Der wichtige Punkt an diesem Beispiel ist, dass die KI nicht dazu aufgefordert wird, das Dokument von Grund auf neu zu erstellen. Sie übersetzt den bearbeitbaren Text und behält dabei die umgebende Word-Struktur bei.
Im tatsächlichen Test behielt das übersetzte Dokument die ursprünglichen Überschriften, die Absatzformatierung, die Tabellenstruktur, Bilder, Hyperlinks, Kopf- und Fußzeilen bei und ersetzte gleichzeitig den englischen Inhalt durch vereinfachtes Chinesisch.
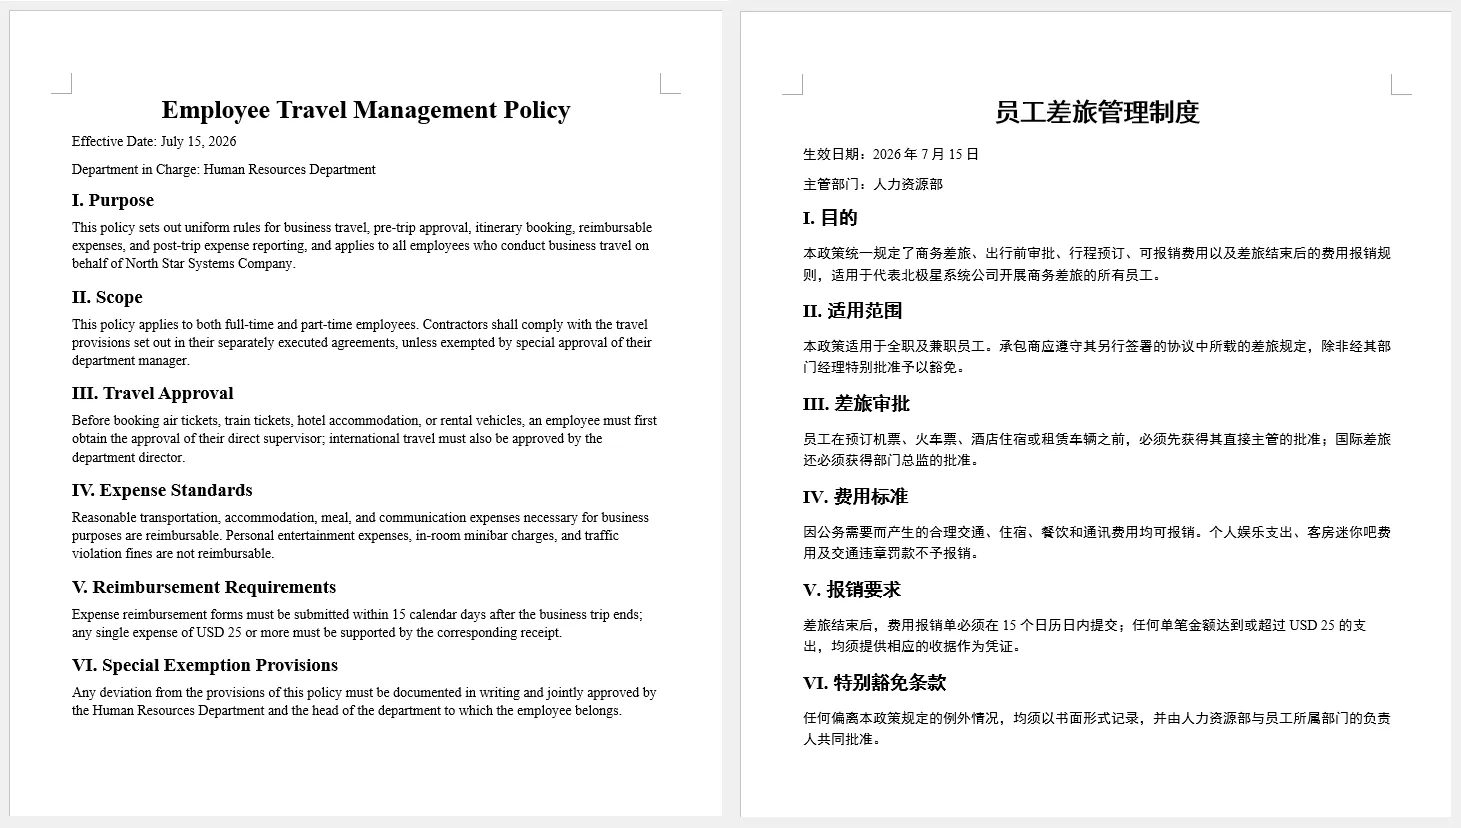
Diese Art von Workflow kann nützlich sein, um Berichte, Handbücher, Richtlinien, Angebote, interne Dokumentationen und andere formatierte Word-Dateien zu übersetzen.
4. Excel-Arbeitsmappen mit KI übersetzen
Die Excel-Übersetzung erfordert eine andere Strategie.
Eine Arbeitsmappe kann textliche Inhalte enthalten, die übersetzt werden sollten, aber sie kann auch Folgendes enthalten:
- Zahlen
- Datumsangaben
- Prozentwerte
- Währungswerte
- Formeln
- Funktionsnamen
- Diagramme
- Bilder
- Hyperlinks
Ein Übersetzungsprozess sollte daher vermeiden, jeden Zellwert als gewöhnlichen Text zu behandeln.
In diesem Beispiel wird die Arbeitsmappe von Englisch nach Französisch übersetzt. Da beide Sprachen hauptsächlich das lateinische Alphabet verwenden, können die ursprünglichen Schriftarten in der Regel beibehalten werden.
using System;
using Spire.Agent.Office.AI;
using Spire.Agent.Office.Extensions;
using Spire.Xls;

string inputPath = @"E:\Documents\Input.xlsx";
string outputPath = @"E:\Documents\Translated.xlsx";
string spireToken = "your spireToken";

string instruction = """
Translate all English text in this Excel workbook into French.

Requirements:
1. Translate textual content in cells, worksheets, tables, and other editable text areas.
2. Preserve the original workbook structure, worksheets, rows, columns, merged cells, and formatting.
3. Keep formulas, numbers, dates, percentages, currency values, and other non-text data unchanged.
4. Preserve cell formatting as much as possible, including font size, color, bold, alignment, borders, and fills.
5. Preserve the original font whenever possible, since French uses the Latin alphabet. If a font does not support required French characters, use a compatible font.
6. Preserve charts, images, hyperlinks, and other workbook elements.
7. Do not translate URLs, email addresses, person names, model numbers, formulas, function names, or technical identifiers.
8. Do not add explanations, comments, or extra content.
9. Ensure the translated French text displays correctly and keep the workbook visually close to the original.
""";

AIOptions options = new AIOptions
{
    SpireToken = spireToken
};

using (Workbook workbook = new Workbook())
{
    workbook.LoadFromFile(inputPath);
    AIDocumentProcessor processor = workbook.AI(options);
    AIResult result = processor.ExecuteInstruction(
        workbook,
        instruction,
        outputPath
    );

    if (result.Success)
    {
        Console.WriteLine($"Translation completed: {outputPath}");
    }
    else
    {
        Console.WriteLine($"Translation failed: {result.ErrorMessage}");
    }
}
Die Anweisung trennt ausdrücklich übersetzbaren Text von Daten, die unverändert bleiben sollen.
Beispielsweise können Produktnamen oder Beschreibungen ins Französische übersetzt werden, während ein Wert wie:
$12,500
oder eine Formel wie:
=SUM(C2:C10)
funktionsfähig bleiben sollten.
Im Testergebnis behielt die Arbeitsmappe ihre Arbeitsblattstruktur und Formatierung bei, während der englische Textinhalt ins Französische übersetzt wurde.
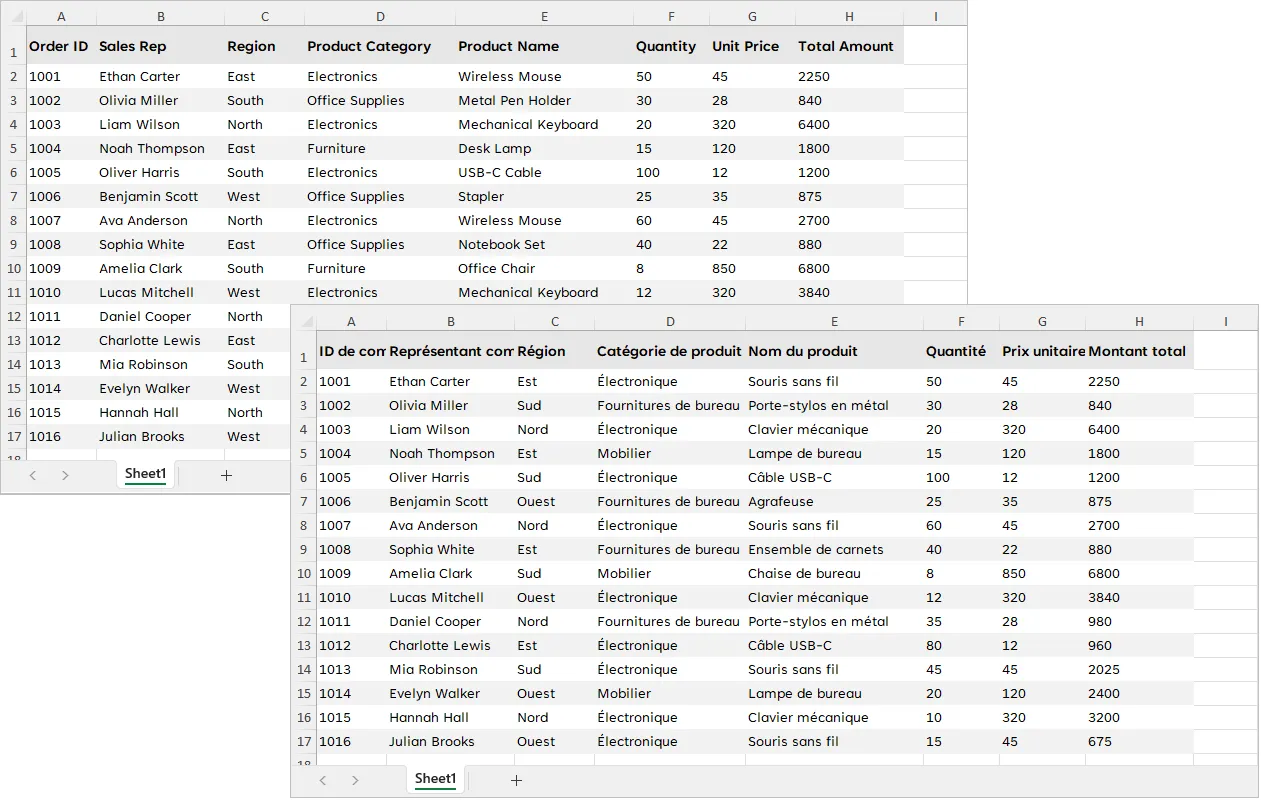
Dieser Ansatz ist besonders nützlich für mehrsprachige Produktkataloge, Finanzberichte, Bestandslisten, Verkaufsberichte, Planungsarbeitsmappen und andere Excel-Dateien, die Text mit strukturierten Daten kombinieren.
5. PowerPoint-Präsentationen mit KI übersetzen
Die PowerPoint-Übersetzung stellt eine weitere Herausforderung dar: Der übersetzte Text muss in ein bestehendes visuelles Layout passen.
Präsentationsinhalte können erscheinen in:
- Folientiteln
- Textfeldern
- Formen
- Tabellen
- Bildunterschriften
- Diagrammbeschriftungen
Gleichzeitig sollte der Übersetzungsprozess Folienthemen, Hintergründe, Bilder, Diagramme und andere visuelle Elemente beibehalten.
In diesem Beispiel wird eine japanische Präsentation ins Englische übersetzt.
using System;
using Spire.Agent.Office.AI;
using Spire.Agent.Office.Extensions;
using Spire.Presentation;

string inputPath = @"E:\Documents\Input.pptx";
string outputPath = @"E:\Documents\Translated.pptx";
string spireToken = "your spireToken";

string instruction = """
Translate all Japanese text in this PowerPoint presentation into English.

Requirements:
1. Translate slide titles, body text, text boxes, table text, captions, and other editable text.
2. Preserve the original slide order, layout, theme, background, shapes, images, charts, and other elements.
3. Preserve text formatting as much as possible, including font size, color, bold, alignment, and spacing.
4. Since the target language is English, use an appropriate Latin font when the original Japanese font is not suitable for English text, while keeping the visual style as close to the original as possible.
5. Keep translated text inside its original text box or shape whenever possible, and make reasonable layout adjustments if needed.
6. Do not translate URLs, email addresses, product names, model numbers, API names, code, or technical identifiers.
7. Do not add explanations, comments, notes, or extra slides.
8. Ensure the translated English text displays correctly and keep the presentation visually close to the original.
""";

AIOptions options = new AIOptions
{
    SpireToken = spireToken
};

using (Presentation ppt = new Presentation())
{
    ppt.LoadFromFile(inputPath);
    AIDocumentProcessor processor = ppt.AI(options);
    AIResult result = processor.ExecuteInstruction(
        ppt,
        instruction,
        outputPath
    );

    if (result.Success)
    {
        Console.WriteLine($"Translation completed: {outputPath}");
    }
    else
    {
        Console.WriteLine($"Translation failed: {result.ErrorMessage}");
    }
}
Anders als Word-Dokumente verwenden Präsentationen häufig Textfelder mit fester Größe. Die Übersetzung kann daher den Zeilenumbruch und die visuelle Balance beeinflussen.
Die Anweisung weist die KI an, übersetzte Inhalte nach Möglichkeit innerhalb der ursprünglichen Formen zu belassen und bei Bedarf angemessene Anpassungen vorzunehmen.
Im Test wurde der japanische Text erfolgreich ins Englische übersetzt, während die ursprüngliche Folienstruktur, das Design, die Formen, Bilder und das Gesamtlayout der Präsentation erhalten blieben.
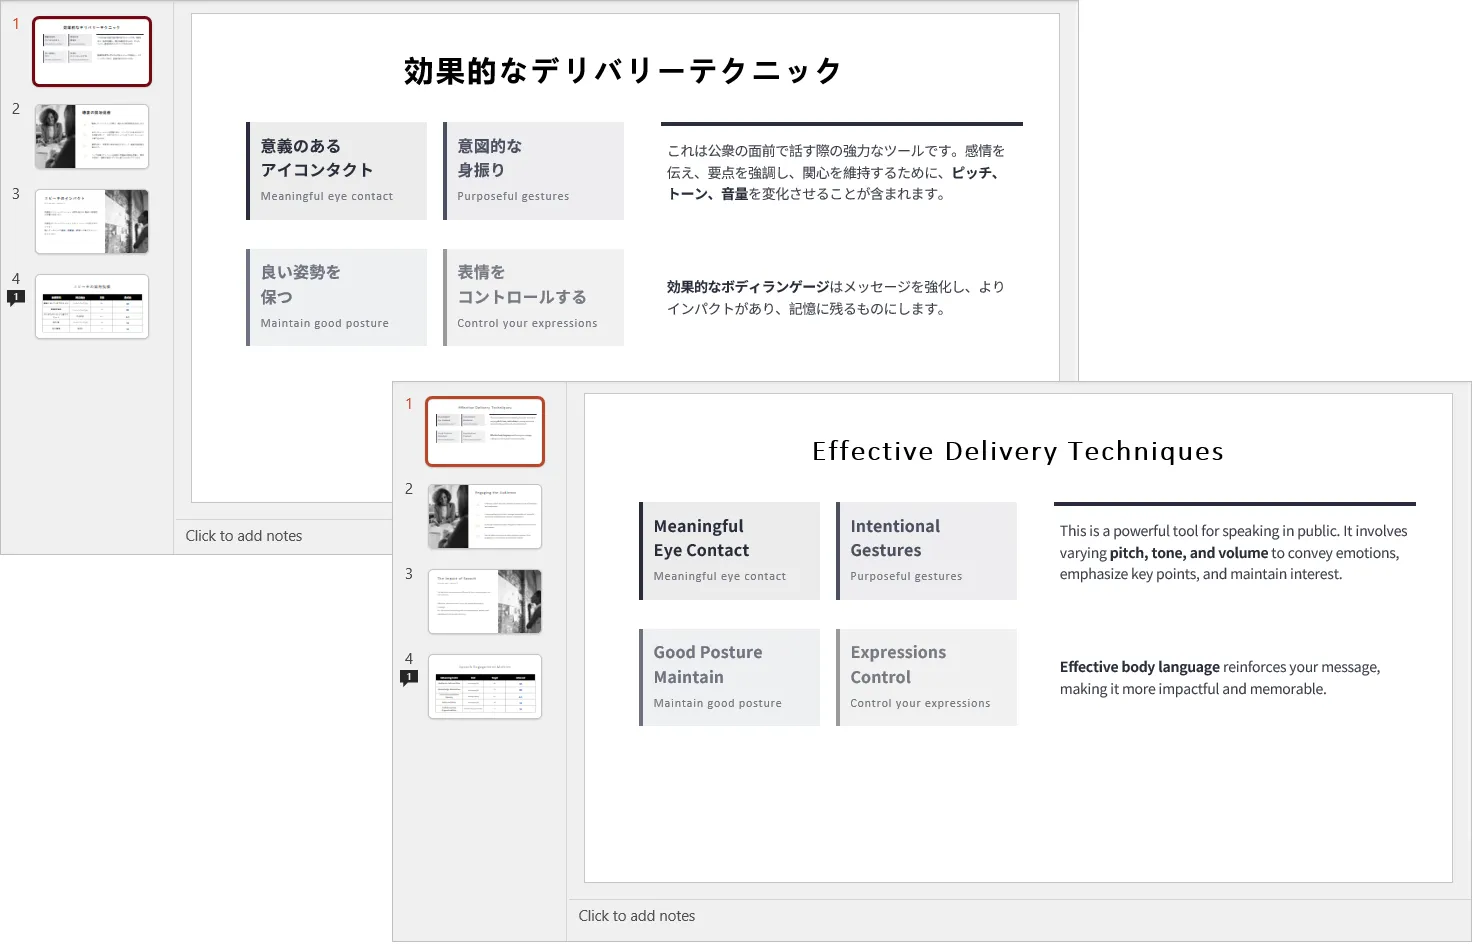
Dies macht den Ansatz nützlich für die Übersetzung von Schulungsmaterialien, Produktpräsentationen, Vertriebspräsentationen, internen Berichten, Konferenzfolien und anderen Präsentationsdateien.
6. Umgang mit Schriftarten und sprachspezifischer Formatierung
Die Schriftartenkompatibilität ist ein wichtiger Aspekt beim Übersetzen von Dokumenten zwischen verschiedenen Schriftsystemen.
Bei Übersetzungen zwischen Sprachen, die dasselbe Schriftsystem verwenden, wie etwa:
English → French
English → German
Spanish → English
kann die vorhandene Schriftart in der Regel beibehalten werden.
Bei der Übersetzung zwischen lateinischem Text und CJK-Sprachen enthält die Originalschriftart jedoch möglicherweise nicht die erforderlichen Zeichen.
Zum Beispiel:
English → Simplified Chinese
English → Japanese
English → Korean
In solchen Fällen kann das erzwungene Beibehalten der Originalschriftart zu fehlenden Glyphen, Kästchen oder inkonsistenten Ersatzschriftarten führen.
Eine flexiblere Anweisung lautet:
Keep the original font if it supports the target language.
Otherwise, use an appropriate font that fully supports the
target-language characters.
Für vereinfachtes Chinesisch können bei Bedarf Schriftarten wie Microsoft YaHei oder SimSun verwendet werden.
Dasselbe Konzept gilt auch umgekehrt. Beim Übersetzen japanischer PowerPoint-Inhalte ins Englische kann das Beibehalten einer japanischen Schriftart technisch funktionieren, aber eine geeignete lateinische Schriftart kann ein natürlicheres Erscheinungsbild bieten.
Der Schriftartenersatz sollte daher als bedingte Operation und nicht als zwingende Regel behandelt werden.
Das Ziel ist es, Folgendes beizubehalten:
- Schriftgröße
- Schriftschnitt
- Farbe
- Ausrichtung
- Absatzabstand
- Visuelle Hierarchie
während die Schriftartenfamilie selbst geändert werden darf, wenn dies für die Sprachkompatibilität erforderlich ist.
7. Wie KI die Dokumentstruktur und Formatierung beibehält
Einer der Hauptunterschiede zwischen KI-gestützter Dokumentenübersetzung und herkömmlicher Textübersetzung ist die Art und Weise, wie das Dokument während des Übersetzungsprozesses behandelt wird.
Spire.Agent.Office basiert auf Spire.Office für .NET, das APIs für die Arbeit mit der nativen Struktur von Office-Dokumenten bereitstellt. Anstatt eine Word-, Excel- oder PowerPoint-Datei als Block reinen Textes zu behandeln, kann das Dokument als Sammlung strukturierter Elemente verarbeitet werden.
Bei der Verarbeitung eines Word-Dokuments kann Spire.Office für .NET beispielsweise mit Dokumentelementen wie den folgenden arbeiten:
- Abschnitte
- Absätze und Textbereiche
- Tabellen und Tabellenzellen
- Bilder
- Hyperlinks
- Textformatierung und Stile, einschließlich Schriftarten, Schriftgrößen, Farben, Ausrichtung und anderer Eigenschaften
Dadurch ist es möglich, die Dokumentstruktur von dem zu übersetzenden Text zu trennen.
Der allgemeine Workflow lässt sich wie folgt veranschaulichen:
Office-Dokument → Dokumentelemente identifizieren → Übersetzbaren Text extrahieren → KI-Übersetzung → Originaltext ersetzen → Bestehende Dokumentstruktur speichern
Betrachten Sie beispielsweise ein Word-Dokument, das eine Überschrift, mehrere Absätze, eine Tabelle und ein Bild enthält. Der Übersetzungsprozess muss das Dokument nicht von Grund auf neu erstellen. Stattdessen bleiben die vorhandenen Dokumentelemente an ihrem Platz, während der übersetzbare Text durch seinen übersetzten Inhalt ersetzt wird.
Das KI-Modell ist für die sprachliche Transformation verantwortlich, während Spire.Office für .NET den Zugriff auf Dokumentebene bietet, der für die Arbeit mit der vorhandenen Office-Struktur erforderlich ist.
Aus diesem Grund können Übersetzungsanweisungen sowohl festlegen, was übersetzt werden soll, als auch, was unverändert bleiben soll. Beispielsweise kann eine Anweisung verlangen, dass Absatztext, Tabelleninhalt, Kopf- und Fußzeilen übersetzt werden, während URLs, Formeln, Bilder, technische Identifikatoren und andere nicht übersetzbare Elemente erhalten bleiben.
Wie dies über Office-Formate hinweg funktioniert
| Format | Zu übersetzender Inhalt | Beizubehaltende Struktur und Elemente |
|---|---|---|
| Word | Absätze, Überschriften, Tabellen, Kopf- und Fußzeilen | Abschnitte, Stile, Bilder, Hyperlinks, Formatierung |
| Excel | Text in Zellen, Tabellen und anderen bearbeitbaren Textbereichen | Arbeitsblätter, Formeln, Werte, Formatierung, Diagramme, Bilder |
| PowerPoint | Titel, Textfelder, Tabellen und Bildunterschriften | Folien, Designs, Formen, Bilder, Layouts, Formatierung |
Der wichtige Punkt ist, dass die KI die Übersetzung übernimmt, während das Office-Dokumentmodell die Struktur bereitstellt, in der die Übersetzung stattfindet. Diese Kombination ermöglicht es Spire.Agent.Office, eine übersetzte Office-Datei zu erzeugen, ohne dass das gesamte Dokument aus übersetztem reinem Text neu aufgebaut werden muss.
Infolgedessen kann die Ausgabe die ursprüngliche Dokumentstruktur und Formatierung beibehalten und gleichzeitig den Inhalt der Ausgangssprache durch den übersetzten Text ersetzen.
8. Fazit
Mit Spire.Agent.Office für .NET kann derselbe KI-gesteuerte Ansatz auf Word, Excel und PowerPoint angewendet werden: Laden Sie die ursprüngliche Office-Datei, beschreiben Sie die Übersetzungsanforderungen in natürlicher Sprache und erzeugen Sie ein übersetztes Dokument, wobei dessen native Struktur und Formatierung so weit wie möglich beibehalten werden.
Die drei Beispiele in diesem Artikel veranschaulichen verschiedene Übersetzungsszenarien:
- Word: Englisch → Vereinfachtes Chinesisch
- Excel: Englisch → Französisch
- PowerPoint: Japanisch → Englisch
Trotz der Unterschiede zwischen diesen Dateiformaten bleibt der zugrunde liegende Workflow konsistent. Der KI-Agent übersetzt bearbeitbare Inhalte und berücksichtigt dabei dokumentenspezifische Elemente wie Word-Stile und -Tabellen, Excel-Formeln und Zellformatierung sowie PowerPoint-Formen und Folienlayouts.
Der entscheidende Vorteil besteht darin, dass die Ausgabe ein bearbeitbares Office-Dokument bleibt und nicht zu einem separaten Block übersetzten Textes wird.
Durch die Kombination von KI-Sprachverständnis mit nativer Office-Dokumentverarbeitung ermöglicht es Spire.Agent.Office, die Dokumentenübersetzung zu automatisieren und dabei einen Großteil des ursprünglichen Layouts, der Formatierung und der eingebetteten Inhalte beizubehalten.
Häufig gestellte Fragen
1. Kann Spire.Agent.Office Word-, Excel- und PowerPoint-Dateien direkt übersetzen?
Ja. Der KI-Prozessor kann mit Word-Document-, Excel-Workbook- und PowerPoint-Presentation-Objekten arbeiten. Die Übersetzungsanweisung wird auf die geladene Office-Datei angewendet, und das Ergebnis kann als neue Datei im selben Office-Format gespeichert werden.
2. Bleibt die ursprüngliche Dokumentformatierung nach der Übersetzung erhalten?
Die KI-Anweisung kann ausdrücklich verlangen, dass die ursprüngliche Formatierung und Struktur beibehalten werden. In den obigen Beispielen behielten die übersetzten Dateien während der Tests ihre Dokumentstruktur und visuelle Formatierung gut bei.
Übersetzter Text kann jedoch in seiner Länge erheblich vom Ausgangstext abweichen, sodass komplexe Layouts nach der Verarbeitung dennoch überprüft werden sollten.
3. Können Excel-Formeln und numerische Daten während der Übersetzung unverändert bleiben?
Ja. Die Anweisung kann der KI vorgeben, nur textliche Inhalte zu übersetzen, während Formeln, Zahlen, Prozentwerte, Währungswerte, Datumsangaben und andere Nicht-Text-Daten erhalten bleiben.
Dies ist wichtig bei der Übersetzung von Arbeitsmappen, die Geschäftstext mit Berechnungen oder strukturierten Daten kombinieren.
4. Wie sollte mit Schriftarten umgegangen werden, wenn zwischen verschiedenen Schriftsystemen übersetzt wird?
Wenn die Originalschriftart die Zeichen der Zielsprache unterstützt, kann sie in der Regel beibehalten werden.
Wenn nicht, sollte die Anweisung es der KI erlauben, eine kompatible Schriftart zu wählen. Beispielsweise kann eine Übersetzung von Englisch nach Chinesisch Microsoft YaHei oder SimSun verwenden, wenn die ursprüngliche lateinische Schriftart chinesische Zeichen nicht ausreichend unterstützt.
5. Kann ich verhindern, dass bestimmte Inhalte übersetzt werden?
Ja. Die Anweisung kann Inhalte definieren, die unverändert bleiben sollen, wie URLs, E-Mail-Adressen, Produktnamen, Modellnummern, API-Namen, Codeausschnitte, Formeln und andere technische Identifikatoren.
Dies ist besonders nützlich für technische, finanzielle, technische und produktbezogene Dokumentation.
Siehe auch
ИИ-переводчик документов: перевод файлов Word, Excel и PowerPoint на C#
Содержание
- Что такое AI-переводчик документов?
- Настройка Spire.Agent.Office для .NET
- Перевод документов Word с помощью ИИ
- Перевод книг Excel с помощью ИИ
- Перевод презентаций PowerPoint с помощью ИИ
- Работа со шрифтами и форматированием для конкретных языков
- Как ИИ сохраняет структуру и форматирование документа
- Заключение
- Часто задаваемые вопросы
Перевод документа Office — это больше, чем просто преобразование предложений с одного языка на другой. Файл Word может содержать заголовки, таблицы, изображения, гиперссылки, верхние и нижние колонтитулы. Книга Excel может включать формулы, числа, диаграммы и форматированные ячейки. Презентация PowerPoint может в значительной степени опираться на текстовые поля, фигуры, темы и тщательно выстроенные макеты слайдов.
Если текст просто извлечь, перевести и записать обратно без учёта этих структур, итоговый документ может легко потерять свой первоначальный вид или даже повредить важное содержимое, такое как формулы и макеты.
В этой статье демонстрируется, как создать AI-переводчик документов на C# с помощью Spire.Agent.Office для .NET. Мы будем переводить файлы Word, Excel и PowerPoint, максимально сохраняя их нативную структуру Office и форматирование.
Примеры охватывают три различных сценария перевода:
- Word: английский → упрощённый китайский
- Excel: английский → французский
- PowerPoint: японский → английский
1. Что такое AI-переводчик документов?
Традиционный процесс перевода обычно сосредоточен только на тексте. Содержимое извлекается из документа, переводится на другой язык, а затем возвращается в виде простого текста или вставляется обратно в новый файл.
Этот подход хорошо работает, когда форматирование не важно. Однако документы Office часто содержат гораздо больше, чем просто текст. Файлы Word могут включать заголовки, таблицы, изображения, гиперссылки, верхние и нижние колонтитулы. Книги Excel могут содержать формулы, числовые данные, объединённые ячейки, диаграммы и форматированные диапазоны. Презентации PowerPoint могут опираться на текстовые поля, фигуры, темы и тщательно продуманные макеты слайдов.
AI-переводчик документов идёт дальше. Вместо того чтобы рассматривать файл как простой контейнер для текста, он переводит редактируемое содержимое, максимально сохраняя нативную структуру документа и визуальную организацию.
На следующей диаграмме показана разница между обычным переводом текста и переводом документов на основе ИИ:
При переводе документов на основе ИИ ожидаемый результат — это не просто переведённый текст. Выходной файл остаётся редактируемым файлом Office, например переведённым .docx, .xlsx или .pptx, с сохранением его исходной структуры, форматирования, таблиц, изображений, формул и макета, где это возможно.
Это делает такой подход особенно полезным, когда переведённые документы должны оставаться готовыми к редактированию, публикации, распространению или дальнейшей бизнес-обработке.
2. Настройка Spire.Agent.Office для .NET
Перед запуском примеров создайте проект .NET и установите Spire.Agent.Office через NuGet.
Вы можете установить пакет с помощью .NET CLI:
dotnet add package Spire.Agent.Office
Функции ИИ требуют SpireToken. Настройте экземпляр AIOptions и укажите токен:
AIOptions options = new AIOptions
{
    SpireToken = "your spireToken"
};
Временный SpireToken для оценки и тестирования можно запросить на странице временной лицензии Spire.
Общая схема обработки аналогична для Word, Excel и PowerPoint:
Load Office file
      ↓
Create AI processor
      ↓
Execute natural-language instruction
      ↓
Save translated Office file
Основное различие между тремя примерами заключается в объекте документа Office, который обрабатывается, и правилах перевода, определённых в инструкции.
3. Перевод документов Word с помощью ИИ
Документы Word могут содержать гораздо больше, чем обычные абзацы. Типичный деловой документ может включать заголовки, таблицы, изображения, гиперссылки, верхние и нижние колонтитулы, списки и различные стили текста.
В этом примере мы переводим документ Word с английского на упрощённый китайский, при этом прося ИИ сохранить структуру документа и визуальное форматирование.
Дополнительным аспектом является совместимость шрифтов. Шрифты, обычно используемые для английского текста, могут не содержать всех символов упрощённого китайского. Поэтому инструкция позволяет ИИ использовать подходящий китайский шрифт, когда исходный шрифт не поддерживает переведённые символы.
using System;
using Spire.Agent.Office.AI;
using Spire.Agent.Office.Extensions;
using Spire.Doc;

string inputPath = @"E:\Documents\Input.docx";
string outputPath = @"E:\Documents\Translated.docx";
string spireToken = "your spireToken";

string instruction = """
Translate all English text in this Word document into Simplified Chinese.

Requirements:
1. Preserve the original document structure, layout, styles, tables, images, headers, footers, and other elements.
2. Preserve the original formatting as much as possible, including font size, color, bold, alignment, and spacing.
3. Keep the original font if it supports Simplified Chinese. Otherwise, use an appropriate Chinese font such as Microsoft YaHei or SimSun.
4. Translate text in paragraphs, headings, tables, headers, footers, and other editable text areas.
5. Do not translate URLs, email addresses, product names, API names, code, model numbers, or technical identifiers.
6. Do not add explanations, comments, or extra content.
7. Ensure the translated Chinese text displays correctly and keep the final document visually close to the original.
""";

AIOptions options = new AIOptions
{
    SpireToken = spireToken
};

using (Document doc = new Document())
{
    doc.LoadFromFile(inputPath);
    AIDocumentProcessor processor = doc.AI(options);
    AIResult result = processor.ExecuteInstruction(
        doc,
        instruction,
        outputPath
    );

    if (result.Success)
    {
        Console.WriteLine($"Translation completed: {outputPath}");
    }
    else
    {
        Console.WriteLine($"Translation failed: {result.ErrorMessage}");
    }
}
Важно в этом примере то, что ИИ не просят перестроить документ с нуля. Он переводит редактируемый текст, сохраняя окружающую структуру Word.
В ходе фактического теста переведённый документ сохранил исходные заголовки, форматирование абзацев, структуру таблиц, изображения, гиперссылки, верхние и нижние колонтитулы, заменив английское содержимое на упрощённый китайский.
Такой подход может быть полезен для перевода отчётов, руководств, политик, предложений, внутренней документации и других форматированных файлов Word.
4. Перевод книг Excel с помощью ИИ
Перевод Excel требует другой стратегии.
Книга может содержать текстовое содержимое, которое следует перевести, но она также может содержать:
- Числа
- Даты
- Проценты
- Значения валют
- Формулы
- Имена функций
- Диаграммы
- Изображения
- Гиперссылки
Поэтому процесс перевода должен избегать обработки каждого значения ячейки как обычного текста.
В этом примере книга переводится с английского на французский. Поскольку оба языка в основном используют латинский алфавит, исходные шрифты обычно можно сохранить.
using System;
using Spire.Agent.Office.AI;
using Spire.Agent.Office.Extensions;
using Spire.Xls;

string inputPath = @"E:\Documents\Input.xlsx";
string outputPath = @"E:\Documents\Translated.xlsx";
string spireToken = "your spireToken";

string instruction = """
Translate all English text in this Excel workbook into French.

Requirements:
1. Translate textual content in cells, worksheets, tables, and other editable text areas.
2. Preserve the original workbook structure, worksheets, rows, columns, merged cells, and formatting.
3. Keep formulas, numbers, dates, percentages, currency values, and other non-text data unchanged.
4. Preserve cell formatting as much as possible, including font size, color, bold, alignment, borders, and fills.
5. Preserve the original font whenever possible, since French uses the Latin alphabet. If a font does not support required French characters, use a compatible font.
6. Preserve charts, images, hyperlinks, and other workbook elements.
7. Do not translate URLs, email addresses, person names, model numbers, formulas, function names, or technical identifiers.
8. Do not add explanations, comments, or extra content.
9. Ensure the translated French text displays correctly and keep the workbook visually close to the original.
""";

AIOptions options = new AIOptions
{
    SpireToken = spireToken
};

using (Workbook workbook = new Workbook())
{
    workbook.LoadFromFile(inputPath);
    AIDocumentProcessor processor = workbook.AI(options);
    AIResult result = processor.ExecuteInstruction(
        workbook,
        instruction,
        outputPath
    );

    if (result.Success)
    {
        Console.WriteLine($"Translation completed: {outputPath}");
    }
    else
    {
        Console.WriteLine($"Translation failed: {result.ErrorMessage}");
    }
}
Инструкция явно отделяет переводимый текст от данных, которые должны оставаться неизменными.
Например, названия или описания продуктов могут быть переведены на французский, тогда как значение, такое как:
$12,500
или формула, такая как:
=SUM(C2:C10)
должны оставаться функциональными.
В результате теста книга сохранила свою структуру листов и форматирование, а английское текстовое содержимое было переведено на французский.
Этот подход особенно полезен для многоязычных каталогов продукции, финансовых отчётов, инвентарных ведомостей, отчётов о продажах, плановых книг и других файлов Excel, которые сочетают текст со структурированными данными.
5. Перевод презентаций PowerPoint с помощью ИИ
Перевод PowerPoint представляет ещё одну сложность: переведённый текст должен уместиться обратно в существующий визуальный макет.
Содержимое презентации может появляться в:
- Заголовках слайдов
- Текстовых полях
- Фигурах
- Таблицах
- Подписях
- Метках диаграмм
В то же время процесс перевода должен сохранять темы слайдов, фоны, изображения, диаграммы и другие визуальные элементы.
В этом примере японская презентация переводится на английский.
using System;
using Spire.Agent.Office.AI;
using Spire.Agent.Office.Extensions;
using Spire.Presentation;

string inputPath = @"E:\Documents\Input.pptx";
string outputPath = @"E:\Documents\Translated.pptx";
string spireToken = "your spireToken";

string instruction = """
Translate all Japanese text in this PowerPoint presentation into English.

Requirements:
1. Translate slide titles, body text, text boxes, table text, captions, and other editable text.
2. Preserve the original slide order, layout, theme, background, shapes, images, charts, and other elements.
3. Preserve text formatting as much as possible, including font size, color, bold, alignment, and spacing.
4. Since the target language is English, use an appropriate Latin font when the original Japanese font is not suitable for English text, while keeping the visual style as close to the original as possible.
5. Keep translated text inside its original text box or shape whenever possible, and make reasonable layout adjustments if needed.
6. Do not translate URLs, email addresses, product names, model numbers, API names, code, or technical identifiers.
7. Do not add explanations, comments, notes, or extra slides.
8. Ensure the translated English text displays correctly and keep the presentation visually close to the original.
""";

AIOptions options = new AIOptions
{
    SpireToken = spireToken
};

using (Presentation ppt = new Presentation())
{
    ppt.LoadFromFile(inputPath);
    AIDocumentProcessor processor = ppt.AI(options);
    AIResult result = processor.ExecuteInstruction(
        ppt,
        instruction,
        outputPath
    );

    if (result.Success)
    {
        Console.WriteLine($"Translation completed: {outputPath}");
    }
    else
    {
        Console.WriteLine($"Translation failed: {result.ErrorMessage}");
    }
}
В отличие от документов Word, презентации часто используют текстовые поля фиксированного размера. Поэтому перевод может влиять на перенос строк и визуальный баланс.
Инструкция предписывает ИИ по возможности сохранять переведённое содержимое внутри исходных фигур и при необходимости вносить разумные корректировки.
В ходе теста японский текст был успешно переведён на английский, при этом исходная структура слайдов, тема, фигуры, изображения и общий макет презентации были сохранены.
Это делает такой подход полезным для перевода учебных материалов, презентаций продуктов, коммерческих презентаций, внутренних отчётов, слайдов конференций и других файлов презентаций.
6. Работа со шрифтами и форматированием для конкретных языков
Совместимость шрифтов — важный аспект при переводе документов между разными системами письменности.
Для переводов между языками, использующими одну и ту же систему письменности, такими как:
English → French
English → German
Spanish → English
существующий шрифт обычно можно сохранить.
Однако при переводе между латинским текстом и языками CJK исходный шрифт может не содержать необходимых символов.
Например:
English → Simplified Chinese
English → Japanese
English → Korean
В таких случаях принудительное сохранение исходного шрифта может привести к отсутствующим глифам, квадратам или несогласованным резервным шрифтам.
Более гибкая инструкция:
Keep the original font if it supports the target language.
Otherwise, use an appropriate font that fully supports the
target-language characters.
Для упрощённого китайского при необходимости можно использовать такие шрифты, как Microsoft YaHei или SimSun.
То же самое применимо и в обратном направлении. При переводе содержимого японского PowerPoint на английский сохранение японского шрифта технически может сработать, но подходящий латинский шрифт может обеспечить более естественный вид.
Поэтому замену шрифта следует рассматривать как условную операцию, а не как обязательное правило.
Цель — сохранить:
- Размер шрифта
- Насыщенность
- Цвет
- Выравнивание
- Межстрочный интервал
- Визуальную иерархию
при этом позволяя самому семейству шрифтов меняться, когда это необходимо для языковой совместимости.
7. Как ИИ сохраняет структуру и форматирование документа
Одно из ключевых различий между переводом документов на основе ИИ и обычным переводом текста заключается в том, как документ обрабатывается во время процесса перевода.
Spire.Agent.Office построен на основе Spire.Office для .NET, который предоставляет API для работы с нативной структурой документов Office. Вместо того чтобы рассматривать файл Word, Excel или PowerPoint как блок простого текста, документ можно обрабатывать как набор структурированных элементов.
Например, при обработке документа Word, Spire.Office для .NET может работать с такими элементами документа, как:
- Разделы
- Абзацы и текстовые диапазоны
- Таблицы и ячейки таблиц
- Изображения
- Гиперссылки
- Форматирование текста и стили, включая шрифты, размеры шрифтов, цвета, выравнивание и другие свойства
Это позволяет отделить структуру документа от текста, который нужно перевести.
Общий рабочий процесс можно проиллюстрировать следующим образом:
Документ Office → Определение элементов документа → Извлечение переводимого текста → Перевод ИИ → Замена исходного текста → Сохранение существующей структуры документа
Например, рассмотрим документ Word, содержащий заголовок, несколько абзацев, таблицу и изображение. Процесс перевода не требует воссоздания документа с нуля. Вместо этого существующие элементы документа остаются на месте, а переводимый текст заменяется его переведённым содержимым.
Модель ИИ отвечает за языковое преобразование, в то время как Spire.Office для .NET обеспечивает доступ на уровне документа, необходимый для работы с существующей структурой Office.
Именно поэтому инструкции по переводу могут указывать как что следует перевести, так и что должно остаться неизменным. Например, инструкция может требовать перевода текста абзацев, содержимого таблиц, верхних и нижних колонтитулов, при этом сохраняя URL-адреса, формулы, изображения, технические идентификаторы и другие непереводимые элементы.
Как это работает для разных форматов Office
| Формат | Содержимое для перевода | Структура и элементы для сохранения |
|---|---|---|
| Word | Абзацы, заголовки, таблицы, верхние и нижние колонтитулы | Разделы, стили, изображения, гиперссылки, форматирование |
| Excel | Текст в ячейках, таблицах и других редактируемых текстовых областях | Рабочие листы, формулы, значения, форматирование, диаграммы, изображения |
| PowerPoint | Заголовки, текстовые поля, таблицы и подписи | Слайды, темы, фигуры, изображения, макеты, форматирование |
Важный момент заключается в том, что ИИ выполняет перевод, а модель документа Office обеспечивает структуру, в которой происходит перевод. Такое сочетание позволяет Spire.Agent.Office создавать переведённый файл Office без необходимости полной перестройки всего документа из переведённого простого текста.
В результате выходной файл сохраняет исходную структуру и форматирование документа, заменяя содержимое исходного языка переведённым текстом.
8. Заключение
С Spire.Agent.Office для .NET один и тот же подход на основе ИИ можно применять к Word, Excel и PowerPoint: загрузить исходный файл Office, описать требования к переводу на естественном языке и создать переведённый документ, максимально сохраняя его нативную структуру и форматирование.
Три примера в этой статье демонстрируют различные сценарии перевода:
- Word: английский → упрощённый китайский
- Excel: английский → французский
- PowerPoint: японский → английский
Несмотря на различия между этими форматами файлов, основной рабочий процесс остаётся неизменным. AI-агент переводит редактируемое содержимое, учитывая специфические элементы документа, такие как стили и таблицы Word, формулы и форматирование ячеек Excel, а также фигуры и макеты слайдов PowerPoint.
Ключевое преимущество заключается в том, что результат остаётся редактируемым документом Office, а не превращается в отдельный блок переведённого текста.
Сочетая языковое понимание ИИ с нативной обработкой документов Office, Spire.Agent.Office позволяет автоматизировать перевод документов, сохраняя большую часть исходного макета, форматирования и встроенного содержимого.
Часто задаваемые вопросы
1. Может ли Spire.Agent.Office напрямую переводить файлы Word, Excel и PowerPoint?
Да. AI-процессор может работать с объектами Word Document, Excel Workbook и PowerPoint Presentation. Инструкция по переводу применяется к загруженному файлу Office, а результат можно сохранить как новый файл в том же формате Office.
2. Сохранится ли исходное форматирование документа после перевода?
Инструкция для ИИ может явно требовать сохранения исходного форматирования и структуры. В приведённых выше примерах переведённые файлы хорошо сохранили свою структуру документа и визуальное форматирование во время тестирования.
Однако переведённый текст может значительно отличаться по длине от исходного текста, поэтому сложные макеты всё равно следует проверять после обработки.
3. Могут ли формулы Excel и числовые данные оставаться неизменными во время перевода?
Да. Инструкция может указать ИИ переводить только текстовое содержимое, сохраняя формулы, числа, проценты, значения валют, даты и другие нетекстовые данные.
Это важно при переводе книг, которые сочетают деловой текст с вычислениями или структурированными данными.
4. Как следует обрабатывать шрифты при переводе между разными системами письменности?
Если исходный шрифт поддерживает символы целевого языка, его обычно можно сохранить.
Если нет, инструкция должна позволить ИИ выбрать совместимый шрифт. Например, при переводе с английского на китайский можно использовать Microsoft YaHei или SimSun, когда исходный латинский шрифт не поддерживает китайские символы в достаточной степени.
5. Могу ли я запретить перевод определённого содержимого?
Да. Инструкция может определять содержимое, которое должно оставаться неизменным, такое как URL-адреса, адреса электронной почты, названия продуктов, номера моделей, имена API, фрагменты кода, формулы и другие технические идентификаторы.
Это особенно полезно для технической, финансовой, инженерной и продуктовой документации.
См. также
AI Document Translator: Translate Word, Excel, and PowerPoint Files in C#
Table of Contents
Translating an Office document involves more than converting sentences from one language to another. A Word file may contain headings, tables, images, hyperlinks, headers, and footers. An Excel workbook may include formulas, numbers, charts, and formatted cells. A PowerPoint presentation may rely heavily on text boxes, shapes, themes, and carefully arranged slide layouts.
If the text is simply extracted, translated, and written back without considering these structures, the resulting document can easily lose its original appearance or even break important content such as formulas and layouts.
This article demonstrates how to build an AI-powered document translator in C# using Spire.Agent.Office for .NET. We will translate Word, Excel, and PowerPoint files while preserving their native Office structure and formatting as much as possible.
The examples cover three different translation scenarios:
- Word: English → Simplified Chinese
- Excel: English → French
- PowerPoint: Japanese → English
1. What Is an AI Document Translator?
A conventional translation workflow usually focuses on text alone. The content is extracted from a document, translated into another language, and then returned as plain text or inserted back into a new file.
This approach works well when formatting is not important. However, Office documents often contain much more than text. Word files may include headings, tables, images, hyperlinks, headers, and footers. Excel workbooks may contain formulas, numerical data, merged cells, charts, and formatted ranges. PowerPoint presentations may rely on text boxes, shapes, themes, and carefully designed slide layouts.
An AI document translator goes a step further. Instead of treating the file as a simple container of text, it translates the editable content while preserving the document's native structure and visual organization as much as possible.
The following diagram illustrates the difference between conventional text translation and AI-powered document translation:
With AI-powered document translation, the expected result is not just translated text. The output remains an editable Office file, such as a translated .docx, .xlsx, or .pptx, with its original structure, formatting, tables, images, formulas, and layout retained where possible.
This makes the workflow especially useful when translated documents need to remain ready for editing, sharing, publishing, or further business processing.
2. Set Up Spire.Agent.Office for .NET
Before running the examples, create a .NET project and install Spire.Agent.Office through NuGet.
You can install the package using the .NET CLI:
dotnet add package Spire.Agent.Office
The AI features require a SpireToken. Configure an AIOptions instance and assign the token:
AIOptions options = new AIOptions
{
    SpireToken = "your spireToken"
};
A temporary SpireToken for evaluation and testing can be requested from Spire temporary license page.
The general processing pattern is similar across Word, Excel, and PowerPoint:
Load Office file
      ↓
Create AI processor
      ↓
Execute natural-language instruction
      ↓
Save translated Office file
The main difference between the three examples is the Office document object being processed and the translation rules defined in the instruction.
3. Translate Word Documents with AI
Word documents can contain much more than ordinary paragraphs. A typical business document may include headings, tables, images, hyperlinks, headers, footers, lists, and different text styles.
In this example, we translate an English Word document into Simplified Chinese while asking the AI to preserve the document structure and visual formatting.
An additional consideration is font compatibility. Fonts commonly used for English text may not contain all Simplified Chinese characters. The instruction therefore allows the AI to use a suitable Chinese font when the original font does not support the translated characters.
using System;
using Spire.Agent.Office.AI;
using Spire.Agent.Office.Extensions;
using Spire.Doc;

string inputPath = @"E:\Documents\Input.docx";
string outputPath = @"E:\Documents\Translated.docx";
string spireToken = "your spireToken";

string instruction = """
Translate all English text in this Word document into Simplified Chinese.

Requirements:
1. Preserve the original document structure, layout, styles, tables, images, headers, footers, and other elements.
2. Preserve the original formatting as much as possible, including font size, color, bold, alignment, and spacing.
3. Keep the original font if it supports Simplified Chinese. Otherwise, use an appropriate Chinese font such as Microsoft YaHei or SimSun.
4. Translate text in paragraphs, headings, tables, headers, footers, and other editable text areas.
5. Do not translate URLs, email addresses, product names, API names, code, model numbers, or technical identifiers.
6. Do not add explanations, comments, or extra content.
7. Ensure the translated Chinese text displays correctly and keep the final document visually close to the original.
""";

AIOptions options = new AIOptions
{
    SpireToken = spireToken
};

using (Document doc = new Document())
{
    doc.LoadFromFile(inputPath);
    AIDocumentProcessor processor = doc.AI(options);
    AIResult result = processor.ExecuteInstruction(
        doc,
        instruction,
        outputPath
    );

    if (result.Success)
    {
        Console.WriteLine($"Translation completed: {outputPath}");
    }
    else
    {
        Console.WriteLine($"Translation failed: {result.ErrorMessage}");
    }
}
The important part of this example is that the AI is not asked to rebuild the document from scratch. It translates the editable text while retaining the surrounding Word structure.
In the actual test, the translated document preserved the original headings, paragraph formatting, table structure, images, hyperlinks, headers, and footers while replacing the English content with Simplified Chinese.
This type of workflow can be useful for translating reports, manuals, policies, proposals, internal documentation, and other formatted Word files.
4. Translate Excel Workbooks with AI
Excel translation requires a different strategy.
A workbook may contain textual content that should be translated, but it can also contain:
- Numbers
- Dates
- Percentages
- Currency values
- Formulas
- Function names
- Charts
- Images
- Hyperlinks
A translation process should therefore avoid treating every cell value as ordinary text.
In this example, the workbook is translated from English to French . Because both languages primarily use the Latin alphabet, the original fonts can usually be preserved.
using System;
using Spire.Agent.Office.AI;
using Spire.Agent.Office.Extensions;
using Spire.Xls;

string inputPath = @"E:\Documents\Input.xlsx";
string outputPath = @"E:\Documents\Translated.xlsx";
string spireToken = "your spireToken";

string instruction = """
Translate all English text in this Excel workbook into French.

Requirements:
1. Translate textual content in cells, worksheets, tables, and other editable text areas.
2. Preserve the original workbook structure, worksheets, rows, columns, merged cells, and formatting.
3. Keep formulas, numbers, dates, percentages, currency values, and other non-text data unchanged.
4. Preserve cell formatting as much as possible, including font size, color, bold, alignment, borders, and fills.
5. Preserve the original font whenever possible, since French uses the Latin alphabet. If a font does not support required French characters, use a compatible font.
6. Preserve charts, images, hyperlinks, and other workbook elements.
7. Do not translate URLs, email addresses, person names, model numbers, formulas, function names, or technical identifiers.
8. Do not add explanations, comments, or extra content.
9. Ensure the translated French text displays correctly and keep the workbook visually close to the original.
""";

AIOptions options = new AIOptions
{
    SpireToken = spireToken
};

using (Workbook workbook = new Workbook())
{
    workbook.LoadFromFile(inputPath);
    AIDocumentProcessor processor = workbook.AI(options);
    AIResult result = processor.ExecuteInstruction(
        workbook,
        instruction,
        outputPath
    );

    if (result.Success)
    {
        Console.WriteLine($"Translation completed: {outputPath}");
    }
    else
    {
        Console.WriteLine($"Translation failed: {result.ErrorMessage}");
    }
}
The instruction explicitly separates translatable text from data that should remain unchanged.
For example, product names or descriptions may be translated into French, while a value such as:
$12,500
or a formula such as:
=SUM(C2:C10)
should remain functional.
In the test result, the workbook retained its worksheet structure and formatting while the English textual content was translated into French.
This approach is particularly useful for multilingual product catalogs, financial reports, inventory sheets, sales reports, planning workbooks, and other Excel files that combine text with structured data.
5. Translate PowerPoint Presentations with AI
PowerPoint translation presents another challenge: translated text must fit back into an existing visual layout.
Presentation content may appear in:
- Slide titles
- Text boxes
- Shapes
- Tables
- Captions
- Diagram labels
At the same time, the translation process should preserve slide themes, backgrounds, images, charts, and other visual elements.
In this example, a Japanese presentation is translated into English .
using System;
using Spire.Agent.Office.AI;
using Spire.Agent.Office.Extensions;
using Spire.Presentation;

string inputPath = @"E:\Documents\Input.pptx";
string outputPath = @"E:\Documents\Translated.pptx";
string spireToken = "your spireToken";

string instruction = """
Translate all Japanese text in this PowerPoint presentation into English.

Requirements:
1. Translate slide titles, body text, text boxes, table text, captions, and other editable text.
2. Preserve the original slide order, layout, theme, background, shapes, images, charts, and other elements.
3. Preserve text formatting as much as possible, including font size, color, bold, alignment, and spacing.
4. Since the target language is English, use an appropriate Latin font when the original Japanese font is not suitable for English text, while keeping the visual style as close to the original as possible.
5. Keep translated text inside its original text box or shape whenever possible, and make reasonable layout adjustments if needed.
6. Do not translate URLs, email addresses, product names, model numbers, API names, code, or technical identifiers.
7. Do not add explanations, comments, notes, or extra slides.
8. Ensure the translated English text displays correctly and keep the presentation visually close to the original.
""";

AIOptions options = new AIOptions
{
    SpireToken = spireToken
};

using (Presentation ppt = new Presentation())
{
    ppt.LoadFromFile(inputPath);
    AIDocumentProcessor processor = ppt.AI(options);
    AIResult result = processor.ExecuteInstruction(
        ppt,
        instruction,
        outputPath
    );

    if (result.Success)
    {
        Console.WriteLine($"Translation completed: {outputPath}");
    }
    else
    {
        Console.WriteLine($"Translation failed: {result.ErrorMessage}");
    }
}
Unlike Word documents, presentations often use fixed-size text boxes. Translation can therefore affect line wrapping and visual balance.
The instruction tells the AI to keep translated content inside the original shapes whenever possible and make reasonable adjustments when necessary.
In the test, the Japanese text was successfully translated into English while the original slide structure, theme, shapes, images, and overall presentation layout were preserved.
This makes the approach useful for translating training materials, product presentations, sales decks, internal reports, conference slides, and other presentation files.
6. Handle Fonts and Language-Specific Formatting
Font compatibility is an important consideration when translating documents across different writing systems.
For translations between languages that share the same writing system, such as:
English → French
English → German
Spanish → English
the existing font can usually be retained.
However, when translating between Latin text and CJK languages, the original font may not contain the required characters.
For example:
English → Simplified Chinese
English → Japanese
English → Korean
In such cases, forcing the original font to remain unchanged may lead to missing glyphs, boxes, or inconsistent fallback fonts.
A more flexible instruction is:
Keep the original font if it supports the target language.
Otherwise, use an appropriate font that fully supports the
target-language characters.
For Simplified Chinese, fonts such as Microsoft YaHei or SimSun can be used when necessary.
The same concept applies in reverse. When translating Japanese PowerPoint content into English, retaining a Japanese font may technically work, but a suitable Latin font can provide a more natural appearance.
Font replacement should therefore be treated as a conditional operation rather than a mandatory rule.
The goal is to preserve:
- Font size
- Weight
- Color
- Alignment
- Paragraph spacing
- Visual hierarchy
while allowing the font family itself to change when required for language compatibility.
7. How AI Preserves Document Structure and Formatting
One of the key differences between AI-powered document translation and conventional text translation is how the document is handled during the translation process.
Spire.Agent.Office is built on Spire.Office for .NET, which provides APIs for working with the native structure of Office documents. Instead of treating a Word, Excel, or PowerPoint file as a block of plain text, the document can be processed as a collection of structured elements.
For example, when processing a Word document, Spire.Office for .NET can work with document elements such as:
- Sections
- Paragraphs and text ranges
- Tables and table cells
- Images
- Hyperlinks
- Text formatting and styles, including fonts, font sizes, colors, alignment, and other properties
This makes it possible to separate the document structure from the text that needs to be translated .
The general workflow can be illustrated as follows:
Office Document → Identify Document Elements → Extract Translatable Text → AI Translation → Replace Original Text → Save the Existing Document Structure
For example, consider a Word document containing a heading, several paragraphs, a table, and an image. The translation process does not need to recreate the document from scratch. Instead, the existing document elements remain in place while the translatable text is replaced with its translated content.
The AI model is responsible for the language transformation, while Spire.Office for .NET provides the document-level access needed to work with the existing Office structure.
This approach is also why translation instructions can specify both what should be translated and what should remain unchanged . For example, an instruction can request that paragraph text, table content, headers, and footers be translated while URLs, formulas, images, technical identifiers, and other non-translatable elements are preserved.
How This Works Across Office Formats
| Format | Content to Translate | Structure and Elements to Preserve |
|---|---|---|
| Word | Paragraphs, headings, tables, headers, and footers | Sections, styles, images, hyperlinks, formatting |
| Excel | Text in cells, tables, and other editable text areas | Worksheets, formulas, values, formatting, charts, images |
| PowerPoint | Titles, text boxes, tables, and captions | Slides, themes, shapes, images, layouts, formatting |
The important point is that AI handles the translation, while the Office document model provides the structure in which the translation takes place . This combination allows Spire.Agent.Office to generate a translated Office file without requiring the entire document to be rebuilt from translated plain text.
As a result, the output can retain the original document structure and formatting while replacing the source-language content with the translated text.
8. Conclusion
With Spire.Agent.Office for .NET, the same AI-driven approach can be applied across Word, Excel, and PowerPoint: load the original Office file, describe the translation requirements in natural language, and generate a translated document while preserving its native structure and formatting as much as possible.
The three examples in this article demonstrate different translation scenarios:
- Word: English → Simplified Chinese
- Excel: English → French
- PowerPoint: Japanese → English
Despite the differences between these file formats, the underlying workflow remains consistent. The AI agent translates editable content while respecting document-specific elements such as Word styles and tables, Excel formulas and cell formatting, and PowerPoint shapes and slide layouts.
The key advantage is that the output remains an editable Office document rather than becoming a separate block of translated text.
By combining AI language understanding with native Office document processing, Spire.Agent.Office makes it possible to automate document translation while retaining much of the original layout, formatting, and embedded content.
FAQs
1. Can Spire.Agent.Office translate Word, Excel, and PowerPoint files directly?
Yes. The AI processor can operate on Word Document, Excel Workbook, and PowerPoint Presentation objects. The translation instruction is applied to the loaded Office file, and the result can be saved as a new file in the same Office format.
2. Will the original document formatting be preserved after translation?
The AI instruction can explicitly require the original formatting and structure to be preserved. In the examples above, the translated files retained their document structure and visual formatting well during testing.
However, translated text can differ significantly in length from the source text, so complex layouts should still be reviewed after processing.
3. Can Excel formulas and numerical data remain unchanged during translation?
Yes. The instruction can tell the AI to translate textual content only while preserving formulas, numbers, percentages, currency values, dates, and other non-text data.
This is important when translating workbooks that combine business text with calculations or structured data.
4. How should fonts be handled when translating between different writing systems?
If the original font supports the target-language characters, it can usually be retained.
If it does not, the instruction should allow the AI to choose a compatible font. For example, an English-to-Chinese translation may use Microsoft YaHei or SimSun when the original Latin font does not adequately support Chinese characters.
5. Can I prevent specific content from being translated?
Yes. The instruction can define content that should remain unchanged, such as URLs, email addresses, product names, model numbers, API names, code snippets, formulas, and other technical identifiers.
This is particularly useful for technical, financial, engineering, and product documentation.
See Also
Annotate PDF Documents with JavaScript in React
PDF annotations provide a convenient way to add comments, highlights, notes, links, stamps, and other interactive elements to a document without changing its original content. They are widely used in document review, proofreading, collaboration, and approval workflows.
With Spire.PDF for JavaScript, developers can programmatically add different types of annotations to PDF documents directly in React applications. This article demonstrates how to add two commonly used annotation types: markup annotations for highlighting specific text and popup annotations for attaching comments to a page.
On this page:
- Install Spire.PDF for JavaScript in a React Project
- Add a Markup Annotation to PDF with JavaScript
- Add a Popup Annotation to PDF with JavaScript
- Markup Annotation vs. Popup Annotation
- Working with Other PDF Annotation Types
- Conclusion
- FAQs
Install Spire.PDF for JavaScript in a React Project
Before working with PDF annotations, you need to integrate Spire.PDF for JavaScript into your React application.
You can install the required package through npm:
npm i spire.office
Then copy the required JavaScript, WebAssembly, and framework files to the public folder of your React project so that they can be loaded by the application at runtime.
For detailed installation and configuration instructions, refer to:
How to Integrate Spire.PDF for JavaScript in a React Project
The examples below assume that Spire.PDF has already been configured and that the input PDF file is available in the public folder.
Add a Markup Annotation to PDF with JavaScript
Markup annotations are commonly used during document review. They allow developers to highlight, underline, strike out, or otherwise mark specific text in a PDF.
In this example, we first locate a specific sentence in the PDF using PdfTextFinder. Once the text is found, its bounding rectangles are retrieved and a highlight annotation is created for each corresponding area.
The following React code demonstrates how to highlight specified text in a PDF document:
import React, { useEffect, useState } from 'react';

function App() {
  const [ready, setReady] = useState(false);

  useEffect(() => {
    (async () => {
      const publicUrl = process.env.PUBLIC_URL || '';
      await import(/* webpackIgnore: true */ `${publicUrl}/spire.common.js`);
      const spireModule = await import(/* webpackIgnore: true */ `${publicUrl}/spire.pdf.js`);
      const rawModule = spireModule.default || spireModule;

      window.wasmModule = typeof rawModule === 'function'
        ? await rawModule({ locateFile: p => p.endsWith('.wasm') ? `${publicUrl}/${p}` : p })
        : rawModule;

      setReady(true);
    })();
  }, []);

  const addMarkupAnnotation = async () => {
    const wasmModule = window.wasmModule.spirepdf;
    const inputFileName = 'input.pdf';
    const outputFileName = 'MarkupAnnotation.pdf';

    await window.spire.FetchFileToVFS(inputFileName, '/', `${process.env.PUBLIC_URL || ''}/`);

    const doc = new wasmModule.PdfDocument();
    doc.LoadFromFile(inputFileName);

    const page = doc.Pages.get_Item(0);
    const finder = new wasmModule.PdfTextFinder(page);
    finder.Options.Parameter = wasmModule.TextFindParameter.IgnoreCase;

    const TARGET_TEXT = 'Artificial Intelligence (AI) is a rapidly evolving field of computer science focused on creating ' +
    'systems capable of performing tasks that typically require human intelligence.';

    const textFragment = finder.Find(TARGET_TEXT).get(0);
    const bounds = textFragment.Bounds.toArray();

    bounds.forEach((rect) => {
      const annotation = new wasmModule.PdfTextMarkupAnnotation(
        'Administrator',
        'This is a markup annotation.',
        rect
      );

      annotation.TextMarkupAnnotationType =
        wasmModule.PdfTextMarkupAnnotationType.Highlight;

      annotation.TextMarkupColor =
        new wasmModule.PdfRGBColor({
          color: wasmModule.Color.get_LightYellow()
        });

      page.AnnotationsWidget.Add(annotation);
    });

    doc.SaveToFile(outputFileName);
    doc.Close();
    finder.Dispose();

    const fileArray = window.dotnetRuntime.Module.FS.readFile(outputFileName);
    const url = URL.createObjectURL(
      new Blob([fileArray], { type: 'application/pdf' })
    );

    const link = document.createElement('a');
    link.href = url;
    link.download = outputFileName;
    link.click();

    URL.revokeObjectURL(url);
  };

  return (
    <div style={{ textAlign: 'center', padding: 30 }}>
      <h1>Add Markup Annotation to PDF</h1>
      <button onClick={addMarkupAnnotation} disabled={!ready}>
        Add Markup Annotation
      </button>
    </div>
  );
}

export default App;
Output:
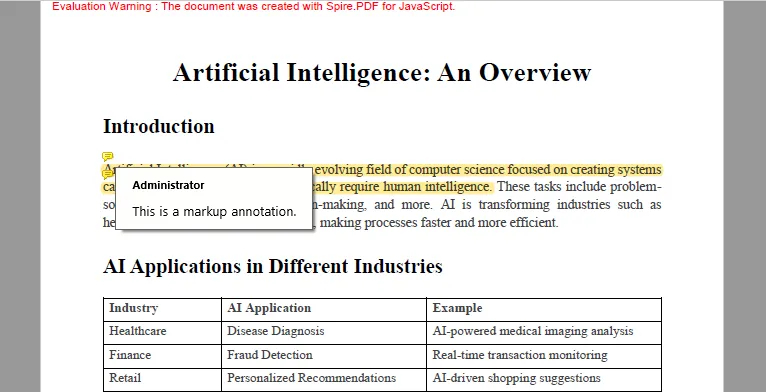
How the Code Works
The annotation process can be divided into several main steps.
First, FetchFileToVFS() loads input.pdf into the WebAssembly virtual file system. A PdfDocument object is then created to load and manipulate the document.
await window.spire.FetchFileToVFS(
  inputFileName,
  '/',
  `${process.env.PUBLIC_URL || ''}/`
);

const doc = new wasmModule.PdfDocument();
doc.LoadFromFile(inputFileName);
Next, the first PDF page is obtained and passed to PdfTextFinder. Setting TextFindParameter.IgnoreCase allows the search to ignore differences in uppercase and lowercase characters.
const page = doc.Pages.get_Item(0);
const finder = new wasmModule.PdfTextFinder(page);

finder.Options.Parameter =
  wasmModule.TextFindParameter.IgnoreCase;
The target text is then located, and its bounding rectangles are retrieved:
const textFragment = finder.Find(TARGET_TEXT).get(0);
const bounds = textFragment.Bounds.toArray();
A sentence may span multiple lines, so its location can consist of several rectangles. The code therefore loops through all returned bounds and creates a PdfTextMarkupAnnotation for each one.
bounds.forEach((rect) => {
  const annotation = new wasmModule.PdfTextMarkupAnnotation(
    'Administrator',
    'This is a markup annotation.',
    rect
  );

  annotation.TextMarkupAnnotationType =
    wasmModule.PdfTextMarkupAnnotationType.Highlight;

  page.AnnotationsWidget.Add(annotation);
});
In this example, the annotation type is set to Highlight and its color is set to light yellow.
Finally, the modified PDF is saved to the virtual file system and converted to a Blob, allowing the browser to download the resulting file.
Add a Popup Annotation to PDF with JavaScript
Popup annotations are useful when comments or notes need to be attached to a particular position on a PDF page. Instead of marking existing text, a popup annotation creates an annotation icon that readers can interact with in compatible PDF viewers.
The following example adds a comment annotation to the first page of a PDF:
import React, { useEffect, useState } from 'react';

function App() {
  const [ready, setReady] = useState(false);

  useEffect(() => {
    (async () => {
      const publicUrl = process.env.PUBLIC_URL || '';
      await import(/* webpackIgnore: true */ `${publicUrl}/spire.common.js`);
      const spireModule = await import(/* webpackIgnore: true */ `${publicUrl}/spire.pdf.js`);
      const rawModule = spireModule.default || spireModule;

      window.wasmModule = typeof rawModule === 'function'
        ? await rawModule({ locateFile: p => p.endsWith('.wasm') ? `${publicUrl}/${p}` : p })
        : rawModule;

      setReady(true);
    })();
  }, []);

  const addPopupAnnotation = async () => {
    const wasmModule = window.wasmModule.spirepdf;
    const inputFileName = 'input.pdf';
    const outputFileName = 'PopupAnnotation.pdf';

    await window.spire.FetchFileToVFS(
      inputFileName,
      '/',
      `${process.env.PUBLIC_URL || ''}/`
    );

    const doc = new wasmModule.PdfDocument();
    doc.LoadFromFile(inputFileName);

    const page = doc.Pages.get_Item(0);

    const rect = new wasmModule.RectangleF({
      x: 155,
      y: 105,
      width: 0,
      height: 0
    });

    const annotation = new wasmModule.PdfPopupAnnotation({
      rectangle: rect,
      text: 'This is a popup annotation.'
    });

    annotation.Icon = wasmModule.PdfPopupIcon.Comment;

    annotation.Color =
      new wasmModule.PdfRGBColor({
        color: wasmModule.Color.get_Red()
      });

    page.Annotations.Add(annotation);

    doc.SaveToFile(outputFileName);
    doc.Close();

    const fileArray =
      window.dotnetRuntime.Module.FS.readFile(outputFileName);

    const url = URL.createObjectURL(
      new Blob([fileArray], { type: 'application/pdf' })
    );

    const link = document.createElement('a');
    link.href = url;
    link.download = outputFileName;
    link.click();

    URL.revokeObjectURL(url);
  };

  return (
    <div style={{ textAlign: 'center', padding: 30 }}>
      <h1>Add Popup Annotation to PDF</h1>
      <button onClick={addPopupAnnotation} disabled={!ready}>
        Add Popup Annotation
      </button>
    </div>
  );
}

export default App;
Output:
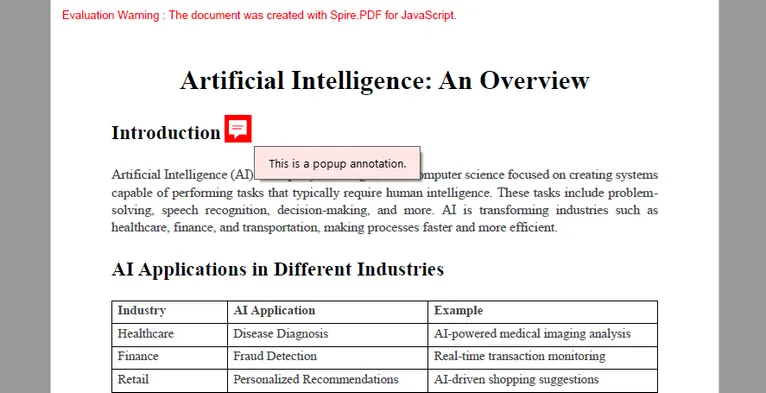
How the Code Works
After loading the PDF, the first page is retrieved:
const page = doc.Pages.get_Item(0);
A RectangleF object is then created to define the position of the popup annotation on the page.
const rect = new wasmModule.RectangleF({
  x: 155,
  y: 105,
  width: 0,
  height: 0
});
Next, a PdfPopupAnnotation object is created. Its rectangle property determines where the annotation appears, while text defines the comment displayed by the annotation.
const annotation = new wasmModule.PdfPopupAnnotation({
  rectangle: rect,
  text: 'This is a popup annotation.'
});
The icon style and color can also be customized:
annotation.Icon = wasmModule.PdfPopupIcon.Comment;

annotation.Color =
  new wasmModule.PdfRGBColor({
    color: wasmModule.Color.get_Red()
  });
Finally, the annotation is added to the page using:
page.Annotations.Add(annotation);
The modified PDF is then saved and downloaded in the browser.
Markup Annotation vs. Popup Annotation
Although both annotation types are designed to add review information to PDF documents, they serve different purposes.
| Annotation Type | Typical Use | Positioning |
|---|---|---|
| Markup Annotation | Highlighting or marking existing PDF text | Based on the bounds of selected text |
| Popup Annotation | Adding comments or notes at a particular location | Based on page coordinates |
Markup annotations are particularly suitable for reviewing existing content because the annotation can follow the exact location of the target text. Popup annotations are more flexible when a comment needs to be associated with a general area rather than a specific text fragment.
Working with Other PDF Annotation Types
The examples above cover only two annotation types, but the overall process is similar when creating other annotations supported by Spire.PDF for JavaScript.
A typical annotation workflow is:
- Load the PDF document.
- Get the page where the annotation should be placed.
- Determine the annotation position or target content.
- Create the appropriate annotation object.
- Configure properties such as text, color, icon, border, or destination.
- Add the annotation to the PDF page.
- Save the modified document.
For example, free text annotations can be used to display text directly on a page, stamp annotations can represent review states such as approval, and link annotations can connect PDF content to web pages, external files, or other locations in the same document.
The annotation class and available properties will differ, but the basic implementation pattern remains largely the same.
Conclusion
Annotations make PDF documents more interactive and are particularly useful in reviewing, commenting, collaboration, and approval scenarios.
With Spire.PDF for JavaScript, React applications can create PDF annotations programmatically in the browser. In this article, we demonstrated how to locate text and apply a markup annotation , as well as how to place a popup annotation at specified coordinates on a PDF page.
Using the same general approach, developers can further implement free text, stamps, shapes, links, and other annotation types according to their application requirements.
FAQs
1. What types of PDF annotations can be added with Spire.PDF for JavaScript?
Spire.PDF for JavaScript supports various annotation types, including markup annotations, free text annotations, popup annotations, stamp annotations, shape annotations, web link annotations, file link annotations, and document link annotations.
The exact classes and properties used depend on the annotation type.
2. Can I highlight text automatically instead of specifying coordinates manually?
Yes. You can use PdfTextFinder to search for specific text in a PDF and retrieve its bounding rectangles. These rectangles can then be used to position markup annotations automatically.
This approach is useful for workflows such as automatically highlighting keywords, review terms, or specific sentences.
3. Why does the markup example create multiple annotations for one sentence?
A sentence may span multiple lines in a PDF. In this case, the text finder can return multiple bounding rectangles representing different portions of the same text.
Creating an annotation for each rectangle ensures that the entire target text is highlighted correctly across line breaks.
4. Can I customize the appearance of PDF annotations?
Yes. Depending on the annotation type, properties such as color, icon, annotation text, position, markup type, and other appearance settings can be customized.
For example, the markup annotation in this tutorial uses a light-yellow highlight, while the popup annotation uses a red comment icon.
5. Are the annotations preserved when the PDF is downloaded?
Yes. The annotations are written into the output PDF when SaveToFile() is called. After the file is downloaded, they can be viewed in PDF readers that support standard PDF annotations.
Get a Free License
To fully experience the capabilities of Spire.PDF for JavaScript without any evaluation limitations, you can request a 30-day free trial license.
How to Read Excel with JavaScript in React
Reading Excel files directly in a web application is useful for many scenarios, such as displaying spreadsheet data on a webpage, importing business records, analyzing worksheet content, or extracting specific data for further processing. In React applications, developers may also need to distinguish between different Excel data types, including text, numbers, formulas, dates, and Boolean values.
Spire.XLS for JavaScript provides APIs for loading and manipulating Excel files in JavaScript applications. With it, you can access worksheets and cells, retrieve different types of cell values, and extract embedded images without requiring Microsoft Excel. This article demonstrates how to read Excel files with JavaScript in React, including reading worksheet data, retrieving different cell value types, and extracting images.
On this page:
- Install Spire.XLS for JavaScript in a React Project
- Read Excel Data with JavaScript in React
- Read Different Types of Cell Data from Excel
- Read Images from Excel Worksheets
- Conclusion
- FAQs
Install Spire.XLS for JavaScript in a React Project
Before working with Excel files, install Spire.XLS for JavaScript in your React project.
Open a terminal in the project directory and run:
npm i spire.office
After installing the package, copy the required Spire.XLS JavaScript and WebAssembly runtime files to the public directory of the React project.
For detailed instructions on setting up the library and its WebAssembly runtime, refer to: How to Integrate Spire.XLS for JavaScript in a React Project
Once the runtime is configured, Excel files can be loaded into the Spire virtual file system and processed in the browser.
Read Excel Data with JavaScript in React
A common requirement when reading Excel files is to retrieve all used data from a worksheet and display it in a web interface.
Spire.XLS provides the AllocatedRange property to obtain the range of cells that are currently in use. You can then loop through its rows and columns and retrieve each cell's value.
The main steps are as follows:
- Load and initialize the Spire.XLS WebAssembly module.
- Load the Excel file into the Spire virtual file system.
- Create a
Workbookobject and load the Excel file. - Access the desired worksheet.
- Get the worksheet's allocated range.
- Iterate through the cells and retrieve their values.
- Store the extracted values in React state and display them in an HTML table.
The following example reads data from the first worksheet of an Excel file named Data.xlsx and displays the retrieved values in a React table.
import React, { useState, useEffect } from 'react';

function App() {
  const [wasmModule, setWasmModule] = useState(null);
  const [tableData, setTableData] = useState([]);
  const [status, setStatus] = useState('Loading Excel runtime...');
  const [error, setError] = useState('');

  useEffect(() => {
    (async () => {
      try {
        const publicUrl = process.env.PUBLIC_URL || '';
        const spireModule = await import(
          /* webpackIgnore: true */
          `${publicUrl}/spire.xls.js`
        );

        const xlsModule = spireModule.spirexls || window.spirexls;

        if (!xlsModule) {
          throw new Error('Spire XLS module was not initialized.');
        }

        window.wasmModule = xlsModule;
        setWasmModule(xlsModule);
        setStatus('Excel runtime ready.');
      } catch (err) {
        console.error('Failed to load Spire XLS runtime:', err);
        setError(err.message || 'Failed to load Spire XLS runtime.');
        setStatus('');
      }
    })();
  }, []);

  const loadExcelToVfs = async (fileName) => {
    const publicUrl = process.env.PUBLIC_URL || '';
    const response = await fetch(`${publicUrl}/${fileName}`);

    if (!response.ok) {
      throw new Error(
        `Failed to load ${fileName}: ${response.status} ${response.statusText}`
      );
    }

    if (!window.dotnetRuntime?.Module?.FS) {
      throw new Error('Spire virtual file system is not ready.');
    }

    const fileBytes = new Uint8Array(await response.arrayBuffer());

    window.dotnetRuntime.Module.FS.writeFile(
      fileName,
      fileBytes,
      { flags: 'w+' }
    );

    return fileName;
  };

  const readExcelData = async () => {
    if (!wasmModule) {
      setError('Excel runtime is not ready yet.');
      return;
    }

    setError('');
    setStatus('Reading Excel file...');

    const workbook = new wasmModule.Workbook();

    try {
      const inputFile = await loadExcelToVfs('Data.xlsx');
      workbook.LoadFromFile(inputFile);

      const sheet = workbook.Worksheets.get(0);
      const range = sheet.AllocatedRange;
      const rows = [];

      if (range) {
        const firstRow = range.Row;
        const firstColumn = range.Column;

        const lastRow =
          range.LastRow || firstRow + range.RowCount - 1;

        const lastColumn =
          range.LastColumn || firstColumn + range.ColumnCount - 1;

        for (let r = firstRow; r <= lastRow; r++) {
          const row = [];

          for (let c = firstColumn; c <= lastColumn; c++) {
            row.push(sheet.get(r, c).Value);
          }

          rows.push(row);
        }
      }

      setTableData(rows);
      setStatus(`Loaded ${rows.length} rows.`);
    } catch (err) {
      console.error('Failed to read Excel file:', err);
      setError(err.message || 'Failed to read Excel file.');
      setStatus('');
    } finally {
      workbook.Dispose();
    }
  };

  return (
    <div style={{ textAlign: 'center', padding: 30 }}>
      <h1>Read Excel in JavaScript</h1>

      <button onClick={readExcelData} disabled={!wasmModule}>
        Read Excel File
      </button>

      {status && <p>{status}</p>}

      {error && (
        <p style={{ color: 'crimson' }}>
          {error}
        </p>
      )}

      {tableData.length > 0 && (
        <table
          border="1"
          cellPadding="8"
          style={{
            margin: '20px auto',
            borderCollapse: 'collapse'
          }}
        >
          <tbody>
            {tableData.map((row, ri) => (
              <tr key={ri}>
                {row.map((cell, ci) => (
                  <td key={ci}>{cell}</td>
                ))}
              </tr>
            ))}
          </tbody>
        </table>
      )}
    </div>
  );
}

export default App;
Code Explanation
The example first dynamically loads the Spire.XLS JavaScript runtime:
const spireModule = await import(
  /* webpackIgnore: true */
  `${publicUrl}/spire.xls.js`
);

const xlsModule = spireModule.spirexls || window.spirexls;
Since Spire.XLS uses a WebAssembly runtime, the source Excel file is then loaded into its virtual file system:
const fileBytes = new Uint8Array(await response.arrayBuffer());

window.dotnetRuntime.Module.FS.writeFile(
  fileName,
  fileBytes,
  { flags: 'w+' }
);
Next, create a Workbook object and load the Excel file:
const workbook = new wasmModule.Workbook();
workbook.LoadFromFile(inputFile);
The first worksheet can be accessed using:
const sheet = workbook.Worksheets.get(0);
To avoid iterating through unnecessary empty cells, the example retrieves the worksheet's used area through AllocatedRange:
const range = sheet.AllocatedRange;
The starting and ending rows and columns are then determined from this range. A nested loop is used to access each cell:
for (let r = firstRow; r <= lastRow; r++) {
  const row = [];

  for (let c = firstColumn; c <= lastColumn; c++) {
    row.push(sheet.get(r, c).Value);
  }

  rows.push(row);
}
Finally, the resulting two-dimensional array is stored in the tableData React state and rendered as an HTML table.
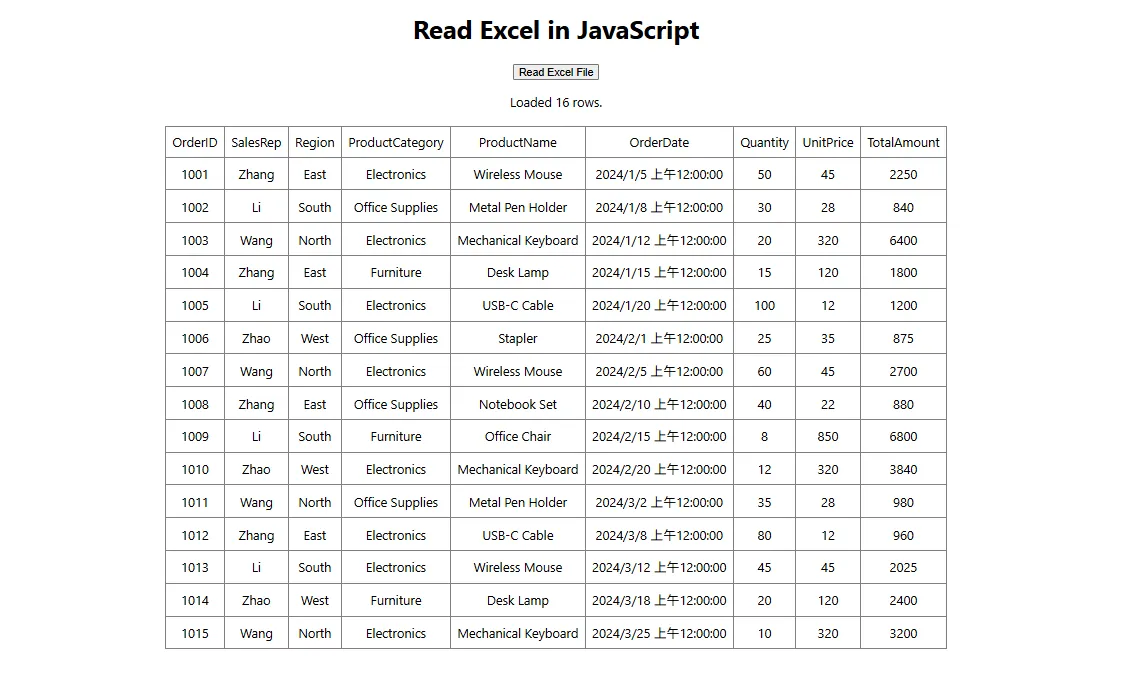
This approach is useful when building spreadsheet viewers, Excel import interfaces, reporting pages, or other applications where worksheet data needs to be presented directly in the browser.
Read Different Types of Cell Data from Excel
Excel cells can contain different kinds of data. Depending on the content you need to retrieve, Spire.XLS provides different properties or methods for accessing the underlying cell value.
The following table lists some commonly used options:
| Data to Read | API |
|---|---|
| Text | cell.Text |
| Number | cell.NumberValue |
| Formula | cell.Formula |
| Formula calculation result | cell.FormulaValue |
| Date and time | cell.DateTimeValue |
| Boolean value | cell.BooleanValue |
| Number or text value | cell.Value |
| Date, Boolean, or other value | cell.Value2 |
For example, first access a particular cell:
const cell = sheet.get(rowIndex, colIndex);
You can then retrieve its content according to the expected data type.
Read Text
Use the Text property to retrieve the text representation of a cell:
const text = sheet.get(rowIndex, colIndex).Text;
This is useful when the displayed textual content of a cell is required.
Read Numbers
To obtain a numeric value, use NumberValue:
const number = sheet.get(rowIndex, colIndex).NumberValue;
This can be useful when worksheet values will be used for calculations or numeric processing in JavaScript.
Read Formulas and Formula Results
Excel cells may contain formulas rather than static values. The formula expression itself can be retrieved through the Formula property:
const formula = sheet.get(rowIndex, colIndex).Formula;
For example, a formula cell may contain an expression such as:
=SUM(B2:B10)
If you need the calculated result of the formula instead of the formula expression, use:
const formulaResult = sheet.get(rowIndex, colIndex).FormulaValue;
Being able to retrieve both the formula and its result is useful for spreadsheet analysis and auditing applications.
Read Dates
Excel stores date and time information as a specialized cell value. You can retrieve it using:
const date = sheet.get(rowIndex, colIndex).DateTimeValue;
The returned date value can then be formatted or processed according to the requirements of the React application.
Read Boolean Values
For cells containing Boolean values such as TRUE or FALSE, use:
const bool = sheet.get(rowIndex, colIndex).BooleanValue;
Read General Cell Values
When a cell may contain either a number or text, the Value property provides a convenient general-purpose option:
const value = sheet.get(rowIndex, colIndex).Value;
For values such as dates, Boolean values, or other underlying Excel data types, Value2 can also be used:
const value = sheet.get(rowIndex, colIndex).Value2;
Choosing the appropriate property based on the expected Excel data type makes it easier to preserve the original meaning of the worksheet content when processing it in JavaScript.
Read Images from Excel Worksheets
In addition to cell data, Excel worksheets can contain embedded pictures. Spire.XLS for JavaScript allows you to access these images through the worksheet's Pictures collection.
The following example retrieves the first picture from a worksheet and saves it as a PNG file:
let pic = sheet.Pictures.get(0);

const outputFileName = 'ReadImages-out.png';

pic.Picture.Save(outputFileName);
Because the image is saved inside the Spire WebAssembly virtual file system, it can then be read back into JavaScript:
const modifiedFileArray = window.dotnetRuntime.Module.FS.readFile(outputFileName);
Next, create a JavaScript Blob from the resulting image data:
const modifiedFile = new Blob(
  [modifiedFileArray],
  { type: 'image/png' }
);
The resulting Blob can be used for further browser-side operations. For example, you can create an object URL and display the extracted image directly in a React component:
const imageUrl = URL.createObjectURL(modifiedFile);
Then use the generated URL as the source of an HTML image element:
<img src={imageUrl} alt="Extracted from Excel" />
If a worksheet contains multiple pictures, you can iterate through the Pictures collection and process each image individually.
This capability is useful for applications that need to extract product images, logos, charts saved as pictures, document assets, or other visual content embedded in Excel worksheets.
Conclusion
Reading Excel files in React makes it possible to bring spreadsheet data directly into browser-based workflows. With Spire.XLS for JavaScript, developers can load Excel workbooks, access worksheets and used ranges, iterate through cells, and retrieve data without relying on Microsoft Excel.
In addition to general cell values, Spire.XLS allows JavaScript applications to access specific data types such as text, numbers, formulas, formula results, dates, and Boolean values. Embedded worksheet images can also be retrieved and converted into browser-compatible objects for display or further processing.
These features can be used to build Excel viewers, data import tools, reporting systems, spreadsheet analysis interfaces, and other React applications that need to work with Excel content.
FAQs
Can JavaScript Read Excel Files in a React Application?
Yes. JavaScript can read Excel files in React with the help of an Excel-processing library such as Spire.XLS for JavaScript. After loading the Excel file into the WebAssembly virtual file system, you can access its worksheets, cells, formulas, images, and other spreadsheet content directly in the browser.
How Do I Read All Used Cells in an Excel Worksheet?
You can use the worksheet's AllocatedRange property to determine the range that contains data. After obtaining its starting and ending rows and columns, iterate through the range and access individual cells using:
sheet.get(rowIndex, colIndex)
This avoids unnecessarily iterating through large areas of empty worksheet cells.
How Can I Read an Excel Formula and Its Calculated Result Separately?
Use the Formula property to retrieve the formula expression:
const formula = sheet.get(rowIndex, colIndex).Formula;
Use CalculatedValue when you need the calculated value of the formula:
const result = sheet.get(rowIndex, colIndex).FormulaValue;
This makes it possible to inspect both the formula logic and its resulting value.
Can I Extract Images from Excel with JavaScript?
Yes. Images embedded in a worksheet can be accessed through the Pictures collection. After retrieving a picture, you can save it to the Spire virtual file system, read the generated image bytes, and convert them into a JavaScript Blob. The Blob can then be displayed, downloaded, or processed further in the browser.
Get a Free License
Spire.XLS for JavaScript offers a 30-day full-featured free trial license with no functional limitations. Apply here to evaluate before purchasing.
AI-Powered Word Formatting, Summarization, and Indexing in C#
Table of Contents
- Why AI-Powered Word Document Standardization Matters
- What This Example Will Automate
- Set Up Spire.Agent.Office for C#
- Standardize Word Formatting with AI
- Extract Metadata and Generate Document Summaries
- Build a Document Index from Multiple Word Files
- Best Practices for Reliable AI Document Processing
- Conclusion
- See Also

Organizations often accumulate hundreds or even thousands of Word documents over time. These files may come from different departments, employees, vendors, or legacy systems, resulting in inconsistent fonts, heading structures, numbering, spacing, headers, and other formatting.
Preparing such documents for publishing, migration, or archiving is more than a simple formatting task. In many cases, organizations also need to identify what each document is about, extract key metadata, create concise summaries, and organize the results into a searchable document index.
Traditional Word automation can handle fixed formatting rules well, but it becomes difficult when document structures vary. An AI-powered approach can first understand the logical role of content — such as titles, headings, body text, dates, and document types — and then apply the appropriate document operations.
In this article, we will use Spire.Agent.Office for .NET to build a three-stage Word processing workflow in C#:
Word documents → Formatting standardization → Metadata and summary extraction → Document index
Why AI-Powered Word Document Standardization Matters
Standardizing a collection of Word documents is not always as simple as setting every paragraph to the same font.
A typical organization may have documents such as:
Input/
├── Employee_Travel_Policy.docx
├── Vendor_Onboarding_Guide.docx
├── Security_Incident_Report.docx
└── Remote_Work_Policy.docx
Even when these documents cover similar business processes, their internal structure may differ considerably.
For example, one document may use a real Word Heading 1 style for section titles, while another simply uses bold 16-point text. Some documents may use numbered sections such as:
1. Purpose
2. Scope
3. Responsibilities
while others may use inconsistent numbering such as:
I. Purpose
Section 2 - Scope
3) Responsibilities
Traditional document automation usually requires developers to inspect paragraph positions, styles, or text patterns and write rules for each variation.
AI-assisted document processing changes the approach. Instead of specifying that "paragraph 3 should be a heading," developers can describe the desired result:
Identify the document title and heading hierarchy, normalize the heading styles and numbering, and preserve the original content.
The AI layer interprets the document structure, while the underlying Word document engine performs the actual document processing.
This makes the approach particularly useful for collections of semi-structured business documents where the content is different but the desired output standard is consistent.
What This Example Will Automate
Our sample workflow contains three processing stages.
Stage 1: Standardize Word Formatting
Each source document is analyzed and reformatted according to a shared corporate style. The processing includes:
- Normalizing fonts and font sizes
- Identifying document titles
- Applying consistent heading levels
- Normalizing heading numbering
- Standardizing paragraph spacing
- Adding a common header
- Adding page numbers to the footer
- Preserving the original text, tables, images, and hyperlinks
The result is a standardized version of every input document.
Stage 2: Extract Metadata and Summaries
The standardized documents are then analyzed individually to extract information such as:
- Document title
- Department
- Document type
- Effective or issue date
- Keywords
- Summary
Each result is saved as a small structured Word metadata document.
Stage 3: Build a Document Index
Finally, the metadata files are combined and converted into a single Word document index.
The finished index can contain information similar to:
| No. | Title | Department | Type | Date | Summary |
|---|---|---|---|---|---|
| 1 | Employee Travel Policy | Human Resources | Policy | July 15, 2026 | Defines travel approval and reimbursement requirements. |
| 2 | Vendor Onboarding Guide | Procurement | Procedure | June 3, 2026 | Describes the process for registering and approving new vendors. |
| 3 | Security Incident Report | IT | Report | August 8, 2026 | Summarizes a security incident and the actions taken in response. |
This produces not only cleaner Word files but also a useful overview of the entire document collection.
Set Up Spire.Agent.Office for C#
First, create a .NET project and install Spire.Agent.Office through NuGet.
You can install the package from Visual Studio's NuGet Package Manager, or use the .NET CLI:
dotnet add package Spire.Agent.Office
Then import the required namespaces:
using System;
using System.IO;
using Spire.Agent.Office.AI;
using Spire.Agent.Office.Extensions;
using Spire.Doc;
AI document processing follows a simple pattern.
First, configure an AIOptions instance with a SpireToken:
AIOptions options = new AIOptions();
options.SpireToken = "your SpireToken";
You can request a temporary SpireToken for testing from the Spire temporary license page. After obtaining the token, assign it to the SpireToken property before calling the AI processing APIs.
Next, load a Word document and create an AIDocumentProcessor:
using (Document doc = new Document())
{
    doc.LoadFromFile("input.docx");

    AIDocumentProcessor processor = doc.AI(options);

    processor.ExecuteInstruction(
        doc,
        "Your natural-language instruction",
        "output.docx"
    );
}
The important part is the instruction. Instead of manually writing a long sequence of Word API calls, we describe what the document should look like and let the agent perform the corresponding operations.
In the following sections, we will apply this approach to an entire directory of Word files.
Standardize Word Formatting with AI
Suppose documents collected from different departments use inconsistent fonts, headings, numbering, and page layouts.
We want all of them to follow the same corporate document style:
- Arial for all text
- 11 pt body text
- 20 pt bold document title
- 16 pt bold Heading 1
- 13 pt bold Heading 2
- Consistent multilevel numbering
- 1.15 line spacing
- A corporate header
- Centered page numbers
- No changes to the original wording
The following code processes every .docx file in an input directory and saves standardized versions to a new directory.
using System;
using System.IO;
using Spire.Agent.Office.AI;
using Spire.Agent.Office.Extensions;
using Spire.Doc;

string inputFolder = @"E:\Documents\Input";
string outputFolder = @"E:\Documents\Standardized";
string spireToken = "your SpireToken";
Directory.CreateDirectory(outputFolder);

string aiRule = """
Analyze the structure of this Word document and standardize its formatting according to the following corporate document rules:

1. Preserve all original wording. Do not rewrite, summarize, shorten, or remove any document content.
2. Use Arial as the default font and 11 pt for normal body text.
3. Identify the main document title and format it as 20 pt bold.
4. Identify the logical heading hierarchy and apply proper Word heading styles. Use 16 pt bold for Heading 1 and 13 pt bold for Heading 2.
5. Normalize section numbering into a consistent hierarchy such as 1, 1.1, and 1.1.1 where appropriate.
6. Use 1.15 line spacing for normal body paragraphs and keep paragraph spacing visually consistent.
7. Add 'Corporate Document Library' to the document header.
8. Add centered page numbers to the footer.
9. Preserve all existing tables, images, hyperlinks, and other document objects.
10. Keep the overall document structure and original meaning unchanged.
""";

var aiOpts = new AIOptions { SpireToken = spireToken };

foreach (var file in Directory.GetFiles(inputFolder, "*.docx"))
{
    var fileName = Path.GetFileName(file);
    var savePath = Path.Combine(outputFolder, fileName);

    using var doc = new Document();
    doc.LoadFromFile(file);

    var res = doc.AI(aiOpts).ExecuteInstruction(doc, aiRule, savePath);
    Console.WriteLine(res.Success ? $"Processed: {fileName}" : $"Failed: {fileName} - {res.ErrorMessage}");
}
One important detail in the instruction is the requirement to identify the logical heading hierarchy .
This is different from simply changing the font of every bold paragraph. The agent can analyze what a paragraph represents and determine whether it functions as a document title, major section heading, subsection, or normal body text.
For document management workflows, proper heading styles are especially useful because they can improve navigation, automatic table-of-contents generation, PDF bookmarks, accessibility, and later document parsing.
Another important rule is:
Preserve all original wording.
Formatting and content rewriting should normally be treated as separate tasks. When the purpose of this stage is document standardization, the AI should not simultaneously rewrite or summarize the source text.
After execution, the output directory contains standardized copies:
Standardized/
├── Employee_Travel_Policy.docx
├── Vendor_Onboarding_Guide.docx
├── Security_Incident_Report.docx
└── Remote_Work_Policy.docx
The following example shows how an inconsistently formatted Word document looks before and after AI-powered standardization.
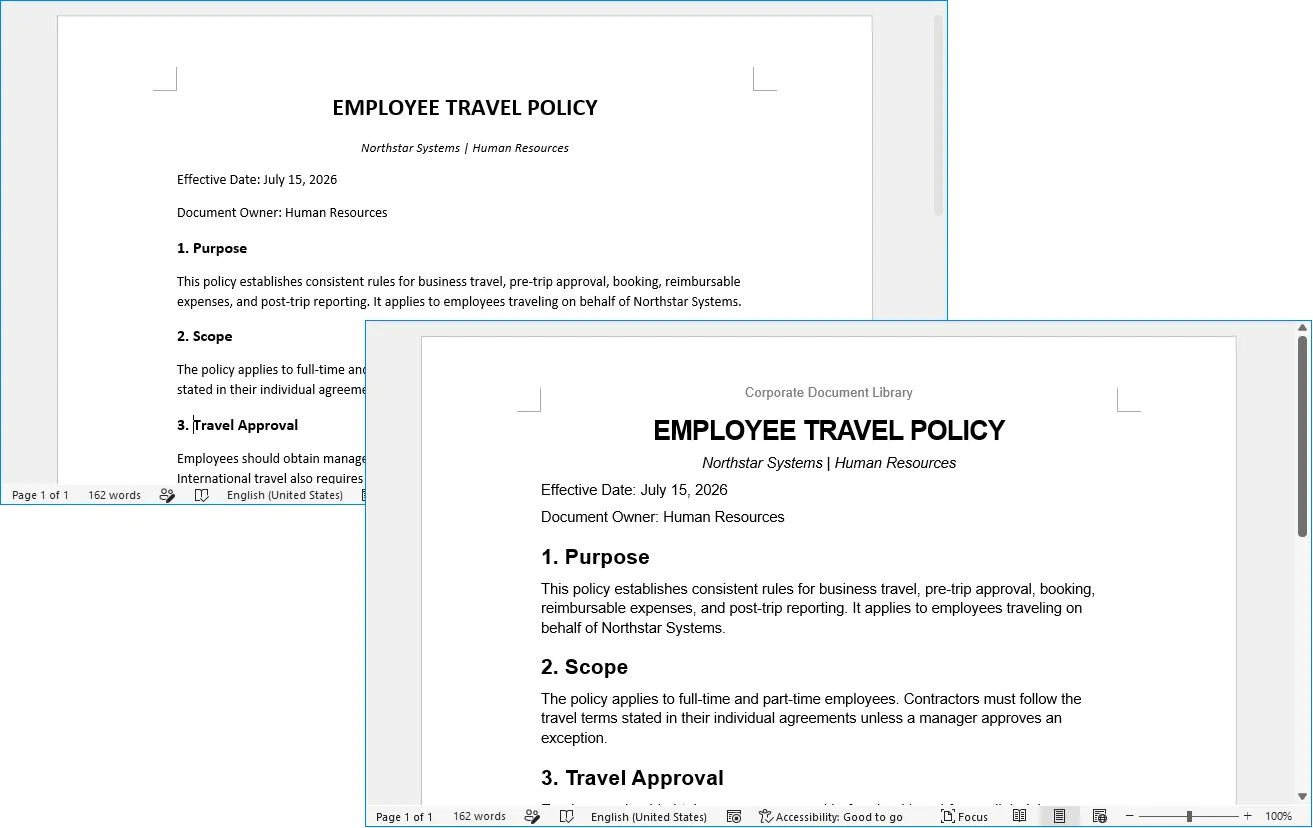
Extract Metadata and Generate Document Summaries
Once the formatting has been standardized, the next step is understanding what each document contains.
Manually opening hundreds of files and recording their titles, departments, dates, categories, and summaries is time-consuming. This is a task where AI document understanding is particularly useful.
For this example, we will extract six fields from every document:
- Title
- Department
- Document Type
- Date
- Keywords
- Summary
Instead of returning free-form prose, the instruction requires a predictable structure. This makes the results easier to process later.
using System;
using System.IO;
using Spire.Agent.Office.AI;
using Spire.Agent.Office.Extensions;
using Spire.Doc;

string inputFolder = @"E:\Documents\Standardized";
string outputFolder = @"E:\Documents\Metadata";
string spireToken = "your SpireToken";

Directory.CreateDirectory(outputFolder);

string aiRule = """
Analyze this Word document and create a concise metadata report.

Extract the following information from the actual document content:
- Title
- Department or responsible business function
- Document Type, such as Policy, Procedure, Report, Guide, or Memo
- Effective Date or Issue Date
- 3 to 5 Keywords
- Summary of approximately 80 to 120 words

Create a new concise document containing only these fields.
Use exactly the following labels:

Title:
Department:
Document Type:
Date:
Keywords:
Summary:

Do not invent information that cannot reasonably be determined from the source. If a specific date or
department is not available, use 'Not specified'. Keep the summary factual and based only on the source document.
""";

var aiOpts = new AIOptions { SpireToken = spireToken };

foreach (var file in Directory.GetFiles(inputFolder, "*.docx"))
{
    var fileName = Path.GetFileNameWithoutExtension(file);
    var savePath = Path.Combine(outputFolder, $"{fileName}_Metadata.docx");

    using var doc = new Document();
    doc.LoadFromFile(file);

    var res = doc.AI(aiOpts).ExecuteInstruction(doc, aiRule, savePath);
    Console.WriteLine(res.Success ? $"Metadata extracted: {fileName}" : $"Failed: {fileName} - {res.ErrorMessage}");
}
A generated metadata document looks like this:
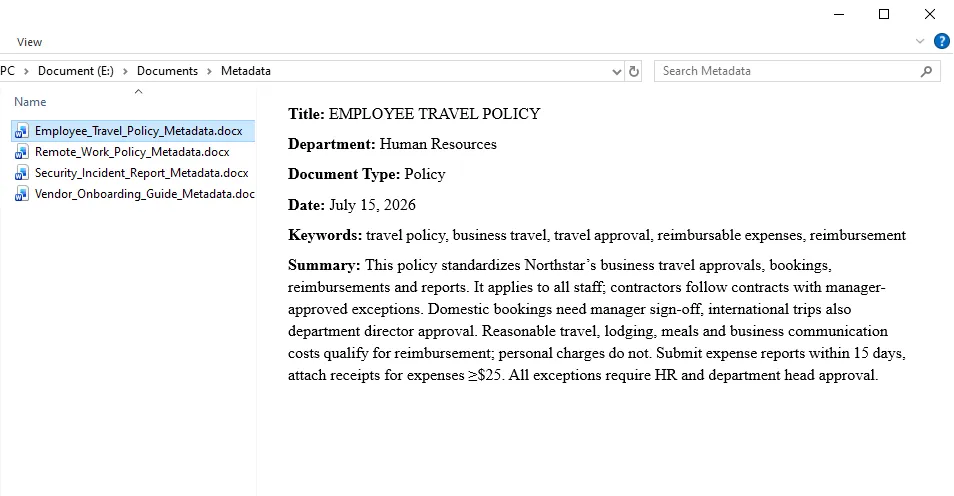
The requirement to use fixed labels is important.
If the prompt simply says "summarize the document," different documents may produce substantially different output structures. Requiring consistent fields makes the intermediate files much easier to combine into a final index.
The instruction also explicitly tells the agent not to invent missing metadata. For business records, "Not specified" is generally more useful than guessing a department or date that the document never states.
Build a Document Index from Multiple Word Files
At this point, we have one metadata file for every processed document:
Metadata/
├── Employee_Travel_Policy_Metadata.docx
├── Vendor_Onboarding_Guide_Metadata.docx
├── Security_Incident_Report_Metadata.docx
└── Remote_Work_Policy_Metadata.docx
The final step is to consolidate these individual metadata files into a single Word-based document index.
Instead of manually opening each metadata document, extracting its text, and merging the results in C#, we can pass all metadata files directly to Spire.Agent.Office through the attachments parameter. The AI agent reads the attached documents, extracts the labeled fields from each one, and creates a new Word document containing a consolidated index.
The attachments parameter is useful when the AI task depends on multiple supporting files rather than a single primary input document. In this example, there is no existing Word document that needs to be modified. We therefore create an empty Document object and use the metadata files as the information sources for generating the final index.
using System;
using System.IO;
using Spire.Agent.Office.AI;
using Spire.Agent.Office.Extensions;
using Spire.Doc;

string metadataFolder = @"E:\Documents\Metadata";
string outputPath = @"E:\Documents\Document_Index.docx";
string spireToken = "your SpireToken";
var attachments = Directory.GetFiles(metadataFolder, "*_Metadata.docx");

string aiRule = """
Read all metadata documents provided in the attachments and create a consolidated Word document index.

Create the title 'Document Index' at the top of the document.

Create a table with the following columns:
No. | Title | Department | Document Type | Date | Keywords | Summary

Requirements:
1. Create one row for each metadata document.
2. Number the records sequentially starting from 1.
3. Extract the values from the labeled fields in each attachment.
4. Preserve the extracted information and do not invent missing data.
5. Use 'Not specified' when a field is unavailable.
6. Make the table header bold.
7. Give the Summary column more width than the other columns.
8. Use a clean professional style suitable for an internal document register.
9. Produce a standalone Word document containing only the final document index.
""";

var aiOpts = new AIOptions { SpireToken = spireToken };

using var doc = new Document();
var res = doc.AI(aiOpts).ExecuteInstruction(doc, aiRule, outputPath, attachments);

Console.WriteLine(res.Success
    ? $"Document index created: {outputPath}"
    : $"Failed to create document index: {res.ErrorMessage}");
The final output is saved as:
Document_Index.docx
Instead of opening every original document individually, employees can now use one consolidated index to quickly understand what documents are available and what each file contains.
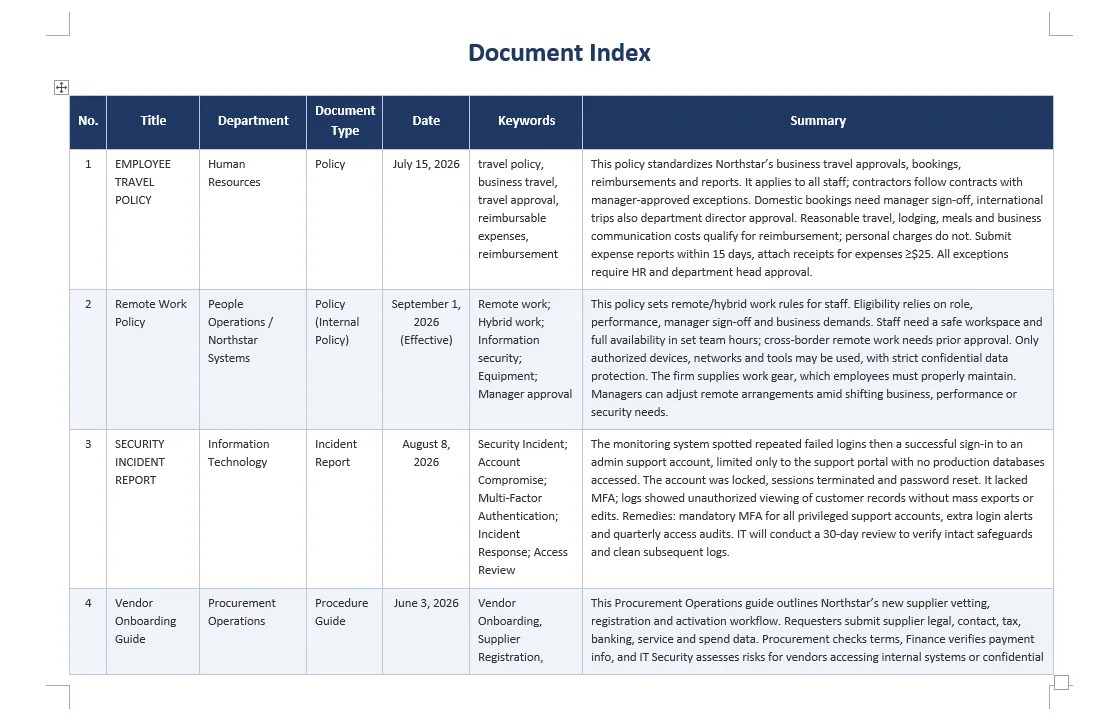
This type of index can be particularly useful before migrating files into a document management system, preparing an internal knowledge base, reviewing legacy document collections, or organizing records for long-term retention.
Best Practices for Reliable AI Document Processing
AI makes semi-structured document processing more flexible, but reliable results still depend heavily on how the task is designed.
Separate Formatting from Content Analysis
Avoid asking the agent to standardize formatting, rewrite text, summarize the document, and extract metadata in one large instruction.
These are different operations with different goals.
A safer workflow is:
Original document
        ↓
Formatting standardization
        ↓
Standardized document
        ↓
Metadata extraction
        ↓
Structured metadata
        ↓
Document index
This also makes problems easier to identify and debug.
Define Formatting Rules Explicitly
Instructions such as:
Make the document look professional.
leave too much room for interpretation.
Whenever consistency matters, specify the actual corporate rules:
Arial, 11 pt body text
20 pt document title
16 pt Heading 1
13 pt Heading 2
1.15 line spacing
1 / 1.1 / 1.1.1 numbering
The same principle applies to headers, footers, table formatting, and page layout.
Protect the Original Content
For formatting tasks, explicitly include requirements such as:
Preserve all original wording.
and:
Do not rewrite, summarize, shorten, or delete the document content.
The source files should also be retained rather than overwritten during automated batch processing.
A practical folder structure is:
Documents/
├── Input/
├── Standardized/
├── Metadata/
└── Document_Index.docx
Request Structured Metadata
When extracted information will be reused programmatically, predictable output is more valuable than creative output.
Instead of:
Tell me what this document is about.
use a fixed schema:
Title:
Department:
Document Type:
Date:
Keywords:
Summary:
This makes downstream processing considerably easier.
Handle Missing Information Explicitly
Not every document contains a department name, effective date, document number, or owner.
Tell the AI what to do when information is missing:
Use "Not specified" instead of guessing.
This is especially important for document management, legal, financial, compliance, and other record-sensitive workflows.
Review High-Importance Outputs
AI-generated metadata and summaries should not automatically be treated as authoritative records in high-stakes workflows.
For ordinary internal document organization, automated results may be sufficient. For regulated archives, legal records, compliance documents, or official retention systems, extracted fields and classifications should still be validated according to the organization's review requirements.
Conclusion
Batch Word processing often involves two different problems.
The first is document automation : changing fonts, applying styles, creating headers and footers, managing numbering, and generating Word files.
The second is document understanding : determining what content represents, identifying document types, finding dates and departments, extracting keywords, and producing summaries.
Traditional Word APIs are highly effective when developers already know exactly what content to modify. AI-assisted processing becomes particularly useful when documents are inconsistent and the software must first understand their structure before deciding how to process them.
Using Spire.Agent.Office in C#, these two capabilities can be combined into one workflow:
Analyze → Standardize → Extract → Organize
In the example above, a folder containing inconsistent Word documents is transformed into a standardized document collection, a set of structured metadata records, and finally a centralized Word document index.
The same architecture can be extended to other enterprise workflows, such as policy libraries, procedure manuals, compliance documentation, project archives, HR records, vendor documentation, and legacy document migration.
Instead of manually reviewing and organizing files one by one, developers can define the required document rules and information structure in natural language and automate the repetitive parts of the workflow while still producing real, editable Word documents.
See Also
Add or Remove Excel AutoFilters with JavaScript in React
During daily Excel data processing, filtering is one of the most common ways to quickly locate and view target data. The AutoFilter feature allows users to quickly filter out data rows that match the conditions by clicking the drop-down arrow on the column header, avoiding the need to search manually through large amounts of data. Spire.XLS for JavaScript, powered by WebAssembly, completes this operation directly in the browser, managing input and output files through a Virtual File System (VFS) with no backend service required.
This article covers three key features:
For installation and project configuration, please refer to How to Integrate Spire.XLS for JavaScript in a React Project. The examples below assume that Spire.XLS is already installed and the WebAssembly module has been initialized.
Add AutoFilters
In Excel, the AutoFilter is an important feature for quickly processing large amounts of data. Through the drop-down arrow on the right side of the column header, you can set filter conditions for each column. Spire.XLS for JavaScript provides the AutoFilters.Range property — you can add AutoFilters to a worksheet simply by setting the worksheet's auto-filter range to the cell range of the header row.
function App() {
  const addAutoFilter = async () => {
    // Get the Spire.XLS WASM module
    const xlsModule = window.wasmModule?.spirexls;

    // Check if the module is ready
    if (!xlsModule) {
      alert('Spire.Xls is not ready yet');
      return;
    }

    // Load the font and Excel file into VFS
    await window.spire.FetchFileToVFS('ARIAL.TTF', '/Library/Fonts/', `${process.env.PUBLIC_URL}/font/`);
    const inputFileName = 'FilterData.xlsx';
    await window.spire.FetchFileToVFS(inputFileName, '', `${process.env.PUBLIC_URL}data/`);

    // Load the workbook
    const workbook = new xlsModule.Workbook();
    workbook.LoadFromFile({ fileName: inputFileName });

    // Get the first worksheet
    const sheet = workbook.Worksheets.get(0);

    // Set the auto filter range: columns A to C of the header row
    sheet.AutoFilters.Range = sheet.Range.get("A1:C1");

    // Save the result file, specifying Excel version 2016
    const outputFileName = "AddAutoFilter_output.xlsx";
    workbook.SaveToFile({ fileName: outputFileName, version: xlsModule.ExcelVersion.Version2016 });

    // Dispose of the workbook object to release resources
    workbook.Dispose();

    // Read the converted file from VFS and trigger the download
    const fileArray = window.dotnetRuntime.Module.FS.readFile(outputFileName);
    const blob = new Blob([fileArray], { type: "application/vnd.openxmlformats-officedocument.spreadsheetml.sheet" });
    const url = URL.createObjectURL(blob);
    const a = document.createElement('a');
    a.href = url;
    a.download = outputFileName;
    a.click();
    URL.revokeObjectURL(url);
  };

  return (
    <div style={{ textAlign: 'center', height: '300px' }}>
      <h1>Add AutoFilter</h1>
      <button onClick={addAutoFilter}>
        Start
      </button>
    </div>
  );
}

export default App;
Add AutoFilters 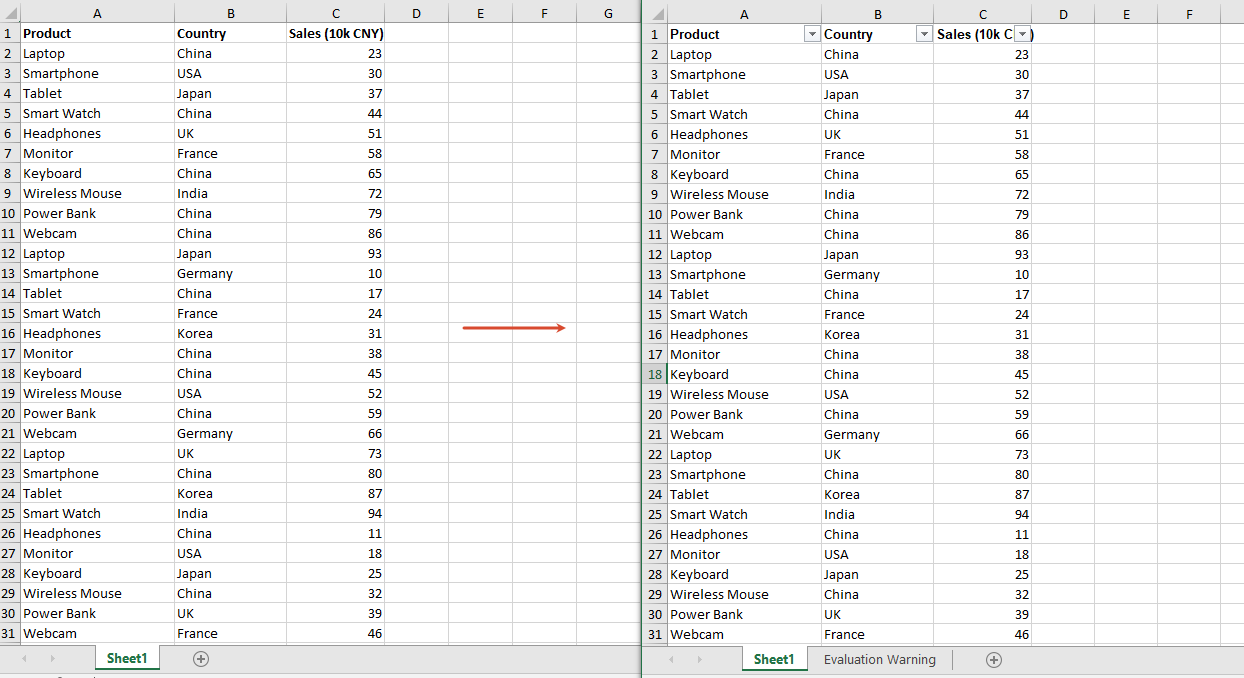
Apply Filter Conditions to Filter Data
After adding AutoFilters, you can also set a custom filter condition for a specified column through the CustomFilter method in code, and then call the Filter method to apply the filter, so that data rows matching the condition are automatically filtered out. For example, the following code sets the filter condition of the second column (Country) to equal "China"; after applying the filter, only data rows whose country is "China" are kept, and the remaining rows are hidden.
function App() {
  const applyFilter = async () => {
    // Get the Spire.XLS WASM module
    const xlsModule = window.wasmModule?.spirexls;

    // Check if the module is ready
    if (!xlsModule) {
      alert('Spire.Xls is not ready yet');
      return;
    }

    // Load the font and Excel file into VFS
    await window.spire.FetchFileToVFS('ARIAL.TTF', '/Library/Fonts/', `${process.env.PUBLIC_URL}/font/`);
    const inputFileName = 'FilterData.xlsx';
    await window.spire.FetchFileToVFS(inputFileName, '', `${process.env.PUBLIC_URL}data/`);

    // Load the workbook
    const workbook = new xlsModule.Workbook();
    workbook.LoadFromFile({ fileName: inputFileName });

    // Get the first worksheet
    const sheet = workbook.Worksheets.get(0);

    // Set the auto filter range: the header and data rows of the second column (Country)
    sheet.AutoFilters.Range = sheet.Range.get("B1:B51");

    // Get the first column of the auto filters
    const filterColumn = sheet.AutoFilters.get(0);

    // Set the custom filter condition: filter rows whose country is "China"
    const strCrt = "China";
    sheet.AutoFilters.CustomFilter({
      column: filterColumn,
      operatorType: xlsModule.FilterOperatorType.Equal,
      criteria: new xlsModule.String(strCrt)
    });

    // Apply the filter
    sheet.AutoFilters.Filter();

    // Save the result file, specifying Excel version 2016
    const outputFileName = "ApplyFilter_output.xlsx";
    workbook.SaveToFile({ fileName: outputFileName, version: xlsModule.ExcelVersion.Version2016 });

    // Dispose of the workbook object to release resources
    workbook.Dispose();

    // Read the converted file from VFS and trigger the download
    const fileArray = window.dotnetRuntime.Module.FS.readFile(outputFileName);
    const blob = new Blob([fileArray], { type: "application/vnd.openxmlformats-officedocument.spreadsheetml.sheet" });
    const url = URL.createObjectURL(blob);
    const a = document.createElement('a');
    a.href = url;
    a.download = outputFileName;
    a.click();
    URL.revokeObjectURL(url);
  };

  return (
    <div style={{ textAlign: 'center', height: '300px' }}>
      <h1>Apply Filter Condition</h1>
      <button onClick={applyFilter}>
        Start
      </button>
    </div>
  );
}

export default App;
Apply Filter Conditions to Filter Data 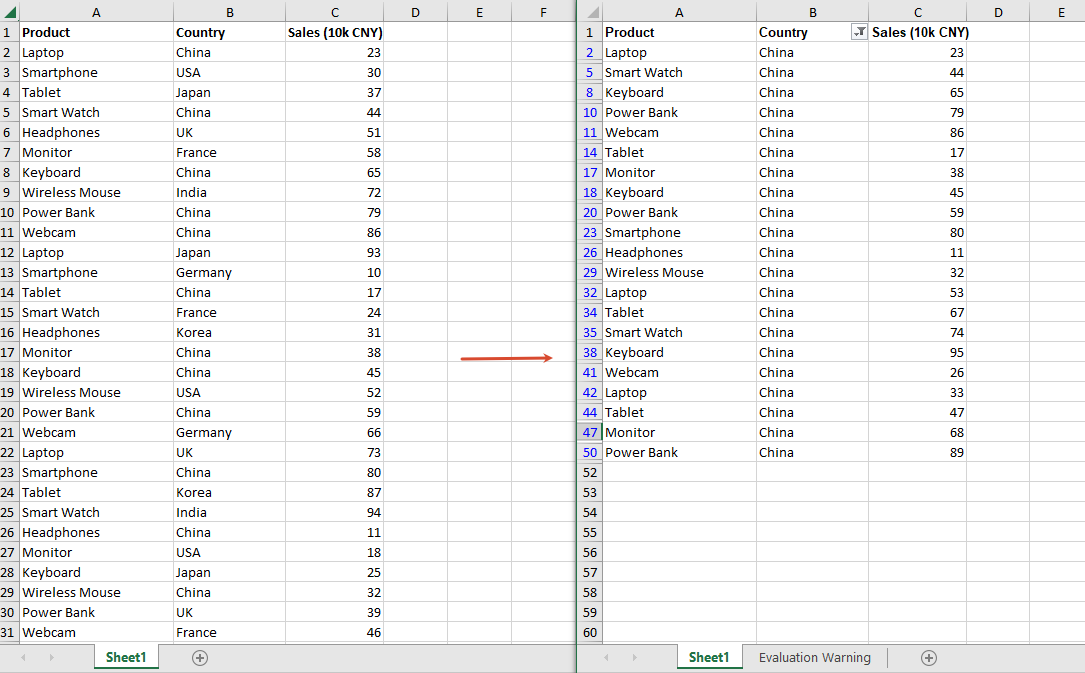
Remove AutoFilters
When you no longer need to filter data, you can remove all AutoFilters from the worksheet through the AutoFilters.Clear method, so that the data is fully displayed again.
function App() {
  const removeAutoFilter = async () => {
    // Get the Spire.XLS WASM module
    const xlsModule = window.wasmModule?.spirexls;

    // Check if the module is ready
    if (!xlsModule) {
      alert('Spire.Xls is not ready yet');
      return;
    }

    // Load the font and Excel file into VFS
    await window.spire.FetchFileToVFS('ARIAL.TTF', '/Library/Fonts/', `${process.env.PUBLIC_URL}/font/`);
    const inputFileName = 'FilteredData.xlsx';
    await window.spire.FetchFileToVFS(inputFileName, '', `${process.env.PUBLIC_URL}data/`);

    // Load the workbook
    const workbook = new xlsModule.Workbook();
    workbook.LoadFromFile({ fileName: inputFileName });

    // Get the first worksheet
    const sheet = workbook.Worksheets.get(0);

    // Remove all AutoFilters from the worksheet
    sheet.AutoFilters.Clear();

    // Save the result file, specifying Excel version 2016
    const outputFileName = "RemoveAutoFilter_output.xlsx";
    workbook.SaveToFile({ fileName: outputFileName, version: xlsModule.ExcelVersion.Version2016 });

    // Dispose of the workbook object to release resources
    workbook.Dispose();

    // Read the converted file from VFS and trigger the download
    const fileArray = window.dotnetRuntime.Module.FS.readFile(outputFileName);
    const blob = new Blob([fileArray], { type: "application/vnd.openxmlformats-officedocument.spreadsheetml.sheet" });
    const url = URL.createObjectURL(blob);
    const a = document.createElement('a');
    a.href = url;
    a.download = outputFileName;
    a.click();
    URL.revokeObjectURL(url);
  };

  return (
    <div style={{ textAlign: 'center', height: '300px' }}>
      <h1>Remove AutoFilter</h1>
      <button onClick={removeAutoFilter}>
        Start
      </button>
    </div>
  );
}

export default App;
Remove AutoFilters 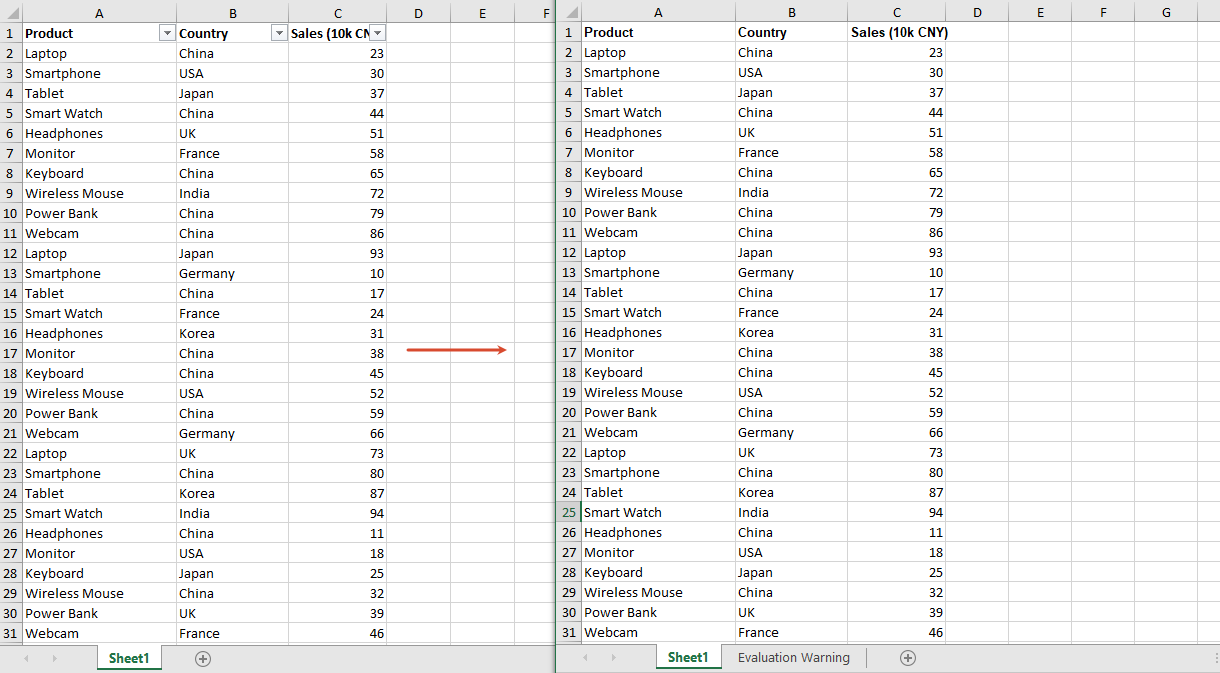
Frequently Asked Questions
Data rows are not hidden after filtering
Reason: The Filter() method was not called to apply the filter after the filter condition was set, or the range set by AutoFilters.Range does not cover the data rows you want to filter.
Solution: Call sheet.AutoFilters.Filter() after setting the filter condition, and make sure AutoFilters.Range covers the header row and all data rows, for example "B1:B51" in the example above.
Filtering by Chinese content fails
Reason: The filter condition is an exact match. If the filter value does not exactly match the cell content (for example, it contains leading or trailing spaces), it will not match.
Solution: Make sure the filter value exactly matches the cell content.
Get a Free License
If you wish to remove the evaluation message from the result documents, or get rid of the feature limitations, please contact sales to get a 30-day temporary license.
How to Split PDF Documents Using JavaScript in React
Splitting PDF documents is a common requirement in web applications. For example, you may need to divide a long report into single-page files, extract the cover page separately, or separate the first page from the remaining pages for further processing. Instead of uploading files to a server, you can perform these operations directly in a React application with JavaScript.
Spire.PDF for JavaScript enables developers to load, manipulate, and save PDF documents in browser-based applications. It works with WebAssembly and a virtual file system, allowing PDF files to be processed on the client side.
This article demonstrates how to split PDF documents using JavaScript in React with Spire.PDF for JavaScript.
Install Spire.PDF for JavaScript in a React Project
Open a terminal in the root directory of your React project and install the spire.office package:
npm i spire.office
After the installation is complete, copy the following runtime files and folder from the installed package to the React project's public folder:
public/
├── _framework/
├── spire.pdf.js
├── Spire.Pdf.Wasm.zip
├── spire.common.js
└── Spire.Common.Wasm.zip
The JavaScript loader, WebAssembly resources, and supporting framework files must remain accessible as static assets when the application runs. For detailed setup instructions and the exact integration process, see How to Integrate Spire.PDF for JavaScript in a React Project.
In the examples below, the PDF file to be split is named input.pdf. Place this file in the public folder as well, so that it can be loaded in the React application.
public/
├── input.pdf
└── ...
Split a PDF into Individual Files by Page in JavaScript
If you want to split a PDF document into multiple single-page PDF files, you can use the Split() method. This method separates the original PDF into individual documents and saves each page as a new PDF file.
The following example loads input.pdf, splits it page by page, and downloads each generated PDF file in the browser.
import React, { useState, useEffect } from 'react';

function App() {
  const [wasmModule, setWasmModule] = useState(null);

  useEffect(() => {
    (async () => {
      const publicUrl = process.env.PUBLIC_URL || '';
      const spireModule = await import(/* webpackIgnore: true */ `${publicUrl}/spire.pdf.js`);
      const rawModule = spireModule.default || spireModule;
      window.wasmModule = typeof rawModule === 'function'
        ? await rawModule({ locateFile: p => p.endsWith('.wasm') ? `${publicUrl}/${p}` : p })
        : rawModule;
      setWasmModule(window.wasmModule);
    })();
  }, []);

  const loadPdfToVfs = async (fileName) => {
    const publicUrl = process.env.PUBLIC_URL || '';
    const response = await fetch(`${publicUrl}/${fileName}`);
    const fileBytes = new Uint8Array(await response.arrayBuffer());
    window.dotnetRuntime.Module.FS.writeFile(fileName, fileBytes, { flags: 'w+' });
    return fileName;
  };

  const SplitPdf = async () => {
    const wasmModule = window.wasmModule?.spirepdf;
    if (!wasmModule) return;

    const inputFile = await loadPdfToVfs('input.pdf');

    const doc = new wasmModule.PdfDocument();
    doc.LoadFromFile(inputFile);

    const pageCount = doc.Pages.Count;
    const outFileName = 'SplitDocument_result-{0}.pdf';
    doc.Split(outFileName);

    for (let i = 0; i < pageCount; i++) {
      const splitFileName = `SplitDocument_result-${i}.pdf`;
      const fileArray = window.dotnetRuntime.Module.FS.readFile(splitFileName);
      const file = new Blob([fileArray], { type: 'application/pdf' });
      const url = URL.createObjectURL(file);
      const a = document.createElement('a');
      a.href = url;
      a.download = splitFileName;
      document.body.appendChild(a);
      a.click();
      document.body.removeChild(a);
      URL.revokeObjectURL(url);
    }
  };

  return (
    <div style={{ textAlign: 'center', height: '300px' }}>
      <h1>Split PDF Documents in React</h1>
      <button onClick={SplitPdf} disabled={!wasmModule}>
        Split PDF
      </button>
    </div>
  );
}

export default App;
Output:
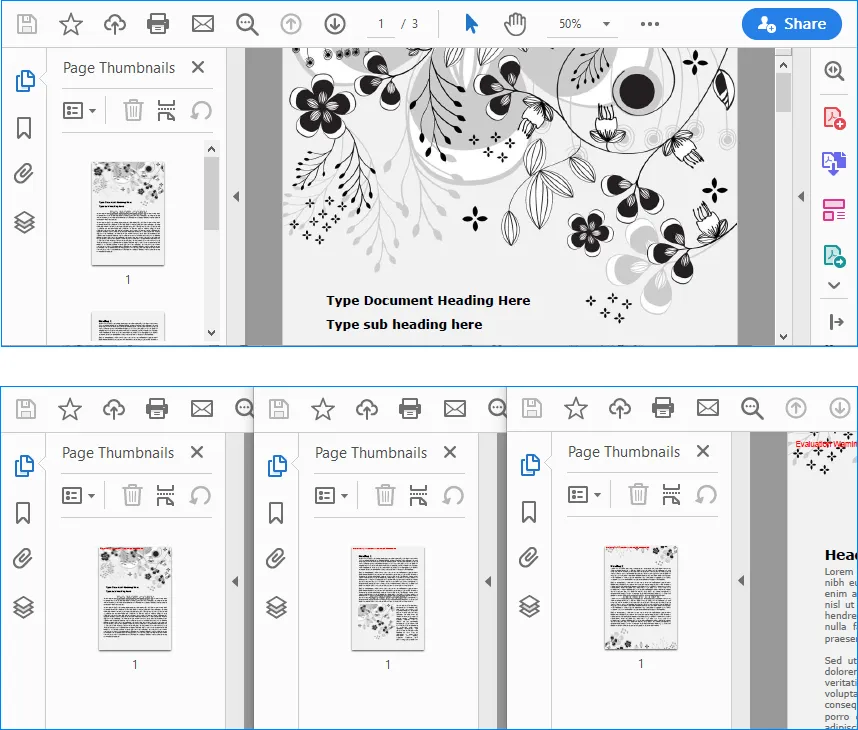
Code Explanation
The code first imports and initializes the Spire.PDF WebAssembly module when the React component is mounted.
const spireModule = await import(/* webpackIgnore: true */ `${publicUrl}/spire.pdf.js`);
Then, the loadPdfToVfs() function loads input.pdf from the public folder and writes it into the virtual file system:
window.dotnetRuntime.Module.FS.writeFile(fileName, fileBytes, { flags: 'w+' });
After the PDF file is loaded, a PdfDocument object is created and the source PDF is opened:
const doc = new wasmModule.PdfDocument();
doc.LoadFromFile(inputFile);
The Split() method splits the PDF document into separate PDF files. The {0} placeholder in the output file name is replaced by the page index:
const outFileName = 'SplitDocument_result-{0}.pdf';
doc.Split(outFileName);
Finally, the generated PDF files are read from the virtual file system, converted into Blob objects, and downloaded in the browser.
Split a PDF by Page Range in JavaScript
In some cases, you may not want to split every page into a separate file. Instead, you may want to extract one page as an individual PDF and save the remaining pages as another PDF. This can be done by creating new PdfDocument objects and inserting selected pages from the source document.
The following example splits input.pdf into two files:
Split-1.pdf: contains the first pageSplit-2.pdf: contains the remaining pages
import React, { useState, useEffect } from 'react';

function App() {
  const [wasmModule, setWasmModule] = useState(null);

  useEffect(() => {
    (async () => {
      const publicUrl = process.env.PUBLIC_URL || '';
      const spireModule = await import(/* webpackIgnore: true */ `${publicUrl}/spire.pdf.js`);
      const rawModule = spireModule.default || spireModule;
      window.wasmModule = typeof rawModule === 'function'
        ? await rawModule({ locateFile: p => p.endsWith('.wasm') ? `${publicUrl}/${p}` : p })
        : rawModule;
      setWasmModule(window.wasmModule);
    })();
  }, []);

  const loadPdfToVfs = async (fileName) => {
    const publicUrl = process.env.PUBLIC_URL || '';
    const response = await fetch(`${publicUrl}/${fileName}`);
    const fileBytes = new Uint8Array(await response.arrayBuffer());
    window.dotnetRuntime.Module.FS.writeFile(fileName, fileBytes, { flags: 'w+' });
    return fileName;
  };

  const SplitPdf = async () => {
    const wasmModule = window.wasmModule?.spirepdf;
    if (!wasmModule) return;

    const inputFile = await loadPdfToVfs('input.pdf');

    const doc = new wasmModule.PdfDocument();
    doc.LoadFromFile(inputFile);

    const newDoc1 = new wasmModule.PdfDocument();
    const newDoc2 = new wasmModule.PdfDocument();

    newDoc1.InsertPage(doc, 0);
    newDoc2.InsertPageRange(doc, 1, doc.Pages.Count - 1);

    newDoc1.SaveToFile('Split-1.pdf');
    newDoc2.SaveToFile('Split-2.pdf');

    for (const splitFileName of ['Split-1.pdf', 'Split-2.pdf']) {
      const fileArray = window.dotnetRuntime.Module.FS.readFile(splitFileName);
      const file = new Blob([fileArray], { type: 'application/pdf' });
      const url = URL.createObjectURL(file);
      const a = document.createElement('a');
      a.href = url;
      a.download = splitFileName;
      document.body.appendChild(a);
      a.click();
      document.body.removeChild(a);
      URL.revokeObjectURL(url);
    }
  };

  return (
    <div style={{ textAlign: 'center', height: '300px' }}>
      <h1>Split PDF Documents in React</h1>
      <button onClick={SplitPdf} disabled={!wasmModule}>
        Split PDF
      </button>
    </div>
  );
}

export default App;
Output:
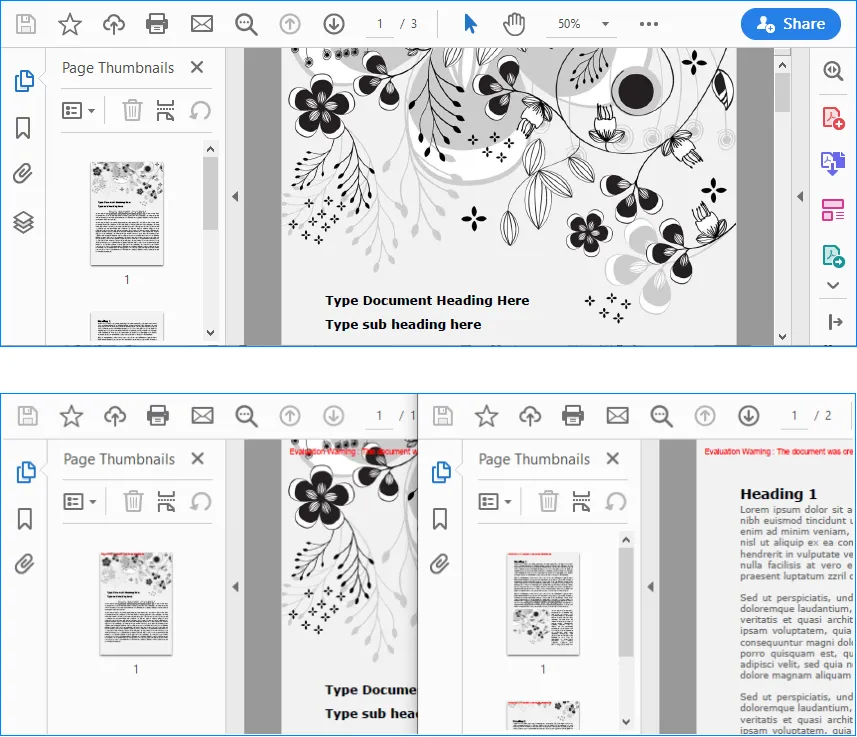
Code Explanation
This example also starts by loading the source PDF file into the virtual file system and opening it with PdfDocument.
const doc = new wasmModule.PdfDocument();
doc.LoadFromFile(inputFile);
Then, two new PDF documents are created:
const newDoc1 = new wasmModule.PdfDocument();
const newDoc2 = new wasmModule.PdfDocument();
The first page of the source PDF is inserted into newDoc1:
newDoc1.InsertPage(doc, 0);
The remaining pages are inserted into newDoc2 with InsertPageRange():
newDoc2.InsertPageRange(doc, 1, doc.Pages.Count - 1);
Here, page indexes are zero-based. The number 1 means the second page of the original PDF, and doc.Pages.Count - 1 means all remaining pages after the first page.
After inserting the selected pages, the two new PDF documents are saved:
newDoc1.SaveToFile('Split-1.pdf');
newDoc2.SaveToFile('Split-2.pdf');
Finally, both output files are read from the virtual file system and downloaded to the local computer.
Conclusion
This article demonstrated how to split PDF documents in a React application using Spire.PDF for JavaScript. With the Split() method, you can divide a PDF into separate single-page documents. With InsertPage() and InsertPageRange(), you can extract specific pages or page ranges into new PDF files.
These methods are useful for building browser-based PDF tools, document management systems, online file-processing applications, and other React applications that require PDF splitting without server-side processing.
FAQs
Can I split a PDF into one file per page in React?
Yes. You can use the Split() method provided by Spire.PDF for JavaScript to split a PDF document into separate PDF files. Each page of the original PDF will be saved as an individual PDF file.
Can I split only a specific page range from a PDF?
Yes. Instead of splitting every page, you can create a new PdfDocument object and use InsertPage() or InsertPageRange() to copy selected pages from the source PDF into a new PDF document.
Are page indexes zero-based in Spire.PDF for JavaScript?
Yes. Page indexes start from 0. For example, page index 0 refers to the first page, and page index 1 refers to the second page. When using InsertPageRange(), make sure the start index and page count are set correctly.
Do I need a server to split PDF documents in React?
No. With Spire.PDF for JavaScript, the PDF can be loaded, processed, and saved in the browser using WebAssembly and the virtual file system. This makes it possible to split PDF documents directly in a React application without sending the file to a server.
How to Merge PDF Documents Using JavaScript in React
Combining PDF files is a common requirement in document management applications. For example, a React application may need to assemble invoices, reports, contracts, or scanned pages into a single PDF before the file is archived or shared. When the source documents do not need to be uploaded to a server, performing the operation in the browser can also simplify the workflow.
In this tutorial, you will learn how to merge PDF documents in a React application using Spire.PDF for JavaScript. The first example combines several complete PDF files in one operation. The second example provides more precise control by taking selected pages from different PDFs and adding them to a new document.
On this page:
- Install Spire.PDF for JavaScript in a React Project
- Merge Multiple PDF Documents in React
- Merge Selected Pages from Different PDF Documents in React
- Important Implementation Notes
- Conclusion
Install Spire.PDF for JavaScript in a React Project
Open a terminal in the root directory of your React project and install the spire.office package:
npm i spire.office
After the installation is complete, copy the following runtime files and folder from the installed package to the React project's public folder:
public/
├── _framework/
├── spire.pdf.js
├── Spire.Pdf.Wasm.zip
├── spire.common.js
└── Spire.Common.Wasm.zip
The JavaScript loader, WebAssembly resources, and supporting framework files must remain accessible as static assets when the application runs. For detailed setup instructions and the exact integration process, see How to Integrate Spire.PDF for JavaScript in a React Project.
For the examples in this article, also place the input PDF files in the public folder so that the application can retrieve them with fetch():
public/
├── input_1.pdf
├── input_2.pdf
├── input_3.pdf
└── ...
Merge Multiple PDF Documents in React
If every page in every source file should appear in the result, the most direct approach is to use the PdfMerger.Merge() method. It accepts an array of input file paths, merges the files in the order in which they appear in the array, and writes the result to the WebAssembly virtual file system.
The following React component merges input_1.pdf, input_2.pdf, and input_3.pdf into a single document named MergedPdf.pdf:
import React, { useState, useEffect } from 'react';

function App() {
  const [wasmModule, setWasmModule] = useState(null);
  const [isGenerating, setIsGenerating] = useState(false);
  const [errorMessage, setErrorMessage] = useState('');

  useEffect(() => {
    (async () => {
      try {
        const publicUrl = process.env.PUBLIC_URL || '';
        const spireModule = await import(/* webpackIgnore: true */ `${publicUrl}/spire.pdf.js`);
        const rawModule = spireModule.default || spireModule;
        window.wasmModule = typeof rawModule === 'function'
          ? await rawModule({ locateFile: p => p.endsWith('.wasm') ? `${publicUrl}/${p}` : p })
          : rawModule;
        setWasmModule(window.wasmModule);
      } catch (error) {
        console.error('Failed to load spire.pdf.js:', error);
      }
    })();
  }, []);

  const loadPdfToVfs = async (fileName) => {
    const publicUrl = process.env.PUBLIC_URL || '';
    const response = await fetch(`${publicUrl}/${fileName}`);

    if (!response.ok) {
      throw new Error(`Failed to load ${fileName}: ${response.status} ${response.statusText}`);
    }

    const fileBytes = new Uint8Array(await response.arrayBuffer());
    const pdfHeader = String.fromCharCode(...fileBytes.slice(0, 4));

    if (pdfHeader !== '%PDF') {
      throw new Error(`${fileName} was loaded, but it is not a valid PDF file.`);
    }

    window.dotnetRuntime.Module.FS.writeFile(fileName, fileBytes, { flags: 'w+' });
    return fileName;
  };

  const MergePdfs = async () => {
    const wasmModule = window.wasmModule?.spirepdf;
    if (!wasmModule || isGenerating) {
      return;
    }

    setIsGenerating(true);
    setErrorMessage('');

    try {
      const inputFiles = await Promise.all([
        loadPdfToVfs('input_1.pdf'),
        loadPdfToVfs('input_2.pdf'),
        loadPdfToVfs('input_3.pdf'),
      ]);

      const outputFileName = 'MergedPdf.pdf';
      const mergeOp = new wasmModule.MergerOptions();
      wasmModule.PdfMerger.Merge({
        inputFiles,
        outputFile: outputFileName,
        pdfMergeOptions: mergeOp
      });

      const modifiedFileArray = window.dotnetRuntime.Module.FS.readFile(outputFileName);
      const modifiedFile = new Blob([modifiedFileArray], { type: 'application/pdf' });
      const url = URL.createObjectURL(modifiedFile);
      const a = document.createElement('a');

      a.href = url;
      a.download = outputFileName;
      document.body.appendChild(a);
      a.click();
      document.body.removeChild(a);
      URL.revokeObjectURL(url);
    } catch (error) {
      console.error('Failed to merge PDFs:', error);
      setErrorMessage(error.message || 'Failed to merge PDFs.');
    } finally {
      setIsGenerating(false);
    }
  };

  return (
    <div style={{ textAlign: 'center', height: '300px' }}>
      <h1>Merge PDF Documents in React</h1>
      <button onClick={MergePdfs} disabled={!wasmModule || isGenerating}>
        {isGenerating ? 'Generating...' : 'Generate'}
      </button>
      {errorMessage && <p style={{ color: 'crimson' }}>{errorMessage}</p>}
    </div>
  );
}

export default App;
Output:
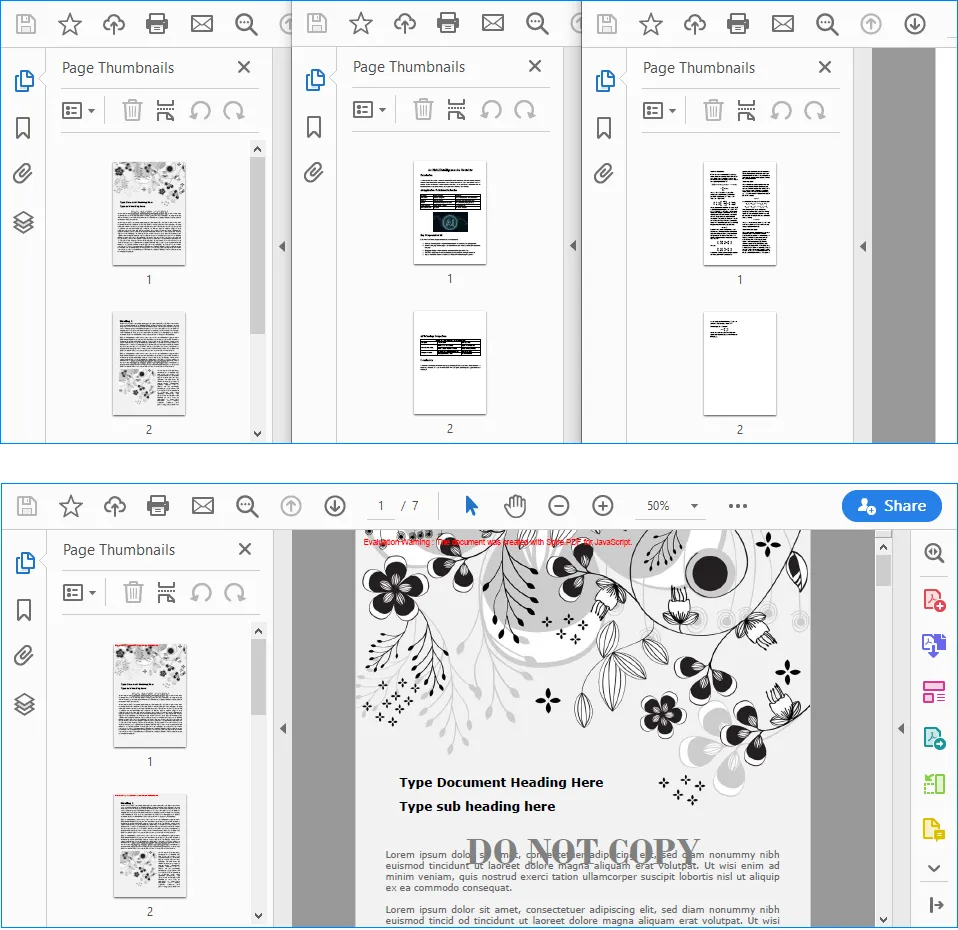
How the Code Works
The component first loads spire.pdf.js inside useEffect(). Because the module is initialized asynchronously, the Generate button remains disabled until the runtime is ready.
The loadPdfToVfs() function then performs three tasks for each source document:
- It retrieves the PDF from the
publicdirectory withfetch(). - It checks the first four bytes for the
%PDFsignature to help catch missing files or non-PDF responses. - It writes the file bytes to the WebAssembly virtual file system, where Spire.PDF can access them.
After all three files have been loaded, PdfMerger.Merge() combines them in the order specified by inputFiles. The output is read from the virtual file system, converted to a PDF Blob, and downloaded through a temporary object URL.
To change the merge order, simply rearrange the entries in the array. For example, the following order would place input_3.pdf first:
const inputFiles = await Promise.all([
  loadPdfToVfs('input_3.pdf'),
  loadPdfToVfs('input_1.pdf'),
  loadPdfToVfs('input_2.pdf'),
]);
Merge Selected Pages from Different PDF Documents in React
Merging complete documents is not always necessary. You may instead need to create a new PDF from a cover page in one file and a page range in another file. In this situation, load the source files as PdfDocument objects and use InsertPage() and InsertPageRange() to construct the output document.
The following example takes the first page from input_1.pdf, appends every page from input_2.pdf, and saves the selected content as MergedPdf.pdf:
import React, { useState, useEffect } from 'react';

function App() {
  const [wasmModule, setWasmModule] = useState(null);
  const [isGenerating, setIsGenerating] = useState(false);
  const [errorMessage, setErrorMessage] = useState('');

  useEffect(() => {
    (async () => {
      try {
        const publicUrl = process.env.PUBLIC_URL || '';
        const spireModule = await import(/* webpackIgnore: true */ `${publicUrl}/spire.pdf.js`);
        const rawModule = spireModule.default || spireModule;
        window.wasmModule = typeof rawModule === 'function'
          ? await rawModule({ locateFile: p => p.endsWith('.wasm') ? `${publicUrl}/${p}` : p })
          : rawModule;
        setWasmModule(window.wasmModule);
      } catch (error) {
        console.error('Failed to load spire.pdf.js:', error);
      }
    })();
  }, []);

  const loadPdfToVfs = async (fileName) => {
    const publicUrl = process.env.PUBLIC_URL || '';
    const response = await fetch(`${publicUrl}/${fileName}`);

    if (!response.ok) {
      throw new Error(`Failed to load ${fileName}: ${response.status} ${response.statusText}`);
    }

    const fileBytes = new Uint8Array(await response.arrayBuffer());
    const pdfHeader = String.fromCharCode(...fileBytes.slice(0, 4));

    if (pdfHeader !== '%PDF') {
      throw new Error(`${fileName} was loaded, but it is not a valid PDF file.`);
    }

    window.dotnetRuntime.Module.FS.writeFile(fileName, fileBytes, { flags: 'w+' });
    return fileName;
  };

  const MergePdfs = async () => {
    const wasmModule = window.wasmModule?.spirepdf;
    if (!wasmModule || isGenerating) {
      return;
    }

    setIsGenerating(true);
    setErrorMessage('');

    try {
      const [firstInputFile, secondInputFile] = await Promise.all([
        loadPdfToVfs('input_1.pdf'),
        loadPdfToVfs('input_2.pdf'),
      ]);

      const outputFileName = 'MergedPdf.pdf';
      const firstDocument = new wasmModule.PdfDocument();
      const secondDocument = new wasmModule.PdfDocument();
      const mergedDocument = new wasmModule.PdfDocument();

      firstDocument.LoadFromFile({ fileName: firstInputFile });
      secondDocument.LoadFromFile({ fileName: secondInputFile });

      if (firstDocument.Pages.Count < 1) {
        throw new Error('The first PDF does not contain any pages.');
      }

      if (secondDocument.Pages.Count < 1) {
        throw new Error('The second PDF does not contain any pages.');
      }

      mergedDocument.InsertPage({ ldDoc: firstDocument, pageIndex: 0 });
      mergedDocument.InsertPageRange(secondDocument, 0, secondDocument.Pages.Count - 1);
      mergedDocument.SaveToFile({ fileName: outputFileName });

      const modifiedFileArray = window.dotnetRuntime.Module.FS.readFile(outputFileName);
      const modifiedFile = new Blob([modifiedFileArray], { type: 'application/pdf' });
      const url = URL.createObjectURL(modifiedFile);
      const a = document.createElement('a');

      a.href = url;
      a.download = outputFileName;
      document.body.appendChild(a);
      a.click();
      document.body.removeChild(a);
      URL.revokeObjectURL(url);
    } catch (error) {
      console.error('Failed to merge PDFs:', error);
      setErrorMessage(error.message || 'Failed to merge PDFs.');
    } finally {
      setIsGenerating(false);
    }
  };

  return (
    <div style={{ textAlign: 'center', height: '300px' }}>
      <h1>Merge PDF Documents in React</h1>
      <button onClick={MergePdfs} disabled={!wasmModule || isGenerating}>
        {isGenerating ? 'Generating...' : 'Generate'}
      </button>
      {errorMessage && <p style={{ color: 'crimson' }}>{errorMessage}</p>}
    </div>
  );
}

export default App;
Output:
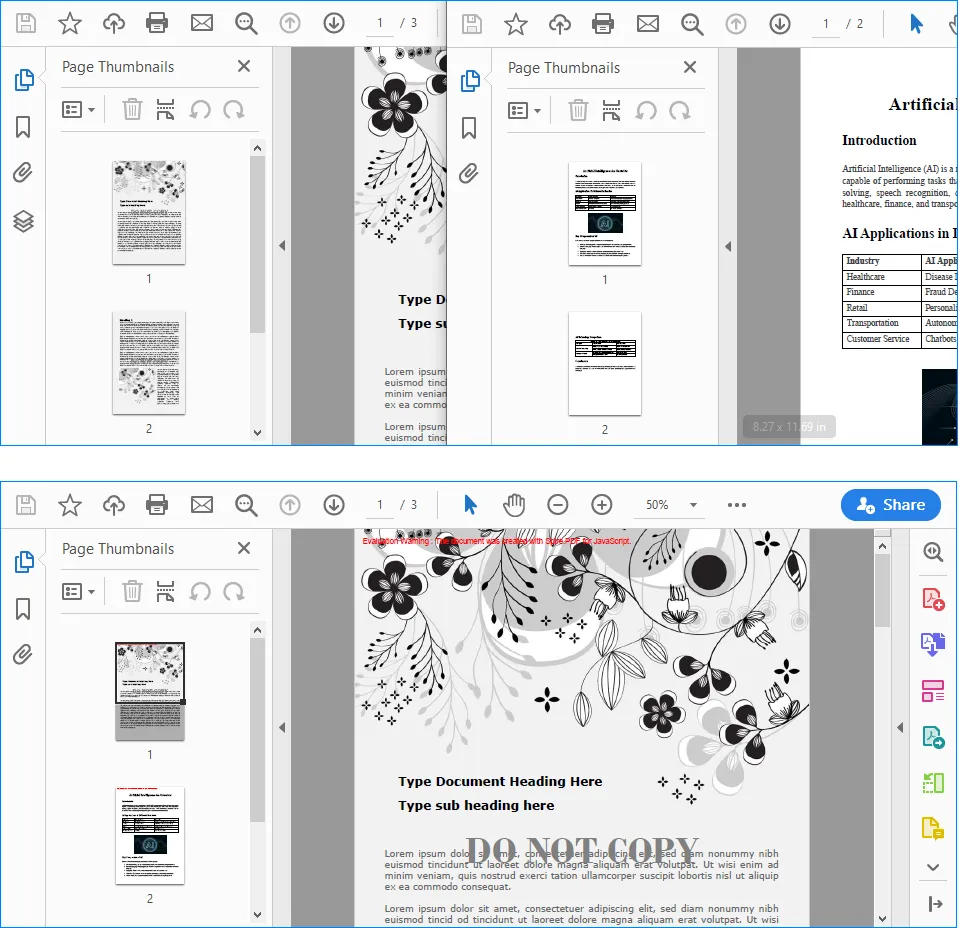
Understanding the Page Selection Logic
The three PdfDocument instances have different roles:
firstDocumentrepresentsinput_1.pdf.secondDocumentrepresentsinput_2.pdf.mergedDocumentis the new PDF that receives the selected pages.
PDF page indexes are zero-based in this example. Therefore, pageIndex: 0 refers to the first page:
mergedDocument.InsertPage({ ldDoc: firstDocument, pageIndex: 0 });
The following statement inserts a continuous range from secondDocument. Its start index is 0, while its end index is secondDocument.Pages.Count - 1, so the complete document is appended:
mergedDocument.InsertPageRange(
  secondDocument,
  0,
  secondDocument.Pages.Count - 1
);
You can change these indexes to merge only the pages required by your application. For instance, this statement inserts pages 2 through 5 from secondDocument because their zero-based indexes are 1 through 4:
mergedDocument.InsertPageRange(secondDocument, 1, 4);
Before using fixed page indexes, make sure the source document contains enough pages. The sample already checks for empty PDFs, but a production application should also validate user-supplied start and end indexes against Pages.Count.
Important Implementation Notes
Keep Runtime and Input Paths Correct
Files stored in the React public directory are requested by URL at runtime. The code uses process.env.PUBLIC_URL so it can construct paths correctly when the application is deployed under a non-root public path. A missing or incorrect file path may return an HTML error page instead of a PDF, which is why the sample verifies the %PDF header before writing the data to the virtual file system.
Wait for WebAssembly Initialization
Spire.PDF cannot process a document until its runtime has finished loading. The wasmModule state controls the button's disabled status, while isGenerating prevents the same operation from being started repeatedly before the current merge has finished.
Validate Page Ranges
When pages are chosen dynamically, check that the start and end indexes are non-negative, that the start index does not exceed the end index, and that both values fall within the source document's page count. This avoids invalid range errors and makes it easier to show a useful message in the React interface.
Release the Download URL
URL.createObjectURL() creates a temporary URL for the generated Blob. Calling URL.revokeObjectURL(url) after the download starts releases that URL and prevents it from remaining in browser memory longer than necessary.
Conclusion
Spire.PDF for JavaScript enables React applications to combine PDF content through a WebAssembly-based workflow. When all pages are required, PdfMerger.Merge() provides a concise way to merge several complete documents in a defined order. When the output must contain only specific content, PdfDocument, InsertPage(), and InsertPageRange() provide page-level control over the result.
With the runtime files configured in the public directory, these techniques can be integrated into document portals, reporting tools, contract workflows, and other React applications that need to assemble PDFs directly in the browser.
How to Create a Pie Chart in Excel: A Step-by-Step Guide
Table of Contents

Pie charts are a simple but effective way to visualize how different categories contribute to a whole. In Microsoft Excel, creating a pie chart only takes a few clicks, making it a popular choice for reports, presentations, and data analysis.
However, creating a chart manually is not always the best option. When working with complex data or repeated reporting tasks, AI tools and programming methods can provide a more efficient workflow.
In this article, we will explore three ways to create a pie chart in Excel:
- Creating a pie chart directly using Microsoft Excel
- Using an AI Agent to generate and refine charts through conversation
- Creating pie charts programmatically with Python
Each method has its own advantages depending on your workflow, technical skills, and automation needs.
Part 1. Create a Pie Chart Using Microsoft Excel
Microsoft Excel provides a built-in chart feature that allows you to create a pie chart in just a few clicks. This method is suitable when you need to quickly visualize a small dataset, such as sales distribution, budget allocation, or market share.
In this section, we will use a simple sales dataset to demonstrate how to create and customize a pie chart in Excel.
Step 1: Prepare Your Data
Before creating a pie chart, organize your data into two columns: one for categories and another for values.
For example:
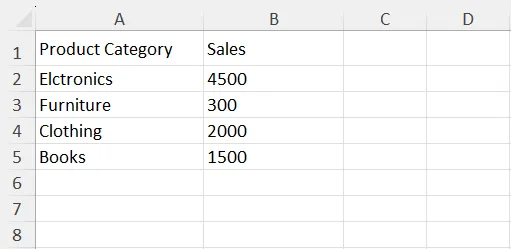
Excel uses the category column as the labels for each slice and the value column to calculate the size of each slice.
For better results, make sure your dataset contains clear category names and numeric values. Avoid leaving empty rows inside the selected range, as they may affect how Excel interprets the chart data.
Step 2: Select Your Data
Select the complete dataset, including the column headers.
In this example, select the range A1:B5. Including headers helps Excel automatically recognize the data structure and use the first row as chart labels.
Step 3: Insert a Pie Chart
After selecting the data, go to the Insert tab on the Excel ribbon.
Then:
- Click Insert Pie or Doughnut Chart in the Charts section.
- Choose your preferred pie chart style.
- Excel will automatically generate the chart based on your selected data.
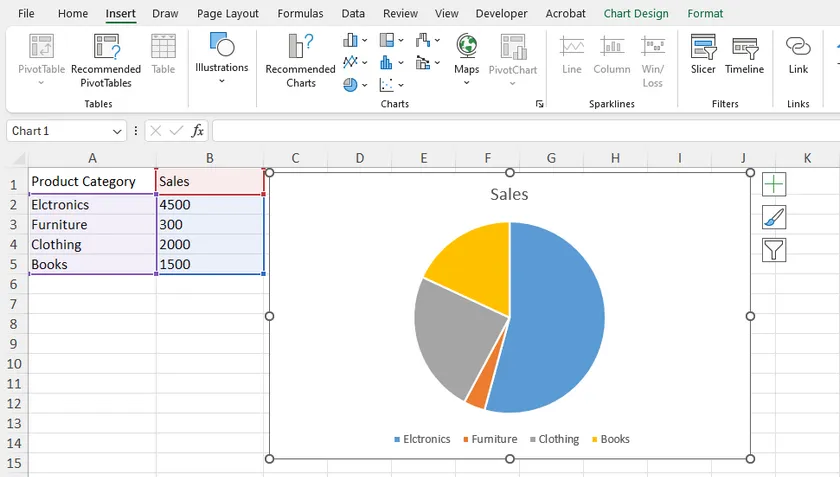
Excel provides several pie chart variations, including standard 2-D Pie, 3-D Pie, Doughnut Chart, and Pie of Pie Chart.
For most situations, the standard 2-D Pie Chart is recommended because it provides a clear comparison without unnecessary visual effects.
Step 4: Customize the Pie Chart
After inserting the chart, you can adjust its appearance and displayed information.
Click the chart, and Excel will show the Chart Design and Format tabs. From here, you can change the chart style, colors, title, and layout.
For example, you can add data labels to display percentages directly on each slice. This is especially useful for pie charts because the main purpose of this chart type is to show how each category contributes to the whole.
To add data labels:
- Select the chart.
- Click the Chart Elements (+) button.
- Enable Data Labels .
Step 5: Highlight Important Data (Optional)
Sometimes, you may want to emphasize a specific category in your pie chart.
For example, if Electronics represents the largest sales segment, you can separate this slice from the rest of the chart.
To highlight a slice, click the slice twice and drag it slightly away from the center. You can also adjust the separation distance through the Format Data Point panel.
This feature is useful when presenting key information in reports or presentations.
Step 6: Save or Export the Chart
Once your pie chart is complete, you can reuse it in other applications.
Excel allows you to copy the chart directly into PowerPoint or Word, save the worksheet as PDF, or export the chart as an image.
This makes Excel pie charts a practical choice for business reports, presentations, and data analysis.
Why Use Excel to Create Pie Charts?
Creating a pie chart directly in Excel is usually the fastest approach because all chart tools are already integrated into the application.
It is especially useful when:
- You are working with Excel data already.
- You need to quickly adjust the chart manually.
- You want full control over the chart appearance.
However, if you need to analyze large datasets or generate charts repeatedly, AI tools and programming methods can provide a more efficient workflow. We will cover these approaches in the following sections.
Part 2. Create a Pie Chart with an AI Agent
Creating a pie chart directly in Excel is straightforward, but it still requires users to manually select data, choose a chart type, and adjust the appearance.
An AI Agent provides a different approach. Instead of working through multiple Excel menus, you can describe what you want to create in natural language. The AI can analyze your spreadsheet, recommend a suitable chart, generate the result, and help you refine it through follow-up conversations.
For this method, we will use CloudXDocs AI Agent, which supports working with Office documents, including Excel files, through conversational interaction.
Step 1: Upload Your Excel File
Start by uploading the Excel workbook that contains your data.
After uploading the file, the AI Agent can understand the structure of your spreadsheet and use the existing data to create a chart.
Step 2: Describe Your Chart Requirements
Instead of manually selecting ranges and chart options, you can explain your goal using a simple prompt.
For example:
Create a pie chart showing sales distribution by product category.
Display percentages on each slice and use a clear title.
The AI Agent can interpret your request, identify the relevant data, and generate a pie chart based on your instructions.
This approach is especially useful when you know what information you want to present but are unsure which Excel settings or chart options to use.
Step 3: Review and Refine the Chart Through Conversation
One advantage of using an AI Agent is that chart creation does not have to be a one-time action.
After reviewing the generated result, you can continue the conversation and request changes.
For example, you can ask:
Change the chart style to make it suitable for a business presentation.
or:
Highlight the Electronics category and move it away from the center.
The AI can adjust the output based on your feedback, allowing you to refine the chart through multiple rounds of interaction.
Step 4: Export and Continue Working with the Result
Once the pie chart meets your requirements, you can continue editing the generated Excel file or use it in other documents.
Compared with creating a pie chart manually in Excel, an AI Agent can save time when you need additional analysis, formatting suggestions, or repeated adjustments.
Why Use an AI Agent to Create Pie Charts?
An AI Agent is not necessarily faster for every simple chart. If you only need a basic pie chart from a small table, Excel's built-in chart tools are usually enough.
However, an AI Agent becomes more useful when your workflow involves understanding data, choosing the right visualization, or making multiple changes through conversation.
It is especially helpful when:
- You need assistance analyzing spreadsheet data before creating a chart.
- You want to generate charts through natural language instructions.
- You need to refine the result through multiple iterations.
Part 3. Create a Pie Chart Programmatically with Python
When working with a small dataset, creating a pie chart directly in Excel is usually the simplest option. However, manual creation becomes inefficient when you need to generate charts repeatedly, process multiple Excel files, or build automated reporting workflows.
In these scenarios, creating pie charts programmatically with Python provides more flexibility. Developers can generate charts, control their appearance, and save the results automatically without manually opening Excel.
In this example, we will use Spire.XLS for Python to create a pie chart in an Excel workbook.
Step 1: Install Spire.XLS for Python
Before creating a pie chart, install the required library:
pip install spire.xls
Spire.XLS for Python provides APIs for creating and manipulating Excel workbooks, including worksheets, charts, formatting, and other spreadsheet elements.
Step 2: Create an Excel Workbook and Add Data
First, create a workbook and add the source data that will be displayed in the pie chart.
from spire.xls import *
from spire.xls.common import *

# Create a workbook
workbook = Workbook()

# Get the first worksheet
sheet = workbook.Worksheets[0]

# Add data
sheet.Range["A1"].Value = "Year"
sheet.Range["A2"].Value = "2002"
sheet.Range["A3"].Value = "2003"
sheet.Range["A4"].Value = "2004"
sheet.Range["A5"].Value = "2005"

sheet.Range["B1"].Value = "Sales"
sheet.Range["B2"].NumberValue = 4000
sheet.Range["B3"].NumberValue = 6000
sheet.Range["B4"].NumberValue = 7000
sheet.Range["B5"].NumberValue = 8500
The first column contains category labels, while the second column provides the numerical values used to calculate the pie slices.
Step 3: Add a Pie Chart
After preparing the data, create a pie chart and specify the data range.
# Add a pie chart
chart = sheet.Charts.Add(ExcelChartType.Pie)

# Set chart data
chart.DataRange = sheet.Range["B2:B5"]
chart.SeriesDataFromRange = False

# Set category labels and values
cs = chart.Series[0]

cs.CategoryLabels = sheet.Range["A2:A5"]
cs.Values = sheet.Range["B2:B5"]
The ExcelChartType.Pie option creates a standard pie chart. You can also use other chart types provided by Spire.XLS, such as ExcelChartType.PieExploded for an exploded pie chart, or ExcelChartType.PieOfPie for a pie-of-pie chart.
The chart creation workflow remains the same; only the chart type and specific formatting options need to be changed.
Step 4: Customize the Chart Appearance
After creating the chart, you can customize its position, title, and data labels.
# Set chart position
chart.LeftColumn = 4
chart.TopRow = 2
chart.RightColumn = 12
chart.BottomRow = 20

# Set chart title
chart.ChartTitle = "Sales by Year"

# Display data labels
cs.DataPoints.DefaultDataPoint.DataLabels.HasValue = True
These settings allow you to create charts that match the style requirements of automated reports.
Step 5: Save the Excel File
Finally, save the workbook containing the generated pie chart.
workbook.SaveToFile("output/PieChart.xlsx", ExcelVersion.Version2016)
workbook.Dispose()
The generated Excel file can be opened directly in Microsoft Excel, where users can continue editing the chart if needed.
Why Create Pie Charts with Python?
Compared with manually creating charts in Excel, a programming approach provides better automation capabilities.
It is useful when you need to:
- Generate charts from large amounts of data automatically.
- Create consistent reports with predefined formatting.
- Integrate Excel chart generation into applications or data processing workflows.
For occasional chart creation, Excel's built-in tools are usually enough. However, Python automation is a better choice when chart generation becomes part of a repeated workflow.
Tips for Creating Better Pie Charts
Creating a pie chart in Excel is easy, but choosing the right design can make the chart much clearer and more effective.
Keep the Number of Categories Limited
Pie charts work best when showing a small number of categories. When too many slices are displayed, the differences between categories become difficult to identify.
If your dataset contains many categories, consider combining smaller categories into an "Others" group or using a bar chart instead.
Use Percentages to Highlight Proportions
The main purpose of a pie chart is to show how each category contributes to the total.
Displaying percentages can often make the chart easier to understand than showing only raw values. For example, showing that a product category represents 35% of total sales provides more context than displaying only the sales amount.
Avoid Unnecessary 3D Effects
Excel provides several visual styles, including 3D pie charts. While these effects may look attractive, they can make it harder to compare slice sizes accurately.
For professional reports and presentations, a simple 2-D pie chart is usually the better choice.
Choose the Right Situation for a Pie Chart
Pie charts are most useful when you want to show a part-to-whole relationship.
For example, they work well for:
- Sales distribution by category.
- Budget allocation.
- Market share comparison.
However, pie charts are not ideal for showing changes over time or comparing many similar values. In those cases, line charts or bar charts may provide a clearer view.
Comparison Table: Which Method Should You Choose?
The best way to create a pie chart depends on your specific requirements.
| Method | Difficulty | Best For | Main Advantage |
|---|---|---|---|
| Microsoft Excel | Easy | Occasional chart creation | Quick and full manual control |
| AI Agent | Easy | Users who want assistance and flexible editing | Create and refine charts through conversation |
| Python Programming | Advanced | Automated reporting and large-scale workflows | Generate charts programmatically |
For most everyday Excel users, the built-in chart feature is the fastest solution. If you need help understanding data or adjusting charts through natural language, an AI Agent can simplify the process. For developers who need repeatable chart generation, programming provides the greatest flexibility.
Final Thoughts
Creating a pie chart in Excel can be done in several ways depending on your workflow.
For simple tasks, Microsoft Excel remains the most convenient option because it provides all the necessary chart tools without additional setup. Users can quickly create, customize, and export charts directly from their spreadsheets.
If you want a more interactive approach, an AI Agent can help analyze your data, create charts based on your instructions, and refine the results through multiple conversations.
For automated workflows, Python provides a powerful solution for generating Excel charts at scale. It allows developers to create consistent reports and integrate chart generation into applications or data processing systems.
Choosing the right method depends on whether you prioritize simplicity, assistance, or automation.
FAQs
How do I create a pie chart in Excel?
To create a pie chart in Excel, select your data range, go to the Insert tab, choose Pie Chart , and select the desired chart style. You can then customize the title, colors, and data labels.
What type of data is suitable for a pie chart?
Pie charts are best suited for showing how individual categories contribute to a total. Common examples include sales distribution, budget allocation, and market share.
Can AI create a pie chart from an Excel file?
Yes. AI Agents can analyze uploaded Excel files, understand your requirements, and create charts based on natural language instructions. Users can also continue the conversation to request changes and refine the result.
Can I create a pie chart in Excel using Python?
Yes. Python libraries such as Spire.XLS for Python allow developers to create Excel files, add pie charts, customize chart properties, and save the results programmatically.
Should I use a pie chart or a bar chart?
Pie charts are better for showing proportions of a whole, especially when there are only a few categories. Bar charts are usually better when comparing many categories or values with small differences.