PNG to Word Converter: Top 5 Ways to Convert PNG to Word
Turning a PNG image into an editable Word document sounds simple, but many people quickly discover that it’s not as straightforward as expected. Whether you’re dealing with scanned contracts, screenshots of reports, or image-based invoices, directly copying content from a PNG file rarely works.
This article compares five popular PNG to Word converters and explains how to use them. You’ll see how each of them works in real scenarios, what their limitations are, and which option is best for different needs.
- Why Converting PNG to Word is Hard
- Using Online PNG to Word Converters
- Using Microsoft Word’s Built-in OCR
- Automate Conversion with Spire.OCR and Spire.Doc
Why Converting PNG to Word Is Not That Simple

A PNG file stores information as pixels rather than structured text. This means Word cannot directly interpret its content unless the image is first processed using OCR (Optical Character Recognition) technology. OCR analyzes visual patterns, identifies characters, and converts them into machine-readable text.
The real challenge in converting PNG to Word is how accurate and usable that Word file is. Layout complexity, tables, mixed fonts, line breaks, and multi-language text can all affect the final result. Different tools handle these elements very differently, which is why the output quality varies significantly even when all of them technically support PNG to Word conversion.
Method 1: Using Online PNG to Word Converters
Online PNG to Word converter tools are usually the fastest way to get editable content from images. They run entirely in the browser and rely on cloud-based OCR engines to recognize text and export Word files. However, different tools vary significantly in accuracy, workflow, and data handling.
Below are three commonly used online tools, each suited to slightly different scenarios.
1. OnlineOCR.net — A Simple Free PNG to Word Converter
OnlineOCR.net is a classic free PNG-to-Word converter option that focuses on simplicity. It has a minimal interface and supports basic OCR for multiple languages, making it suitable for quick text extraction from clear images.
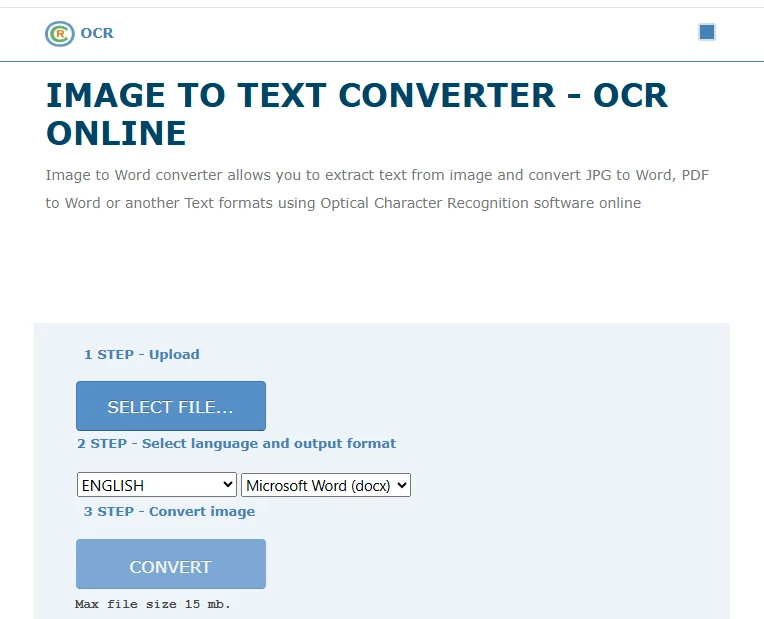
How to convert PNG to Word for free with OnlineOCR.net
- Open the OnlineOCR.net website.
- Upload your PNG file from your local device.
- Select the language of the content on PNG and choose Microsoft Word (DOCX) as the output format.
- Click CONVERT and download the Word file.
Pros
- Free for small files
- No account required
- Straightforward workflow
Cons
- File size and page limits
- Basic formatting only
- Not suitable for batch processing
Best For:
Quick, one-off PNG-to-Word conversions where formatting accuracy is not critical.
2. Smallpdf — A Modern Way to Convert from PNG to Word
Smallpdf offers a more polished user experience and integrates cloud storage platforms such as Google Drive and Dropbox. Unlike simpler tools, it uses a multi-step workflow: image to PDF, then OCR-based export to Word.

How to convert PNG to Word with Smallpdf
- Open the JPG to PDF tool on Smallpdf.
- Drag and drop your PNG file into the upload area. You may also upload from Google Drive, Dropbox, or OneDrive.
- Click Convert to turn the PNG into a PDF.
- Once processing finishes, click Export As and choose Word.
- Enable OCR when prompted to extract editable text.
- Download the generated DOCX file or save it to a cloud service.
Pros
- Clean, beginner-friendly interface
- Cloud storage integration
- Better OCR accuracy than basic tools
Cons
- OCR is limited for free users
- Requires internet upload
- No automation or batch APIs
- Requires multiple steps
Best For:
Users who prioritize a polished online experience and don’t mind a multi-step workflow when converting PNG to Word occasionally, especially when cloud storage integration is needed.
3. Adobe Acrobat Online — A Trusted Brand for Image-to-Word Conversion
Adobe Acrobat Online leverages Adobe’s OCR technology and is often perceived as more reliable for structured documents. It is commonly used when users have already applied Adobe for PDF workflows.
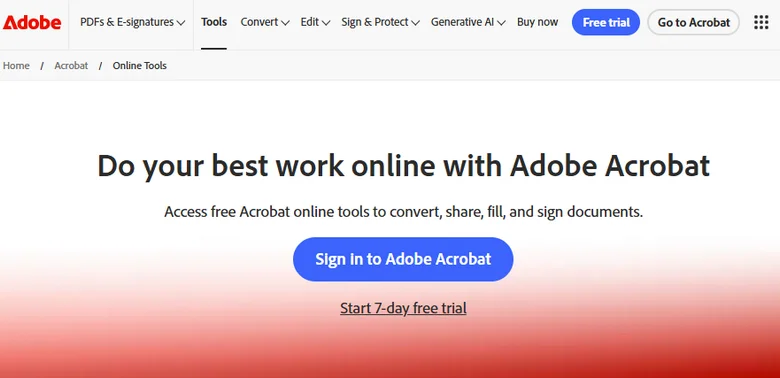
How to Convert PNG File to Word with Adobe Acrobat Online
- Open Adobe Acrobat Online and choose PNG to PDF.
- Upload your PNG image and convert it to a PDF file.
- Download the generated PDF to your device.
- Go back to the Convert section and select PDF to Word.
- Upload the PDF file you just created.
- Convert the file and download the resulting Word document.
Pros
- Strong OCR engine
- Good for business-style documents
Cons
- Requires signing in to download the Word file
- Limited free usage
- Files are processed in the cloud
Best For:
Professional users handling standard documents who value brand reliability.
Method 2: Using Microsoft Word’s Built-in OCR
Many users don’t realize that Microsoft Word includes a basic OCR engine. While Word doesn’t directly open PNG files as editable documents, there is a way that allows you to convert from PNG to Word without extra tools.
Step-by-Step: Convert PNG to Word Using MS Word
- Convert your PNG image to PDF (using Print to PDF or any image-to-PDF tool).
- Open Microsoft Word.
- Use File → Open and select the PDF.
- Word automatically runs OCR and converts the content into an editable document.
- Save the file as a .docx document.
Best For
- Users with Microsoft 365
- Occasional desktop conversions
- No-cost solutions
Limitations
- Manual and time-consuming
- Inconsistent layout for tables and complex formatting
- Not suitable for automation or large volumes
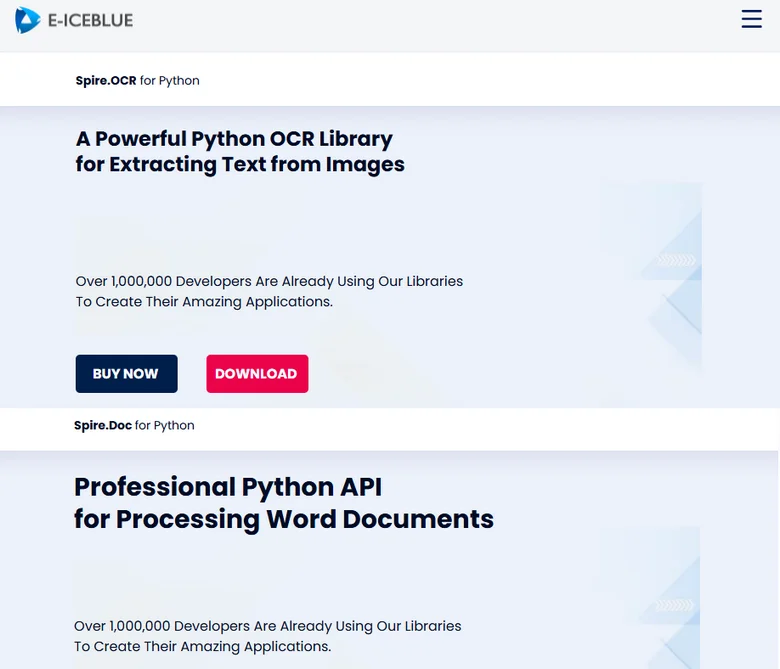
Method 3: Professional Automation with Spire.OCR and Spire.Doc
If you need to process large numbers of images reliably and repeatedly, a professional solution becomes essential. This is when Spire.OCR and Spire.Doc differentiate themselves from the other tools.
Spire.OCR is an OCR API for converting text from PNG images, and Spire.Doc is a Word document API for generating and formatting DOCX files programmatically. Used together, they enable a fully automated PNG-to-Word workflow that scales well for batch processing and system integration.
How the Conversion Workflow Works
- Use Spire.OCR to extract text from PNG images.
- Generate a Word document using Spire.Doc based on text extracted.
- Save the result as a Word file.
Python Code Example: Convert PNG to Word
import os
from spire.ocr import *

# Create an instance of the OCR scanner
scanner = OcrScanner()
configureOptions = ConfigureOptions()

# Set the path to the OCR runtime models
configureOptions.ModelPath = r'E:\DownloadsNew\win-x64'
# Set the target recognition language
configureOptions.Language = 'English'
scanner.ConfigureDependencies(configureOptions)

# Specify the path of the source image
image_path = r'E:/DownloadsNew/pic.png'
# Perform the OCR scan on the image file
scanner.Scan(image_path)
# Get the recognized text content
extracted_text = scanner.Text.ToString()

print("OCR Step Completed. Text Length:", len(extracted_text))

# Import and Use Spire.Doc
if extracted_text.strip():
    from spire.doc import Document, FileFormat

    # Create a new Word Document instance
    doc = Document()
    # Add a section to the document
    section = doc.AddSection()
    # Add a paragraph and append the extracted text
    para = section.AddParagraph()
    para.AppendText(extracted_text)

    # Define the output path for the Word file
    output_file = r'E:/DownloadsNew/Output.docx'
    # Save the document as a standard .docx file
    doc.SaveToFile(output_file, FileFormat.Docx2013)
    # Close the document to release resources
    doc.Close()
Pros
- Fully automated batch conversion for large volumes of PNG files
- Local processing ensures data privacy and security
- Easily integrates into backend systems or enterprise workflows
Cons
- Requires programming knowledge to use (SDK/API-based)
- Initial setup may take longer than manual tools
- Advanced features require a paid license for full functionality
Best For:
Developers and enterprises that need automated, batch PNG-to-Word conversion as part of systems or document processing workflows.
Conclusion
Online PNG to Word converters are ideal for quick tasks where speed and convenience matter most, while Microsoft Word works well for users who prefer a familiar desktop environment and occasional manual conversions. For developers and businesses dealing with massive images, Spire.OCR and Spire.Doc offer an automated approach for batch processing and system integration. Each method has its own strengths and limitations, and the best choice ultimately depends on your workflow, scale, and long-term needs.
Also Read
Reduce Excel File Size: 6 Proven Ways to Shrink Spreadsheets

We’ve all run into situations like this: trying to send an email to clients, only to have it rejected because the Excel attachment is too large. Or opening a spreadsheet and watching Excel freeze for a full minute before you can even type into a cell. When problems like these start disrupting your workflow, learning how to reduce Excel file size becomes a priority to maintain productivity and ensure smooth data sharing.
In this guide, we’ll walk through several practical techniques to shrink Excel file size, with clear explanations and step-by-step instructions.
- Reduce the Size of an Excel File Manually
- Reduce Excel File Size by Handling Images
- Reduce Excel File Size using Free Spire.XLS for Python
- Reduce File Size in Excel for Large Data Sets
Quick Fixes: How to Reduce the Size of an Excel File Manually
Before diving into complex methods, you can often make an Excel file size smaller by addressing the hidden overhead that accumulates over time.
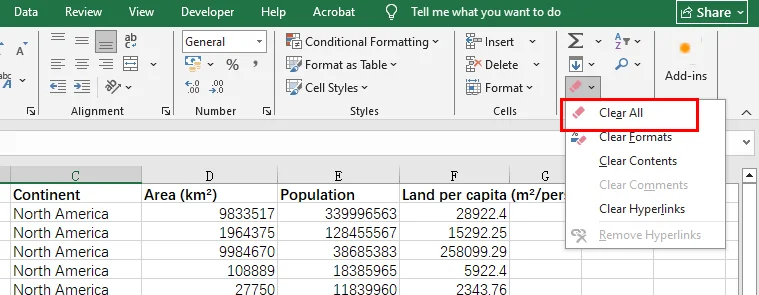
Clear Excessive Formatting
One of the most common reasons for a bloated file is ghost formatting. You might have formatted an entire column to the bottom of the sheet, which may contain 1,000 rows, even though you only have data in the first 100 rows.
The Fix: Select the empty rows or columns beyond your actual data, then go to the Home tab and click Clear → Clear All to remove all formatting, styles, and other residual data.
If you want to completely remove unused rows or columns, select the entire rows or columns by clicking their headers, right-click, and choose Delete.
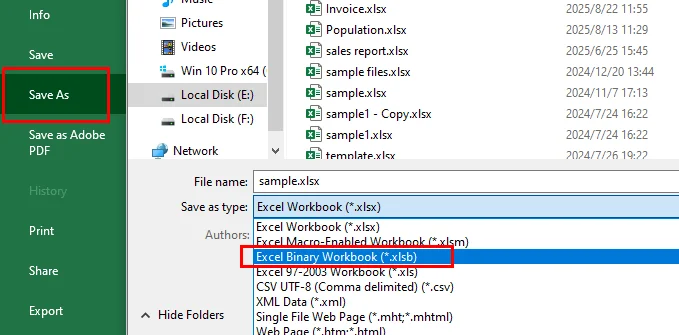
Save as Binary Format (.xlsb)
If you want to decrease Excel file size instantly without losing any data, try changing the file extension. Saving your standard .xlsx file as a binary workbook (.xlsb) can often reduce the file size of an Excel file by 30% to 50%. Binary files are faster for Excel to read and write, making them perfect for massive datasets.
The Fix: Open the Excel file, click the File tab, choose Save As, and select the .xlsb format. Alternatively, you can rename the file directly and change the extension to .xlsb, but this approach may cause file corruption and is not recommended.
Visual Optimization: How to Reduce Excel File Size by Handling Images
Images are often the biggest reason behind a massive file. If your spreadsheet contains logos, screenshots, or product photos, you must optimize them to compress the Excel file size effectively.
The Fix: Click on any image in your workbook, go to the Picture Format tab, and select Compress Pictures.

Pro Tip: Uncheck "Apply only to this picture" to compress all images at once and select "Email (96 ppi)" for the maximum reduction in weight. This is the fastest way to reduce file size in Excel when visual fidelity isn't the top priority.
Professional Approach: Reduce Excel File Size using Free Spire.XLS for Python
For developers or businesses dealing with hundreds of files, manual clicking isn't efficient enough. A more robust way to minimize Excel file size is through automation. Free Spire.XLS for Python is a powerful library that allows you to programmatically optimize spreadsheets without even opening Microsoft Excel.
Why use a programmatic approach?
While manual fixes work for one-off tasks, Free Spire.XLS allows you to implement deep optimization logic in bulk:
-
Compressing Image Quality: You can iterate through every worksheet, identify media elements, and utilize the ExcelPicture.Compress() method to programmatically decrease image quality. This significantly reduces the storage footprint while maintaining acceptable visual clarity for reports.
-
Cleaning Redundant Cell Styles: By applying the Clear(ExcelClearOptions.ClearFormat) method to specific ranges, Free Spire.XLS allows you to strip away these redundant styles and metadata, effectively thinning the file’s internal structure without affecting the underlying data.
-
Optimization of Data Storage: Blank rows or columns that appear empty but contain invisible formatting can trick Excel into expanding the used range. You can use the Worksheet.DeleteRow() and Worksheet.DeleteColumn() methods to remove these empty rows and columns. This ensures your Excel file size reduction efforts are thorough, leaving you with a clean, high-performance dataset.
The following code snippet demonstrates how to integrate these three methods to shrink Excel file size using Free Spire.XLS for Python:
from spire.xls import *
from spire.xls.common import *

# 1. Initialize and load the workbook
workbook = Workbook()
input_path = "/input/sample excel.xlsx"
output_path = "/output/Compressed_Excel_Full.xlsx"
workbook.LoadFromFile(input_path)

# 2. Iterate through worksheets to perform optimization operations
for i in range(workbook.Worksheets.Count):
    sheet = workbook.Worksheets[i]

    # Compress Image Quality
    for picture in sheet.Pictures:
        picture.Compress(50)  # Compress to 50% quality

    # Clear Specific Range Formatting
    target_range = sheet.Range["A1:D1"]
    target_range.Clear(ExcelClearOptions.ClearFormat)

    # Iterate through rows in reverse (from last to first) to avoid index shifting
    for r in range(sheet.LastRow, 0, -1):
        if sheet.Rows[r-1].IsBlank:
            sheet.DeleteRow(r)

    # Iterate through columns in reverse
    for c in range(sheet.LastColumn, 0, -1):
        if sheet.Columns[c-1].IsBlank:
            sheet.DeleteColumn(c)

# Save the file and release resources
workbook.SaveToFile(output_path, ExcelVersion.Version2016)
workbook.Dispose()

print(f"Successfully optimized! File saved to: {output_path}")
Excel File size before and after reducing with the code:

Advanced Tactics: How to Reduce File Size in Excel for Large Data Sets
When your spreadsheet is heavy due to data rather than media, you need to change how that data is stored.
Use the Data Model (Power Pivot)
If you are dealing with millions of rows, stop keeping them in standard worksheets. Importing data into the Excel Data Model (Power Pivot) uses a highly efficient compression engine (Vertipaq) that can handle massive amounts of information while keeping the file footprint remarkably small.
Remove Hidden Sheets and Objects
Sometimes, old versions of a file contain hidden sheets or objects that you’ve forgotten about. Go to the Inspect Document tool (File > Info > Check for Issues) to find and remove hidden content that might be inflating your file size.
Conclusion
Reducing Excel file size is essential for improving performance and ensuring seamless data sharing. For quick, one-off fixes, manual methods like saving as Binary Format (.xlsb) or using built-in image compression are highly effective to shrink Excel file size.
However, for developers managing high-volume data, automation is the ultimate solution. As demonstrated, Free Spire.XLS for Python provides a powerful way to minimize Excel file size by programmatically purging redundant formatting, compressing media, and cleaning up "ghost cells." By combining these manual and programmatic strategies, you can ensure your workbooks remain fast, lightweight, and professional.
Also Read
How to Embed a PDF in Excel With or Without Microsoft Office
Table of Contents

Have you ever sent an Excel report, only to realize the recipient couldn't see the supporting evidence because you forgot to attach the original PDF contracts or invoices? It is a common challenge.
Embedding a PDF in an Excel file is the ultimate solution to keep your data and its "proof" together. Whether you are looking for a quick manual fix or needing to automate thousands of reports on a server, this guide covers how to get it done—with or without Microsoft Office installed.
- What Does Embedding Mean
- Embed a PDF in Excel File with Microsoft Office
- Embed a PDF Document in Excel with Code
- Display PDF Content as Images
- Supplement: Linking vs. Attaching
- Compare Microsoft Office and Free Spire.XLS
- FAQs
What Does "Embedding" Really Mean?
Before we dive into the how to embed a PDF in Excel spreadsheets, it is important to understand that embedding can look different depending on your goals. There are three common ways to embed a PDF file in an Excel worksheet:
-
OLE Object Embedding: The PDF is bundled inside the Excel file. If you send the Excel file, the PDF goes with it.
-
Visual Embedding: The PDF pages are converted into images and placed on the sheet. The content shows immediately, but there is no PDF file to open or check.
-
Hyperlinking: You create a clickable link to a PDF stored on your PC or the cloud. As a result, when you share the Excel file, the recipient will often be unable to access or view the PDF due to missing files, broken paths, or permission issues. This isn't a true embed, but it keeps the Excel file size small.
Method 1: Embed a PDF in Excel File with Microsoft Office
As the world’s most popular spreadsheet software, Microsoft Office provides a built-in "Object" tool that allows you to easily embed a PDF in an Excel file. This is the most straightforward and common method, especially if your device already has the Microsoft Office suite installed and you only have a few files to process manually.
How to embed a PDF document in Excel via "Insert Object"
- Open your Excel file and go to the Insert tab.
- On the far right, click on Object.
- In the dialog box, go to the Create from File tab and browse for your PDF.
- Check "Display as icon" if you want a neat PDF logo in your cell.
- Leave it unchecked if you want to see a small preview of the first page.

- Click OK.
The Pros: It’s free and very easy.
The Cons: The Cons: It is not suitable for batch processing, and it relies heavily on the local system’s OLE configuration.
Method 2: Embed a PDF Document in Excel with Code
What if you are building a web application or a server-side service that needs to generate reports with PDF attachments? It is not recommended to install Microsoft Office on a server just for this. This is where Free Spire.XLS comes in. It embeds a PDF in an Excel worksheet by inserting OLE objects.
How to embed a PDF in an Excel file programmatically
Using a library like Free Spire.XLS allows you to automate the process without opening the Excel interface. You can precisely place a PDF into a specific cell range using code.
For developers, the key is the OleObjectType enumeration. Since you are dealing with PDFs, you would use OleObjectType.AdobeAcrobatDocument.
Here's how it works in Python:
- Install Free Spire.XLS and import the essential modules.
- Create Workbook object and load an Excel file.
- Access the target worksheet.
- Load an image to use as the placeholder icon.
- Embed a PDF in the Excel file using the Worksheet.OleObjects.Add() method.
- Specify the display location of the OLE object, and set the OLE object type to AdobeAcrobatDocument through OleObjectType property.
- Save the modified Excel workbook.
Below is a sample code:
from spire.xls import *
from spire.xls.common import *

# Create a Workbook object and load an Excel file
workbook = Workbook()
workbook.LoadFromFile("/input/sales report.xlsx")
# Get the first worksheet
sheet = workbook.Worksheets[0]

# Add a descriptive label to cell A16
sheet.Range["A16"].Text = "Here is an OLE Object."

# Define the paths for the PDF and the placeholder icon
pdf_path = "/input/sample.pdf"
icon_path = "/pdf.png"

# Read the icon image as a byte stream
with open(icon_path, 'rb') as f:
    img_data = f.read()
    icon_stream = Stream(img_data)

    # Add the PDF as an embedded OLE object using the image stream
    oleObject = sheet.OleObjects.Add(pdf_path, icon_stream, OleLinkType.Embed)

# Specify the display location of the OLE object
oleObject.Location = sheet.Range["A17"]

# Set the OLE object type to AdobeAcrobatDocument (Standard for PDFs)
oleObject.ObjectType = OleObjectType.AdobeAcrobatDocument

# Save the modified workbook to the output directory
workbook.SaveToFile("/output/OleObject.xlsx", ExcelVersion.Version2016)

# Dispose of the workbook to release resources
workbook.Dispose()
Output file preview:

Why go the "Without Office" route with Free Spire.XLS?
- Massive Automation: You can loop through a folder of 500 PDFs and embed each one into a corresponding row in seconds.
- Precision: You can set the exact height, width, and cell coordinates for the PDF icon.
- No Dependencies: Your server doesn't need Excel installed, which is safer and more efficient for enterprise environments.
Method 3: Display PDF Content as Images
Sometimes, you don't want your users to have to double-click an icon; you want them to see the content of the PDF as they scroll through the spreadsheet. Then you can insert screenshot images of a PDF by pasting it into an Excel file.
How to embed a PDF file in an Excel worksheet as an image
-
With Office: You can use the "Screen Clipping" tool or take a screenshot of the PDF and paste it into Excel.
-
Without Office: You can use a two-step automated process. First, use a PDF library to convert the PDF pages into images (PNG or JPEG), then use Free Spire.XLS to insert those images into the worksheet.
This is the best solution for embedding a PDF file when the visual data is more important than the actual file format.
Supplement: Linking vs. Attaching
If you are worried about your Excel file becoming too large and slowing down the opening and processing speed, you should consider linking instead of embedding PDFs.
-
Embedding (Attachment): The PDF is part of the
.xlsxfile. High portability, high file size. -
Linking (Hyperlink): The Excel file only stores the "path" to the PDF. Low file size, but if you move the PDF or send the Excel file to someone else, the link will break.
A Side-by-Side Comparison: Microsoft Office vs. Free Spire.XLS
To help you quickly identify the most suitable solution, this section compares Microsoft Office and Free Spire.XLS across four key dimensions that matter most when embedding PDFs into Excel files:
| Requirement | Microsoft Office | Free Spire.XLS |
|---|---|---|
| Installation | Requires Microsoft Office | Requires Free Spire.XLS DLL |
| Processing Speed | Manual and time-consuming | Automated and fast |
| Flexibility | Drag-and-drop, limited control | Logic-driven and highly extensible |
| Best Use Case | Individual desktop use | Server-side or production environments |
FAQs about Embedding a PDF in an Excel File
1. How do I embed a PDF in Excel?
You can use the "Insert Object" menu in Office or the Worksheet.OleObjects.Add() method in Free Spire.XLS for automation.
2. How do I embed a file in Excel as an attachment?
Follow the "Insert Object" steps and always check "Display as Icon." This treats the file like a clickable attachment.
3. Can you embed a PDF in Google Sheets?
No. Google Sheets does not support OLE embedding. Your only option there is to upload the PDF to Google Drive and use a hyperlink.
Conclusion
Deciding how to embed a PDF in Excel depends largely on your working environment. For business users handling a one-off report, the built-in "Insert" and "Object" feature in Microsoft Office is usually sufficient. However, if you are an IT professional or developer who needs to scale or automate the process, an Office-independent solution such as Free Spire.XLS is a better fit. Choosing the right approach ensures your Excel files remain organized, professional, and—most importantly—complete.
Also Read
Embed Video in PDF: 4 Practical Ways to Add Videos to a PDF
Table of Contents

Can you embed a video in a PDF? The answer is yes, you can. Even though PDF documents are not designed for multimedia, there are several ways to add videos to a PDF. In this guide, we'll walk you through 4 practical approaches to embed video in PDF documents, explain how they work and the tools involved. Let's find the best method for you today!
- Understanding How Video Works in a PDF Document
- Approach 1 – Embed Video as Rich Media
- Approach 2 – Attach Video Files to a PDF
- Approach 3 – Add Video via Hyperlinks
- Approach 4 – Online Editors
- Comparison Table of 4 Methods
- FAQs
Understanding How Video Works in a PDF Document
Before looking at specific approaches, it helps to understand a key limitation: PDF is not a video-oriented format. When you embed a video in a PDF file, it's either storing the video inside the file, adding it as an attachment, or linking to a video stored locally or hosted on platforms like YouTube.
These differences matter because they directly affect whether a video can play offline, how large the PDF file becomes, and how consistently the document works across different PDF readers. With these considerations in mind, let’s take a closer look at the main approaches to embedding video in a PDF.
Approach 1 – Embed Video as Rich Media (True Embedded Video)
This is the closest approach to video embedding in a PDF. The Rich Media feature uses special PDF annotations that allow a video to be stored inside the document and played directly on the page.
From a technical perspective, it relies on PDF Rich Media Annotations, where the video file is embedded as part of the PDF structure. When it works as expected, the video will appear inline and can even be played offline.
However, this approach comes with an important caveat. Rich media support depends heavily on the PDF reader being used. In practice, you may encounter a situation where a video embedded with Adobe Acrobat plays perfectly in Adobe Acrobat or Adobe Reader but fails to play or does not appear at all when the same PDF is opened in other PDF viewers. For this reason, rich media is best suited for scenarios where the viewing environment is known in advance and Adobe-compatible readers are guaranteed.
Typical steps (Adobe Acrobat Pro):
- Open the PDF file in Adobe Acrobat Pro.
- Go to the Tools panel and locate Rich Media.
- Click Add Video, then drag to define the area on the page where the video should appear.
- Choose a local video file or enter a video URL, and click OK to confirm.

Tools that support this approach:
- Adobe Acrobat Pro
Pros and cons:
- Video is stored inside the PDF and can play offline.
- Limited compatibility and reliance on specific PDF readers.
Approach 2 – Attach Video Files to a PDF
Another way to embed a video in a PDF document is by adding it as an attachment. In this approach, the video file is stored inside the PDF package but is not displayed directly on the page.
The video appears as an attached file that users can open manually. While this feels less interactive, it offers much broader compatibility across different PDF readers and avoids many of the limitations associated with rich media playback.
Using Adobe Acrobat
Adobe Acrobat allows you to attach video files to a PDF as embedded files. The attached video can be accessed through the attachments panel or a file icon placed on the page.
Typical steps:
- Open the PDF file in Adobe Acrobat. Go to the Tools panel or the right-hand sidebar and select Comment.
- In the top toolbar, click Attach File (Add a new attachment).
- Click on the page to choose where the attachment icon should appear, then select the video file.
- Customize the attachment settings if needed, and click OK to finish adding the video file.

This method is commonly used when all related materials must be delivered together in a single, self-contained document.
Using Free Spire.PDF
With Free Spire.PDF, you can embed videos on a PDF as attachments in a programming way. This PDF library helps developers to add attachments to PDF documents automatically. The following example uses Python, but the overall workflow is similar in Java and C#.
Typical steps:
- Install Free Spire.PDF in your Python environment. And import the required modules.
- Load the existing PDF document and prepare the video file to be attached.
- Add the video file to the PDF as an embedded attachment.
- Save the updated PDF document.

Here's the complete code you can follow:
from spire.pdf import *
from spire.pdf.common import *

# Create a PdfDocument object
doc = PdfDocument()

# Load a sample PDF file
doc.LoadFromFile("\\Input.pdf")

# Create PdfAttachment objects based on external files
attachment = PdfAttachment("\\sample.mp4")

# Add the attachments to PDF
doc.Attachments.Add(attachment)

# Save to file
doc.SaveToFile("\\Attachment.pdf")
This approach works well in automated or programmatic workflows, especially when generating PDFs in bulk or integrating video files as supporting materials.
Use cases:
- Legal documents that require all supporting files to be bundled together.
- Technical deliveries or project handovers.
- Scenarios where file completeness is more important than inline playback.
Overall, attaching video files to a PDF strikes a balance between reliability and simplicity. It may not provide the smoothest viewing experience, but it remains a dependable option for professional environments.
Approach 3 – Add Video via Hyperlinks (Most Compatible)
Embedding a video in a PDF using hyperlinks is the most common and direct way. Technically speaking, the video is not embedded in the PDF. Instead, the document contains a clickable link that points to the video file.
In practice, this is what most people mean when they ask how to embed a video in a PDF. It works in almost every PDF reader while keeping the PDF file sizes small and avoiding many security issues.
The video content can be hosted on:
- YouTube or other online video platforms.
- A local video file on the user’s device.
- Cloud storage services.
Using Adobe Acrobat
Adobe Acrobat allows you to add hyperlinks to text, images, or specific areas of a page. When a reader clicks the link, the video opens in the default browser or media player.
Typical steps:
- Open the PDF document in Adobe Acrobat.
- Right-click on the text, image, or area where you want to place the video link, and select Create Link.
- Set the Link Action to Open a file (for a local video file) or Open a web page (for an online video).
- Click Next, then choose the video file or enter the video URL.

This method is simple and reliable, making it a common choice for instructional documents and online-ready PDFs.
Using Free Spire.PDF
Free Spire.PDF allows you to add hyperlinks to PDF as well. While the implementation is done through code, you don't have to worry about manual errors.
Typical steps:
- Load the existing PDF document.
- Locate the target text using a text search method and define it as the link area.
- Set the hyperlink target to a video URL or a local video file.
- Save the updated PDF document.
Here's the code example you can follow:
from spire.pdf.common import *
from spire.pdf import *

# Create a PdfDocument instance
pdf = PdfDocument()

# Load a PDF file
pdf.LoadFromFile("input.pdf")

# Get the first page
page = pdf.Pages.get_Item(0)

# Find all occurrences of the specified text on the page
collection = page.FindText("Christmas Songs", TextFindParameter.IgnoreCase)

# Loop through all occurrences of the specified text
for find in collection.Finds:
    # Create a hyperlink annotation
    uri = PdfUriAnnotation(find.Bounds)
    # Set the URL of the hyperlink
    uri.Uri = "https://youtu.be/ombP9z_ir8c?si=Wq2U-HWeSyJQda-0"
    # Set the border of the hyperlink annotation
    uri.Border = PdfAnnotationBorder(1.0)
    # Set the color of the border
    uri.Color = PdfRGBColor(Color.get_Blue())
    # Add the hyperlink annotation to the page
    page.AnnotationsWidget.Add(uri)

#Save the result file
pdf.SaveToFile("SearchTextAndAddHyperlink.pdf")
pdf.Close()
This method is especially useful in automated workflows where PDFs are generated or modified in batches.
Why this is the most common method:
- Simple and easy to implement.
- Best compatibility across devices and PDF readers.
- Minimal impact on PDF file size.
- Lower security and stability risks.
For most business, educational, and documentation scenarios, adding videos via hyperlinks is the safest and most practical solution.
Approach 4 – Online Editors: Convenience over Control
We discuss online PDF editors in a separate section, not because they introduce a new embedding method, but because they provide a distinct usage scenario. They allow you to upload a PDF, insert video link online without installing third-party applications.
Typical steps (online PDF editors, e.g. Smallpdf):
- Upload the PDF file to the online editor.
- Insert a thumbnail image to represent the video.
- Add a clickable link to the video URL (on the image or as nearby text).
- Download and test the updated PDF.
Advantages and risks:
- No installation required.
- Potential privacy and compliance concerns.
- Limited file size and feature control.
Online tools are suitable for lightweight, non-sensitive tasks but are usually not ideal for enterprise or long-term workflows.
Comparison: Which Approach Should You Choose?
| Approach | Offline Playback | File Size | Compatibility | Best Tools |
|---|---|---|---|---|
| Rich Media | Yes | Large | Low | Adobe Acrobat Pro |
| Attachment | Yes | Large | Medium | Adobe Acrobat, Spire.PDF |
| Hyperlink | No | Small | High | Adobe Acrobat, Spire.PDF |
| Online Editors | No | Small | High | Web-based PDF tools |
Each method serves a different purpose. If offline playback is required, rich media may be an option. If reliability and readability matter most, hyperlinks are usually the better choice.
Conclusion
Embedding videos in PDFs is less about finding a single perfect method and more about understanding the trade-offs of each approach. Once you align the technique with your audience and distribution scenario, choosing the right solution becomes much easier.
FAQ: Embedding Videos in PDF Documents
Q1: Can you embed a video in a PDF document and play it offline?
Yes, but only when the video is added as rich media or as an attached file. Hyperlinks can point to local video files, but offline playback usually fails on other devices because the linked file is not available.
Q2: Why doesn’t my embedded video play in some PDF readers?
Many PDF readers restrict or completely block rich media features for security reasons. As a result, embedded videos may only work reliably in Adobe Acrobat and a few compatible viewers.
Q3: Can PDFs support videos or animated content like GIFs?
Yes. PDFs can support videos through rich media, file attachments, or hyperlinks, and GIFs can be inserted as images. However, support varies depending on the PDF reader and platform.
Convert Word to PNG: 3 Practical Ways You Can Actually Use

Have you ever shared a Word document with co-workers or posted it online, only to discover that the layout looks completely different? Fonts shift, spacing breaks, and pages no longer appear the way you want. This is exactly when converting a Word document to a PNG file becomes useful. By turning each page into an image, you can preserve the original visual appearance across different systems and devices.
In today’s guide, we’ll walk through three practical and easy ways to convert Word to PNG, helping you choose the method that best fits your situation—whether you need a quick one-time solution or a more reliable approach.
- Convert Word to PNG Using Online Converters
- Convert Word Doc to PNG with Screenshots
- Converting Word to PNG with Python
- Choosing the Right Way to Convert Word to PNG
- FAQs
1. Convert Word to PNG Using Online Converters
Online converters are the most common solution people try first. They work directly in the browser and require no technical knowledge. After uploading a Word document, the service processes it on a remote server and exports each page as a PNG image.
Before using an online Word to PNG converter, it’s worth checking the file format. If your document is still in the older .doc format, it is recommended to convert doc to docx first, as most online tools handle .docx files more reliably and produce more consistent results.
Rather than recommending specific Word document to PNG converters, this chapter simply highlights two popular options to show how they work.
cloudconvert

cloudconvert is an all-in-one file conversion platform that supports a wide range of formats. In addition to quickly converting Word documents into image files such as PNG, it can also handle Excel files, videos, audio files, and more. Using it to convert Word to PNG is straightforward:
- Go to cloudconvert and choose to convert Word to PNG, or simply search for cloudconvert’s Word to PNG converter.
- Upload your file and click Convert.
- Once the conversion is complete, download the PNG file to your local device.
CLOUDXDOCS
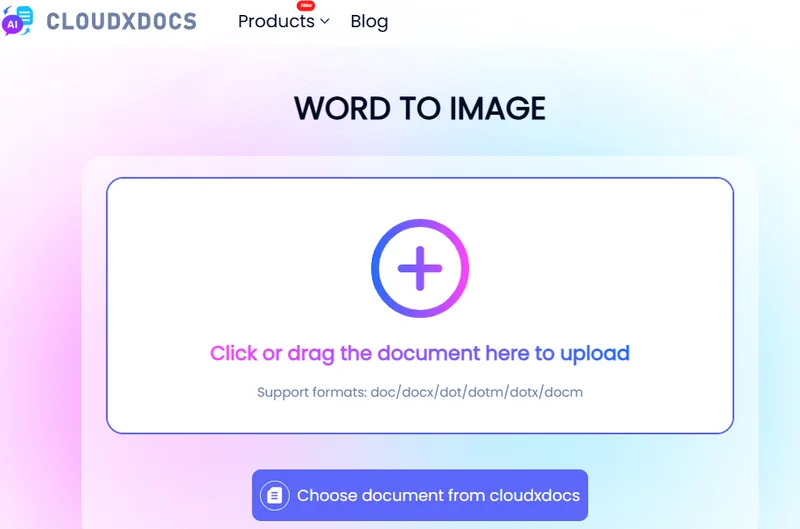
CLOUDXDOCS is another website that supports converting multiple file formats. It mainly handles documents such as Word files, Excel spreadsheets, PDFs, and PowerPoint presentations. Unlike cloudconvert, it also allows you to edit files online and integrates AI features to intelligently process different types of documents.
Converting Word to PNG with CLOUDXDOCS is equally simple:
- Navigate to CLOUDXDOCS and choose Converter → WORD > IMAGE.
- Upload your file, and the conversion will start automatically.
- Click Download to save the converted PNG file to your local device.
These two Word to PNG converters are quick and convenient, especially for small or occasional tasks. However, they often come with limitations such as file size restrictions, limited image resolution, and concerns about uploading sensitive documents. Online tools are best suited for simple, one-time conversions instead of ongoing or professional use.
Tip: You can reduce a Word document's size by remove hyperlinks, comments, attachments, and other unnessary elements.
2. Convert Word Doc to PNG with Screenshots
Although Microsoft Word does not provide a built-in feature to convert Word files directly into images, you can still save a Word document as a PNG by using the screenshot function on your computer or other devices. For example, on Windows you can use the Print Screen key, while on macOS you can use Command (⌘) + Shift + 4 to capture a selected area of the screen. 
This approach is essentially a manual workaround rather than a true conversion, but it can be useful when you only need an image of one or two pages. The general steps are as follows:
- Open the Word document and navigate to the page you want to save as a PNG.
- Adjust the zoom level so the entire page fits clearly on the screen.
- Use the system screenshot shortcut to capture the page.
- Save the captured image in PNG format to your local device.
Keep in mind that the image quality depends on your screen resolution and zoom settings, and each page must be captured separately.
3. Converting Word to PNG with Python
For users who need consistent output quality or want to convert multiple files at once, using Python to convert Word documents to PNG is the most reliable solution. Unlike online tools or screenshots, this approach does not depend on screen resolution or manual operations. Instead, it works directly with the document’s internal structure and renders each page as an image programmatically.
A common way to achieve this in Python is by using Free Spire.Doc. It is a lightweight document processing library that allows you to load Word files, loop through pages and export them as images without relying on Microsoft Word or any other third-party applications. ![Convert a Word Document to PNG Files Using Free Spire.Doc]/images/art_images/convert-word-png-4.webp)
Here's the code example you can refer to:
from spire.doc import *
from spire.doc.common import *

# Create a Document object
document = Document()

# Load a Word file
document.LoadFromFile("Desktop/input.docx")

# Loop through the pages in the document
for i in range(document.GetPageCount()):

    # Convert the current page to bitmap image
    imageStream = document.SaveImageToStreams(i, ImageType.Bitmap)

    # Save the bitmap to a PNG file
    with open('Output/ToImage-{0}.png'.format(i),'wb') as imageFile:
        imageFile.write(imageStream.ToArray())

document.Close()
This approach is commonly used in automated systems, backend services, and enterprise workflows. Although it requires some technical setup, it works well for batch converting and greatly improves efficiency.
4. Choosing the Right Way to Convert Word to PNG
To help you quickly identify the method that best fits your needs, this section compares the three most common Word-to-PNG solutions discussed earlier.
| Method | Ease of Use | Image Quality | Batch Support | Automation | Best For |
|---|---|---|---|---|---|
| Online tools | Very easy, no setup required | Medium, usually fixed resolution | Limited or not supported | Not supported | One-time conversions and casual users |
| Screenshots | Easy but fully manual | Low to medium, depends on screen resolution | Not supported | Not supported | Capturing a single page for quick reference |
| Free Spire.Doc (Python) | Requires basic coding knowledge | High, controllable resolution | Fully supported | Fully supported | Batch processing, automation, and enterprise workflows |
Final Thoughts
Converting Word to PNG becomes much easier once you understand the three approaches covered in this guide. Online tools are convenient for quick, one-off conversions, screenshots work only for simple and temporary needs, and using Free Spire.Doc with Python offers the most control for batch processing and automation. By choosing the option that aligns with your file size, quality requirements, and workflow, you can turn Word documents into PNG images more efficiently.
FAQs about Converting Word Document to PNG File
Q1: How can I convert a Word file to PNG online for free?
You can convert a Word file to PNG online using free tools such as cloudconvert or CLOUDXDOCS. These platforms allow you to upload a Word document, choose PNG as the output format, and download the converted images, usually with basic limitations on file size or page count.
Q2: How do I convert Word to PNG or JPG?
When using cloudconvert, simply select PNG or JPG as the output format.
With Free Spire.Doc, you only need to change the file extension when saving the rendered image:
    with open('Output/ToImage-{0}.jpg'.format(i),'wb') as imageFile:
        imageFile.write(imageStream.ToArray())
Q3: Which Word to PNG method works best for multiple pages or batch files?
For multi-page documents or batch conversion, using Python with Free Spire.Doc is the most reliable option. It supports prcocessing multiple documents in one go directly in code.
Also Read
How to Flatten a PDF: 5 Methods (Adobe, Online & Python)

When you want to prevent your PDFs from being edited, flattening the document is often the simplest and most effective solution. However, many users are unfamiliar with what a flattened PDF actually means or how to create one.
In this article, we’ll explain what it means to flatten a PDF and show you how to flatten a PDF document using several practical approaches. These include using Adobe Acrobat, Google Chrome, online tools, and programming libraries, helping you secure your PDFs easily on both Windows and Mac.
- What Does It Mean to Flatten a PDF
- How to Flatten a PDF in Adobe Acrobat
- How to Flatten a PDF Without Acrobat
- Flatten a PDF Programmatically Using Free Spire.PDF
- How to Flatten a PDF Document on Mac
- FAQs About Flattening a PDF
What Does It Mean to Flatten a PDF (and Why You Might Need It)
Before diving into specific tools, it’s worth clarifying what “flattening” actually means in the context of PDF files and why it matters in everyday workflows.
Flattening a PDF means converting interactive elements—such as text, annotations, or images—into static page content. The document keeps the same visual appearance, but users can no longer type into new paragraphs, toggle checkboxes, or modify annotations. In other words, flattening turns a working or draft PDF into a final, non-editable version.
This is especially useful when you need to submit the final report, share contracts, issue invoices, or archive documents. Flattening helps prevent unintended edits and ensures the PDF displays consistently across devices and viewers. It’s also important to note that flattening is different from protecting PDFs with a password, as password protection mainly controls who can open or edit the file, but it does not permanently remove the ability to modify the PDF content.
How to Flatten a PDF in Adobe Acrobat
Adobe Acrobat is often the first tool people think of when dealing with advanced PDF tasks. Because it fully supports the PDF standard, it offers reliable ways to flatten documents that contain forms, comments, or other interactive elements.
Adobe Acrobat allows you to flatten a PDF file by recreating the document through the printing feature. The approach produces a static PDF file that looks the same as the original but cannot be edited.
- Open the PDF file in Adobe Acrobat.
- Use the Print Production tool to flatten form fields and annotations, or go to File → Print and select “Adobe PDF” as the printer to recreate the document as a flattened PDF.
- Save the resulting file as a new flattened PDF.

Adobe Acrobat is a strong choice if you frequently work with PDFs and prefer a desktop-based, visual interface. However, it requires a paid license and is not designed for automated or large-scale processing.
How to Flatten a PDF Without Acrobat
Not everyone has access to Adobe Acrobat, and many users look for ways to flatten a PDF without installing paid software. In those cases, alternative methods can still get the job done, although they may involve some compromises.
How to Flatten a PDF Using Google Chrome
Google Chrome provides a simple and reliable way to flatten a PDF document without installing additional software. By opening a PDF in Chrome and printing it to a new PDF file, it will be changed into a static document.
Here are the detailed steps to flatten a PDF with Chrome:
- Open the PDF file in Google Chrome.
- Press Ctrl + P (or Cmd + P on Mac) to open the print dialog.
- Select Save as PDF as the destination printer.
- Click Save to generate a flattened PDF file.

This method is free and works on both Windows and Mac. However, it offers limited control over PDF processing, and Google Chrome relies on a browser-based environment, which makes it less suitable for offline or controlled workflows.
How to Flatten a PDF with Online Tools for Free
Online PDF tools are popular because they run directly in the browser and require no installation. Services like Smallpdf and Sejda PDF allow users to flatten a PDF file quickly, making them a common choice for occasional, short-term tasks.

These tools generally follow a simple, browser-based workflow. Using Smallpdf as an example, the process typically works as follows:
- Navigate to the online tool’s website.
- Upload the PDF file you want to flatten, after which the tool processes it automatically.
- Download the flattened PDF file and save it to your local device.
These tools are useful if you need to flatten a PDF for free and the document does not contain sensitive information. That said, they often come with limitations such as file size and usage restrictions. For professional or confidential documents, these factors should be taken into consideration.
How to Flatten a PDF Programmatically Using Free Spire.PDF
For developers working with automated systems, PDF flattening is often part of a larger workflow rather than a one-time task. In such cases, Free Spire.PDF for Python allows you to flatten a PDF document by flattening its interactive form fields through code, ensuring the final output is non-editable while preserving the original appearance.

The general idea is straightforward: load the PDF, enable form flattening, and save the result. Once form fields are flattened, all user-entered data is rendered directly onto the page, and the document becomes a static PDF.
from spire.pdf.common import *
from spire.pdf import *

# Specify the input and output PDF file paths
input_file = "Form.pdf"
output_file = "FlattenAll.pdf"

# Create an object of the PdfDocument class
doc = PdfDocument()
# Load a PDF file
doc.LoadFromFile(input_file)

# Flatten all forms in the PDF file
doc.Form.IsFlatten = True

# Save the result file
doc.SaveToFile(output_file)
doc.Close()
This approach is particularly useful when flattening needs to be integrated into automated systems, when processing files in batches, or when handling large PDF documents.
How to Flatten a PDF Document on Mac
On macOS, in addition to Chrome and online tools, you can also flatten a PDF using Preview. As a built-in application, Preview allows you to flatten PDFs directly on Mac without installing any third-party software, making it a convenient and straightforward option for quick, safe, and offline tasks.
Here's how it works:
- Open the PDF file in Preview.
- Choose Print and save the output as a new PDF file.

This method works well for small projects. However, if you need more advanced PDF operations beyond flattening, such as making a PDF read only, editing form fields, or handling documents programmatically, Adobe Acrobat or Free Spire.PDF would be a better choice.
FAQs About Flattening a PDF
Q1: How do I flatten a PDF file?
You can flatten a PDF file using Adobe Acrobat, Google Chrome, online PDF tools, or programmatically with libraries such as Free Spire.PDF.
Q2: What is the shortcut for flattening a PDF?
In general, in Adobe Acrobat, you can often use Ctrl + P to flatten a PDF by printing it, while other tools may rely on different shortcut combinations.
Q3: Is compressing a PDF the same as flattening it?
No. Compressing a PDF reduces its file size, while flattening removes interactive elements and makes the document non-editable.
Conclusion
There is no single best method for every situation. Adobe Acrobat is well suited for manual, desktop-based workflows. Google Chrome and online tools work for quick, occasional tasks. For automated document processing, Free Spire.PDF offers the most flexibility and control.
By understanding how each method works, you can flatten a PDF document efficiently based on your own needs.
Also Read
How to Duplicate a Page in a PDF Easily & Effectively (3 Ways)

When preparing a contract template, being able to duplicate a page in a PDF can save a lot of time and effort. However, this task is often harder than it sounds, and many people aren't sure how to copy a page in a PDF effectively. In this guide, we’ll walk you through three practical methods—using Adobe Acrobat, a free programming library, and simple online tools—so you can choose the approach that best fits your workflow.
- Duplicate a Page Using Adobe Acrobat
- Duplicate Pages Using Free Spire.PDF
- Duplicate a Page in a PDF Online
- Which Method Should You Choose
- FAQs
1. Duplicate a Page Using Adobe Acrobat DC (Paid Version)
If you use Adobe’s tools regularly, this is the most direct solution. It’s especially suitable for people who handle PDFs frequently and have no experience with coding. If you simply need a straightforward way to copy pages in a PDF during everyday office work — Acrobat DC provides the most familiar and user-friendly experience.
How to duplicate a page in Adobe Acrobat DC
- Open your PDF in Adobe Acrobat DC.
- Go to Tool and find the Organize Pages tool.
- Select the page you want to duplicate.
- Hold down the Ctrl key, then drag the selected page to the position where you want the copy to appear.
- Release the mouse, and Acrobat will create a duplicate of that page automatically.

This simple drag-and-copy action is often the quickest way to duplicate a page without using menus.
Notes:
- Only the paid version supports PDF page duplication.
- Acrobat is reliable but can feel heavy for occasional tasks.
- Large PDFs may take a moment to process.
2. Duplicate Pages Using Free Spire.PDF
When you need to duplicate many pages or integrate the task into an automated workflow, Free Spire.PDF becomes a much better choice. This free library lets developers copy pages in PDF files programmatically, removing the need for manual editing. It also gives you full control over where the duplicated pages are inserted, making large-scale or repeated operations more efficient.
Instructions to duplicate a page in PDF with Free Spire.PDF
- Install Free Spire.PDF and import relevant modules.
- Create a PdfDocument instance and load a PDF document.
- Select the page you want to duplicate.
- Create a template based on the page using the PdfPageBase.CreateTemplate().
- Insert a new page with PdfDocument.Pages.Insert and draw the template on the page with PdfPageBase.Canvas.DrawTemplate.
- Save the modified PDF.
The Python code below shows how to duplicate the first page of a PDF and insert it as the second page in the original file.
from spire.pdf.common import *
from spire.pdf import *

# Create a PdfDocument object
pdf = PdfDocument()

# Load a PDF file from disk
pdf.LoadFromFile("/input/sample.pdf")

# Get the first page
page = pdf.Pages[0]

# Get the size of the page
size = page.Size

# Create a template based on the page
template = page.CreateTemplate()

# Add a new page of the same size at the end
#page = pdf.Pages.Add(size, PdfMargins(0.0))
# Insert a new page at the specified location
page = pdf.Pages.Insert(1, size, PdfMargins(0.0))

# Draw the template on the newly added page
page.Canvas.DrawTemplate(template, PointF(0.0, 0.0))

# Save the PDF file
pdf.SaveToFile("/output/CopyPDFPages.pdf");
pdf.Close()
Here's the preview of the output PDF file: 
This style of workflow is perfect for generating repeated form pages, producing large batches of documents, or supporting server-side automation.
3. Duplicate Pages in PDF Online (Free Tools)
Online tools work best when you only need to duplicate a page occasionally and prefer not to install additional software. They’re especially convenient when you’re working on a mobile device or shared computer, or simply want the fastest way to make a quick change. As long as your document doesn’t contain sensitive or confidential information, using a browser-based PDF tool is the simplest and most accessible option.
During research, we found that some online tools complete this task by extracting a page and then inserting it through a separate “add page” tool, such as PDFgear. Others provide an online PDF editor where you can simply duplicate a page directly, like DocHub. In this section, we’ll focus on the workflow of the latter approach.
How to copy pages from a PDF document using online tools
- Go to DocHub and open the Duplicate Pages in a PDF tool.
- Upload your PDF and wait for it to be processed.
- In the left-side page thumbnails, find the page you want to copy.
- Right-click the page and select Duplicate page from the menu.
- Click Save on the right, then download the updated PDF to your computer.

Pros
- Fast and free
- No installation required
- Works on any device
Cons
- Not ideal for confidential documents
- File size limits vary
- Not suitable for bulk tasks or automation
4. Which Method Should You Choose?
This section provides a comparison table of the three methods, showing their advantages, suitable users, and costs, helping you quickly identify the approach that best fits your current needs.
| Method | Best For | Cost | Strengths | Limitations |
|---|---|---|---|---|
| Adobe Acrobat DC | Regular office users | Paid | Reliable, easy to use | Reader doesn’t support duplication |
| Free Spire.PDF | Developers / automation | Free | Batch operations, flexible | Requires coding knowledge |
| Online tools | Occasional tasks | Free | Quick, no installation | Privacy concerns, file limits |
If you work with PDFs daily, Acrobat DC is the most polished option. If you need automation or batch copying PDF pages, Free Spire.PDF is the better way. For small one-time edits, online tools offer the quickest solution.
Conclusion
Duplicating a page in a PDF doesn’t have to be complicated. Whether you're copying a form, repeating a worksheet, or preparing consistent document templates, the right tool can save time and reduce effort. Acrobat DC offers the smoothest interface, Free Spire.PDF excels at automation, and online tools are perfect for quick, simple edits. Choose the method that matches your workflow, and you’ll be able to copy PDF pages with ease whenever you need to.
FAQs about Duplicating Pages in PDF
1. How do I duplicate a page in a PDF?
You can duplicate a page in a PDF using Adobe Acrobat, free online tools, or a programming library like Free Spire.PDF. Online tools let you copy pages quickly without installing software, while Acrobat provides a more professional interface. For automation or batch tasks, Free Spire.PDF is ideal.
2. Can I copy only one page from a PDF document?
Yes, most PDF editors allow you to select and duplicate a single page. In Adobe Acrobat, use the Organize Pages tool. In online editors like DocHub, you can select a page thumbnail and duplicate it. Programming libraries also allow precise control over copying individual pages.
3. How do I duplicate a PDF page multiple times?
Duplicating a page multiple times can be done manually or programmatically. In Acrobat, you can repeat the drag-and-copy process. With Free Spire.PDF, you can clone a page multiple times in a loop and insert it wherever needed.
4. Can I copy a PDF page into Word or another format?
Yes, you can extract a PDF page and save it as a Word document or another format. Many online tools support converting specific pages to Word. For more control, PDF libraries let you extract pages and export them programmatically.
Also Read:
How to Make a PDF Read Only in 2025 (A Complete Guide)

When sharing a contract, invoice, report, or confidential file, you may want to ensure the content cannot be modified. That’s why making a PDF read only is so important. A “read-only PDF” protects your content from unwanted edits, unauthorized changes, or accidental modification. In practice, setting editing permissions and flattening PDFs are the two effective ways to make a PDF non-editable.
Both methods work, but they apply to different scenarios. Below, we will walk through each method step-by-step using tools like Adobe Acrobat, Free Spire.PDF, and online services.
- Make a PDF Read Only by Setting Editing Permissions
- Make a PDF Non Editable by Flattening It
- Comparing the 2 Methods
- Choose the Best Method
- Conclusion
Method 1: Make a PDF Read Only by Setting Editing Permissions
Setting permissions is the most common way to lock a PDF from editing. The method keeps the file fully searchable and selectable while preventing others from making changes.
1. Use Adobe Acrobat to Make a PDF Read Only
Adobe Acrobat includes built-in security settings that let you apply a permissions password to control what others can do with your PDF—such as editing, printing, or copying its content. To make a PDF read only, simply set a permissions password that blocks any changes to the document.
Steps to make a PDF non-editable using Adobe Acrobat:
-
Open your PDF in Adobe Acrobat.
-
Navigate to Tools → Protect → Protect Using Password.
-
In the dialog box, select Editing as the restriction option, then enter and confirm your permissions password.

-
Save the file to apply the read-only settings.
This method is quick and convenient, especially for users who already have Adobe Acrobat installed. While permission protection can sometimes be bypassed by advanced tools, it is still sufficient for most everyday office scenarios.
If you want more control over what users can or cannot do with your PDF, you can go to File → Properties → Security, where Adobe Acrobat provides a full list of detailed permission settings. Here, you can set restrictions such as printing, content copying, form filling, commenting, and more.
2. Use Free Spire.PDF to Set Read-Only Permissions (for Automation & Systems)
If you have a large number of PDFs that need to be locked from editing, automating the process with Python is far more efficient than opening each file manually in Adobe Acrobat. Free Spire.PDF for Python, a powerful library for protecting PDF documents, makes it easy to process multiple files in a single workflow. Below is the general process for making a PDF read only with this tool: 
- Install Free Spire.PDF and import essential modules.
- Create a PdfDocument and load a PDF from file.
- Make the PDF file read only by setting a permission password for it with the PdfDocument.Security.Encrypt() method.
- Save the non-editable PDF as a new one.
The following code demonstrates how to make a PDF non-editable with Python:
from spire.pdf.common import *
from spire.pdf import *

# Create a PdfDocument object
doc = PdfDocument()

# Load a sample PDF file
doc.LoadFromFile("/input/Booklet.pdf")

# Set only a permission password and disable editing
doc.Security.Encrypt(
    "",
    "permissionPsd",
    PdfPermissionsFlags.none,
    PdfEncryptionKeySize.Key128Bit
)

# Save the result file
doc.SaveToFile("/output/ReadOnly.pdf", FileFormat.PDF)
This approach is ideal for companies that need automated PDF protection in their workflows, as it helps improve efficiency while reducing errors caused by manual operations. It can also be used together with features like adding a digital signature to further enhance document security.
When to Use Permission-Based Protection
Choose this method if:
- You need the PDF to remain searchable and selectable.
- You want basic protection without changing the visual appearance.
- You prefer a reversible, lightweight locking method.
- You need to batch-process PDFs through code.
For most knowledge workers, this is the simplest answer to make a PDF read only.
Method 2: Make a PDF Non Editable by Flattening It
Flattening converts every page into static elements, such as images or outlines, creating a truly non-editable PDF; this process is irreversible, so once flattened, no text, forms, stamps, annotations, or layers can be modified.
1. Use Adobe Acrobat to Flatten a PDF
Adobe Acrobat provides built-in tools to flatten PDFs. This feature is available in Adobe Acrobat Pro, which is a paid version; it is not fully available in the free Acrobat Reader.
Flattening can be done through the following steps:
-
Open your PDF in Adobe Acrobat Pro.
-
Go to File → Print.
-
Select Adobe PDF as the printer.
-
Click Print and choose a location to save the new file.

-
The resulting PDF is a flattened version—visually identical but non-editable.
Flattening ensures the content is locked and cannot be modified, making it ideal for documents that require high security or legal compliance.
2. Use Online Tools to Flatten a PDF (Fast & No Installation)
If you only need a quick solution, online PDF flatteners can be very convenient. Simply upload your file, and the tool will convert it into a static layout, and then you download the read-only version.
Online tools are especially helpful when you don’t have Adobe Acrobat installed and when you only have a few documents to deal with. Although than that, uploading PDF files to the Internet may cause a data leakage.
When to Use PDF Flattening
Flattening is the best method when:
- You need maximum protection.
- You’re sharing signed contracts or legal documents.
- You must ensure absolutely no one can edit the content.
- You are submitting a PDF to a government or business portal that requires a “read-only” version.
If security is your priority, this method is far more robust than permissions.
Method 1 vs. Method 2 — What’s the Best Way to Make a PDF Read Only?
| Feature | Permissions (Adobe, Free Spire.PDF) | Flattening (Adobe, Online Tools) |
|---|---|---|
| Editable | Potentially | Almost impossible |
| Text selectable/searchable | Yes | Usually No |
| Security level | Medium | High |
| Ease of use | Easy | Easy |
| Best for | Office files, internal sharing | Contracts, legal files, external sharing |
Both methods solve the problem of how to make a PDF read only effectively, but they suit different needs. Some organizations even combine both: flattening and permission protection.
How to Choose the Best Method
If you’re unsure which method is best for your situation, refer to the quick guide below:
-
Need quick protection?
→ Set permissions in Adobe. -
Need automation for multiple files?
→ Use Free Spire.PDF. -
Need strong protection or locking a signed PDF?
→ Flatten the file. -
No software installed?
→ Use an online flattening tool.
Conclusion
When it comes to making a PDF read only, you can either set editing permissions to keep the text searchable or flatten the file for maximum, permanent security. Using tools like Adobe Acrobat, Free Spire.PDF, or online services, it’s easy to create a read-only PDF that fits your workflow, security needs, and preference for manual or automated processing.
Also Read:
How to Convert PowerPoint to PDF with 4 Methods [Free]

If you want to share your slides with others, preserve the formatting, or make your presentation easier to view across different devices, converting your PowerPoint to PDF is a great choice. Luckily, there are several ways to save PowerPoint as PDF, from using built-in Office features to online tools and specialized software. In this guide, we’ll walk you through all 4 options, including how to save PowerPoint as PDF on Windows, Mac, or even Google Slides.
- Save as PDF Directly in Microsoft PowerPoint
- Convert PowerPoint to PDF Using Online Tools
- Batch Convert PowerPoint to PDF with Code
- Convert Google Slides to PDF
- The Conclusion
1. Save as PDF Directly in Microsoft PowerPoint
The easiest and fastest way to convert a PowerPoint file to PDF is by using the built-in "Save As" feature provided by Microsoft PowerPoint. This method doesn’t require any additional software and works perfectly for single presentations.
Steps to save a PowerPoint presentation as a PDF in Microsoft PowerPoint:
- Open your PowerPoint file.
- Go to File → Save As.
- Choose PDF as the file format.
- Optionally, select whether you want to include speaker notes or hidden slides.
- Click Save, and your PDF is ready.

This method is ideal if you want a quick solution and don’t need to batch process multiple files. It works on both Windows and Mac, covering basic needs like saving a PowerPoint slide as a PDF or preserving your presentation with notes.
2. Convert PowerPoint to PDF Using Online Tools
If you don’t have PowerPoint installed, online tools are a convenient alternative. Websites like iLovePDF or CLOUDXDOCS allow you to convert your PPT or PPTX files to PDF quickly, without installing any software. In the following instructions, we use CLOUDXDOCS to demonstrate how online tools work.
Steps to save a PowerPoint presentation as a PDF with CLOUDXDOCS:
- Navigate to the Powerpoint-to-PDF converter.
- Upload your PowerPoint file, and the tool will automatically convert it to PDF.
- Click View to check out the converted PDF document, or click Download to save the PDF to your device.

Online tools are especially useful when you need to convert a file on the go or when using a device without Office installed, such as a Mac, a smartphone, or other devices that don’t have Microsoft PowerPoint.
3. Batch Convert PowerPoint to PDF with Free Spire.Presentation
For larger projects or when you need to convert multiple presentations all at once, Free Spire.Presentation is a reliable choice. It preserves your slides’ original formatting, including fonts, charts, and layouts, while allowing automated batch conversion. It also lets you convert a specified PowerPoint slide to PDF, giving you more control over the output.

Why use Free Spire.Presentation:
- Supports PPT and PPTX formats.
- Maintains original design and formatting.
- Handles batch conversions, saving time on large projects.
- Free and easy to install.
To convert PowerPoint files to PDF using Free Spire.Presentation, you can choose your preferred programming language, such as Python, Java, or C#. Below is an example using Python.
Steps to convert PowerPoint presentations to PDF using Python:
- Download and install Free Spire.Presentation.
- Import the necessary modules in your code editor.
- Create a Presentation object and load your PowerPoint file.
- Use the SaveToFile() method to save the PowerPoint file as a PDF.
Below is a complete code example:
import os
from spire.presentation import *

# Specify the directory containing the PPT/PPTX files
input_dir = r"/input/pptx"

# Get all files in the directory (since there are only the PPT/PPTX files)
ppt_files = os.listdir(input_dir)

# Loop through each file and convert to PDF
for ppt_file in ppt_files:
    ppt_path = os.path.join(input_dir, ppt_file)

    # Create a Presentation object
    presentation = Presentation()

    # Load the PowerPoint file
    presentation.LoadFromFile(ppt_path)

    # Generate output PDF file name based on input file name
    output_pdf = os.path.join("/output/pdfs", os.path.splitext(ppt_file)[0] + ".pdf")

    # Save as PDF
    presentation.SaveToFile(output_pdf, FileFormat.PDF)

    # Release resources
    presentation.Dispose()
This method is perfect for professionals managing multiple presentations or needing consistent, high-quality PDFs for sharing or archiving.
Tip: This component is capable of exporting PowerPoint to images, Word documents, and more.
4. Extra Tip: Convert Google Slides to PDF
Besides using applications like Microsoft PowerPoint, many people also use Google Slides to create and manage presentations. This raises a common question: how can you save a Google Slides presentation as a PDF? Fortunately, it’s quite simple. You can easily do it by following the steps below.
Steps to save a presentation from Google Slides as a PDF:
- Open your Google Slides file.
- Click File → Download → PDF Document (.pdf).
- Save the PDF to your computer.

This method is especially useful for remote collaboration or when you are tring to save a PowerPoint as PDF on Mac—without Microsoft PowerPoint installed.
The Conclusion
Converting PowerPoint to PDF is simpler than you might think. Whether you prefer the built-in Office method, online converters, or Free Spire.Presentation for batch projects, there’s a solution for every need. Even Google Slides can be easily exported to PDF. With these methods, you can easily share, archive, and preserve your presentations without worrying about formatting or compatibility issues.
Also Read
How to Add a Link to PDF for Free [Quickly and Easily]

Sometimes, a PDF needs more than text alone. Adding hyperlinks makes it easier for readers to access related pages, resources, or extra details—without overwhelming the content. In this guide, you’ll learn three free ways to add a link to a PDF, all simple and practical for everyday use.
- Add a Link to a PDF Using Google Docs
- Add a Link to PDF Using Free Tools
- Add Hyperlinks to PDF Using Code
- Insert Hyperlink to PDF with Adobe Acrobat (Paid Option)
- Comparison Table of the 4 Methods
- The Conclusion
How to Add a Link to a PDF Using Google Docs
We often use Google Docs for working with Word documents, but it can also edit PDF files. As an online tool, Google Docs lets you add a link to a PDF document quickly without installing any software — everything is done right in your browser. Since it’s a Google product, you also get solid security and reliability, making it a convenient option for simple PDF editing tasks.
Steps to add hyperlinks to a PDF with Google Docs:
Step 1. Open your PDF to Google Drive
- Upload your PDF in Google Drive and choose open with > Google Docs.
Step 2. Add a hyperlink to the PDF
- Scroll to the part of the document where you want to insert a link.
- Select the text you want to make clickable.
- Click Insert > link in the toolbar, or press Ctrl + K.

- Paste your URL (or choose a Google Doc or heading within the file).
- Click Apply to add the link.
Step 3. Export the edited file back to PDF
- Go to File > Download.
- Select PDF Document (.pdf).
- Save the updated PDF with the active hyperlink to your computer.
How to Add a Link to PDF Using Free Third-party Tools
Besides online tools, free third-party desktop applications are also a popular choice for editing PDF files. These programs often have an interface similar to Adobe Acrobat, so they’re usually easy to navigate. There are many available options you can find through a quick browser search. In this section, we’ll use PDFgear as an example to show you how to insert a hyperlink in PDFs.

Steps to add a link to a PDF with PDFgear:
- Install and open PDFgear and load your PDF.
- Go to Edit > Link > Create/Edit Link.
- Choose a link style (visible or invisible) and customize if needed.
- Set the link destination: Page, URL, or Local File, then click OK.
- (Optional) To add a clickable text link, go to Edit > Edit Text, paste your URL, and exit text mode.
- Save the PDF with active hyperlinks.
How to Add a Link to PDFs Using Python Code
The previous two methods are better suited for small or individual PDF files. If you need to process multiple PDFs at once, using Python or other popular programming languages is a more efficient choice. With Python, you can automatically add hyperlinks to PDFs, including text links, file links, email links, and more, all in one go.
To make adding hyperlinks even easier, this chapter uses Free Spire.PDF for Python. This is the free version of Spire.PDF for Python, ideal for small projects and testing. Its API is straightforward, so even beginners can get started quickly. With it, you can easily handle both simple and complex PDF tasks.

Steps to add a hyperlink to a PDF using Free Spire.PDF:
- Install Spire.PDF and import modules.
- Create a PdfDocument instance, and add pages to the document.
- Add text to the page and convert it into a hyperlink — whether it's a URL, email address, or file link. You can apply different hyperlink types using objects like PdfTextWebLink or PdfFileLinkAnnotation.
- Customize the link style (font, color, underline, rectangle, etc.) if needed.
- Save the final document as a PDF.
Here's the complete code example of adding multiple hyperlinks while create a PDF document:
from spire.pdf.common import *
from spire.pdf import *

# Create a PdfDocument instance
pdf = PdfDocument()

# Add a page
page = pdf.Pages.Add()

# Initialize x, y coordinates
y = 30.0
x = 10.0

# Create true type fonts
font = PdfTrueTypeFont("Arial", 14.0,PdfFontStyle.Regular,True)
font1 = PdfTrueTypeFont("Arial", 14.0, PdfFontStyle.Underline,True)

# Add a simply link
label = "Simple Text Link: "
format = PdfStringFormat()
format.MeasureTrailingSpaces = True
page.Canvas.DrawString(label, font, PdfBrushes.get_Orange(), 0.0, y, format)
x = font.MeasureString(label, format).Width
url = "http://www.e-iceblue.com"
page.Canvas.DrawString(url, font1, PdfBrushes.get_Blue(), x, y)
y = y + 28

# Add a hypertext link
label = "Hypertext Link: "
page.Canvas.DrawString(label, font, PdfBrushes.get_Orange(), 0.0, y, format)
x = font.MeasureString(label, format).Width
webLink = PdfTextWebLink()
webLink.Text = "Home Page"
webLink.Url = url
webLink.Font = font1
webLink.Brush = PdfBrushes.get_Blue()
webLink.DrawTextWebLink(page.Canvas, PointF(x, y))
y = y + 28

# Add an Email link
label = "Email Link:  "
page.Canvas.DrawString(label, font, PdfBrushes.get_Orange(), 0.0, y, format)
x = font.MeasureString(label, format).Width
link = PdfTextWebLink()
link.Text = "Contact Us"
link.Url = "mailto:[email protected]"
link.Font = font1
link.Brush = PdfBrushes.get_Blue()
link.DrawTextWebLink(page.Canvas, PointF(x, y))
y = y + 28

# Add a file link
label = "Document Link: "
page.Canvas.DrawString(label, font, PdfBrushes.get_Orange(), 0.0, y, format)
x = font.MeasureString(label, format).Width
text = "Open File"
location = PointF(x, y)
size = font1.MeasureString(text)
linkBounds = RectangleF(location, size)
fileLink = PdfFileLinkAnnotation(linkBounds,"/Desktop/Report.xlsx")
fileLink.Border = PdfAnnotationBorder(0.0)
page.AnnotationsWidget.Add(fileLink)
page.Canvas.DrawString(text, font1, PdfBrushes.get_Blue(), x, y)

#Save the result pdf file
pdf.SaveToFile("E:/Administrator/Python1/output/AddLinkstoPDF.pdf")
pdf.Close()
Here's the output file that created by the above code: 
How to Insert Hyperlink to PDF with Adobe Acrobat (Paid Option)
While the free methods—Google Docs, PDFgear, and Free Spire.PDF for Python—allow you to add links to PDFs without any cost, some users may need more advanced editing features or a stable, enterprise-level solution. Adobe Acrobat is a common choice in such cases. Keep in mind that its hyperlink feature is only available in the paid version. In this section, we’ll briefly show how to add a hyperlink to a PDF document using Adobe Acrobat, providing a complete view of the available PDF editing options alongside the free methods.
Steps to insert a hyperlink in PDF file with Adobe Acrobat:
- Open your PDF in Adobe Acrobat.
- Select the text or area where you want to add a hyperlink.
- Right-click the selected content and choose Create Link.

- In the pop-up window, set the Link Appearance and Link Action, choose to open a web page, go to a page view, or open a file.
- Click OK, then save the PDF to apply the hyperlink.
The Comparison Table of the 4 Methods
Each of these four methods for adding hyperlinks to PDFs has its own advantages and best-use scenarios. In this section, we’ve prepared a comparison table to help you quickly identify the solution that best fits your needs, making it easier to choose at a glance.
| Method | Free/Paid | Installation Required | Difficulty | Best Use Case | Advantages | Disadvantages |
|---|---|---|---|---|---|---|
| Google Docs | Free | No | Easy | Single PDF, light editing | Works online, no installation needed; secure and stable | Limited features; not suitable for batch processing |
| PDFgear | Free | Requires installation | Easy | Single PDF, small projects | Intuitive interface; supports rectangle or text hyperlinks | Best for a few files; advanced features are limited |
| Free Spire.PDF for Python | Free | Requires Python environment | Medium | Batch processing, developers, automation | Supports multiple link types; can handle multiple files at once | Requires programming knowledge; free version best for small projects |
| Adobe Acrobat | Paid | Requires installation | Easy | Enterprise, professional users | Full-featured; familiar interface; stable | Requires paid subscription; relatively expensive |
The Conclusion
The four methods we introduced for adding hyperlinks to PDFs have their own advantages and best-use scenarios. For everyday editing and single-file tasks, Google Docs or PDFgear is usually sufficient. If you need to handle multiple files or require more flexible automation, Free Spire.PDF for Python offers a free and easy-to-use option.
Also Read