Document processing is an essential feature in many modern web applications, enabling tasks such as report generation and data management. Node.js, known for its non-blocking I/O model and extensive ecosystem, provides a powerful platform for backend development. By integrating Spire.Doc for JavaScript, you can streamline the creation and manipulation of Word documents effortlessly.
This guide will take you through the steps to integrate Spire.Doc for JavaScript into your Node.js projects, from initial setup to a basic usage example.
- Benefits of Using Spire.Doc for JavaScript in Node.js Projects
- Set Up Your Environment
- Integrate Spire.Doc for JavaScript in Your Project
- Create and Save Word Files Using JavaScript
Benefits of Using Spire.Doc for JavaScript in Node.js Projects
Node.js is a powerful runtime environment that allows developers to build scalable network applications using JavaScript. Spire.Doc for JavaScript, on the other hand, is a versatile library designed to manipulate Word documents within JavaScript environments. It provides a wide range of features, including document creation, editing, conversion, and more, making it a valuable tool for developers working with document-based applications.
Integrating Spire.Doc for JavaScript into your Node.js project offers numerous benefits, including:
- Efficient Document Management: Easily create, edit, and manage Word documents without the need for Microsoft Word.
- Scalability: Leverage Node.js's non-blocking I/O model to handle large volumes of document processing tasks efficiently.
- Cross-Platform Compatibility: Use Spire.Doc for JavaScript across various platforms, including Windows, macOS, and Linux.
- Ease of Integration: Seamlessly integrate Spire.Doc for JavaScript with other Node.js libraries and tools.
These benefits make Spire.Doc for JavaScript an ideal choice for developers looking to enhance their Node.js projects with robust document processing capabilities.
Set Up Your Environment
Step 1
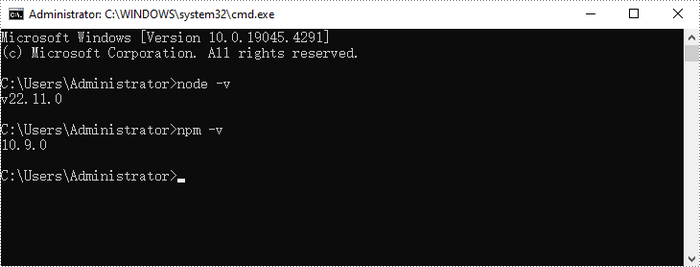
Download and install Node.js from the official website. Make sure to choose the version that matches your operating system.
After the installation is complete, you can verify that Node.js and npm are installed correctly, along with the version numbers, by entering the following commands in CMD:
node -v
npm -v
Step 2
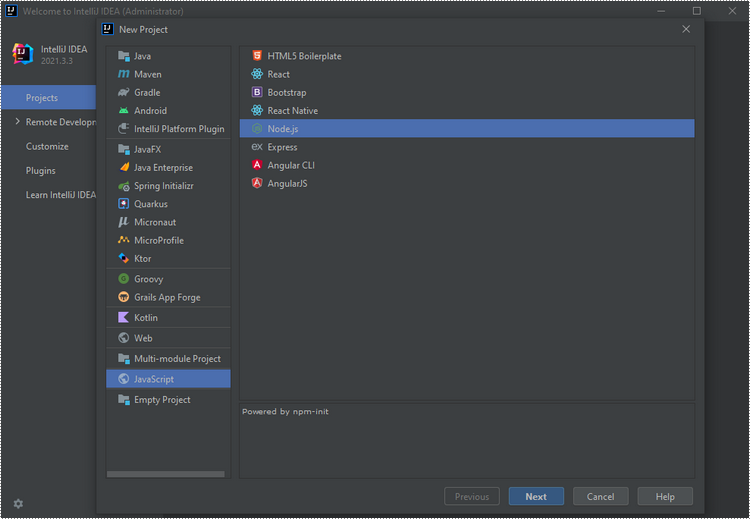
Create a Node.js project in your IntelliJ IDEA.
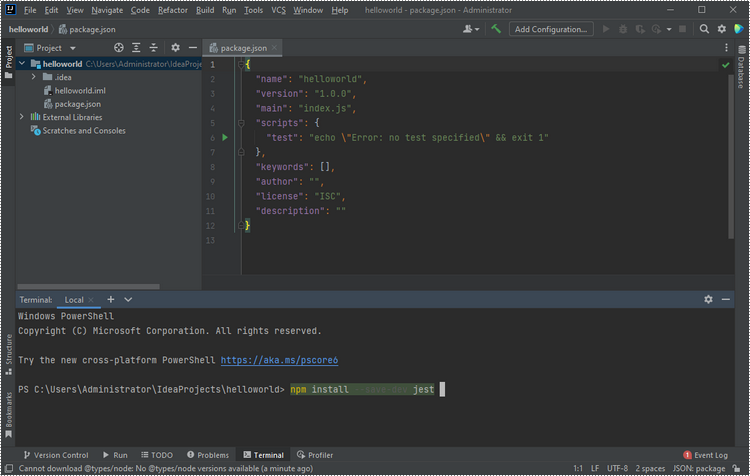
Install Jest in your project to write and run tests for your code, by running the following command in Terminal:
npm install --save-dev jest
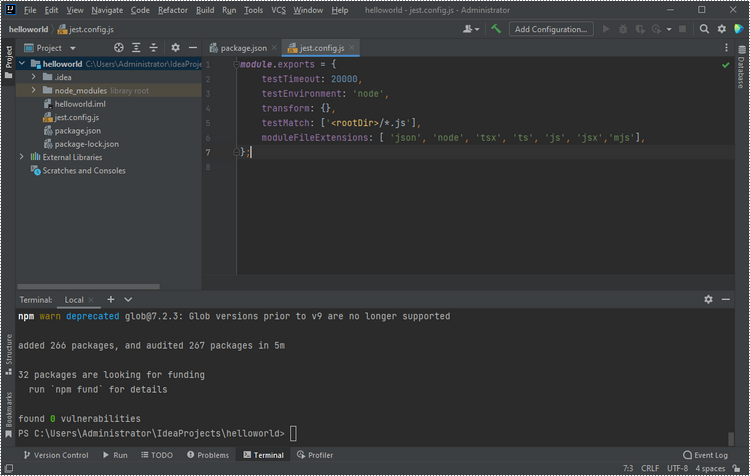
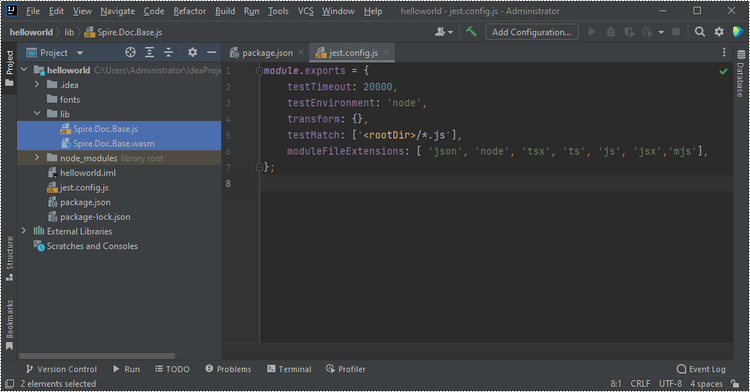
Create a JavaScript file named "jest.config.js" in your project, and include the following configuration in it.
module.exports = {
    testTimeout: 20000,
    testEnvironment: 'node',
    transform: {},
    testMatch: ['<rootDir>/*.js'],
    moduleFileExtensions: [ 'json', 'node', 'tsx', 'ts', 'js', 'jsx','mjs'],
};
Add a "fonts" folder and a "lib" folder to your project.

Integrate Spire.Doc for JavaScript in Your Project
Download Spire.Doc for JavaScript and unzip it to a location on your disk. Inside the lib folder, you will find the Spire.Doc.Base.js and Spire.Doc.Base.wasm files.
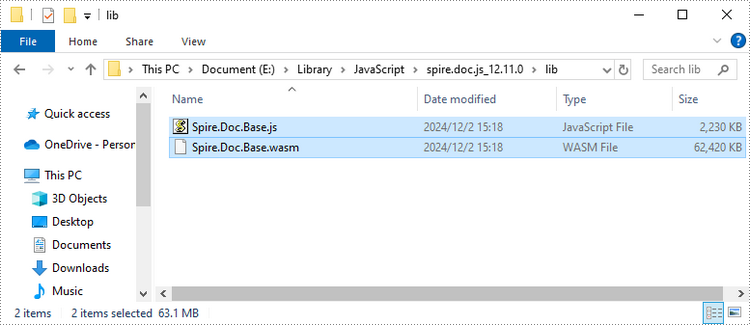
Copy these two files into the "lib" folder in your Node.js project.
Place the font files you plan to use into the "fonts" folder in your project.

Create and Save Word Files Using JavaScript
Add a JavaScript file in your project to generate a simple Word document from JavaScript code.
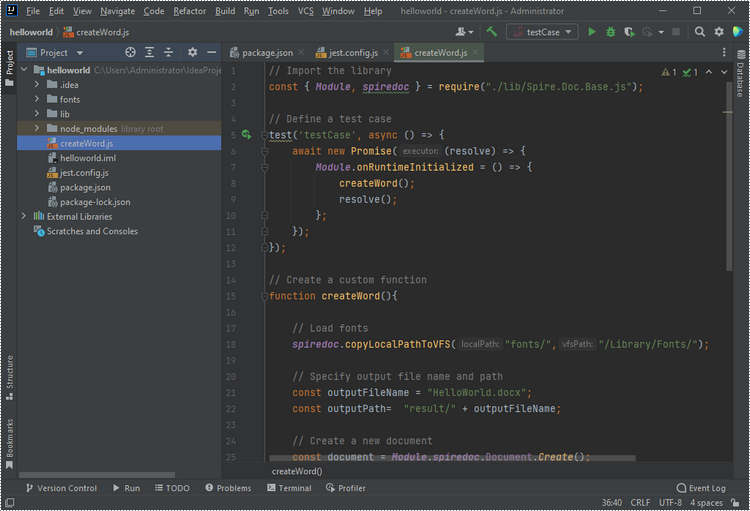
Here is the entire JavaScript code:
- JavaScript
// Import the library
const { Module, spiredoc } = require("./lib/Spire.Doc.Base.js");

// Define a test case
test('testCase', async () => {
    await new Promise((resolve) => {
        Module.onRuntimeInitialized = () => {
            createWord();
            resolve();
        };
    });
});

// Create a custom function
function createWord(){

    // Load fonts
    spiredoc.copyLocalPathToVFS("fonts/","/Library/Fonts/");

    // Specify output file name and path
    const outputFileName = "HelloWorld.docx";
    const outputPath=  "result/" + outputFileName;

    // Create a new document
    const document = Module.spiredoc.Document.Create();

    // Add a section
    let section = document.AddSection();

    // Add a paragraph
    let paragraph = section.AddParagraph();

    // Append text to the paragraph
    paragraph.AppendText("Hello, World!");

    // Save the document to a Word file
    document.SaveToFile({fileName: outputFileName, fileFormat: spiredoc.FileFormat.Docx2013,
    });
    spiredoc.copyFileFromFSToLocalStorage(outputFileName, outputPath);

    // Dispose resources
    document.Dispose();
}
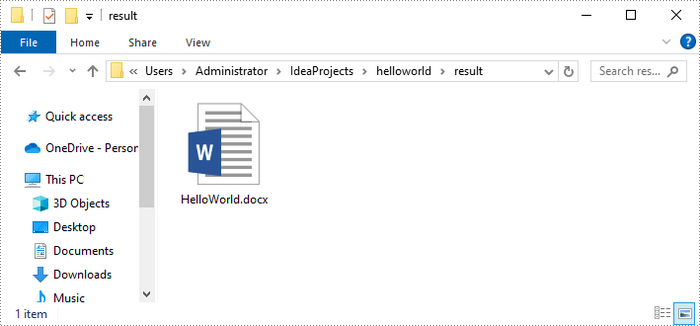
Once you run the code, you will find the generated Word file in the designated file path.
Apply for a Temporary License
If you'd like to remove the evaluation message from the generated documents, or to get rid of the function limitations, please request a 30-day trial license for yourself.