
Protection (2)
Protect Word Documents and Restrict Editing with JavaScript in React
2026-09-21 07:15:09 Written by Amy ZhaoIn document distribution and collaboration, controlling what a reader may do with a document often matters more than controlling who may open it — when a contract template goes to a client, the client should fill in the blank items without touching the agreed clauses; when a final draft goes to the team, comments should be allowed but the body text should not be edited directly. Requirements like these are met by restricting editing, which is a different concept from setting an open password. Spire.Doc for JavaScript processes Word documents directly in the browser via WebAssembly, using a virtual file system (VFS) to manage fonts and file resources — no backend server required.
This article covers two core features:
For installation and project setup, refer to Integrating Spire.Doc for JavaScript in a React Project. The examples below assume Spire.Doc is installed and the WebAssembly module is initialized.
Protect a Document with a Specified Protection Type
Word's editing restrictions come in five protection types, each covering a different editable scope: NoProtection (no restriction), AllowOnlyComments (comments only), AllowOnlyFormFields (form fields only), AllowOnlyReading (reading only), and AllowOnlyRevisions (tracked changes only). Calling the Protect method with a ProtectionType enum value and a password applies a restriction to the whole document as required.
Protecting a document with a specified protection type involves three stages: first, load the font files and the target Word document into the WASM virtual file system via FetchFileToVFS; then instantiate a Document and load the file, and call the Protect method to specify the protection type together with the password that lifts the restriction; finally, save the document, read the generated file from VFS, wrap it as a Blob, and trigger a browser download.
function App() {
  const protectWithSpecifiedType = async () => {
    const docModule = window.wasmModule?.spiredoc;
    if (!docModule) {
      alert('Spire.Doc is not ready yet');
      return;
    }

    const inputFileName = 'Template.docx';
    await window.spire.FetchFileToVFS(inputFileName, '', `${process.env.PUBLIC_URL}/data/`);

    // Load the document
    const doc = new docModule.Document();
    doc.LoadFromFile(inputFileName);

    // Protect the document with the "AllowOnlyReading" type; the password lifts the restriction
    doc.Protect({ type: docModule.ProtectionType.AllowOnlyReading, password: "123456" });

    // Define the output file name and save
    const outputFileName = "SpecifiedProtectionType.docx";
    doc.SaveToFile({ fileName: outputFileName, fileFormat: docModule.FileFormat.Docx2013 });
    doc.Dispose();

    const modifiedFileArray = window.dotnetRuntime.Module.FS.readFile(outputFileName);
    const blob = new Blob([modifiedFileArray], { type: 'application/vnd.openxmlformats-officedocument.wordprocessingml.document' });
    const url = URL.createObjectURL(blob);
    const a = document.createElement('a');
    a.href = url;
    a.download = outputFileName;
    a.click();
    URL.revokeObjectURL(url);
  };

 return (
    <div style={{ textAlign: 'center', height: '300px' }}>
      <h1>Protect a Document with a Specified Type</h1>
      <button onClick={protectWithSpecifiedType}>Generate</button>
    </div>
  );
}
export default App;
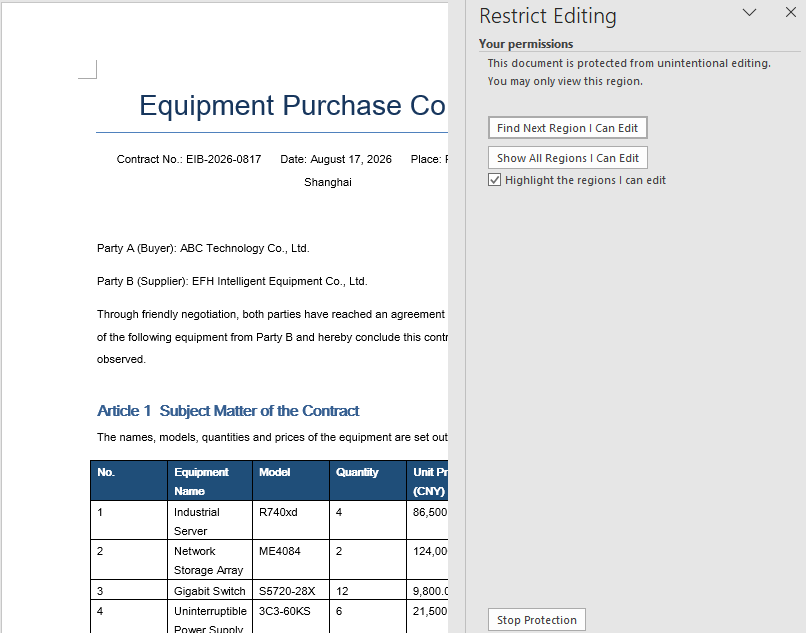
Once the document is protected with the AllowOnlyReading type, its content can only be viewed and the editing commands on the ribbon are restricted.
Lock Only Specified Sections
Protecting the whole document uniformly is not always appropriate. In templates such as contracts and quotations, usually only a few places need to be filled in while every other clause has to stay locked. In that case, protect the whole document with AllowOnlyFormFields first, then release the section that may be edited through the ProtectForm property, which gives per-section control over the permissions.
Locking only specified sections involves three stages: first, load the font files into the WASM virtual file system via FetchFileToVFS; then instantiate a Document, create several sections with AddSection and write content into them, call Protect to protect the whole document for form fields only, and set the ProtectForm property of the section to be released to false; finally, save the document, read the generated file from VFS, wrap it as a Blob, and trigger a browser download.
function App() {
  const lockSpecifiedSections = async () => {
    const docModule = window.wasmModule?.spiredoc;
    if (!docModule) {
      alert('Spire.Doc is not ready yet');
      return;
    }

    // Create a new document and add two sections
    const doc = new docModule.Document();
    let s1 = doc.AddSection();
    let s2 = doc.AddSection();

    // Write content into each of the two sections
    s1.AddParagraph().AppendText("Spire.Doc demo, section 1");
    s2.AddParagraph().AppendText("Spire.Doc demo, section 2");

    // Protect the whole document for form fields only
    doc.Protect({ type: docModule.ProtectionType.AllowOnlyFormFields, password: "123" });

    // Release section 2 on its own so that it can be edited
    s2.ProtectForm = false;

    // Define the output file name and save
    const outputFileName = 'LockSpecifiedSections.docx';
    doc.SaveToFile({ fileName: outputFileName, fileFormat: docModule.FileFormat.Docx2013 });
    doc.Dispose();

    const modifiedFileArray = window.dotnetRuntime.Module.FS.readFile(outputFileName);
    const blob = new Blob([modifiedFileArray], { type: 'application/vnd.openxmlformats-officedocument.wordprocessingml.document' });
    const url = URL.createObjectURL(blob);
    const a = document.createElement('a');
    a.href = url;
    a.download = outputFileName;
    a.click();
    URL.revokeObjectURL(url);
  };

 return (
    <div style={{ textAlign: 'center', height: '300px' }}>
      <h1>Lock Specified Sections of a Word Document</h1>
      <button onClick={lockSpecifiedSections}>Generate</button>
    </div>
  );
}
export default App;
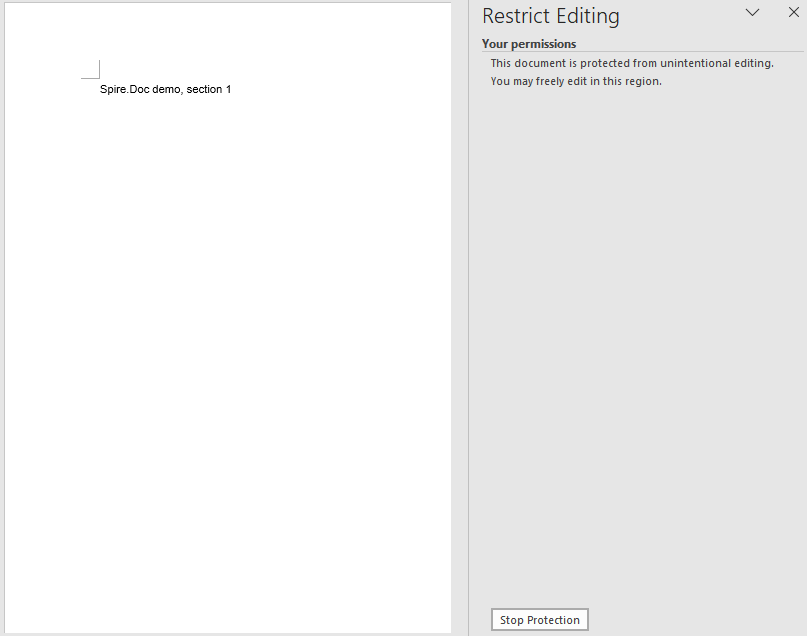
Once section 2 has been released, only section 1 keeps its editing restriction in the document.
FAQ
A section is still not editable after ProtectForm = false
Cause: ProtectForm only takes effect while the document is protected with AllowOnlyFormFields (form fields only). If the document uses another protection type such as AllowOnlyReading, releasing a single section has no effect.
Solution: Make sure the protection type passed to Protect matches the operation that releases the section:
doc.Protect({ type: wasmModule.ProtectionType.AllowOnlyFormFields, password: "123" });
s2.ProtectForm = false;
A protected document can still be selected and copied
Cause: Every protection type restricts editing behaviour, not reading behaviour. AllowOnlyReading only blocks changes to the body text; it does not affect selection, copying or searching. To restrict reading as well, an open password should be used rather than editing restrictions.
Solution: Choose the means for the actual purpose — use document encryption when the content must not be taken away, and use editing restrictions only when the content must not be changed:
doc.Protect({ type: wasmModule.ProtectionType.AllowOnlyReading, password: "123456" });
Get a Free License
Spire.Doc for JavaScript offers a 30-day full-featured free trial license with no functional limitations. Apply here to evaluate before purchasing.
Set and Remove Editable Ranges in Word Documents with JavaScript in React
2026-09-21 02:59:40 Written by Amy ZhaoIn documents such as contracts, forms, and official templates, you often want the person filling them in to modify only a few specific places — signature details, project name, acceptance conclusion — while every other clause has to stay exactly as it is. Setting an editable range on a document pins down "what may be changed" precisely and leaves everything else read-only. Spire.Doc for JavaScript does this entirely in the browser via WebAssembly, using a virtual file system (VFS) to manage fonts and file resources — no backend server required.
This article covers two core features:
For installation and project setup, refer to Integrating Spire.Doc for JavaScript in a React Project. The examples below assume Spire.Doc is installed and the WebAssembly module is initialized.
Set an Editable Range
Setting an editable range involves three stages: first, load the font files and the target Word document into the WASM virtual file system via FetchFileToVFS; then instantiate a Document and load the file, call Protect to make the whole document read-only, and create a pair of PermissionStart and PermissionEnd markers that share the same id to mark the specified paragraph as an editable range; finally, save the document, read the generated file from VFS, wrap it as a Blob, and trigger a browser download.
function App() {
  const SetEditableRange = async () => {
    const docModule = window.wasmModule?.spiredoc;
    if (!docModule) {
      alert('Spire.Doc is not ready yet');
      return;
    }

    // Load the input document into VFS
    const inputFileName = "SetEditableRange.docx";
    await window.spire.FetchFileToVFS(inputFileName, "", `${process.env.PUBLIC_URL}static/data/`);

    // Create a document object and load the document
    const doc = new docModule.Document();
    doc.LoadFromFile(inputFileName);

    // Protect the whole document: everything outside the editable range is read-only
    doc.Protect({ type: docModule.ProtectionType.AllowOnlyReading, password: "password" });

    // Create the permission markers: a start and an end with the same id form one editable range
    const start = new docModule.PermissionStart(doc, "testID");
    const end = new docModule.PermissionEnd(doc, "testID");

    // Insert the markers into the first paragraph: the start at the beginning, the end appended at the end
    doc.Sections.get_Item(0).Paragraphs.get_Item(0).ChildObjects.Insert(0, start);
    doc.Sections.get_Item(0).Paragraphs.get_Item(0).ChildObjects.Add(end);

    // Save the document
    const outputFileName = "Set Editable Range.docx";
    doc.SaveToFile({ fileName: outputFileName, fileFormat: docModule.FileFormat.Docx2013 });
    doc.Dispose();

    const modifiedFileArray = window.dotnetRuntime.Module.FS.readFile(outputFileName);
    const blob = new Blob([modifiedFileArray], { type: 'application/vnd.openxmlformats-officedocument.wordprocessingml.document' });
    const url = URL.createObjectURL(blob);
    const a = document.createElement('a');
    a.href = url;
    a.download = outputFileName;
    a.click();
    URL.revokeObjectURL(url);
  };

 return (
    <div style={{ textAlign: 'center', height: '300px' }}>
      <h1>Set Editable Range in a Word Document</h1>
      <button onClick={SetEditableRange}>
        Generate
      </button>
    </div>
  );
}
export default App;
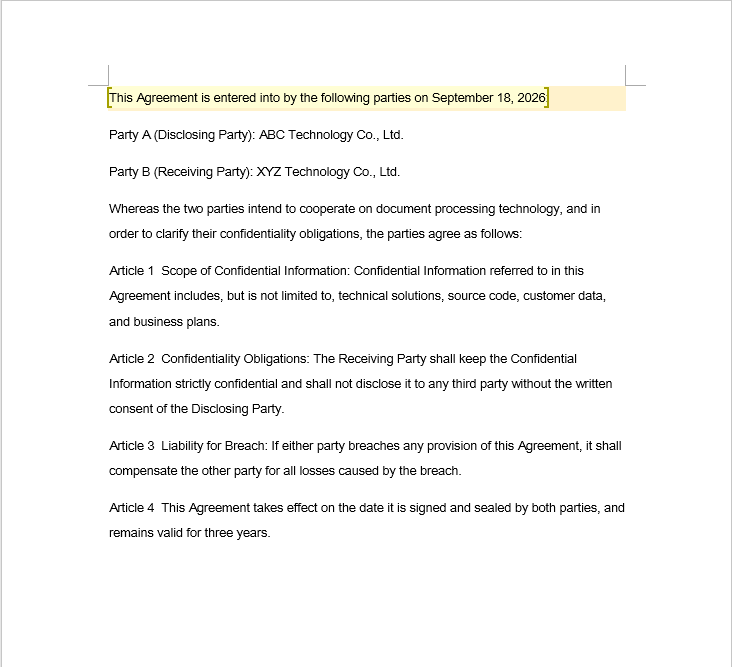
In the sample document, the places that need to be filled in are highlighted with light shading (a visual hint only — it has nothing to do with how the editable range is set). Once the editable range has been set, only the shaded paragraph can be modified, and the remaining clauses are read-only in Word.
Remove an Editable Range
Removing an editable range takes a single pass: walk each section and each paragraph of the document in turn, look for the PermissionStart and PermissionEnd objects in the paragraph's ChildObjects collection, and remove each one you find from the collection.
There is one detail that is easy to trip over: ChildObjects.Remove shrinks the collection immediately, so the indexes of the remaining elements all shift forward. The index must therefore not be incremented while removing, or every marker you delete causes the one right behind it to be skipped, leaving markers behind.
function App() {
  const RemoveEditableRange = async () => {
    const docModule = window.wasmModule?.spiredoc;
    if (!docModule) {
      alert('Spire.Doc is not ready yet');
      return;
    }

      // Load the input document into VFS
      const inputFileName = "RemoveEditableRange.docx";
      await window.spire.FetchFileToVFS(inputFileName, "", `${process.env.PUBLIC_URL}static/data/`);

      // Create a document object and load the document
      const doc = new docModule.Document();
      doc.LoadFromFile(inputFileName);

      // Iterate over every section and paragraph and delete the permission markers
      for (let i = 0; i < doc.Sections.Count; i++) {
        const section = doc.Sections.get_Item(i);
        for (let j = 0; j < section.Body.Paragraphs.Count; j++) {
          const paragraph = section.Body.Paragraphs.get_Item(j);

          // Remove on a match; the collection shrinks, so the index is not incremented
          for (let k = 0; k < paragraph.ChildObjects.Count;) {
            const obj = paragraph.ChildObjects.get_Item(k);
            if (obj instanceof docModule.PermissionStart || obj instanceof docModule.PermissionEnd) {
              paragraph.ChildObjects.Remove(obj);
            } else {
              k++;
            }
          }
        }
      }

      // Save the document
      const outputFileName = "Remove Editable Range.docx";
      doc.SaveToFile({ fileName: outputFileName, fileFormat: docModule.FileFormat.Docx2013 });

    // Release resources
    doc.Dispose();

    const modifiedFileArray = window.dotnetRuntime.Module.FS.readFile(outputFileName);
    const blob = new Blob([modifiedFileArray], { type: 'application/vnd.openxmlformats-officedocument.wordprocessingml.document' });
    const url = URL.createObjectURL(blob);
    const a = document.createElement('a');
    a.href = url;
    a.download = outputFileName;
    a.click();
    URL.revokeObjectURL(url);
  };

 return (
    <div style={{ textAlign: 'center', height: '300px' }}>
      <h1>Remove Editable Ranges from a Word Document</h1>
      <button onClick={RemoveEditableRange}>
        Generate
      </button>
    </div>
  );
}
export default App;
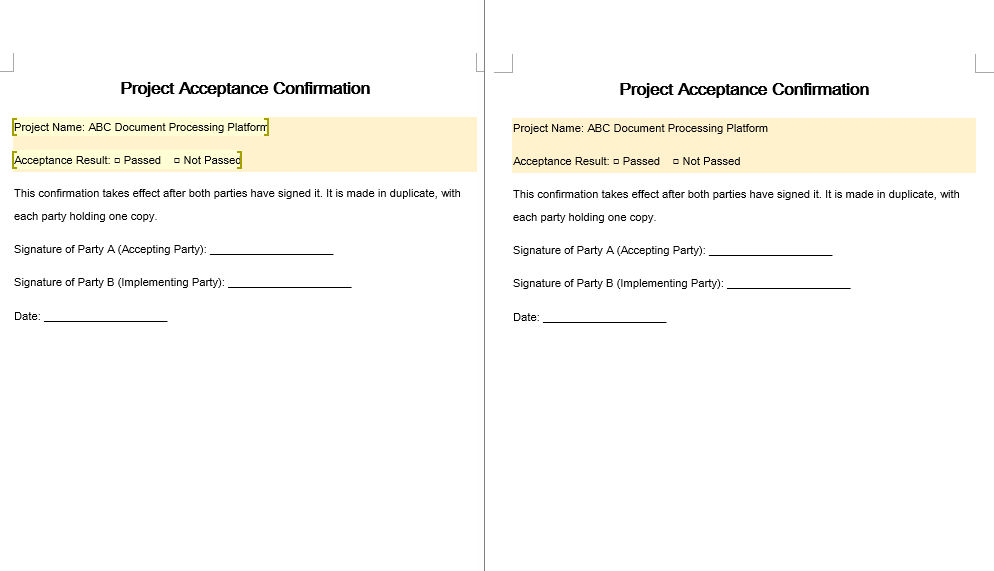
Removing the markers only affects how the editable area is divided; the text content and the formatting of the document do not change in any way.
FAQ
The editable range is set, but the content inside it still cannot be edited
Cause: The permission markers only take effect together with the document's editing restriction. If PermissionStart and PermissionEnd are inserted without calling Protect, the document never enters the protected state and the markers have no effect whatsoever; on top of that, the ids of the two markers must match exactly before Word recognizes them as one single editable range.
Solution: Enable the editing restriction first, and then create the paired markers with the same id:
// Enable protection first so that the markers mean something
document.Protect({ type: wasmModule.ProtectionType.AllowOnlyReading, password: "password" });

// The start and the end must use the same id
const start = new wasmModule.PermissionStart(document, "testID");
const end = new wasmModule.PermissionEnd(document, "testID");
Some markers are missed when removing editable ranges
Cause: ChildObjects.Remove shifts the indexes of all the subsequent elements in the collection forward. If the index is incremented while removing inside a for loop, every object that is removed causes the one right behind it to be skipped, and the more markers are left in the document, the more obvious the misses become.
Solution: Switch to "remove on a match, do not increment the index", or collect the objects to be removed first and then iterate backwards:
for (let k = 0; k < paragraph.ChildObjects.Count;) {
  const obj = paragraph.ChildObjects.get_Item(k);
  if (obj instanceof wasmModule.PermissionStart || obj instanceof wasmModule.PermissionEnd) {
    paragraph.ChildObjects.Remove(obj);
    // Do not increment k here: check the new object at the current index
  } else {
    k++;
  }
}
The document is still read-only after the markers are removed
Cause: PermissionStart and PermissionEnd only mark "which areas may be edited"; removing them does not turn off the document's editing restriction. The protection is still in effect, so at that point the whole document cannot be edited.
Solution: If the protection is no longer needed, call Unprotect after removing the markers; if the document was protected with a password, pass the password that was used at the time:
document.Unprotect("password");
Get a Free License
Spire.Doc for JavaScript offers a 30-day full-featured free trial license with no functional limitations. Apply here to evaluate before purchasing.
