
Image and Shape (3)
Add, Delete, and Replace Images in Word with JavaScript in React
2026-09-21 02:34:17 Written by Amy ZhaoWorking with images in Word documents is one of the most common requirements in day-to-day office development. Whether you are adding a company logo to a contract template, cleaning up leftover placeholder pictures in a document, or batch-replacing the stamps and icons in a report, manipulating images dynamically keeps document content in sync with your business data. Spire.Doc for JavaScript handles Word image processing entirely in the browser via WebAssembly, using a virtual file system (VFS) to manage fonts, documents, and image resources — no backend server required.
This article covers three core features:
- Add an image to a Word document
- Delete images from a Word document
- Replace images in a Word document
For installation and project setup, refer to Integrating Spire.Doc for JavaScript in a React Project. The examples below assume Spire.Doc is installed and the WebAssembly module is initialized.
Add an Image to a Word Document
Adding an image involves three phases: first, load the font files, the target Word document, and the image to be inserted into the WASM virtual file system via FetchFileToVFS; then instantiate a Document and load the file, get the target section and create a DocPicture object, call LoadImage to load the image and set its position, size, and text wrapping style, then use ChildObjects.Insert to insert the picture at the specified position in the specified paragraph; finally, save the document, read the generated file from VFS, wrap it as a Blob, and trigger a browser download.
function App() {
  const insertImage = async () => {
    const docModule = window.wasmModule?.spiredoc;
    if (!docModule) {
      alert('Spire.Doc is not ready yet');
      return;
    }
    // Load the input document into VFS
    const inputFileName = "BlankTemplate.docx";
    await window.spire.FetchFileToVFS(inputFileName, "", `${process.env.PUBLIC_URL}static/data/`);

    // Load the image file to be inserted into VFS
    const inputImgFileName = "Word.png";
    await window.spire.FetchFileToVFS(inputImgFileName, "", `${process.env.PUBLIC_URL}static/data/`);

    // Load the document
    let doc = new docModule.Document();
    doc.LoadFromFile(inputFileName);

    // Get the first section
    let section = doc.Sections.get_Item(0);

    // Add a heading paragraph
    let paragraph = section.AddParagraph();
    paragraph.AppendText("The sample demonstrates how to insert an image into a document.");
    paragraph.ApplyStyle({ builtinStyle: docModule.BuiltinStyle.Heading2 });

    // Add a new paragraph to hold the picture
    paragraph = section.AddParagraph();
    paragraph.AppendText("This is a picture.");

    // Create a picture object and load the image file
    let picture = new docModule.DocPicture(doc);
    picture.LoadImage({ imgFile: inputImgFileName });

    // Set the position of the picture
    picture.HorizontalPosition = 50.0;
    picture.VerticalPosition = 60.0;

    // Set the size of the picture
    picture.Width = 200;
    picture.Height = 200;

    // Set the text wrapping style of the picture
    picture.TextWrappingStyle = docModule.TextWrappingStyle.Through;

    // Insert the picture at the beginning of the paragraph (index 0)
    paragraph.ChildObjects.Insert(0, picture);

    // Save the document
    const outputFileName = "Insert Image.docx";
    doc.SaveToFile({ fileName: outputFileName, fileFormat: docModule.FileFormat.Docx });
    // Release resources
    doc.Dispose();

    const modifiedFileArray = window.dotnetRuntime.Module.FS.readFile(outputFileName);
    const blob = new Blob([modifiedFileArray], { type: 'application/vnd.openxmlformats-officedocument.wordprocessingml.document' });
    const url = URL.createObjectURL(blob);
    const a = document.createElement('a');
    a.href = url;
    a.download = outputFileName;
    a.click();
    URL.revokeObjectURL(url);
  };

 return (
    <div style={{ textAlign: 'center', height: '300px' }}>
      <h1>Insert an Image into a Word Document</h1>
      <button onClick={insertImage}>
        Generate
      </button>
    </div>
  );
}
export default App;
The code above loads the picture through DocPicture, sets its absolute position to (50, 60) and its size to 200×200, applies the Through text wrapping style, and finally inserts it at the beginning of the second paragraph
Delete Images from a Word Document
Deleting images also involves three phases: first, load the font files and the Word document to be processed into the WASM virtual file system via FetchFileToVFS; then instantiate a Document and load the file, walk the sections, the paragraphs, and the child objects inside each paragraph level by level, and use DocumentObjectType.Picture to determine whether an object is a picture — if it is, call ChildObjects.Remove to remove it from the paragraph; finally, save the document, read the generated file from VFS, wrap it as a Blob, and trigger a browser download.
function App() {
  const RemoveImage = async () => {
    const docModule = window.wasmModule?.spiredoc;
    if (!docModule) {
      alert('Spire.Doc is not ready yet');
      return;
    }
   // Load the input document into VFS
      const inputFileName = "ImageTemplate.docx";
      await window.spire.FetchFileToVFS(inputFileName, "", `${process.env.PUBLIC_URL}/static/data/`);

      // Load the document
      let doc = new docModule.Document();
      doc.LoadFromFile(inputFileName);

      let removedCount = 0;

      // Iterate over every section and paragraph and delete the pictures in each paragraph
      for (let i = 0; i < doc.Sections.Count; i++) {
        let sec = doc.Sections.get_Item(i);
        for (let j = 0; j < sec.Paragraphs.Count; j++) {
          let para = sec.Paragraphs.get_Item(j);

          // Collect all the picture objects in the paragraph
          let pictures = [];
          for (let k = 0; k < para.ChildObjects.Count; k++) {
            let docObj = para.ChildObjects.get_Item(k);
            if (docObj.DocumentObjectType == docModule.DocumentObjectType.Picture) {
              pictures.push(docObj);
            }
          }

          // Remove the pictures from the paragraph one by one
          for (let m = 0; m < pictures.length; m++) {
            para.ChildObjects.Remove(pictures[m]);
            removedCount++;
          }
        }
      }

      // Save the document
      const outputFileName = "Delete Image.docx";
      doc.SaveToFile({ fileName: outputFileName, fileFormat: docModule.FileFormat.Docx });
    // Release resources
    doc.Dispose();

    const modifiedFileArray = window.dotnetRuntime.Module.FS.readFile(outputFileName);
    const blob = new Blob([modifiedFileArray], { type: 'application/vnd.openxmlformats-officedocument.wordprocessingml.document' });
    const url = URL.createObjectURL(blob);
    const a = document.createElement('a');
    a.href = url;
    a.download = outputFileName;
    a.click();
    URL.revokeObjectURL(url);
  };

 return (
    <div style={{ textAlign: 'center', height: '300px' }}>
      <h1>Delete Images from a Word Document</h1>
      <button onClick={RemoveImage}>
        Generate
      </button>
    </div>
  );
}
export default App;
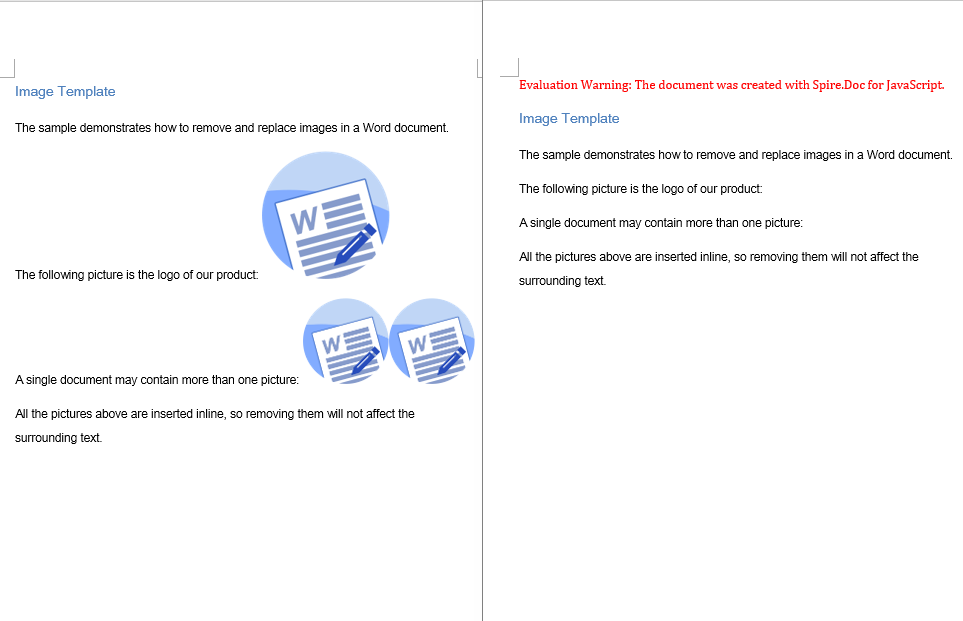
The code above walks the document structure and removes every picture object, while the text content and formatting in the paragraphs stay unchanged. The picture on the left is the document before deletion, and the one on the right is the same document after all the images have been removed
Replace Images in a Word Document
Replacing an image can be seen as a combination of deleting and adding. It involves three phases: first, load the font files, the target Word document, and the new image file into the WASM virtual file system via FetchFileToVFS; then walk the sections and paragraphs, locate the picture objects and record their index within the paragraph, their original size, and their text wrapping style, call ChildObjects.Remove to remove the old picture, and then create a new DocPicture and insert it at the original index with the same parameters; finally, save the document, read the generated file from VFS, wrap it as a Blob, and trigger a browser download.
function App() {
  const ReplaceImage = async () => {
    const docModule = window.wasmModule?.spiredoc;
    if (!docModule) {
      alert('Spire.Doc is not ready yet');
      return;
    }

      // Load the input document into VFS
      const inputFileName = "ImageTemplate.docx";
      await window.spire.FetchFileToVFS(inputFileName, "", `${process.env.PUBLIC_URL}/static/data/`);

      // Load the new picture that will take the place of the old ones into VFS
      const inputImgFileName = "NewLogo.png";
      await window.spire.FetchFileToVFS(inputImgFileName, "", `${process.env.PUBLIC_URL}/static/data/`);

      // Load the document
      let doc = new docModule.Document();
      doc.LoadFromFile(inputFileName);

      // Iterate over every section and paragraph and replace the pictures in each paragraph
      for (let i = 0; i < doc.Sections.Count; i++) {
        let sec = doc.Sections.get_Item(i);
        for (let j = 0; j < sec.Paragraphs.Count; j++) {
          let para = sec.Paragraphs.get_Item(j);

          // Collect the picture objects in the paragraph along with their index in ChildObjects
          let pictures = [];
          for (let k = 0; k < para.ChildObjects.Count; k++) {
            let docObj = para.ChildObjects.get_Item(k);
            if (docObj.DocumentObjectType == docModule.DocumentObjectType.Picture) {
              pictures.push({ index: k, picture: docObj });
            }
          }

          // Iterate backwards so that removing an object does not shift the remaining indexes
          for (let m = pictures.length - 1; m >= 0; m--) {
            let index = pictures[m].index;
            let picture = pictures[m].picture;

            // Record the size and the text wrapping style of the original picture
            let width = picture.Width;
            let height = picture.Height;
            let wrappingStyle = picture.TextWrappingStyle;

            // Remove the original picture
            para.ChildObjects.Remove(picture);

            // Create a new picture that keeps the size and wrapping style of the original one
            let newPicture = new docModule.DocPicture(doc);
            newPicture.LoadImage({ imgFile: inputImgFileName });
            newPicture.Width = width;
            newPicture.Height = height;
            newPicture.TextWrappingStyle = wrappingStyle;

            // Insert the new picture at the original index
            para.ChildObjects.Insert(index, newPicture);
          }
        }
      }

      // Save the document
      const outputFileName = "Replace Image.docx";
      doc.SaveToFile({ fileName: outputFileName, fileFormat: docModule.FileFormat.Docx });
    // Release resources
    doc.Dispose();

    const modifiedFileArray = window.dotnetRuntime.Module.FS.readFile(outputFileName);
    const blob = new Blob([modifiedFileArray], { type: 'application/vnd.openxmlformats-officedocument.wordprocessingml.document' });
    const url = URL.createObjectURL(blob);
    const a = document.createElement('a');
    a.href = url;
    a.download = outputFileName;
    a.click();
    URL.revokeObjectURL(url);
  };

 return (
    <div style={{ textAlign: 'center', height: '300px' }}>
      <h1>Replace Images in a Word Document</h1>
      <button onClick={ReplaceImage}>
        Generate
      </button>
    </div>
  );
}
export default App;
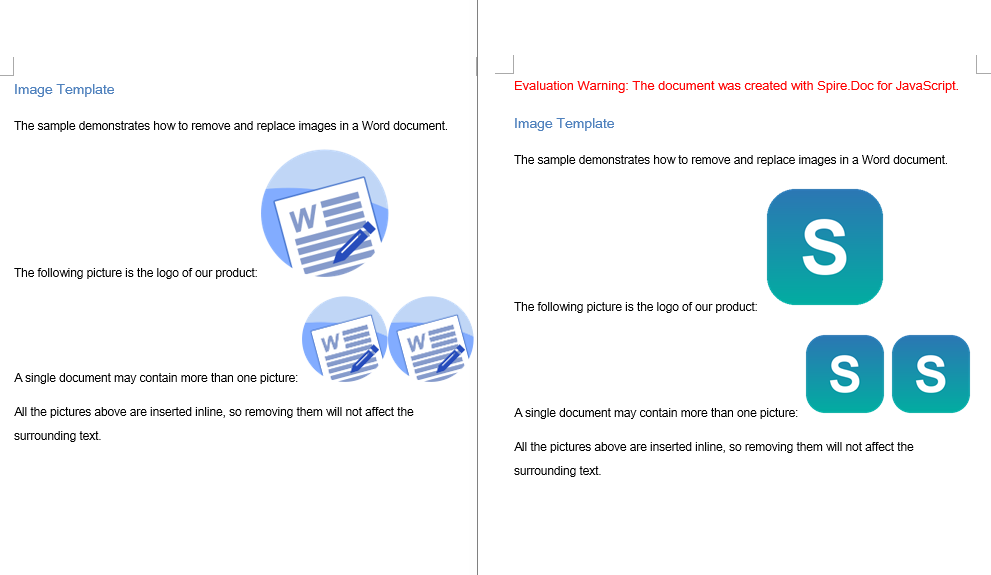
The code above removes each original picture while inserting the new picture at the index the original one occupied, reusing its size and its wrapping style, so the layout of the document is exactly the same as before the replacement
FAQ
The inserted image does not show up, or the image file cannot be found
Cause: The image file has not been loaded into the WASM virtual file system, or the path passed to FetchFileToVFS does not match the actual location of the file, so LoadImage cannot read the image data from VFS.
Solution: Load the image into VFS with FetchFileToVFS before inserting it, and make sure the target file name matches the file name passed to LoadImage:
await window.spire.FetchFileToVFS(
  'Word.png', '', `${process.env.PUBLIC_URL}static/data/`
);
let picture = new wasmModule.DocPicture(doc);
picture.LoadImage({ imgFile: 'Word.png' });
Images are left behind, or end up misplaced, after deletion or replacement
Cause: ChildObjects.Remove shifts the indexes of all subsequent child objects forward. If you read ChildObjects.Count while removing objects in the same loop, some of the pictures are skipped; and when replacing, inserting at the new index taken after the removal puts the picture at the wrong position.
Solution: Collect the picture objects and their original indexes in one pass first, then iterate backwards over that collection, and insert the new picture at the original index that was recorded:
// Collect the pictures and their indexes first
pictures.push({ index: k, picture: docObj });

// Then iterate backwards, removing each picture and inserting the new one back at its original index
for (let m = pictures.length - 1; m >= 0; m--) {
  para.ChildObjects.Remove(pictures[m].picture);
  para.ChildObjects.Insert(pictures[m].index, newPicture);
}
Get a Free License
Spire.Doc for JavaScript offers a 30-day full-featured free trial license with no functional limitations. Apply here to evaluate before purchasing.
Add, Delete, and Modify Shapes in Word with JavaScript in React
2026-09-21 02:33:48 Written by Amy ZhaoWorking with shapes in Word documents is one of the most common requirements in day-to-day office development. Whether you are stamping a rounded-rectangle signature box onto a contract template, annotating approval steps with a group of flowchart shapes, cleaning up leftover decorative shapes in a document, or restyling the shapes in an old template to match a new brand palette, manipulating shapes dynamically keeps document content in sync with your business data. Spire.Doc for JavaScript handles Word shapes entirely in the browser via WebAssembly, using a virtual file system (VFS) to manage fonts, documents, and image resources — no backend server required.
This article covers three core features:
For installation and project setup, refer to Integrating Spire.Doc for JavaScript in a React Project. The examples below assume Spire.Doc is installed and the WebAssembly module is initialized.
Add Shapes to a Word Document
Adding shapes involves three phases: first, load the font files into the WASM virtual file system via FetchFileToVFS; then instantiate a Document, add a section and a paragraph in turn, and call Paragraph.AppendShape to insert a shape of the specified type and size into the paragraph, anchoring it to the page with HorizontalOrigin/VerticalOrigin while setting its absolute coordinates through HorizontalPosition/VerticalPosition; finally, save the document, read the generated file from VFS, wrap it as a Blob, and trigger a browser download.
function App() {
  const appendShape = async () => {

    const docModule = window.wasmModule?.spiredoc;

    if (!docModule) {
      alert('Spire.Doc is not ready yet');
      return;
    }

      // Create a new document
    const doc = new docModule.Document();

      // Add a section
    let sec = doc.AddSection();

      // Add a paragraph to hold the shapes
    let paragraph = sec.AddParagraph();

    let x = 60, y = 40, lineCount = 0;
    for (let i = 1; i < 20; i++) {
      if (lineCount > 0 && lineCount % 8 == 0) {
        // Start a new page once 8 rows are filled, and reset the starting coordinates
        paragraph.AppendBreak(docModule.BreakType.PageBreak);
        x = 60;
        y = 40;
        lineCount = 0;
      }

        // Add a shape and set its size
      let shape = paragraph.AppendShape(50, 50, docModule.ShapeType.fromValue(i));

      // Position the shape in absolute coordinates relative to the page
      shape.HorizontalOrigin = docModule.HorizontalOrigin.Page;
      shape.HorizontalPosition = x;
      shape.VerticalOrigin = docModule.VerticalOrigin.Page;
      shape.VerticalPosition = y + 50;

      // Calculate the coordinates of the next shape
      x = x + shape.Width + 50;
      if (i > 0 && i % 5 == 0) {
        y = y + shape.Height + 120;
        lineCount++;
        x = 60;
        }
    }

    // Save the document
    const outputFileName = "Add Shapes.docx";
    doc.SaveToFile({ fileName: outputFileName, fileFormat: docModule.FileFormat.Docx });
    // Release resources
    doc.Dispose();

    const modifiedFileArray = window.dotnetRuntime.Module.FS.readFile(outputFileName);
    const blob = new Blob([modifiedFileArray], { type: 'application/vnd.openxmlformats-officedocument.wordprocessingml.document' });
    const url = URL.createObjectURL(blob);
    const a = document.createElement('a');
    a.href = url;
    a.download = outputFileName;
    a.click();
    URL.revokeObjectURL(url);
  };

 return (
    <div style={{ textAlign: 'center', height: '300px' }}>
      <h1>Add Shapes to a Word Document</h1>
      <button onClick={appendShape}>
        Generate
      </button>
    </div>
  );
}
export default App;
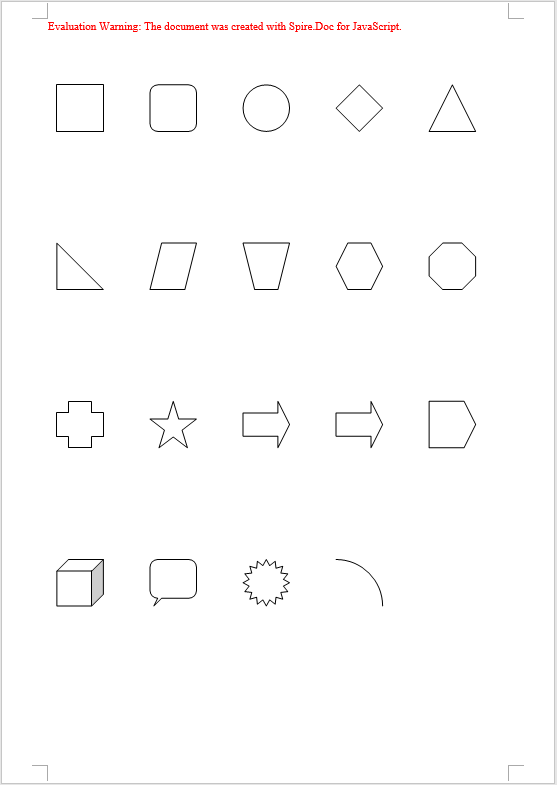
The code above inserts 19 different preset shapes in a loop, each 50×50, retrieving the shape type one by one with ShapeType.fromValue(i) and laying them out in rows and columns from the page origin — 5 shapes per row, and an automatic page break via AppendBreak once 8 rows are filled
When you need to insert several related shapes at once — building a flowchart out of rectangles, parallelograms, and arrows, for example — you can instead call Paragraph.AppendShapeGroup to create a shape group first, then add text boxes, arrows, and other child shapes to it with ChildObjects.Add so they are laid out together. Coordinates inside a shape group are relative to the group itself, so you need to work out the scale factor with Width / 1000.0 and Height / 1000.0, then divide the target coordinates of each child shape by that factor before assigning them to HorizontalPosition/VerticalPosition. A text box is created with new wasmModule.TextBox(doc) and its outline specified through SetShapeType; its Format.LineColor sets the stroke color in exactly the same way as StrokeColor does for a regular shape.
Delete Shapes from a Word Document
Deleting shapes involves three phases: first, load the font files and the Word document to be processed into the WASM virtual file system via FetchFileToVFS; then instantiate a Document and load the file, walk the sections and paragraphs of the document level by level, and use DocumentObjectType to determine whether a child object in a paragraph is a shape — regular shapes and text boxes in a document both exist as type Shape, shape groups are ShapeGroup, while a text box created in memory with new wasmModule.TextBox(doc) and not yet saved is reported separately as TextBox, so all three types must be checked; once identified, collect the objects and remove them from the paragraph one by one with ChildObjects.Remove; finally, save the document, read the generated file from VFS, wrap it as a Blob, and trigger a browser download.
function App() {
  const removeShape = async () => {
    const docModule = window.wasmModule?.spiredoc;
    if (!docModule) {
      alert('Spire.Doc is not ready yet');
      return;
    }
    const inputFileName = 'ShapeTemplate.docx';
    await window.spire.FetchFileToVFS(inputFileName, '', `${process.env.PUBLIC_URL}static/data/`);

   // Load the document
    let doc = new docModule.Document();
    doc.LoadFromFile(inputFileName);

    let removedCount = 0;

    // Iterate over every section and paragraph and delete the shapes in each paragraph
    for (let i = 0; i < doc.Sections.Count; i++) {
      let sec = doc.Sections.get_Item(i);
      for (let j = 0; j < sec.Paragraphs.Count; j++) {
        let para = sec.Paragraphs.get_Item(j);

        // Collect the shapes in the paragraph in one pass: regular shapes and text boxes are Shape, shape groups are ShapeGroup
        let shapes = [];
        for (let k = 0; k < para.ChildObjects.Count; k++) {
          let docObj = para.ChildObjects.get_Item(k);
          let objType = docObj.DocumentObjectType;
          if (objType == docModule.DocumentObjectType.Shape
            || objType == docModule.DocumentObjectType.ShapeGroup
            || objType == docModule.DocumentObjectType.TextBox) {
              shapes.push(docObj);
    }
        }

        // Remove the shapes from the paragraph one by one
        for (let m = 0; m < shapes.length; m++) {
         para.ChildObjects.Remove(shapes[m]);
         removedCount++;
        }
      }
    }

    // Save the document
    const outputFileName = "Delete Shapes.docx";
    doc.SaveToFile({ fileName: outputFileName, fileFormat: docModule.FileFormat.Docx });

    // Release resources
    doc.Dispose();

    const modifiedFileArray = window.dotnetRuntime.Module.FS.readFile(outputFileName);
    const blob = new Blob([modifiedFileArray], { type: 'application/vnd.openxmlformats-officedocument.wordprocessingml.document' });
    const url = URL.createObjectURL(blob);
    const a = document.createElement('a');
    a.href = url;
    a.download = outputFileName;
    a.click();
    URL.revokeObjectURL(url);
  };

 return (
    <div style={{ textAlign: 'center', height: '300px' }}>
      <h1>Delete Shapes from a Word Document</h1>
      <button onClick={removeShape}>
        Generate
      </button>
    </div>
  );
}
export default App;
The code above walks the document structure and removes every shape on the page, while the text content and formatting in the paragraphs stay unchanged
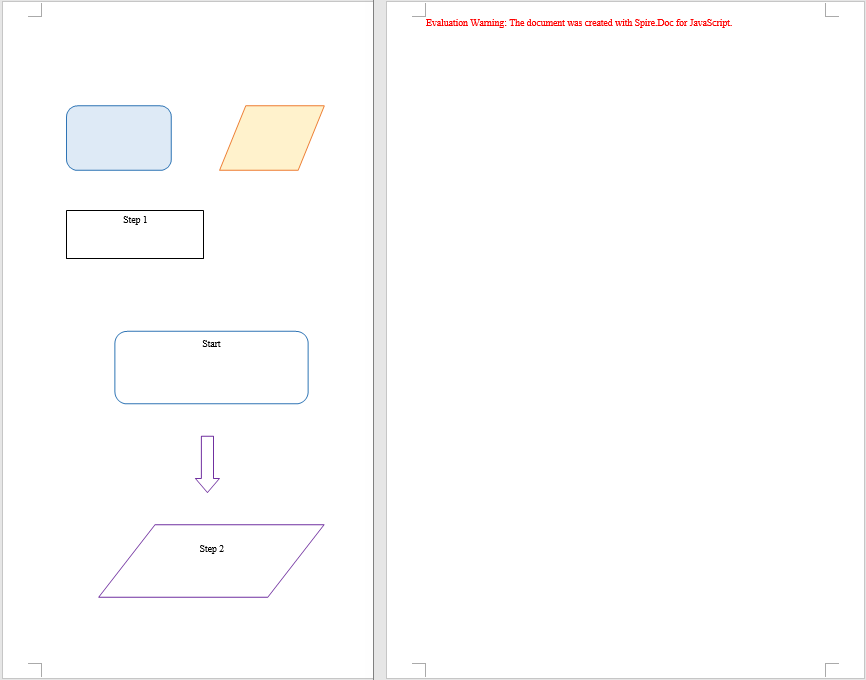
Modify Shapes in a Word Document
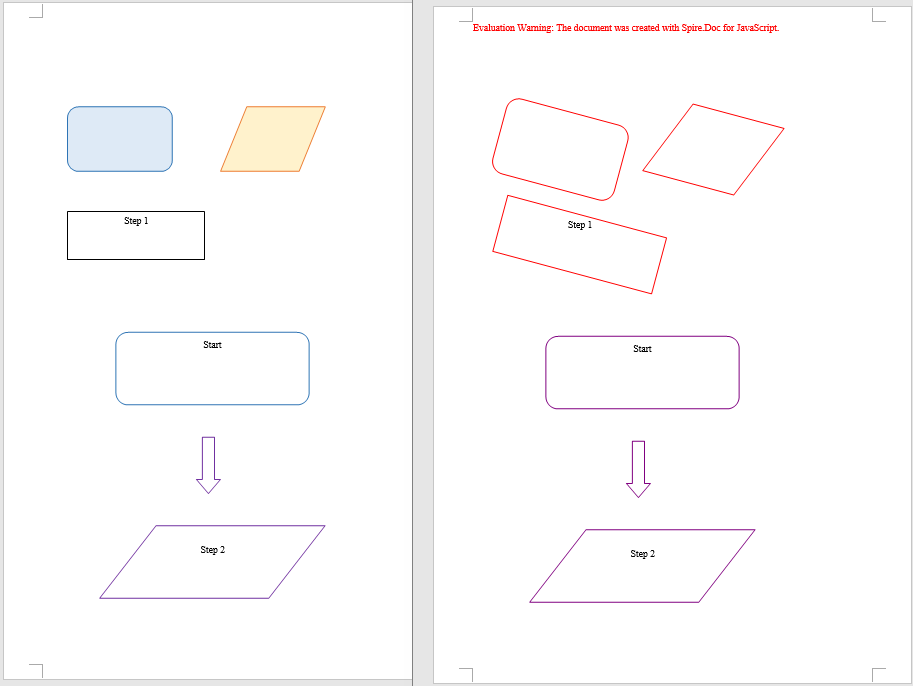
Modifying shapes involves three phases: first, load the font files and the Word document to be processed into the WASM virtual file system via FetchFileToVFS; then instantiate a Document and load the file, walk the sections and paragraphs to locate the shape objects within them, and for regular shapes and text boxes set FillColor and StrokeColor directly to change the colors and set Rotation, Width, and Height to adjust the rotation angle and size, while for a shape group you drill down into its ChildObjects and modify each child shape in turn; finally, save the document, read the generated file from VFS, wrap it as a Blob, and trigger a browser download.
function App() {
  const modifyShape = async () => {
    const docModule = window.wasmModule?.spiredoc;
    if (!docModule) {
      alert('Spire.Doc is not ready yet');
      return;
    }
    const inputFileName = 'ShapeTemplate.docx';
    await window.spire.FetchFileToVFS(inputFileName, '', `${process.env.PUBLIC_URL}static/data/`);

    // Load the document
    let doc = new docModule.Document();
    doc.LoadFromFile(inputFileName);

    // Iterate over every section and paragraph and modify the shapes in each paragraph
    for (let i = 0; i < doc.Sections.Count; i++) {
      let sec = doc.Sections.get_Item(i);
      for (let j = 0; j < sec.Paragraphs.Count; j++) {
        let para = sec.Paragraphs.get_Item(j);
        for (let k = 0; k < para.ChildObjects.Count; k++) {
          let docObj = para.ChildObjects.get_Item(k);
          let objType = docObj.DocumentObjectType;

          // Modify the fill color, outline color, rotation, and size of regular shapes and text boxes
          if (objType == docModule.DocumentObjectType.Shape) {
            docObj.FillColor = docModule.Color.get_Orange();
            docObj.StrokeColor = docModule.Color.get_Red();
            docObj.Rotation = 15;
            docObj.Width = docObj.Width * 1.2;
            docObj.Height = docObj.Height * 1.2;
          }

          // Modify a shape group: drill into the group and change the outline color of each child shape
          if (objType == docModule.DocumentObjectType.ShapeGroup) {
            for (let n = 0; n < docObj.ChildObjects.Count; n++) {
              let child = docObj.ChildObjects.get_Item(n);
              child.StrokeColor = docModule.Color.get_Purple();
            }
          }
        }
      }
    }

    // Save the document
    const outputFileName = "Modify Shapes.docx";
    doc.SaveToFile({ fileName: outputFileName, fileFormat: docModule.FileFormat.Docx });

    // Release resources
    doc.Dispose();

    const modifiedFileArray = window.dotnetRuntime.Module.FS.readFile(outputFileName);
    const blob = new Blob([modifiedFileArray], { type: 'application/vnd.openxmlformats-officedocument.wordprocessingml.document' });
    const url = URL.createObjectURL(blob);
    const a = document.createElement('a');
    a.href = url;
    a.download = outputFileName;
    a.click();
    URL.revokeObjectURL(url);
  };

 return (
    <div style={{ textAlign: 'center', height: '300px' }}>
      <h1>Modify Existing Shapes in a Word Document</h1>
      <button onClick={modifyShape}>
        Generate
      </button>
    </div>
  );
}
export default App;
The code above keeps each shape's original position and text while restyling every shape in the document with an orange fill and a red outline, scaling it up to 120% and rotating it 15 degrees, and the child shapes inside shape groups get the new outline color as well
FAQ
Shapes end up misplaced or pushed off the page after being added
Cause: The meaning of the coordinates in HorizontalPosition/VerticalPosition depends on the frame of reference (the origin). If HorizontalOrigin/VerticalOrigin are not set explicitly, the coordinates default to the paragraph or the column, so they shift along with paragraph indentation and page margins, and the shape drifts away from the intended position.
Solution: Specify the frame of reference with HorizontalOrigin/VerticalOrigin first, and then set the coordinate values:
// Position the shape relative to the page
shape.HorizontalOrigin = wasmModule.HorizontalOrigin.Page;
shape.HorizontalPosition = x;
shape.VerticalOrigin = wasmModule.VerticalOrigin.Page;
shape.VerticalPosition = y + 50;
Some objects are missed when deleting shapes
Cause: In Spire.Doc a shape does not have just one DocumentObjectType: regular shapes and text boxes are uniformly Shape, shape groups are ShapeGroup, and a text box created in memory and not yet saved is TextBox. Checking only for Shape will miss shape groups and unsaved text boxes. On top of that, ChildObjects.Remove shifts the indexes of all subsequent child objects forward, so reading ChildObjects.Count while removing during the same loop will also skip some objects.
Solution: Collect all three types into an array in one pass first, then process the array one item at a time; when modifying the child shapes inside a shape group, drill down into its ChildObjects and iterate separately:
// Collect the shape objects of all three types first
if (objType == wasmModule.DocumentObjectType.Shape
  || objType == wasmModule.DocumentObjectType.ShapeGroup
  || objType == wasmModule.DocumentObjectType.TextBox) {
  shapes.push(docObj);
}

// Then remove them together
for (let m = 0; m < shapes.length; m++) {
  para.ChildObjects.Remove(shapes[m]);
}
Get a Free License
Spire.Doc for JavaScript offers a 30-day full-featured free trial license with no functional limitations. Apply here to evaluate before purchasing.
In MS word, images can quickly and easily convey complex information that may be difficult to explain in words alone. Whether you're creating a report, a presentation, a newsletter, or a simple document, adding images can make your content more engaging, informative, and visually appealing. In this article, you will learn how to add images to a Word document in React using Spire.Doc for JavaScript.
- Insert an Image in a Word Document in JavaScript
- Insert an Image at a Specified Location in Word in JavaScript
Install the JavaScript Library
To get started with inserting images in Word in a React application, you can either download Spire.Doc for JavaScript from our website or install it via npm with the following command:
npm i spire.officeThe downloaded product package integrates Spire.Doc for JavaScript, Spire.XLS for JavaScript, Spire.PDF for JavaScript, and Spire.Presentation for JavaScript. To use the features of Spire.Doc for JavaScript, you need to copy the corresponding files (spire.doc.js, Spire.Doc.Wasm.zip, spire.common.js, Spire.Common.Wasm.zip, and the _framework folder) to the public folder of your project. To ensure proper text rendering, you can add relevant font files with a custom path. In the following example, the font is added to the path: public\static\font.
For more details, refer to the documentation: How to Integrate Spire.Doc for JavaScript in a React Project
Insert an Image in a Word Document in JavaScript
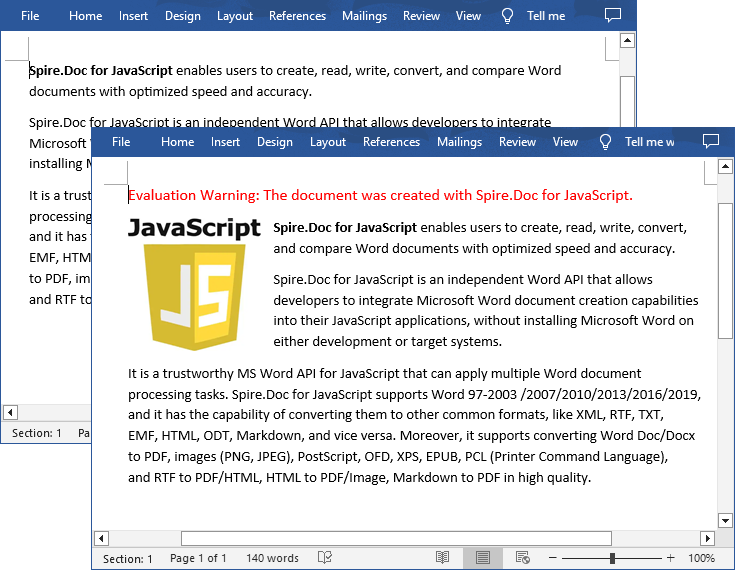
The Paragraph.AppendPicture() method offered by Spire.Doc for JavaScript allows to insert an image into a Word document. The following are the main steps to insert an image in Word and set its size, text wrapping style using JavaScript.
- Create a new document using the new wasmModule.Document() method.
- Load a Word document using the Document.LoadFromFile() method.
- Get a specified section in the document using the Document.Sections.get_Item() method.
- Get a specified paragraph in the section using the Section.Paragraphs.get_Item() method.
- Add an image to the specified paragraph using the Paragraph.AppendPicture() method.
- Set width, height and text wrapping style for the image.
- Save the result document using Document.SaveToFile() method.
- JavaScript
import React, { useState, useEffect } from 'react';

function App() {
  const [wasmModule, setWasmModule] = useState(null);
  // Load Spire.Doc
  useEffect(() => {
    (async () => {
      try {
        const publicUrl = process.env.PUBLIC_URL || '';
        const spireModule = await import(/* webpackIgnore: true */ `${publicUrl}/spire.doc.js`);
        const rawModule = spireModule.default || spireModule;
        window.wasmModule = typeof rawModule === 'function'
          ? await rawModule({ locateFile: p => p.endsWith('.wasm') ? `${publicUrl}/${p}` : p })
          : rawModule;
        setWasmModule(window.wasmModule);
      } catch (error) {
        console.error('Failed to load spire.doc.js WASM module:', error);
      }
    })();
  }, []);

  // Function to insert an image in Word
  const InsertWordImage = async () => {
    const wasmModule = window.wasmModule.spiredoc;

    if (wasmModule) {
      // Load the font files into the virtual file system (VFS)
      await window.spire.FetchFileToVFS('Arial.ttf', '/Library/Fonts/', `${process.env.PUBLIC_URL}/static/font/`);

      // Specify the input file name and the output file name
      const inputFileName = 'input.docx';
      const outputFileName = "InsertImage.docx";
      const imageFile = "logo.png";

      // Fetch the input file and add it to the VFS
      await window.spire.FetchFileToVFS(inputFileName, '', `${process.env.PUBLIC_URL}/static/data/`);
      await window.spire.FetchFileToVFS(imageFile, '', `${process.env.PUBLIC_URL}/static/data/`);

      // Create an instance of the Document class
      const doc = new wasmModule.Document();

      // Load the Word document
      doc.LoadFromFile({ fileName: inputFileName });

      // Get the first section
      const section = doc.Sections.get_Item(0);

      // Get the first paragraph
      const paragraph = section.Paragraphs.get_Item(0);

      // Add the image to the first paragraph
      let picture = paragraph.AppendPicture({ imgFile: imageFile });

      // Set image width and height
      picture.Width = 100;
      picture.Height = 100;

      // Set text wrapping style for the image
      picture.TextWrappingStyle = wasmModule.TextWrappingStyle.Square;

      // Save the result document
      doc.SaveToFile({ fileName: outputFileName, fileFormat: wasmModule.FileFormat.Docx });

      // Release resources
      doc.Dispose();

      // Read the generated Word file from VFS
      const modifiedFileArray = window.dotnetRuntime.Module.FS.readFile(outputFileName);

      // Create a Blob object from the Word file
      const modifiedFile = new Blob([modifiedFileArray], { type: "application/vnd.openxmlformats-officedocument.wordprocessingml.document" });

      // Create a URL for the Blob
      const url = URL.createObjectURL(modifiedFile);

      // Create an anchor element to trigger the download
      const a = document.createElement("a");
      a.href = url;
      a.download = outputFileName;
      document.body.appendChild(a);
      a.click();
      document.body.removeChild(a);
      URL.revokeObjectURL(url);
    }
  };

  return (
    <div style={{ textAlign: 'center', height: '300px' }}>
      <h1>Insert an Image in a Word Document Using JavaScript in React</h1>
      <button onClick={InsertWordImage} disabled={!wasmModule}>
        Execute
      </button>
    </div>
  );
}

export default App;
Run the code to launch the React app at localhost:3000. Once it's running, click on the "Execute" button to download the result file:
The input file and the result file:
Insert an Image at a Specified Location in Word in JavaScript
You can also place the image at any specified location in the Word document through the DocPicture.HorizontalPosition and DocPicture.VerticalPosition properties. The following are the main steps:
- Create a new document using the new wasmModule.Document() method.
- Add a section to the document using the Document.AddSection() method.
- Add a paragraph to the section using the Section.AddParagraph() method.
- Add text to the paragraph and set paragraph style.
- Add an image to the paragraph using the Paragraph.AppendPicture() method.
- Set the horizontal position and vertical position for the image through the DocPicture.HorizontalPosition and DocPicture.VerticalPosition properties.
- Set width, height and text wrapping style for the image.
- Save the result document using Document.SaveToFile() method.
- JavaScript
import React, { useState, useEffect } from 'react';

function App() {
  const [wasmModule, setWasmModule] = useState(null);
  // Load Spire.Doc
  useEffect(() => {
    (async () => {
      try {
        const publicUrl = process.env.PUBLIC_URL || '';
        const spireModule = await import(/* webpackIgnore: true */ `${publicUrl}/spire.doc.js`);
        const rawModule = spireModule.default || spireModule;
        window.wasmModule = typeof rawModule === 'function'
          ? await rawModule({ locateFile: p => p.endsWith('.wasm') ? `${publicUrl}/${p}` : p })
          : rawModule;
        setWasmModule(window.wasmModule);
      } catch (error) {
        console.error('Failed to load spire.doc.js WASM module:', error);
      }
    })();
  }, []);

  // Function to insert an image at a specified location in Word
  const InsertImage = async () => {
    const wasmModule = window.wasmModule.spiredoc;

    if (wasmModule) {
      // Load the font files into the virtual file system (VFS)
      await window.spire.FetchFileToVFS('Arial.ttf', '/Library/Fonts/', `${process.env.PUBLIC_URL}/static/font/`);

      // Specify the input file name and the output file name
      const outputFileName = "WordImage.docx";
      const imageFile = "logo.png";

      // Fetch the input file and add it to the VFS
      await window.spire.FetchFileToVFS(imageFile, '', `${process.env.PUBLIC_URL}/static/data/`);

      // Create an instance of the Document class
      const doc = new wasmModule.Document();

      // Add a section in the document
      let section = doc.AddSection();

      // Add a paragraph to the section
      let paragraph = section.AddParagraph();

      // Add text to the paragraph and set paragraph style
      paragraph.AppendText("The sample demonstrates how to insert an image at a specified location in a Word document.");
      paragraph.ApplyStyle({ builtinStyle: wasmModule.BuiltinStyle.Heading2 });

      //Add an image to the paragraph
      let picture = paragraph.AppendPicture({ imgFile: imageFile });

      // Set image position
      picture.HorizontalPosition = 150.0;
      picture.VerticalPosition = 70.0;

      // Set image width and height
      picture.Width = 100;
      picture.Height = 100;

      // Set text wrapping style for the image
      picture.TextWrappingStyle = wasmModule.TextWrappingStyle.Through;

      // Save the result document
      doc.SaveToFile({ fileName: outputFileName, fileFormat: wasmModule.FileFormat.Docx });

      // Release resources
      doc.Dispose();

      // Read the generated Word file from VFS
      const modifiedFileArray = window.dotnetRuntime.Module.FS.readFile(outputFileName);

      // Create a Blob object from the Word file
      const modifiedFile = new Blob([modifiedFileArray], { type: "application/vnd.openxmlformats-officedocument.wordprocessingml.document" });

      // Create a URL for the Blob
      const url = URL.createObjectURL(modifiedFile);

      // Create an anchor element to trigger the download
      const a = document.createElement("a");
      a.href = url;
      a.download = outputFileName;
      document.body.appendChild(a);
      a.click();
      document.body.removeChild(a);
      URL.revokeObjectURL(url);
    }
  };

  return (
    <div style={{ textAlign: 'center', height: '300px' }}>
      <h1>Insert an Image at a Specified Location in Word Using JavaScript in React</h1>
      <<button onClick={InsertImage} disabled={!wasmModule}>
      Execute
      </button>
    </div>
 );
}

export default App;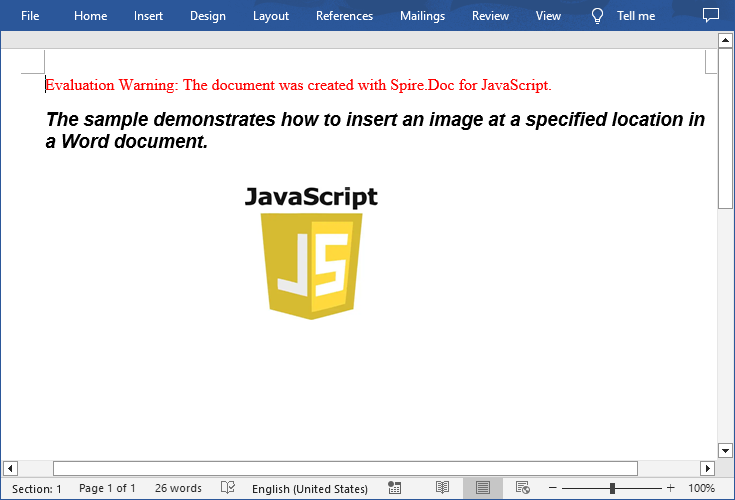
Get a Free License
To fully experience the capabilities of Spire.Doc for JavaScript without any evaluation limitations, you can request a free 30-day trial license.
