How to Integrate Spire.XLS for JavaScript in a React Project
In today's data-driven landscape, efficiently handling Excel files is crucial for web applications. React, a widely-used JavaScript library for user interfaces, can significantly enhance its capabilities by integrating Spire.XLS for JavaScript. This integration allows developers to perform complex operations like reading, writing, and formatting Excel files directly within their React projects.
This article will walk you through the integration of Spire.XLS for JavaScript into your React projects, covering everything from the initial setup to a straightforward usage example.
- Benefits of Using Spire.XLS for JavaScript in React Projects
- Set Up Your Environment
- Integrate Spire.XLS for JavaScript in Your Project
- Create and Save Excel Files Using JavaScript
Benefits of Using Spire.XLS for JavaScript in React Projects
React, a popular JavaScript library for building user interfaces, has revolutionized web development by enabling developers to create interactive and dynamic user experiences. On the other hand, Spire.XLS for JavaScript is a powerful library that allows developers to manipulate Excel files directly in the browser.
By integrating Spire.XLS for JavaScript into your React project, you can add advanced Excel capabilities to your application. Here are some of the key advantages:
- Enhanced Functionality: Spire.XLS for JavaScript enables creating, modifying, and formatting Excel files directly in the browser, enhancing your React app's capabilities and user experience.
- Improved Data Management: Easily import, export, and manipulate Excel files with Spire.XLS, streamlining data management and reducing errors.
- Cross-Browser Compatibility: Designed to work seamlessly across major web browsers, Spire.XLS ensures consistent handling of Excel files in your React application.
- Seamless Integration: Compatible with various JavaScript frameworks, including React, Spire.XLS integrates easily into existing projects without disrupting your workflow.
Set Up Your Environment
Step 1. Install Node.js and npm
Download and install Node.js from the official website. Make sure to choose the version that matches your operating system.
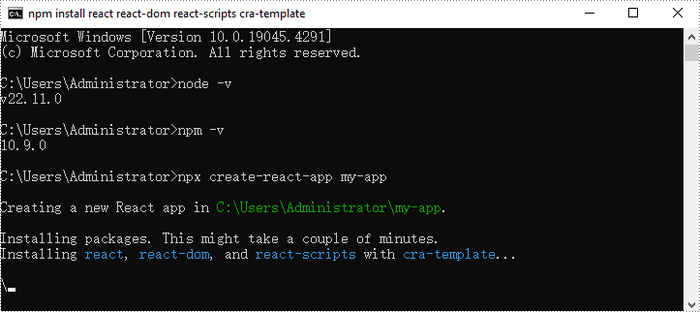
After the installation is complete, you can verify that Node.js and npm are working correctly by running the following commands in your terminal:
node -v
npm -v

Step 2. Create a New React Project
Create a new React project named my-app using Create React App from terminal:
npx create-react-app my-app
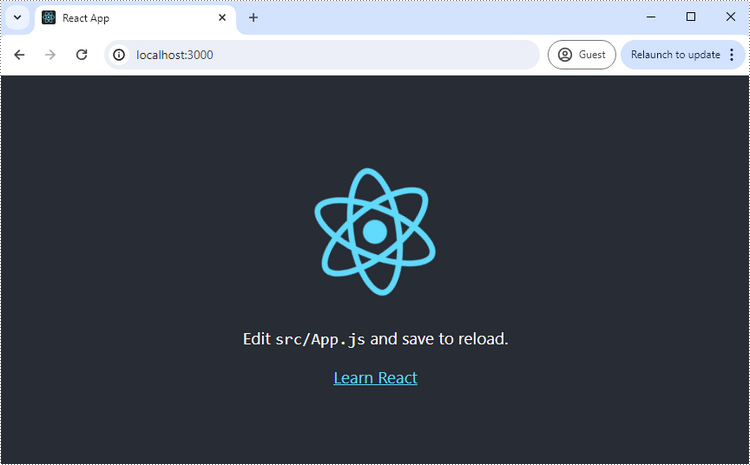
Once the project is created, you can navigate to the project directory and start the development server using the following commands:
cd my-app
npm start

If your React project is compiled successfully, the app will be served at http://localhost:3000, allowing you to view and test your application in a browser.
To visually browse and manage the files in your project, you can open the project using VS Code.

Integrate Spire.XLS for JavaScript in Your Project
Download Spire.XLS for JavaScript from our website and unzip it to a location on your disk. The downloaded product package has been integrated Spire.Doc for JavaScript,Spire.XLS for JavaScript,Spire.PDF for JavaScript,Spire.Presentation for JavaScript. To use the functionality of Spire.XLS for JavaScript, you need to copy the corresponding files (spire.xls.js, Spire.Xls.Wasm.zip, spire.common.js, Spire.Common.Wasm.zip, and _framework) to the project's “public” folder.
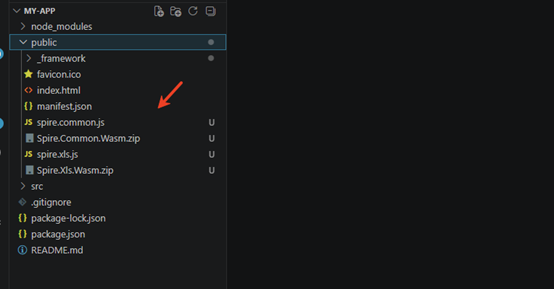
You can also install Spire.XLS for JavaScript using npm. In the terminal within VS Code, run the following command:
npm i spire.office
After downloading this command, find the corresponding file in the node_comodules/spire.office path of the project and copy it to “public” folder.
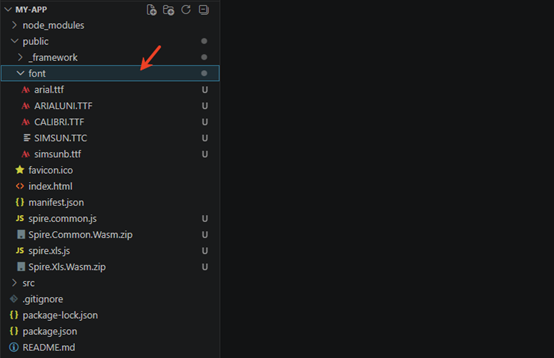
At the same time, in order to ensure text rendering, the related font files can be added with custom paths. In the following example, the font addition path is: public\font.
Create Excel files using JavaScript
Modify the code in the "App.js" file to generate an Excel file using the WebAssembly (WASM) module. Specifically, utilize the Spire.XLS for JavaScript library for Excel file manipulation.
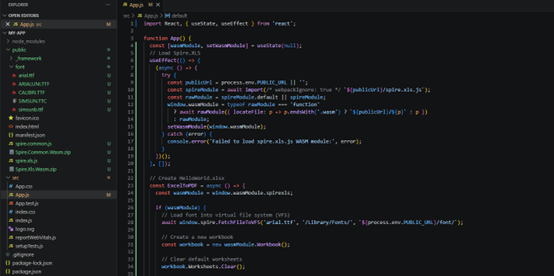
- JavaScript
import React, { useState, useEffect } from 'react';
function App() {
const [wasmModule, setWasmModule] = useState(null);
// Load Spire.XLS
useEffect(() => {
(async () => {
try {
const publicUrl = process.env.PUBLIC_URL || '';
const spireModule = await import(/* webpackIgnore: true */ `${publicUrl}/spire.xls.js`);
const rawModule = spireModule.default || spireModule;
window.wasmModule = typeof rawModule === 'function'
? await rawModule({ locateFile: p => p.endsWith('.wasm') ? `${publicUrl}/${p}` : p })
: rawModule;
setWasmModule(window.wasmModule);
} catch (error) {
console.error('Failed to load spire.xls.js WASM module:', error);
}
})();
}, []);
// Create HelloWorld.xlsx
const ExcelToPDF = async () => {
const wasmModule = window.wasmModule.spirexls;
if (wasmModule) {
// Load font into virtual file system (VFS)
await window.spire.FetchFileToVFS('arial.ttf', '/Library/Fonts/', `${process.env.PUBLIC_URL}/font/`);
// Create a new workbook
const workbook = new wasmModule.Workbook();
// Clear default worksheets
workbook.Worksheets.Clear();
// Add a new worksheet named "MySheet"
const sheet = workbook.Worksheets.Add("MySheet");
// Set the text of cell "A1"
sheet.Range.get("A1").Text = "Hello World";
// Set column width to auto-fit
sheet.Range.get("A1").AutoFitColumns();
// Define output file name
const outputFileName = 'HelloWorld.xlsx';
// Save the workbook to the specified path
workbook.SaveToFile({ fileName: outputFileName, version: wasmModule.ExcelVersion.Version2010 });
// Read the saved file and convert to Blob object
const modifiedFileArray = window.dotnetRuntime.Module.FS.readFile(outputFileName);
const modifiedFile = new Blob([modifiedFileArray], { type: 'application/vnd.openxmlformats-officedocument.spreadsheetml.sheet' });
// Create a URL for the Blob and start download
const url = URL.createObjectURL(modifiedFile);
const a = document.createElement('a');
a.href = url;
a.download = outputFileName;
document.body.appendChild(a);
a.click();
document.body.removeChild(a);
URL.revokeObjectURL(url);
// Clean up resources used by the workbook
workbook.Dispose();
}
};
return (
<div style={{ textAlign: 'center', height: '300px' }}>
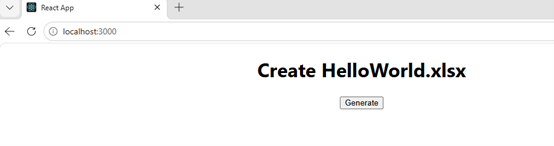
<h1>Create HelloWorld.xlsx</h1>
<button onClick={ExcelToPDF} disabled={!wasmModule}>
Generate
</button>
</div>
);
}
export default App;
Using "npm start" to run the program, and click "Generate" to download the generated Excel file.
Apply for a Temporary License
If you'd like to remove the evaluation message from the generated documents, or to get rid of the function limitations, please request a 30-day trial license for yourself.
How to Integrate Spire.XLS for JavaScript in a Node.js Project
Excel manipulation is a crucial aspect of many modern web applications, from data analysis to report generation. Node.js, with its non-blocking I/O model and rich ecosystem, is an excellent choice for backend development. When combined with Spire.XLS for JavaScript, you can unlock a world of possibilities for handling Excel files efficiently.
This guide will walk you through the process of integrating Spire.XLS for JavaScript into your Node.js projects, covering everything from initial setup to generating a simple Excel document.
- Benefits of Using Spire.XLS for JavaScript in Node.js Projects
- Set Up Your Environment
- Integrate Spire.XLS for JavaScript in Your Project
- Create and Save Excel Files Using JavaScript
Benefits of Using Spire.XLS for JavaScript in Node.js Projects
Node.js is a great option for developing scalable network applications. When paired with Spire.XLS for JavaScript, you get a robust solution for handling Excel files. Here are some key features and benefits of using Spire.XLS for JavaScript in Node.js projects:
- Comprehensive Excel Support: Spire.XLS for JavaScript supports a wide range of Excel features, including formulas, charts, pivot tables, and more.
- High Performance: The library is optimized for speed, ensuring that your application remains responsive even when handling large datasets.
- Cross-Platform Compatibility: With Node.js, you can run your application on any platform that supports JavaScript, including Windows, macOS, and Linux.
- Secure and Reliable: The library is designed to be secure, with features like data validation and encryption to protect your data.
By leveraging the strengths of both Node.js and Spire.XLS for JavaScript, you can build powerful applications that handle Excel files with ease.
Set Up Your Environment
Step 1
Download and install Node.js from the official website. Make sure to choose the version that matches your operating system.
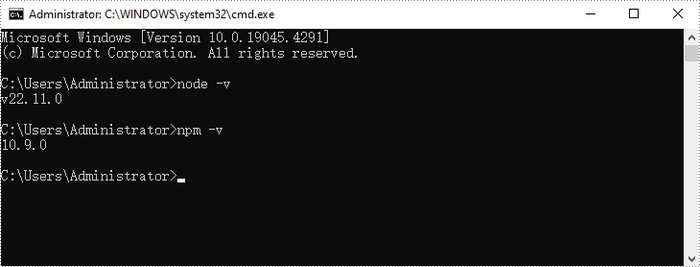
After the installation is complete, you can verify that Node.js and npm are installed correctly, along with the version numbers, by entering the following commands in CMD:
node -v
npm -v
Step 2
Initialize a Node.js project:
npm init -y
Installation dependencies:
npm install adm-zip@^0.5.16
Configure packaging.json:
{
	"name": "nodejstest",
    "version": "1.0.0",
    "description": "Simple test project to generate HelloWorld.xlsx using spire.xls.js",
    "main": "index.js",
    "type": "module",
    "scripts": {
      "start": "node --experimental-modules --experimental-wasm-modules --experimental-vm-modules index.js"
    },
    "dependencies": {
      "adm-zip": "^0.5.16"
    }
  }
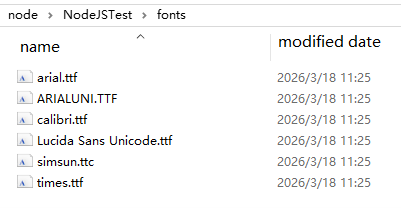
Customize folder in the root directory to put some font files, you can customize and add fonts based on the font used in your documents.
Integrate Spire.XLS for JavaScript in Your Project
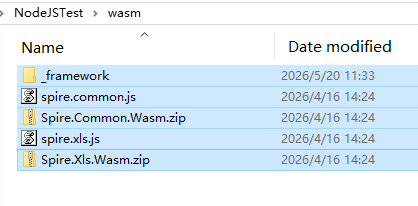
Download Spire.XLS for JavaScript and unzip it to a location on your disk. The downloaded product package integrates Spire.Doc for JavaScript, Spire.XLS for JavaScript, Spire.PDF for JavaScript, and Spire.Presentation for JavaScript. To use the features of Spire.XLS for JavaScript, customize the folder in the root directory, this tutorial defined the 'wasm' folder, and copy the corresponding files (spire.xls.js, Spire.Xls.Wasm.zip, spire.common.js, Spire.Common.Wasm.zip, and the _framework folder) to the “wasm” folder.
Add the 'index.js' file to the root directory of the project and set the following content to create a simple Excel file
- JavaScript
//NodeJSTest----create "HelloWorld.xlsx"
import fs from 'fs/promises';
import path from 'path';
import { fileURLToPath } from 'url';
import AdmZip from 'adm-zip';
const __filename = fileURLToPath(import.meta.url);
const __dirname = path.dirname(__filename);
async function extractWasmFiles() {
const wasmDir = path.join(__dirname, 'wasm');
const frameworkDir = path.join(wasmDir, '_framework');
await fs.mkdir(frameworkDir, { recursive: true });
for (const zipName of ['Spire.Common.Wasm.zip', 'Spire.Xls.Wasm.zip']) {
const zipPath = path.join(wasmDir, zipName);
try {
await fs.access(zipPath);
new AdmZip(zipPath).extractAllTo(wasmDir, true);
} catch { }
}
}
async function main() {
try {
await extractWasmFiles();
const { spirexls } = await import('./wasm/spire.xls.js');
const spire = globalThis.spire;
if (!spire) throw new Error('WASM module not loaded correctly');
const outputDir = path.join(__dirname, 'output');
await fs.mkdir(outputDir, { recursive: true });
const fontsPath = path.join(__dirname, 'fonts');
try {
await fs.access(fontsPath);
spire.copyLocalPathToVFS(fontsPath, '/Library/Fonts/');
} catch { }
// Create a new workbook
const workbook = new spirexls.Workbook();
// Clear default worksheets
workbook.Worksheets.Clear();
// Add a new worksheet named "MySheet"
const sheet = workbook.Worksheets.Add("MySheet");
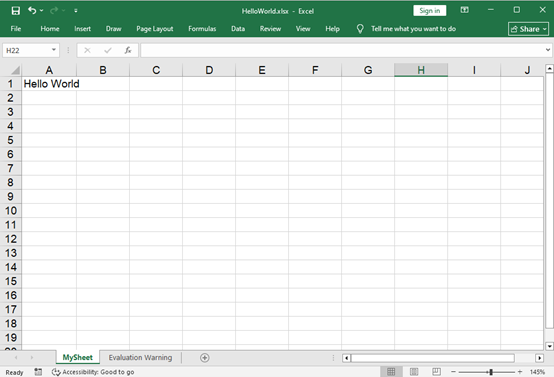
// Set text for the "A1" range
sheet.Range.get("A1").Text = "Hello World";
// Set the column width to auto fit
sheet.Range.get("A1").AutoFitColumns();
// Define the output file name
const outputFileName = 'HelloWorld.xlsx';
// Save the workbook to the specified path
workbook.SaveToFile({ fileName: outputFileName, version: spirexls.ExcelVersion.Version2010 });
const outputFile = path.join(outputDir, outputFileName);
spire.copyFileFromFSToLocalStorage(outputFileName, outputFile);
workbook.Dispose();
console.log(`Document saved to ${outputFile}`);
} catch (error) {
console.error(error);
process.exit(1);
}
}
main();
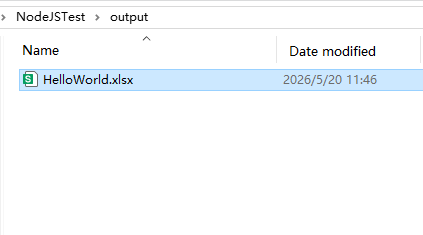
Using “npm start” run the program, you will find the generated Word file in the designated file path.
Apply for a Temporary License
If you'd like to remove the evaluation message from the generated documents, or to get rid of the function limitations, please request a 30-day trial license for yourself.