This article demonstrates the steps to use Spire.OCR for .NET in .NET Core applications.
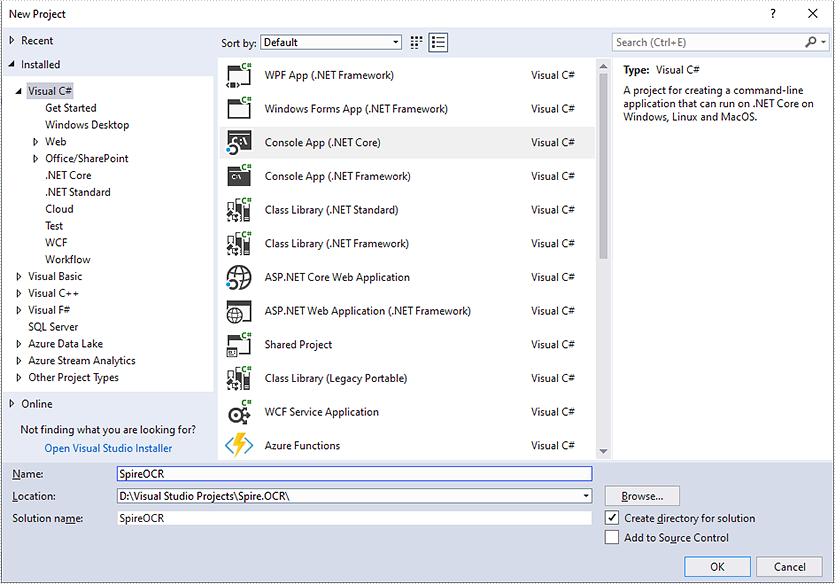
Step 1: Create a .NET Core project in Visual Studio.
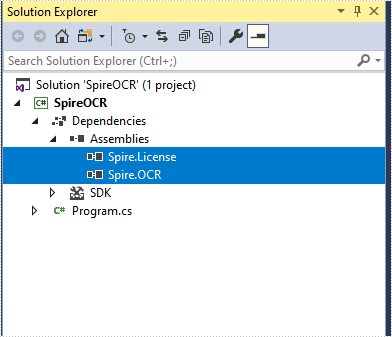
Step 2: Add reference to Spire.OCR for .NET DLLs in your project.
You can add reference to Spire.OCR for .NET DLLs through one of the following two ways:
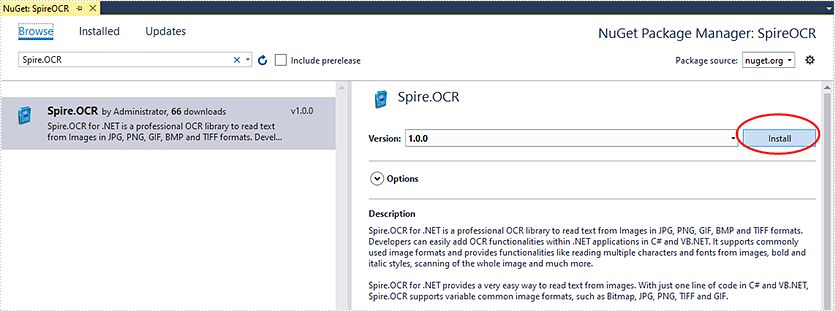
1. Install Spire.OCR for .NET through NuGet using NuGet Package Manager (recommended):
- In Solution Explorer, right-click the project or "Dependencies" and select "Manage NuGet Packages".
- Click "Browse" tab and search Spire.OCR.
- Install Spire.OCR.
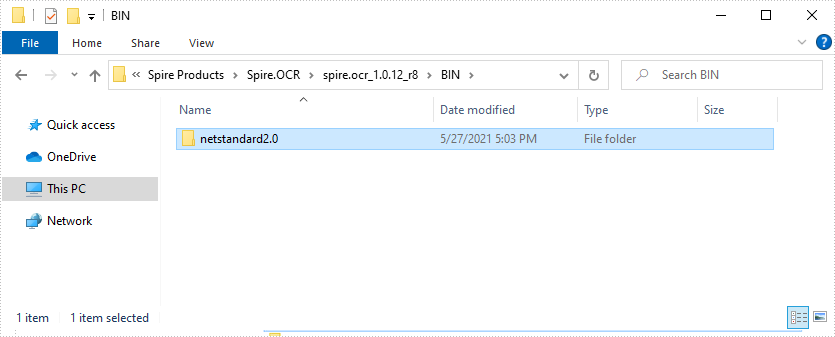
2. Manually add reference to Spire.OCR for .NET DLLs.
- Download Spire.OCR for .NET package from the following link, unzip it, you will get the DLLs from the "netstandard2.0" folder.
- Right-click the project or "Dependencies" – select "Add Reference" – click "Browse" – select all DLLs under "netstandard2.0" folder – click "Add".
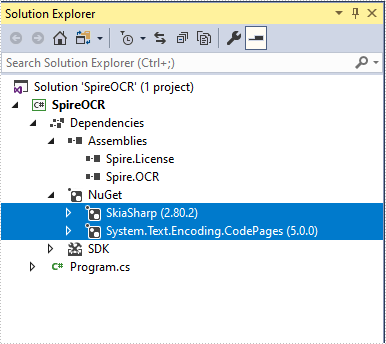
- Install the other two packages: SkiaSharp and System.Text.Encoding.CodePages in your project via the NuGet Package Manager.
Right-click the project or "Dependencies" – select "Manage NuGet Packages" – click "Browse" – type the package name – select the package from the search results – click "Install".
Step 3: Copy dependency DLLs to running directory of your project.
If you install Spire.OCR from NuGet and your project's target framework is .NET Core 3.0 or above, please build the project, then copy the 6 DLLs from bin\Debug\netcoreapp3.0\runtimes\win-x64\native folder to the running directory such as bin\Debug\netcoreapp3.0 or C:\Windows\System32 .

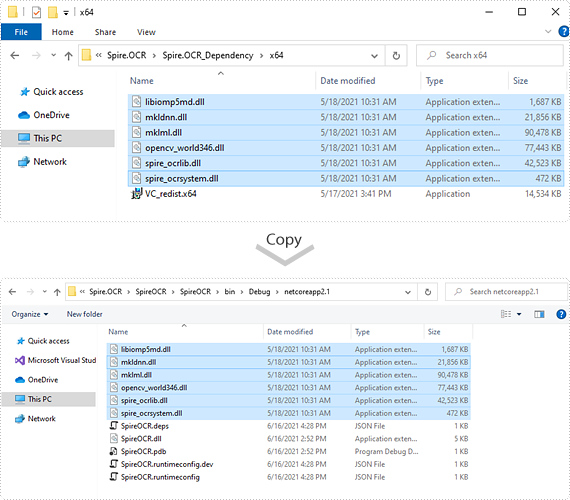
If your project's target framework is below .NET Core 3.0 or you download Spire.OCR from our website, please copy the 6 DLLs from Spire.OCR\Spire.OCR_Dependency\x64 folder to the running directory such as bin\Debug\netcoreapp2.1 or C:\Windows\System32.
Step 4: Now you have successfully included Spire.OCR in your project. You can refer the following code example to scan images using Spire.OCR.
- C#
using Spire.OCR;
using System.IO;

namespace SpireOCR
{
    class Program
    {
        static void Main(string[] args)
        {
            OcrScanner scanner = new OcrScanner();
            scanner.Scan("image.png");
            File.WriteAllText("output.txt", scanner.Text.ToString());
        }
    }
}