Add and Remove Word Page Breaks with JavaScript in React
Inserting a page break in a Word document is the most common way to control where a chapter begins and to keep a heading from being split from its body text across a page boundary; cleaning up the redundant page breaks in a document, on the other hand, is the key step in dealing with the blank pages left behind after content is copied from another document. Spire.Doc for JavaScript carries out these operations directly in the browser via WebAssembly, using a virtual file system (VFS) to manage input and output files — no backend server required.
This article covers two core features:
For installation and project setup, refer to Integrating Spire.Doc for JavaScript in a React Project. The examples below assume Spire.Doc is installed and the WebAssembly module is initialized.
Insert a Page Break
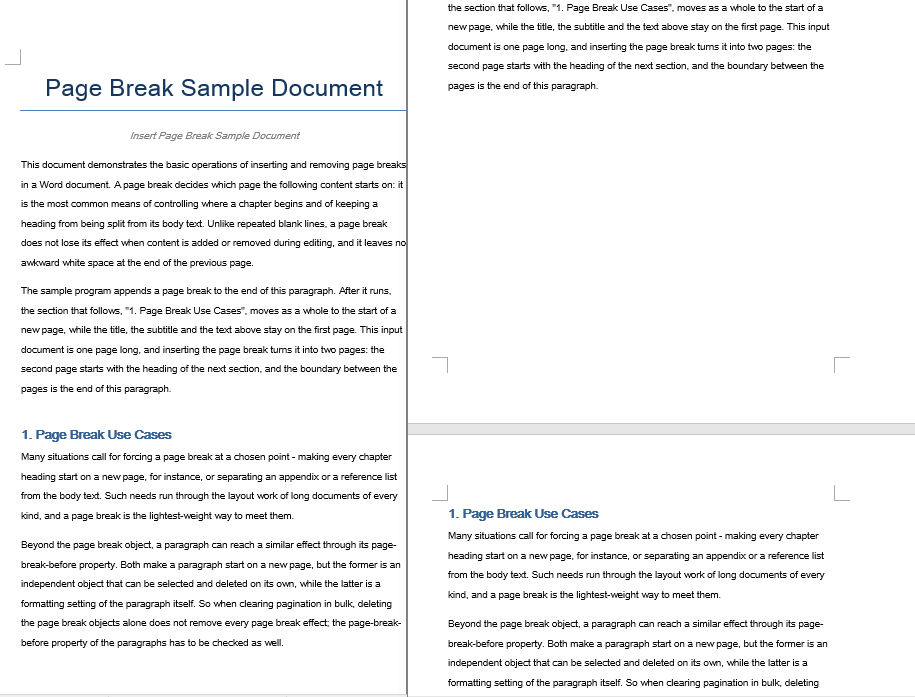
Inserting a page break involves three steps: first, load the font files and the target Word document into the WASM virtual file system via FetchFileToVFS; then instantiate a Document, load the document, locate the target paragraph and call AppendBreak with BreakType.PageBreak, which appends the page break to the end of that paragraph as one of its child objects; finally, read the saved file from VFS, wrap it as a Blob and trigger a browser download.
function App() {
  const InsertPageBreak = async () => {
    const docModule = window.wasmModule?.spiredoc;
    if (!docModule) {
      alert('Spire.Doc is not ready yet');
      return;
    }

    // Load the target Word document into VFS
    const inputFileName = "Template_Docx_1.docx";
    await window.spire.FetchFileToVFS(inputFileName, "", `${process.env.PUBLIC_URL}static/data/`);

    // Create a Document instance and load the document
    const doc = new docModule.Document();
    doc.LoadFromFile(inputFileName);

    // Locate the fourth paragraph of the first section and append a page break to its end
    doc.Sections.get_Item(0).Paragraphs.get_Item(3).AppendBreak(docModule.BreakType.PageBreak);

    // Define the output file name
    const outputFileName = "InsertPageBreak_out.docx";

    // Save the document to VFS
    doc.SaveToFile({ fileName: outputFileName, fileFormat: docModule.FileFormat.Docx2013 });

    doc.Dispose();

    const modifiedFileArray = window.dotnetRuntime.Module.FS.readFile(outputFileName);
    const blob = new Blob([modifiedFileArray], { type: 'application/vnd.openxmlformats-officedocument.wordprocessingml.document' });
    const url = URL.createObjectURL(blob);
    const a = document.createElement('a');
    a.href = url;
    a.download = outputFileName;
    a.click();
    URL.revokeObjectURL(url);
  };

 return (
    <div style={{ textAlign: 'center', height: '300px' }}>
      <h1>Insert a Page Break into a Word Document</h1>
      <button onClick={InsertPageBreak}>Generate</button>
    </div>
  );
}
export default App;
The document after a page break is appended to the end of the fourth paragraph
Remove Page Breaks
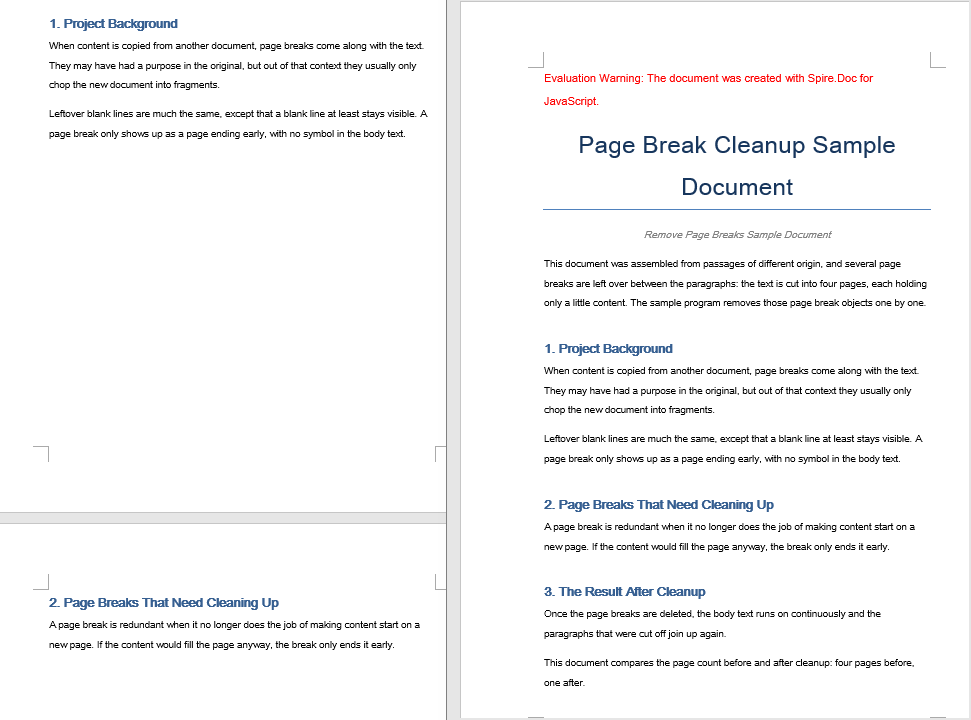
Removing page breaks also involves three steps: first, load the font files and the Word document that contains the page breaks into the WASM virtual file system via FetchFileToVFS; then instantiate a Document, load the document, walk through the child objects of every paragraph in each section, test with DocumentObjectType whether an object is a page break, and remove it with ChildObjects.Remove; finally, read the saved file from VFS, wrap it as a Blob and trigger a browser download.
function App() {
  const RemovePageBreaks = async () => {
    const docModule = window.wasmModule?.spiredoc;
    if (!docModule) {
      alert('Spire.Doc is not ready yet');
      return;
    }

    // Load the target Word document into VFS
    const inputFileName = "Template_Docx_4.docx";
    await window.spire.FetchFileToVFS(inputFileName, "", `${process.env.PUBLIC_URL}static/data/`);

    // Create a Document instance and load the document
    const doc = new docModule.Document();
    doc.LoadFromFile(inputFileName);

    // Get the first section
    const section = doc.Sections.get_Item(0);

    // Walk through every paragraph in the section
    for (let j = 0; j < section.Paragraphs.Count; j++) {
        const p = section.Paragraphs.get_Item(j);

        // Walk the paragraph's child objects backwards, so that removing an element does not shift the indices still to come
        for (let i = p.ChildObjects.Count - 1; i >= 0; i--) {
            const obj = p.ChildObjects.get_Item(i);

            // Test whether the object is a page break
            if (obj.DocumentObjectType == docModule.DocumentObjectType.Break
                && obj.BreakType == docModule.BreakType.PageBreak) {
                // Remove the page break from the paragraph
                p.ChildObjects.Remove(obj);
            }
        }
    }

    // Define the output file name
    const outputFileName = "RemovePageBreaks_out.docx";

    // Save the document to VFS
    doc.SaveToFile({ fileName: outputFileName, fileFormat: docModule.FileFormat.Docx2013 });
    doc.Dispose();

    const modifiedFileArray = window.dotnetRuntime.Module.FS.readFile(outputFileName);
    const blob = new Blob([modifiedFileArray], { type: 'application/vnd.openxmlformats-officedocument.wordprocessingml.document' });
    const url = URL.createObjectURL(blob);
    const a = document.createElement('a');
    a.href = url;
    a.download = outputFileName;
    a.click();
    URL.revokeObjectURL(url);
  };

 return (
    <div style={{ textAlign: 'center', height: '300px' }}>
      <h1>Remove Page Breaks from a Word Document</h1>
      <button onClick={RemovePageBreaks}>Generate</button>
    </div>
  );
}
export default App;
The document after every page break has been removed
FAQ
An extra blank line appears at the top of the new page after inserting a page break
Cause: AppendBreak appends the page break to the end of the target paragraph, so that paragraph's own spacing after it is carried over to the start of the new page along with the page break, which shows up as a strip of white space at the top of the new page. If the paragraph has automatic spacing enabled, the height of that strip also changes with the font size.
Solution: Clear the spacing after the target paragraph before inserting the page break:
const para = document.Sections.get_Item(0).Paragraphs.get_Item(3);

// Turn off automatic spacing after the paragraph and set the space after it to 0
para.Format.AfterAutoSpacing = false;
para.Format.AfterSpacing = 0;

// Then insert the page break
para.AppendBreak(wasmModule.BreakType.PageBreak);
The document is still paginated after the page breaks are removed
Cause: Not every page break in a document comes from a page break object. If a paragraph itself has the page-break-before property set, that paragraph will still start on a new page even after the page break objects have been removed; walking ChildObjects and deleting DocumentObjectType.Break objects alone cannot take that kind of pagination out.
Solution: Reset the paragraph's page-break-before property at the same time as the page break objects are removed:
const section = document.Sections.get_Item(0);

for (let j = 0; j < section.Paragraphs.Count; j++) {
  const p = section.Paragraphs.get_Item(j);

  // Clear the page-break-before property set on the paragraph
  if (p.Format.PageBreakBefore) {
    p.Format.PageBreakBefore = false;
  }
}
Get a Free License
Spire.Doc for JavaScript offers a 30-day full-featured free trial license with no functional limitations. Apply here to evaluate before purchasing.
Add and Set the Gutter Position in Word with JavaScript in React
A gutter is the extra white space a page sets aside for binding, so that the body text is not hidden by the staples or the glued spine once the document is printed and bound. Because it is part of the page setup, it has to be fixed when the document is generated and cannot be added later at the printing stage. Spire.Doc for JavaScript performs page setup directly in the browser via WebAssembly, using a virtual file system (VFS) to manage input and output files — no backend server required.
This article covers two core features:
For installation and project setup, refer to Integrating Spire.Doc for JavaScript in a React Project. The examples below assume Spire.Doc is installed and the WebAssembly module is initialized.
Add a Gutter
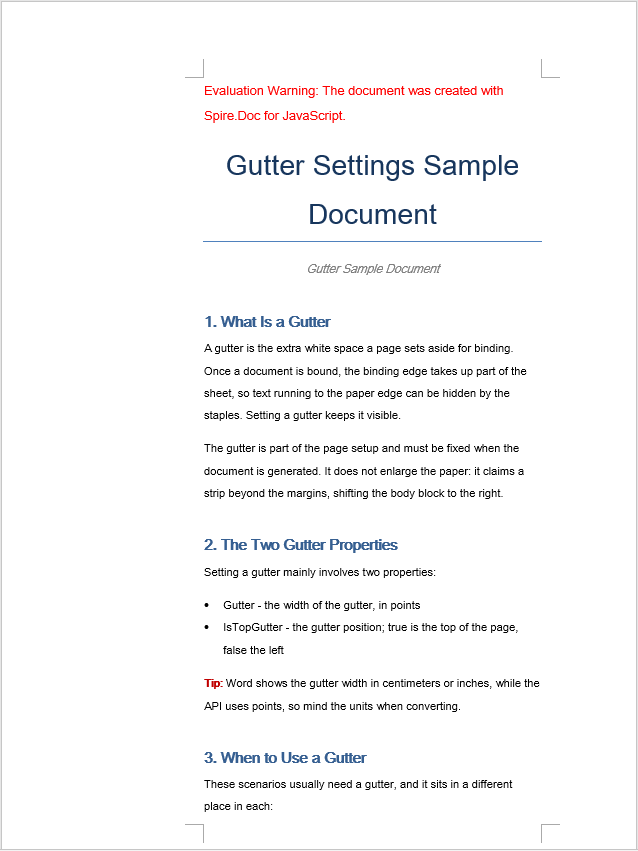
Adding a gutter involves three steps: first, load the font files and the target Word document into the WASM virtual file system via FetchFileToVFS; then instantiate a Document, load the document, get the target section and set the gutter width through PageSetup.Gutter — the value is in points and applies to the left side of the page by default; finally, read the saved file from VFS, wrap it as a Blob and trigger a browser download.
function App() {
  const AddGutter = async () => {
    const docModule = window.wasmModule?.spiredoc;
    if (!docModule) {
      alert('Spire.Doc is not ready yet');
      return;
    }

    // Load the target Word document into VFS
    const inputFileName = "GutterSample.docx";
    await window.spire.FetchFileToVFS(inputFileName, "", `${process.env.PUBLIC_URL}static/data/`);

    // Create a Document instance and load the document
    const doc = new docModule.Document();
    doc.LoadFromFile(inputFileName);

    // Get the first section
    const section = doc.Sections.get_Item(0);

    // Set the gutter width in points; it applies to the left side of the page by default
    section.PageSetup.Gutter = 100;

    // Define the output file name
    const outputFileName = "AddGutter_out.docx";

    // Save the document to VFS
    doc.SaveToFile({ fileName: outputFileName, fileFormat: docModule.FileFormat.Docx2013 });

    // Release resources
    doc.Dispose();

    const modifiedFileArray = window.dotnetRuntime.Module.FS.readFile(outputFileName);
    const blob = new Blob([modifiedFileArray], { type: 'application/vnd.openxmlformats-officedocument.wordprocessingml.document' });
    const url = URL.createObjectURL(blob);
    const a = document.createElement('a');
    a.href = url;
    a.download = outputFileName;
    a.click();
    URL.revokeObjectURL(url);
  };

 return (
    <div style={{ textAlign: 'center', height: '300px' }}>
      <h1>Add a Gutter to a Word Document</h1>
      <button onClick={AddGutter}>Generate</button>
    </div>
  );
}
export default App;
The document after a gutter has been added
Set the Gutter Position
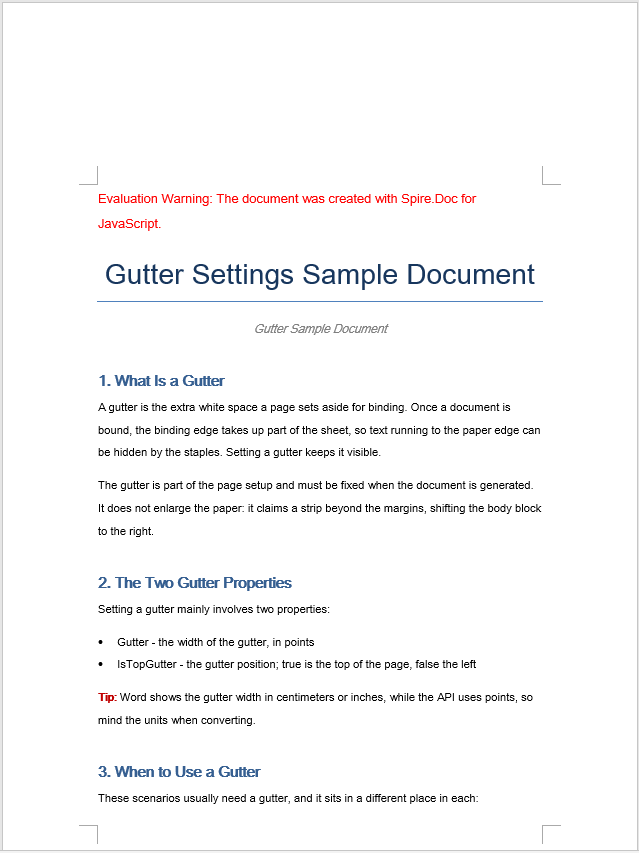
The gutter position decides which side of the page the strip of white space is added to: PageSetup.IsTopGutter set to true means a top gutter, and false (the default) means a left gutter. The steps are the same three as before: first, load the font files and the target Word document into the WASM virtual file system via FetchFileToVFS; then instantiate a Document, load the document, get the target section and set PageSetup.IsTopGutter to true to turn on the top gutter, then set the gutter width through PageSetup.Gutter; finally, read the saved file from VFS, wrap it as a Blob and trigger a browser download.
function App() {
  const SetGutterPosition = async () => {
    const docModule = window.wasmModule?.spiredoc;
    if (!docModule) {
      alert('Spire.Doc is not ready yet');
      return;
    }

    // Load the target Word document into VFS
    const inputFileName = "GutterSample.docx";
    await window.spire.FetchFileToVFS(inputFileName, "", `${process.env.PUBLIC_URL}static/data/`);

    // Create a Document instance and load the document
    const doc = new docModule.Document();
    doc.LoadFromFile(inputFileName);

    // Get the first section
    const section = doc.Sections.get_Item(0);

    // Set the gutter position to the top
    section.PageSetup.IsTopGutter = true;

    // Set the gutter width in points
    section.PageSetup.Gutter = 100;

    // Define the output file name
    const outputFileName = "SetGutterPosition_out.docx";

    // Save the document to VFS
    doc.SaveToFile({ fileName: outputFileName, fileFormat: docModule.FileFormat.Docx2013 });

    // Release resources
    doc.Dispose();

    const modifiedFileArray = window.dotnetRuntime.Module.FS.readFile(outputFileName);
    const blob = new Blob([modifiedFileArray], { type: 'application/vnd.openxmlformats-officedocument.wordprocessingml.document' });
    const url = URL.createObjectURL(blob);
    const a = document.createElement('a');
    a.href = url;
    a.download = outputFileName;
    a.click();
    URL.revokeObjectURL(url);
  };

 return (
    <div style={{ textAlign: 'center', height: '300px' }}>
      <h1>Set the Gutter Position in a Word Document</h1>
      <button onClick={SetGutterPosition}>Generate</button>
    </div>
  );
}
export default App;
The document after the top gutter has been set
FAQ
The gutter width does not match the value shown in the Word interface
Cause: PageSetup.Gutter is measured in points, while the Word Page Setup dialog box displays centimeters or inches by default. Passing 100 directly, as the examples do, means 100 points — about 3.53 centimeters — which is noticeably wide on an A4 page.
Solution: Convert the unit before passing the value in. One point is 1/72 inch and one inch is 2.54 centimeters, so the formula for converting centimeters to points is points = centimeters ÷ 2.54 × 72:
// Convert a 1.5-centimeter gutter width to points
const gutterInPoints = (1.5 / 2.54) * 72;
section.PageSetup.Gutter = gutterInPoints;
The text area becomes too narrow after a gutter is set
Cause: The gutter claims space in addition to the margins; it does not enlarge the page but squeezes the text area inwards. If the existing margins were already generous, adding a gutter narrows the usable width further, leaving too few characters per line and making paragraphs wrap far more often.
Solution: Reduce the margin on the same side at the same time as the gutter is set, so that the usable text width is preserved:
const pageSetup = section.PageSetup;

// Set a 1.5-centimeter gutter (centimeters converted to points)
pageSetup.Gutter = (1.5 / 2.54) * 72;

// The gutter takes up space on the left, so reduce the left margin accordingly
pageSetup.Margins.Left = 60;
Get a Free License
Spire.Doc for JavaScript offers a 30-day full-featured free trial license with no functional limitations. Apply here to evaluate before purchasing.
Set Word Document Backgrounds with JavaScript in React
Setting a page background for a Word document is one of the most common ways to polish contracts, official papers and brand materials: a soft base color, or a background image that matches the corporate visual identity, is enough to give the whole document a consistent visual tone. Spire.Doc for JavaScript performs this setting directly in the browser via WebAssembly, using a virtual file system (VFS) to manage input and output files — no backend server required.
This article covers three core features:
For installation and project setup, refer to Integrating Spire.Doc for JavaScript in a React Project. The examples below assume Spire.Doc is installed and the WebAssembly module is initialized.
Set a Solid Color Background
The solid color background involves three stages: first, load the font files and the target Word file into the WASM virtual file system via FetchFileToVFS; then instantiate a Document and load the file, set Background.Type to BackgroundType.Color, and assign a built-in color value to Background.Color; finally, save the document to the VFS with SaveToFile, read the generated docx file from it, wrap it as a Blob, and trigger a browser download.
function App() {
  const SetSolidColorBackground = async () => {
    const docModule = window.wasmModule?.spiredoc;
    if (!docModule) {
      alert('Spire.Doc is not ready yet');
      return;
    }
    // Load the sample file into the virtual file system (VFS)
    let inputFileName = "ScienceTemplate.docx";
    await window.spire.FetchFileToVFS(inputFileName, "", `${process.env.PUBLIC_URL}static/data/`);

    // Create Word document
    let doc = new docModule.Document();

    // Load the file
    doc.LoadFromFile(inputFileName);

    // Set the background type as Color
    doc.Background.Type = docModule.BackgroundType.Color;

    // Set the background color
    doc.Background.Color = docModule.Color.get_LightYellow();

    // Define the output file name
    const outputFileName = "SetSolidColorBackground_out.docx";

    // Save the document to the specified path
    doc.SaveToFile({ fileName: outputFileName, fileFormat: docModule.FileFormat.Docx2013 });

    doc.Dispose();

    const modifiedFileArray = window.dotnetRuntime.Module.FS.readFile(outputFileName);
    const blob = new Blob([modifiedFileArray], { type: 'application/vnd.openxmlformats-officedocument.wordprocessingml.document' });
    const url = URL.createObjectURL(blob);
    const a = document.createElement('a');
    a.href = url;
    a.download = outputFileName;
    a.click();
    URL.revokeObjectURL(url);
  };

 return (
    <div style={{ textAlign: 'center', height: '300px' }}>
      <h1>Set a Solid Color Background for a Word Document</h1>
      <button onClick={SetSolidColorBackground}>Generate</button>
    </div>
  );
}
export default App;
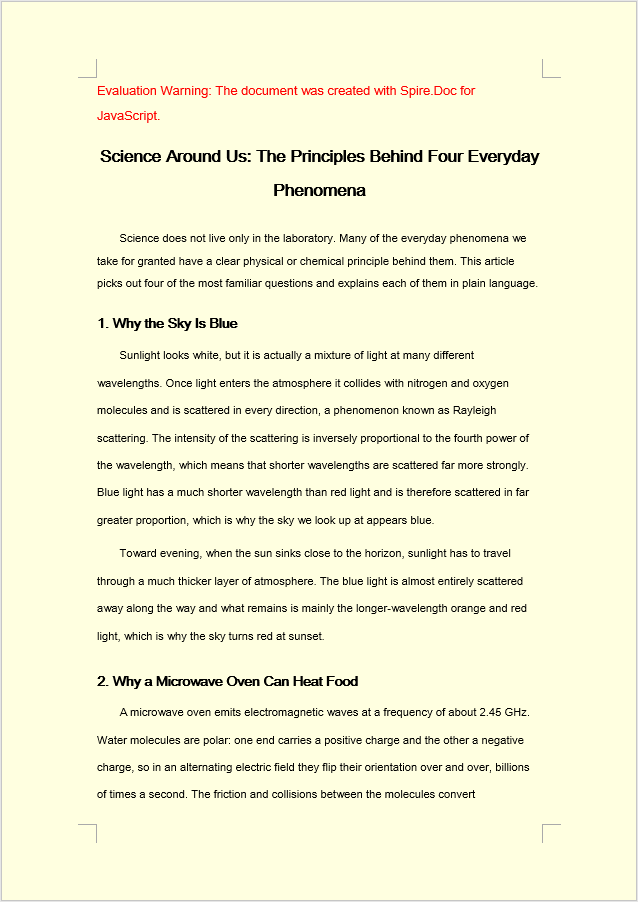
After Background.Color has been applied, the whole page is filled with the built-in LightYellow background color.
Set a Gradient Background
A gradient background follows the same flow as a solid color background; only the middle stage differs. Set Background.Type to BackgroundType.Gradient, retrieve the background gradient object through Background.Gradient, set the start color Color1 and the end color Color2 separately, and then use ShadingStyle and ShadingVariant to control the direction of the gradient and the way it transitions.
function App() {
  const SetGradientBackground = async () => {
    const docModule = window.wasmModule?.spiredoc;
    if (!docModule) {
      alert('Spire.Doc is not ready yet');
      return;
    }
    // Load the sample file into the virtual file system (VFS)
    let inputFileName = "ScienceTemplate.docx";
    await window.spire.FetchFileToVFS(inputFileName, "", `${process.env.PUBLIC_URL}static/data/`);

    // Create Word document
    let doc = new docModule.Document();

    // Load the file
    doc.LoadFromFile(inputFileName);

    // Set the background type as Gradient
    doc.Background.Type = docModule.BackgroundType.Gradient;
    let gradient = doc.Background.Gradient;

    // Set the start color and the end color of the gradient
    gradient.Color1 = docModule.Color.get_White();
    gradient.Color2 = docModule.Color.get_LightBlue();

    // Set the shading style and variant of the gradient
    gradient.ShadingVariant = docModule.GradientShadingVariant.ShadingDown;
    gradient.ShadingStyle = docModule.GradientShadingStyle.Horizontal;

    // Define the output file name
    const outputFileName = "SetGradientBackground_out.docx";

    // Save the document to the specified path
    doc.SaveToFile({ fileName: outputFileName, fileFormat: docModule.FileFormat.Docx2013 });

    doc.Dispose();

    const modifiedFileArray = window.dotnetRuntime.Module.FS.readFile(outputFileName);
    const blob = new Blob([modifiedFileArray], { type: 'application/vnd.openxmlformats-officedocument.wordprocessingml.document' });
    const url = URL.createObjectURL(blob);
    const a = document.createElement('a');
    a.href = url;
    a.download = outputFileName;
    a.click();
    URL.revokeObjectURL(url);
  };

 return (
    <div style={{ textAlign: 'center', height: '300px' }}>
      <h1>Set a Gradient Background for a Word Document</h1>
      <button onClick={SetGradientBackground}>Generate</button>
    </div>
  );
}
export default App;
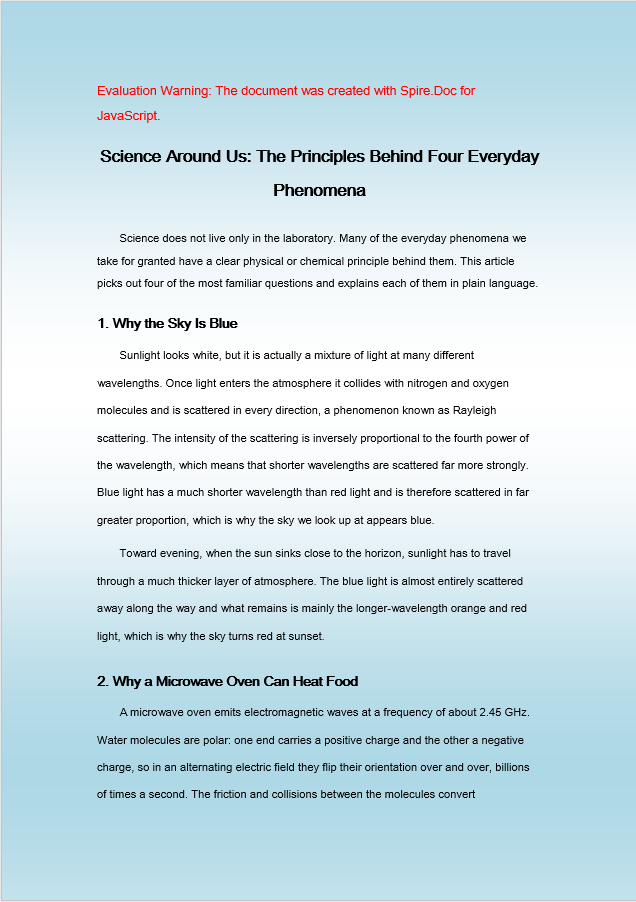
After Background.Gradient has been applied, the page background is filled with a white and light blue gradient.
Set a Picture Background
A picture background is similar to the two backgrounds above; the difference lies in how the resources are prepared and assigned. At the loading stage the background image has to be loaded into the VFS together with the font files and the target Word file; then set Background.Type to BackgroundType.Picture and call Background.SetPicture with the path of the image inside the VFS to tile the image across the whole page as the background.
function App() {
  const SetImageBackground = async () => {
    const docModule = window.wasmModule?.spiredoc;
    if (!docModule) {
      alert('Spire.Doc is not ready yet');
      return;
    }
    // Load the sample file into the virtual file system (VFS)
    let inputFileName1 = "ScienceTemplate.docx";
    await window.spire.FetchFileToVFS(inputFileName1, "", `${process.env.PUBLIC_URL}static/data/`);

    // Load the background image into the virtual file system (VFS)
    let inputFileName2 = "Background.png";
    await window.spire.FetchFileToVFS(inputFileName2, "", `${process.env.PUBLIC_URL}static/data/`);

    // Load a Word document
    let doc = new docModule.Document();
    doc.LoadFromFile(inputFileName1);

    // Set the background type as Picture
    doc.Background.Type = docModule.BackgroundType.Picture;

    // Set the background picture
    doc.Background.SetPicture(inputFileName2);

    // Define the output file name
    const outputFileName = "SetImageBackground_out.docx";

    // Save the document to the specified path
    doc.SaveToFile({ fileName: outputFileName, fileFormat: docModule.FileFormat.Docx2013 });

    doc.Dispose();

    const modifiedFileArray = window.dotnetRuntime.Module.FS.readFile(outputFileName);
    const blob = new Blob([modifiedFileArray], { type: 'application/vnd.openxmlformats-officedocument.wordprocessingml.document' });
    const url = URL.createObjectURL(blob);
    const a = document.createElement('a');
    a.href = url;
    a.download = outputFileName;
    a.click();
    URL.revokeObjectURL(url);
  };

 return (
    <div style={{ textAlign: 'center', height: '300px' }}>
      <h1>Set a Picture Background in a Word Document</h1>
      <button onClick={SetImageBackground}>Generate</button>
    </div>
  );
}
export default App;
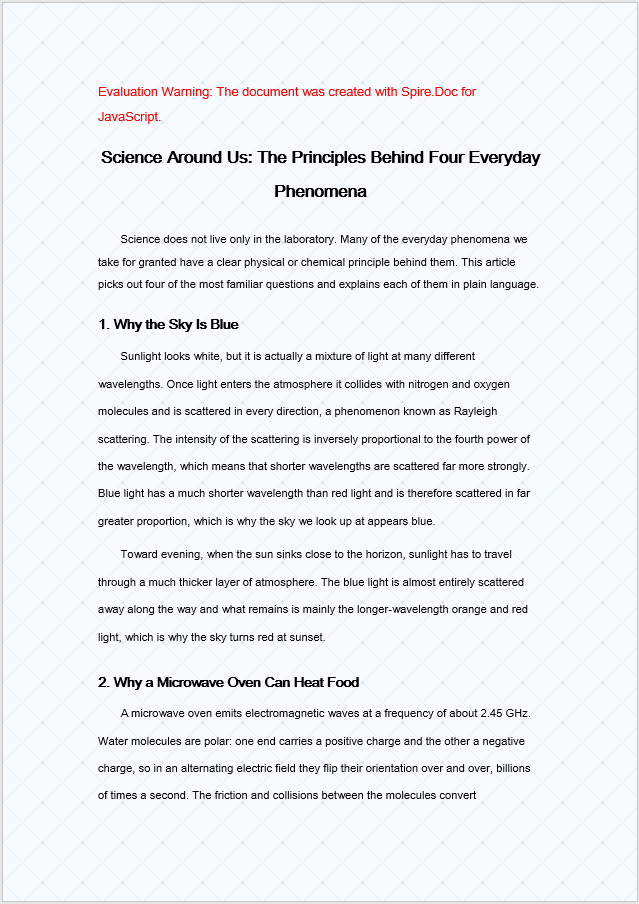
After Background.SetPicture has been applied, the image is tiled across the whole page as the background.
FAQ
The background does not appear in print
Cause: Word does not print page background colors or background pictures by default. This is a printing setting of the Word client, not a lost background setting in the document. The background displays normally while the document is open and is only ignored in the printed output.
Solution: To keep the background in a printed copy, select Print background colors and images under File > Options > Display in Word before printing. If the background has to be output in every environment, use a full-page shape in the header or a watermark to simulate it instead.
The picture background has no effect
Cause: Background.Type was not set to BackgroundType.Picture before SetPicture was called, or the background image was not loaded into the VFS via FetchFileToVFS, so SetPicture cannot find the image file.
Solution: Set the background type first, then pass the name of the image that has already been loaded into the VFS:
document.Background.Type = wasmModule.BackgroundType.Picture;
document.Background.SetPicture("Background.png");
Get a Free License
Spire.Doc for JavaScript offers a 30-day full-featured free trial license with no functional limitations. Apply here to evaluate before purchasing.