C#: Add or Remove Editable area in a Word Document
Adding the ability to edit permission area in a Word document can help users specify certain sections for others to edit while protecting the rest of the document from accidental modifications. This is particularly useful for scenarios like collaborative documents, document reviews, and comments. On the other hand, removing editable area functionality allows the document to be restored to a read-only state when specific sections do not need to be edited, ensuring the integrity and security of the document content. This article will explain how to use Spire.Doc for .NET to add or remove editable area in a Word document within a C# project.
Install Spire.Doc for .NET
To begin with, you need to add the DLL files included in the Spire.Doc for .NET package as references in your .NET project. The DLL files can be either downloaded from this link or installed via NuGet.
PM> Install-Package Spire.Doc
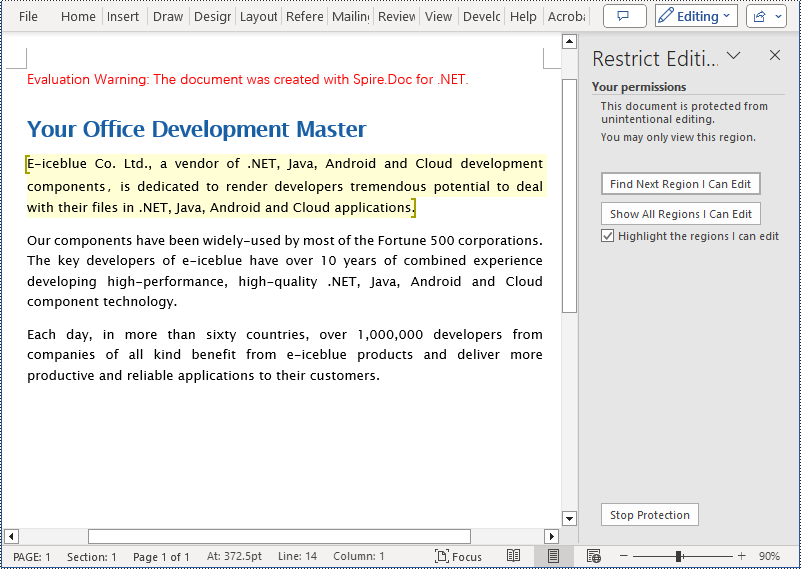
Add Editable Area in a Word Document in C#
The steps to add editable area in a Word document involve inserting PermissionStart and PermissionEnd objects in the document and setting the document to read-only protection mode to ensure that the content within the specified areas can be edited while the rest remains read-only. Here are the detailed steps:
- Create a Document object.
- Load a Word document using the Document.LoadFromFile() method.
- Access a section of the document through the Document.Sections[index] property.
- Create a PermissionStart object using PermissionStart permissionStart = new PermissionStart(document, id) to mark the beginning of the editable area .
- Create a PermissionEnd object using PermissionEnd permissionEnd = new PermissionEnd(document, id) to mark the end of the editable area .
- Access a paragraph using the Section.Paragraphs[index] property.
- Insert the permission start object at the beginning of the paragraph using the Paragraph.ChildObjects.Insert(0, permissionStart) method.
- Add the permission end object at the end of the paragraph using the Paragraph.ChildObjects.Add(permissionEnd) method.
- Set the document to read-only protection mode and restrict editing permissions using the Document.Protect(ProtectionType.AllowOnlyReading, password) method.
- Save the resulting document using the Document.SaveToFile() method.
- C#
using Spire.Doc;
using Spire.Doc.Documents;

namespace SpireDocDemo
{
    internal class Program
    {
        static void Main(string[] args)
        {
            // Create a new document object
            Document document = new Document();

            // Load the document from the specified path
            document.LoadFromFile("Sample1.docx");

            // Get the first section of the document
            Section section = document.Sections[0];

            // Create a permission start object
            PermissionStart permissionStart = new PermissionStart(document, "restricted1");

            // Create a permission end object
            PermissionEnd permissionEnd = new PermissionEnd(document, "restricted1");

            // Get the second paragraph in the section
            Paragraph paragraph = section.Paragraphs[1];

            // Insert the permission start object at the beginning of the paragraph
            paragraph.ChildObjects.Insert(0, permissionStart);

            // Add the permission end object at the end of the paragraph
            paragraph.ChildObjects.Add(permissionEnd);

            // Set the document to be read-only protected
            document.Protect(ProtectionType.AllowOnlyReading, "123456");

            // Save the modified document to the specified path
            document.SaveToFile("AddedEditingPermissionsArea.docx", FileFormat.Docx);

            // Close the document and release the resources occupied by the document object
            document.Close();
            document.Dispose();
        }
  }
}
Remove Editable Area in a Word Document in C#
The key steps to remove editable area in a Word document involve iterating through each paragraph of the document and removing the PermissionStart and PermissionEnd objects. Here are the detailed steps:
- Create a Document object.
- Load a Word document using the Document.LoadFromFile() method.
- Iterate through each paragraph in each section of the document, check for the presence of PermissionStart or PermissionEnd objects, and remove them.
- Save the resulting document using the Document.SaveToFile() method.
- C#
using Spire.Doc;
using Spire.Doc.Documents;

namespace SpireDocDemo
{
    internal class Program
    {
        static void Main(string[] args)
        {
             // Create a new document object
            Document document = new Document();

            // Load the document from the specified path
            document.LoadFromFile("Sample2.docx");

            // Iterate through the sections of the document
            for (int a = 0; a < document.Sections.Count; a++)
            {
                // Get the body of the current section
                Body body = document.Sections[a].Body;

                // Iterate through the child objects of the body
                for (int i = 0; i < body.ChildObjects.Count; i++)
                {
                    // Check if the child object is a paragraph
                    if (body.ChildObjects[i] is Paragraph)
                    {
                        // Get the current paragraph
                        Paragraph paragraph = (Paragraph)body.ChildObjects[i];

                        // Iterate backwards from the last child object of the paragraph
                        for (int j = paragraph.ChildObjects.Count - 1; j >= 0; j--)
                        {
                            // Get the current child object
                            DocumentObject documentObject = paragraph.ChildObjects[j];

                            // Remove the current child object if it is a permission start object
                            if (documentObject.DocumentObjectType == DocumentObjectType.PermissionStart)
                            {
                                paragraph.ChildObjects.RemoveAt(j);
                            }
                            // Remove the current child object if it is a permission end object
                            else if (documentObject.DocumentObjectType == DocumentObjectType.PermissionEnd)
                            {
                                paragraph.ChildObjects.RemoveAt(j);
                            }
                        }
                    }
                }
            }

            // Save the modified document to the specified path
            document.SaveToFile("RemovedEditingPermissionsArea.docx", FileFormat.Docx);

            // Close the document and release the resources occupied by the document object
            document.Close();
            document.Dispose();
        }
    }
}

Apply for a Temporary License
If you'd like to remove the evaluation message from the generated documents, or to get rid of the function limitations, please request a 30-day trial license for yourself.
Spire.PDF 10.3.7 optimizes the high memory consumption when converting multiple TIFF to PDF
We are pleased to announce the release of Spire.PDF 10.3.7. This version optimizes the high memory consumption when converting multiple TIFF to PDF. In addition, some known issues are also fixed in this version, such as the issue that the program threw a "System.NullReferenceException" exception when printing PDF. More details are listed below.
Here is a list of changes made in this release
| Category | ID | Description |
| Bug | SPIREPDF-6423 | Optimizes the high memory consumption when converting multiple TIFF to PDF. |
| Bug | SPIREPDF-6515 | Fixes the issue that the application threw a "System.NullReferenceException" when printing PDF documents. |
| Bug | SPIREPDF-6516 | Fixes the issue that some content remained in color when converting PDF documents to grayscale. |
| Bug | SPIREPDF-6528 | Fixes the issue that the application threw a "System.NullReferenceException" when using the split() method. |
| Bug | SPIREPDF-6531 | Fixes the issue that the application threw a "System.IndexOutOfRangeException" when extracting text. |
| Bug | SPIREPDF-6547 | Fixes the issue that the results of searching for highlighted text were incorrect. |
| Bug | SPIREPDF-6549 | Fixes the issue that the application threw an exception when using PdfCode39Barcode to generate barcodes for data with "*" |
| Bug | SPIREPDF-6550 | Fixes the issue that the digital signature verification result was incorrect. |
| Bug | SPIREPDF-6555 | Fixes the issue that spaces disappeared after converting PDF documents to PPT. |
| Bug | SPIREPDF-6558 | Fixes the issue that the application threw an "Empty convert-string" exception when saving PDF documents. |
| Bug | SPIREPDF-6568 | Fixes the issue that the application threw a "System.OverflowException" when loading PDF documents. |
| Bug | SPIREPDF-6574 | Fixes the issue that the application threw a "System.ArgumentException" when converting PDF to XPS. |
| Bug | SPIREPDF-6575 | Fixes the issue that the action JavaScript code of the form button field could not be obtained. |
Python: Merge PowerPoint Presentations
Merging multiple PowerPoint presentations can be a daunting task, often leading to a less-than-optimal presentation experience. However, there is a solution that can streamline this process and ensure seamless transitions throughout the presentation. By combining multiple PowerPoint files into a single cohesive presentation, presenters can eliminate the need to repeatedly open different files, saving time and effort. While manually copying slides can be arduous and time-consuming, Python offers a swift and efficient solution. This article is going to show how to leverage Spire.Presentation for Python to merge PowerPoint presentations effortlessly through Python programs.
- Merging PowerPoint Presentations and Retain Their Designs
- Merging PowerPoint Presentations with Consistent Design
Install Spire.PDF for Python
This scenario requires Spire.Presentation for Python and plum-dispatch v1.7.4. They can be easily installed in your VS Code through the following pip command.
pip install Spire.Presentation
If you are unsure how to install, please refer to: How to Install Spire.Presentation for Python on Windows
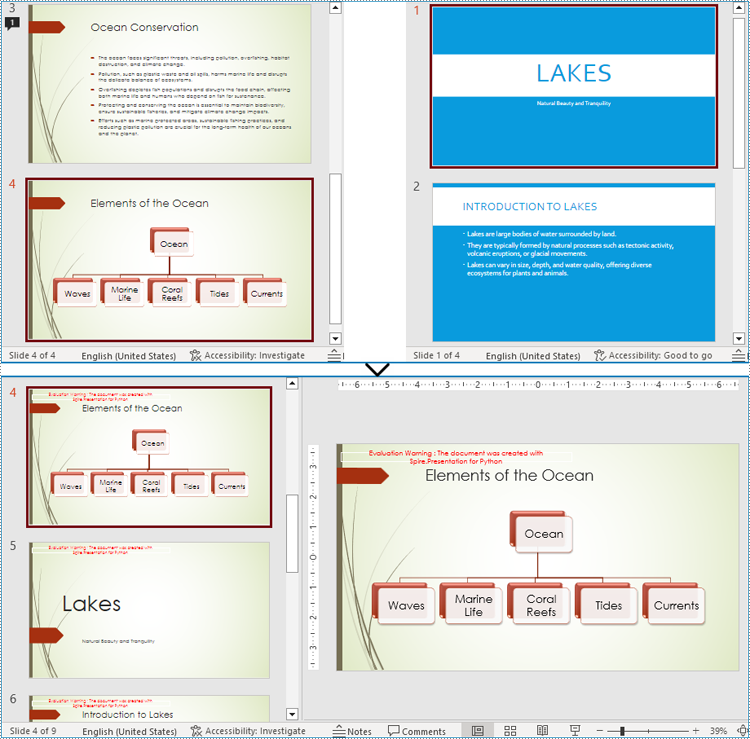
Merging PowerPoint Presentations and Retain Their Designs
Merging PowerPoint presentations can be accomplished by reading slides from one presentation and adding them to another presentation. During the process of adding to the target presentation, developers can use Presentation.Slides.AppendBySlide(ISlide) method to add slides and retain the original design of the slides.
The detailed steps are as follows:
- Create two instances of Presentation class.
- Load two PowerPoint presentations using Presentation.LoadFromFile() method.
- Iterate through each slide in the second presentation and add them to the first presentation while keeping their design using Presentation.Slides.AppendBySlide() method.
- Save the first presentation using Presentation.SaveToFile() method.
- Python
from spire.presentation import *
from spire.presentation.common import *

# Create two instances of Presentation class
pres1 = Presentation()
pres2 = Presentation()

# Load two presentation files
pres1.LoadFromFile("Sample1.pptx")
pres2.LoadFromFile("Sample2.pptx")

# Iterate through the slides of the second presentation
for slide in pres2.Slides:
    # Add each slides to the first presentation and keep the original design
    pres1.Slides.AppendBySlide(slide)

# Save the first presentation
pres1.SaveToFile("output/MergePresentations.pptx", FileFormat.Pptx2016)
pres1.Dispose()
pres2.Dispose()
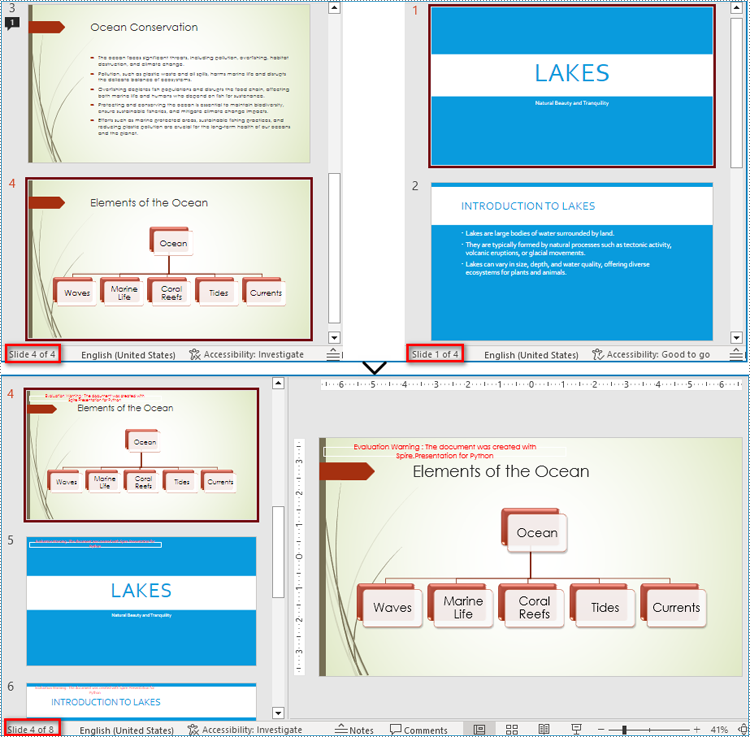
Merging PowerPoint Presentations with Consistent Design
Developers can also use Presentation.Slides.AppendByMaster(slide Islide, master IMasterSlide) method to insert slides into the target presentation and change the design of the slides to the design of the target presentation. This allows for merging presentations and ensuring a consistent design.
The detailed stops are as follows:
- Create two instances of Presentation class.
- Load two PowerPoint presentations using Presentation.LoadFromFile() method.
- Iterate through each slide in the second presentation and add them to the first presentation while changing their design to the design of the first presentation using Presentation.Slides.AppendByMaster() method.
- Save the first presentation using Presentation.SaveToFile() method.
- Python
from spire.presentation import *
from spire.presentation.common import *

# Create two instances of Presentation class
pres1 = Presentation()
pres2 = Presentation()

# Load two presentation files
pres1.LoadFromFile("Sample1.pptx")
pres2.LoadFromFile("Sample2.pptx")

# Iterate through each slide in the second presentation
for slide in pres2.Slides:
    # Add each slide to the first presentation
    pres1.Slides.AppendByMaster(slide, pres1.Masters[0])

# Save the first presentation
pres1.SaveToFile("output/MergePresentationsDesign.pptx", FileFormat.Pptx2016)
pres1.Dispose()
pres2.Dispose()
Apply for a Temporary License
If you'd like to remove the evaluation message from the generated documents, or to get rid of the function limitations, please request a 30-day trial license for yourself.
Spire.XLS for Java 14.3.0 supports AI features
We are pleased to announce the release of Spire.XLS for Java 14.3.0. This version adds the XLSAI feature to the original Spire.XLS for Java product. By sending requests to the AI model, it is possible to achieve functions such as document calculation, range merging, image generation, file upload, questioning and translation with the help of AI. More details are listed below.
Here is a list of the main AI functions and their APIs
| Function | API |
| Calculate document | public String excelGenerate(List<CellRange> ranges) |
| Merge ranges | public String excelMerge(CellRange descRange, List<Cellrange> srcRanges, CellRange titleRange) |
| Generate images | public InputStream imageGenerate(String description) |
| Generate images with specified size | public InputStream imageGenerate(String description, ImageGenerationModel model, ImageGenerationSize size) |
| Upload files | public String uploadFile(String fileName, InputStream stream) |
| Upload workbooks | public String uploadWorkbook(Workbook workbook) |
| Ask a question about the document | public String documentSearch(String question, String file_server_path, boolean enableHistory) |
| public String documentSearch(String question, String file_server_path, Map<String, String> options, boolean enableHistory) | |
| Search | public String search(String question, String language, boolean enableHistory) |
| Translate worksheets | public String excelTranslate(List<Worksheet> srcWorksheets, String language, boolean translateSheetName) |
| Translate ranges | public String excelTranslate(List<CellRange> srcRanges, String language) |
| Fill out Excel worksheets | public String excelFill(CellRange dataRange, CellRange descRange, boolean containTitle, List<Integer> fillColumnIndexs) |
| public String excelFill(CellRange dataRange, CellRange descRange, boolean containTitle, List<Integer> fillColumnIndexs, List<String> keys) | |
| Question | public String ask(String question, boolean enableHistory) |
| Clear user history | public String resetUserHistory() |
| Clear history sessions | public String resetChatHistory(String sessionid) |
Spire.PDF for Java 10.3.1 enhances the conversion from OFD to PDF
We are delighted to announce the release of Spire.PDF for Java 10.3.1. This version enhances the conversion from OFD to PDF. Besides, it fixes some known issues, such as the issue that it threw "StackOverflow" exception when using setRowSpan() twice. More details are listed below.
Here is a list of changes made in this release
| Category | ID | Description |
| Bug | SPIREPDF-6548 | Fixes the issue that the PDF type obtained by using pdfDocument.getConformance() was incorrect. |
| Bug | SPIREPDF-6554 | Fixes the issue that it threw "StackOverflow" exception when using setRowSpan() twice. |
| Bug | SPIREPDF-6581 | Fixes the issue that content was lost after converting OFD to PDF. |
Python: Change the Margins of a PDF Document
Margins in a PDF document refer to the blank spaces surrounding the content on each page. They act as a buffer zone between the text or images and the edges of the page. Changing the margins of a PDF document can be a useful task when you want to adjust the layout, accommodate annotations or comments, or prepare the document for printing or presentation.
This article introduces how to modify the margins of a PDF document using the Spire.PDF for Python library. You will discover techniques to both increase and reduce the margins of your PDFs, enabling you to customize the layout according to your specific requirements.
Install Spire.PDF for Python
This scenario requires Spire.PDF for Python and plum-dispatch v1.7.4. They can be easily installed in your VS Code through the following pip command.
pip install Spire.PDF
If you are unsure how to install, please refer to this tutorial: How to Install Spire.PDF for Python on Windows
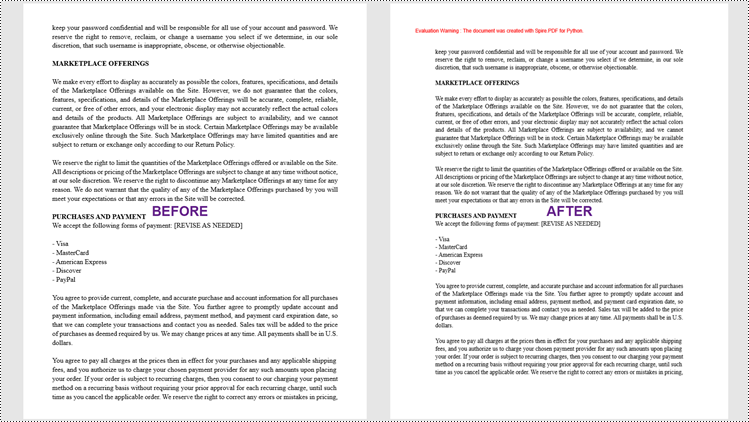
Increase the Margins of a PDF Document in Python
In Spire.PDF for Python, there isn't a direct method to modify the margins of an existing PDF document. However, you can increase the margins by creating a new PDF document with a page size equal to the original document's page size plus the increased margin values. Then, copy and paste (draw) each page of the original document into the appropriate place on the new document page.
The following are the steps to increase the margins of a PDF document using Python.
- Create a PdfDocument object called "originalPdf" and load the original PDF document.
- Create another PdfDocument object called "newPdf" for creating a new PDF document.
- Specify the desired increase values for the top, bottom, left, and right margins.
- Calculate the new page size by adding the margin increase values to the original page dimensions.
- Create a template based on the original PDF page using PdfPageBase.CreateTemplate() method.
- Add a new page to the "newPdf" document with the calculated page size using PdfDocument.Pages.Add() method.
- Draw the template onto the new page at the appropriate location to using PdfTemplate.Draw() method.
- Repeat steps 5-7 for each page in the original PDF document.
- Save the "newPdf" object to a PDF file.
- Python
from spire.pdf.common import *
from spire.pdf import *

# Create a PdfDocument object
originalPdf = PdfDocument()

# Load a PDF file
originalPdf.LoadFromFile("C:\\Users\\Administrator\\Desktop\\Input.pdf")

# Get the first page
firstPage = originalPdf.Pages[0]

# Create another PdfDocument object for creating new document
newPdf = PdfDocument()

# Set the increase values of the margins
marginsToAdd = newPdf.PageSettings.Margins
marginsToAdd.Top = 40
marginsToAdd.Bottom = 40
marginsToAdd.Left = 40
marginsToAdd.Right = 40

# Calculate the new page size
sizeF = SizeF(firstPage.Size.Width + marginsToAdd.Left + marginsToAdd.Right, firstPage.Size.Height + marginsToAdd.Top + marginsToAdd.Bottom)

# Iterate through the pages in the original document
for i in range(originalPdf.Pages.Count):

    # Create a template based on a specific page
    pdfTemplate = originalPdf.Pages[i].CreateTemplate()

    # Add a page to the new PDF
    page = newPdf.Pages.Add(sizeF)

    # Draw template on the page
    pdfTemplate.Draw(page, 0.0, 0.0)

# Save the new document
newPdf.SaveToFile("Output/IncreaseMargins.pdf", FileFormat.PDF)

# Dispose resources
originalPdf.Dispose()
newPdf.Dispose()
Reduce the Margins of a PDF Document in Python
Similarly, you can reduce the margins by creating a new PDF document with a page size equal to the page size of the original document minus the margin value to be reduced. Then, copy and paste (draw) each page of the original document into the appropriate place on the new document page.
To reduce the margins of a PDF document using Python, follow these steps:
- Create a PdfDocument object called "originalPdf" and load the original PDF document.
- Create another PdfDocument object called "newPdf" for creating a new PDF document.
- Specify the desired reduction values for the top, bottom, left, and right margins.
- Calculate the new page size by subtracting the margin value to be reduced from the original page size.
- Create a template based on the original PDF page using PdfPageBase.CreateTemplate() method.
- Add a new page to the "newPdf" document with the calculated page size using PdfDocument.Pages.Add() method.
- Draw the template onto the new page at the appropriate location using PdfTemplate.Draw() method.
- Repeat steps 5-7 for each page in the original PDF document.
- Save the "newPdf" object to a PDF file.
- Python
from spire.pdf.common import *
from spire.pdf import *

# Create a PdfDocument object
originalPdf = PdfDocument()

# Load a PDF file
originalPdf.LoadFromFile("C:\\Users\\Administrator\\Desktop\\Input.pdf")

# Get the first page
firstPage = originalPdf.Pages[0]

# Create another PdfDocument object
newPdf = PdfDocument()

# Set the reduction value of the margins
topToReduce = 20.0
bottomToReduce = 20.0
leftToReduce = 20.0
rightToReduce = 20.0

# Calculate the new page size
sizeF = SizeF(firstPage.Size.Width - leftToReduce - rightToReduce, firstPage.Size.Height - topToReduce - bottomToReduce)

# Iterate through the pages in the original document
for i in range(originalPdf.Pages.Count):

    # Create a template based on a specific page
    pdfTemplate = originalPdf.Pages[i].CreateTemplate()

    # Add a page to the new PDF
    page = newPdf.Pages.Add(sizeF, PdfMargins(0.0))

    # Draw template on the page
    pdfTemplate.Draw(page, -leftToReduce, -topToReduce)

# Save the new document
newPdf.SaveToFile("Output/ReduceMargins.pdf", FileFormat.PDF)

# Dispose resources
originalPdf.Dispose()
newPdf.Dispose()
Apply for a Temporary License
If you'd like to remove the evaluation message from the generated documents, or to get rid of the function limitations, please request a 30-day trial license for yourself.
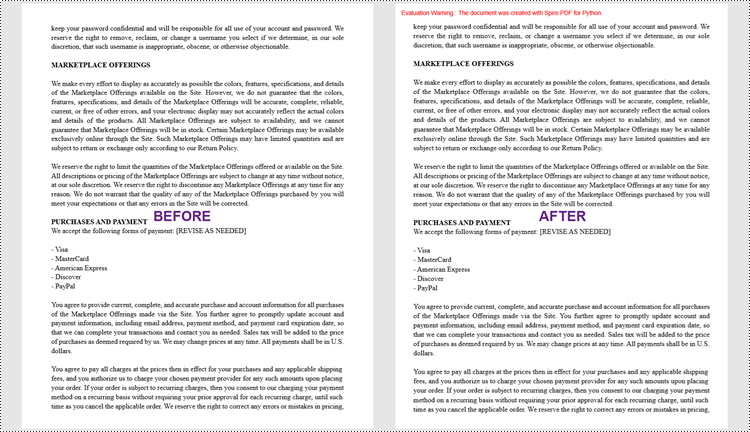
Python: Set Paragraph Spacing and Line Spacing in Word
Paragraph spacing and line spacing are crucial formatting options in Microsoft Word that greatly influence the visual presentation and readability of your documents. Paragraph spacing determines the vertical space between paragraphs, creating a distinct separation between each paragraph. Line spacing, on the other hand, controls the vertical distance between lines within a paragraph, directly impacting the density and readability of the text. By appropriately setting paragraph spacing and line spacing, you can easily create visually appealing and easy-to-read documents. In this article, we will explain how to set paragraph spacing and line spacing in Word documents in Python using Spire.Doc for Python.
Install Spire.Doc for Python
This scenario requires Spire.Doc for Python and plum-dispatch v1.7.4. They can be easily installed in your VS Code through the following pip commands.
pip install Spire.Doc
If you are unsure how to install, please refer to this tutorial: How to Install Spire.Doc for Python on Windows
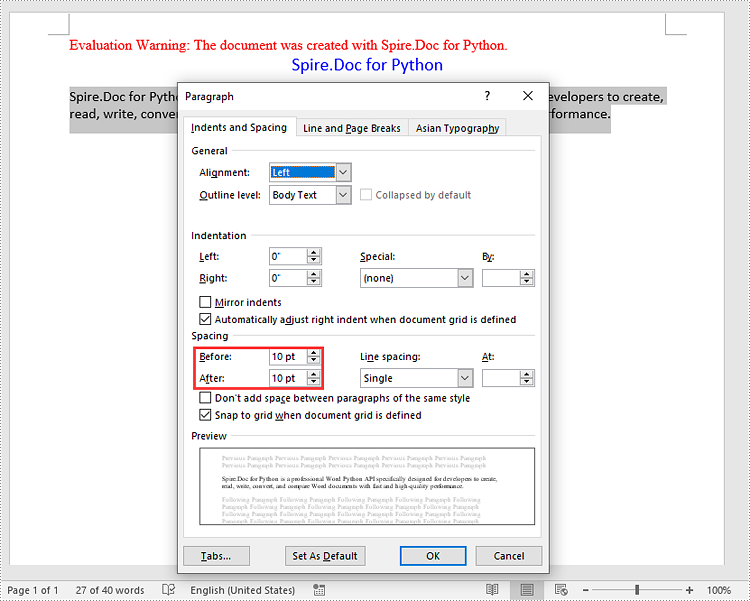
Set Paragraph Spacing in Word in Python
Spire.Doc for Python provides the Paragraph.Format.BeforeSpacing and Paragraph.Format.AfterSpacing properties to adjust the spacing before and after a paragraph. The detailed steps are as follows.
- Create an object of the Document class.
- Add a section to the document using Document.AddSection() method.
- Add two paragraphs to the section using Section.AddParagraph() methods.
- Set the spacing before and after the paragraphs using Paragraph.Format.BeforeSpacing and Paragraph.Format.AfterSpacing properties.
- Save the result document using Document.SaveToFile() method.
- Python
from spire.doc import *
from spire.doc.common import *

# Create an object of the Document class
document = Document()
# Add a section to the document
section = document.AddSection()

# Add two paragraphs to the section
para1 = section.AddParagraph()
para1.Format.HorizontalAlignment = HorizontalAlignment.Center
textRange1 = para1.AppendText("Spire.Doc for Python")
textRange1.CharacterFormat.TextColor = Color.get_Blue()
textRange1.CharacterFormat.FontName = "Calibri"
textRange1.CharacterFormat.FontSize = 15

para2 = section.AddParagraph()
textRange2 = para2.AppendText("Spire.Doc for Python is a professional Word Python API specifically designed for developers to create, read, write, convert, and compare Word documents with fast and high-quality performance.")
textRange2.CharacterFormat.FontName = "Calibri"
textRange2.CharacterFormat.FontSize = 12

# Set the spacing after the first paragraph
para1.Format.AfterAutoSpacing = False
para1.Format.AfterSpacing = 10

# Set the spacing before and after the second paragraph
para2.Format.BeforeAutoSpacing = False
para2.Format.BeforeSpacing = 10
para2.Format.AfterAutoSpacing = False
para2.Format.AfterSpacing = 10

# Save the result file
document.SaveToFile("SetParagraphSpacing.docx", FileFormat.Docx2013)
document.Close()
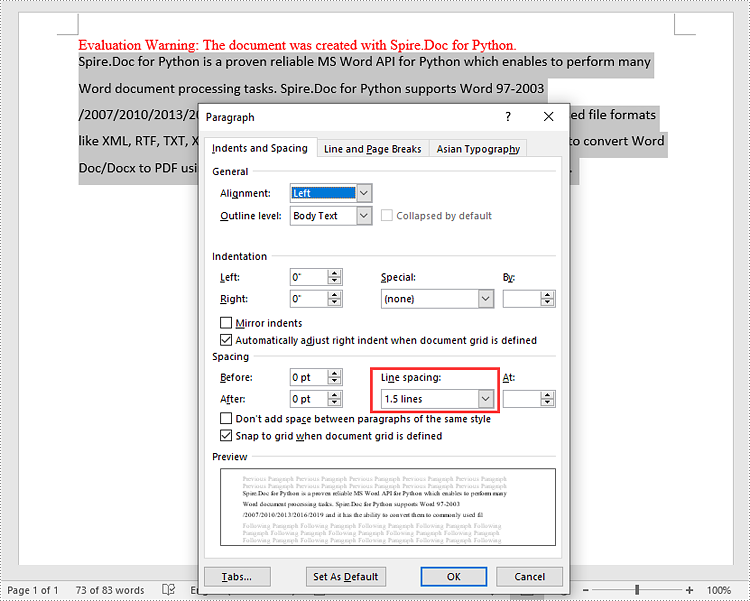
Set Line Spacing in Word in Python
To set the pacing between lines in a paragraph, you can use the Paragraph.Format.LineSpacing property. The detailed steps are as follows.
- Create an object of the Document class.
- Add a section to the document using Document.AddSection() method.
- Add a paragraph to the section using Section.AddParagraph() methods.
- Set the spacing between lines in the paragraph using Paragraph.Format.LineSpacing property.
- Save the result document using Document.SaveToFile() method.
- Python
from spire.doc import *
from spire.doc.common import *

# Create an object of the Document class
document = Document()
# Add a section
section = document.AddSection()

# Add a paragraph to the section
para = section.AddParagraph()
textRange = para.AppendText("Spire.Doc for Python is a proven reliable MS Word API for Python which enables to perform many Word document processing tasks. Spire.Doc for Python supports Word 97-2003 /2007/2010/2013/2016/2019 and it has the ability to convert them to commonly used file formats like XML, RTF, TXT, XPS, EPUB, EMF, HTML and vice versa. Furthermore, it supports to convert Word Doc/Docx to PDF using Python, Word to SVG, and Word to PostScript in high quality.")
textRange.CharacterFormat.FontName = "Calibri"
textRange.CharacterFormat.FontSize = 12

# Set line spacing rule
para.Format.LineSpacingRule = LineSpacingRule.Multiple
# Set line spacing value (The line spacing rule "Multiple" with value 18 sets the line spacing to "1.5 lines", value 12 sets the line spacing to "Single")
para.Format.LineSpacing = 18

# Save the result file
document.SaveToFile("SetLineSpacing.docx", FileFormat.Docx2013)
document.Close()
Apply for a Temporary License
If you'd like to remove the evaluation message from the generated documents, or to get rid of the function limitations, please request a 30-day trial license for yourself.
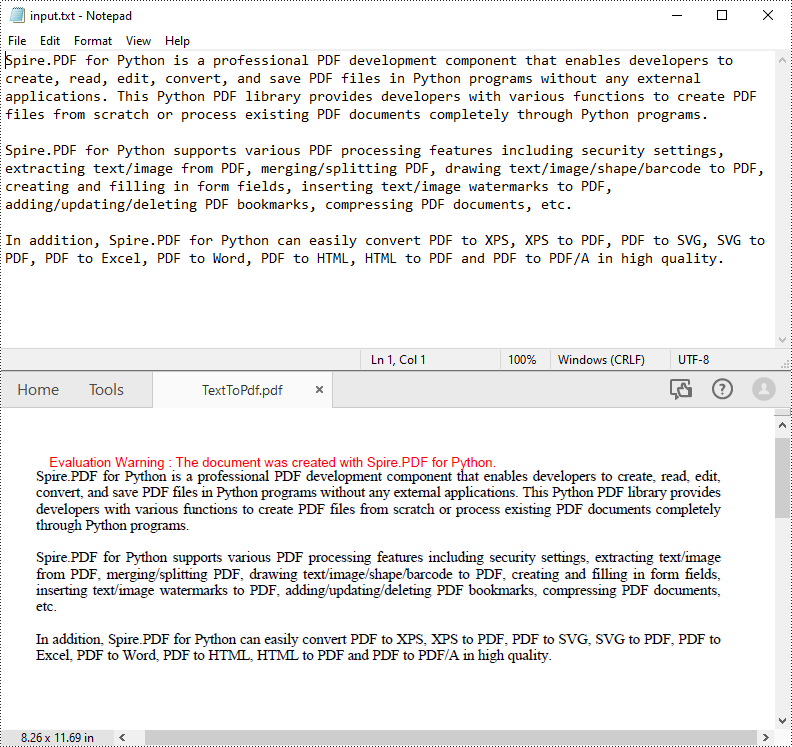
Python: Convert TXT to PDF
PDF is an ideal file format for sharing and archiving. If you are working with text files, you may find it beneficial to convert them to PDF files for enhanced portability, security and format preservation. In this article, you will learn how to convert TXT files to PDF in Python using Spire.PDF for Python.
Install Spire.PDF for Python
This scenario requires Spire.PDF for Python and plum-dispatch v1.7.4. They can be easily installed in your VS Code through the following pip command.
pip install Spire.PDF
If you are unsure how to install, please refer to this tutorial: How to Install Spire.PDF for Python on Windows
Convert TXT to PDF with Python
Spire.PDF for Python allows to convert text files to PDF by reading the text content from the input TXT file, and then drawing it onto the pages of a PDF document. Some of the core classes and methods used are listed below:
- PdfDocument class: Represents a PDF document model.
- PdfTextWidget class: Represents the text area with the ability to span several pages.
- File.ReadAllText() method: Reads the text in the text file into a string object.
- PdfDocument.Pages.Add() method: Adds a page to a PDF document.
- PdfTextWidget.Draw() method: Draws the text widget at a specified location on the page.
The following are the detailed steps to convert TXT to PDF in Python:
- Read text from the TXT file using File.ReadAllText() method.
- Create a PdfDocument instance and add a page to the PDF file.
- Create a PDF font and brush objects.
- Set the text format and layout.
- Create a PdfTextWidget object to hold the text content.
- Draw the text widget at a specified location on the PDF page using PdfTextWidget.Draw() method.
- Save the PDF file using PdfDocument.SaveToFile() method.
- Python
from spire.pdf.common import *
from spire.pdf import *

def ReadFromTxt(fname: str) -> str:
    with open(fname, 'r') as f:
        text = f.read()
    return text

inputFile = "input.txt"
outputFile = "TextToPdf.pdf"

# Get text from the txt file
text = ReadFromTxt(inputFile)

# Create a PdfDocument instance
pdf = PdfDocument()

# Add a page
page = pdf.Pages.Add()

# Create a PDF font and PDF brush
font = PdfFont(PdfFontFamily.TimesRoman, 11.0)
brush = PdfBrushes.get_Black()

# Set the text alignment and line spacing
strformat = PdfStringFormat()
strformat.LineSpacing = 10.0
strformat.Alignment = PdfTextAlignment.Justify

# Set the text layout
textLayout = PdfTextLayout()
textLayout.Break = PdfLayoutBreakType.FitPage
textLayout.Layout = PdfLayoutType.Paginate

# Create a PdfTextWidget instance to hold the text content
textWidget = PdfTextWidget(text, font, brush)

# Set the text format
textWidget.StringFormat = strformat

# Draw the text at the specified location on the page
bounds = RectangleF(PointF(0.0, 20.0), page.Canvas.ClientSize)
textWidget.Draw(page, bounds, textLayout)

# Save the result file
pdf.SaveToFile(outputFile, FileFormat.PDF)
pdf.Close()
Apply for a Temporary License
If you'd like to remove the evaluation message from the generated documents, or to get rid of the function limitations, please request a 30-day trial license for yourself.
Spire.Doc for Java 12.3.1 adds multiple new features
We are excited to announce the release of Spire.Doc for Java 12.3.1. This version adds multiple new features, such as determining whether a digital signature exists for a document and setting field properties when updating a field. Besides, it also optimizes the file size of the resulting document of Word to OFD conversion. More details are listed below.
Here is a list of changes made in this release
| Category | ID | Description |
| Improvement | SPIREDOC-10325 | Optimizes the file size of the resulting document of Word to OFD conversion. |
| New feature | - | Adds the setImageLink() in MergeImageFieldEventArgs event to support adding hyperlinks to the mail merge images.
Document document = new Document();
 document.loadFromFile(inputFile);
 String[] fieldNames = new String[]{"ImageFile"};
 String[] fieldValues = new String[]{inputFile_img};
 document.getMailMerge().MergeImageField = new MergeImageFieldEventHandler() {
     @Override
     public void invoke(Object sender, MergeImageFieldEventArgs args) {
         mailMerge_MergeImageField(sender, args);
     }
 };
 document.getMailMerge().execute(fieldNames, fieldValues);
 document.saveToFile(outputFile, FileFormat.Docx);
private static void mailMerge_MergeImageField(Object sender, MergeImageFieldEventArgs field) {
    String filePath = field.getImageFileName();
    if (filePath != null && !"".equals(filePath)) {
        try {
            field.setImage(filePath);
            field.setImageLink("https://www.baidu.com/");
        } catch (Exception e) {
            e.printStackTrace();
        }
    }
|
| New feature | SPIREDOC-9369 | Adds the getFieldOptions() method to support setting field properties when updating a field.
document.getFieldOptions().setCultureSource(FieldCultureSource.CurrentThread); |
| New feature | - | Adds the hasDigitalSignature() method to support determining whether a document has a digital signature.
Document.hasDigitalSignature("filepath");
|
| New feature | SPIREDOC-9455 | Adds the integrateFontTableTo method to support copying Fonttable data from source document to target document.
sourceDoc.integrateFontTableTo(Document destDoc); |
| New feature | SPIREDOC-9869 | Adds the HtmlUrlLoadEvent event to support the control of loading URLs in the file when loading HTML files.
public static void main(String[] args) {
    Document document = new Document();
    document.HtmlUrlLoadEvent = new MyDownloadEvent();
    document.loadFromFile(inputFile, FileFormat.Html, XHTMLValidationType.None);
    document.saveToFile(outputFile, FileFormat.PDF);
}
static class MyDownloadEvent extends HtmlUrlLoadHandler {
    @Override
    public void invoke(Object o, HtmlUrlLoadEventArgs htmlUrlLoadEventArgs) {
        try {
            byte[] bytes = downloadBytesFromURL(htmlUrlLoadEventArgs.getUrl());
            htmlUrlLoadEventArgs.setDataBytes(bytes);
        } catch (Exception e) {
            e.printStackTrace();
        }
    }
}
public static byte[] downloadBytesFromURL(String urlString) throws Exception {
    URL url = new URL(urlString);
    HttpURLConnection connection = (HttpURLConnection) url.openConnection();
    connection.setRequestMethod("GET");
    connection.setConnectTimeout(5000);
    connection.setReadTimeout(5000);
    int responseCode = connection.getResponseCode();
    if (responseCode == HttpURLConnection.HTTP_OK) {
        InputStream inputStream = connection.getInputStream();
        ByteArrayOutputStream outputStream = new ByteArrayOutputStream();
        byte[] buffer = new byte[1024];
        int bytesRead;
        while ((bytesRead = inputStream.read(buffer)) != -1) {
            outputStream.write(buffer, 0, bytesRead);
        }
        outputStream.close();
        return outputStream.toByteArray();
    } else {
        throw new Exception("Failed to download content. Response code: " + responseCode);
    }
}
|
| New feature | - | Adds the setCustomFonts(InputStream[] fontStreamList) method to support setting custom fonts by stream.
document.setCustomFonts(InputStream[] fontStreamList); |
| New feature | - | Replaces the clearCustomFontsFolders() method with the new clearCustomFonts() method.
document.clearCustomFonts(); |
| New feature | - | Replaces the setGlobalCustomFontsFolders(InputStream[] fontStreamList) method with the new setGlobalCustomFonts(InputStream[] fontStreamList) method.
Document.setGlobalCustomFonts(InputStream[] fontStreamList); |
| New feature | - | Replaces the clearGlobalCustomFontsFolders() method with the new clearGlobalCustomFonts() method.
Document.clearGlobalCustomFonts(); |
Python: Insert Rows and Columns in Excel
If you have additional pieces of information to include in your spreadsheet, inserting rows or columns can provide room for these new fields. In addition,
adding blank rows or columns between data sets can also help to effectively separate different categories of information, making them easier to read and analyze. This article will demonstrate how to insert rows and columns in Excel in Python using Spire.XLS for Python.
Install Spire.XLS for Python
This scenario requires Spire.XLS for Python and plum-dispatch v1.7.4. They can be easily installed in your VS Code through the following pip command.
pip install Spire.XLS
If you are unsure how to install, please refer to this tutorial: How to Install Spire.XLS for Python on Windows
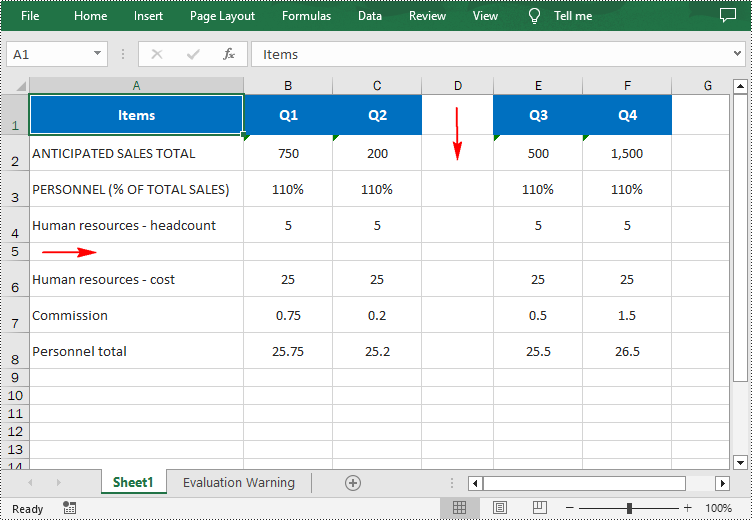
Insert a Row and a Column in Excel in Python
Spire.XLS for Python provides the Worksheet.InsertRow(rowIndex: int) and Worksheet.InsertColumn(columnIndex: int) methods for inserting a blank row and a blank column in an Excel worksheet. The following are the detailed steps:
- Create a Workbook instance.
- Load a sample Excel file using Workbook.LoadFromFile() method.
- Get a specified worksheet using Workbook.Worksheets[sheetIndex] property.
- Insert a row into the worksheet using Worksheet.InsertRow(rowIndex: int) method.
- Insert a column into the worksheet using Worksheet.InsertColumn(columnIndex: int) method.
- Save the result file using Workbook.SaveToFile() method.
- Python
from spire.xls import *
from spire.xls.common import *

inputFile = "input.xlsx"
outputFile = "InsertRowAndColumn.xlsx"

# Create a Workbook instance
workbook = Workbook()

# Load an Excel document
workbook.LoadFromFile(inputFile)

# Get a specified worksheet
worksheet = workbook.Worksheets[0]

# Insert a blank row as the 5th row in the worksheet
worksheet.InsertRow(5)

# Insert a blank column as the 4th column in the worksheet
worksheet.InsertColumn(4)

# Save the result file
workbook.SaveToFile(outputFile, ExcelVersion.Version2016)
workbook.Dispose()
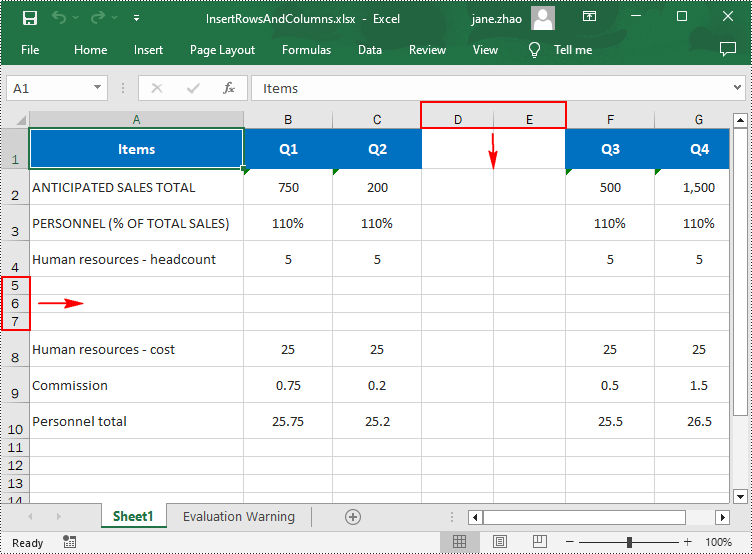
Insert Multiple Rows and Columns in Excel in Python
To insert multiple rows and columns into a worksheet, you can use the Worksheet.InsertRow(rowIndex: int, rowCount: int) and Worksheet.InsertColumn(columnIndex: int, columnCount: int) methods. The following are detailed steps.
- Create a Workbook instance.
- Load a sample Excel file using Workbook.LoadFromFile() method.
- Get a specified worksheet using Workbook.Worksheets[sheetIndex] property.
- Insert multiple rows into the worksheet using Worksheet.InsertRow(rowIndex: int, rowCount: int) method.
- Insert multiple columns into the worksheet using Worksheet.InsertColumn(columnIndex: int, columnCount: int) method.
- Save the result file using Workbook.SaveToFile() method.
- Python
from spire.xls import *
from spire.xls.common import *

inputFile = "input.xlsx"
outputFile = "InsertRowsAndColumns.xlsx"

# Create a Workbook instance
workbook = Workbook()

# Load an Excel document
workbook.LoadFromFile(inputFile)

# Get a specified worksheet
worksheet = workbook.Worksheets[0]

# Insert three blank rows into the worksheet
worksheet.InsertRow(5, 3)

#Insert two blank columns into the worksheet
worksheet.InsertColumn(4, 2)

# Save the result file
workbook.SaveToFile(outputFile, ExcelVersion.Version2016)
workbook.Dispose()
Apply for a Temporary License
If you'd like to remove the evaluation message from the generated documents, or to get rid of the function limitations, please request a 30-day trial license for yourself.