Spire.PDF for Java 10.3.4 supports adding InkAnnotation to PDF
We are delighted to announce the release of Spire.PDF for Java 10.3.4. This version adds the PdfTextReplacer class to replace PDF text and supports adding InkAnnotation to PDF. Besides, it also optimizes the PDF digital signature time to match the system local time. More details are listed below.
Here is a list of changes made in this release
| Category | ID | Description |
| New feature | SPIREPDF-4354 | Adds the PdfTextReplacer class to replace PDF text.
PdfDocument doc = new PdfDocument();
doc.loadFromFile("Input.pdf");
PdfPageBase page = doc.getPages().get(0);
PdfTextReplacer textReplacer = new PdfTextReplacer(page);
textReplacer.replaceAllText("old", "NEW");
doc.saveToFile("output.pdf");
doc.dispose();
|
| New feature | SPIREPDF-6591 | Supports adding InkAnnotation to PDF.
PdfDocument doc = new PdfDocument();
PdfPageBase pdfPage = doc.getPages().add();
List<int[]> inkList = new ArrayList<>();
int[] intPoints = new int[]
		{
				100,800,
				200,800,
				200,700
		};
inkList.add(intPoints);
PdfInkAnnotation ia = new PdfInkAnnotation(inkList);
ia.setColor(new PdfRGBColor(Color.RED));
ia.getBorder().setWidth(12);
ia.setText("e-iceblue");
((PdfNewPage) pdfPage).getAnnotations().add(ia);
doc.saveToFile("inkannotation.pdf");
|
| Bug | SPIREPDF-6606 | Optimizes the PDF signature time to match the system local time. |
Spire.XLS for Java 14.3.2 optimizes the memory usage for parsing Excel documents
We are happy to announce the release of Spire.XLS for Java 14.3.2. This version optimizes the memory usage for parsing Excel files. Besides, some known issues are fixed in this version, such as the issue that shapes were lost after copying a worksheet table. More details are listed below.
Here is a list of changes made in this release
| Category | ID | Description |
| Bug | SPIREXLS-5096 | Optimize the issue that the memory consumption is high when parsing Excel documents. |
| Bug | SPIREXLS-5136 | Fix the issue that it reported an error when opening an Excel document after loading and saving it directly. |
| Bug | SPIREXLS-5138 | Fix the issue that shapes were lost after copying the worksheet table. |
C#: Add Gutters on Word Document Pages
Adding gutters on Word document pages can enhance the professionalism and aesthetics of the document. Gutters not only make the document appear neater and more organized but also serve as a guide when printing the document, making it easier for readers to navigate and browse through the content. By adding gutters on the document pages, you can simulate the common binding line effect found in physical documents, giving the document a more printed quality. This article will explain how to use Spire.Doc for .NET to add gutters on Word document pages within a C# project.
- Add a Gutter at the Top of a Word Document Page using C#
- Add a Gutter at the Left of a Word Document Page using C#
Install Spire.Doc for .NET
To begin with, you need to add the DLL files included in the Spire.Doc for .NET package as references in your .NET project. The DLL files can be either downloaded from this link or installed via NuGet.
PM> Install-Package Spire.Doc
Add a Gutter at the Top of a Word Document Page using C#
To enable the top gutter on a page, you can set the section.PageSetup.IsTopGutter = true. The default gutter area displays blank without content, and this example also includes how to add text within the gutter area. Here are the detailed steps:
- Create a Document object.
- Load a document using the Document.LoadFromFile() method.
- Iterate through all sections of the document using a for loop over the Document.Sections collection.
- Set Section.PageSetup.IsTopGutter to true to display the gutter at the top of the page.
- Use the Section.PageSetup.Gutter property to set the width of the gutter.
- Call the custom AddTopGutterText() method to add text to the gutter area.
- Save the document using the Document.SaveToFile() method.
- C#
using Spire.Doc;
using Spire.Doc.Documents;
using Spire.Doc.Fields;
using Spire.Doc.Formatting;
using System.Drawing;
using System.Text;

namespace SpireDocDemo
{
	internal class Program
	{
		static void Main(string[] args)
		{
			// Create a document object
			Document document = new Document();

			// Load the document
			document.LoadFromFile("Sample1.docx");

			// Iterate through all sections of the document
			for (int i = 0; i < document.Sections.Count; i++)
			{
				// Get the current section
				Section section = document.Sections[i];

				// Set whether to add a gutter at the top of the page to true
				section.PageSetup.IsTopGutter = true;

				// Set the width of the gutter to 100f
				section.PageSetup.Gutter = 100f;

				// Call a method to add text on the top gutter
				AddTopGutterText(section);
			}

			// Save the modified document to a file
			document.SaveToFile("Add Gutter Line at the Top of the Page.docx", FileFormat.Docx2016);

			// Release document resources
			document.Dispose();
		}
		// Method to add text on the top gutter
		static void AddTopGutterText(Section section)
		{
			// Get the header of the section
			HeaderFooter header = section.HeadersFooters.Header;

			// Set the width of the text box to the page width
			float width = section.PageSetup.PageSize.Width;

			// Set the height of the text box to 40
			float height = 40;

			// Add a text box in the header
			TextBox textBox = header.AddParagraph().AppendTextBox(width, height);

			// Set the text box without border
			textBox.Format.NoLine = true;

			// Set the vertical starting position of the text box to the top margin area
			textBox.VerticalOrigin = VerticalOrigin.TopMarginArea;

			// Set the vertical position of the text box
			textBox.VerticalPosition = 140;

			// Set the horizontal alignment of the text box to left
			textBox.HorizontalAlignment = ShapeHorizontalAlignment.Left;

			// Set the horizontal starting position of the text box to the left margin area
			textBox.HorizontalOrigin = HorizontalOrigin.LeftMarginArea;

			// Set the text anchor to bottom
			textBox.Format.TextAnchor = ShapeVerticalAlignment.Bottom;

			// Set the text wrapping style to in front of text
			textBox.Format.TextWrappingStyle = TextWrappingStyle.InFrontOfText;

			// Set the text wrapping type to both sides
			textBox.Format.TextWrappingType = TextWrappingType.Both;

			// Create a paragraph object
			Paragraph paragraph = new Paragraph(section.Document);

			// Set the paragraph to be horizontally centered
			paragraph.Format.HorizontalAlignment = HorizontalAlignment.Center;

			// Create a font object
			Font font = new Font("Times New Roman", 8);

			// Create a drawing object
			Graphics graphics = Graphics.FromImage(new Bitmap(1, 1));
			string text1 = " - ";
			SizeF size1 = graphics.MeasureString(text1, font);
			float textWidth1 = size1.Width / 96 * 72;
			int count = (int)(textBox.Width / textWidth1);
			StringBuilder stringBuilder = new StringBuilder();
			for (int i = 1; i < count; i++)
			{
				stringBuilder.Append(text1);
			}

			// Create a character format object
			CharacterFormat characterFormat = new CharacterFormat(section.Document);
			characterFormat.FontName = font.Name;
			characterFormat.FontSize = font.Size;
			TextRange textRange = paragraph.AppendText(stringBuilder.ToString());
			textRange.ApplyCharacterFormat(characterFormat);

			// Add the paragraph to the text box
			textBox.ChildObjects.Add(paragraph);
		}
	}
}
Add a Gutter at the Left of a Word Document Page using C#
To set the left-side gutter on the page, ensure that you set the Section.PageSetup.IsTopGutter property to false. Here are the detailed steps:
- Create a Document object.
- Load a document using the Document.LoadFromFile() method.
- Iterate through all sections of the document using a for loop over the Document.Sections collection.
- Set Section.PageSetup.IsTopGutter to false to display the gutter on the left side of the page.
- Use the Section.PageSetup.Gutter property to set the width of the gutter.
- Call the custom AddLeftGutterText() method to add text to the gutter area.
- Save the document using the Document.SaveToFile() method.
- C#
using Spire.Doc;
using Spire.Doc.Documents;
using Spire.Doc.Fields;
using Spire.Doc.Formatting;
using System.Drawing;
using System.Text;

namespace SpireDocDemo
{
	internal class Program
	{
		static void Main(string[] args)
		{
			// Create a document object
			Document document = new Document();

			// Load the document
			document.LoadFromFile("Sample1.docx");

			// Iterate through all sections of the document
			for (int i = 0; i < document.Sections.Count; i++)
			{
				// Get the current section
				Section section = document.Sections[i];

				// Set whether to add a gutter at the top of the page to false, it will be added to the left side of the page
				section.PageSetup.IsTopGutter = false;

				// Set the width of the gutter to 100f
				section.PageSetup.Gutter = 100f;

				// Call a method to add text on the left gutter
				AddLeftGutterText(section);
			}

			// Save the modified document to a file
			document.SaveToFile("Add Gutter Line on the Left Side of the Page.docx", FileFormat.Docx2016);

			// Release document resources
			document.Dispose();
		}
		// Method to add text on the left gutter
		static void AddLeftGutterText(Section section)
		{
			// Get the header of the section
			HeaderFooter header = section.HeadersFooters.Header;

			// Set the width of the text box to 40
			float width = 40;

			// Get the page height
			float height = section.PageSetup.PageSize.Height;

			// Add a text box in the header
			TextBox textBox = header.AddParagraph().AppendTextBox(width, height);

			// Set the text box without border
			textBox.Format.NoLine = true;

			// Set the text direction in the text box from right to left
			textBox.Format.LayoutFlowAlt = TextDirection.RightToLeft;

			// Set the horizontal starting position of the text box
			textBox.HorizontalOrigin = HorizontalOrigin.LeftMarginArea;

			// Set the horizontal position of the text box
			textBox.HorizontalPosition = 140;

			// Set the vertical alignment of the text box to top
			textBox.VerticalAlignment = ShapeVerticalAlignment.Top;

			// Set the vertical starting position of the text box to the top margin area
			textBox.VerticalOrigin = VerticalOrigin.TopMarginArea;

			// Set the text anchor to top
			textBox.Format.TextAnchor = ShapeVerticalAlignment.Top;

			// Set the text wrapping style to in front of text
			textBox.Format.TextWrappingStyle = TextWrappingStyle.InFrontOfText;

			// Set the text wrapping type to both sides
			textBox.Format.TextWrappingType = TextWrappingType.Both;

			// Create a paragraph object
			Paragraph paragraph = new Paragraph(section.Document);

			// Set the paragraph to be horizontally centered
			paragraph.Format.HorizontalAlignment = HorizontalAlignment.Center;

			// Create a font object
			Font font = new Font("Times New Roman", 8);

			// Create a drawing object
			Graphics graphics = Graphics.FromImage(new Bitmap(1, 1));
			string text1 = " - ";

			// Measure the size of the text
			SizeF size1 = graphics.MeasureString(text1, font);
			float textWidth1 = size1.Width / 96 * 72;

			int count = (int)(textBox.Height / textWidth1);
			StringBuilder stringBuilder = new StringBuilder();
			for (int i = 1; i < count; i++)
			{
				stringBuilder.Append(text1);
			}

			// Create a character format object
			CharacterFormat characterFormat = new CharacterFormat(section.Document);
			characterFormat.FontName = font.Name;
			characterFormat.FontSize = font.Size;
			TextRange textRange = paragraph.AppendText(stringBuilder.ToString());
			textRange.ApplyCharacterFormat(characterFormat);

			// Add the paragraph to the text box
			textBox.ChildObjects.Add(paragraph);
		}
	}
}
Apply for a Temporary License
If you'd like to remove the evaluation message from the generated documents, or to get rid of the function limitations, please request a 30-day trial license for yourself.
Python: Split Word Documents
Efficiently managing Word documents often requires the task of splitting them into smaller sections. However, manually performing this task can be time-consuming and labor-intensive. Fortunately, Spire.Doc for Python provides a convenient and efficient way to programmatically segment Word documents, helping users to extract specific parts of a document, split lengthy documents into smaller chunks, and streamline data extraction. This article demonstrates how to use Spire.Doc for Python to split a Word document into multiple documents in Python.
The splitting of a Word document is typically done by page breaks and section breaks due to the dynamic nature of document content. Therefore, this article focuses on the following two parts:
- Split a Word Document by Page Breaks with Python
- Split a Word Document by Section Breaks with Python
Install Spire.Doc for Python
This scenario requires Spire.Doc for Python and plum-dispatch v1.7.4. They can be easily installed in your Windows through the following pip command.
pip install Spire.Doc
If you are unsure how to install, please refer to: How to Install Spire.Doc for Python on Windows
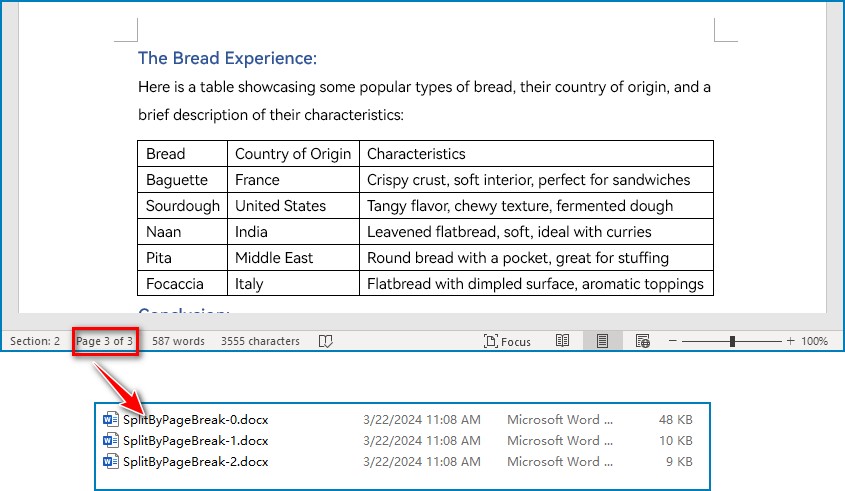
Split a Word Document by Page Breaks with Python
Page breaks allow for the forced pagination of a document, thereby achieving a fixed division of content. By using page breaks as divisions, we can split a Word document into smaller content-related documents. The detailed steps for splitting a Word document by page breaks are as follows:
- Create an instance of Document class and load a Word document using Document.LoadFromFile() method.
- Create a new document, add a section to it using Document.AddSection() method.
- Iterate through all body child objects in each section in the original document and check if the child object is a paragraph or a table.
- If the child object is a table, add it to the section in the new document using Section.Body.ChildObjects.Add() method.
- If the child object is a paragraph, add the paragraph object to the section in the new document. Then, iterate through all child objects of the paragraph and check if a child object is a page break.
- If the child object in the paragraph is a page break, get its index using Paragraph.ChildObjects.IndexOf() method and remove it from the paragraph by its index.
- Save the new document using Document.SaveToFile() method and repeat the above process.
- Python
from spire.doc import *
from spire.doc.common import *

inputFile = "Sample.docx"
outputFolder = "output/SplitDocument/"

# Create an instance of Document
original = Document()
# Load a Word document
original.LoadFromFile(inputFile)

# Create a new word document and add a section to it
newWord = Document()
section = newWord.AddSection()
original.CloneDefaultStyleTo(newWord)
original.CloneThemesTo(newWord)
original.CloneCompatibilityTo(newWord)

index = 0
# Iterate through all sections of original document
for m in range(original.Sections.Count):
    sec = original.Sections.get_Item(m)
    # Iterate through all body child objects of each section
    for k in range(sec.Body.ChildObjects.Count):
        obj = sec.Body.ChildObjects.get_Item(k)
        if isinstance(obj, Paragraph):
            para = obj if isinstance(obj, Paragraph) else None
            sec.CloneSectionPropertiesTo(section)
            # Add paragraph object in original section into section of new document
            section.Body.ChildObjects.Add(para.Clone())
            for j in range(para.ChildObjects.Count):
                parobj = para.ChildObjects.get_Item(j)
                if isinstance(parobj, Break) and ( parobj if isinstance(parobj, Break) else None).BreakType == BreakType.PageBreak:
                    # Get the index of page break in paragraph
                    i = para.ChildObjects.IndexOf(parobj)
                    # Remove the page break from its paragraph
                    section.Body.LastParagraph.ChildObjects.RemoveAt(i)
                    # Save the new document
                    resultF = outputFolder
                    resultF += "SplitByPageBreak-{0}.docx".format(index)
                    newWord.SaveToFile(resultF, FileFormat.Docx)
                    index += 1
                    # Create a new document and add a section
                    newWord = Document()
                    section = newWord.AddSection()
                    original.CloneDefaultStyleTo(newWord)
                    original.CloneThemesTo(newWord)
                    original.CloneCompatibilityTo(newWord)
                    sec.CloneSectionPropertiesTo(section)
                    # Add paragraph object in original section into section of new document
                    section.Body.ChildObjects.Add(para.Clone())
                    if section.Paragraphs[0].ChildObjects.Count == 0:
                        # Remove the first blank paragraph
                        section.Body.ChildObjects.RemoveAt(0)
                    else:
                        # Remove the child objects before the page break
                        while i >= 0:
                            section.Paragraphs[0].ChildObjects.RemoveAt(i)
                            i -= 1
        if isinstance(obj, Table):
            # Add table object in original section into section of new document
            section.Body.ChildObjects.Add(obj.Clone())

# Save the document
result = outputFolder+"SplitByPageBreak-{0}.docx".format(index)
newWord.SaveToFile(result, FileFormat.Docx2013)
newWord.Close()
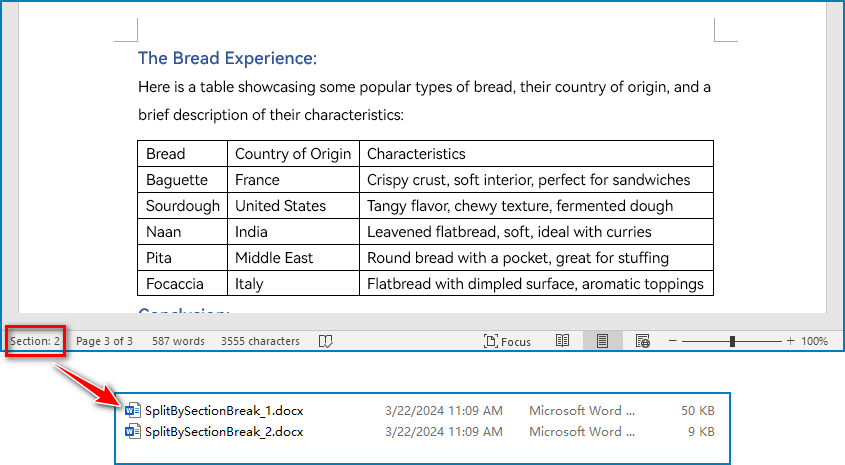
Split a Word Document by Section Breaks with Python
Sections divide a Word document into different logical parts and allow for independent formatting for each section. By splitting a Word document into sections, we can obtain multiple documents with relatively independent content and formatting. The detailed steps for splitting a Word document by section breaks are as follows:
- Create an instance of Document class and load a Word document using Document.LoadFromFile() method.
- Iterate through each section in the document.
- Get a section using Document.Sections.get_Item() method.
- Create a new Word document and copy the section in the original document to the new document using Document.Sections.Add() method.
- Save the new document using Document.SaveToFile() method.
- Python
from spire.doc import *
from spire.doc.common import *

# Create an instance of Document class
document = Document()
# Load a Word document
document.LoadFromFile("Sample.docx")

# Iterate through all sections
for i in range(document.Sections.Count):
    section = document.Sections.get_Item(i)
    result = "output/SplitDocument/" + "SplitBySectionBreak_{0}.docx".format(i+1)
    # Create a new Word document
    newWord = Document()
    # Add the section to the new document
    newWord.Sections.Add(section.Clone())
    #Save the new document
    newWord.SaveToFile(result)
    newWord.Close()
Apply for a Temporary License
If you'd like to remove the evaluation message from the generated documents, or to get rid of the function limitations, please request a 30-day trial license for yourself.
Python: Protect or Unprotect Excel Files
Excel files often contain sensitive and confidential information, such as financial data, personal information, trade secrets, or proprietary formulas. When sharing these files over the internet or between organizations, there might be a risk of data leaks, theft, or unauthorized modifications. To address this concern, Excel provides a comprehensive set of protection features, such as password-protecting workbooks, restricting editing on worksheets, and locking cells, which enable users to establish multiple layers of security to control data access and maintain the integrity of their Excel files. In this article, you will learn how to protect and unprotect Excel workbooks and worksheets in Python using Spire.XLS for Python.
- Password Protect an Entire Workbook
- Protect a Worksheet with a Specific Protection Type
- Allow Users to Edit Ranges in a Protected Worksheet
- Unprotect a Password Protected Worksheet
- Remove or Reset the Password of an Encrypted Workbook
Install Spire.XLS for Python
This scenario requires Spire.XLS for Python and plum-dispatch v1.7.4. They can be easily installed in your Windows through the following pip commands.
pip install Spire.XLS
If you are unsure how to install, please refer to this tutorial: How to Install Spire.XLS for Python on Windows
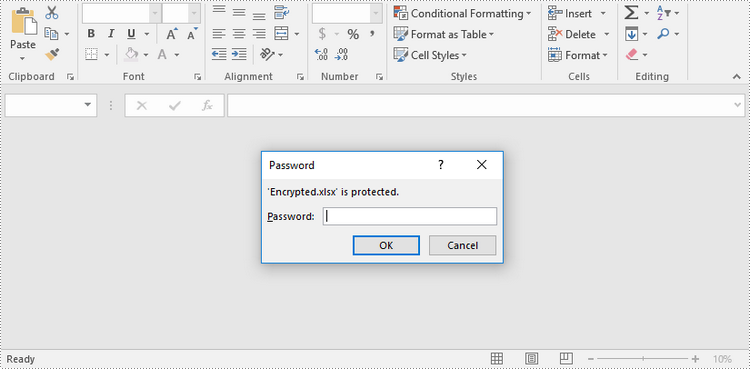
Password Protect an Entire Workbook in Python
By encrypting an Excel document with a password, you ensure that the data within the document remains secure and inaccessible to unauthorized individuals. The following are the steps to password-protect a workbook using Spire.XLS for Python.
- Create a Workbook object.
- Load an Excel file using Workbook.LoadFromFile() method.
- Protect the workbook with a password using Workbook.Protect() method.
- Save the workbook to another Excel file using Workbook.SaveToFile() method.
- Python
from spire.xls import *
from spire.xls.common import *

# Create a Workbook object
workbook = Workbook()

# Load an Excel workbook
workbook.LoadFromFile("Sample.xlsx")

# Protect the workbook with a password
workbook.Protect("psd-123")

# Save the workbook to another Excel file
workbook.SaveToFile("Encrypted.xlsx", ExcelVersion.Version2016)
workbook.Dispose()
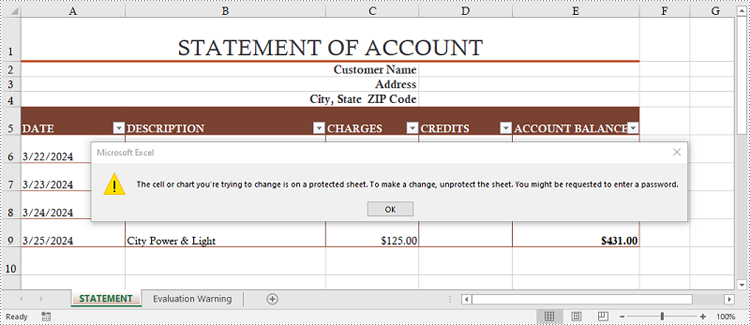
Protect a Worksheet with a Specific Protection Type in Python
If you want to authorize others to view your Excel document while limiting the types of changes they can make to a worksheet, you can protect the worksheet with a specific protection type. The table below lists a variety of pre-defined protection types under the SheetProtectionType enumeration.
| Protection Type | Allow users to |
| Content | Modify or insert content. |
| DeletingColumns | Delete columns. |
| DeletingRows | Delete rows. |
| Filtering | Set filters. |
| FormattingCells | Format cells. |
| FormattingColumns | Format columns. |
| FormattingRows | Format rows. |
| InsertingColumns | Insert columns. |
| InsertingRows | Insert rows. |
| InsertingHyperlinks | Insert hyperlinks . |
| LockedCells | Select locked cells. |
| UnlockedCells | Select unlocked cells. |
| Objects | Modify drawing objects. |
| Scenarios | Modify saved scenarios. |
| Sorting | Sort data. |
| UsingPivotTables | Use pivot table and pivot chart. |
| All | Do any operations listed above on the protected worksheet. |
| none | Do nothing on the protected worksheet. |
The following steps show you how to protect a worksheet with a specific protection type using Spire.XLS for Python.
- Create a Workbook object.
- Load an Excel file using Workbook.LoadFromFile() method.
- Get a specific worksheet through Workbook.Worksheets[index] property.
- Protect the worksheet with a password and a specific protection type using Worksheet.Protect(password:str, options:SheetProtectionType) method.
- Save the workbook to another Excel file using Workbook.SaveToFile() method.
- Python
from spire.xls import *
from spire.xls.common import *

# Create a Workbook object
workbook = Workbook()

# Load an Excel workbook
workbook.LoadFromFile("Sample.xlsx")

# Get the first worksheet
worksheet = workbook.Worksheets[0]

# Protect the worksheet with a password and a specific protection type
worksheet.Protect("psd-permission", SheetProtectionType.none)

# Save the workbook to another Excel file
workbook.SaveToFile("ProtectWorksheet.xlsx", ExcelVersion.Version2016)
workbook.Dispose()
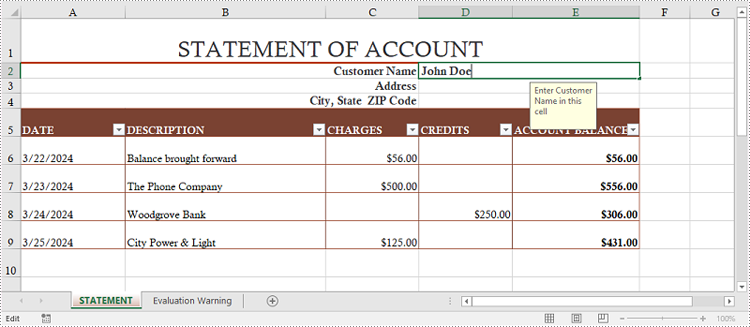
Allow Users to Edit Ranges in a Protected Worksheet in Python
In certain cases, you may want to allow users to edit certain ranges of a worksheet while preserving the integrity of other data. The following steps demonstrate how to accomplish this feature using Spire.XLS for Python.
- Create a Workbook object.
- Load an Excel file using Workbook.LoadFromFile() method.
- Get a specific worksheet through Workbook.Worksheets[index] property.
- Specify editable cell ranges using Worksheet.AddAllowEditRange() method.
- Protect the worksheet with a password and a specific protection type using Worksheet.Protect(password:str, options:SheetProtectionType) method.
- Save the workbook to another Excel file using Workbook.SaveToFile() method.
- Python
from spire.xls import *
from spire.xls.common import *

# Create a Workbook object
workbook = Workbook()

# Load an Excel workbook
workbook.LoadFromFile("Sample.xlsx")

# Get the first worksheet
sheet = workbook.Worksheets[0]

# Add ranges that allow editing
sheet.AddAllowEditRange("Range One", sheet.Range["A5:A6"])
sheet.AddAllowEditRange("Range Two", sheet.Range["A8:B11"])

# Protect the worksheet with a password and a protection type
sheet.Protect("psd-permission", SheetProtectionType.All)

# Save the workbook to another Excel file
workbook.SaveToFile("AllowEditRange.xlsx", ExcelVersion.Version2016)
workbook.Dispose()
Unprotect a Password Protected Worksheet in Python
To remove the protection of a password-protected worksheet, you need to invoke the Worksheet.Unprotect() method and pass the original password to the method as a parameter. The detailed steps are as follows.
- Create a Workbook object.
- Load an Excel file using Workbook.LoadFromFile() method.
- Get a specific worksheet through Workbook.Worksheets[index] property.
- Remove the password protection using Worksheet.Unprotect(password:str) method.
- Save the workbook to another Excel file using Workbook.SaveToFile() method.
- Python
from spire.xls import *
from spire.xls.common import *

# Create a Workbook object
workbook = Workbook()

# Load an Excel workbook containing protected worksheet
workbook.LoadFromFile("ProtectWorksheet.xlsx")

# Get the first worksheet
sheet = workbook.Worksheets[0]

# Unprotect the worksheet using the specified password
sheet.Unprotect("psd-permission")

# Save the workbook to another Excel file
workbook.SaveToFile("UnprotectWorksheet.xlsx", ExcelVersion.Version2016)
workbook.Dispose()
Remove or Reset the Password of an Encrypted Workbook in Python
To remove or reset password of an encrypted workbook, you can use the Workbook.Unprotect() or the Workbook.Protect() method. The following steps show you how to load an encrypted Excel document and delete or change the password of it.
- Create a Workbook object.
- Specify the open password through Workbook.OpenPassword property.
- Load the encrypted Excel file using Workbook.LoadFromFile() method.
- Remove the encryption using Workbook.Unprotect() method. Or change the password using Workbook.Protect() method.
- Save the workbook to another Excel file using Workbook.SaveToFile() method.
- Python
from spire.xls import *
from spire.xls.common import *

# Create a Workbook object
workbook = Workbook()

# Specify the open password
workbook.OpenPassword = "psd-123"

# Load an encrypted Excel workbook
workbook.LoadFromFile("Encrypted.xlsx")

# Unprotect the workbook
workbook.UnProtect()

# Reset password
# workbook.Protect("newpassword")

# Save the workbook to another Excel file
workbook.SaveToFile("UnprotectWorkbook.xlsx", ExcelVersion.Version2016)
workbook.Dispose()
Apply for a Temporary License
If you'd like to remove the evaluation message from the generated documents, or to get rid of the function limitations, please request a 30-day trial license for yourself.
Spire.Office 9.3.1 is released
We are excited to announce the release of Spire.Office 9.3.1. In this version, Spire.Doc supports parsing GIF format content in Word documents; Spire.Presentation supports AI features and setting PPTX to SVG conversion options; Spire.DocViewer supports WPF and MAUI platforms; Spire.XLS supports PivotTable grouping functionality; Spire.PDFViewer supports obtaining the coordinates of a mouse click relative to the PDF page content. In additions, a lot of known issues are fixed successfully in this version. More details are listed below.
In this version, the most recent versions of Spire.Doc, Spire.PDF, Spire.XLS, Spire.Presentation, Spire.Email, Spire.DocViewer, Spire.PDFViewer, Spire.Spreadsheet, Spire.OfficeViewer, Spire.DataExport, and Spire.Barcode are included.
DLL Versions:
- Spire.Doc.dll v12.2.10
- Spire.Pdf.dll v10.3.7
- Spire.XLS.dll v14.3.3
- Spire.Presentation.dll v9.3.4
- Spire.Barcode.dll v7.2.9
- Spire.Spreadsheet.dll v7.4.6
- Spire.Email.dll v6.5.10
- Spire.DocViewer.Forms.dll v8.7.8
- Spire.PdfViewer.Forms.dll v7.12.11
- Spire.PdfViewer.Asp.dll v7.12.11
- Spire.OfficeViewer.Forms.dll v8.7.6
- Spire.DataExport.dll v4.9.0
- Spire.DataExport.ResourceMgr.dll v2.1.0
Here is a list of changes made in this release
Spire.Doc
| Category | ID | Description |
| New feature | SPIREDOC-10052 | Supports parsing GIF format content in Word documents. |
| Bug | SPIREDOC-10154 | Fixes the issue that incorrect bullets were retrieved. |
| Bug | SPIREDOC-10160 | Fixes the issue that GIF format was converted to PNG format after mail merge. |
| Bug | SPIREDOC-10233 | Fixes the issue that private font embedding failed when converting Word to PDF. |
| Bug | SPIREDOC-10234 | Fixes the issue that characters were incorrect when converting Word to PDF. |
| Bug | SPIREDOC-10235 | Fixes the issue that reading fonts failed when converting Word to PDF on MAC systems. |
| Bug | SPIREDOC-10261 | Fixes the issue that the program threw "System.NullReferenceException" exception when loading a Docx document. |
| Bug | SPIREDOC-10295 | Fixes the issue that the table would have extra borders after loading a Docx document and saving it as a new document. |
| Bug | SPIREDOC-10305 | Fixes the issue that the program threw "System.ArgumentException" exception when comparing two Word documents. |
| Bug | SPIREDOC-10308 | Fixes the issue that the program hung when getting page count. |
| Bug | SPIREDOC-10318 | Fixes the issue that the program threw "System.InvalidCastException" when comparing two Word documents. |
Spire.XLS
| Category | ID | Description |
| New feature | SPIREXLS-765 | Supports PivotTable grouping function.
XlsPivotTable pt = worksheet.PivotTables[0] as XlsPivotTable;
IPivotField field = pt.RowFields[0];
DateTime start = new DateTime(2024, 5, 6);
DateTime end = new DateTime(2024, 10, 6);
PivotGroupByTypes[] types = new PivotGroupByTypes[]{ PivotGroupByTypes.Days };
field.CreateGroup(start, end, types, 1);
|
| New feature | SPIREXLS-5091 | Supports adding FindAll() method to CellRange.
Workbook workbook = new Workbook(); workbook.LoadFromFile(@"test.xlsx"); Worksheet sheet = workbook.Worksheets[0]; sheet.Range["A1"].FindAll() |
| New feature | SPIREXLS-5123 | Supports setting "Repeat All Item Labels" for PivotTable.
foreach (XlsPivotTable pt in wb.Worksheets["PivotTable"].PivotTables)
 {
 pt.Options.RepeatAllItemLabels = true;
 }
|
| Bug | SPIREXLS-5097 | Fixes the issue that the content was incorrect after saving Excel files. |
| Bug | SPIREXLS-5103 | Fixes the issue that the sheet content exported using ExportDataTable was incorrect. |
| Bug | SPIREXLS-5105 | Fixes the issue that formula values were incorrect when converting Excel to PDF. |
| Bug | SPIREXLS-5106 | Fixes the issue that the program threw "Size of image is too large" exception when converting Excel to images. |
| Bug | SPIREXLS-5110 | Fixes the issue that the PivotTable column names were inconsistent when converting Excel to pictures. |
| Bug | SPIREXLS-5122 | Fixes the issue that there were some extra blank comments in result files after using CellRange.Comment.Text. |
| Bug | SPIREXLS-5125 | Fixes the issue that the styles were incorrect when converting Excel to PDF. |
| Bug | SPIREXLS-5126 | Fixes the issue that the program threw "ArgumentNullException" exception when loading files. |
| Bug | SPIREXLS-5148 | Fixed the issue that the program threw "NullReferenceException" exception when splitting a document. |
Spire.PDF
| Category | ID | Description |
| Bug | SPIREPDF-6423 | Optimizes the high memory consumption when converting multiple TIFF to PDF. |
| Bug | SPIREPDF-6515 | Fixes the issue that the application threw a "System.NullReferenceException" when printing PDF documents. |
| Bug | SPIREPDF-6516 | Fixes the issue that some content remained in color when converting PDF documents to grayscale. |
| Bug | SPIREPDF-6528 | Fixes the issue that the application threw a "System.NullReferenceException" when using the split() method. |
| Bug | SPIREPDF-6531 | Fixes the issue that the application threw a "System.IndexOutOfRangeException" when extracting text. |
| Bug | SPIREPDF-6547 | Fixes the issue that the results of searching for highlighted text were incorrect. |
| Bug | SPIREPDF-6549 | Fixes the issue that the application threw an exception when using PdfCode39Barcode to generate barcodes for data with "*" |
| Bug | SPIREPDF-6550 | Fixes the issue that the digital signature verification result was incorrect. |
| Bug | SPIREPDF-6555 | Fixes the issue that spaces disappeared after converting PDF documents to PPT. |
| Bug | SPIREPDF-6558 | Fixes the issue that the application threw an "Empty convert-string" exception when saving PDF documents. |
| Bug | SPIREPDF-6568 | Fixes the issue that the application threw a "System.OverflowException" when loading PDF documents. |
| Bug | SPIREPDF-6574 | Fixes the issue that the application threw a "System.ArgumentException" when converting PDF to XPS. |
| Bug | SPIREPDF-6575 | Fixes the issue that the action JavaScript code of the form button field could not be obtained. |
Spire.Presentation
New features and bug fixes:
| Category | ID | Description |
| New feature | SPIREPPT-2445 | Support retrieving the default font styles of a PowerPoint document.
Presentation presentation = new Presentation(); presentation.LoadFromFile(inputFile); IAutoShape shape = presentation.Slides[0].Shapes[0] as IAutoShape; DefaultTextRangeProperties format = shape.TextFrame.Paragraphs[0].TextRanges[0].DisPlayFormat; File.AppendAllText(outputFile, "text :" + shape.TextFrame.Paragraphs[0].TextRanges[0].Text + "\r\n"); File.AppendAllText(outputFile, "is bold :" + format.IsBold + "\r\n"); File.AppendAllText(outputFile, "is italic :" + format.IsItalic + "\r\n"); |
| New feature | SPIREPPT-2451 | Adds SaveToSvgOption for settings PPTX to SVG conversion options.
Presentation ppt = new Presentation(); ppt.LoadFromFile(inputFile); ppt.SaveToSvgOption.SaveUnderlineAsDecoration = true; byte[] svgByte = ppt.Slides[0].Shapes[0].SaveAsSvgInSlide(); FileStream fs = new FileStream(outputFile + "1.svg", FileMode.Create); fs.Write(svgByte, 0, svgByte.Length); fs.Close(); |
| New feature | SPIREPPT-2459 | Adds the showMasterShapes property to the ILayout class to display background shapes.
Presentation presentation = new Presentation(); presentation.LoadFromFile(@"in.pptx"); bool showMasterShape = presentation.Slides[1].Layout.ShowMasterShapes; |
| Bug | SPIREPPT-2443 | Fixes the issue that the gradient color was incorrect when converting PPTX to SVG. |
| Bug | SPIREPPT-2452 | Fixes the issue that the image quality degraded when converting PPTX to PDF. |
| Bug | SPIREPPT-2453 | Fixes the issue that the text space was lost when converting shape to SVG. |
| Bug | SPIREPPT-2454 | Fixes the issue that the content was incorrect when loading and saving PPTX documents. |
AI functions and APIs:
| Function | API |
| Text polishing | public string Polish(IShape shape,string language); |
| Translation | public string Translate(ISlide slide, string language); |
| Summarization | public string Summarize(IShape shape, string language); |
| Presentation generation | public Presentation Generate(string describe, string language, bool genareteBackGroundImage); |
| Questioning | public string Ask(string question, bool enableHistory = false); |
| Document search | public string DocumentSearch(string question, string file_server_path, bool enableHistory = false); |
| Image generation | public Stream ImageGenerate(string description); |
Spire.DocViewer
| Category | Description |
| New feature | Supports .NET 6.0, including WPF and Windows Form. |
| New feature | Supports MAUI platform (.NET 7.0), currently only for Windows and Android. |
Spire.PDFViewer
| Category | ID | Description |
| New feature | SPIREPDFVIEWER-454 | Spire.PdfDocumentViewer supports obtaining the coordinates of a mouse click relative to the PDF page content.
private void Form1_Load(object sender, EventArgs e)
   {
	  this.pdfDocumentViewer1.LoadFromFile("1.pdf");
	  this.pdfDocumentViewer1.MouseDown += new MouseEventHandler(PV_Click);
	}

	private void PV_Click(object sender, MouseEventArgs e)
	{
		string outputFile = "out.Pdf";
		string outputFile_TXT = "out.txt";
		File.Delete(outputFile_TXT);
	   if (e.Button == MouseButtons.Left)
	   {
			PointF[] controlPositions = new PointF[] { e.Location};
			Spire.PdfViewer.Forms.PagePosition[] pagePositions = this.pdfDocumentViewer1.ControlToPage(controlPositions);
string fileName = this.pdfDocumentViewer1.FileName;
			PdfDocument doc = new PdfDocument();
			doc.LoadFromFile(fileName,FileFormat.PDF);
PdfPageBase page = doc.Pages[pagePositions[0].PageIndex];

			RectangleF bounds = new RectangleF(pagePositions[0].Position, new SizeF(100, 100));
			PdfTextExtractor textExtractor = new PdfTextExtractor(page);
			PdfTextExtractOptions option = new PdfTextExtractOptions();
			option.ExtractArea = bounds;
			string text = textExtractor.ExtractText(option);
			PdfFont font = new PdfFont(PdfFontFamily.Helvetica, 11);
			PdfTextWidget pdfTextbox = new PdfTextWidget();
			pdfTextbox.Font = font;
			pdfTextbox.Brush = PdfBrushes.Red;
			pdfTextbox.Text = "stamp";
pdfTextbox.Draw(page, bounds);
doc.Pages[pagePositions[0].PageIndex].Canvas.DrawRectangle(PdfPens.Red, bounds);
			doc.SaveToFile(outputFile);
File.AppendAllText(outputFile_TXT, "Position: " + pagePositions[0].Position.ToString() + "\ntext:\r\n " + text);
MessageBox.Show("finish");
doc.Dispose();
		}
	}
|
Spire.Presentation for Java 9.3.1 supports adding math equation in paragraphs
We are pleased to announce the release of Spire.Presentation for Java 9.3.1. This version supports adding math equation in paragraphs and getting the display color of a shape. Additionally, the issue that the application threw a "DocumentEditException" when merging documents has also been fixed. More details are listed below.
Here is a list of changes made in this release
| Category | ID | Description |
| New feature | SPIREPPT-2210 | Supports adding math equation in paragraphs.
Presentation ppt = new Presentation();
String latexMathCode="x^{2}+\\sqrt{x^{2}+1=2}";
IAutoShape shape=ppt.getSlides().get(0).getShapes().appendShape(ShapeType.RECTANGLE,new Rectangle2D.Float(30,100,400,200));
shape.getTextFrame().getParagraphs().clear();

ParagraphEx p=new ParagraphEx();
shape.getTextFrame().getParagraphs().append(p);

PortionEx portionEx=new PortionEx("Test");
p.getTextRanges().append(portionEx);
p.appendFromLatexMathCode(latexMathCode);
PortionEx portionEx2=new PortionEx("Hello");
p.getTextRanges().append(portionEx2);
ppt.saveToFile(outputFile, FileFormat.AUTO);
|
| New feature | SPIREPPT-2422 | Supports getting the display color of a shape.
Presentation ppt = new Presentation();
ppt.loadFromFile("input.pptx");
IAutoShape shape = (IAutoShape)ppt.getSlides().get(0).getShapes().get(0);
System.out.println(shape.getDisplayFill().getFillType().getName());
System.out.println(shape.getDisplayFill().getSolidColor().getColor());
|
| Bug | SPIREPPT-2456 | Fixes the issue that the application threw "DocumentEditException" when merging documents. |
Spire.Presentation 9.3.4 supports setting PPTX to SVG conversion options
We're glad to announce the release of Spire.Presentation 9.3.4. This version adds SaveToSvgOption for settings PPTX to SVG conversion options, and it also supports retrieving the default font style of a PowerPoint document. Besides, some issues that occurred when converting PPTX to PDF/ SVG, loading and saving files are successfully fixed. See the content below for more details.
Here is a list of changes made in this release
| Category | ID | Description |
| New feature | SPIREPPT-2445 | Support retrieving the default font styles of a PowerPoint document.
Presentation presentation = new Presentation(); presentation.LoadFromFile(inputFile); IAutoShape shape = presentation.Slides[0].Shapes[0] as IAutoShape; DefaultTextRangeProperties format = shape.TextFrame.Paragraphs[0].TextRanges[0].DisPlayFormat; File.AppendAllText(outputFile, "text :" + shape.TextFrame.Paragraphs[0].TextRanges[0].Text + "\r\n"); File.AppendAllText(outputFile, "is bold :" + format.IsBold + "\r\n"); File.AppendAllText(outputFile, "is italic :" + format.IsItalic + "\r\n"); |
| New feature | SPIREPPT-2451 | Adds SaveToSvgOption for settings PPTX to SVG conversion options.
Presentation ppt = new Presentation(); ppt.LoadFromFile(inputFile); ppt.SaveToSvgOption.SaveUnderlineAsDecoration = true; byte[] svgByte = ppt.Slides[0].Shapes[0].SaveAsSvgInSlide(); FileStream fs = new FileStream(outputFile + "1.svg", FileMode.Create); fs.Write(svgByte, 0, svgByte.Length); fs.Close(); |
| New feature | SPIREPPT-2459 | Adds the showMasterShapes property to the ILayout class to display background shapes.
Presentation presentation = new Presentation(); presentation.LoadFromFile(@"in.pptx"); bool showMasterShape = presentation.Slides[1].Layout.ShowMasterShapes; |
| Bug | SPIREPPT-2443 | Fixes the issue that the gradient color was incorrect when converting PPTX to SVG. |
| Bug | SPIREPPT-2452 | Fixes the issue that the image quality degraded when converting PPTX to PDF. |
| Bug | SPIREPPT-2453 | Fixes the issue that the text space was lost when converting shape to SVG. |
| Bug | SPIREPPT-2454 | Fixes the issue that the content was incorrect when loading and saving PPTX documents. |
Python: Add or Remove AutoFilter in Excel
The AutoFilter feature in Excel is a powerful tool that allows you to quickly filter worksheet data based on specific criteria, making it easier to find and analyze relevant information. When applying AutoFilter to a range of cells, you can display only those rows that meet certain conditions, while hiding the rest of the data. In this article, you will learn how to add or remove AutoFilter in Excel with Python using Spire.XLS for Python.
- Add AutoFilter to Excel Cells in Python
- Apply Date AutoFilter in Excel in Python
- Apply Custom AutoFilter in Excel in Python
- Remove AutoFilter in Excel in Python
Install Spire.XLS for Python
This scenario requires Spire.XLS for Python and plum-dispatch v1.7.4. They can be easily installed in your Windows through the following pip command.
pip install Spire.XLS
If you are unsure how to install, please refer to this tutorial: How to Install Spire.XLS for Python on Windows
Add AutoFilter to Excel Cells in Python
Spire.XLS for Python allows you to apply AutoFilter on a specific cell range through the Worksheet.AutoFilters.Range property. The following are the detailed steps:
- Create a Workbook instance.
- Load a sample Excel file using Workbook.LoadFromFile() method.
- Get a specified worksheet using Workbook.Worksheets[sheetIndex] property.
- Add an AutoFilter to a specified cell range using Worksheet.AutoFilters.Range property.
- Save the result file using Workbook.SaveToFile() method.
- Python
from spire.xls import *
from spire.xls.common import *

inputFile = "Data.xlsx"
outputFile = "ExcelAutoFilter.xlsx"

# Create a Workbook instance
workbook = Workbook()

# Load an Excel file
workbook.LoadFromFile(inputFile)

# Get the first worksheet
sheet = workbook.Worksheets[0]

# Create an AutoFilter in the sheet and specify the range to be filtered
sheet.AutoFilters.Range = sheet.Range["A1:C1"]

# Save the result file
workbook.SaveToFile(outputFile, ExcelVersion.Version2016)
workbook.Dispose()
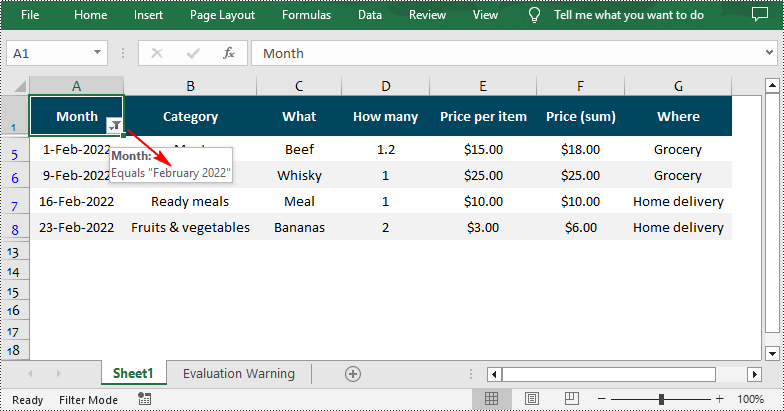
Apply Date AutoFilter in Excel in Python
If you need to explore information related to specific dates or time, you can apply a date filter to the selected range using the Workbook.AutoFilters.AddDateFilter(column: IAutoFilter, dateTimeGroupingType: DateTimeGroupingType, year: int, Month: int, day: int, hour: int, minute: int, second: int) method. The following are detailed steps.
- Create a Workbook instance.
- Load a sample Excel file using Workbook.LoadFromFile() method.
- Get a specified worksheet using Workbook.Worksheets[sheetIndex] property.
- Add an AutoFilter to a specified range using Workbook.AutoFilters.Range property.
- Get the column to be filtered.
- Call the Workbook.AutoFilters.AddDateFilter() method to add a date filter to the column to filter data related to a specified year/month/date, etc.
- Apply the filter using Workbook.AutoFilters.Filter() method.
- Save the result file using Workbook.SaveToFile() method.
- Python
from spire.xls import *
from spire.xls.common import *

inputFile = "Data.xlsx"
outputFile = "DateAutoFilter.xlsx"

# Create a Workbook instance
workbook = Workbook()

#Load an Excel file
workbook.LoadFromFile(inputFile)

#Get the first worksheet
sheet = workbook.Worksheets[0]

# Create an auto filter in the sheet and specify the range to be filtered
sheet.AutoFilters.Range = sheet.Range["A1:A12"]

# Get the column to be filtered
filtercolumn = sheet.AutoFilters[0]

# Add a date filter to filter data related to February 2022
sheet.AutoFilters.AddDateFilter(filtercolumn, DateTimeGroupingType.Month, 2022, 2, 0, 0, 0, 0)

# Apply the filter
sheet.AutoFilters.Filter()

# Save the result file
workbook.SaveToFile(outputFile, ExcelVersion.Version2016)
workbook.Dispose()
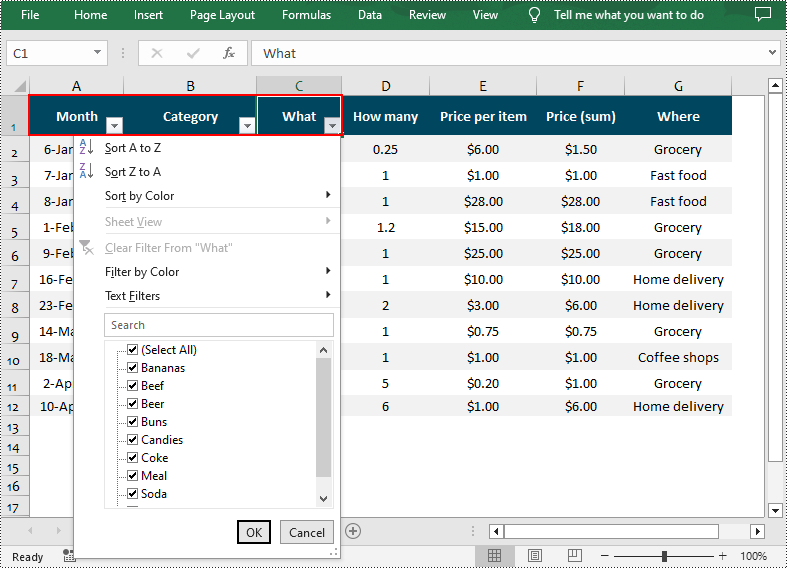
Apply Custom AutoFilter in Excel in Python
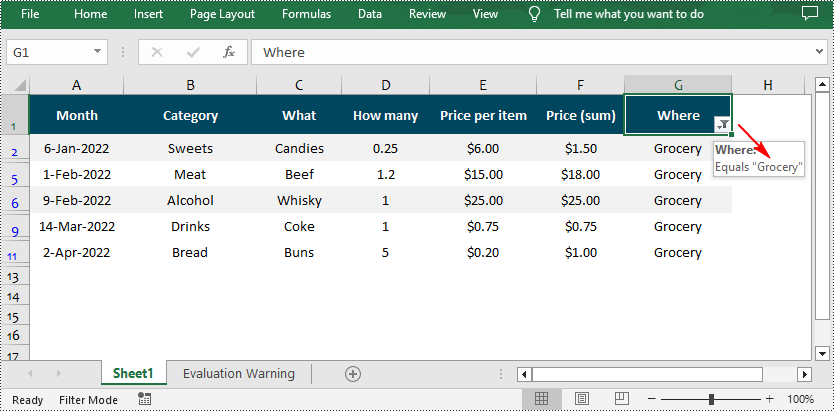
The Workbook.AutoFilters.CustomFilter(column: FilterColumn, operatorType: FilterOperatorType, criteria: Object) method allows you to create custom filters based on certain criteria. For example, you can filter data that contains specific text. The following are detailed steps.
- Create a Workbook instance.
- Load a sample Excel file using Workbook.LoadFromFile() method.
- Get a specified worksheet using Workbook.Worksheets[sheetIndex] property.
- Add an AutoFilter to a specified range using Workbook.AutoFilters.Range property.
- Get the column to be filtered.
- Add a custom filter to the column to filter data containing the specified string using Workbook.AutoFilters.CustomFilter() method.
- Apply the filter using Workbook.AutoFilters.Filter() method.
- Save the result file using Workbook.SaveToFile() method.
- Python
from spire.xls import *
from spire.xls.common import *

inputFile = "Data.xlsx"
outputFile = "CustomAutoFilter.xlsx"

# Create a Workbook instance
workbook = Workbook()

#Load an Excel file
workbook.LoadFromFile(inputFile)

#Get the first worksheet
sheet = workbook.Worksheets[0]

# Create an auto filter in the sheet and specify the range to be filtered
sheet.AutoFilters.Range = sheet.Range["G1:G12"]

# Get the column to be filtered
filtercolumn = sheet.AutoFilters[0]

# Add a custom filter to filter data containing the string "Grocery"
strCrt = String("Grocery")
sheet.AutoFilters.CustomFilter(filtercolumn, FilterOperatorType.Equal, strCrt)

# Apply the filter
sheet.AutoFilters.Filter()

# Save the result file
workbook.SaveToFile(outputFile, ExcelVersion.Version2016)
workbook.Dispose()
Remove AutoFilter in Excel in Python
In addition to adding AutoFilters in Excel files, Spire.XLS for Python also support removing or deleting the AutoFilters from Excel through the Worksheet.AutoFilters.Clear() method. The following are detailed steps.
- Create a Workbook instance.
- Load a sample Excel file using Workbook.LoadFromFile() method.
- Get a specified worksheet using Workbook.Worksheets[sheetIndex] property.
- Remove AutoFilter from the worksheet using Worksheet.AutoFilters.Clear() method.
- Save the result file using Workbook.SaveToFile() method.
- Python
from spire.xls import *
from spire.xls.common import *

inputFile = "CustomAutoFilter.xlsx"
outputFile = "RemoveAutoFilter.xlsx"

# Create a Workbook instance
workbook = Workbook()

# Load an Excel file
workbook.LoadFromFile(inputFile)

# Get the first worksheet
sheet = workbook.Worksheets[0]

# Delete AutoFilter from the sheet
sheet.AutoFilters.Clear()

# Save the result file
workbook.SaveToFile(outputFile, ExcelVersion.Version2016)
workbook.Dispose()
Apply for a Temporary License
If you'd like to remove the evaluation message from the generated documents, or to get rid of the function limitations, please request a 30-day trial license for yourself.
C#: Add, Modify, or Remove Footers in PowerPoint Documents
Adding, modifying, and removing footers in a PowerPoint document is crucial for enhancing the professionalism and readability of a presentation. By adding footers, you can include key information such as presentation titles, authors, dates, or page numbers, which helps the audience better understand the content. Modifying footers allows you to update information, making it more attractive and practical. Additionally, removing footers is also necessary, especially in certain situations such as when specific information is not required to be displayed at the bottom of each page for a particular occasion. In this article, you will learn how to add, modify, or remove footers in PowerPoint documents in C# using Spire.Presentation for .NET.
- C# Add Footers in PowerPoint Documents
- C# Modify Footers in PowerPoint Documents
- C# Remove Footers in PowerPoint Documents
Install Spire.Presentation for .NET
To begin with, you need to add the DLL files included in the Spire.Presentation for.NET package as references in your .NET project. The DLL files can be either downloaded from this link or installed via NuGet.
PM> Install-Package Spire.Presentation
C# Add Footers in PowerPoint Documents
Spire.Presentation enables the addition of footer, slide number, and date placeholders at the bottom of PowerPoint document pages to uniformly add the same footer content across all pages. Here are the detailed steps:
- Create a Presentation object.
- Load a PowerPoint document using the lisentation.LoadFromFile() method.
- Set Presentation.FooterVisible = true to make the footer visible and set the footer text.
- Set Presentation.SlideNumberVisible = true to make slide numbers visible, then iterate through each slide, check for the existence of a slide number placeholder, and modify the text to "Slide X" format if found.
- Set Presentation.DateTimeVisible = true to make date and time visible.
- Use the Presentation.SetDateTime() method to set the date format.
- Save the document using the Presentation.SaveToFile() method.
- C#
using Spire.Presentation;

namespace SpirePresentationDemo
{
    internal class Program
    {
        static void Main(string[] args)
        {
            // Create a Presentation object
            Presentation presentation = new Presentation();

            // Load the presentation from a file
            presentation.LoadFromFile("Sample1.pptx");

            // Set the footer visible
            presentation.FooterVisible = true;

            // Set the footer text to "Spire.Presentation"
            presentation.SetFooterText("Spire.Presentation");

            // Set slide number visible
            presentation.SlideNumberVisible = true;

            // Iterate through each slide in the presentation
            foreach (ISlide slide in presentation.Slides)
            {
                foreach (IShape shape in slide.Shapes)
                {
                    if (shape.Placeholder != null)
                    {
                        // If it is a slide number placeholder
                        if (shape.Placeholder.Type.Equals(PlaceholderType.SlideNumber))
                        {
                            TextParagraph textParagraph = (shape as IAutoShape).TextFrame.TextRange.Paragraph;
                            String text = textParagraph.Text;

                            // Modify the slide number text to "Slide X"
                            textParagraph.Text = "Slide " + text;
                        }
                    }
                }
            }

            // Set date time visible
            presentation.DateTimeVisible = true;

            // Set date time format
            presentation.SetDateTime(DateTime.Now, "MM/dd/yyyy");

            // Save the modified presentation to a file
            presentation.SaveToFile("AddFooter.pptx", FileFormat.Pptx2016);

            // Dispose of the Presentation object resources
            presentation.Dispose();
        }
    }
}
C# Modify Footers in PowerPoint Documents
To modify footers in a PowerPoint document, you first need to individually inspect the shapes on each slide, identify footer placeholders, page number placeholders, etc., and then set specific content and formats for each type of placeholder. Here are the detailed steps:
- Create a Presentation object.
- Load a PowerPoint document using the Presentation.LoadFromFile() method.
- Use the Presentation.Slides[index] property to retrieve a slide.
- Use a for loop to iterate through the shapes on the slide, individually checking each shape to determine if it is a placeholder for a footer, page number, etc., and then modify its content or format accordingly.
- Save the document using the Presentation.SaveToFile() method.
- C#
using Spire.Presentation;

namespace SpirePresentationDemo
{
    internal class Program
    {
        static void Main(string[] args)
        {
            // Create a Presentation object
            Presentation presentation = new Presentation();

            // Load the presentation from a file
            presentation.LoadFromFile("Sample2.pptx");

            // Get the first slide
            ISlide slide = presentation.Slides[0];

            // Iterate through shapes in the slide
            for (int i = 0; i < slide.Shapes.Count; i++)
            {
                // Check if the shape is a placeholder
                if (slide.Shapes[i].Placeholder != null)
                {
                    // Get the placeholder type
                    PlaceholderType type = slide.Shapes[i].Placeholder.Type;

                    // If it is a footer placeholder
                    if (type == PlaceholderType.Footer)
                    {
                        // Convert the shape to IAutoShape type
                        IAutoShape autoShape = (IAutoShape)slide.Shapes[i];

                        // Set the text content to "E-ICEBLUE"
                        autoShape.TextFrame.Text = "E-ICEBLUE";

                        // Modify the text font
                        ChangeFont1(autoShape.TextFrame.Paragraphs[0]);
                    }
                    // If it is a slide number placeholder
                    if (type == PlaceholderType.SlideNumber)
                    {
                        // Convert the shape to IAutoShape type
                        IAutoShape autoShape = (IAutoShape)slide.Shapes[i];

                        // Modify the text font
                        ChangeFont1(autoShape.TextFrame.Paragraphs[0]);
                    }
                }
            }

            // Save the modified presentation to a file
            presentation.SaveToFile("ModifyFooter.pptx", FileFormat.Pptx2016);

            // Dispose of the Presentation object resources
            presentation.Dispose();
        }
       static void ChangeFont1(TextParagraph paragraph)
        {
            // Iterate through each text range in the paragraph
            foreach (TextRange textRange in paragraph.TextRanges)
            {
                // Set the text style to italic
                textRange.IsItalic = TriState.True;

                // Set the text font
                textRange.EastAsianFont = new TextFont("Times New Roman");

                // Set the text font size to 34
                textRange.FontHeight = 34;

                // Set the text color
                textRange.Fill.FillType = Spire.Presentation.Drawing.FillFormatType.Solid;
                textRange.Fill.SolidColor.Color = System.Drawing.Color.LightSkyBlue;
            }
        }
   }
}
C# Remove Footers in PowerPoint Documents
To remove footers from a PowerPoint document, you first need to locate footer placeholders, page number placeholders, date placeholders, etc., within the slides, and then remove them from the collection of shapes on the slide. Here are the detailed steps:
- Create a Presentation object.
- Load a PowerPoint document using the Presentation.LoadFromFile() method.
- Use the Presentation.Slides[index] property to retrieve a slide.
- Use a for loop to iterate through the shapes on the slide, check if it is a placeholder, and if it is a footer placeholder, page number placeholder, date placeholder, remove it from the slide.
- Save the document using the Presentation.SaveToFile() method.
- C#
using Spire.Presentation;

namespace SpirePresentationDemo
{
    internal class Program
    {
        static void Main(string[] args)
        {
            // Create a Presentation object
            Presentation presentation = new Presentation();

            // Load the presentation from a file
            presentation.LoadFromFile("Sample2.pptx");

            // Get the first slide
            ISlide slide = presentation.Slides[0];

            // Iterate through shapes in the slide in reverse order
            for (int i = slide.Shapes.Count - 1; i >= 0; i--)
            {
                // Check if the shape is a placeholder
                if (slide.Shapes[i].Placeholder != null)
                {
                    // Get the placeholder type
                    PlaceholderType type = slide.Shapes[i].Placeholder.Type;

                    // If it is a footer placeholder, slide number placeholder, or date placeholder
                    if (type == PlaceholderType.Footer || type == PlaceholderType.SlideNumber || type == PlaceholderType.DateAndTime)
                    {
                        // Remove it from the slide
                        slide.Shapes.RemoveAt(i);
                    }
                }
            }

            // Save the modified presentation to a file
            presentation.SaveToFile("RemoveFooter.pptx", FileFormat.Pptx2016);

            // Dispose of the Presentation object resources
            presentation.Dispose();
        }
    }
}
Apply for a Temporary License
If you'd like to remove the evaluation message from the generated documents, or to get rid of the function limitations, please request a 30-day trial license for yourself.