Python: Convert PDF to SVG
SVG (Scalable Vector Graphics) is an XML-based vector image format that describes two-dimensional graphics using geometric shapes, text, and other graphical elements. SVG files can be easily scaled without losing image quality, which makes them ideal for various purposes such as web design, illustrations, and animations. In certain situations, you may encounter the need to convert PDF files to SVG format. In this article, we will explain how to convert PDF to SVG in Python using Spire.PDF for Python.
- Convert a PDF File to SVG in Python
- Convert a PDF File to SVG with Custom Width and Height in Python
- Convert Specific Pages of a PDF File to SVG in Python
Install Spire.PDF for Python
This scenario requires Spire.PDF for Python and plum-dispatch v1.7.4. They can be easily installed in your VS Code through the following pip command.
pip install Spire.PDF
If you are unsure how to install, please refer to this tutorial: How to Install Spire.PDF for Python in VS Code
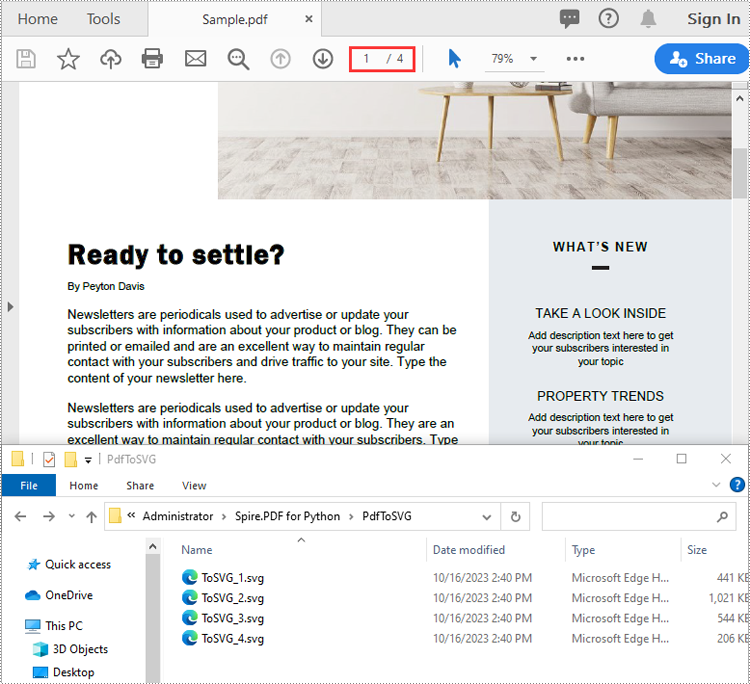
Convert a PDF File to SVG in Python
Spire.PDF for Python provides the PdfDocument.SaveToFile(filename:str, fileFormat:FileFormat) method to convert each page of a PDF file to a separate SVG file. The detailed steps are as follows.
- Create an object of the PdfDocument class.
- Load a sample PDF file using PdfDocument.LoadFromFile() method.
- Convert each page of the PDF file to SVG using PdfDocument.SaveToFile(filename:str, fileFormat:FileFormat) method.
- Python
from spire.pdf.common import *
from spire.pdf import *

# Create an object of the PdfDocument class
doc = PdfDocument()
# Load a PDF file
doc.LoadFromFile("Sample.pdf")

# Save each page of the file to a separate SVG file
doc.SaveToFile("PdfToSVG/ToSVG.svg", FileFormat.SVG)

# Close the PdfDocument object
doc.Close()
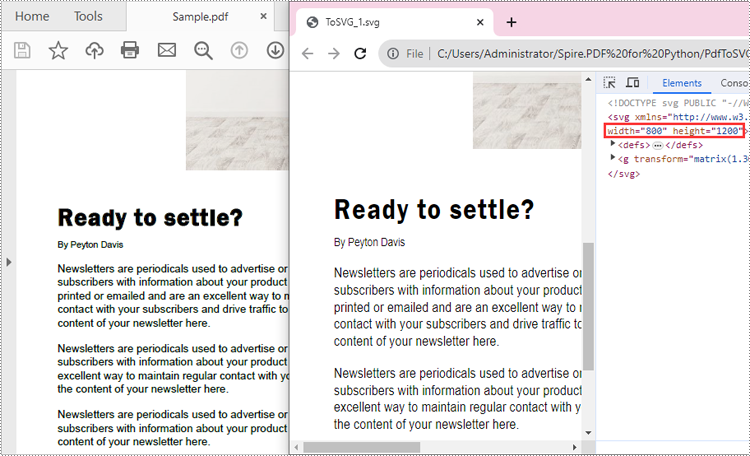
Convert a PDF File to SVG with Custom Width and Height in Python
The PdfDocument.PdfConvertOptions.SetPdfToSvgOptions(wPixel:float, hPixel:float) method provided by Spire.PDF for Python allows you to specify the width and height of the SVG files converted from PDF. The detailed steps are as follows.
- Create an object of the PdfDocument class.
- Load a sample PDF file using PdfDocument.LoadFromFile() method.
- Specify the width and height of the output SVG files using PdfDocument.PdfConvertOptions.SetPdfToSvgOptions(wPixel:float, hPixel:float) method.
- Convert each page of the PDF file to SVG using PdfDocument.SaveToFile(filename:str, fileFormat:FileFormat) method.
- Python
from spire.pdf.common import *
from spire.pdf import *

# Create an object of the PdfDocument class
doc = PdfDocument()
# Load a PDF file
doc.LoadFromFile("Sample.pdf")

# Specify the width and height of output SVG files
doc.ConvertOptions.SetPdfToSvgOptions(800.0, 1200.0)

# Save each page of the file to a separate SVG file
doc.SaveToFile("PdfToSVGWithCustomWidthAndHeight/ToSVG.svg", FileFormat.SVG)

# Close the PdfDocument object
doc.Close()
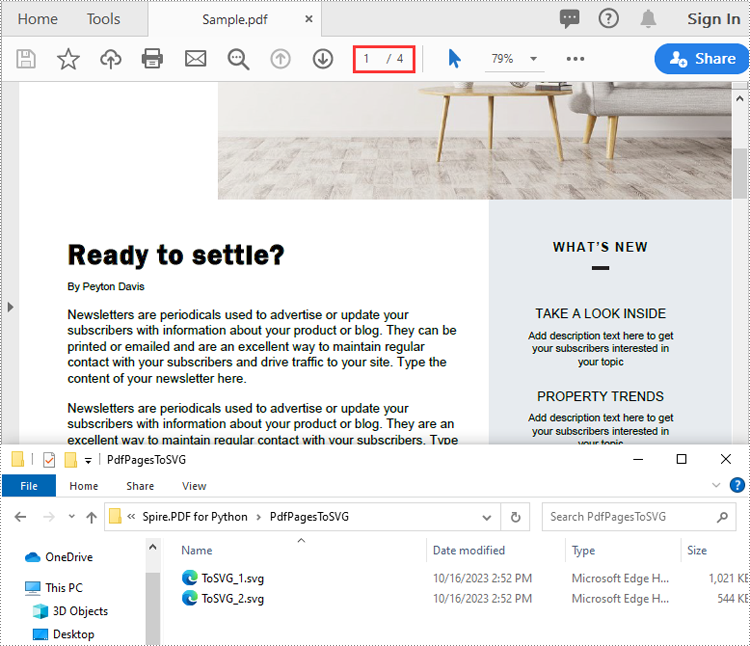
Convert Specific Pages of a PDF File to SVG in Python
The PdfDocument.SaveToFile(filename:str, startIndex:int, endIndex:int, fileFormat:FileFormat) method provided by Spire.PDF for Python allows you to convert specific pages of a PDF file to SVG files. The detailed steps are as follows.
- Create an object of the PdfDocument class.
- Load a sample PDF file using PdfDocument.LoadFromFile() method.
- Convert specific pages of the PDF file to SVG using PdfDocument.SaveToFile(filename:str, startIndex:int, endIndex:int, fileFormat:FileFormat) method.
- Python
from spire.pdf.common import *
from spire.pdf import *

# Create an object of the PdfDocument class
doc = PdfDocument()
# Load a PDF file
doc.LoadFromFile("Sample.pdf")

# Save specific pages of the file to SVG files
doc.SaveToFile("PdfPagesToSVG/ToSVG.svg", 1, 2, FileFormat.SVG)

# Close the PdfDocument object
doc.Close()
Apply for a Temporary License
If you'd like to remove the evaluation message from the generated documents, or to get rid of the function limitations, please request a 30-day trial license for yourself.
Spire.XLS 13.10.1 supports customizing the names of pivot table fields
We are excited to announce the release of Spire.XLS 13.10.1. This version improves the efficiency of Excel to PDF conversion and supports customizing the names of pivot table fields. It also enhances the conversion from Excel to HTML. Moreover, some known issues are fixed in this version, such as the issue that deleted annotations were not removed successfully from the document. More details are listed below.
Here is a list of changes made in this release
| Category | ID | Description |
| New feature | SPIREXLS-4907 | Improves the efficiency of Excel to PDF conversion. |
| New feature | SPIREXLS-4857 | Supports customizing the names of pivot table fields.
sheet.PivotTables[0].RowFields[0].CustomName = "rowName"; sheet.PivotTables[0].ColumnFields[0].CustomName = "colName"; sheet.PivotTables[0].PivotFields[0].CustomName = "fieldName1"; sheet.PivotTables[0].DataFields[0].CustomName = "dataName"; |
| Bug | SPIREXLS-4883 | Fixes the issue that the position of images changed after converting Excel to HTML. |
| Bug | SPIREXLS-4897 | Fixes the issue that deleted annotations were not successfully removed from the document. |
| Bug | SPIREXLS-4909 | Fixes the issue that the program threw System.OverflowException exception when reading Excel documents. |
Python: Add, Replace, or Remove Images in a PDF Document
Alongside textual content, images in a PDF play a crucial role in conveying messages effectively. Being able to manipulate images within a PDF document, such as adding, replacing, or removing them, can be incredibly useful for enhancing the visual appeal, updating outdated graphics, or modifying the document's content. In this article, you will learn how to add, replace, or delete images in a PDF document in Python using Spire.PDF for Python.
- Add an Image to a PDF Document in Python
- Replace an Image in a PDF Document in Python
- Remove an Image from a PDF Document in Python
Install Spire.PDF for Python
This scenario requires Spire.PDF for Python and plum-dispatch v1.7.4. They can be easily installed in your VS Code through the following pip command.
pip install Spire.PDF
If you are unsure how to install, please refer to this tutorial: How to Install Spire.PDF for Python in VS Code
Add an Image to a PDF Document in Python
To add an image to a PDF page, you can use the PdfPage.Canvas.DrawImage() method. The following are the detailed steps.
- Create a PdfDocument object.
- Add a page to the document using PdfDocument.Pages.Add() method.
- Load an image using PdfImage.FromFile() method.
- Draw the image on the page using PdfPageBase.Canvas.DrawImage() method.
- Save the document using PdfDocument.SaveToFile() method.
- Python
from spire.pdf.common import *
from spire.pdf import *

# Create a PdfDocument instance
doc = PdfDocument()

# Set the page margins
doc.PageSettings.SetMargins(30.0, 30.0, 30.0, 30.0)

# Add a page
page = doc.Pages.Add()

# Load an image
image = PdfImage.FromFile('C:/Users/Administrator/Desktop/logo.png')

# Specify the size of the image in the document
width = image.Width * 0.70
height = image.Height * 0.70

# Specify the X and Y coordinates where the image will be drawn
x = 10.0
y = 30.0

# Draw the image at a specified location on the page
page.Canvas.DrawImage(image, x, y, width, height)

# Save the result document
doc.SaveToFile("output/AddImage.pdf", FileFormat.PDF)
Replace an Image in a PDF Document in Python
Spire.PDF for Python offers the PdfImageHelper class to help us get and deal with the images in a certain page. To replace an image with a new one, you can use the PdfImageHelper.ReplaceImage() method. The following are the steps.
- Create a PdfDocument object.
- Load a PDF document using PdfDocument.LoadFromFile() method.
- Get a specific page through PdfDocument.Pages[index] property.
- Load an image using PdfImage.FromFile() method.
- Create a PdfImageHelper object, and get the image information from the specified page using PdfImageHelper.GetImagesInfo() method.
- Replace an existing image in the page with the new image using PdfImageHelper.ReplaceImage() method.
- Save the document using PdfDocument.SaveToFile() method.
- Python
from spire.pdf.common import *
from spire.pdf import *

# Create a PdfDocument instance
doc = PdfDocument()

# Load a PDF document
doc.LoadFromFile('C:/Users/Administrator/Desktop/input.pdf')

# Get the first page
page = doc.Pages[0]

# Load an image
image = PdfImage.FromFile('C:/Users/Administrator/Desktop/newImage.png')

# Create a PdfImageHelper instance
imageHelper = PdfImageHelper()

# Get the image information from the page
imageInfo = imageHelper.GetImagesInfo(page)

# Replace the first image on the page with the loaded image
imageHelper.ReplaceImage(imageInfo[0], image)

# Save the result document
doc.SaveToFile("output/ReplaceImage.pdf", FileFormat.PDF)
Remove an Image from a PDF Document in Python
To remove a specific image from a page, use the PdfPageBase.DeleteImage(index) method. The following are the steps.
- Create a PdfDocument object.
- Load a PDF document using PdfDocument.LoadFromFile() method.
- Get a specific page through PdfDocument.Pages[index] property.
- Delete a certain image in the page by its index using PdfPageBase.DeleteImage() method.
- Save the document using PdfDocument.SaveToFile() method.
- Python
from spire.pdf.common import *
from spire.pdf import *

# Create a PdfDocument instance
doc = PdfDocument()

# Load a PDF document
doc.LoadFromFile('C:/Users/Administrator/Desktop/input.pdf')

# Get the first page
page = doc.Pages[0]

# Delete the first image on the page
page.DeleteImage(0)

# Save the result document
doc.SaveToFile('output/DeleteImage.pdf', FileFormat.PDF)
Apply for a Temporary License
If you'd like to remove the evaluation message from the generated documents, or to get rid of the function limitations, please request a 30-day trial license for yourself.
Python: Change the Font of a Word Document
Modifying the font in a Word document can significantly impact its visual appearance and overall readability. Whether you want to enhance the document's style or align it with specific formatting requirements, changing the font is a straightforward process that allows you to customize your text. In this article, you will learn how to change font of a paragraph or a piece of text in a Word document in Python using Spire.Doc for Python.
Install Spire.Doc for Python
This scenario requires Spire.Doc for Python and plum-dispatch v1.7.4. They can be easily installed in your VS Code through the following pip command.
pip install Spire.Doc
If you are unsure how to install, please refer to this tutorial: How to Install Spire.Doc for Python in VS Code
Change the Font of a Paragraph in Python
Using Spire.Doc for Python, you can create a ParagraphStyle object which defines the font information that can be applied to a certain paragraph. The following are the steps to change the font of a paragraph.
- Create a Document instance.
- Load a Word document using Document.LoadFromFile() method.
- Get a specified section through Document.Sections[index] property.
- Get a specified paragraph that you want to change the font through Section.Paragraphs[index] property.
- Create a ParagraphStyle instance, specifying the font name, font color and font style through the properties under it.
- Add the style to the document using Document.Styles.Add() method.
- Apply the style to the paragraph using Paragraph.ApplyStyle() method.
- Save the result document using Document.SaveToFile() method.
- Python
from spire.doc import *
from spire.doc.common import *

# Create a Document instance
document = Document()

# Load a Word document
document.LoadFromFile('C:/Users/Administrator/Desktop/input.docx')

# Get the first section
section = document.Sections[0]

# Get a specific paragraph
paragraph = section.Paragraphs[2]

# Create a paragraph style
style = ParagraphStyle(document)
style.Name = 'NewStyle'
style.CharacterFormat.Bold = True
style.CharacterFormat.Italic = True
style.CharacterFormat.TextColor = Color.get_Red()
style.CharacterFormat.FontName = 'Cambria'
document.Styles.Add(style)

# Apply the style to the paragraph
paragraph.ApplyStyle(style.Name)

# Save the result document
document.SaveToFile('output/ChangeFontOfParagraph.docx', FileFormat.Docx)
Change the Font of Specific Text in Python
To change the font of specific text (letter, phrase or sentence) in a Word document, you need first to find the text from the document and then set a different color or font style for it. The following are the detailed steps.
- Create a Document instance.
- Load a Word document using Document.LoadFromFile() method.
- Find the text that you want to change font color using Document.FindAllString() method.
- Loop through all occurrences of the searched text and change the font color or style for each occurrence through the properties under TextSelection.GetAsOneRange().CharacterFormat object.
- Save the result document using Document.SaveToFile() method.
- Python
from spire.doc import *
from spire.doc.common import *

# Create a Document instance
document = Document()

# Load a Word document
document.LoadFromFile('C:/Users/Administrator/Desktop/input.docx')

# Find the text that you want to change font
textSelections = document.FindAllString('programming language', False, True)

# Change the font style of the text
for selection in textSelections:
    selection.GetAsOneRange().CharacterFormat.TextColor = Color.get_Red()
    selection.GetAsOneRange().CharacterFormat.Bold = True

# Save the result document
document.SaveToFile('output/ChangeFontOfText.docx', FileFormat.Docx)

Apply for a Temporary License
If you'd like to remove the evaluation message from the generated documents, or to get rid of the function limitations, please request a 30-day trial license for yourself.
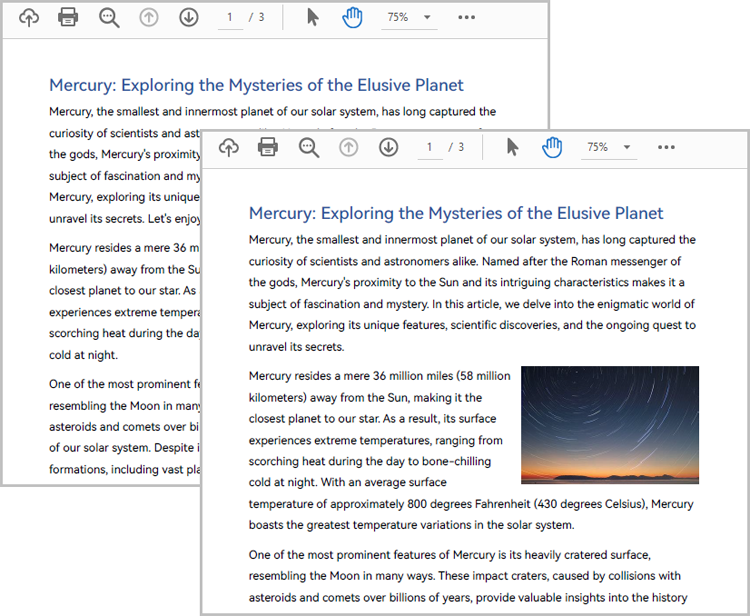
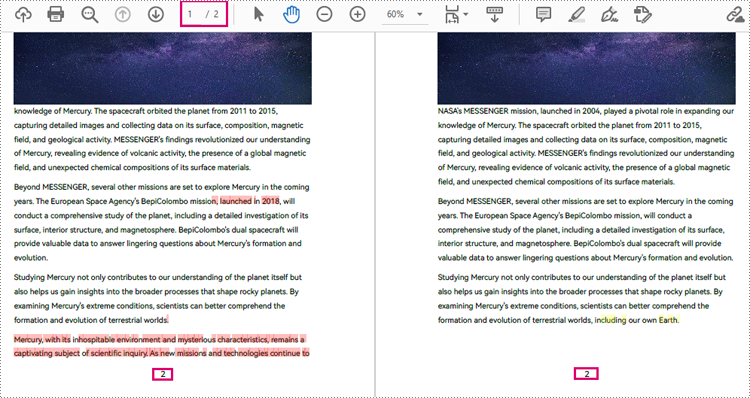
Java: Compare PDF Documents
Comparison of PDF documents is essential for effective document management. By comparing PDF documents, users can easily identify differences in document content to have a more comprehensive understanding of them, which will greatly facilitate the user to modify and integrate the document content. This article will introduce how to use Spire.PDF for Java to compare PDF documents and find the differences.
Examples of the two PDF documents that will be used for comparison:
Install Spire.PDF for Java
First of all, you need to add the Spire.Pdf.jar file as a dependency in your Java program. The JAR file can be downloaded from this link. If you use Maven, you can easily import the JAR file by adding the following code to your project's pom.xml file.
<repositories>
    <repository>
        <id>com.e-iceblue</id>
        <name>e-iceblue</name>
        <url>https://repo.e-iceblue.com/nexus/content/groups/public/</url>
    </repository>
</repositories>
<dependencies>
    <dependency>
        <groupId>e-iceblue</groupId>
        <artifactId>spire.pdf</artifactId>
        <version>10.4.4</version>
    </dependency>
</dependencies>
Compare Two PDF Documents
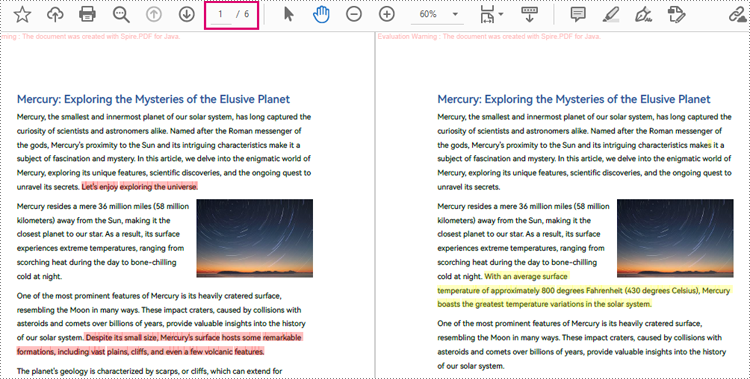
Spire.PDF for Java provides the PdfComparer class for users to create an object with two PDF documents for comparing. After creating the PdfComparer object, users can use PdfComparer.compare(String fileName) method to compare the two documents and save the result as a new PDF file.
The resulting PDF document displays the two original documents on the left and the right, with the deleted items in red and the added items in yellow.
The detailed steps for comparing two PDF documents are as follows:
- Create two objects of PdfDocument class and load two PDF documents using PdfDocument.loadFromFile() method.
- Create an object of PdfComparer class with the two documents.
- Compare the two documents and save the result as a new PDF document using PdfComparer.compare() method.
- Java
import com.spire.pdf.PdfDocument;
import com.spire.pdf.comparison.PdfComparer;

public class ComparePDFPageRange {
    public static void main(String[] args) {
        //Create an object of PdfDocument class and load a PDF document
        PdfDocument pdf1 = new PdfDocument();
        pdf1.loadFromFile("Sample1.pdf");

        //Create another object of PdfDocument class and load another PDF document
        PdfDocument pdf2 = new PdfDocument();
        pdf2.loadFromFile("Sample2.pdf");

        //Create an object of PdfComparer class
        PdfComparer comparer = new PdfComparer(pdf1,pdf2);

        //Compare the two PDF documents and save the compare results to a new document
        comparer.compare("ComparisonResult.pdf");
    }
}
Compare a Specified Page Range of Two PDF Documents
Before comparing, users can use the PdfComparer.getOptions().setPageRanges() method to limit the page range to be compared. The detailed steps are as follows:
- Create two objects of PdfDocument class and load two PDF documents using PdfDocument.loadFromFile() method.
- Create an object of PdfComparer class with the two documents.
- Set the page range to be compared using PdfComparer.getOptions().setPageRanges() method.
- Compare the two documents and save the result as a new PDF document using PdfComparer.compare() method.
- Java
import com.spire.pdf.PdfDocument;
import com.spire.pdf.comparison.PdfComparer;

public class ComparePDFPageRange {
    public static void main(String[] args) {
        //Create an object of PdfDocument class and load a PDF document
        PdfDocument pdf1 = new PdfDocument();
        pdf1.loadFromFile("G:/Documents/Sample6.pdf");

        //Create another object of PdfDocument class and load another PDF document
        PdfDocument pdf2 = new PdfDocument();
        pdf2.loadFromFile("G:/Documents/Sample7.pdf");

        //Create an object of PdfComparer class
        PdfComparer comparer = new PdfComparer(pdf1,pdf2);

        //Set the page range to be compared
        comparer.getOptions().setPageRanges(1, 1, 1, 1);

        //Compare the two PDF documents and save the compare results to a new document
        comparer.compare("ComparisonResult.pdf");
    }
}
Apply for a Temporary License
If you'd like to remove the evaluation message from the generated documents, or to get rid of the function limitations, please request a 30-day trial license for yourself.
Spire.Doc 11.10.3 adds the feature of text formatting when converting Word to PDF
We are pleased to announce the release of Spire.Doc 11.10.3. This version adds the feature of text formatting when converting Word to PDF and supports for .NET 4.6.2 and above, .NET Core, and .NET Standard platforms. More details are listed below.
Here is a list of changes made in this release
| Category | ID | Description |
| New feature | - | Adds the feature of text formatting when converting Word to PDF (mainly for handling Thai characters and Tibetan characters), and supports for .NET 4.6.2 and above, .NET Core, and .NET Standard platforms.
Document doc = new Document(); doc.LoadFromFile(fileName); doc.LayoutOptions.UseHarfBuzzTextShaper = true; doc.SaveToFile(pdfFileName, Spire.Doc.FileFormat.PDF) |
Spire.PDF for Android via Java 9.10.1 supports setting encryption options when encrypting PDF documents
We are pleased to announce the release of Spire.PDF for Android via Java 9.10.1. This version supports setting encryption options when encrypting PDF documents and determining whether PDF document stream is encrypted. Besides, it also adds a new method to convert PDF to Word. More details are listed below.
Here is a list of changes made in this release
| Category | ID | Description |
| New feature | SPIREPDF-6190 | Support setting encryption options when encrypting PDF documents.
PdfDocument pdfdoc = new PdfDocument();
pdfdoc.loadFromFile(inputFile);
PdfSecurityPolicy securityPolicy = new PdfPasswordSecurityPolicy("123", "e-iceblue");
securityPolicy.setEncryptionAlgorithm(PdfEncryptionAlgorithm.AES_128);
securityPolicy.setEncryptMetadata(false);
pdfdoc.encrypt(securityPolicy);
pdfdoc.saveToFile(outputFile);
|
| New feature | - | Supports determining if a PDF document stream is encrypted.
FileInputStream stream_1 = new FileInputStream(new File(inputFile_1)); boolean isPasswordProtected_1 = PdfDocument.isPasswordProtected(stream_1); |
| New feature | - | Add a new method to convert PDF to Word.
PdfToWordConverter convert = new PdfToWordConverter(inputFile); convert.saveToDocx(outputFile); |
Python: Add Worksheets to Excel
A workbook can consist of one or more worksheets, and each worksheet is independent. When dealing with an existing Excel file or creating a new Excel file from scratch, we can add worksheets as needed to better manage and analyze data. In this article, we will show you how to add worksheets to Excel programmatically by using Spire.XLS for Python.
- Add a Worksheet to an Existing Excel file
- Add a Worksheet to a New Excel file
- Add Multiple Worksheets to a New Excel file
Install Spire.XLS for Python
This scenario requires Spire.XLS for Python and plum-dispatch v1.7.4. They can be easily installed in your VS Code through the following pip command.
pip install Spire.XLS
If you are unsure how to install, please refer to this tutorial: How to Install Spire.XLS for Python in VS Code
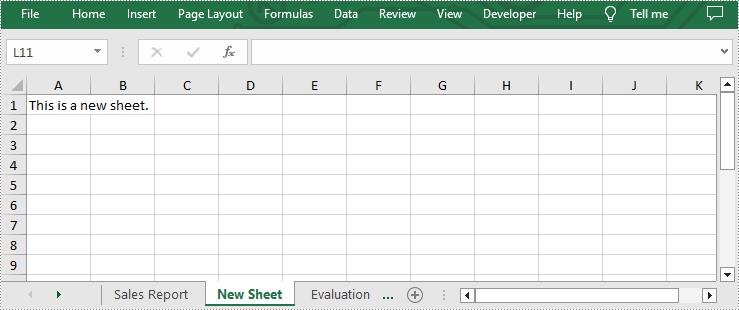
Add a Worksheet to an Existing Excel file
Spire.XLS for Python allows users to add a new worksheet to an existing Excel file by using Workbook.Worksheets.Add(sheetName) method. The following are detailed steps.
- Create an object of Workbook class.
- Load an Excel file using Workbook.LoadFromFile() method.
- Add a new sheet to this file using Workbook.Worksheets.Add(sheetName) method.
- Add desired text to cell A1 by Worksheet.Range[cellName].Text property.
- Save the result file using Workbook.SaveToFile() method.
- Python
from spire.xls import *
from spire.xls.common import *

inputFile = "sample.xlsx"
outputFile = "AddWorksheet.xlsx"

#Create an object of Workbook class
workbook = Workbook()

#Load an Excel file from disk
workbook.LoadFromFile(inputFile)

#Add a new worksheet to this file
sheet = workbook.Worksheets.Add("New Sheet")

#Add desired text to cell A1
sheet.Range["A1"].Text = "This is a new sheet."

#Save the result file
workbook.SaveToFile(outputFile, ExcelVersion.Version2013)
workbook.Dispose()
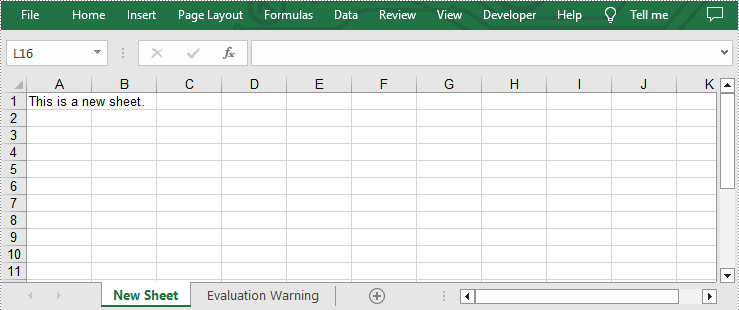
Add a Worksheet to a New Excel file
In addition to adding worksheets to existing Excel files, you can also add worksheets to a newly created Excel files with the same method. You just need to clear the default worksheet before adding by calling Workbook.Worksheets.Clear() method. The following are detailed steps.
- Create an object of Workbook class.
- Clear the default worksheets using Workbook.Worksheets.Clear() method.
- Add a new sheet to the new workbook by using Workbook.Worksheets.Add(sheetName) method.
- Add desired text to cell A1 by Worksheet.Range[cellName].Text property.
- Save the result file using Workbook.SaveToFile() method.
- Python
from spire.xls import *
from spire.xls.common import *

outputFile = "AddWorksheet.xlsx"

#Create an object of Workbook class
workbook = Workbook()

#Clear the default sheets
workbook.Worksheets.Clear()

#Add a new worksheet to the new file
sheet = workbook.Worksheets.Add("New Sheet")

#Add desired text to cell A1
sheet.Range["A1"].Text = "This is a new sheet."

#Save the result file
workbook.SaveToFile(outputFile, ExcelVersion.Version2013)
workbook.Dispose()
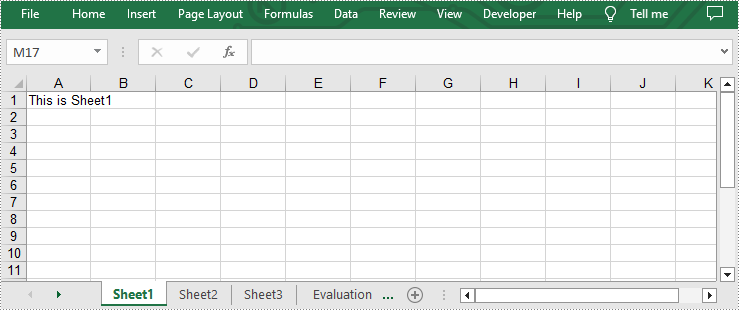
Add Multiple Worksheets to a New Excel file
If you want to add multiple worksheets to a newly created Excel file, you can use Workbook.CreateEmptySheets(sheetCount) method to add a specified number of worksheets. The following are detailed steps.
- Create an object of Workbook class.
- Add three sheets to this file by using Workbook.CreateEmptySheets(sheetCount) method.
- Loop through the added worksheets and add text to cell A1 in each worksheet by Worksheet.Range[cellName].Text property.
- Save the result file using Workbook.SaveToFile() method.
- Python
from spire.xls import *
from spire.xls.common import *

outputFile = "AddWorksheet.xlsx"

#Create an object of Workbook class
workbook = Workbook()

#Add three sheets to this file
sheetCount = 3
workbook.CreateEmptySheets(sheetCount)

#Loop through the added worksheets
for i in range(sheetCount):

    #Add text to cell A1 in each worksheet
    sheet = workbook.Worksheets[i]
    sheet.Range["A1"].Text = "This is Sheet{}".format(i+1)

#Save the result file
workbook.SaveToFile(outputFile, ExcelVersion.Version2013)
workbook.Dispose()
Apply for a Temporary License
If you'd like to remove the evaluation message from the generated documents, or to get rid of the function limitations, please request a 30-day trial license for yourself.
Spire.PDF 9.10.2 supports getting the text coordinates of multi-column text in reading order
We are excited to announce the release of Spire.PDF 9.10.2. This version supports getting the text coordinates of multi-column text in reading order, setting the HorizontalScalingFactor property for PdfStringFormat, and setting whether to allow conversion when converting the PDF with permission password. Besides, this version enhances the conversion from OFD to PDF. In addition, many known issues are fixed successfully in this version, such as the issue that the extracted table data was not formatted correctly. More details are listed below.
Here is a list of changes made in this release
| Category | ID | Description |
| New feature | SPIREPDF-6153 | Supports getting the text coordinates of multi-column text in reading order.
PdfDocument doc = new PdfDocument(); doc.LoadFromFile(input); PdfPageBase pdfPageBase = doc.Pages[0]; PdfTextFinder finder = new PdfTextFinder(pdfPageBase); finder.Options.Strategy = PdfTextStrategy.Simple; |
| New feature | SPIREPDF-6264 | Supports setting the HorizontalScalingFactor property for PdfStringFormat.
PdfDocument doc = new PdfDocument(); PdfPageBase page = doc.Pages.Add(); string text = "Please add the code picture BehindText=true to set the picture behind text"; PdfSolidBrush solidBrush = new PdfSolidBrush (new PdfRGBColor(Color.Black)); PdfStringFormat format = new PdfStringFormat(): format.HorizontalScalingFactor = 80; PdfFont font = new PdfFont(PdfFontFamily.TimesRoman, 14f, PdfFontStyle.Regular); PdfGraphicsState state = page.Canvas.Save(); page.Canvas.DrawString(text, font, solidBrush, 0, 0, format); page.Canvas.Restore(state): doc.SaveToFile(outputFile); doc.Close(); |
| New feature | SPIREPDF-6285 | Support setting whether to allow conversion when converting the PDF with permission password.
PdfDocument doc = new PdfDocument();
doc.LoadFromFile(inputFile);
doc.ConvertOptions.ApplyPermissionsOptions(true);
StringBuilder sb = new StringBuilder();
    foreach (FileFormat type in Enum.GetValues(typeof(FileFormat)))
        {
            try
                {
                    if (type.ToString().Equals("PDF"))
                    {
                        doc.SaveToFile(outputFile_P, type);
                    }
                    else
                    {
                        doc.SaveToFile(outputFile, type);
                    }
                }
                catch (Exception ex)
                {
                    sb.AppendLine("save to: "+ type +"  :"+ ex.Message);
                }
            }
File.AppendAllText(outputFile,sb.ToString());
doc.Dispose();
|
| Bug | SPIREPDF-5579 | Fixes the issue that the extracted table data was not formatted correctly. |
| Bug | SPIREPDF-6089 | Fixes the issue that the output result was incorrect after setting cell spacing for a table. |
| Bug | SPIREPDF-6244 | Fixes the issue that filling the form fields of XFA's text box failed . |
| Bug | SPIREPDF-6262 | Fixes the issue that the program threw "System.IO.IOExceptions:Stream was too long" exception when merging PDF files. |
| Bug | SPIREPDF-6268 | Fixes the issue that fonts were applied incorrectly after filling the textbox field. |
| Bug | SPIREPDF-6284 | Fixes the issue that no permission password was requested when converting PDF with permission password to Word. |
| Bug | SPIREPDF-6292 | Fixes the issue that the program threw "System.NullReferenceException" exception when converting OFD to PDF files. |
| Bug | SPIREPDF-6303 | Fixes the issue that "new PdfGoToAction(partBookmarkDest)" did not work. |
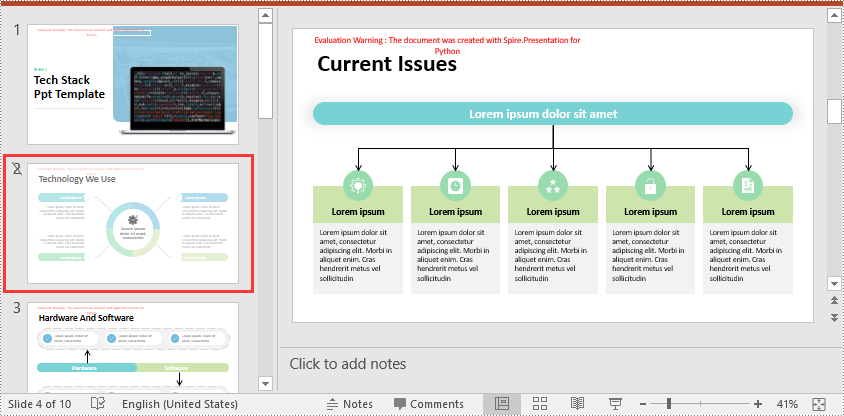
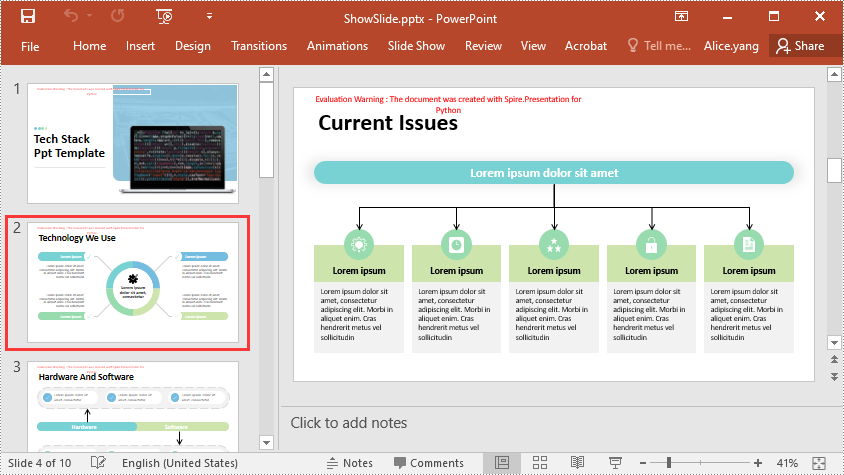
Python: Hide or Show Slides in PowerPoint Presentations
Hiding and showing slides are two practical features in PowerPoint that allow you to control the visibility of slides during a slideshow. Hiding slides is useful when you want to skip certain slides or temporarily remove them from the presentation without deleting them. Whereas showing slides is helpful when you want to re-display the hidden slides. In this article, we will demonstrate how to hide and show slides in a PowerPoint presentation in Python using Spire.Presentation for Python.
- Hide a Specific Slide in PowerPoint in Python
- Show a Hidden Slide in PowerPoint in Python
- Show All Hidden Slides in PowerPoint in Python
Install Spire.Presentation for Python
This scenario requires Spire.Presentation for Python and plum-dispatch v1.7.4. They can be easily installed in your VS Code through the following pip command.
pip install Spire.Presentation
If you are unsure how to install, please refer to this tutorial: How to Install Spire.Presentation for Python in VS Code
Hide a Specific Slide in PowerPoint in Python
Spire.Presentation for Python provides the ISlide.Hidden property to control the visibility of a slide during a slideshow. If you don’t want a certain slide to be shown, you can hide this slide by setting the ISlide.Hidden property as True. The detailed steps are as follows.
- Create an object of the Presentation class.
- Load a PowerPoint presentation using Presentation.LoadFromFile() method.
- Get a specific slide using Presentation.Slides[index] property.
- Hide the slide by setting the ISlide.Hidden property as True.
- Save the resulting presentation using Presentation.SaveToFile() method.
- Python
from spire.presentation.common import *
from spire.presentation import *

# Create an object of the Presentation class
ppt = Presentation()
# Load a PowerPoint presentation
ppt.LoadFromFile("Sample.pptx")

# Get the second slide and hide it
slide = ppt.Slides[1]
slide.Hidden = True

# Save the resulting presentation to a new .pptx file
ppt.SaveToFile("HideSlide.pptx", FileFormat.Pptx2016)
ppt.Dispose()
Show a Hidden Slide in PowerPoint in Python
To show a hidden slide, you can set the ISlide.Hidden property as False. The detailed steps are as follows.
- Create an object of the Presentation class.
- Load a PowerPoint presentation using Presentation.LoadFromFile() method.
- Get a specific slide using Presentation.Slides[index] property.
- Unhide the slide by setting the ISlide.Hidden property as False.
- Save the resulting presentation using Presentation.SaveToFile() method.
- Python
from spire.presentation.common import *
from spire.presentation import *

# Create an object of the Presentation class
ppt = Presentation()
# Load a PowerPoint presentation
ppt.LoadFromFile("HideSlide.pptx")

# Get the second slide and unhide it
slide = ppt.Slides[1]
slide.Hidden = False

# Save the resulting presentation to a new .pptx file
ppt.SaveToFile("ShowSlide.pptx", FileFormat.Pptx2016)
ppt.Dispose()
Show All Hidden Slides in PowerPoint in Python
To show all hidden slides in a PowerPoint presentation, you need to loop through all the slides in the presentation, then find the hidden slides and unhide them by setting the ISlide.Hidden property as False. The detailed steps are as follows.
- Create an object of the Presentation class.
- Load a PowerPoint presentation using Presentation.LoadFromFile() method.
- Loop through the slides in the presentation.
- Check whether the current slide is hidden or not using ISlide.Hidden property. If the result is true, unhide the slide by setting the ISlide.Hidden property as False.
- Save the resulting presentation using Presentation.SaveToFile() method.
- Python
from spire.presentation.common import *
from spire.presentation import *

# Create an object of the Presentation class
ppt = Presentation()
# Load a PowerPoint presentation
ppt.LoadFromFile("Sample2.pptx")

# Loop through each slide in the presentation
for i in range(ppt.Slides.Count):
    slide = ppt.Slides[i]
    # Check if the slide is hidden
    if(slide.Hidden):
        # Unhide the slide
        slide.Hidden = False

# Save the resulting presentation to a new .pptx file
ppt.SaveToFile("ShowAllHidenSlides.pptx", FileFormat.Pptx2016)
ppt.Dispose()
Apply for a Temporary License
If you'd like to remove the evaluation message from the generated documents, or to get rid of the function limitations, please request a 30-day trial license for yourself.