Python: Add or Read Formulas in Excel
Formulas in Excel are equations or expressions that perform calculations on data within a spreadsheet. They allow you to perform basic arithmetic operations like addition, subtraction, multiplication, and division, as well as more advanced functions like statistical analysis, date and time calculations, and logical evaluations. By incorporating formulas into your Excel spreadsheets, you can save time, eliminate errors, and gain valuable insights from your data. In this article, we will demonstrate how to add or read formulas in Excel in Python using Spire.XLS for Python.
Install Spire.XLS for Python
This scenario requires Spire.XLS for Python and plum-dispatch v1.7.4. They can be easily installed in your VS Code through the following pip command.
pip install Spire.XLS
If you are unsure how to install, please refer to this tutorial: How to Install Spire.XLS for Python in VS Code
Add Formulas to Excel in Python
Spire.XLS for Python offers the Worksheet.Range[rowIndex, columnIndex].Formula property to add formulas to specific cells in an Excel worksheet. The detailed steps are as follows.
- Create an object of the Workbook class.
- Get a specific worksheet by its index using the Workbook.Worksheets[sheetIndex] property.
- Add some text and numeric data to specific cells of the worksheet using the Worksheet.Range[rowIndex, columnIndex].Text and Worksheet.Range[rowIndex, columnIndex].NumberValue properties.
- Add text and formulas to specific cells of the worksheet using the Worksheet.Range[rowIndex, columnIndex].Text and Worksheet.Range[rowIndex, columnIndex].Formula properties.
- Save the result file using the Workbook.SaveToFile() method.
- Python
from spire.xls import *
from spire.xls.common import *

# Create an object of the Workbook class
workbook = Workbook()

# Get the first worksheet
sheet = workbook.Worksheets[0]

# Declare two variables: currentRow, currentFormula
currentRow = 1
currentFormula = ""

# Add text to the worksheet and set cell style
sheet.Range[currentRow, 1].Text = "Test Data:"
sheet.Range[currentRow, 1].Style.Font.IsBold = True
sheet.Range[currentRow, 1].Style.FillPattern = ExcelPatternType.Solid
sheet.Range[currentRow, 1].Style.KnownColor = ExcelColors.LightGreen1
sheet.Range[currentRow, 1].Style.Borders[BordersLineType.EdgeBottom].LineStyle = LineStyleType.Medium
currentRow += 1

# Add some numeric data to the worksheet
sheet.Range[currentRow, 1].NumberValue = 7.3
sheet.Range[currentRow, 2].NumberValue = 5
sheet.Range[currentRow, 3].NumberValue = 8.2
sheet.Range[currentRow, 4].NumberValue = 4
sheet.Range[currentRow, 5].NumberValue = 3
sheet.Range[currentRow, 6].NumberValue = 11.3
currentRow += 2

# Add text to the worksheet and set cell style
sheet.Range[currentRow, 1].Text = "Formulas"
sheet.Range[currentRow, 2].Text = "Results"
sheet.Range[currentRow, 1, currentRow, 2].Style.Font.IsBold = True
sheet.Range[currentRow, 1, currentRow, 2].Style.KnownColor = ExcelColors.LightGreen1
sheet.Range[currentRow, 1, currentRow, 2].Style.FillPattern = ExcelPatternType.Solid
sheet.Range[currentRow, 1, currentRow, 2].Style.Borders[BordersLineType.EdgeBottom].LineStyle = LineStyleType.Medium
currentRow += 1

# Add text and formulas to the worksheet
# Str
currentFormula = "=\"Hello\""
sheet.Range[currentRow, 1].Text = "'" + currentFormula
sheet.Range[currentRow, 2].Formula = currentFormula
currentRow += 1

# Int
currentFormula = "=300"
sheet.Range[currentRow, 1].Text = "'" + currentFormula
sheet.Range[currentRow, 2].Formula = currentFormula
currentRow += 1

# Float
currentFormula = "=3389.639421"
sheet.Range[currentRow, 1].Text = "'" + currentFormula
sheet.Range[currentRow, 2].Formula = currentFormula
currentRow += 1

# Bool
currentFormula = "=false"
sheet.Range[currentRow, 1].Text = "'" + currentFormula
sheet.Range[currentRow, 2].Formula = currentFormula
currentRow += 1

# Expressions
currentFormula = "=1+2+3+4+5-6-7+8-9"
sheet.Range[currentRow, 1].Text = "'" + currentFormula
sheet.Range[currentRow, 2].Formula = currentFormula
currentRow += 1

currentFormula = "=33*3/4-2+10"
sheet.Range[currentRow, 1].Text = "'" + currentFormula
sheet.Range[currentRow, 2].Formula = currentFormula
currentRow += 1

# Cell reference
currentFormula = "=Sheet1!$B$2"
sheet.Range[currentRow, 1].Text = "'" + currentFormula
sheet.Range[currentRow, 2].Formula = currentFormula
currentRow += 1

# Functions
# AVERAGE
currentFormula = "=AVERAGE(Sheet1!$D$2:F$2)"
sheet.Range[currentRow, 1].Text = "'" + currentFormula
sheet.Range[currentRow, 2].Formula = currentFormula
currentRow += 1

# COUNT
currentFormula = "=COUNT(3,5,8,10,2,34)"
sheet.Range[currentRow, 1].Text = "'" + currentFormula
sheet.Range[currentRow, 2].Formula = currentFormula
currentRow += 1

# NOW
currentFormula = "=NOW()"
sheet.Range[currentRow, 1].Text = "'" + currentFormula
sheet.Range[currentRow, 2].Formula = currentFormula
sheet.Range[currentRow, 2].Style.NumberFormat = "yyyy-MM-DD"
currentRow += 1

# SECOND
currentFormula = "=SECOND(0.503)"
sheet.Range[currentRow, 1].Text = "'" + currentFormula
sheet.Range[currentRow, 2].Formula = currentFormula
currentRow += 1

# MINUTE
currentFormula = "=MINUTE(0.78125)"
sheet.Range[currentRow, 1].Text = "'" + currentFormula
sheet.Range[currentRow, 2].Formula = currentFormula
currentRow += 1

# MONTH
currentFormula = "=MONTH(9)"
sheet.Range[currentRow, 1].Text = "'" + currentFormula
sheet.Range[currentRow, 2].Formula = currentFormula
currentRow += 1

# DAY
currentFormula = "=DAY(10)"
sheet.Range[currentRow, 1].Text = "'" + currentFormula
sheet.Range[currentRow, 2].Formula = currentFormula
currentRow += 1

# TIME
currentFormula = "=TIME(4,5,7)"
sheet.Range[currentRow, 1].Text = "'" + currentFormula
sheet.Range[currentRow, 2].Formula = currentFormula
currentRow += 1

# DATE
currentFormula = "=DATE(6,4,2)"
sheet.Range[currentRow, 1].Text = "'" + currentFormula
sheet.Range[currentRow, 2].Formula = currentFormula
currentRow += 1

# RAND
currentFormula = "=RAND()"
sheet.Range[currentRow, 1].Text = "'" + currentFormula
sheet.Range[currentRow, 2].Formula = currentFormula
currentRow += 1

# HOUR
currentFormula = "=HOUR(0.5)"
sheet.Range[currentRow, 1].Text = "'" + currentFormula
sheet.Range[currentRow, 2].Formula = currentFormula
currentRow += 1

# MOD
currentFormula = "=MOD(5,3)"
sheet.Range[currentRow, 1].Text = "'" + currentFormula
sheet.Range[currentRow, 2].Formula = currentFormula
currentRow += 1

# WEEKDAY
currentFormula = "=WEEKDAY(3)"
sheet.Range[currentRow, 1].Text = "'" + currentFormula
sheet.Range[currentRow, 2].Formula = currentFormula
currentRow += 1

# YEAR
currentFormula = "=YEAR(23)"
sheet.Range[currentRow, 1].Text = "'" + currentFormula
sheet.Range[currentRow, 2].Formula = currentFormula
currentRow += 1

# NOT
currentFormula = "=NOT(true)"
sheet.Range[currentRow, 1].Text = "'" + currentFormula
sheet.Range[currentRow, 2].Formula = currentFormula
currentRow += 1

# OR
currentFormula = "=OR(true)"
sheet.Range[currentRow, 1].Text = "'" + currentFormula
sheet.Range[currentRow, 2].Formula = currentFormula
currentRow += 1

# AND
currentFormula = "=AND(TRUE)"
sheet.Range[currentRow, 1].Text = "'" + currentFormula
sheet.Range[currentRow, 2].Formula = currentFormula
currentRow += 1

# VALUE
currentFormula = "=VALUE(30)"
sheet.Range[currentRow, 1].Text = "'" + currentFormula
sheet.Range[currentRow, 2].Formula = currentFormula
currentRow += 1

# LEN
currentFormula = "=LEN(\"world\")"
sheet.Range[currentRow, 1].Text = "'" + currentFormula
sheet.Range[currentRow, 2].Formula = currentFormula
currentRow += 1

# MID
currentFormula = "=MID(\"world\",4,2)"
sheet.Range[currentRow, 1].Text = "'" + currentFormula
sheet.Range[currentRow, 2].Formula = currentFormula
currentRow += 1

# ROUND
currentFormula = "=ROUND(7,3)"
sheet.Range[currentRow, 1].Text = "'" + currentFormula
sheet.Range[currentRow, 2].Formula = currentFormula
currentRow += 1

# SIGN
currentFormula = "=SIGN(4)"
sheet.Range[currentRow, 1].Text = "'" + currentFormula
sheet.Range[currentRow, 2].Formula = currentFormula
currentRow += 1

# INT
currentFormula = "=INT(200)"
sheet.Range[currentRow, 1].Text = "'" + currentFormula
sheet.Range[currentRow, 2].Formula = currentFormula
currentRow += 1

# ABS
currentFormula = "=ABS(-1.21)"
sheet.Range[currentRow, 1].Text = "'" + currentFormula
sheet.Range[currentRow, 2].Formula = currentFormula
currentRow += 1

# LN
currentFormula = "=LN(15)"
sheet.Range[currentRow, 1].Text = "'" + currentFormula
sheet.Range[currentRow, 2].Formula = currentFormula
currentRow += 1

# EXP
currentFormula = "=EXP(20)"
sheet.Range[currentRow, 1].Text = "'" + currentFormula
sheet.Range[currentRow, 2].Formula = currentFormula
currentRow += 1

# SQRT
currentFormula = "=SQRT(40)"
sheet.Range[currentRow, 1].Text = "'" + currentFormula
sheet.Range[currentRow, 2].Formula = currentFormula
currentRow += 1

# PI
currentFormula = "=PI()"
sheet.Range[currentRow, 1].Text = "'" + currentFormula
sheet.Range[currentRow, 2].Formula = currentFormula
currentRow += 1

# COS
currentFormula = "=COS(9)"
sheet.Range[currentRow, 1].Text = "'" + currentFormula
sheet.Range[currentRow, 2].Formula = currentFormula
currentRow += 1

# SIN
currentFormula = "=SIN(45)"
sheet.Range[currentRow, 1].Text = "'" + currentFormula
sheet.Range[currentRow, 2].Formula = currentFormula
currentRow += 1

# MAX
currentFormula = "=MAX(10,30)"
sheet.Range[currentRow, 1].Text = "'" + currentFormula
sheet.Range[currentRow, 2].Formula = currentFormula
currentRow += 1

# MIN
currentFormula = "=MIN(5,7)"
sheet.Range[currentRow, 1].Text = "'" + currentFormula
sheet.Range[currentRow, 2].Formula = currentFormula
currentRow += 1

# AVERAGE
currentFormula = "=AVERAGE(12,45)"
sheet.Range[currentRow, 1].Text = "'" + currentFormula
sheet.Range[currentRow, 2].Formula = currentFormula
currentRow += 1

# SUM
currentFormula = "=SUM(18,29)"
sheet.Range[currentRow, 1].Text = "'" + currentFormula
sheet.Range[currentRow, 2].Formula = currentFormula
currentRow += 1

# IF
currentFormula = "=IF(4,2,2)"
sheet.Range[currentRow, 1].Text = "'" + currentFormula
sheet.Range[currentRow, 2].Formula = currentFormula
currentRow += 1

# SUBTOTAL
currentFormula = "=SUBTOTAL(3,Sheet1!A2:F2)"
sheet.Range[currentRow, 1].Text = "'" + currentFormula
sheet.Range[currentRow, 2].Formula = currentFormula
currentRow += 1

# Set width of the 1st, 2nd and 3rd columns
sheet.SetColumnWidth(1, 32)
sheet.SetColumnWidth(2, 16)
sheet.SetColumnWidth(3, 16)

# Create a cell style
style = workbook.Styles.Add("Style")
# Set the horizontal alignment as left
style.HorizontalAlignment = HorizontalAlignType.Left
# Apply the style to the worksheet
sheet.ApplyStyle(style)

# Save the result file
workbook.SaveToFile("AddFormulas.xlsx", ExcelVersion.Version2016)
workbook.Dispose()
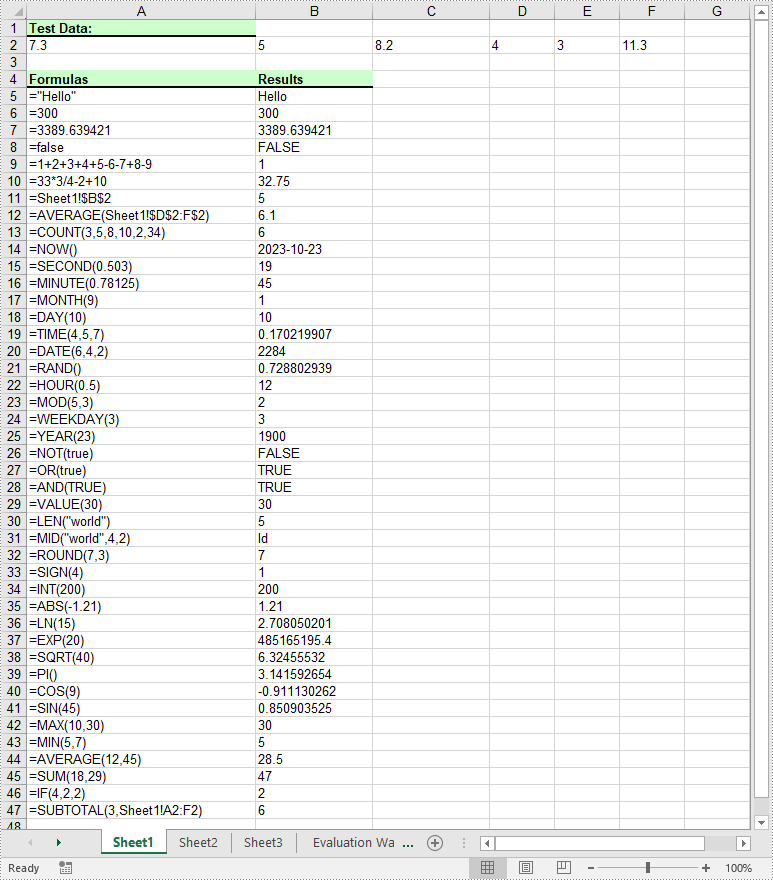
Read Formulas in Excel in Python
To read formulas in an Excel worksheet, you need to loop through all the cells in the worksheet, after that, find the cells containing formulas using the Cell.HasFormula property, and then get the formulas of the cells using the CellRange.Formula property. The detailed steps are as follows.
- Create an object of the Workbook class.
- Load an Excel file using the Workbook.LoadFromFile() method.
- Get a specific worksheet by its index using the Workbook.Worksheets[sheetIndex] property.
- Get the used range of the worksheet using the Worksheet.AllocatedRange property.
- Create an empty list.
- Loop through all the cells in the used range.
- Find the cells containing formulas using the Cell.HasFormula property.
- Get the names and the formulas of the cells using the CellRange.RangeAddressLocal and CellRange.Formula properties.
- Append the cell names and formulas to the list.
- Write the items in the list into a text file.
- Python
from spire.xls import *
from spire.xls.common import *

# Create an object of the Workbook class
workbook = Workbook()
# Load an Excel file
workbook.LoadFromFile("AddFormulas.xlsx")

# Get the first worksheet
sheet = workbook.Worksheets[0]

# Get the used range of the worksheet
usedRange = sheet.AllocatedRange

# Create an empty list
list = []

# Loop through the cells in the used range
for cell in usedRange:
    # Check if the cell has a formula
    if(cell.HasFormula):
        # Get the cell name
        cellName = cell.RangeAddressLocal
        # Get the formula
        formula = cell.Formula
        # Append the cell name and formula to the list
        list.append(cellName + " has a formula: " + formula)

# Write the items in the list into a text file
with open("Formulas.txt", "w", encoding = "utf-8") as text_file:
    for item in list:
        text_file.write(item + "\n")

workbook.Dispose()

Apply for a Temporary License
If you'd like to remove the evaluation message from the generated documents, or to get rid of the function limitations, please request a 30-day trial license for yourself.
Python: Add Images to PowerPoint Presentations
Images have the power to captivate audiences and enhance their understanding of your content. By adding relevant and visually appealing images to your PowerPoint presentations, you can effectively convey complex ideas and make your presentations more memorable and impactful. In this article, we will explain how to add images to PowerPoint presentations in Python using Spire.Presentation for Python.
Install Spire.Presentation for Python
This scenario requires Spire.Presentation for Python and plum-dispatch v1.7.4. They can be easily installed in your VS Code through the following pip command.
pip install Spire.Presentation
If you are unsure how to install, please refer to this tutorial: How to Install Spire.Presentation for Python in VS Code
Add an Image to a Slide in Python
Spire.Presentation for Python offers the ISlide.Shapes.AppendEmbedImageByPath() method to add an image to a specific slide. The detailed steps are as follows.
- Create an object of the Presentation class.
- Load a PowerPoint presentation using Presentation.LoadFromFile() method.
- Get a specific slide by its index through Presentation.Slides[index] property.
- Add an image to the slide using ISlide.Shapes.AppendEmbedImageByPath() method.
- Save the resulting presentation using Presentation.SaveToFile() method.
- Python
from spire.presentation.common import *
import math
from spire.presentation import *

inputFile = "Input.pptx"
outputFile = "AddImageToSlide.pptx"

# Create an object of the Presentation class
presentation = Presentation()
# Load a PowerPoint presentation
presentation.LoadFromFile(inputFile)

# Get the first slide
slide = presentation.Slides[0]

# Insert an image into the slide
imageFile = "Image.png"
left = math.trunc(presentation.SlideSize.Size.Width / float(2)) - 280
rect1 = RectangleF.FromLTRB (left, 140, 120 + left, 260)
image = slide.Shapes.AppendEmbedImageByPath (ShapeType.Rectangle, imageFile, rect1)
image.Line.FillType = FillFormatType.none

# Save the resulting presentation
presentation.SaveToFile(outputFile, FileFormat.Pptx2010)
presentation.Dispose()
Add an Image to a Slide Master in Python
A slide master is the top-level slide that governs the formatting and styling of all other slides within the presentation. When you make changes to the slide master, such as adding a logo, modifying the background or changing the font styles, those changes are automatically applied to all slides based on that slide master. If you want an image to appear on all your slides, you can add it to the slide master.
Spire.Presentation for Python offers the IMasterSlide.Shapes.AppendEmbedImageByPath() method to add an image to a slide master. The detailed steps are as follows.
- Create an object of the Presentation class.
- Load a PowerPoint presentation using Presentation.LoadFromFile() method.
- Get a specific slide master by its index through Presentation.Masters[index] property.
- Add an image to the slide master using IMasterSlide.Shapes.AppendEmbedImageByPath() method.
- Save the resulting presentation using Presentation.SaveToFile() method.
- Python
from spire.presentation.common import *
import math
from spire.presentation import *

inputFile = "Input1.pptx"
outputFile = "AddImageToSlideMaster.pptx"

# Create an object of the Presentation class
presentation = Presentation()
# Load a PowerPoint presentation
presentation.LoadFromFile(inputFile)

# Get the first slide master
master = presentation.Masters[0]

# Insert an image into the slide master
imageFile = "Logo.png"
rect1 = RectangleF.FromLTRB (40, 40, 80, 80)
image = master.Shapes.AppendEmbedImageByPath (ShapeType.Rectangle, imageFile, rect1)
image.Line.FillType = FillFormatType.none

# Save the resulting presentation
presentation.SaveToFile(outputFile, FileFormat.Pptx2010)
presentation.Dispose()

Apply for a Temporary License
If you'd like to remove the evaluation message from the generated documents, or to get rid of the function limitations, please request a 30-day trial license for yourself.
Spire.Doc for Java 11.10.3 synchronizes the AppendHorizonalLine() method to Java
We are happy to announce the release of Spire.Doc for Java 11.10.3. This version synchronizes the AppendHorizonalLine() method to Java and supports switching fonts that do not support drawing characters through the FontFallbackRule method in XML when converting to a non-flow layout document. It also enhances the conversion from Word to PDF, HTML, and OFD. Besides, some known issues are fixed successfully in this version, such as the issue that the result of setting the image zoom size was incorrect. More details are listed below.
Here is a list of changes made in this release
| Category | ID | Description |
| New feature | SPIREDOC-9912 | Synchronizes the AppendHorizonalLine() method to Java.
paragraph.appendHorizonalLine() |
| New feature | - | Supports switching fonts that do not support drawing characters through the FontFallbackRule method in XML when converting to a non-flow layout document.
Document doc = new Document();
doc.loadFromFile(inputFile);
doc.saveFontFallbackRuleSettings(outputFile_xml);
doc.loadFontFallbackRuleSettings(outputFile_xml);
doc.saveToFile(outputFile, FileFormat.PDF);
Instructions:
If there is no XML available, first save an XML using saveFontFallbackRuleSettings and then manually edit the font replacement rules in the XML. The rules consist of three attributes: Ranges correspond to Unicode ranges for each character; FallbackFonts correspond to the font names for substitution; BaseFonts correspond to the font names for characters in the document. When editing the XML, it is important to note that the rules are searched from top to bottom for character matching. After editing the XML, load the rules using the loadFontFallbackRuleSettings method. |
| Bug | SPIREDOC-9711 | Fixes the issue that the program threw "OutOfMemoryError" when using WPS rules to convert Word to PDF. |
| Bug | SPIREDOC-9781 | Fixes the issue that the embedding of "楷体_GB2312" font failed. |
| Bug | SPIREDOC-9842 | Fixes the issue that the Chinese characters garbled after converting RTF to PDF. |
| Bug | SPIREDOC-9854 | Fixes the issue that the editable area was changed after saving the Word document. |
| Bug | SPIREDOC-9860 | Fixes the issue that the editable area was changed after modifying Word documents. |
| Bug | SPIREDOC-9862 | Fixes the issue that the result of setting image zoom size was incorrect. |
| Bug | SPIREDOC-9871 | Fixes the issue that the table style was incorrect after converting Word to HTML. |
| Bug | SPIREDOC-9880 | Fixes the issue that the font size was incorrect after converting HTML to Word. |
| Bug | SPIREDOC-9891 | Fixes the issue that each value would be displayed twice after doing mail merging using executeWidthNestedRegion() method. |
| Bug | SPIREDOC-9892 | Fixes the issue that the file became much larger after converting Word to OFD. |
Python: Insert Page Break into Word Documents
A page break is a formatting element used in documents to indicate the end of one page and the beginning of a new page. It is typically represented by a horizontal line or other visual indicator that separates content into different pages. This feature is commonly used when creating lengthy documents such as reports, essays, or books to enhance the overall layout and readability. In this article, you will learn how to how to insert page break into Word documents in Python using Spire.Doc for Python.
Install Spire.Doc for Python
This scenario requires Spire.Doc for Python and plum-dispatch v1.7.4. They can be easily installed in your VS Code through the following pip command.
pip install Spire.Doc
If you are unsure how to install, please refer to this tutorial: How to Install Spire.Doc for Python in VS Code
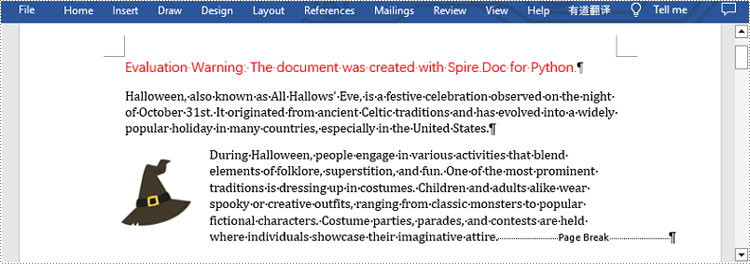
Insert Page Break after a Specific Paragraph
Spire.Doc for Python provides Paragraph.AppendBreak(BreakType.PageBreak) method to insert a page break after a specific paragraph. The following are detailed steps.
- Create an object of Document class.
- Load a sample file from disk using Document.LoadFromFile() method.
- Get the first section of this file by Document.Sections[sectionIndex] property.
- Get the second paragraph in the section by Section.Paragraphs[paragraphIndex] property.
- Insert a page break after this paragraph using Paragraph.AppendBreak(BreakType.PageBreak) method.
- Save the result file using Document.SaveToFile() method.
- Python
from spire.doc import *
from spire.doc.common import *

inputFile =  "sample.docx"
outputFile = "InsertPageBreak.docx"

#Create an object of Document class
document = Document()

#Load a sample file from disk
document.LoadFromFile(inputFile)

#Get the first section of this file
section = document.Sections[0]

#Get the second paragraph in the section
paragraph = section.Paragraphs[1]

#Insert a page break after this paragraph
paragraph.AppendBreak(BreakType.PageBreak)

#Save the result file
document.SaveToFile(outputFile, FileFormat.Docx2013)
document.Close()
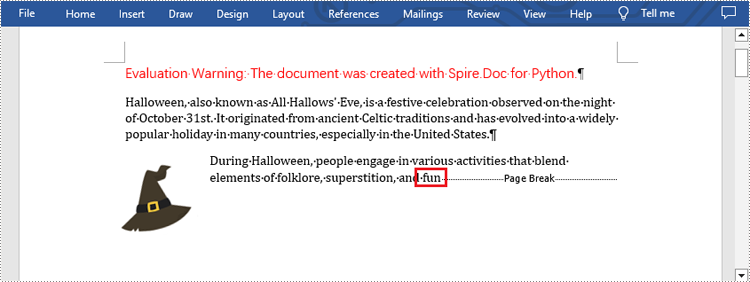
Insert Page Break after a Specific Text
What's more, you are also allowed to insert page break after a specific text by using Paragraph.ChildObjects.Insert() method provided by this library. The following are detailed steps.
- Create an object of Document class.
- Load a sample file from disk using Document.LoadFromFile() method.
- Find a specific text using Document.FindAllString() method.
- Loop through all searched text and access the text range of it by calling TextSelection.GetAsOneRange() method.
- Get the paragraph where the text range is located by ParagraphBase.OwnerParagraph property.
- Get the position index of the text range in the paragraph using Paragraph.ChildObjects.IndexOf() method.
- Create an object of Break class to create a page break.
- Insert page break after the searched text using Paragraph.ChildObjects.Insert() method.
- Save the result file using Document.SaveToFile() method.
- Python
from spire.doc import *
from spire.doc.common import *

inputFile = "sample.docx"
outputFile =  "InsertPageBreakAfterText.docx"

#Create an object of Document class
document = Document()

#Load a sample file from disk
document.LoadFromFile(inputFile)

#Find the specified text
selection = document.FindAllString("fun", True, True)

#Loop through all searched text
for ts in selection:

    #Get the text range of the searched text
    range = ts.GetAsOneRange()

    #Get the paragraph where the text range is located
    paragraph = range.OwnerParagraph

    #Get the position index of the text range in the paragraph
    index = paragraph.ChildObjects.IndexOf(range)

    #Create an object of Break class
    pageBreak = Break(document, BreakType.PageBreak)

    #Insert page break after the searched text
    paragraph.ChildObjects.Insert(index + 1, pageBreak)

#Save the result file
document.SaveToFile(outputFile, FileFormat.Docx2013)
document.Close()
Apply for a Temporary License
If you'd like to remove the evaluation message from the generated documents, or to get rid of the function limitations, please request a 30-day trial license for yourself.
Spire.Doc 11.10.7 enhances the conversion from Word to PDF
We are pleased to announce the release of Spire.Doc 11.10.7. This version fixes the issue that Thai characters were not aligned and wrapped when converting Word to PDF. More details are listed below.
Here is a list of changes made in this release
| Category | ID | Description |
| Bug | SPIREDOC-9831 | Fixes the issue that Thai characters were not aligned and wrapped when converting Word to PDF. |
Python: Add Image Watermarks to PDF Documents
Image watermarks are frequently found on shared documents. Unlike text watermarks, image watermarks provide a simpler and less intrusive way to emphasize copyright, ownership, and confidentiality by displaying company logos, trademarks, warning icons, etc. In addition, adding image watermarks to PDF documents can also help brand promotion and enhance the visual appeal of the documents. This article will explain how to insert image watermarks to PDF documents using Spire.PDF for Python in Python programs.
Install Spire.PDF for Python
This scenario requires Spire.PDF for Python and plum-dispatch v1.7.4. They can be easily installed in your VS Code through the following pip commands.
pip install Spire.PDF
If you are unsure how to install, please refer to this tutorial: How to Install Spire.PDF for Python in VS Code
Add Single Image Watermarks to PDF Documents
Single image watermarks are transparent images at the center of PDF pages. With Spire.PDF for Python, users can draw a specified image as a watermark on any PDF page. The detailed steps are as follows:
- Create an object of PdfDocument class.
- Load a PDF document using PdfDocument.LoadFromFile() method.
- Load the watermark image using PdfImage.FromFile() method.
- Loop through the pages in the document to add the watermark.
- Get a page using PdfDocument.Pages.get_Item() method.
- Set the transparency of the watermark using PdfPageBase.Canvas.SetTransparency() method.
- Draw the watermark image in the center of the page using PdfPageBase.Canvas.DrawImage() method.
- Save the document using PdfDocument.SaveToFile() method.
- Python
from spire.pdf import *
from spire.pdf.common import *

# Create an object of PdfDocument class
pdf = PdfDocument()

# Load a PDF document
pdf.LoadFromFile("Sample.pdf")

# Load the watermark image
image = PdfImage.FromFile("watermark.png")

# Get the width and height of the image
imageWidth = float(image.Width)
imageHeight = float(image.Height)

# Loop through the pages in the document
for i in range(pdf.Pages.Count):
    # Get a page
    page = pdf.Pages.get_Item(i)
    # Set the transparency of the watermark
    page.Canvas.SetTransparency(0.3)
    # Get the width and height of the page
    pageWidth = page.ActualSize.Width
    pageHeight = page.ActualSize.Height
    # Draw the watermark image on the page
    page.Canvas.DrawImage(image, pageWidth/2 - imageWidth/2, pageHeight/2 - imageHeight/2, imageWidth, imageHeight)

# Save the document
pdf.SaveToFile("output/SingleImageWatermark.pdf")
pdf.Close()
Add Repeating Image Watermarks to PDF Documents
Repeating image watermarks are images repeated regularly on PDF pages. Drawing repeated image watermarks on PDF pages with Spire.PDF for Python involves the use of the PdfTillingBrush class. Below are the detailed steps:
- Create an object of PdfDocument class.
- Load a PDF document using PdfDocument.LoadFromFile() method.
- Load the watermark image using PdfImage.FromFile() method.
- Loop through the pages in the document to add the watermark.
- Get a page using PdfDocument.Pages.get_Item() method.
- Create an object of PdfTilingBrush class and set its size to determine the number of repetitions of the watermark.
- Set the transparency of the watermark using PdfTillingBrush.Graphics.SetTransparency() method.
- Translate the coordinate system to the specified position using PdfTillingBrush.Graphics.TranslateTransform() method to make the watermark displayed in the center of each repetition.
- Draw the watermark image on the tilling brush using PdfTillingBrush.Graphics.DrawImage() method.
- Draw the watermark on the page using PdfPageBase.Canvas.DrawRectangle() method.
- Save the document using PdfDocument.SaveToFile() method.
- Python
from spire.pdf.common import *
from spire.pdf import *

# Create an object of PdfDocument class
pdf = PdfDocument()

# Load a PDF document
pdf.LoadFromFile("Sample.pdf")

# Load the watermark image
image = PdfImage.FromFile("watermark.png")

# Loop through the pages of the document
for i in range(pdf.Pages.Count):
    # Get a page
    page = pdf.Pages.get_Item(i)
    # Create an object of PdfTilingBrush class and set its size
    brush = PdfTilingBrush(SizeF(page.Canvas.Size.Width / float(3), page.Canvas.Size.Height / float(3)))
    # Set the transparency of the watermark
    brush.Graphics.SetTransparency(0.3)
    brush.Graphics.Save()
    # Translate the coordinate to the specified position
    brush.Graphics.TranslateTransform(brush.Size.Width/2 - image.Width/2, brush.Size.Height/2 - image.Height/2)
    # Draw the watermark image on the brush
    brush.Graphics.DrawImage(image, 0.0, 0.0, float(image.Width), float(image.Height))
    brush.Graphics.Restore()
    # Draw the watermark on the page
    page.Canvas.DrawRectangle(brush, RectangleF(PointF(0.0, 0.0), page.Canvas.Size))

# Save the PDF document
pdf.SaveToFile("output/RepeatingImageWatermark.pdf", FileFormat.PDF)
pdf.Close()
Apply for a Temporary License
If you'd like to remove the evaluation message from the generated documents, or to get rid of the function limitations, please request a 30-day trial license for yourself.
Python: Add Headers and Footers to Excel
Headers and footers are areas located at the top and bottom of each page in a document, used to add additional information or elements. Headers typically include document titles, company names, dates, and other information, while footers often contain page numbers, file paths, copyright statements, and other details. By setting headers and footers in Excel, documents can be made more professional and organized. In this article, we will show you how to add headers and footers to Excel by using Spire.XLS for Python.
Spire.XLS for Python provides the PageSetup class to work with the page setup in Excel including headers and footers. Specifically, it contains LeftHeader property, CenterHeader property, RightHeader property, LeftFooter property, etc. to represent the left section, center section and right section of a header or footer. To add fields to headers or footers, or to apply formatting to text, you'll need to use the scripts listed in the following table.
| Script | Description |
| &P | The current page numbers. |
| &N | The total number of pages. |
| &D | The current data. |
| &T | The current time. |
| &G | A picture. |
| &A | The worksheet name. |
| &F | The file name. |
| &B | Make text bold. |
| &I | Italicize text. |
| &U | Underline text. |
| &"font name" | Represents a font name, for example, &"Arial". |
| & + Integer | Represents font size, for example, &12. |
| &K + Hex color code | Represents font color, for example, &KFF0000. |
Install Spire.XLS for Python
This scenario requires Spire.XLS for Python and plum-dispatch v1.7.4. They can be easily installed in your VS Code through the following pip command.
pip install Spire.XLS
If you are unsure how to install, please refer to this tutorial: How to Install Spire.XLS for Python in VS Code
Add Text to the Header or Footer in Excel
Spire.XLS for Python allows you to add formatted text to the certain section of the header or footer. In this way, you can set different elements in Excel, such as file titles, page numbers or date. Here are the detailed steps.
- Create an object of Workbook class.
- Load a sample Excel file using Workbook.LoadFromFile() method.
- Get the specific worksheet by Workbook.Worksheets[index] property.
- Add text to the left header by setting PageSetup.LeftHeader property as you like.
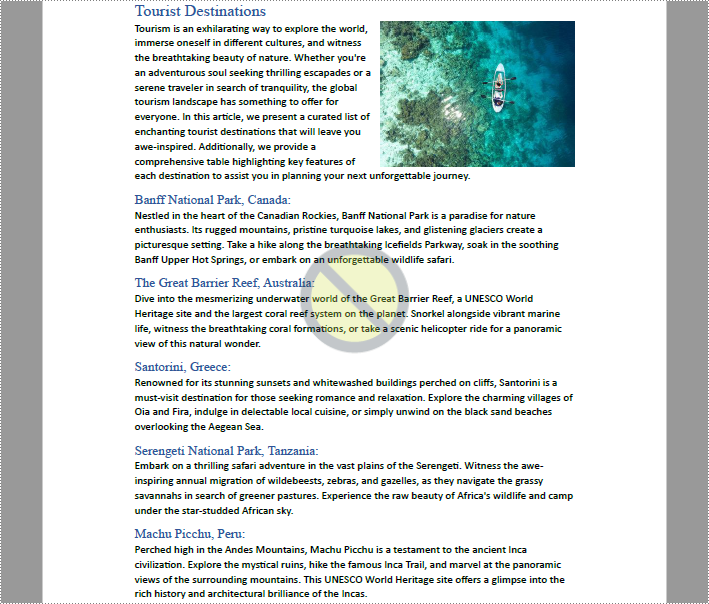
- Add page number to the center footer by setting PageSetup.CenterFooter property to &P.
- Add the current date to the right footer by setting PageSetup.RightFooter property to &D.
- Save the result file using Workbook.SaveToFile() method.
- Python
from spire.xls import *
from spire.xls.common import *

inputFile = "sample.xlsx"
outputFile = "TextHeaderFooter.xlsx"

#Create an object of Workbook class
workbook = Workbook()

#Load a sample file from disk
workbook.LoadFromFile(inputFile)

#Get the first worksheet of this file
Worksheet = workbook.Worksheets[0]

#Add text to the left header
Worksheet.PageSetup.LeftHeader = "&\"Calibri\"&14 Sales Volume"

#Add page number to the center footer
Worksheet.PageSetup.CenterFooter = "&P"

#Add the current date to the right footer
Worksheet.PageSetup.RightFooter = "&D"

#Set the view mode of the sheet
Worksheet.ViewMode = ViewMode.Layout

#Save the result file
workbook.SaveToFile(outputFile, ExcelVersion.Version2010)
workbook.Dispose()
Add Images to the Header or Footer in Excel
What's more, Spire.XLS for Python also supports adding images to the header or footer. The following are detailed steps.
- Create an object of Workbook class.
- Load a sample Excel file using Workbook.LoadFromFile() method.
- Get the specific worksheet by Workbook.Worksheets[index] property.
- Load an image and set it as the image source of the left header by PageSetup.LeftHeaderImage property.
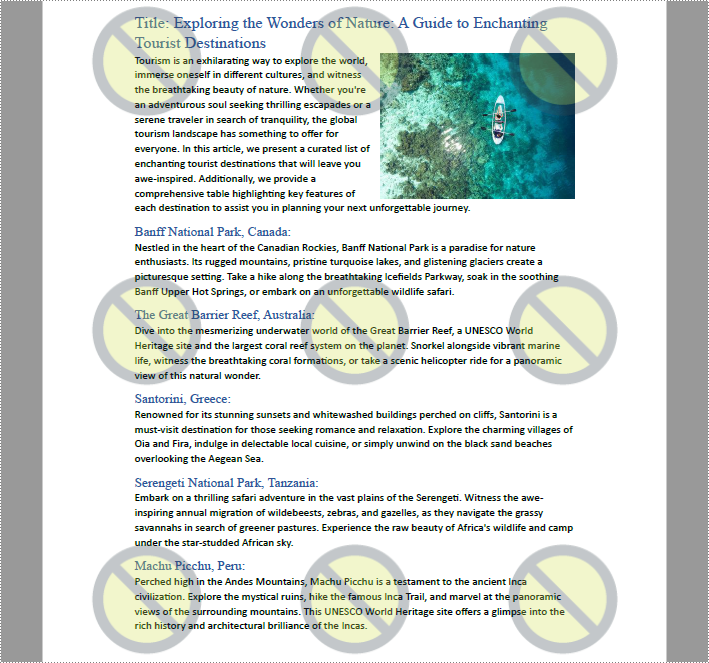
- Display the image in the left header section by setting PageSetup.LeftHeader property to “&G”.
- Set it as the image source of the center footer by PageSetup.CenterFooterImage property.
- Display the image in the center footer section by setting PageSetup.CenterFooter property to “&G”.
- Save the result file using Workbook.SaveToFile() method.
- Python
from spire.xls import *
from spire.common import *

inputFile = "sample.xlsx"
inputImage = "Logo.png"
outputFile = "ImageHeaderFooter.xlsx"

#Create an object of workbook class
workbook = Workbook()

#Load a sample file from disk
workbook.LoadFromFile(inputFile)

#Get the first sheet of this file
sheet = workbook.Worksheets[0]

#Load an image from disk
image = Image.FromFile(inputImage)

#Add the image to the left header
sheet.PageSetup.LeftHeaderImage = image
sheet.PageSetup.LeftHeader = "&G"

#Add the image to the center footer
sheet.PageSetup.CenterFooterImage = image
sheet.PageSetup.CenterFooter = "&G"

#Set the view mode of the sheet
sheet.ViewMode = ViewMode.Layout

#Save the result file
workbook.SaveToFile(outputFile, ExcelVersion.Version2010)
workbook.Dispose()
Apply for a Temporary License
If you'd like to remove the evaluation message from the generated documents, or to get rid of the function limitations, please request a 30-day trial license for yourself.
Python: Add Text Watermarks to PDF Documents
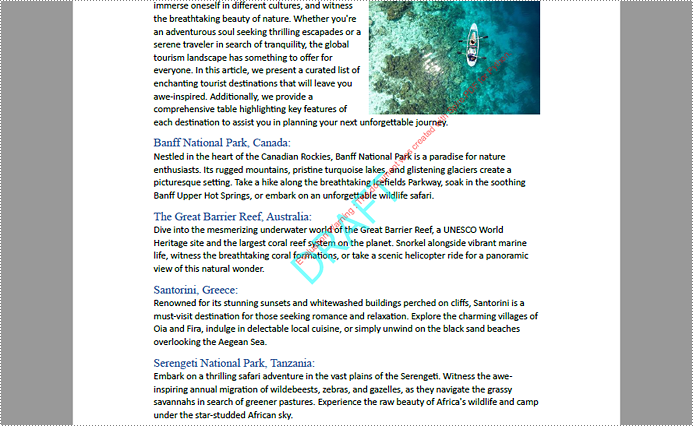
Text watermarks in PDF documents are semitransparent text displayed on PDF pages. By displaying copyright, confidentiality, author, company, or other information on PDF pages, watermarks can protect document copyright and confidential information, facilitate document identification and management, and help with branding. Whether it is a publicly released document or a document that needs to be kept confidential, adding a text watermark to the document will greatly help with document protection and personalization. This article will show how to use Spire.PDF for Python to add text watermarks to PDF documents through Python programs.
Install Spire.PDF for Python
This scenario requires Spire.PDF for Python and plum-dispatch v1.7.4. They can be easily installed in your VS Code through the following pip commands.
pip install Spire.PDF
If you are unsure how to install, please refer to this tutorial: How to Install Spire.PDF for Python in VS Code
Add Single-Line Text Watermarks to PDF Documents
A single-line text watermark is usually text displayed slanted in the center of a page. Below are the detailed steps to add a single-line text watermark in a PDF document:
- Create an object of PdfDocument class and load a PDF document using PdfDocument.LoadFromFile() method.
- Create a font.
- Specify the watermark text and calculate the position of the watermark.
- Loop through the pages in the document to add watermarks.
- Get a page using PdfDocument.Pages.get_Item() method.
- Set the transparency using PdfPageBase.Canvas.SetTransparency() method.
- Translate the page coordinate system to the specified position using PdfPageBase.Canvas.TranslateTransform() method and rotate the coordinate system 45 degrees counterclockwise using PdfPageBase.Canvas.RotateTransform() method, so that the watermark will be tilted 45 degrees counterclockwise in the center of the page.
- Draw the watermark text on the page using PdfPageBase.Canvas.DrawString() method.
- Save the document using PdfDocument.SaveToFile() method.
- Python
from spire.pdf import *
from spire.pdf.common import *
import math

# Create an object of PdfDocument class
pdf = PdfDocument()

# Load a PDF document
pdf.LoadFromFile("Sample.pdf")

# Create an object of PdfTrueTypeFont class
font = PdfTrueTypeFont("HarmonyOS Sans SC", 48.0, 0, True)

# Specify the watermark text and calculate the position of the watermark
text = "DRAFT"
set1 = float (font.MeasureString(text).Width * math.sqrt(2) / 4)
set2 = float (font.MeasureString(text).Height * math.sqrt(2) / 4)

# Loop through the pages in the document
for i in range(pdf.Pages.Count):
    # Get a page
    page = pdf.Pages.get_Item(i)
    # Set the transparency of the watermark
    page.Canvas.SetTransparency(0.5)
    # Translate the page coordinate system to the specified position
    page.Canvas.TranslateTransform(page.Canvas.Size.Width / 2 - set1 - set2,
                                   page.Canvas.Size.Height / 2 + set1 - set2)
    # Rotate the coordinate system 45 degrees counterclockwise
    page.Canvas.RotateTransform(-45.0)
    # Draw the watermark on the page
    page.Canvas.DrawString(text, font, PdfBrushes.get_Cyan(), 0.0, 0.0)

# Save the document
pdf.SaveToFile("output/SingleLineTextWatermark.pdf")
pdf.Close()
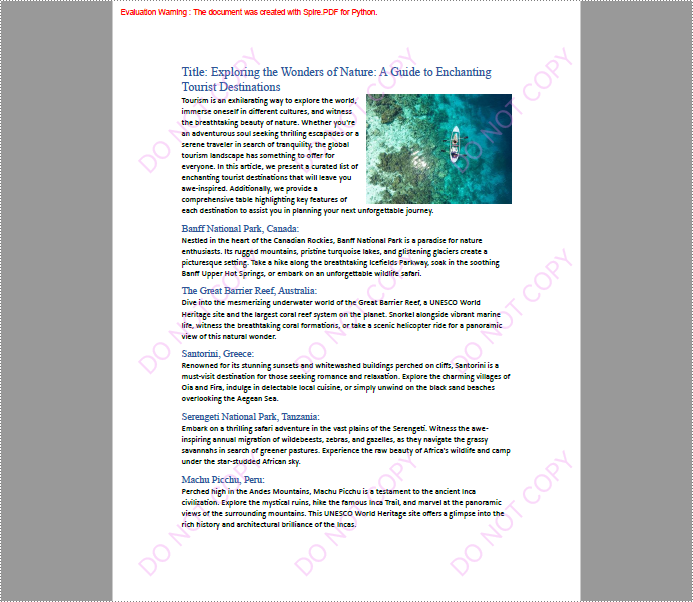
Add Multi-Line Text Watermarks to PDF Documents
Multi-line text watermarks are watermarks that are regularly displayed multiple times on a PDF page. Users can create a multi-line text watermark using a PdfTillingBrush object and the repeating times of the watermark can be controlled by modifying the size of the object. The detailed steps are as follows:
- Create an object of PdfDocument class and load a PDF document using PdfDocument.LoadFromFile() method.
- Create a font and specify the watermark text.
- Loop through the pages in the document to add watermarks.
- Get a page using PdfDocument.Pages.get_Item() method.
- Create an object of PdfTillingBrush class and set its size.
- Set the transparency using PdfTillingBrush.Graphics.SetTransparency() method.
- Translate the coordinate system to the specified position using PdfTillingBrush.Graphics.TranslateTransform() method and rotate the coordinate system 45 degrees counterclockwise using PdfTillingBrush.Graphics.RotateTransform() method, so that the watermark will be tilted 45° counterclockwise in the center of each repetition.
- Draw the watermark text on the tilling brush using PdfTillingBrush.Graphics.DrawString() method.
- Draw the watermark on the page using PdfPageBase.Canvas.DrawRectangle() method.
- Save the document using PdfDocument.SaveToFile() method.
- Python
from spire.pdf.common import *
from spire.pdf import *

# Create an object of PdfDocument class
pdf = PdfDocument()

# Load a PDF document
pdf.LoadFromFile("Sample.pdf")

# Create an object of PdfTrueTypeFont class
font = PdfTrueTypeFont("HarmonyOS Sans SC", 32.0, 0, True)

# Specify the watermark text
text = "DO NOT COPY"

# Iterate through the pages of the document
for i in range(pdf.Pages.Count):
    # Get a page
    page = pdf.Pages.get_Item(i)
    # Create an object of PdfTilingBrush class
    brush = PdfTilingBrush(SizeF(page.Canvas.ClientSize.Width / float(3), page.Canvas.ClientSize.Height / float(3)))
    # Set the transparency of the watermark
    brush.Graphics.SetTransparency(0.3)
    brush.Graphics.Save()
    # Translate the coordinate system of the brush to the specified position
    brush.Graphics.TranslateTransform(brush.Size.Width / float(2), brush.Size.Height / float(2))
    # Rotate the coordinate system 45 degrees counterclockwise
    brush.Graphics.RotateTransform(-45.0)
    # Draw the watermark text on the brush
    brush.Graphics.DrawString(text, font, PdfBrushes.get_Violet(), 0.0, 0.0, PdfStringFormat(PdfTextAlignment.Center))
    brush.Graphics.Restore()
    brush.Graphics.SetTransparency(1.0)
    # Draw the watermark on the page
    page.Canvas.DrawRectangle(brush, RectangleF(PointF(0.0, 0.0), page.Canvas.ClientSize))

# Save the PDF document
pdf.SaveToFile("output/MultiLineTextWatermark.pdf")
pdf.Close()
Apply for a Temporary License
If you'd like to remove the evaluation message from the generated documents, or to get rid of the function limitations, please request a 30-day trial license for yourself.
Spire.PDF for Java 9.10.3 supports configuring AES encryption algorithms and setting the names of existing fields
We are delighted to announce the release of Spire.PDF for Java 9.10.3. This version supports configuring AES encryption algorithms and setting the names of existing fields. Besides, it also enhances the conversion from PDF to SVG, PPTX, and PDFA2B as well as OFD to PDF. In addition, some known issues are fixed successfully in this version, such as the issue that the application threw the "NullPointerException" when loading PDF documents. More details are listed below.
Here is a list of changes made in this release
| Category | ID | Description |
| New feature | - | Synchronizes the new encryption and decryption interface to Java, and supports configuring the AES encryption algorithm.
PdfEncryptionAlgorithm.AES //Create password security policies
PdfSecurityPolicy securityPolicy = new PdfPasswordSecurityPolicy("", "123456");
//Set AES encryption algorithm
securityPolicy.setEncryptionAlgorithm( PdfEncryptionAlgorithm.AES_256);
//Set document permissions (ownership), default is ForbidAll.
securityPolicy.setDocumentPrivilege(PdfDocumentPrivilege.getForbidAll());
securityPolicy.getDocumentPrivilege().setAllowDegradedPrinting(true);
securityPolicy.getDocumentPrivilege().setAllowModifyAnnotations(true);
securityPolicy.getDocumentPrivilege().setAllowAssembly(true);
securityPolicy.getDocumentPrivilege().setAllowModifyContents(true);
securityPolicy.getDocumentPrivilege().setAllowFillFormFields(true);
securityPolicy.getDocumentPrivilege().setAllowPrint(true);
pdf.encrypt(securityPolicy);
PdfDocument pdf = new PdfDocument(); //Pass the open password to open the PDF document pdf.loadFromFile(inputFile, "1234"); //Decrypt pdf.decrypt(); pdf.saveToFile(outputFile, FileFormat.PDF); pdf.dispose(); |
| New feature | SPIREPDF-6306 | Supports setting the names of existing fields.
PdfDocument document=new PdfDocument();
document.loadFromFile("input.pdf");
PdfFormWidget formWidget = (PdfFormWidget)document.getForm();
for (int i = 0; i < formWidget.getFieldsWidget().getCount(); i++)
{
    PdfField field = (PdfField)formWidget.getFieldsWidget().get(i);
    for (PdfFieldWidget widget : (Iterable<? extends PdfFieldWidget>) formWidget.getFieldsWidget())
    {
        if (widget.getName() == "oldName")
        {
            widget.setName("NewName");
        }
    }
}
document.saveToFile("result.pdf",FileFormat.PDF);
|
| Bug | SPIREPDF-6253 SPIREPDF-6313 |
Fixes the issue that the background was incorrect after converting PDF to SVG. |
| Bug | SPIREPDF-6275 | Fixes the issue that the shape color was incorrect and the content was missing after converting PDF to PPTX. |
| Bug | SPIREPDF-6277 | Fixes the issue that images were obstructed after converting PDF to PPTX. |
| Bug | SPIREPDF-6300 | Fixes the issue that the standard validation failed after converting PDF to PDFA2B. |
| Bug | SPIREPDF-6307 | Fixes the issue that stamps were lost after converting OFD to PDF. |
| Bug | SPIREPDF-6324 | Fixes the issue that the program threw "NullPointerException" when loading PDF. |
Spire.Presentation 8.10.2 supports getting location information of the text within shapes
We are pleased to announce the release of Spire.Presentation 8.10.2. This version supports getting location information of the text within shapes. Besides, it also supports getting the Ascent and Descent properties of the text within shapes and converting shapes to SVG format. What's more, it has fixed the issue that there was a blank space when opening SVG files in the browser after converting PPT to SVG. More details are listed below.
Here is a list of changes made in this release
| Category | ID | Description |
| New feature | SPIREPPT-2324 | Supported the functionality to obtain the text position information within a shape.
Presentation ppt = new Presentation();
ppt.LoadFromFile(inputFile);
StringBuilder sb = new StringBuilder();
ISlide slide = ppt.Slides[0];
for (int i = 0; i < slide.Shapes.Count; i++)
 {
     IShape shape = slide.Shapes[i];
     if (shape is IAutoShape)
     {
         IAutoShape autoshape = slide.Shapes[i] as IAutoShape;
         string text = autoshape.TextFrame.Text;
         //obtain the text position information
         PointF point = autoshape.TextFrame.GetTextLocation();
         sb.AppendLine("Shape " + i + ":" + text + "\r\n" + "location:" + point.ToString());
     }
}
File.AppendAllText(outputFile, sb.ToString());
ppt.Dispose();
|
| New feature | SPIREPPT-2350 | Supported the functionality to get the Ascent and Descent properties of text within a Shape.
Presentation ppt = new Presentation();
ppt.LoadFromFile(inputFile);
ISlide slide = ppt.Slides[0];
IAutoShape autoshape = slide.Shapes[0] as IAutoShape;
IList<LineText> lines = autoshape.TextFrame.GetLayoutLines();
for (int i = 0; i < lines.Count; i++)
{
   float ascent= lines[i].Ascent;
   float descent = lines[i].Descent;
}
|
| New feature | SPIREPPT-2365 | Supported the functionality to convert shapes to SVG format.
Presentation ppt = new Presentation();
ppt.LoadFromFile("FreeForm.pptx");
ISlide slide = ppt.Slides[0];
int num = 0;
foreach (IShape shape in slide.Shapes)
{
    byte[] svgByte = shape.SaveAsSvg();
    FileStream fs = new FileStream("shape_" + num + ".svg",FileMode.Create);
    fs.Write(svgByte, 0, svgByte.Length);
    fs.Close();
    num++;
}
|
| Bug | SPIREPPT-2350 | Fixed the issue of SVG files appearing blank when opening them in a browser after converting PPT to SVG. |