Python: Set and Retrieve PDF Properties
PDF properties refer to the information embedded within the document that provides detailed information about the documents, such as author, creation date, last modification date, etc. Users can check the properties of a PDF document in PDF viewers to quickly grasp the key information of the document. Apart from the built-in properties, PDF documents also offer the feature of customizing properties to help provide additional information about the document. Understanding how to specify and access this document information facilitates the creation of user-friendly documents and the processing of documents in large quantities. In this article, we will explore how to set and retrieve PDF properties through Python programs using Spire.PDF for Python.
Install Spire.PDF for Python
This scenario requires Spire.PDF for Python and plum-dispatch v1.7.4. They can be easily installed in your VS Code through the following pip commands.
pip install Spire.PDF
If you are unsure how to install, please refer to this tutorial: How to Install Spire.PDF for Python on Windows
Set PDF Properties with Python
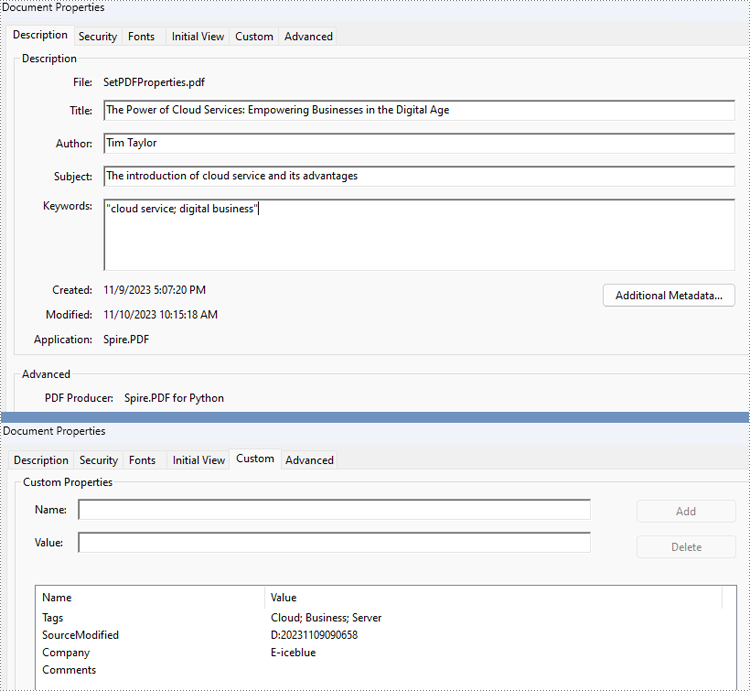
Spire.PDF for Python provides several properties under the PdfDocumentInformation class for setting built-in document properties, such as author, subject, keywords. Besides, it also provides the PdfDocumentInformation.SetCustomProperty() method to set custom properties. The following are the detailed steps to set PDF properties:
- Create an object of PdfDocument class and load a PDF document using PdfDocument.LoadFromFile() method.
- Get the properties of the document through PdfDocument.DocumentInformation property.
- Set the built-in properties through properties under PdfDocumentInformation class.
- Set custom properties using PdfDocumentInformation.SetCustomProperty() method.
- Save the document using PdfDocument.SaveToFile() method.
- Python
from spire.pdf import *
from spire.pdf.common import *

# Create an object of PdfDocument class and load a PDF document
pdf = PdfDocument()
pdf.LoadFromFile("Sample.pdf")

# Get the properties of the document
properties = pdf.DocumentInformation

# Set built-in properties
properties.Author = "Tim Taylor"
properties.Creator = "Spire.PDF"
properties.Keywords = "cloud service; digital business"
properties.Subject = "The introduction of cloud service and its advantages"
properties.Title = "The Power of Cloud Services: Empowering Businesses in the Digital Age"
properties.Producer = "Spire.PDF for Python"

# Set custom properties
properties.SetCustomProperty("Company", "E-iceblue")
properties.SetCustomProperty("Tags", "Cloud; Business; Server")

# Save the document
pdf.SaveToFile("output/SetPDFProperties.pdf")
pdf.Close()
Retrieve PDF Properties with Python
Information in built-in PDF properties can be obtained using the properties under the PdfDocumentInformation class, while that in custom PDF properties can be obtained using PdfDocumentInformation.GetCustomProperty() method. The detailed steps are as follows:
- Create an object of PdfDocument class and load a PDF document using PdfDocument.LoadFromFile() method.
- Get the properties of the document through PdfDocument.DocumentInformation property.
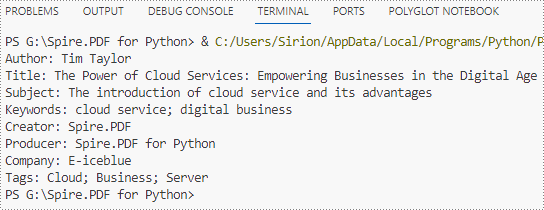
- Retrieve the built-in properties through properties under PdfDocumentInformation class and custom properties using PdfDocumentInformation.GetCustomProperty() method and print them.
- Python
from spire.pdf import *
from spire.pdf.common import *

# Create an object of PdfDocument class and load a PDF document
pdf = PdfDocument()
pdf.LoadFromFile("output\SetPDFProperties.pdf")

# Get the properties of the document
properties = pdf.DocumentInformation

# Create a StringBuilder object
information = ""

# Retrieve the built-in properties
information += "Author: " + properties.Author
information += "\nTitle: " + properties.Title
information += "\nSubject: " + properties.Subject
information += "\nKeywords: " + properties.Keywords
information += "\nCreator: " + properties.Creator
information += "\nProducer: " + properties.Producer

# Retrieve the custom properties
information += "\nCompany: " + properties.GetCustomProperty("Company")
information += "\nTags: " + properties.GetCustomProperty("Tags")

# Print the document properties
print(information)
pdf.Close()
Apply for a Temporary License
If you'd like to remove the evaluation message from the generated documents, or to get rid of the function limitations, please request a 30-day trial license for yourself.
Spire.PDF 9.11.4 adds the new PdfImageHelper interface to process images
We are excited to announce the release of Spire.PDF 9.11.4. This version adds the new PdfImageHelper interface for image extraction, deletion, replacement and compression. It also enhances the conversion from PDF to XPS and XPS to PDF. Moreover, some known issues are fixed in this version, such as the issue that two columns of the extracted PDF table were merged. More details are listed below.
Here is a list of changes made in this release
| Category | ID | Description |
| New feature | - | Adds the new PdfImageHelper interface for image extraction, deletion, replacement and compression. Key code snippets are as follows: // Delete image:
imageHelper.DeleteImage(imageInfos[0]);
// Extract images:
int index = 0;
foreach (PdfImageInfo info in imageInfos)
{
info.Image.Save(outputFile_I + string.Format("Image-{0}.png", index));
index++;
}
// Replace image:
PdfImage image = PdfImage.FromFile(TestUtil.DataPath + "ImgFiles/E-iceblue logo.png");
imageHelper.ReplaceImage(imageInfos[0], image);
// Compress images:
foreach (PdfPageBase page in doc.Pages)
{
foreach (PdfImageInfo info in imageHelper.GetImagesInfo(page))
{
bool success = info.TryCompressImage();
}
}
|
| Bug | SPIREPDF-5781 | Fixes the issue that two columns of the extracted PDF table were merged into one. |
| Bug | SPIREPDF-6225 | Fixes the issue that the result document of XPS to PDF conversion was blank. |
| Bug | SPIREPDF-6232 | Fixes the issue that it popped up page error when opening PDF converted from XPS with Adobe tools. |
| Bug | SPIREPDF-6355 | Fixes the issue that extra characters appeared in the content after converting PDF to XPS. |
| Bug | SPIREPDF-6361 | Fixes the issue that the program threw an exception System.NullReferenceException when loading PDF documents. |
Python: Create Tables in a Word Document
A table is a powerful tool in a Word document that allows you to organize and present information in a structured manner. It consists of rows and columns, forming a grid-like structure. Tables are commonly used for various purposes, such as creating schedules, comparing data, or displaying data in a neat and organized format. In this article, you will learn how to programmatically create tables in a Word document in Python using Spire.Doc for Python.
- Create a Simple Table in Word in Python
- Create a Table from an HTML String in Python
- Merge and Split Cells in a Table in Python
- Fill a Table with Data in Word in Python
Install Spire.Doc for Python
This scenario requires Spire.Doc for Python and plum-dispatch v1.7.4. They can be easily installed in your VS Code through the following pip command.
pip install Spire.Doc
If you are unsure how to install, please refer to this tutorial: How to Install Spire.Doc for Python on Windows
Prerequisite Knowledge
Spire.Doc for Python offers the Table class to represent a table in a Word document. You can create table objects either through the constructor or the Section.AddTable() method. After the table object is created, you can use the Table.AddRow() method to dynamically add rows to the table, or specify the number of rows and columns of the table, and then populate it with data in a single pass.
Also, Spire.Doc for Python supports creating tables from an HTML string. This method does not return an object of Table. Therefore, you cannot use the properties or methods under the Table class to deal with the table created from an HTML string. You need to set up the content and style of the table in the HTML string.
Create a Simple Table in Word in Python
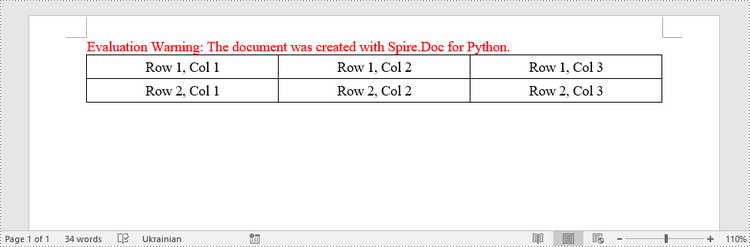
This example demonstrates how to create a simple plain table using the Table class and how to add rows one by one. Here are the main steps.
- Create a Document object.
- Add a section to it using Document.AddSection() method.
- Create a Table object.
- Add a row to it using Table.AddRow() method.
- Get a specific cell of the row through Row.Cells[index] property.
- Add text to the cell using TableCell.AddParagraph().AppendText() method.
- Add the table to the document using Section.AddTable() method.
- Save the document to a .docx file using Document.SaveToFile() method.
- Python
from spire.doc import *
from spire.doc.common import *

# Create a Document object
doc = Document()

# Add a section
section = doc.AddSection()

# Create a table
table = Table(doc, True)

# Set the width of table
table.PreferredWidth = PreferredWidth(WidthType.Percentage, int(100))

# Set the border of table
table.TableFormat.Borders.BorderType = BorderStyle.Single
table.TableFormat.Borders.Color = Color.get_Black()

# Add a row
row = table.AddRow(False, 3)
row.Height = 20.0

# Add data to the cells
cell = row.Cells[0]
cell.CellFormat.VerticalAlignment = VerticalAlignment.Middle
paragraph = cell.AddParagraph()
paragraph.Format.HorizontalAlignment = HorizontalAlignment.Center
paragraph.AppendText("Row 1, Col 1")
cell = row.Cells[1]
cell.CellFormat.VerticalAlignment = VerticalAlignment.Middle
paragraph = cell.AddParagraph()
paragraph.Format.HorizontalAlignment = HorizontalAlignment.Center
paragraph.AppendText("Row 1, Col 2")
cell = row.Cells[2]
cell.CellFormat.VerticalAlignment = VerticalAlignment.Middle
paragraph = cell.AddParagraph()
paragraph.Format.HorizontalAlignment = HorizontalAlignment.Center
paragraph.AppendText("Row 1, Col 3")

# Add the second row
row = table.AddRow(False, 3)
row.Height = 20.0
cell = row.Cells[0]
cell.CellFormat.VerticalAlignment = VerticalAlignment.Middle
paragraph = cell.AddParagraph()
paragraph.Format.HorizontalAlignment = HorizontalAlignment.Center
paragraph.AppendText("Row 2, Col 1")
cell = row.Cells[1]
cell.CellFormat.VerticalAlignment = VerticalAlignment.Middle
paragraph = cell.AddParagraph()
paragraph.Format.HorizontalAlignment = HorizontalAlignment.Center
paragraph.AppendText("Row 2, Col 2")
cell = row.Cells[2]
cell.CellFormat.VerticalAlignment = VerticalAlignment.Middle
paragraph = cell.AddParagraph()
paragraph.Format.HorizontalAlignment = HorizontalAlignment.Center
paragraph.AppendText("Row 2, Col 3")

# Add the table to the section
section.Tables.Add(table)

# Save the document
doc.SaveToFile("output/CreateTable.docx", FileFormat.Docx2013)
doc.Close()
Create a Table from an HTML String in Python
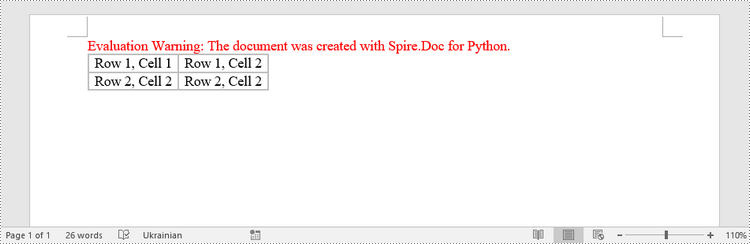
To create a table from an HTML string, use the Paragraph.AppendHTML() method. The following are the steps.
- Create a Document object.
- Add a section to it using Document.AddSection() method.
- Specify the HTML string for generating the table.
- Add a paragraph using Section.AddParagraph() method.
- Add the HTML table to the paragraph using Paragraph.AppendHTML() method.
- Save the document to a .docx file using Document.SaveToFile() method.
- Python
from spire.doc import *
from spire.doc.common import *

# Create a Document object
document = Document()

# Add a section
section = document.AddSection()

# Specify HTML string
HTML = "<table border='2px'>" + "<tr>" + "<td>Row 1, Cell 1</td>" + "<td>Row 1, Cell 2</td>" + \
    "</tr>" + "<tr>" + "<td>Row 2, Cell 2</td>" + \
    "<td>Row 2, Cell 2</td>" + "</tr>" + "</table>"

# Add a paragraph
paragraph = section.AddParagraph()

# Append HTML string to the paragraph
paragraph.AppendHTML(HTML)

# Save to Word document
document.SaveToFile("output/HtmlTable.docx", FileFormat.Docx2013)
document.Close()
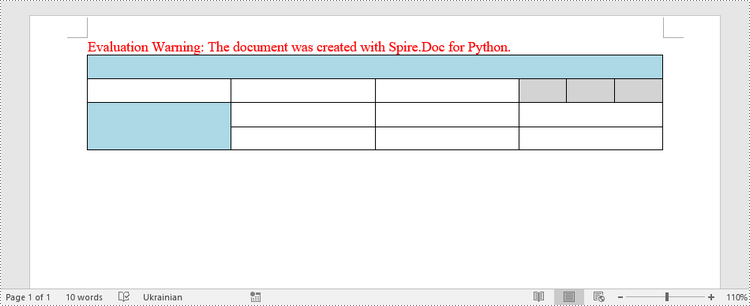
Merge and Split Cells in a Table in Python
When working with tables, the ability to merge or split cells provides a powerful way to customize and format data. This example shows you how to combine adjacent cells into a single cell and how to divide a single cell into multiple smaller cells using Spire.Doc for Python.
- Create a Document object.
- Add a section using Document.AddSection() method.
- Add a table using Section.AddTable() method.
- Set the column number and row number of the table using Table.ResetCells() method.
- Horizontally merge cells using Table.ApplyHorizontalMerge() method.
- Vertically merge cells using Table.ApplyVerticalMerge() method.
- Split a cell into multiple smaller cells using TableCell.SplitCell() method.
- Save the document to a .docx file using Document.SaveToFile() method.
- Python
from spire.doc import *
from spire.doc.common import *

# Create a Document object
document = Document()

# Add a section
section = document.AddSection()

# Create a table
table = section.AddTable(True)

# Set the row number and column number of table
table.ResetCells(4, 4)

# Set the width of table
table.PreferredWidth = PreferredWidth(WidthType.Percentage, int(100))

# Set row height
for i in range(0, table.Rows.Count):
    table.Rows[i].Height = 20.0

# Horizontally merge cells
table.ApplyHorizontalMerge(0, 0, 3)

# Vertically merge cells
table.ApplyVerticalMerge(0, 2, 3)

# Get a cell
cell = table.Rows[1].Cells[3]

# Split the cell into 3 smaller cells
cell.SplitCell(3, 0)

# Fill specified cells with color
table.Rows[0].Cells[0].CellFormat.BackColor = Color.get_LightBlue()
table.Rows[2].Cells[0].CellFormat.BackColor = Color.get_LightBlue()
table.Rows[1].Cells[3].CellFormat.BackColor = Color.get_LightGray()
table.Rows[1].Cells[4].CellFormat.BackColor = Color.get_LightGray()
table.Rows[1].Cells[5].CellFormat.BackColor = Color.get_LightGray()

# Save to Word document
document.SaveToFile("output/MergeAndSplit.docx", FileFormat.Docx2013)
document.Close()
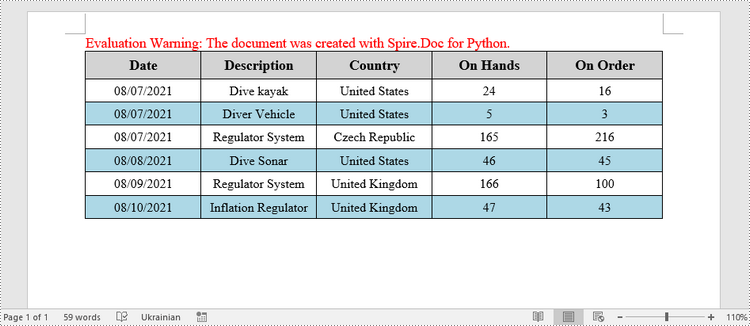
Fill a Table with Data in Word in Python
This example creates a 5x7 table, writes the data from lists into the cells, and applies different formatting to the header row and other rows. The following are the main steps.
- Create a Document object.
- Add a section using Document.AddSection() method.
- Add a table using Section.AddTable() method.
- Specify the data for filling the table in two lists.
- Reset the row number and column number of the table depending on the height and width of the data using Table.ResetCells() method.
- Write data into the corresponding cells using TableCell.AddParagraph().AppendText() method.
- Apply different colors to different rows through TableCell.CellFormat.BackColor property.
- Save the document to a .docx file using Document.SaveToFile() method.
- Python
import math
from spire.doc import *
from spire.doc.common import *

# Create a Document object
doc = Document()

# Add a section
section = doc.AddSection()

# Create a table
table = section.AddTable(True)

# Specify table data
header_data = ["Date", "Description", "Country", "On Hands", "On Order"]
row_data = [ ["08/07/2021","Dive kayak","United States","24","16"],
                ["08/07/2021","Diver Vehicle","United States","5","3"],
                ["08/07/2021","Regulator System","Czech Republic","165","216"],
                ["08/08/2021","Dive Sonar","United States","46","45"],
                ["08/09/2021","Regulator System","United Kingdom","166","100"],
                ["08/10/2021","Inflation Regulator","United Kingdom","47","43"]]

# Set the row number and column number of table
table.ResetCells(len(row_data) + 1, len(header_data))

# Set the width of table
table.PreferredWidth = PreferredWidth(WidthType.Percentage, int(100))

# Get header row
headerRow = table.Rows[0]
headerRow.IsHeader = True
headerRow.Height = 23
headerRow.RowFormat.BackColor = Color.get_LightGray()

# Fill the header row with data and set the text formatting
i = 0
while i < len(header_data):
    headerRow.Cells[i].CellFormat.VerticalAlignment = VerticalAlignment.Middle
    paragraph = headerRow.Cells[i].AddParagraph()
    paragraph.Format.HorizontalAlignment = HorizontalAlignment.Center
    txtRange = paragraph.AppendText(header_data[i])
    txtRange.CharacterFormat.Bold = True
    txtRange.CharacterFormat.FontSize = 12
    i += 1

# Fill the rest rows with data and set the text formatting
r = 0
while r < len(row_data):
    dataRow = table.Rows[r + 1]
    dataRow.Height = 20
    dataRow.HeightType = TableRowHeightType.Exactly
    c = 0
    while c < len(row_data[r]):
        dataRow.Cells[c].CellFormat.VerticalAlignment = VerticalAlignment.Middle
        paragraph = dataRow.Cells[c].AddParagraph()
        paragraph.Format.HorizontalAlignment = HorizontalAlignment.Center
        txtRange =  paragraph.AppendText(row_data[r][c])
        txtRange.CharacterFormat.FontSize = 11
        c += 1
    r += 1

# Alternate row color
for j in range(1, table.Rows.Count):
    if math.fmod(j, 2) == 0:
        row2 = table.Rows[j]
        for f in range(row2.Cells.Count):
            row2.Cells[f].CellFormat.BackColor = Color.get_LightBlue()

# Set the border of table
table.TableFormat.Borders.BorderType = BorderStyle.Single
table.TableFormat.Borders.LineWidth = 1.0
table.TableFormat.Borders.Color = Color.get_Black()

# Save the document
doc.SaveToFile("output/Table.docx", FileFormat.Docx2013)
Apply for a Temporary License
If you'd like to remove the evaluation message from the generated documents, or to get rid of the function limitations, please request a 30-day trial license for yourself.
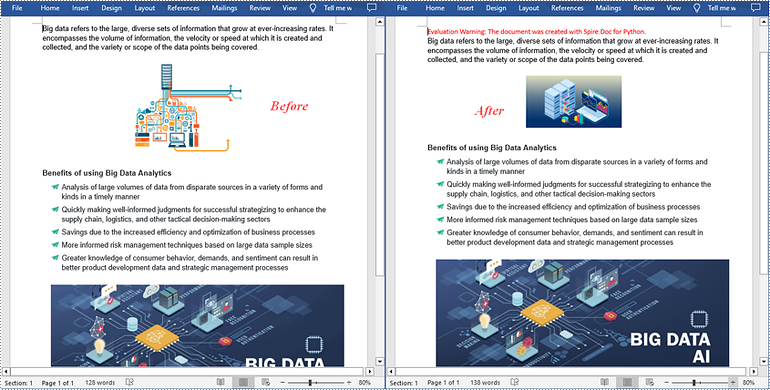
Python: Replace Images in Word
Images play a crucial role in effectively communicating complex ideas or concepts. When there are low-quality or outdated images in a Word document, it is necessary to replace the images to enhance the overall visual appeal and professionalism of your document. In this article, you will learn how to replace images in a Word document in Python using Spire.Doc for Python.
Install Spire.Doc for Python
This scenario requires Spire.Doc for Python and plum-dispatch v1.7.4. They can be easily installed in your VS Code through the following pip commands.
pip install Spire.Doc
If you are unsure how to install, please refer to this tutorial: How to Install Spire.Doc for Python on Windows
Replace Image with New Image in Word in Python
Spire.Doc for Python supports not only inserting images in Word, but also replacing existing images. The following are the detailed steps to get a specific image in Word and then replace it with a new image.
- Create a Document object.
- Load a Word document using Document.LoadFromFile() method.
- Create a list to store the images.
- Iterate through all sections in the document.
- Iterate through all paragraphs in each section.
- Iterate through all child objects in each paragraph.
- Find the images and add them to the list.
- Get a specific image from the list and replace it with another image using DocPicture.LoadImage() method.
- Save the result document using Document.SaveToFile() method.
- Python
from spire.doc import *
from spire.doc.common import *

# Create a Document object
doc = Document()

# Load a Word document
doc.LoadFromFile("Data.docx")

# Create a list to store the images
pictures = []

# Iterate through all sections in the document
for i in range(doc.Sections.Count):
    sec = doc.Sections.get_Item(i)

    # Iterate through all paragraphs in each section
    for j in range(sec.Paragraphs.Count):
        para = sec.Paragraphs.get_Item(j)

        # Iterate through all child objects in each paragraph
        for k in range(para.ChildObjects.Count):
            docObj = para.ChildObjects.get_Item(k)

            # Find the images and add them to the list
            if docObj.DocumentObjectType == DocumentObjectType.Picture:
                pictures.append(docObj)

# Replace the first picture in the list with a new image
picture = pictures[0] if isinstance(pictures[0], DocPicture) else None
picture.LoadImage("data.jpg")

# Save the result document
doc.SaveToFile("ReplaceImage.docx", FileFormat.Docx)
doc.Close()
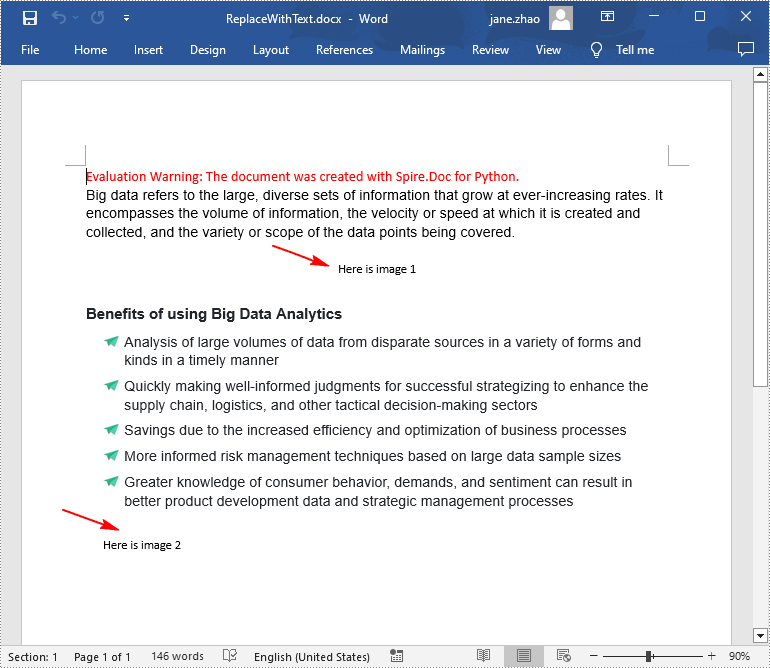
Replace Image with Text in Word in Python
Spire.Doc for Python doesn't provide a direct method to replace image with text, but you can achieve this task by inserting text at the image location and then removing the image from the document.
The following are the steps to replace all images in a Word document with text:
- Create a Document object.
- Load a Word document using Document.LoadFromFile() method.
- Iterate through all sections in the document.
- Iterate through all paragraphs in each section.
- Create a list to store the images.
- Iterate through all child objects in each paragraph.
- Find the images and add them to the list.
- Iterate through the images in the list.
- Get the index of the image in the paragraph using Paragraph.ChildObjects.Indexof() method.
- Initialize an instance of TextRange class and set text for the text range through TextRange.Text property.
- Insert the text range at the image location using Paragraph.ChildObjects.Insert() method.
- Remove the image from the paragraph using Paragraph.ChildObjects.Remove() method.
- Save the result document using Document.SaveToFile() method.
- Python
from spire.doc import *
from spire.doc.common import *

# Create a Document object
doc = Document()

# Load a Word document
doc.LoadFromFile("Data.docx")

j = 1
# Iterate through all sections in the document
for k in range(doc.Sections.Count):
    sec = doc.Sections.get_Item(k)

    # Iterate through all sections in the document
    for m in range(sec.Paragraphs.Count):
        para = sec.Paragraphs.get_Item(m)

        # Create a list to store the images
        pictures = []

        # Find the images and add them to the list
        for x in range(para.ChildObjects.Count):
            docObj = para.ChildObjects.get_Item(x)
            if docObj.DocumentObjectType == DocumentObjectType.Picture:
                pictures.append(docObj)

        # Iterate through all images in the list and replace them with text "Here is image {image index}"
        for pic in pictures:
            index = para.ChildObjects.IndexOf(pic)
            textRange = TextRange(doc)
            textRange.Text = "Here is image {0}".format(j)
            para.ChildObjects.Insert(index, textRange)
            para.ChildObjects.Remove(pic)
            j += 1

# Save the result document
doc.SaveToFile("ReplaceWithText.docx", FileFormat.Docx)
doc.Close()
Apply for a Temporary License
If you'd like to remove the evaluation message from the generated documents, or to get rid of the function limitations, please request a 30-day trial license for yourself.
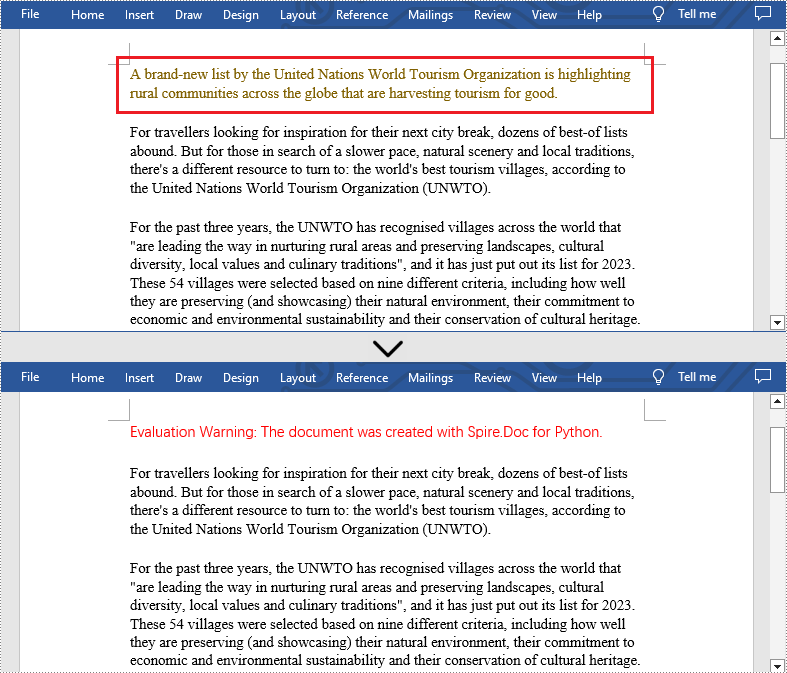
Python: Remove Paragraphs from Word Documents
When working with Word documents, sometimes you may need to adjust the content or layout of the document by deleting certain paragraphs. For example, when you have copied a very long paragraph from the Internet, you can delete redundant paragraphs as needed and keep only the useful ones. Or you can create a new document by deleting irrelevant paragraphs in an existing document. In this case, performing this process programmatically is a better option than tedious manual deletion, which can help you batch process a large number of documents in a short period of time. In this article, we will show you how to remove a specific paragraph or all paragraphs from Word documents in python using Spire.Doc for Python.
Install Spire.Doc for Python
This scenario requires Spire.Doc for Python and plum-dispatch v1.7.4. They can be easily installed in your VS Code through the following pip command.
pip install Spire.Doc
If you are unsure how to install, please refer to this tutorial: How to Install Spire.Doc for Python on Windows
Delete a Specific Paragraph from Word Documents
With Spire.Doc for Python library, you are allowed to remove specific paragraphs from Word documents. You just need to get the desired section, and then call the Section.Paragraphs.RemoveAt() method to remove the paragraphs you want. The detailed steps are as follows.
- Create an object of Document class.
- Load a Word document from disk using Document.LoadFromFile() method.
- Get the first section of this file using Document.Sections[] property.
- Remove the first paragraph from this section using Section.Paragraphs.RemoveAt() method.
- Save the result file using Document.SaveToFile() method.
- Python
from spire.doc import *
from spire.doc.common import *

inputFile = "C:/Users/Administrator/Desktop/Sample.docx"
outputFile = "C:/Users/Administrator/Desktop/RemoveParagraphs.docx"

#Create an object of Document class
document = Document()

#Load a sample file from disk
document.LoadFromFile(inputFile)

#Get the first section of this file
section=document.Sections[0]

#Remove the first paragraph from this section
section.Paragraphs.RemoveAt(0)

#Save the result file
document.SaveToFile(outputFile, FileFormat.Docx2013)
document.Close()
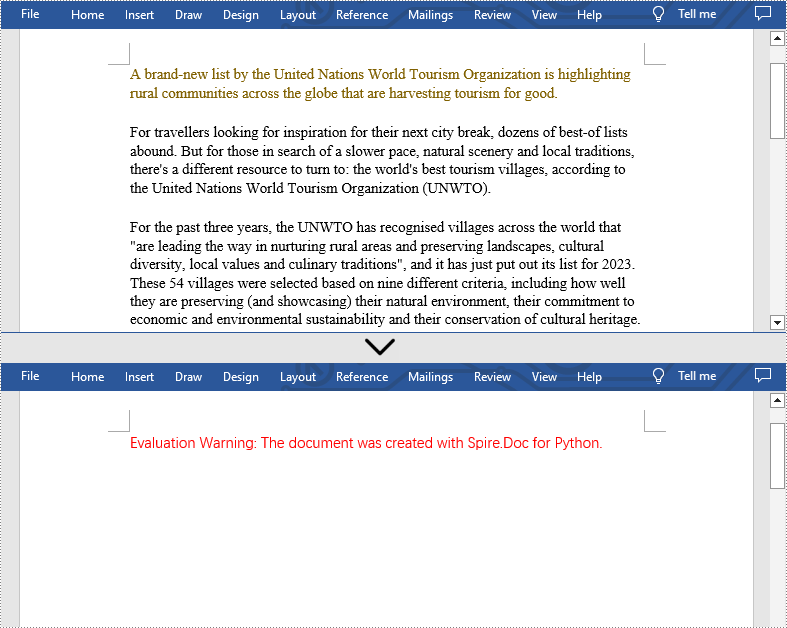
Delete All Paragraphs from Word Documents
In addition, if you want to clear all paragraphs of the Word document at once, please loop through all sections first and call the Section.Paragraphs.Clear() method to do that. The detailed steps are as follows.
- Create an object of Document class.
- Load a Word document from disk using Document.LoadFromFile() method.
- Loop through all sections first and remove all paragraphs in each section by using Section.Paragraphs.Clear() method.
- Save the result file using Document.SaveToFile() method.
- Python
from spire.doc import *
from spire.doc.common import *

inputFile = "C:/Users/Administrator/Desktop/Sample.docx"
outputFile = "C:/Users/Administrator/Desktop/RemoveAllParagraphs.docx"

#Create an object of Document class
document = Document()

#Load a sample file from disk
document.LoadFromFile(inputFile)

#Remove paragraphs from the body of every section in the document
for i in range(document.Sections.Count):
    section = document.Sections.get_Item(i)
    section.Paragraphs.Clear()

#Save the result file
document.SaveToFile(outputFile, FileFormat.Docx2013)
document.Close()
Apply for a Temporary License
If you'd like to remove the evaluation message from the generated documents, or to get rid of the function limitations, please request a 30-day trial license for yourself.
Python: Protect or Unprotect PowerPoint Presentations
PowerPoint presentations often contain sensitive information, such as financial data, trade secrets, or personal details. When sharing these files via email or cloud storage, it is important to prevent unauthorized individuals from accessing or viewing them. To protect the content of your PowerPoint presentation, there are various security measures you can employ. For instance, you can implement password protection, or make the presentation as final or read-only. In certain situations, you may find the need to unprotect a password-protected or encrypted PowerPoint presentation. This may be necessary when you need to share the file with the public or when the password is no longer needed. In this article, we will explain how to protect or unprotect a PowerPoint presentation in Python using Spire.Presentation for Python.
- Protect a PowerPoint Presentation with a Password
- Mark a PowerPoint Presentation as Final
- Make a PowerPoint Presentation Read-Only
- Remove Password Protection from a PowerPoint Presentation
- Remove Mark as Final Option from a PowerPoint Presentation
- Remove Read-Only Option from a PowerPoint Presentation
Install Spire.Presentation for Python
This scenario requires Spire.Presentation for Python and plum-dispatch v1.7.4. They can be easily installed in your VS Code through the following pip command.
pip install Spire.Presentation
If you are unsure how to install, please refer to this tutorial: How to Install Spire.Presentation for Python on Windows
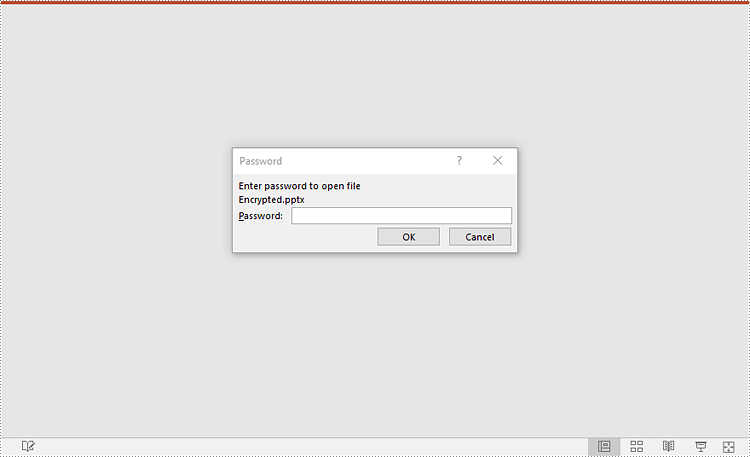
Protect a PowerPoint Presentation with a Password
You can protect a PowerPoint presentation with a password to ensure that only the people who have the right password can view and edit it.
The following steps demonstrate how to protect a PowerPoint presentation with a password:
- Create an object of the Presentation class.
- Load a PowerPoint presentation using Presentation.LoadFromFile() method.
- Encrypt the presentation with a password using Presentation.Encrypt() method.
- Save the resulting presentation using Presentation.SaveToFile() method.
- Python
from spire.presentation import *

# Create a Presentation object
presentation = Presentation()
# Load a PowerPoint presentation
presentation.LoadFromFile("Sample.pptx")

# Encrypy the presentation with a password
presentation.Encrypt("your password")

# Save the resulting presentation
presentation.SaveToFile("Encrypted.pptx", FileFormat.Pptx2016)
presentation.Dispose()
Mark a PowerPoint Presentation as Final
You can mark a PowerPoint presentation as final to inform readers that the document is final and no further editing is expected.
The following steps demonstrate how to mark a PowerPoint presentation as final:
- Create an object of the Presentation class.
- Load a PowerPoint presentation using Presentation.LoadFromFile() method.
- Mark the presentation as final using presentation.DocumentProperty.MarkAsFinal property.
- Save the resulting presentation using Presentation.SaveToFile() method.
- Python
from spire.presentation import *

# Create a Presentation object
presentation = Presentation()
# Load a PowerPoint presentation
presentation.LoadFromFile("Sample.pptx")

# Mark the presentation as final
presentation.DocumentProperty.MarkAsFinal = True

# Save the resulting presentation
presentation.SaveToFile("MarkAsFinal.pptx", FileFormat.Pptx2016)
presentation.Dispose()

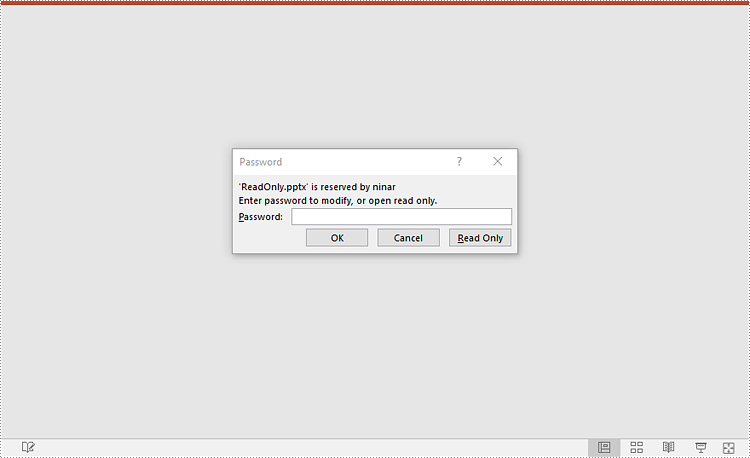
Make a PowerPoint Presentation Read-Only
You can make a PowerPoint presentation read-only to allow others to view it while preventing them from making any changes to the content.
The following steps demonstrate how to make a PowerPoint presentation read-only:
- Create an object of the Presentation class.
- Load a PowerPoint presentation using Presentation.LoadFromFile() method.
- Make the presentation read-only using Presentation.Protect() method.
- Save the resulting presentation using Presentation.SaveToFile() method.
- Python
from spire.presentation import *

# Create a Presentation object
presentation = Presentation()
# Load a PowerPoint presentation
presentation.LoadFromFile("Sample.pptx")

# Make the presentation read-only by protecting it with a password
presentation.Protect("your password")

# Save the resulting presentation
presentation.SaveToFile("ReadOnly.pptx", FileFormat.Pptx2016)
presentation.Dispose()
Remove Password Protection from a PowerPoint Presentation
You can remove password protection from a PowerPoint presentation by loading the presentation with the correct password and then removing the password protection from it.
The following steps demonstrate how to remove password protection from a PowerPoint presentation:
- Create an object of the Presentation class.
- Load a password-protected PowerPoint presentation with its password using Presentation.LoadFromFile() method.
- Remove password protection from the presentation using Presentation.RemoveEncryption() method.
- Save the resulting presentation using Presentation.SaveToFile() method.
- Python
from spire.presentation import *

# Create a Presentation object
presentation = Presentation()
# Load an encrypted PowerPoint presentation with its password
presentation.LoadFromFile("Encrypted.pptx", "your password")

# Remove password encryption from the presentation
presentation.RemoveEncryption()

# Save the resulting presentation
presentation.SaveToFile("Decrypted.pptx", FileFormat.Pptx2016)
presentation.Dispose()
Remove Mark as Final Option from a PowerPoint Presentation
The mark as final feature makes a PowerPoint presentation read-only to prevent further changes, if you decide to make changes to the presentation later, you can remove the mark as final option from it.
The following steps demonstrate how to remove the mark as final option from a PowerPoint presentation:
- Create an object of the Presentation class.
- Load a PowerPoint presentation that has been marked as final using Presentation.LoadFromFile() method.
- Remove the mark as final option from the presentation using presentation.DocumentProperty.MarkAsFinal property.
- Save the resulting presentation using Presentation.SaveToFile() method.
- Python
from spire.presentation import *

# Create a Presentation object
presentation = Presentation()
# Load a PowerPoint presentation that has been marked as final
presentation.LoadFromFile("MarkAsFinal.pptx")

# Remove the mark as final option from the presentation
presentation.DocumentProperty.MarkAsFinal = False

# Save the resulting presentation
presentation.SaveToFile("RemoveMarkAsFinal.pptx", FileFormat.Pptx2016)
presentation.Dispose()
Remove Read-Only Option from a PowerPoint Presentation
Removing the read-only option from a PowerPoint presentation allows you to regain full editing capabilities, enabling you to modify, add, or delete content within the presentation as needed.
The following steps demonstrate how to remove the read-only option from a PowerPoint presentation:
- Create an object of the Presentation class.
- Load a PowerPoint presentation that has been made as read-only using Presentation.LoadFromFile() method.
- Remove the read-only option from the presentation using Presentation.RemoveProtect() method.
- Save the resulting presentation using Presentation.SaveToFile() method.
- Python
from spire.presentation import *

# Create a Presentation object
presentation = Presentation()
# Load a PowerPoint presentation that has been made as read-only
presentation.LoadFromFile("ReadOnly.pptx")

# Remove the read-only option from the presentation
presentation.RemoveProtect()

# Save the resulting presentation
presentation.SaveToFile("RemoveReadOnly.pptx", FileFormat.Pptx2016)
presentation.Dispose()
Apply for a Temporary License
If you'd like to remove the evaluation message from the generated documents, or to get rid of the function limitations, please request a 30-day trial license for yourself.
Python: Add or Remove Data Validation in Excel Cells
Data validation in Excel is a powerful feature that allows you to control the type and range of data that can be entered into a cell or a range of cells. The main goal of data validation is to prevent errors and inconsistencies in data, which can lead to inaccurate analysis, reporting, and decision-making. Data validation helps ensure data accuracy by setting specific criteria for data entry. In this article, you will learn how to add or remove data validation in Excel in Python using Spire.XLS for Python.
Install Spire.XLS for Python
This scenario requires Spire.XLS for Python and plum-dispatch v1.7.4. They can be easily installed in your VS Code through the following pip command.
pip install Spire.XLS
If you are unsure how to install, please refer to this tutorial: How to Install Spire.XLS for Python on Windows
Add Various Types of Data Validation to Excel in Python
Spire.XLS for Python provides the DataValidation class to handle data validation in a specific cell or range. Through the properties under the DataValidation object, you can specify validation type, formula, compare operator, etc. The following are the steps to add data validation to an Excel cell using Spire.XLS for Python.
- Create a Workbook object.
- Get a specific worksheet through Workbook.Worksheets[index] property.
- Get a specific cell through Worksheet.Range property.
- Set the data validation type, formula, compare operator and other related attributes through the properties under CellRarange.DataValidation object.
- Save the workbook to another Excel file using Workbook.SaveToFile() method.
- Python
from spire.xls import *
from spire.xls.common import *
# Create a Workbook object
workbook = Workbook()
# Get the first worksheet
sheet = workbook.Worksheets[0]
# Insert text in cells
sheet.Range["B2"].Text = "Number Validation:"
sheet.Range["B4"].Text = "Date Validation:"
sheet.Range["B6"].Text = "Text Length Validation:"
sheet.Range["B8"].Text = "List Validation:"
sheet.Range["B10"].Text = "Time Validation:"
# Add number validation to C2
rangeNumber = sheet.Range["C2"]
rangeNumber.DataValidation.AllowType = CellDataType.Integer
rangeNumber.DataValidation.CompareOperator = ValidationComparisonOperator.Between
rangeNumber.DataValidation.Formula1 = "1"
rangeNumber.DataValidation.Formula2 = "10"
rangeNumber.DataValidation.InputMessage = "Enter a number between 1 and 10"
rangeNumber.Style.KnownColor = ExcelColors.Gray25Percent
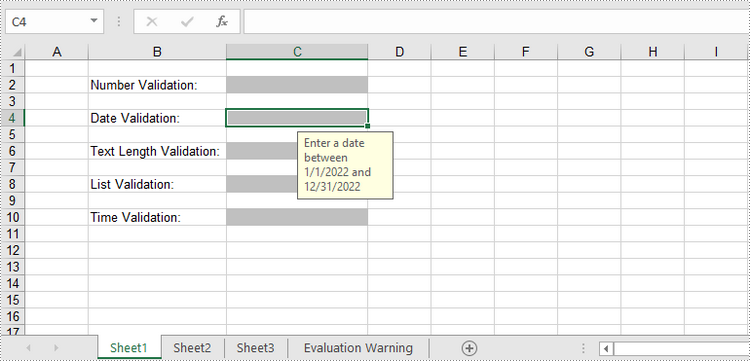
# Add date validation to C4
rangeDate = sheet.Range["C4"]
rangeDate.DataValidation.AllowType = CellDataType.Date
rangeDate.DataValidation.CompareOperator = ValidationComparisonOperator.Between
rangeDate.DataValidation.Formula1 = "01/01/2022"
rangeDate.DataValidation.Formula2 = "31/12/2022"
rangeDate.DataValidation.InputMessage = "Enter a date between 01/01/2022 and 31/12/2022"
rangeDate.Style.KnownColor = ExcelColors.Gray25Percent
# Add text length validation to C6
rangeTextLength = sheet.Range["C6"]
rangeTextLength.DataValidation.AllowType = CellDataType.TextLength
rangeTextLength.DataValidation.CompareOperator = ValidationComparisonOperator.LessOrEqual
rangeTextLength.DataValidation.Formula1 = "5"
rangeTextLength.DataValidation.InputMessage = "Enter text lesser than 5 characters"
rangeTextLength.Style.KnownColor = ExcelColors.Gray25Percent
# Apply list validation to C8
rangeList = sheet.Range["C8"]
rangeList.DataValidation.Values = ["United States", "Canada", "United Kingdom", "Germany"]
rangeList.DataValidation.IsSuppressDropDownArrow = False
rangeList.DataValidation.InputMessage = "Choose an item from the list"
rangeList.Style.KnownColor = ExcelColors.Gray25Percent
# Apply time validation to C10
rangeTime = sheet.Range["C10"]
rangeTime.DataValidation.AllowType = CellDataType.Time
rangeTime.DataValidation.CompareOperator = ValidationComparisonOperator.Between
rangeTime.DataValidation.Formula1 = "9:00"
rangeTime.DataValidation.Formula2 = "12:00"
rangeTime.DataValidation.InputMessage = "Enter a time between 9:00 and 12:00"
rangeTime.Style.KnownColor = ExcelColors.Gray25Percent
# Auto fit width of column 2
sheet.AutoFitColumn(2)
# Set the width of column 3
sheet.Columns[2].ColumnWidth = 20
# Save to file
workbook.SaveToFile("output/DataValidation.xlsx", ExcelVersion.Version2016)
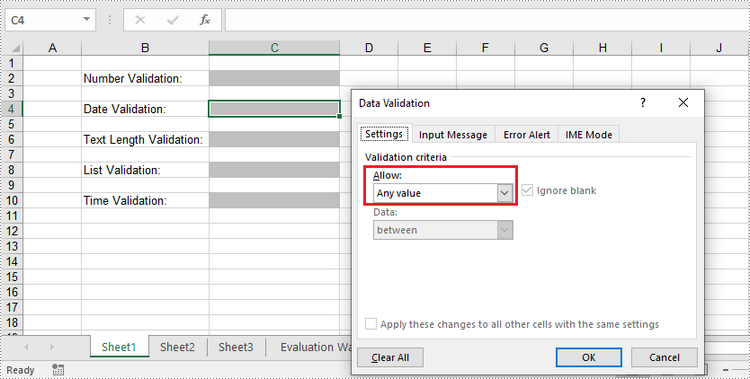
Remove Data Validation from Excel in Python
To remove the data validation from an Excel worksheet, use the Worksheet.DVTable.Remove(list rectangles) method. The parameter list specifies the cells to remove validation. The following are the detailed steps.
- Create a Workbook object.
- Load the Excel file containing data validation using Workbook.LoadFromFile() method.
- Get the specified worksheet though Workbook.Worksheets[index] property.
- Create a list of rectangles, which is used to specify the cells where the validation will be removed.
- Remove the data validation from the selected cells using Worksheet.DVTable.Remove() method.
- Save the workbook to another Excel file using Workbook.SaveToFile() method.
- Python
from spire.xls import *
from spire.xls.common import *

# Create a Workbook object
workbook = Workbook()

# Load a sample Excel file
workbook.LoadFromFile("C:\\Users\\Administrator\\Desktop\\DataValidation.xlsx")

# Get the first worksheet
worksheet = workbook.Worksheets[0]

# Create a list of rectangles to specify the cells or cell ranges where the data validation will be removed
rects= []
rects.append(Rectangle.FromLTRB(0,0,2,9))

# Remove the data validation from the selected cells
worksheet.DVTable.Remove(rects)

# Save the workbook to an Excel file
workbook.SaveToFile("output/RemoveDataValidation.xlsx")
Apply for a Temporary License
If you'd like to remove the evaluation message from the generated documents, or to get rid of the function limitations, please request a 30-day trial license for yourself.
Spire.XLS for Java 13.11.0 supports retrieving comments from the Name Manager
We are pleased to announce the release of Spire.XLS for Java 13.11.0. This version supports retrieving comments from the Name Manager. The conversion of Excel to PDF has also been enhanced. Besides, some known issues are fixed successfully in this version, such as the issue that the program threw "Invalid ValidationAlertType " when reading an Excel file. More details are listed below.
Here is a list of changes made in this release
| Category | ID | Description |
| New feature | SPIREXLS-4919 | Supports retrieving comments from the Name Manager.
Workbook workbook = new Workbook();
workbook.loadFromFile(inputFile);
INameRanges nameManager = workbook.getNameRanges();
StringBuilder stringBuilder = new StringBuilder();
for (int i = 0; i < nameManager.getCount(); i++) {
XlsName name = (XlsName) nameManager.get(i);
stringBuilder.append("Name: " + name.getName() + ", Comment: " + name.getCommentValue() + "\r\n");
}
workbook.dispose();
|
| Bug | SPIREXLS-4911 | Improves the speed of converting Excel to PDF on Linux. |
| Bug | SPIREXLS-4860 | Fixes the issue that the page size setting failed after setting the setSheetFitToPage method when converting Excel to PDF. |
| Bug | SPIREXLS-4894 | Fixes the issue that removing pivot table borders failed. |
| Bug | SPIREXLS-4906 | Fixes the issue that text was reversed and cropped after converting Excel to PDF. |
| Bug | SPIREXLS-4923 | Fixes the issue that the program threw "Invalid ValidationAlertType" when reading an Excel file. |
| Bug | SPIREXLS-4924 | Fixes the issue that the program threw "Input string was not in the correct format" when reading an Excel file. |
Python: Add, Read or Delete Speaker Notes in PowerPoint
Speaker notes in PowerPoint play a crucial role in enhancing the presenter's delivery and ensuring a seamless presentation experience. They can be added to individual slides to provide valuable guidance, reminders, and supplementary information for the presenter. Unlike the content displayed on the slides, speaker notes are typically not visible to the audience during the actual presentation. In this article, we'll explain how to add, read or delete speaker notes in a PowerPoint presentation in Python using Spire.Presentation for Python.
- Add Speaker Notes to PowerPoint in Python
- Read Speaker Notes in PowerPoint in Python
- Delete Speaker Notes from PowerPoint in Python
Install Spire.Presentation for Python
This scenario requires Spire.Presentation for Python and plum-dispatch v1.7.4. They can be easily installed in your VS Code through the following pip command.
pip install Spire.Presentation
If you are unsure how to install, please refer to this tutorial: How to Install Spire.Presentation for Python on Windows
Add Speaker Notes to PowerPoint in Python
Spire.Presentation for Python provides the ISlide.AddNotesSlides() method to add notes to a PowerPoint slide. The detailed steps are as follows.
- Create a Presentation object.
- Load a PowerPoint presentation using Presentation.LoadFromFile() method.
- Get the slide that you want to add notes to using Presentation.Slides[index] property.
- Add a notes slide to the slide using ISlide.AddNotesSlides() method.
- Create TextParagraph objects and set text for the paragraphs using TextParagraph.Text property, then add the paragraphs to the notes slide using NotesSlide.NotesTextFrame.Paragraphs.Append() method.
- Save the resulting presentation using Presentation.SaveToFile() method.
- Python
from spire.presentation.common import *
from spire.presentation import *
# Create a Presentation object
ppt = Presentation()
# Load a PowerPoint presentation
ppt.LoadFromFile("Sample.pptx")
# Get the first slide
slide = ppt.Slides[0]
# Add a notes slide to the slide
notesSlide = slide.AddNotesSlide()
# Add 4 paragraphs to the notes slide
paragraph = TextParagraph()
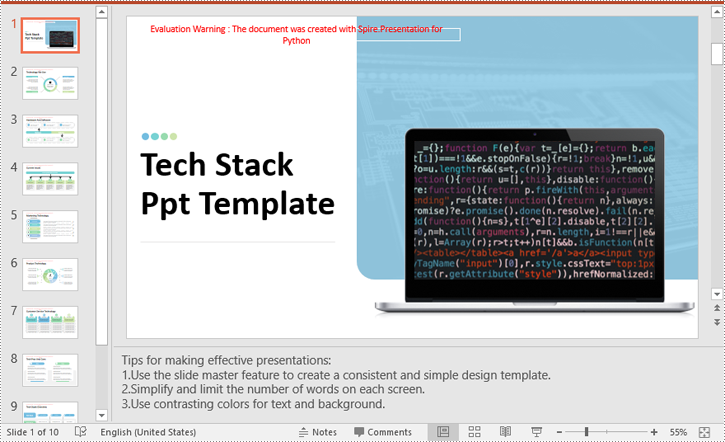
paragraph.Text = "Tips for making effective presentations:"
notesSlide.NotesTextFrame.Paragraphs.Append(paragraph)
paragraph = TextParagraph()
paragraph.Text = "Use the slide master feature to create a consistent and simple design template."
notesSlide.NotesTextFrame.Paragraphs.Append(paragraph)
paragraph = TextParagraph()
paragraph.Text = "Simplify and limit the number of words on each screen."
notesSlide.NotesTextFrame.Paragraphs.Append(paragraph)
paragraph = TextParagraph()
paragraph.Text = "Use contrasting colors for text and background."
notesSlide.NotesTextFrame.Paragraphs.Append(paragraph)
# Set bullet type and style for specific paragraphs
for i in range(1, notesSlide.NotesTextFrame.Paragraphs.Count):
notesSlide.NotesTextFrame.Paragraphs[i].BulletType = TextBulletType.Numbered
notesSlide.NotesTextFrame.Paragraphs[i].BulletStyle = NumberedBulletStyle.BulletArabicPeriod
# Save the resulting presentation
ppt.SaveToFile("AddSpeakerNotes.pptx", FileFormat.Pptx2016)
ppt.Dispose()
Read Speaker Notes in PowerPoint in Python
To read the text content of the notes, you can use the NotesSlide.NotesTextFrame.Text property. The detailed steps are as follows.
- Create a Presentation object.
- Load a PowerPoint presentation using Presentation.LoadFromFile() method.
- Get the slide that you want to read notes from using Presentation.Slides[index] property.
- Get the notes slide of the slide using ISlide.NotesSlide property.
- Get the text content of the notes slide using NotesSlide.NotesTextFrame.Text property.
- Write the text content into a text file.
- Python
from spire.presentation.common import *
from spire.presentation import *
# Create a Presentation object
ppt = Presentation()
# Load a PowerPoint presentation
ppt.LoadFromFile("AddSpeakerNotes.pptx")
# Get the first slide
slide = ppt.Slides[0]
# Get the notes slide of the slide
notesSlide = slide.NotesSlide
# Get the text content of the notes slide
notes = notesSlide.NotesTextFrame.Text
# Write the text content to a text file
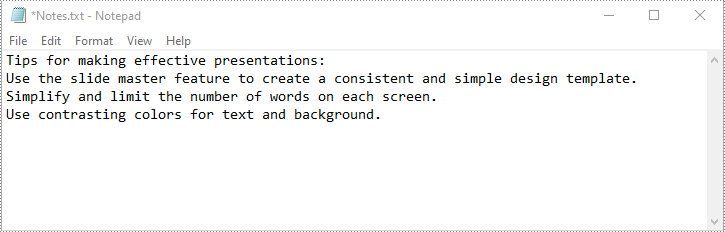
with open("Notes.txt", 'w') as file:
file.write(notes)
ppt.Dispose()
Delete Speaker Notes from PowerPoint in Python
You can delete a specific paragraph of note or delete all the notes from a slide using the NotesSlide.NotesTextFrame.Paragraphs.RemoveAt(index) or NotesSlide.NotesTextFrame.Paragraphs.Clear() method. The detailed steps are as follows.
- Create a Presentation object.
- Load a PowerPoint presentation using Presentation.LoadFromFile() method.
- Get the slide that you want to delete notes from using Presentation.Slides[index] property.
- Get the notes slide of the slide using ISlide.NotesSlide property.
- Delete a specific paragraph of note or delete all the notes from the notes slide using the NotesSlide.NotesTextFrame.Paragraphs.RemoveAt(index) or NotesSlide.NotesTextFrame.Paragraphs.Clear() method.
- Save the resulting presentation using Presentation.SaveToFile() method.
- Python
from spire.presentation.common import *
from spire.presentation import *

# Create a Presentation object
presentation = Presentation()
# Load a PowerPoint presentation
presentation.LoadFromFile("AddSpeakerNotes.pptx")

# Get the first slide
slide = presentation.Slides[0]

# Get the notes slide of the slide
notesSlide = slide.NotesSlide

# Remove a specific paragraph of note from the notes slide
# notesSlide.NotesTextFrame.Paragraphs.RemoveAt(1)

# Remove all the notes from the notes slide
notesSlide.NotesTextFrame.Paragraphs.Clear()

# Save the resulting presentation
presentation.SaveToFile("DeleteSpeakerNotes.pptx", FileFormat.Pptx2013)
presentation.Dispose()
Apply for a Temporary License
If you'd like to remove the evaluation message from the generated documents, or to get rid of the function limitations, please request a 30-day trial license for yourself.
Python: Merge Word Documents
Dealing with a large number of Word documents can be very challenging. Whether it's editing or reviewing a large number of documents, there's a lot of time wasted on opening and closing documents. What's more, sharing and receiving a large number of separate Word documents can be annoying, as it may require a lot of repeated sending and receiving operations by both the sharer and the receiver. Therefore, in order to enhance efficiency and save time, it is advisable to merge related Word documents into a single file. From this article, you will know how to use Spire.Doc for Python to easily merge Word documents through Python programs.
- Merge Word Documents by Inserting Files with Python
- Merge Word Documents by Cloning Contents with Python
Install Spire.Doc for Python
This scenario requires Spire.Doc for Python and plum-dispatch v1.7.4. They can be easily installed in your VS Code through the following pip command.
pip install Spire.Doc
If you are unsure how to install, please refer to this tutorial: How to Install Spire.Doc for Python on Windows
Merge Word Documents by Inserting Files with Python
The method Document.insertTextFromFile() is used to insert other Word documents to the current one, and the inserted content will start from a new page. The detailed steps for merging Word documents by inserting are as follows:
- Create an object of Document class and load a Word document using Document.LoadFromFile() method.
- Insert the content from another document to it using Document.InsertTextFromFile() method.
- Save the document using Document.SaveToFile() method.
- Python
from spire.doc import *
from spire.doc.common import *

# Create an object of Document class and load a Word document
doc = Document()
doc.LoadFromFile("Sample1.docx")

# Insert the content from another Word document to this one
doc.InsertTextFromFile("Sample2.docx", FileFormat.Auto)

# Save the document
doc.SaveToFile("output/InsertDocuments.docx")
doc.Close()
Merge Word Documents by Cloning Contents with Python
Merging Word documents can also be achieved by cloning contents from one Word document to another. This method maintains the formatting of the original document, and content cloned from another document continues at the end of the current document without starting a new Page. The detailed steps are as follows:
- Create two objects of Document class and load two Word documents using Document.LoadFromFile() method.
- Get the last section of the destination document using Document.Sections.get_Item() method.
- Loop through the sections in the document to be cloned and then loop through the child objects of the sections.
- Get a section child object using Section.Body.ChildObjects.get_Item() method.
- Add the child object to the last section of the destination document using Section.Body.ChildObjects.Add() method.
- Save the result document using Document.SaveToFile() method.
- Python
from spire.doc import *
from spire.doc.common import *

# Create two objects of Document class and load two Word documents
doc1 = Document()
doc1.LoadFromFile("Sample1.docx")
doc2 = Document()
doc2.LoadFromFile("Sample2.docx")

# Get the last section of the first document
lastSection = doc1.Sections.get_Item(doc1.Sections.Count - 1)

# Loop through the sections in the second document
for i in range(doc2.Sections.Count):
    section = doc2.Sections.get_Item(i)
    # Loop through the child objects in the sections
    for j in range(section.Body.ChildObjects.Count):
        obj = section.Body.ChildObjects.get_Item(j)
        # Add the child objects from the second document to the last section of the first document
        lastSection.Body.ChildObjects.Add(obj.Clone())

# Save the result document
doc1.SaveToFile("output/MergeByCloning.docx")
doc1.Close()
doc2.Close()
Apply for a Temporary License
If you'd like to remove the evaluation message from the generated documents, or to get rid of the function limitations, please request a 30-day trial license for yourself.