Replace Image with New Image in PowerPoint in C#
This article demonstrates how to replace an existing image with a new image in a PowerPoint document using Spire.Presentation.
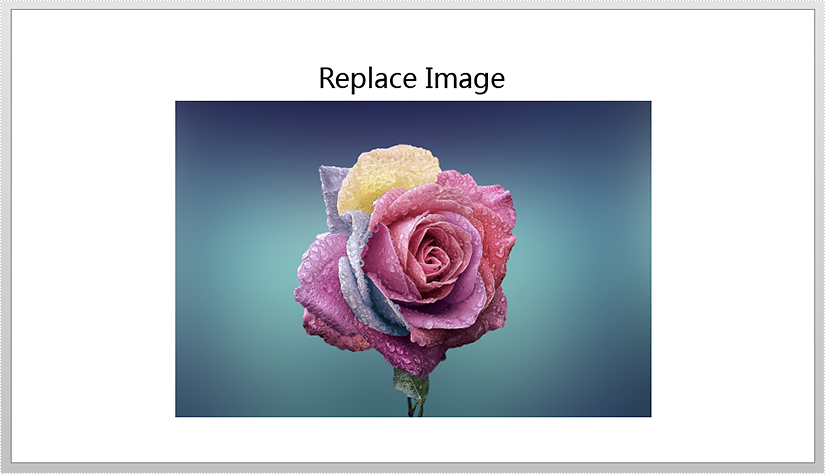
The original image:
Detail steps:
Step 1: Instantiate a Presentation object and load the PowerPoint file.
Presentation ppt = new Presentation();
ppt.LoadFromFile("Input.pptx");
Step 2: Get the first slide.
ISlide slide = ppt.Slides[0];
Step 3: Append a new image to replace an existing image.
IImageData image = ppt.Images.Append(Image.FromFile("timg.jpg"));
Step 4: Replace the image which title is "image1" with the new image.
foreach (IShape shape in slide.Shapes)
{
    if (shape is SlidePicture)
    {
        if (shape.AlternativeTitle == "image1")
        {
            (shape as SlidePicture).PictureFill.Picture.EmbedImage = image;
        }
    }
}
Step 5: Save the file.
ppt.SaveToFile("Output.pptx", FileFormat.Pptx2013);
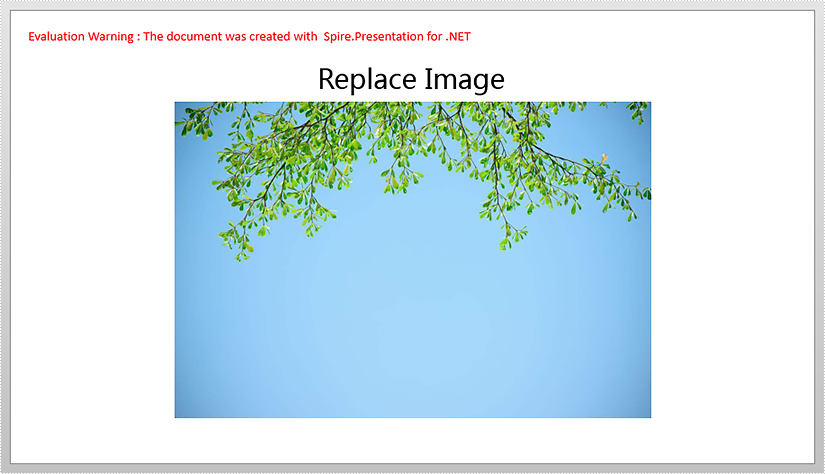
Screenshot after replacing image:
Full code:
using Spire.Presentation;
using Spire.Presentation.Drawing;
using System.Drawing;

namespace ReplaceImage
{

    class Program
    {

        static void Main(string[] args)
        {
            {
                Presentation ppt = new Presentation();
                ppt.LoadFromFile("Input.pptx");

                ISlide slide = ppt.Slides[0];

                IImageData image = ppt.Images.Append(Image.FromFile("timg.jpg"));

                foreach (IShape shape in slide.Shapes)
                {
                    if (shape is SlidePicture)
                    {
                        if (shape.AlternativeTitle == "image1")
                        {
                            (shape as SlidePicture).PictureFill.Picture.EmbedImage = image;
                        }
                    }
                }

                ppt.SaveToFile("Output.pptx", FileFormat.Pptx2013);


            }
        }

    }
}
Detect the used themes in PowerPoint in C#
This article demonstrates how to detect the used themes in a PowerPoint document using Spire.Presentation.
Detail steps:
Step 1: Instantiate a Presentation object and load the PowerPoint document.
Presentation ppt = new Presentation();
ppt.LoadFromFile(@"Sample.pptx");
Step 2: Get the theme name of each slide in the document.
StringBuilder sb = new StringBuilder();
string themeName = null;

foreach (ISlide slide in ppt.Slides)
{
    themeName = slide.Theme.Name;
    sb.AppendLine(themeName);
}
Step 3: Save to a .txt file.
File.WriteAllText("themeName.txt", sb.ToString());
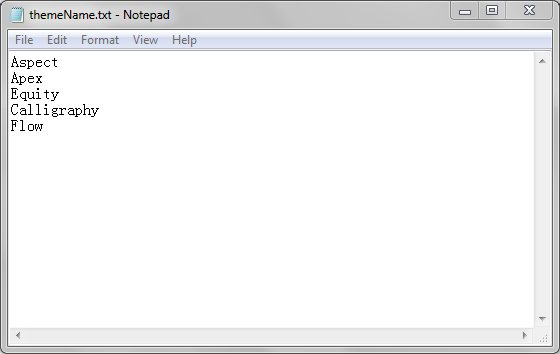
Output:
Full code:
using Spire.Presentation;
using System.IO;
using System.Text;
namespace DetectThemes
{
    class Program
    {
        static void Main(string[] args)
        {
            //Instantiate a Presentation object
            Presentation ppt = new Presentation();
            //Load the PowerPoint document
            ppt.LoadFromFile(@"Sample.pptx");

            StringBuilder sb = new StringBuilder();
            string themeName = null;

            //Get the theme name of each slide in the document
            foreach (ISlide slide in ppt.Slides)
            {
                themeName = slide.Theme.Name;
                sb.AppendLine(themeName);
            }

            //Save to a .txt file
            File.WriteAllText("themeName.txt", sb.ToString());

            }
        }
    }
Filter cells by cell color in Excel in C#
In Excel, cells can be filtered based on the cell color. This article is going to show you how to filter rows by cell color using Spire.XLS.
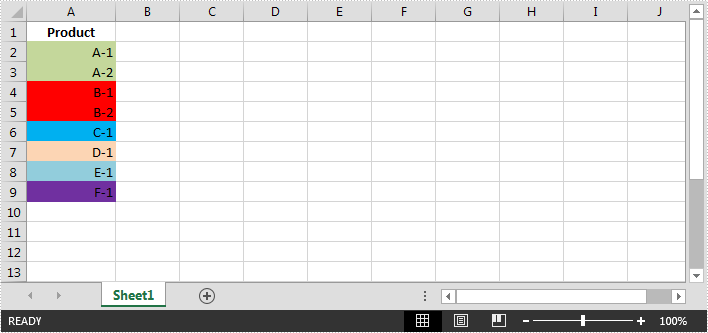
The example Excel file:
Detail steps:
Step 1: Instantiate a Workbook object and load the Excel file.
Workbook workbook = new Workbook();
workbook.LoadFromFile("sample.xlsx");
Step 2: Get the first worksheet.
Worksheet sheet = workbook.Worksheets[0];
Step 3: Add a color filter to filter cells based on cell color.
//Create an auto filter in the sheet and specify the range to be filterd
sheet.AutoFilters.Range = sheet.Range["A1:A9"];
//Get the coloumn to be filterd
FilterColumn filtercolumn = (FilterColumn)sheet.AutoFilters[0];
//Add a color filter to filter the column based on cell color
sheet.AutoFilters.AddFillColorFilter(filtercolumn, Color.Red);
Step 4: Filter the data.
sheet.AutoFilters.Filter();
Step 5: Save the file.
workbook.SaveToFile("ColorFilter.xlsx", ExcelVersion.Version2013);
Screenshot:

Full code:
using Spire.Xls;
using Spire.Xls.Core.Spreadsheet.AutoFilter;
namespace FilterCells
{
    class Program
    {
        static void Main(string[] args)
        {
            //Instantiate a Workbook object
            Workbook workbook = new Workbook();
            //Load the Excel file
            workbook.LoadFromFile("sample.xlsx");

            //Get the first worksheet
            Worksheet sheet = workbook.Worksheets[0];

            //Create an auto filter in the sheet and specify the range to be filterd
            sheet.AutoFilters.Range = sheet.Range["A1:A9"];
            //Get the coloumn to be filterd
            FilterColumn filtercolumn = (FilterColumn)sheet.AutoFilters[0];
            //Add a color filter to filter the column based on cell color
            sheet.AutoFilters.AddFillColorFilter(filtercolumn, Color.Red);

            //Filter the data
            sheet.AutoFilters.Filter();

            //Save the file
            workbook.SaveToFile("ColorFilter.xlsx", ExcelVersion.Version2013);
        }
    }
}
C#: Add or Remove AutoFilter in Excel
Excel's AutoFilter is a simple yet effective tool for managing data, especially when working with large datasets. By using AutoFilters, you can quickly narrow down your focus to specific subsets of information, making it easier to identify trends, make decisions, and keep your spreadsheets organized. Upon completion of the analysis, you may need to remove the AutoFilters to restore visibility to the full dataset. In this article, you will learn how to add or remove AutoFilter in Excel in C# using Spire.XLS for .NET.
- Add AutoFilter to Excel Cells in C#
- Apply Date AutoFilter in Excel in C#
- Apply Custom AutoFilter in Excel in C#
- Remove AutoFilter in Excel in C#
Install Spire.XLS for .NET
To begin with, you need to add the DLL files included in the Spire.XLS for .NET package as references in your .NET project. The DLL files can be either downloaded from this link or installed via NuGet.
PM> Install-Package Spire.XLS
Add AutoFilter to Excel Cells in C#
Spire.XLS for .NET allows you to apply AutoFilter on a specific cell range through the Worksheet.AutoFilters.Range property. The following are the detailed steps:
- Create a Workbook instance.
- Load a sample Excel file using Workbook.LoadFromFile() method.
- Get a specified worksheet using Workbook.Worksheets[] property.
- Add an AutoFilter to a specified cell range using Worksheet.AutoFilters.Range property.
- Save the result file using Workbook.SaveToFile() method.
- C#
using Spire.Xls;

namespace AddAutoFilter
{
    class Program
    {
        static void Main(string[] args)
        {
            //Create a Workbook instance
            Workbook workbook = new Workbook();

            //Load an Excel file
            workbook.LoadFromFile(@"C:\Users\Administrator\Desktop\Data.xlsx");

            //Get the first worksheet
            Worksheet sheet = workbook.Worksheets[0];

            //Create an AutoFilter in the sheet and specify the range to be filtered
            sheet.AutoFilters.Range = sheet.Range["A1:C1"];

            //Save the result file
            workbook.SaveToFile("ExcelAutoFilter.xlsx", ExcelVersion.Version2016);
        }
    }
}

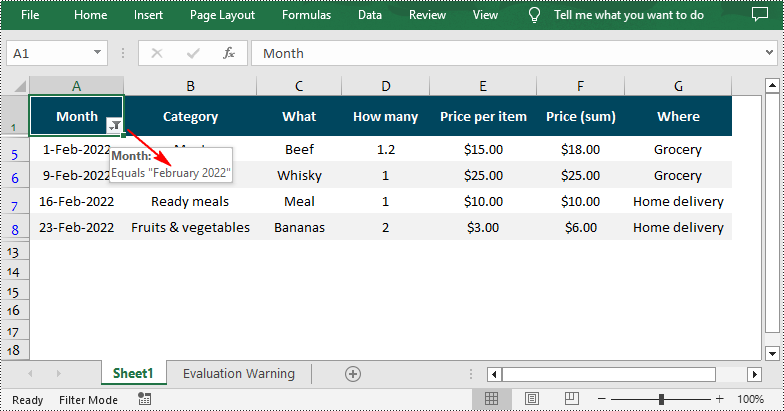
Apply Date AutoFilter in Excel in C#
If you need to explore information related to specific dates or time, you can apply a date filter to the selected range using the Workbook.AutoFilters.AddDateFilter(IAutoFilter column, DateTimeGroupingType dateTimeGroupingType, int year, int month, int day, int hour, int minute, int second) method. The following are detailed steps.
- Create a Workbook instance.
- Load a sample Excel file using Workbook.LoadFromFile() method.
- Get a specified worksheet using Workbook.Worksheets[] property.
- Add an AutoFilter to a specified range using Workbook.AutoFilters.Range property.
- Get the column to be filtered.
- Call the Workbook.AutoFilters.AddDateFilter() method to add a date filter to the column to filter data related to a specified year/month/date, etc.
- Apply the filter using Workbook.AutoFilters.Filter() method.
- Save the result file using Workbook.SaveToFile() method.
- C#
using Spire.Xls;
using Spire.Xls.Core;
using Spire.Xls.Core.Spreadsheet.AutoFilter;

namespace AddAutoFilter
{
    class Program
    {
        static void Main(string[] args)
        {
            //Create a Workbook instance
            Workbook workbook = new Workbook();

            //Load an Excel file
            workbook.LoadFromFile(@"C:\Users\Administrator\Desktop\Data.xlsx");

            //Get the first worksheet
            Worksheet sheet = workbook.Worksheets[0];

            //Create an auto filter in the sheet and specify the range to be filtered
            sheet.AutoFilters.Range = sheet.Range["A1:A12"];

            //Get the column to be filtered
            IAutoFilter filtercolumn = sheet.AutoFilters[0];

            //Add a date filter to filter data related to February 2022
            sheet.AutoFilters.AddDateFilter(filtercolumn, DateTimeGroupingType.Month, 2022, 2, 0, 0, 0, 0);

            //Apply the filter
            sheet.AutoFilters.Filter();

           //Save the result file
            workbook.SaveToFile("DateAutoFilter.xlsx", ExcelVersion.Version2016);
        }
    }
}
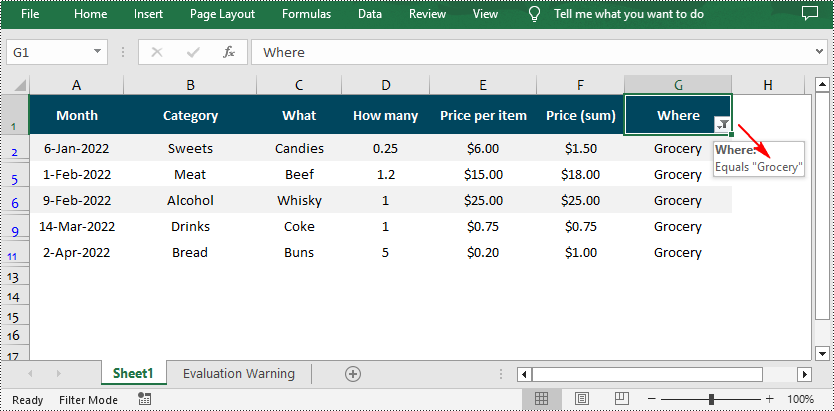
Apply Custom AutoFilter in Excel in C#
The Workbook.AutoFilters.CustomFilter(FilterColumn column, FilterOperatorType operatorType, Object criteria) method allows you to create custom filters based on certain criteria. For example, you can filter data that contains specific text. The following are detailed steps.
- Create a Workbook instance.
- Load a sample Excel file using Workbook.LoadFromFile() method.
- Get a specified worksheet using Workbook.Worksheets[] property.
- Add an AutoFilter to a specified range using Workbook.AutoFilters.Range property.
- Get the column to be filtered.
- Add a custom filter to the column to filter data containing the specified string using Workbook.AutoFilters.CustomFilter() method.
- Apply the filter using Workbook.AutoFilters.Filter() method.
- Save the result file using Workbook.SaveToFile() method.
- C#
using Spire.Xls;
using Spire.Xls.Core.Spreadsheet.AutoFilter;

namespace AddAutoFilter
{
    class Program
    {
        static void Main(string[] args)
        {
            //Create a Workbook instance
            Workbook workbook = new Workbook();

            //Load an Excel file
            workbook.LoadFromFile(@"C:\Users\Administrator\Desktop\Data.xlsx");

            //Get the first worksheet
            Worksheet sheet = workbook.Worksheets[0];

            //Create an auto filter in the sheet and specify the range to be filtered
            sheet.AutoFilters.Range = sheet.Range["G1:G12"];

            //Get the column to be filtered
            FilterColumn filtercolumn = (FilterColumn)sheet.AutoFilters[0];

            //Add a custom filter to filter data containing the string "Grocery"
            string strCrt = "Grocery";
            sheet.AutoFilters.CustomFilter(filtercolumn, FilterOperatorType.Equal, strCrt);

            //Apply the filter
            sheet.AutoFilters.Filter();

           //Save the result file
            workbook.SaveToFile("CustomAutoFilter.xlsx", ExcelVersion.Version2016);
        }
    }
}
Remove AutoFilter in Excel in C#
In addition to adding AutoFilters in Excel files, Spire.XLS for .NET also support removing or deleting the AutoFilters from Excel through the Worksheet.AutoFilters.Clear() method. The following are detailed steps.
- Create a Workbook instance.
- Load a sample Excel file using Workbook.LoadFromFile() method.
- Get a specified worksheet using Workbook.Worksheets[sheetIndex] property.
- Remove AutoFilter from the worksheet using Worksheet.AutoFilters.Clear() method.
- Save the result file using Workbook.SaveToFile() method.
- C#
using Spire.Xls;

namespace AddAutoFilter
{
    class Program
    {
        static void Main(string[] args)
        {
            //Create a Workbook instance
            Workbook workbook = new Workbook();

            //Load an Excel file
            workbook.LoadFromFile("CustomAutoFilter.xlsx");

            //Get the first worksheet
            Worksheet sheet = workbook.Worksheets[0];

            //Delete AutoFilter from the sheet
            sheet.AutoFilters.Clear();

           //Save the result file
            workbook.SaveToFile("RemoveAutoFilter.xlsx", ExcelVersion.Version2016);
        }
    }
}
Apply for a Temporary License
If you'd like to remove the evaluation message from the generated documents, or to get rid of the function limitations, please request a 30-day trial license for yourself.
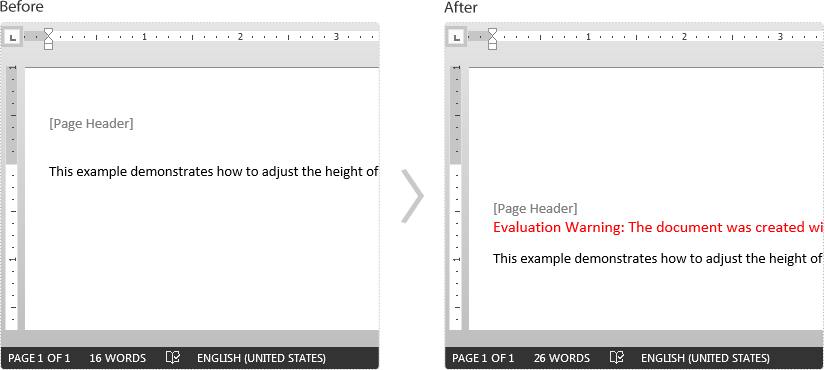
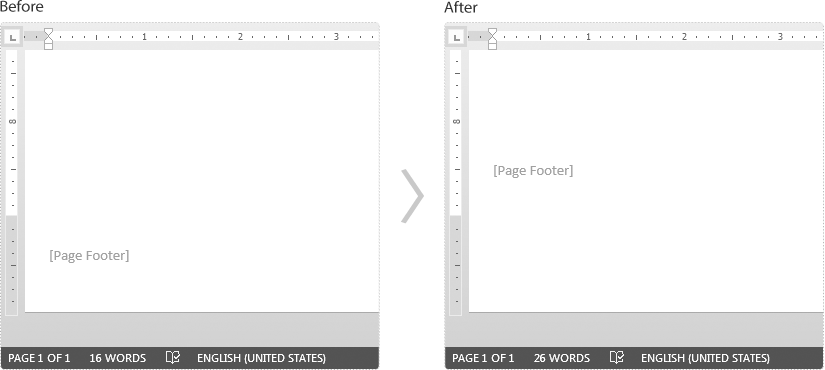
Adjust the Height of Headers and Footers in a Word document in C#
The height of headers and footers can be adjusted by using the HeaderDistance and the FooterDistance properties. The detail steps of how to adjust the height of headers and footers in a word document using Spire.Doc are shown below.
Detail steps:
Step 1: Instantiate a Document object and load the word document.
Document doc = new Document();
doc.LoadFromFile("Headers and Footers.docx");
Step 2: Get the first section.
Section section = doc.Sections[0];
Step 3: Adjust the height of headers and footers in the section.
section.PageSetup.HeaderDistance = 100;
section.PageSetup.FooterDistance = 100;
Step 4: Save the file.
doc.SaveToFile("Output.docx", FileFormat.Docx2013);
Screenshot:
Header:
Footer:
Full code:
//Instantiate a Document object
Document doc = new Document();
//Load the word document
doc.LoadFromFile("Headers and Footers.docx");

//Get the first section
Section section = doc.Sections[0];

//Adjust the height of headers in the section
section.PageSetup.HeaderDistance = 100;

//Adjust the height of footers in the section
section.PageSetup.FooterDistance = 100;

//Save the document
doc.SaveToFile("Output.docx", FileFormat.Docx2013);
Add a Total Row to Table in Excel in C#
We can quickly total data in an Excel table by adding a total row. This article demonstrates how to add a total row to a table in Excel using Spire.XLS.
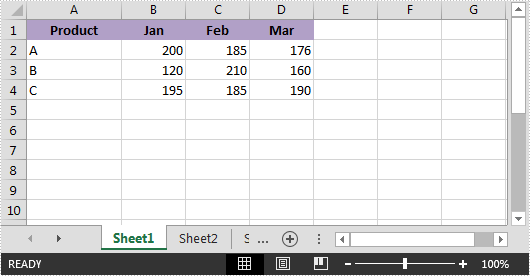
Blow is the screenshot of the example file:
Detail steps:
Step 1: Instantiate a Workbook object and load the excel file.
Workbook workbook = new Workbook();
workbook.LoadFromFile("Input.xlsx");
Step 2: Get the first worksheet.
Worksheet sheet = workbook.Worksheets[0];
Step 3: Create a table with the data from the specific cell range.
IListObject table = sheet.ListObjects.Create("Table", sheet.Range["A1:D4"]);
Step 4: Display total row.
table.DisplayTotalRow = true;
Step 5: Add a total row.
table.Columns[0].TotalsRowLabel = "Total";
table.Columns[1].TotalsCalculation = ExcelTotalsCalculation.Sum;
table.Columns[2].TotalsCalculation = ExcelTotalsCalculation.Sum;
table.Columns[3].TotalsCalculation = ExcelTotalsCalculation.Sum;
Step 6: Save the file.
workbook.SaveToFile("AddTotalRow.xlsx", ExcelVersion.Version2013);
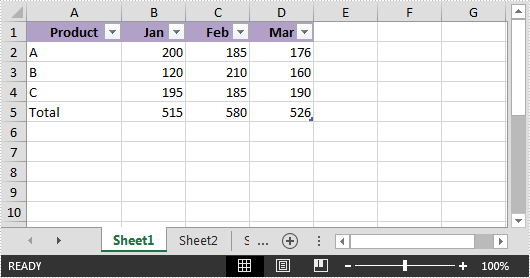
Output:
Full code:
using Spire.Xls;
using Spire.Xls.Core;
namespace AddTotalRow
{
    class Program
    {
        static void Main(string[] args)
        {
            //Instantiate a Workbook object
            Workbook workbook = new Workbook();
            //Load the Excel file
            workbook.LoadFromFile("Input.xlsx");

            //Get the first worksheet
            Worksheet sheet = workbook.Worksheets[0];

            //Create a table with the data from the specific cell range
            IListObject table = sheet.ListObjects.Create("Table", sheet.Range["A1:D4"]);

            //Display total row
            table.DisplayTotalRow = true;

            //Add a total row
            table.Columns[0].TotalsRowLabel = "Total";
            table.Columns[1].TotalsCalculation = ExcelTotalsCalculation.Sum;
            table.Columns[2].TotalsCalculation = ExcelTotalsCalculation.Sum;
            table.Columns[3].TotalsCalculation = ExcelTotalsCalculation.Sum;

            //Save the file
            workbook.SaveToFile("AddTotalRow.xlsx", ExcelVersion.Version2013);
        }
    }
}
Add Exit Animation Effect to a Shape in PowerPoint in C#
In Spire.Presentation, when we add a common animation effect that belongs to both entrance and exit types, it’s applied as entrance effect by default. This article is going to show you how to add exit animation effect to a shape in PowerPoint using Spire.Presentation.
Detail steps:
Step 1: Create a Presentation instance and get the first slide.
Presentation ppt = new Presentation();
ISlide slide = ppt.Slides[0];
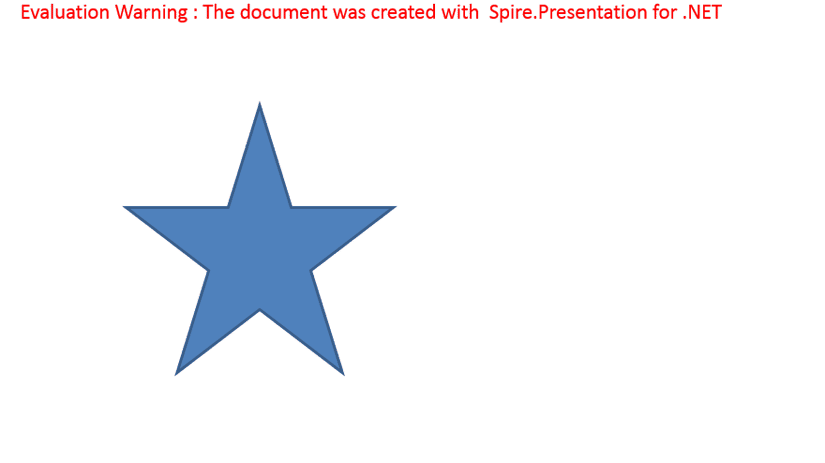
Step 2: Add a shape to the slide.
IShape starShape = slide.Shapes.AppendShape(ShapeType.FivePointedStar, new RectangleF(100, 100, 200, 200));
Step 3: Add random bars effect to the shape.
AnimationEffect effect = slide.Timeline.MainSequence.AddEffect(starShape, AnimationEffectType.RandomBars);
Step 4: Change the type of the effect from entrance to exit.
effect.PresetClassType = TimeNodePresetClassType.Exit;
Step 5: Save the file.
ppt.SaveToFile("ExitAnimationEffect.pptx", FileFormat.Pptx2013);
Screenshot:
Full code:
using Spire.Presentation;
using Spire.Presentation.Drawing.Animation;
using System.Drawing;

namespace AddExitAnimationEffect
{

    class Program
    {

        static void Main(string[] args)
        {
            {
                //Create a Presentation instance
                Presentation ppt = new Presentation();

                //Get the first slide
                ISlide slide = ppt.Slides[0];

                //Add a shape to the slide
                IShape starShape = slide.Shapes.AppendShape(ShapeType.FivePointedStar, new RectangleF(100, 100, 200, 200));

                //Add random bars effect to the shape
                AnimationEffect effect = slide.Timeline.MainSequence.AddEffect(starShape, AnimationEffectType.RandomBars);

                //Change effect type from entrance to exit
                effect.PresetClassType = TimeNodePresetClassType.Exit;

                //Save the file
                ppt.SaveToFile("ExitAnimationEffect.pptx", FileFormat.Pptx2013);


            }
        }

    }
}
How to use Spire.Doc on .NET Core
This program guide focus on helping you how to make Spire.Doc workable on Windows and Linux.
Starts from V 6.7.4, Spire.Doc supports .NET Core 2.0. Spire.Doc uses System.Drawing.Common, which depends on Libgdiplus library. So when you use Spire.Doc on .NET core, you need to install Libgdiplus library.
On Windows, we recommend you to get Spire.Doc package via Nuget. The Libgdiplus library will be installed automatically.

On Linux, you need to install Libgdiplus library independently. Please follow the below three steps to install it successfully.
Step1: Open xxxx.csproj file and write the code snippet into it.
<ItemGroup>
<PackageReference Include=”Spire.Doc” Version=”6.7.13”/>
</ItemGroup>
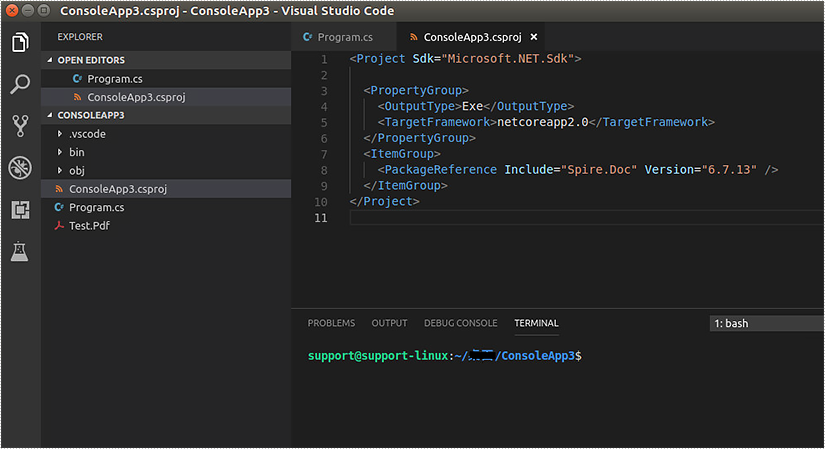
Step 2. Execute "dotnet build" command on terminal window of Visual Studio Code. It will install Spire.Doc package.

Step 3. Open terminal window on Linux and execute Libgdiplus library installation command, for example, the command on Linux Ubuntu is "sudo apt-get install libgdiplus".

Then you can use Spire.Doc on .NET core.
If you have any question, please feel free to contact us.
Replace Text with a Word document in C#
Spire.Doc provides several overloaded Replace methods to replace text in different scenarios. This article is going to show you how to replace a specified text in a template document with another document using Spire.Doc.
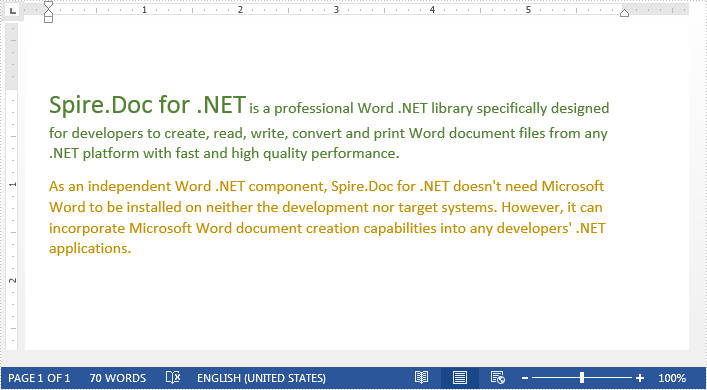
The template document:
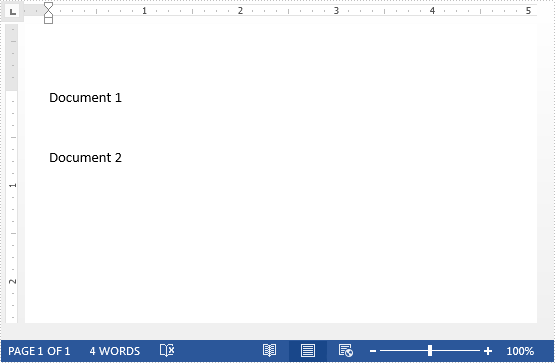
The document to replace text:
Detail steps:
Step 1: Load a template document.
Document document = new Document("Template.docx");
Step 2: Load another document to replace text.
IDocument replaceDocument = new Document("Document1.docx");
Step 3: Replace specified text with the other document.
document.Replace("Document 1", replaceDocument, false, true);
Step 4: Save the file.
document.SaveToFile("Output.docx", FileFormat.Docx2013);
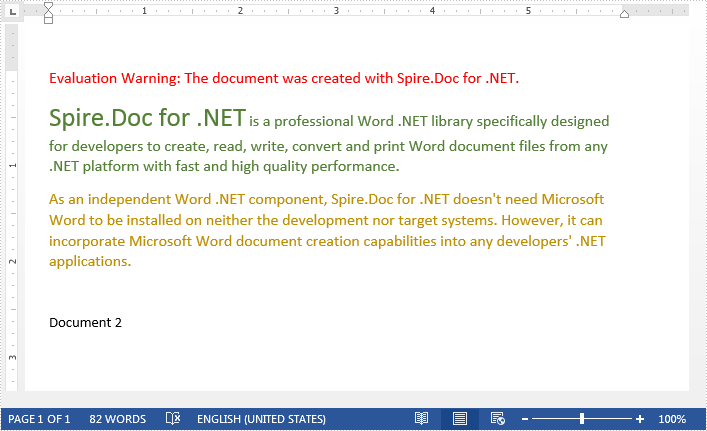
Output:
Full code:
using Spire.Doc;
using Spire.Doc.Interface;

namespace Replace_Text_With_Document
{
    class Program
    {
        static void Main(string[] args)
        {
            //Load a template document
            Document document = new Document("Template.docx");

            //Load another document to replace text
            IDocument replaceDocument = new Document("Document1.docx");

            //Replace specified text with the other document
            document.Replace("Document 1", replaceDocument, false, true);

            //Save the file
            document.SaveToFile("Output.docx", FileFormat.Docx2013);
        }
    }
}
Apply Soft Edges effect to Excel Chart in C#
This article elaborates the steps to apply soft edges effect to an excel chart using Spire.XLS.
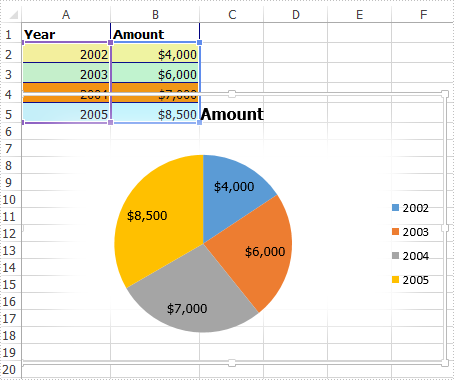
The example Excel file we used for demonstration:
Detail steps:
Step 1: Instantiate a Workbook object and load the excel file.
Workbook workbook = new Workbook();
workbook.LoadFromFile("Input.xlsx");
Step 2: Get the first worksheet.
Worksheet sheet = workbook.Worksheets[0];
Step 3: Get the chart.
IChart chart = sheet.Charts[0];
Step 4: Specify the size of the soft edge. Value can be set from 0 to 100.
chart.ChartArea.Shadow.SoftEdge = 10;
Step 5: Save the file.
workbook.SaveToFile("Output.xlsx", ExcelVersion.Version2013);
Output:
Full code:
using Spire.Xls;
using Spire.Xls.Core;

namespace Soft_Edges_in_Excel_Chart
{
    class Program
    {
        static void Main(string[] args)
        {
            //Instantiate a Workbook object
            Workbook workbook = new Workbook();
            //Load the Excel file
            workbook.LoadFromFile("Input.xlsx");

            //Get the first worksheet
            Worksheet sheet = workbook.Worksheets[0];

            //Get the chart
            IChart chart = sheet.Charts[0];

            //Specify the size of the soft edge. Value can be set from 0 to 100
            chart.ChartArea.Shadow.SoftEdge = 10;

            //Save the file
            workbook.SaveToFile("Output.xlsx", ExcelVersion.Version2013);
        }
    }
}