
Knowledgebase (2016)
Sometimes, you may want to hide one or more worksheets in an Excel workbook to prevent the data they contain from being viewed by others. After hiding, the data in the hidden worksheets will no longer be visible, but it can still be referenced by other worksheets. If you want to display the data again, you can show the hidden worksheets at any time. In this article, you will learn how to hide or show worksheets in Excel in C# and VB.NET using Spire.XLS for .NET library.
Install Spire.XLS for .NET
To begin with, you need to add the DLL files included in the Spire.XLS for .NET package as references in your .NET project. The DLL files can be either downloaded from this link or installed via NuGet.
PM> Install-Package Spire.XLS
Hide a Worksheet in Excel in C# and VB.NET
There can be two levels of worksheet hiding: hidden and very hidden. An end user can easily show a hidden worksheet using the unhide command of Excel, but if the worksheet is set as very hidden, he/she cannot make the sheet visible again via the Excel user interface.
In Spire.XLS for .NET, you can set a worksheet as hidden or very hidden by setting the Worksheet.Visibility property to WorksheetVisibility.Hidden or WorksheetVisibility.StrongHidden. Please note that you must leave at least one worksheet visible in an Excel workbook.
The following steps demonstrate how to set a worksheet as hidden or very hidden:
- Initialize an instance of the Workbook class.
- Load an Excel file through Workbook.LoadFromFile() method.
- Get a specific worksheet in the file by its index through Workbook.Worksheets[int] property.
- Set the worksheet as hidden or very hidden by setting the Worksheet.Visibility property to WorksheetVisibility.Hidden or WorksheetVisibility.StrongHidden.
- Save the result file using Workbook.SaveToFile() method.
- C#
- VB.NET
using Spire.Xls;

namespace HideWorksheetsInExcel
{
    class Program
    {
        static void Main(string[] args)
        {
            //Initialize an instance of the Workbook class
            Workbook workbook = new Workbook();
            //Load an Excel file
            workbook.LoadFromFile("Sample.xlsx");

            //Get the first worksheet
            Worksheet sheet1 = workbook.Worksheets[0];

            //Set the worksheet as hidden
            sheet1.Visibility = WorksheetVisibility.Hidden;

            //Get the second worksheet
            Worksheet sheet2 = workbook.Worksheets[1];

            //Set the worksheet as very hidden
            sheet2.Visibility = WorksheetVisibility.StrongHidden;

            //Save the result file
            workbook.SaveToFile("HideWorksheets.xlsx", ExcelVersion.Version2013);
        }
    }
}
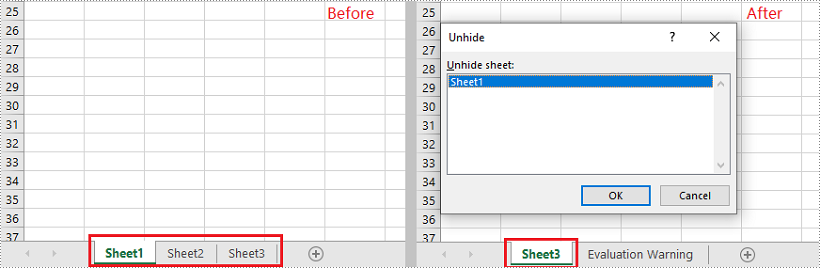
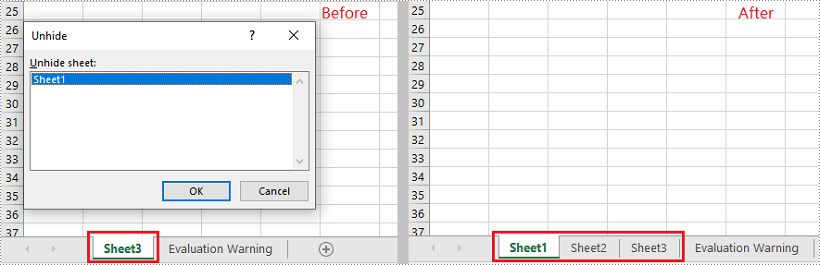
Show All Hidden Worksheets in Excel in C# and VB.NET
You can show a hidden worksheet in Excel by setting the Worksheet.Visibility property to WorksheetVisibility.Visible.
The following steps demonstrate how to show all hidden worksheets in an Excel file:
- Initialize an instance of the Workbook class.
- Load an Excel file through Workbook.LoadFromFile() method.
- Iterate through all worksheets in the Excel file.
- Find the hidden or very hidden worksheets, and then make them visible by setting the Worksheet.Visibility property to WorksheetVisibility.Visible.
- Save the result file using Workbook.SaveToFile() method.
- C#
- VB.NET
using Spire.Xls;

namespace ShowHiddenWorksheetsInExcel
{
    class Program
    {
        static void Main(string[] args)
        {
            //Initialize an instance of the Workbook class
            Workbook workbook = new Workbook();
            //Load an Excel file
            workbook.LoadFromFile("HideWorksheets.xlsx");

            //Iterate through all worksheets in the file
            foreach (Worksheet sheet in workbook.Worksheets)
            {
                //Show hidden worksheets
                if (sheet.Visibility == WorksheetVisibility.Hidden)
                {
                    sheet.Visibility = WorksheetVisibility.Visible;
                }
                //Show very hidden worksheets
                else if (sheet.Visibility == WorksheetVisibility.StrongHidden)
                {
                    sheet.Visibility = WorksheetVisibility.Visible;
                }
            }

            //Save the result file
            workbook.SaveToFile("ShowHiddenWorksheets.xlsx", ExcelVersion.Version2013);
        }
    }
}
Apply for a Temporary License
If you'd like to remove the evaluation message from the generated documents, or to get rid of the function limitations, please request a 30-day trial license for yourself.
In the tutorials part of Spire.Doc, we have introduced the simple and easy method to "Replace text in Word with Table in C#" and "Replace images in Word with Texts in C#". Sometimes, we need to replace text in Word with image. Spire.Doc also provides a quick and effective solution to achieve this function with a little bit different codes. This article is going to introduce the method to replace text in Word with image.
Note: Before start, please download the latest version of Spire.Doc and add Spire.Doc .dll in the bin folder as the reference of visual studio.
Sample document:

Step 1: Load the sample Word document and the image used to replace the text.
Document document = new Document();
document.LoadFromFile("s.docx");
Image image = Image.FromFile("2.bmp");
Step 2: Find the string "E-iceblue" in the document.
TextSelection[] selections = document.FindAllString("E-iceblue", true, true);
int index = 0;
TextRange range = null;
Step 3: Remove the text and replace it with Image
foreach (TextSelection selection in selections)
            {
                DocPicture pic = new DocPicture(document);
                pic.LoadImage(image);

                range = selection.GetAsOneRange();
                index = range.OwnerParagraph.ChildObjects.IndexOf(range);
                range.OwnerParagraph.ChildObjects.Insert(index, pic);
                range.OwnerParagraph.ChildObjects.Remove(range);

            }
Step 4: Save and launch the document to see effects.
document.SaveToFile("Sample.doc", FileFormat.Doc);
System.Diagnostics.Process.Start("Sample.doc");
Effects:

Full codes:
using System;
using System.Collections.Generic;
using System.Linq;
using System.Text;
using Spire.Doc;
using Spire.Doc.Documents;
using Spire.Doc.Fields;
using System.Drawing;

namespace Replace_Text_with_Image
{
    class Program
    {
        static void Main(string[] args)
        {
            Document document = new Document();
            document.LoadFromFile("s.docx");
            Image image = Image.FromFile("2.bmp");

            TextSelection[] selections = document.FindAllString("E-iceblue", true, true);
            int index = 0;
            TextRange range = null;

            foreach (TextSelection selection in selections)
            {
                DocPicture pic = new DocPicture(document);
                pic.LoadImage(image);

                range = selection.GetAsOneRange();
                index = range.OwnerParagraph.ChildObjects.IndexOf(range);
                range.OwnerParagraph.ChildObjects.Insert(index, pic);
                range.OwnerParagraph.ChildObjects.Remove(range);

            }

            document.SaveToFile("Sample.doc", FileFormat.Doc);
            System.Diagnostics.Process.Start("Sample.doc");

        }
    }
}
How to Split a PowerPoint Document into Individual Slides in C#, VB.NET
2015-06-15 09:07:21 Written by support iceblueIt must be time-consuming if you manually split a large PowerPoint document that contains a lot of slides into presentations that each contains one original slide. In this article, I'll introduce a simple solution for doing this using Spire.Presentation in C#, VB.NET.
The core thought in this solution is to create a new PowerPoint presentation and remove the blank slide, then clone the specified slide of original presentation to the new one.
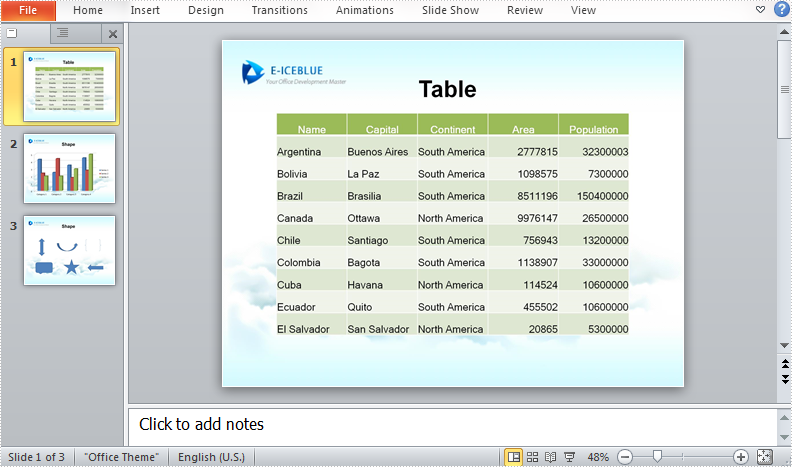
Test File:
Code Snippet:
Step 1: Initialize a new instance of Presentation class.
Presentation ppt = new Presentation();
Step 2: Load the test file.
ppt.LoadFromFile("test.pptx");
Step 3: Initialize another instance of Presentation class, and remove the blank slide.
Presentation newppt = new Presentation();
newppt.Slides.RemoveAt(0);
Step 4: Append the specified slide from old presentation to the new one.
newppt.Slides.Append(ppt.Slides[0]);
Step 5: Save the file.
newppt.SaveToFile("result.pptx", FileFormat.Pptx2010);
Step 6: Use a for loop to export each slide in the presentation as individual slides.
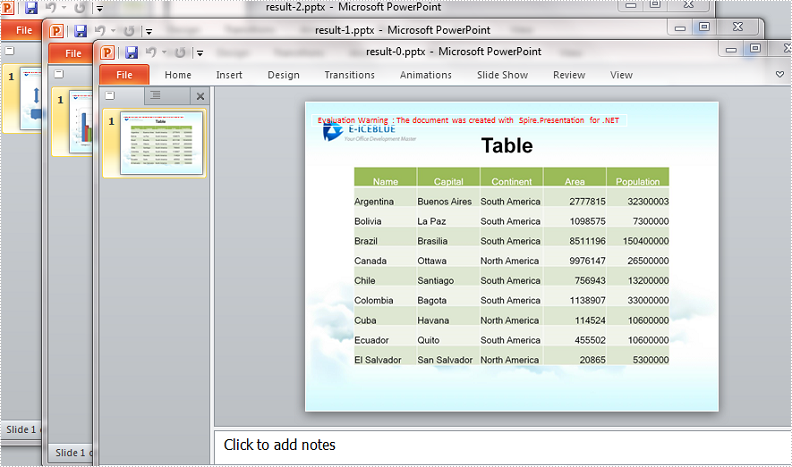
Result:
Entire Code:
using Spire.Presentation;
using System;
namespace SplitPPT
{
    class Program
    {
        static void Main(string[] args)
        {
            Presentation ppt = new Presentation();
            ppt.LoadFromFile("test.pptx");

            for (int i = 0; i < ppt.Slides.Count; i++)
            {
                Presentation newppt = new Presentation();
                newppt.Slides.RemoveAt(0);
                newppt.Slides.Append(ppt.Slides[i]);
                newppt.SaveToFile(String.Format("result-{0}.pptx", i), FileFormat.Pptx2010);

            }
        }
    }
}
Imports Spire.Presentation
Namespace SplitPPT
	Class Program
		Private Shared Sub Main(args As String())
			Dim ppt As New Presentation()
			ppt.LoadFromFile("test.pptx")

			For i As Integer = 0 To ppt.Slides.Count - 1
				Dim newppt As New Presentation()
				newppt.Slides.RemoveAt(0)
				newppt.Slides.Append(ppt.Slides(i))

				newppt.SaveToFile([String].Format("result-{0}.pptx", i), FileFormat.Pptx2010)
			Next
		End Sub
	End Class
End Namespace
