
Image (8)
Sometimes after you have finished an Excel workbook, you may need to replace some of the existing pictures with better ones for the purpose of making the workbook more appealing and persuasive. In this tutorial, you will learn how to replace a picture in Excel using Spire.XLS for .NET.
Install Spire.XLS for .NET
To begin with, you need to add the DLL files included in the Spire.XLS for .NET package as references in your .NET project. The DLLs files can be either downloaded from this link or installed via NuGet.
- Package Manager
PM> Install-Package Spire.XLS
Replace a Picture in Excel
The following are the detailed steps to replace a picture with another one using Spire.XLS for .NET.
- Create a Workbook object.
- Load a sample file using Workbook.LoadFromFile() method.
- Use Workbook.Worksheets[0] to get the first worksheet.
- Use Worksheet.Pictures[0] property to get the first picture from the first worksheet
- Use Image.FromFile() method to load an image from the specified file, and set it as a new value of ExcelPicture.Picture property. To do so, the original picture will be replaced with the new one.
- Save the document using Workbook.SaveToFile() method.
- C#
- VB.NET
using Spire.Xls;
using Spire.Xls.Collections;
using System.Drawing;

namespace ReplacePictureinExcel
{
    class Program
    {
        static void Main(string[] args)
        {
            //Create a Workbook instance
            Workbook workbook = new Workbook();
            //Load the Excel file
            workbook.LoadFromFile (“Input.xls”);

            //Get the first sheet
            Worksheet sheet = workbook.Worksheets[0];

            //Get Excel picture collection
            PicturesCollection pictureCollection = sheet.Pictures;

            //Get the first picture from the collection
            ExcelPicture excelPicture = pictureCollection[0];

            // Creates an Image from the specified file.
            excelPicture.Picture = Image.FromFile (image);

            //Save the document
            workbook.SaveToFile("ReplaceImage.xlsx", ExcelVersion.Version2013);
        }
    }
}
Imports Spire.Xls
Imports Spire.Xls.Collections
Imports System.Drawing

Namespace ReplacePictureinExcel
	Class Program
		Private Shared Sub Main(args As String())

			'Create a Workbook instance
			Dim workbook As New Workbook()
			'Load the Excel file
			workbook.LoadFromFile(Input.xls)

			'Get the first sheet
			Dim sheet As Worksheet = workbook.Worksheets(0)

			'Get Excel picture collection
			Dim pictureCollection As PicturesCollection = sheet.Pictures

			'Get the first picture from the collection
			Dim excelPicture As ExcelPicture = pictureCollection(0)

			' Creates an Image from the specified file.
			excelPicture.Picture = Image.FromFile(image)

			'Save the document
			workbook.SaveToFile("ReplaceImage.xlsx", ExcelVersion.Version2013)
		End Sub
	End Class
End Namespace
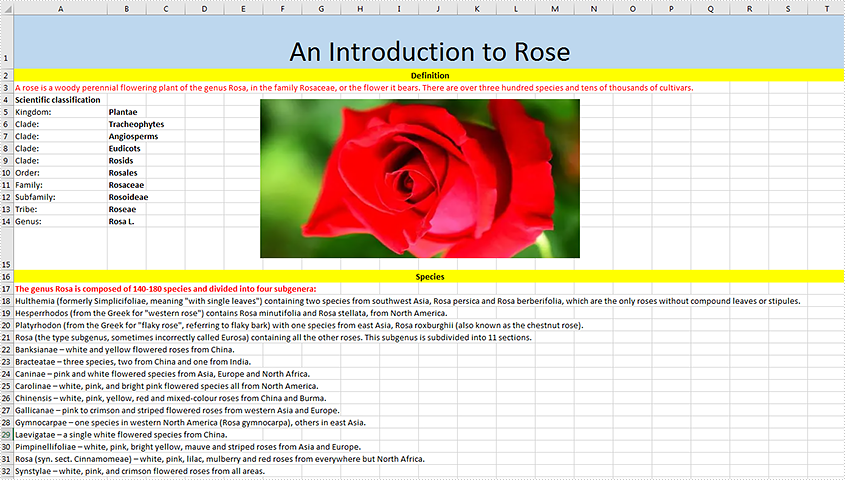
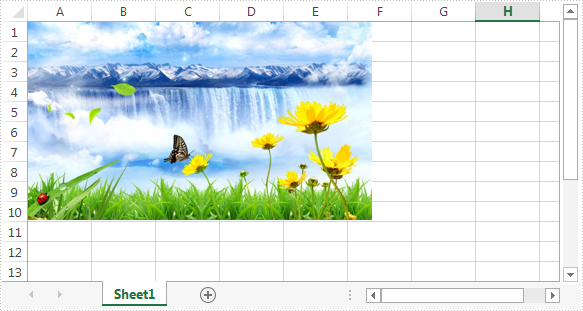
The original file:
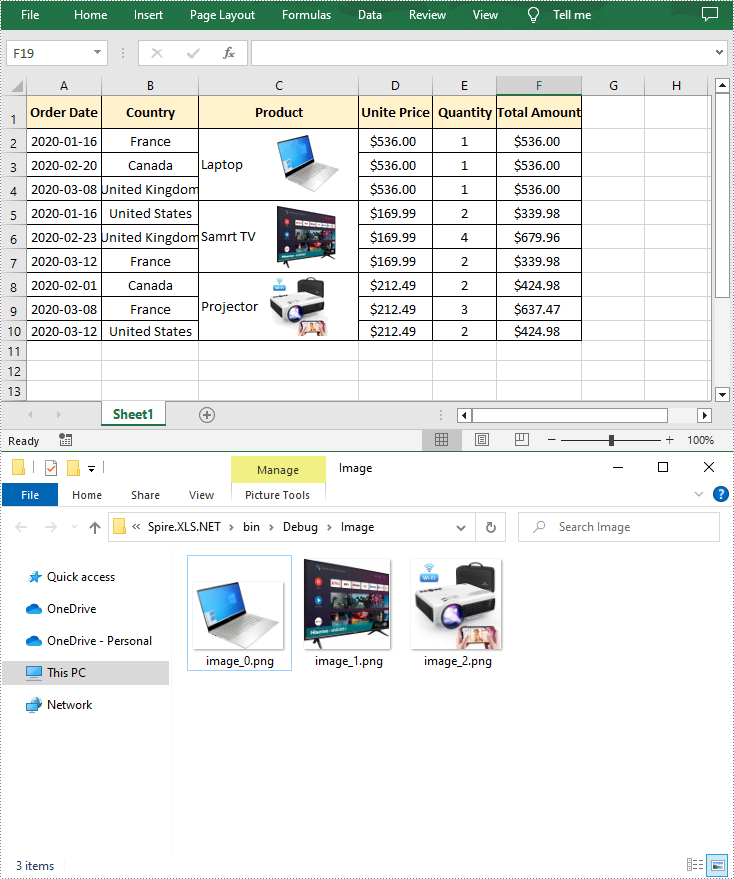
The generated file:

Apply for a Temporary License
If you'd like to remove the evaluation message from the generated documents, or to get rid of the function limitations, please request a 30-day trial license for yourself.
Although Excel files typically store numbers and data, they can also contain images associated with the file. After inserting images into Excel, it may sometimes be necessary to extract the images for use elsewhere, or to remove them to improve simplicity. In this article, you will learn how to programmatically extract or remove images from an Excel document using Spire.XLS for .NET.
Install Spire.XLS for .NET
To begin with, you need to add the DLL files included in the Spire.XLS for .NET package as references in your .NET project. The DLL files can be either downloaded from this link or installed via NuGet.
PM> Install-Package Spire.XLS
Extract Images from Excel in C# and VB.NET
Spire.XLS for .NET allows you to extract all images in an Excel worksheet at once. The following are the detailed steps.
- Create a Workbook instance.
- Load a sample Excel file using Workbook.LoadFromFile() method.
- Get a specific worksheet using Workbook.Worksheets[] property.
- Loop through to get all pictures in the worksheet using Worksheet.Pictures property.
- Extract pictures and save them to a specified file path using ExcelPicture.Picture.Save() method.
- C#
- VB.NET
using Spire.Xls;

namespace ExtractImages
{
    class Program
    {
        static void Main(string[] args)
        {
            //Create a Workbook instance
            Workbook workbook = new Workbook();

            //Load a sample Excel document
            workbook.LoadFromFile("input.xlsx");

            //Get the first worksheet
            Worksheet sheet = workbook.Worksheets[0];

            //Get all images in the worksheet
            for (int i = sheet.Pictures.Count - 1; i >= 0; i--)
            {
                ExcelPicture picture = sheet.Pictures[i];

                //Extract the images
                picture.Picture.Save(string.Format(@"Image\image_{0}.png", i));
            }
        }
    }
}
Delete Images from Excel in C# and VB.NET
To delete pictures from an Excel worksheet, you can use the Worksheet.Pictures.Remove() method. The following are the detailed steps.
- Create a Workbook instance.
- Load a sample Excel file using Workbook.LoadFromFile() method.
- Get a specific worksheet using Workbook.Worksheets[] property.
- Loop through all pictures in the worksheet and remove them using Worksheet.Pictures.Remove() method.
- Save the result document using Workbook.SaveToFile() method.
- C#
- VB.NET
using Spire.Xls;

namespace DeleteImages
{
    class Program
    {
        static void Main(string[] args)
        {
            //Create a Workbook instance
            Workbook workbook = new Workbook();

            //Load a sample Excel document
            workbook.LoadFromFile("input0.xlsx");

            //Get the first worksheet
            Worksheet sheet = workbook.Worksheets[0];

            //Delete all pictures from the worksheet
            for (int i = sheet.Pictures.Count - 1; i >= 0; i--)
            {
                sheet.Pictures[i].Remove();
            }

            //Save the result document
            workbook.SaveToFile("DeleteImages.xlsx", ExcelVersion.Version2016);
        }
    }
}
Apply for a Temporary License
If you'd like to remove the evaluation message from the generated documents, or to get rid of the function limitations, please request a 30-day trial license for yourself.
Reset the size and position for the image on Excel worksheet
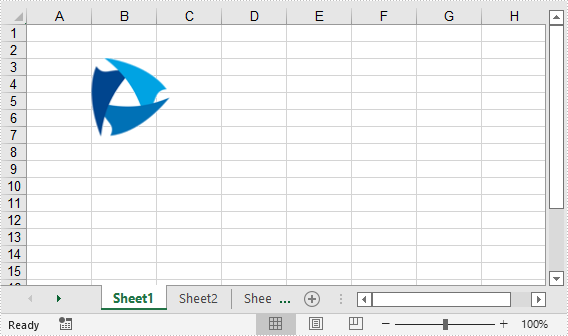
2017-06-05 07:52:47 Written by support iceblueWhen we add an image to the Excel worksheet, we always need to reset the size and position for the image to list the image where we want and make the size coordinate with the other elements on the Excel worksheet. This article will focus on demonstrates how to apply picture settings by using Spire.XLS.
Step 1: Initialize an instance of Workbook and get the first worksheet.
Workbook workbook = new Workbook();
Worksheet sheet = workbook.Worksheets[0];
Step 2: Add a picture to the first worksheet.
ExcelPicture picture = sheet.Pictures.Add(1, 1, "Logo.png");
Step 3: Set the size for the picture.
picture.Width = 75;
picture.Height = 75;
Step 4: Set the position for the picture.
picture.Left = 200;
picture.Top = 100;
Step 5: Save the document to file.
workbook.SaveToFile("Output.xlsx",FileFormat.Version2013);
Effective screenshot after reset the size and position for the image:
Full codes:
using Spire.Xls;
namespace ReseSizeandPosition
{
    class Program
    {
        static void Main(string[] args)
        {
            Workbook workbook = new Workbook();
            Worksheet sheet = workbook.Worksheets[0];

            ExcelPicture picture = sheet.Pictures.Add(1, 1, "Logo.png");

            picture.Width = 75;
            picture.Height = 75;

            picture.Left = 200;
            picture.Top = 100;

            workbook.SaveToFile("Output.xlsx", FileFormat.Version2013);
        }
    }
}
How to Extract Image from Excel Worksheet in C#, VB.NET
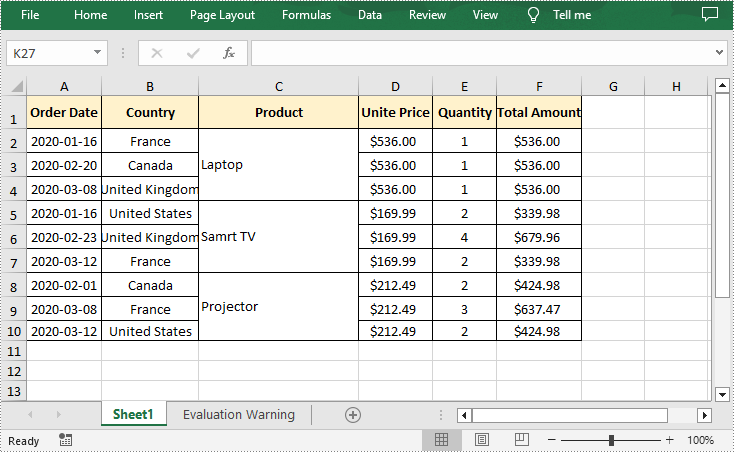
2017-04-26 07:38:00 Written by support iceblueIn the previous article, we've introduced how to insert image into excel worksheet. In this article, we'll demonstrate how to extract image from Excel worksheet. Please check the below screenshot of the source excel worksheet which contains an image:
Code snippet:
Step 1: Instantiate an instance of Workbook class and load the excel file.
Workbook workbook = new Workbook();
workbook.LoadFromFile(@"C:\Users\Administrator\Desktop\test.xlsx");
Step 2: Get the first worksheet.
Worksheet sheet = workbook.Worksheets[0];
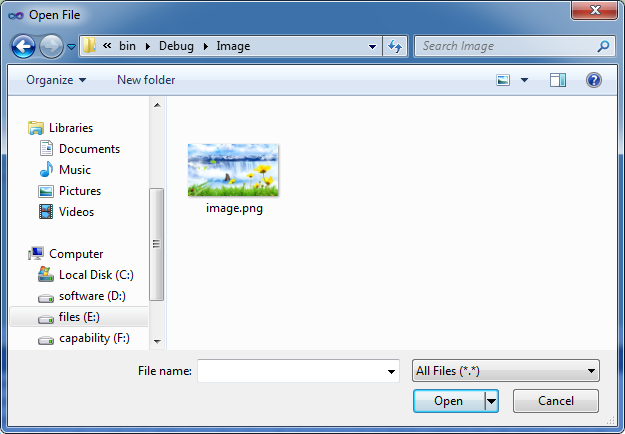
Step 3: Get the first picture in the worksheet and save it to disk.
ExcelPicture picture = sheet.Pictures[0];
picture.Picture.Save(@"Image\image.png", ImageFormat.Png);
Screenshot:
Full code:
using System.Drawing.Imaging;
using Spire.Xls;

namespace Extract_Image
{
    class Program
    {
        static void Main(string[] args)
        {
            Workbook workbook = new Workbook();
            workbook.LoadFromFile(@"C:\Users\Administrator\Desktop\test.xlsx");
            Worksheet sheet = workbook.Worksheets[0];
            ExcelPicture picture = sheet.Pictures[0];
            picture.Picture.Save(@"Image\image.png", ImageFormat.Png);
        }
    }
}
Imports System.Drawing.Imaging
Imports Spire.Xls

Namespace Extract_Image
	Class Program
		Private Shared Sub Main(args As String())
			Dim workbook As New Workbook()
			workbook.LoadFromFile("C:\Users\Administrator\Desktop\test.xlsx")
			Dim sheet As Worksheet = workbook.Worksheets(0)
			Dim picture As ExcelPicture = sheet.Pictures(0)
			picture.Picture.Save("Image\image.png", ImageFormat.Png)
		End Sub
	End Class
End Namespace
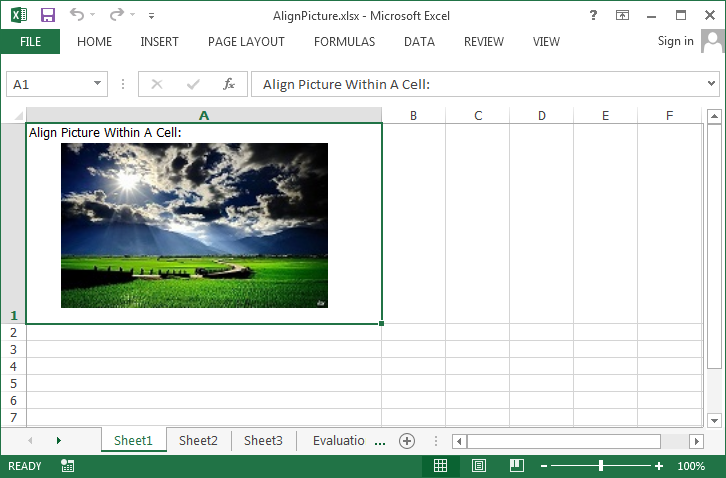
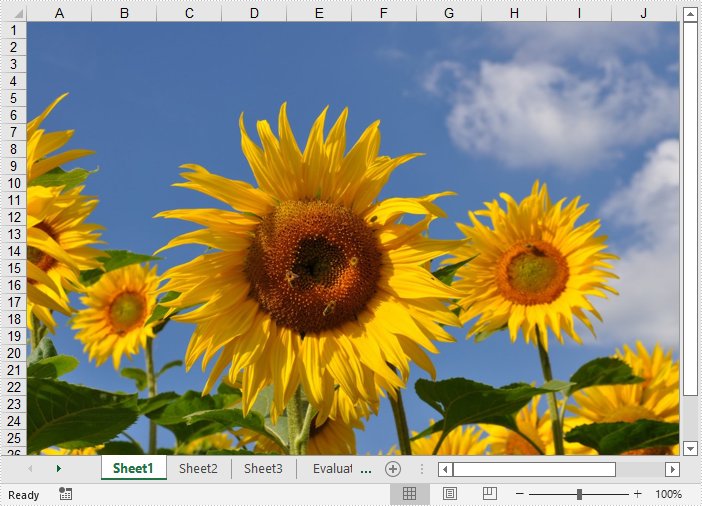
By default, when we insert an image to a cell, the image automatically be placed at top left corner. If there are some text in the same cell, then the text will be covered by the image. To avoid the problem, we need to vertically or horizontally align the picture. This article focuses on how to align a picture within a cell using Spire.XLS with C#, VB.NET.
Code Snippet:
Step 1: Create an object of Workbook and get the first worksheet.
Workbook wb = new Workbook();
Worksheet sheet = wb.Worksheets[0];
Step 2: Insert an image to the specific cell using Pictures.Add(int topRow, int leftColumn, string filename) method.
string picPath = @"C:\Users\Administrator\Desktop\scenery.jpg";
ExcelPicture picture = sheet.Pictures.Add(1, 1, picPath);
Step 3: Adjust the column width and row height so that the cell can contain the picture.
sheet.Columns[0].ColumnWidth = 50;
sheet.Rows[0].RowHeight = 150;
Step 4: Vertically and horizontally align the image by setting values for LeftColumnOffset and TopRowOffset properties.
picture.LeftColumnOffset = 100;
picture.TopRowOffset = 25;
Step 5: Save the file.
wb.SaveToFile("AlignPicture.xlsx", ExcelVersion.Version2013);
Output:
Full Code:
using Spire.Xls;
namespace AlignPicture
{
    class Program
    {
        static void Main(string[] args)
        {
            Workbook wb = new Workbook();
            Worksheet sheet = wb.Worksheets[0];

            sheet.Range["A1"].Text = "Align Picture Within A Cell:";
            sheet.Range["A1"].Style.VerticalAlignment = VerticalAlignType.Top;

            string picPath = @"C:\Users\Administrator\Desktop\scenery.jpg";
            ExcelPicture picture = sheet.Pictures.Add(1, 1, picPath);

            sheet.Columns[0].ColumnWidth = 50;
            sheet.Rows[0].RowHeight = 150;

            picture.LeftColumnOffset = 100;
            picture.TopRowOffset = 25;

            wb.SaveToFile("AlignPicture.xlsx", ExcelVersion.Version2013);
        }
    }
}
Imports Spire.Xls
Namespace AlignPicture
	Class Program
		Private Shared Sub Main(args As String())
			Dim wb As New Workbook()
			Dim sheet As Worksheet = wb.Worksheets(0)

			sheet.Range("A1").Text = "Align Picture Within A Cell:"
			sheet.Range("A1").Style.VerticalAlignment = VerticalAlignType.Top

			Dim picPath As String = "C:\Users\Administrator\Desktop\scenery.jpg"
			Dim picture As ExcelPicture = sheet.Pictures.Add(1, 1, picPath)

			sheet.Columns(0).ColumnWidth = 50
			sheet.Rows(0).RowHeight = 150

			picture.LeftColumnOffset = 100
			picture.TopRowOffset = 25

			wb.SaveToFile("AlignPicture.xlsx", ExcelVersion.Version2013)
		End Sub
	End Class
End Namespace
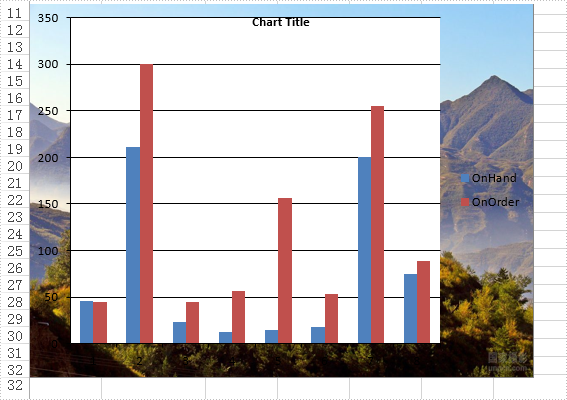
Set the offset of image when the fill way of chart is picture fill
2015-04-17 07:39:10 Written by support iceblueSet offset of the filled image could make your chart background pictures zoom and show proportional as you wish. This article shows how to set the offset of image via Spire.XLS.
Here are the steps:
Step 1: Create an instance of Spire.XLS.Workbook.
Workbook book = new Workbook();
Step 2: Load data and create a contrast sheet.
workbook.LoadFromFile("test.xlsx",ExcelVersion.Version2013);
Worksheet sheet = workbook.Worksheets[0];
Worksheet sheet1 = workbook.Worksheets.Add("Contrast");
Step 3: Add chart1 and background image to sheet1 as comparision.
Chart chart1 = sheet1.Charts.Add(ExcelChartType.ColumnClustered);
chart1.DataRange = sheet.Range["D1:E9"];
chart1.SeriesDataFromRange = false;

chart1.LeftColumn = 1;
chart1.TopRow = 11;
chart1.RightColumn = 8;
chart1.BottomRow = 33;

chart1.ChartArea.Fill.CustomPicture(Image.FromFile("2.jpg"), "None");
Step 4: Add same chart and background image then set offset of image by transforming image in sheet[0] as form of XlsShapeFill. Then set the property of PicStretch of each direction with percentage and Tile property.
Chart chart = sheet.Charts.Add(ExcelChartType.ColumnClustered);
chart.DataRange = sheet.Range["D1:E9"];
chart.SeriesDataFromRange = false;

chart.LeftColumn = 1;
chart.TopRow = 11;
chart.RightColumn = 8;
chart.BottomRow = 33;

chart.ChartArea.Fill.CustomPicture(Image.FromFile("2.jpg"), "None");

IChart ichart = sheet.Charts[0];
(ichart.ChartArea.Fill as XlsShapeFill).Tile = false;
(ichart.ChartArea.Fill as XlsShapeFill).PicStretch.Left = 10;
(ichart.ChartArea.Fill as XlsShapeFill).PicStretch.Top = 20;
(ichart.ChartArea.Fill as XlsShapeFill).PicStretch.Right = 10;
(ichart.ChartArea.Fill as XlsShapeFill).PicStretch.Bottom = 5;
Step 5: Save and review.
workbook.SaveToFile("result.xlsx", ExcelVersion.Version2013);
System.Diagnostics.Process.Start("result.xlsx");
Screenshot:

Full code:
using Spire.Xls;
using Spire.Xls.Core;
using Spire.Xls.Core.Spreadsheet.Shapes;
using System.Drawing;
namespace SetOffsetofImage
{
    class Program
    {
        static void Main(string[] args)
        {
            Workbook workbook = new Workbook();
            workbook.LoadFromFile("test.xlsx", ExcelVersion.Version2013);
            Worksheet sheet = workbook.Worksheets[0];
            Worksheet sheet1 = workbook.Worksheets.Add("Contrast");

            //add contrast
            Chart chart1 = sheet1.Charts.Add(ExcelChartType.ColumnClustered);
            chart1.DataRange = sheet.Range["D1:E9"];
            chart1.SeriesDataFromRange = false;

            //Chart Position
            chart1.LeftColumn = 1;
            chart1.TopRow = 11;
            chart1.RightColumn = 8;
            chart1.BottomRow = 33;

            chart1.ChartArea.Fill.CustomPicture(Image.FromFile("2.jpg"), "None");

            //add original
            Chart chart = sheet.Charts.Add(ExcelChartType.ColumnClustered);
            chart.DataRange = sheet.Range["D1:E9"];
            chart.SeriesDataFromRange = false;

            //Chart Position
            chart.LeftColumn = 1;
            chart.TopRow = 11;
            chart.RightColumn = 8;
            chart.BottomRow = 33;

            chart.ChartArea.Fill.CustomPicture(Image.FromFile("2.jpg"), "None");

            IChart ichart = sheet.Charts[0];
            (ichart.ChartArea.Fill as XlsShapeFill).Tile = false;
            (ichart.ChartArea.Fill as XlsShapeFill).PicStretch.Left = 10;
            (ichart.ChartArea.Fill as XlsShapeFill).PicStretch.Top = 20;
            (ichart.ChartArea.Fill as XlsShapeFill).PicStretch.Right = 10;
            (ichart.ChartArea.Fill as XlsShapeFill).PicStretch.Bottom = 5;

            workbook.SaveToFile("result.xlsx", ExcelVersion.Version2013);
            System.Diagnostics.Process.Start("result.xlsx");
        }
    }
}
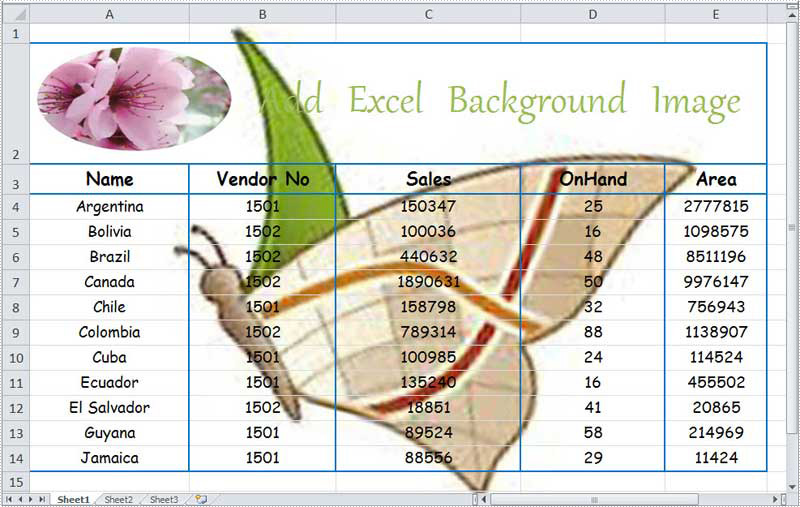
This section aims at providing developers a solution on how to insert Excel background image in C#, VB.NET via a .NET Excel library Spire.XLS for .NET.
Spire.XLS for .NET enables you to add background image in your Excel file by setting BackgroundImage property of the object PageSetup to be the image you want to insert, you can see the code here: Spire.Xls.Worksheet.PageSetup.BackgroundImage. Now let us start our task.
Task:
If you are not familiar with Spire.XLS for .NET, please allow me to give a short description of it. Spire.XLS for .NET is an Excel application which enables users to perform a wide range of processing tasks in Excel documents such as generate, edit and handle Excel files in C#.
You will use Spire.XLS for .NET, so we can download Spire.XLS for .NET first. After installing it on system, please start your project either in C# Console Application or VB.NET Console Application. You also can create your project in Windows Forms Application. Please do not forget to add Spire.Xls as reference. The default path is “..\Spire.XLS\Bin\Bin\NET4.0\ Spire.XLS.dll”. Below shows the whole code of my project:
using Spire.Xls;
using System.Drawing;
namespace InsertExcelBackgroundImage
{
    class Program
    {
        static void Main(string[] args)
        {
            //initialize a new instance of Workbook
            Workbook workbook = new Workbook();
            //import an Excel file from system
            workbook.LoadFromFile(@"..\Excel background image.xlsx");
            //get the first worksheet
            Worksheet sheet = workbook.Worksheets[0];
            //open an image
            Bitmap bm = new Bitmap(Image.FromFile(@"..\butterflytable.jpg"));
            //set the image to be background image of the worksheet
            sheet.PageSetup.BackgoundImage = bm;
            //save excel file
            workbook.SaveToFile("result.xlsx", ExcelVersion.Version2010);
            //launch the file
            System.Diagnostics.Process.Start("result.xlsx");
        }
    }
}
Imports Spire.Xls
Imports System.Drawing
Namespace InsertExcelBackgroundImage
	Class Program
		Private Shared Sub Main(args As String())
			'initialize a new instance of Workbook
			Dim workbook As New Workbook()
			'import an Excel file from system
			workbook.LoadFromFile("..\Excel background image.xlsx")
			'get the first worksheet
			Dim sheet As Worksheet = workbook.Worksheets(0)
			'open an image
			Dim bm As New Bitmap(Image.FromFile("..\butterflytable.jpg"))
			'set the image to be background image of the worksheet
			sheet.PageSetup.BackgoundImage = bm
			'save excel file
			workbook.SaveToFile("result.xlsx", ExcelVersion.Version2010)
			'launch the file
			System.Diagnostics.Process.Start("result.xlsx")
		End Sub
	End Class
End Namespace
Output File:
After executing above code, I successfully add background image in Excel file, you can see the output file as below:
In this section, I have introduced the detail solution on how to insert background image in Excel file with C#, VB.NET. I wish it can help you. If you have any questions, comments or advice, you can add it at E-iceblue Forum, our professionals will give prompt reply.
Images are highly effective in conveying thoughts and ideas. Sometimes, you may need to insert images into an Excel report so that audiences can grasp your intentions quickly and clearly. In this article, you will learn how to insert image into Excel in C# and VB.NET using Spire.XLS for .NET library.
- Insert Image from Disk into Excel in C# and VB.NET
- Insert Web Image from a URL into Excel in C# and VB.NET
Install Spire.XLS for .NET
To begin with, you need to add the DLL files included in the Spire.XLS for .NET package as references in your .NET project. The DLL files can be either downloaded from this link or installed via NuGet.
PM> Install-Package Spire.XLS
Insert Image from Disk into Excel in C# and VB.NET
The following are the steps to insert an image from disk into Excel:
- Initialize a Workbook instance.
- Get the desired worksheet using Workbook.Worksheets[sheetIndex] property.
- Insert an image into the worksheet using the Worksheet.Pictures.Add() method.
- Save the result file using Workbook.SaveToFile() method.
- C#
- VB.NET
using Spire.Xls;

namespace InsertImageInExcel
{
    class Program
    {
        static void Main(string[] args)
        {
            //Initialize a Workbook instance
            Workbook workbook = new Workbook();
            //Get the first worksheet
            Worksheet sheet = workbook.Worksheets[0];

            //Insert image into the worksheet
            sheet.Pictures.Add(1, 1, @"E:\work\sample.jpg");

            //Save the result file
            workbook.SaveToFile("InsertImageFromDisk.xlsx", ExcelVersion.Version2016);
        }
    }
}
Insert Web Image from a URL into Excel in C# and VB.NET
The following are the steps to insert a web image from a URL into Excel:
- Initialize a Workbook instance.
- Get the desired worksheet using Workbook.Worksheets[sheetIndex] property.
- Initialize a WebClient instance, then download the web image as a byte array from the specified URL using WebClient.DownloadData(urlAddress) method.
- Initialize a MemoryStream instance from the byte array.
- Create an Image object from the memory stream then insert it into the worksheet using Worksheet.Pictures.Add() method.
- Save the result file using Workbook.SaveToFile() method.
- C#
- VB.NET
using Spire.Xls;
using System.Drawing;
using System.IO;
using System.Net;

namespace InsertWebImageInExcel
{
    class Program
    {
        static void Main(string[] args)
        {
            //Initialize a Workbook instance
            Workbook workbook = new Workbook();

            //Get the first sheet
            Worksheet sheet = workbook.Worksheets[0];

            //Specify the image URL
            string URL = "https://www.e-iceblue.com/downloads/demo/Logo.png";

            //Initialize a WebClient instance
            WebClient webClient = new WebClient();
            //Download the image as a byte array from the URL
            byte[] imageData = webClient.DownloadData(URL);

            //Initialize a MemoryStream instance from the byte array
            MemoryStream objImage = new MemoryStream(imageData);

            //Create an Image object from the memory stream
            Image image = Image.FromStream(objImage);

            //Insert the image into the worksheet
            sheet.Pictures.Add(3, 2, image);

            //Save the result file
            workbook.SaveToFile("InsertWebImage.xlsx", ExcelVersion.Version2016);
        }
    }
}
Apply for a Temporary License
If you'd like to remove the evaluation message from the generated documents, or to get rid of the function limitations, please request a 30-day trial license for yourself.
