
Header and Footer (6)
How to add different header & footer for the first page
2016-12-20 06:41:53 Written by support iceblueWith the help of Spire.XLS, we could easily add header and footer to the excel page; we can also set different Header and Footer for Odd and Even Pages in Excel. This article will demonstrate how to add different header & footer for the first page on the excel worksheet.
Here comes to the code snippets of how to set different header and footer for the first page:
Step 1: Initialize an instance of Workbook and get the first worksheet.
Workbook workbook = new Workbook();
Worksheet sheet = workbook.Worksheets[0];
Step 2: Set the value of DifferentFirst as 1, which indicates that headers/footers for first page are different from the other pages.
Step 3: Set the header and footer for the first page.
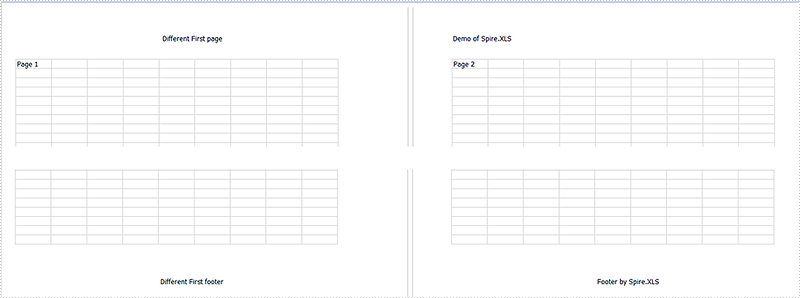
sheet.PageSetup.FirstHeaderString = "Different First page";
sheet.PageSetup.FirstFooterString = "Different First footer";
Step 4: Set the other pages' header and footer. If we don't need to set the header and footer for other pages, we can ignore this step.
sheet.PageSetup.LeftHeader = "Demo of Spire.XLS";
sheet.PageSetup.CenterFooter = "Footer by Spire.XLS";
Step 5: Save the document to file.
workbook.SaveToFile("Result.xlsx", FileFormat.Version2010);
Effective screenshot:
Full codes:
using Spire.Xls;
namespace SetDifferentHeaderorFooter
{
    class Program
    {
        static void Main(string[] args)
        {
            Workbook workbook = new Workbook();
            Worksheet sheet = workbook.Worksheets[0];

            sheet.PageSetup.DifferentFirst = 1;

            sheet.PageSetup.FirstHeaderString = "Different First page";
            sheet.PageSetup.FirstFooterString = "Different First footer";

            sheet.PageSetup.LeftHeader = "Demo of Spire.XLS";
            sheet.PageSetup.CenterFooter = "Footer by Spire.XLS";

            workbook.SaveToFile("result.xlsx", FileFormat.Version2010);
        }
    }
}
Set Different Header or Footer for Odd and Even Pages in Excel in C#, VB.NET
2016-09-22 00:59:10 Written by support iceblueHeaders or footers are added to a worksheet to deliver some extra information about each page. By default, the headers or footers on odd and even pages are the same. However, we are able to set different headers or footers for odd and even pages to display different information.
Following sections demonstrate how to create different odd and even page headers/footers using Spire.XLS.
Code Snippet:
Step 1: Initialize an instance of Workbook and get the first worksheet.
Workbook wb = new Workbook();
Worksheet sheet = wb.Worksheets[0];
Step 2: Set the value of DifferentOddEven as 1, which indicates that headers/footers for odd and even pages are different.
sheet.PageSetup.DifferentOddEven = 1;
Step 3: Set header and footer string for odd pages, and format the string.
sheet.PageSetup.OddHeaderString = "&\"Arial\"&12&B&KFFC000Odd_Header";
sheet.PageSetup.OddFooterString = "&\"Arial\"&12&B&KFFC000Odd_Footer";
Step 4: Set different header and footer string for even pages, and format the string with different color.
sheet.PageSetup.EvenHeaderString = "&\"Arial\"&12&B&KFF0000Even_Header";
sheet.PageSetup.EvenFooterString = "&\"Arial\"&12&B&KFF0000Even_Footer";
Step 5: Save the file.
wb.SaveToFile("OddEvenHeaderFooter.xlsx", ExcelVersion.Version2013);
Output:

Full Code:
using Spire.Xls;
namespace SetDifferentHeaderorFooter
{
    class Program
    {
        static void Main(string[] args)
        {
            Workbook wb = new Workbook();
            Worksheet sheet = wb.Worksheets[0];

            sheet.Range["A1"].Text = "Page 1";
            sheet.Range["J1"].Text = "Page 2";

            sheet.PageSetup.DifferentOddEven = 1;
            sheet.PageSetup.OddHeaderString = "&\"Arial\"&12&B&KFFC000Odd_Header";
            sheet.PageSetup.OddFooterString = "&\"Arial\"&12&B&KFFC000Odd_Footer";
            sheet.PageSetup.EvenHeaderString = "&\"Arial\"&12&B&KFF0000Even_Header";
            sheet.PageSetup.EvenFooterString = "&\"Arial\"&12&B&KFF0000Even_Footer";

            wb.SaveToFile("OddEvenHeaderFooter.xlsx", ExcelVersion.Version2013);
        }
    }
}
Imports Spire.Xls
Namespace SetDifferentHeaderorFooter
	Class Program
		Private Shared Sub Main(args As String())
			Dim wb As New Workbook()
			Dim sheet As Worksheet = wb.Worksheets(0)

			sheet.Range("A1").Text = "Page 1"
			sheet.Range("J1").Text = "Page 2"

			sheet.PageSetup.DifferentOddEven = 1
			sheet.PageSetup.OddHeaderString = "&""Arial""&12&B&KFFC000Odd_Header"
			sheet.PageSetup.OddFooterString = "&""Arial""&12&B&KFFC000Odd_Footer"
			sheet.PageSetup.EvenHeaderString = "&""Arial""&12&B&KFF0000Even_Header"
			sheet.PageSetup.EvenFooterString = "&""Arial""&12&B&KFF0000Even_Footer"

			wb.SaveToFile("OddEvenHeaderFooter.xlsx", ExcelVersion.Version2013)
		End Sub
	End Class
End Namespace
Watermarks are often used in electronic documents to protect their copyright or to specify their status. Microsoft Excel does not come with a built-in feature to add watermarks to Excel worksheets, but you can use some ingenious approaches to implement the watermark effect, such as inserting a header image or WordArt. In this article, we will demonstrate how to create and add a header image in Excel to mimic a watermark in C# and VB.NET using Spire.XLS for .NET.
Install Spire.XLS for .NET
To begin with, you need to add the DLL files included in the Spire.XLS for.NET package as references in your .NET project. The DLL files can be either downloaded from this link or installed via NuGet.
PM> Install-Package Spire.XLS
Add a Watermark to Excel in C# and VB.NET
To create a header image, we defined a custom method called DrawWatermarkImage(). This method enables you to generate a custom image based on a string, such as "Confidential", "Draft", "Internal Use" or any text you want to be shown as the watermark. After the image is generated, you can add it to the header section of an Excel worksheet through the Worksheet.PageSetup.LeftHeaderImage and Worksheet.PageSetup.LeftHeader properties.
The following are the detailed steps:
- Create an instance of the Workbook class.
- Load an Excel file using Workbook.LoadFromFile() method.
- Create a font and define a text.
- Loop through all worksheets in the Excel file.
- Call the DrawWatermarkImage() method to create a watermark image based on the text.
- Set the image as the image source of the left header in each worksheet through Worksheet.PageSetup.LeftHeaderImage property.
- Display the image in the left header section by setting the Worksheet.PageSetup.LeftHeader property to “&G”.
- Change the view mode of the worksheet to page layout in order to view the watermark.
- Save the result file using Workbook.SaveToFile() method.
- C#
- VB.NET
using Spire.Xls;
using System.Drawing;

namespace AddWatermark
{
    class Program
    {
        static void Main(string[] args)
        {
            //initialize a new instance of the Workbook class and load an Excel file
            Workbook workbook = new Workbook();
            workbook.LoadFromFile(@"Sample.xlsx");

            //Create a font
            Font font = new Font("Arial", 40);
            //Define a text
            string watermark = "Confidential";

            //Loop through all worksheets in the file
            foreach (Worksheet sheet in workbook.Worksheets)
            {
                //Call the DrawWatermarkImage() method to create an image based on the text
                Image imgWtrmrk = DrawWatermarkImage(watermark, font, Color.LightCoral, Color.White, sheet.PageSetup.PageHeight, sheet.PageSetup.PageWidth);

                //Add the image to the left header section of each worksheet
                sheet.PageSetup.LeftHeaderImage = imgWtrmrk;
                sheet.PageSetup.LeftHeader = "&G";

                //Change the view mode of the worksheet to page layout in order to view the watermark
                sheet.ViewMode = ViewMode.Layout;
            }

            //Save the result file
            workbook.SaveToFile("AddWatermark.xlsx", ExcelVersion.Version2013);
        }

        private static Image DrawWatermarkImage(string text, Font font, Color textColor, Color backColor, double height, double width)
        {
            //Create an image with specified width and height
            Image img = new Bitmap((int)width, (int)height);
            //Create a Graphics object from the image
            Graphics drawing = Graphics.FromImage(img);

            //Get the size of the text
            SizeF textSize = drawing.MeasureString(text, font);

            //Change the origin of the coordinate system by prepending the specified translation to the transformation matrix of the Graphics
            drawing.TranslateTransform(((int)width - textSize.Width) / 2, ((int)height - textSize.Height) / 2);

            //Apply rotation
            drawing.RotateTransform(-45);

            //Change the origin of the coordinate system by prepending the specified translation to the transformation matrix of the Graphics
            drawing.TranslateTransform(-((int)width - textSize.Width) / 2, -((int)height - textSize.Height) / 2);

            //Paint the background
            drawing.Clear(backColor);

            //Create a brush for the text
            Brush textBrush = new SolidBrush(textColor);

            //Draw the text onto the center position of the Graphics
            drawing.DrawString(text, font, textBrush, ((int)width - textSize.Width) / 2, ((int)height - textSize.Height) / 2);
            drawing.Save();
            return img;
        }
    }
}

Apply for a Temporary License
If you'd like to remove the evaluation message from the generated documents, or to get rid of the function limitations, please request a 30-day trial license for yourself.
How to change the font and size for Excel header and footer in C#
2014-10-29 07:18:58 Written by support iceblueExcel header and footer give additional information of an Excel sheet, such as the page number, author name, topic name and date etc. With the help of Spire.XLS, developers can easily add text header and footer into an excel spreadsheet. Sometimes, the font and size of the header and footer may be different with the font in the excel documents, and it makes the document in disorder. This article will demonstrate how to change the font and size for the text on excel header and footer.
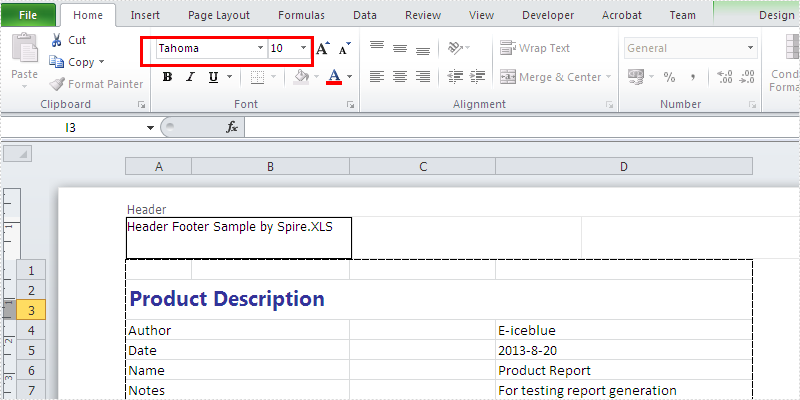
Firstly, check the original font and size on Excel header and footer:
By using Spire.XLS, we can easily set the new size and font for the header and footer text. Here comes to the steps of how to change the font and size for excel header and footer:
Step 1: Create an excel document and load the Excel with header and footer from file:
Workbook workbook = new Workbook();
workbook.LoadFromFile("Sample.xlsx");
Step 2: Gets the first worksheet in the Excel file
Worksheet sheet = workbook.Worksheets[0];
Step 3: Set the new font and size for the header and footer
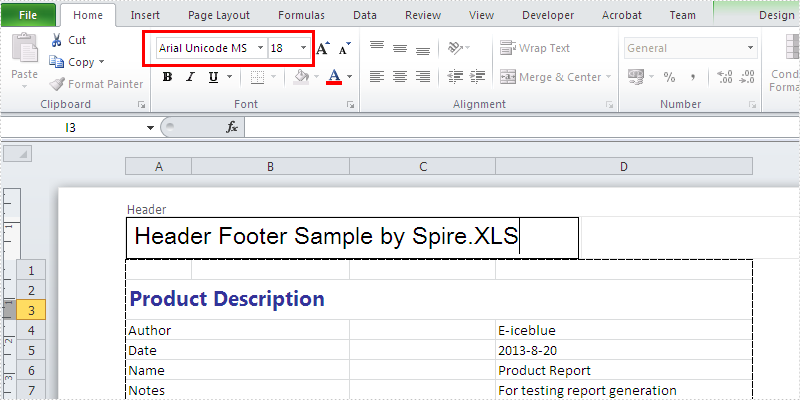
string text = sheet.PageSetup.LeftHeader;
//"Arial Unicode MS" is font name, "18" is font size
text = "&\"Arial Unicode MS\"&18 Header Footer Sample by Spire.XLS ";
sheet.PageSetup.LeftHeader = text;
sheet.PageSetup.RightFooter = text;
Step 4: Save the document to file and preview it
workbook.SaveToFile(@"..\Result.xlsx",ExcelVersion.Version2010);
System.Diagnostics.Process.Start(@"..\Result.xlsx");
Effective screenshot after changing the font and size for the header:
Full codes:
using Spire.Xls;
namespace Changefontforheaderfooter
{
    class Program
    {
        static void Main(string[] args)
        {
            Workbook workbook = new Workbook();
            workbook.LoadFromFile("Sample.xlsx");
            Worksheet sheet = workbook.Worksheets[0];
            string text = sheet.PageSetup.LeftHeader;
            //"Arial Unicode MS" is font name, "18" is font size
            text = "&\"Arial Unicode MS\"&18 Header Footer Sample by Spire.XLS ";
            sheet.PageSetup.LeftHeader = text;
            sheet.PageSetup.RightFooter = text;
            //Save workbook and preview it
            workbook.SaveToFile(@"..\Result.xlsx",ExcelVersion.Version2010);
            System.Diagnostics.Process.Start(@"..\Result.xlsx");
        }
    }
}
Excel header and footer gives additional information of a spreadsheet. And it can be in text and image. We have already shows you the text header and footer in excel worksheet, this guide focuses on introducing how to insert image header and footer for Excel files in C# by using Spire.XLS for .NET.
Firstly, Download Spire.XLS for .NET (or Spire.Office for .NET) and install it on your system. The Spire.XLS installation is clean, professional and wrapped up in a MSI installer.
Then, adds Spire.XLS.dll as reference in the downloaded Bin folder thought the below path: "..\Spire.XLS\Bin\NET4.0\ Spire.XLS.dll".
Now it comes to the details of how to add image header and footer in C#:
Step 1: Create a new excel document and load from the file.
Workbook workbook = new Workbook();
workbook.LoadFromFile(@"..\..\XLS1.xlsx");
Step 2: Get a first worksheet.
Worksheet sheet = workbook.Worksheets[0];
Step 3: Load the image and set header and footer style.
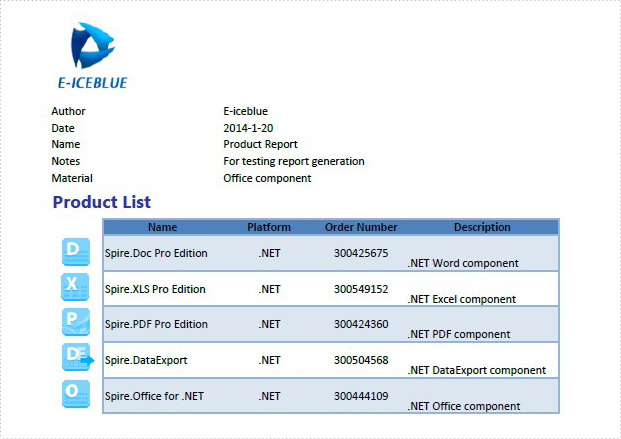
Image image = Image.FromFile(@"..\..\logo.png");

//Set Header format
sheet.PageSetup.LeftHeaderImage = image;
sheet.PageSetup.LeftHeader = "&G";

//Set Footer format
sheet.PageSetup.CenterFooterImage = image;
sheet.PageSetup.CenterFooter = "&G";
Step 4: Save the document to file.
workbook.SaveToFile(@"..\..\result.xlsx", ExcelVersion.Version2010);
Effected screenshot:
The full codes:
using Spire.Xls;
using System.Drawing;
namespace AddImageHeaderandFooter
{
    class Program
    {
        static void Main(string[] args)
        {
            Workbook workbook = new Workbook();
            workbook.LoadFromFile(@"..\..\XLS1.xlsx");
            Worksheet sheet = workbook.Worksheets[0];
            Image image = Image.FromFile(@"..\..\logo.png");

            sheet.PageSetup.LeftHeaderImage = image;
            sheet.PageSetup.LeftHeader = "&G";

            sheet.PageSetup.CenterFooterImage = image;
            sheet.PageSetup.CenterFooter = "&G";

            workbook.SaveToFile(@"..\..\result.xlsx", ExcelVersion.Version2010);
        }
    }
}
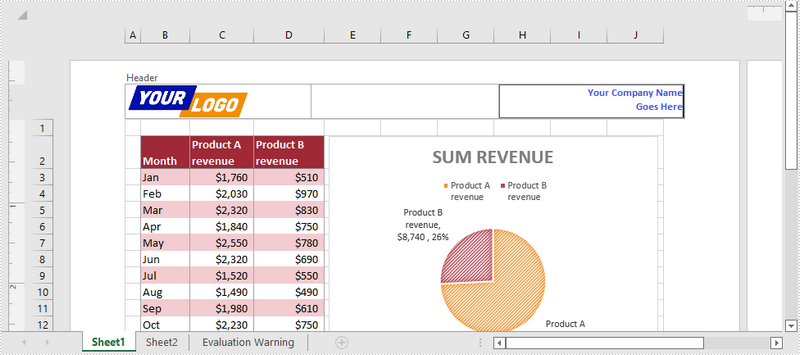
In Excel files, headers and footers provide rich content at the top and bottom of worksheet pages. The content can include a logo, company name, page number, date, and time, etc. This article shows you how to add text, images, as well as fields (like page numbers) to Excel headers or footers using Spire.XLS for .NET.
- Add an Image and Formatted Text to Excel Header
- Add the Current Date and Page Numbers to Excel Footer
Spire.XLS for .NET provides the PageSetup class to work with the page setup in Excel including headers and footers. Specifically, it contains LeftHeader property, CenterHeader property, RightHeader property, LeftFooter property, etc. to represent the left section, center section and right section of a header or footer. To add fields to headers or footers, or to apply formatting to text, you’ll need to use the scripts listed in the following table.
| Script | Description |
| &P | The current page numbers. |
| &N | The total number of pages. |
| &D | The current data. |
| &T | The current time. |
| &G | A picture. |
| &A | The worksheet name. |
| &F | The file name. |
| &B | Make text bold. |
| &I | Italicize text. |
| &U | Underline text. |
| &"font name" | Represents a font name, for example, &"Arial". |
| & + Integer | Represents font size, for example, &12. |
| &K + Hex color code | Represents font color, for example, &KFF0000. |
Install Spire.XLS for .NET
To begin with, you need to add the DLL files included in the Spire.XLS for.NET package as references in your .NET project. The DLL files can be either downloaded from this link or installed via NuGet.
PM> Install-Package Spire.XLS
Add an Image and Formatted Text to Excel Header
The following are the steps to add an image and formatted text to the header of an existing Excel document using Spire.XLS for .NET.
- Create a Workbook object, and load a sample Excel file using Workbook.LoadFromFile() method.
- Get a specific worksheet through the Workbook.Worksheets[index] property.
- Load an image, scale it and set it as the image source of the left header through the PageSetup.LeftHeaderImage property.
- Display image in the left header section by setting the PageSetup.LeftHeader property to “&G”.
- Save the workbook to another Excel file using Workbook.SaveToFile() method.
- C#
- VB.NET
using Spire.Xls;
using System.Drawing;

namespace AddImageAndTextToHeader
{
    class Program
    {
        static void Main(string[] args)
        {
            //Create a Workbook object
            Workbook wb = new Workbook();

            //Load an existing Excel file
            wb.LoadFromFile(@"C:\Users\Administrator\Desktop\sample.xlsx");

            //Get the first worksheet
            Worksheet sheet = wb.Worksheets[0];

            //Load an image
            Image image = Image.FromFile(@"C:\Users\Administrator\Desktop\your-logo.png");

            //Scale the image
            Bitmap bitmap = new Bitmap(image, new Size(image.Width / 2, image.Height / 2));

            //Add image to header’s left section
            sheet.PageSetup.LeftHeaderImage = bitmap;
            sheet.PageSetup.LeftHeader = "&G";

            //Add formatted text to header’s right section
            sheet.PageSetup.RightHeader = "&\"Calibri\"&B&10&K4253E2Your Company Name \n Goes Here";

            //Save the file
            wb.SaveToFile("Header.xlsx", ExcelVersion.Version2016);
        }
    }
}
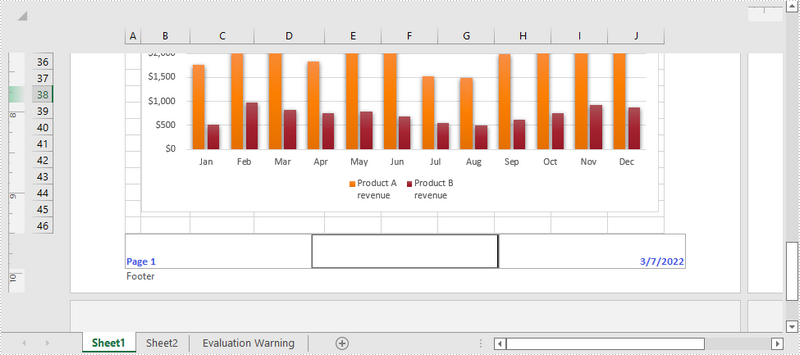
Add the Current Date and Page Numbers to Excel Footer
The following are the steps to add the current date and page numbers to the footer of an existing Excel document using Spire.XLS for .NET.
- Create a Workbook object, and load a sample Excel file using Workbook.LoadFromFile() method.
- Get a specific worksheet through the Workbook.Worksheets[index] property.
- Add page numbers with formatting to the left footer section by setting the PageSetup.LeftFooter property to “&\"Calibri\"&B&10&K4253E2Page &P”. You can customize the page numbers’ formatting according to your preference.
- Add the current date to the right footer section by setting the PageSetup.RightFooter property to “&\"Calibri\"&B&10&K4253E2&D”. Likewise, you can change the appearance of the date string as desired.
- Save the workbook to another Excel file using Workbook.SaveToFile() method.
- C#
- VB.NET
using Spire.Xls;

namespace AddDateAndPageNumberToFooter
{
    class Program
    {
        static void Main(string[] args)
        {
            //Create a Workbook object
            Workbook wb = new Workbook();

            //Load an exsting Excel file
            wb.LoadFromFile(@"C:\Users\Administrator\Desktop\sample.xlsx");

            //Get the first worksheet
            Worksheet sheet = wb.Worksheets[0];

            //Add page number to footer's left section
            sheet.PageSetup.LeftFooter = "&\"Calibri\"&B&10&K4253E2Page &P";

            //Add current date to footer's right section
            sheet.PageSetup.RightFooter = "&\"Calibri\"&B&10&K4253E2&D";

            //Save the file
            wb.SaveToFile("Footer.xlsx", ExcelVersion.Version2016);
        }
    }
}
Apply for a Temporary License
If you'd like to remove the evaluation message from the generated documents, or to get rid of the function limitations, please request a 30-day trial license for yourself.
