Auto Filter is the most convenient way to select the data we want from a large amount of the data in an excel data table. With the help of Spire.XLS for .NET, developers can use the method ListObjects to filter the data and format it as a table. This article will focus on show you how to add table with filter in Excel.
Step 1: Create an excel document and load the Excel from file:
Workbook workbook = new Workbook();
workbook.LoadFromFile("DataTable.xlsx");
Step 2: Gets the first worksheet in the Excel file
Worksheet sheet = workbook.Worksheets[0];
Step 3: Create a List Object named in Table
sheet.ListObjects.Create("Table", sheet.Range[1, 1, sheet.LastRow, sheet.LastColumn]);
Step 4: Set the BuiltInTableStyle for List object.
sheet.ListObjects[0].BuiltInTableStyle = TableBuiltInStyles.TableStyleLight9;
Step 5: Save the document to file.
workbook.SaveToFile("Filter.xlsx", ExcelVersion.Version2010);
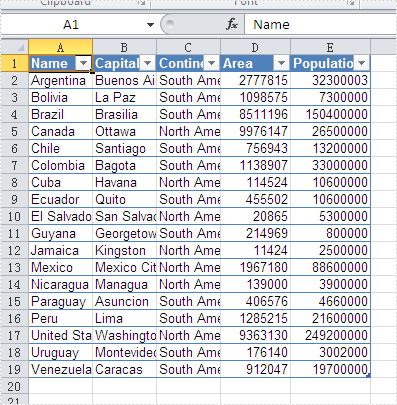
Effective screenshot after the date has been auto filtered:
Full codes:
namespace Excelfilter
{
    class Program
    {
        static void Main(string[] args)
        {
            Workbook workbook = new Workbook();
            workbook.LoadFromFile("DataTable.xlsx");

            Worksheet sheet = workbook.Worksheets[0];

            sheet.ListObjects.Create("Table", sheet.Range[1, 1, sheet.LastRow, sheet.LastColumn]);

            sheet.ListObjects[0].BuiltInTableStyle = TableBuiltInStyles.TableStyleLight9;

            workbook.SaveToFile("Filter.xlsx", ExcelVersion.Version2010);
        }
    }
}