

Spire.Doc for .NET (332)
Children categories
It is not uncommon at work that we may receive two versions of a Word document and face the need to find the differences between them. Document comparison is particularly important and popular in the fields of laws, regulations and education. In this article, you will learn how to compare two Word documents in C# and VB.NET by using Spire.Doc for .NET.
- Compare Two Documents and Save Result in a Third Word Document
- Compare Two Documents and Return Insertions and Deletions in Lists
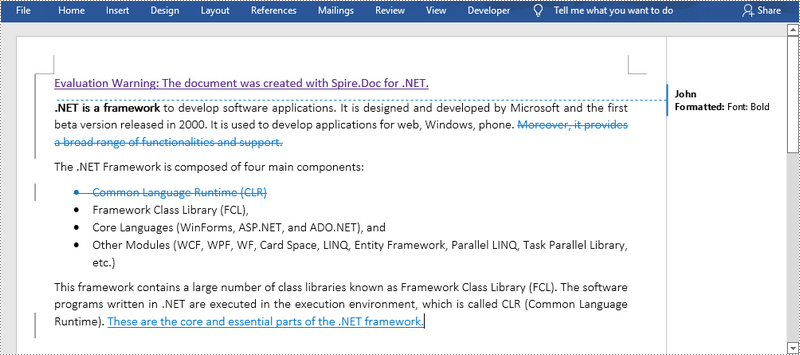
Below is a screenshot of the two Word documents that’ll be compared.

Install Spire.Doc for .NET
To begin with, you need to add the DLL files included in the Spire.Doc for .NET package as references in your .NET project. The DLL files can be either downloaded from this link or installed via NuGet.
PM> Install-Package Spire.Doc
Compare Two Documents and Save Result in a Third Word Document
Saving the comparison result in a separate Word document allows us to see all the changes made to the original document, including insertions, deletions as well as modifications on formatting. The following are the steps to compare two documents and save the result in a third Word document using Spire.Doc for .NET.
- Load two Word documents separately while initialing the Document objects.
- Compare these two documents using Document.Compare() method.
- Save the result in a third Word document using ;Document.SaveToFile() method.
- C#
- VB.NET
using Spire.Doc;

namespace CompareDocuments
{
    class Program
    {
        static void Main(string[] args)
        {
            //Load one Word document
            Document doc1 = new Document("C:\\Users\\Administrator\\Desktop\\original.docx");

            //Load the other Word document
            Document doc2 = new Document("C:\\Users\\Administrator\\Desktop\\revised.docx");

            //Compare two documents
            doc1.Compare(doc2, "John");

            //Save the differences in a third document
            doc1.SaveToFile("Differences.docx", FileFormat.Docx2013);
            doc1.Dispose();
        }
    }
}
Compare Two Documents and Return Insertions and Deletions in Lists
Developers may only want to obtain the insertions and deletions instead of the whole differences. The following are the steps to get insertions and deletions in two separate lists.
- Load two Word documents separately while initialing the Document objects.
- Compare two documents using Document.Compare() method.
- Get the revisions using the constructor function of the DifferRevisions ;class.
- Get a list of insertions through DifferRevisions.InsertRevisions property.
- Get a list of deletions through DifferRevisions.DeleteRevisions property.
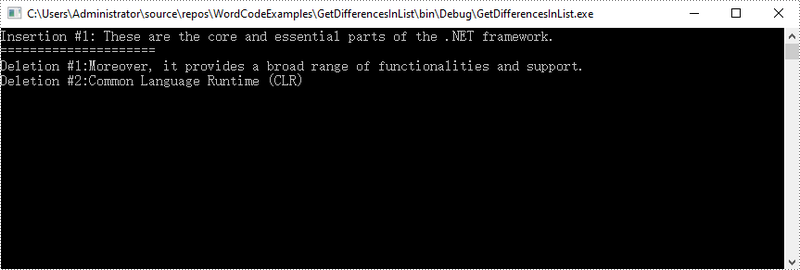
- Loop through the elements in the two lists to get the specific insertion and deletion.
- C#
- VB.NET
using Spire.Doc;
using Spire.Doc.Fields;
using System;

namespace GetDifferencesInList
{
    class Program
    {
        static void Main(string[] args)
        {
            //Load one Word document
            Document doc1 = new Document("C:\\Users\\Administrator\\Desktop\\original.docx");

            //Load the other Word document
            Document doc2 = new Document("C:\\Users\\Administrator\\Desktop\\revised.docx");

            //Compare the two Word documents
            doc1.Compare(doc2, "Author");

            //Get the revisions
            DifferRevisions differRevisions = new DifferRevisions(doc1);

            //Return the insertion revisions in a list
            var insetRevisionsList = differRevisions.InsertRevisions;

            //Return the deletion revisions in a list
            var deletRevisionsList = differRevisions.DeleteRevisions;

            //Create two int variables
            int m = 0;
            int n = 0;

            //Loop through the insertion revision list
            for (int i = 0; i < insetRevisionsList.Count; i++)
            {
                if (insetRevisionsList[i] is TextRange)
                {
                    m += 1;
                    //Get the specific revision and get its content
                    TextRange textRange = insetRevisionsList[i] as TextRange;
                    Console.WriteLine("Insertion #" + m + ":" + textRange.Text);
                }
            }
            Console.WriteLine("=====================");

            //Loop through the deletion revision list
            for (int i = 0; i < deletRevisionsList.Count; i++)
            {
                if (deletRevisionsList[i] is TextRange)
                {
                    n += 1;
                    //Get the specific revision and get its content
                    TextRange textRange = deletRevisionsList[i] as TextRange;
                    Console.WriteLine("Deletion #" + n + ":" + textRange.Text);
                }
            }
            Console.ReadKey();
        }
    }
}
Apply for a Temporary License
If you'd like to remove the evaluation message from the generated documents, or to get rid of the function limitations, please request a 30-day trial license for yourself.
How to Mannually Add Spire.Doc as Dependency in a .NET Standard Library Project
2019-10-22 09:02:07 Written by support iceblueAs System.Drawing only supported on Windows in NET6.0, you need to use SkiaSharp instead under NET5.0 or NET6.0 in Linux, or inside docker container. Please follow the next steps to use the NetStandard dlls to get SkiaSharp to your project manually. We will use Spire.Doc as example.
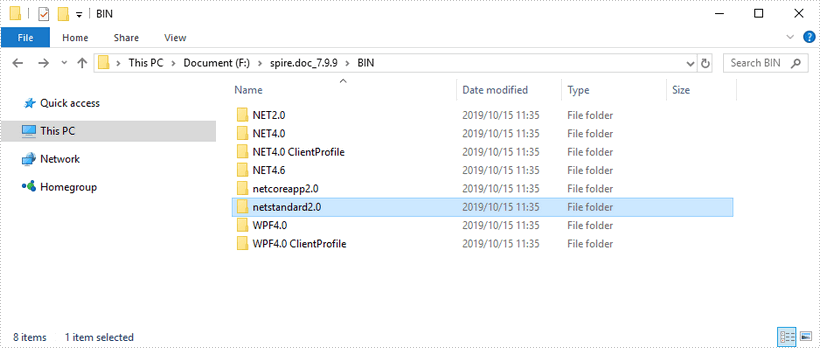
Step 1: Download the latest version of Spire.Doc Pack from this link, unzip it, and you'll get the DLL files for .NET Standarad from the "netstandard2.0" folder or install via NuGet.
PM> Install-Package Spire.Officefor.NETStandard
If you already have this folder in your disk, go straight to step two.
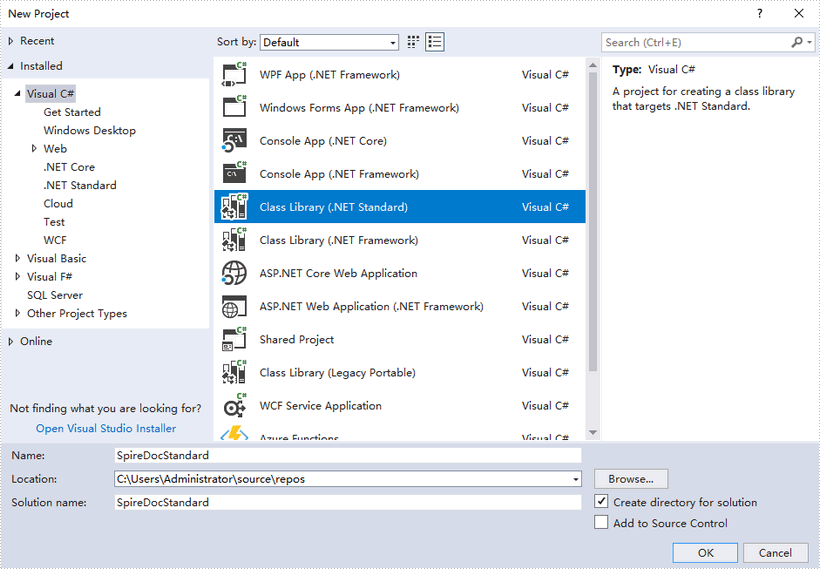
Step 2: Create a .NET Standard library project in your Visual Studio.
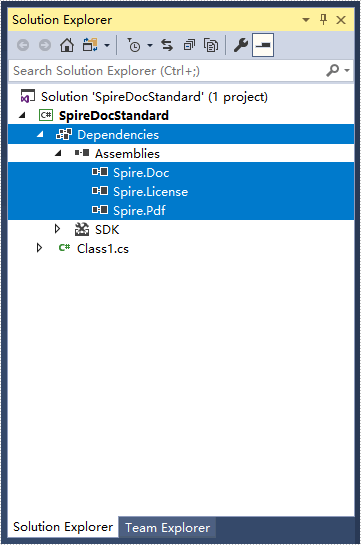
Step 3: Add all DLL files under the "netstandard2.0" folder as dependencies in your project.
Right-click "Dependencies" – select "Add Reference" – click "Browse" – selcet all DLLs under "netstandard2.0" folder – click "Add".
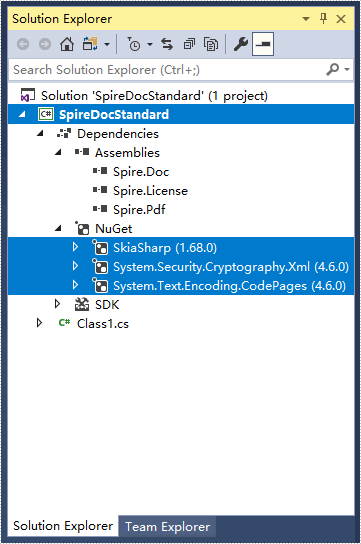
Step 4: Install the other three packages in your project via the NuGet Package Manager. They are SkiaSharp, System.Text.Encoding.CodePages and System.Security.Cryptography.Xml.
Right-click "Dependencies" – select "Manage NuGet Packages" – click "Browse" – type the package name – select the package from the search results – click "Install".
Step 5: Now that you've added all the dependences successfully, you can start to write your own .NET Standard library that is capable of creating and processing Word documents.
using Spire.Doc;
using Spire.Doc.Documents;

namespace SpireDocStandard
{
    public class Class1
    {
        public void CreateWord()
        {
            //Create a document object
            Document doc = new Document();

            //Add a section
            Section section = doc.AddSection();

            //Add a paragrah
            Paragraph paragraph = section.AddParagraph();

            //Append text to the paragraph
            paragraph.AppendText("Hello World");

            //Save to file
            doc.SaveToFile("Output.docx", FileFormat.Docx2013);
        }
    }
}
How to Mannually Add Spire.Doc as Dependency in a .NET Core Application
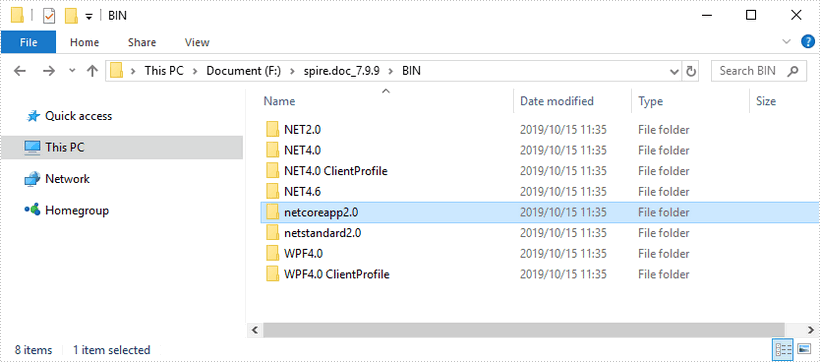
2019-10-16 02:56:57 Written by support iceblueStep 1: Download the latest version of Spire.Doc Pack from the link below, unzip it, and you'll get the DLL files for .NET Core in the “netcoreapp2.0” folder. If you already have this folder in your disk, go straight to step two.
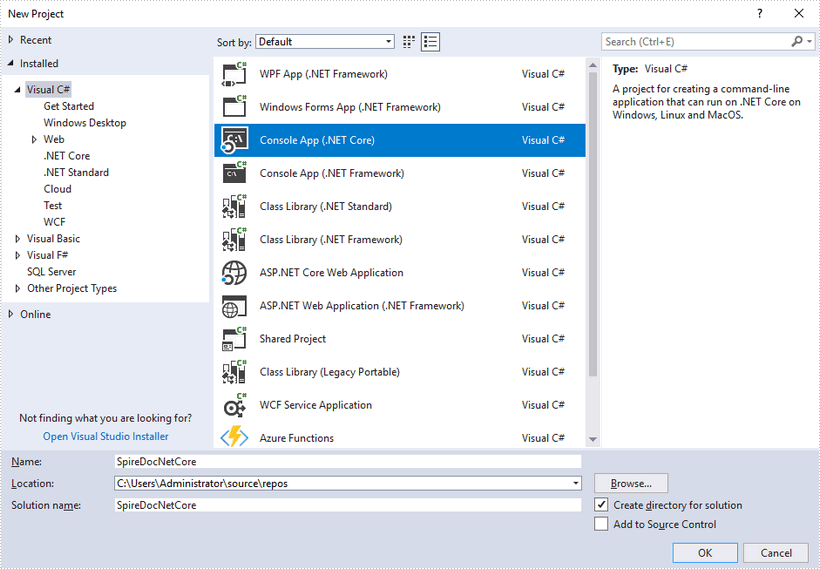
Step 2: Create a .Net Core application in your Visual Studio.
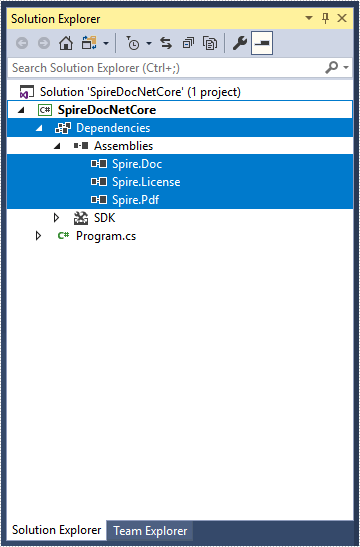
Step 3: Add all DLL files under the "netcoreapp2.0" folder as dependencies in your project.
Right-click "Dependencies" – select "Add Reference" – click "Browse" – selcet all DLLs under "netcoreapp2.0" folder – click "Add".
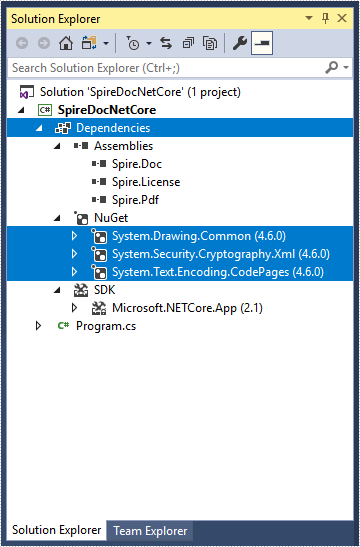
Step 4: Install the other three packages in your project via the NuGet Package Manager. They are System.Drawing.Common, System.Text.Encoding.CodePages and System.Security.Cryptography.Xml.
Right-click "Dependencies" – select "Manage NuGet Packages" – click "Browse" –type the package name – select the package from the search results – click "Install".
Step 5: Now that you've added all the dependences successfully, you can start to code. The following code snippet gives you an exmaple of how to create a simple Word document using Spire.Doc.
using Spire.Doc;
using Spire.Doc.Documents;

namespace SpireDocNetCore
{
    class Program
    {
        static void Main(string[] args)
        {
            //Create a document object
            Document doc = new Document();

            //Add a section
            Section section = doc.AddSection();

            //Add a paragrah
            Paragraph paragraph = section.AddParagraph();

            //Append text to the paragraph
            paragraph.AppendText("This article shows you how to mannually add Spire.Doc as dependency in a .NET Core application.");

            //Save to file
            doc.SaveToFile("Output.docx", FileFormat.Docx2013);
        }
    }
}
