

Spire.Doc for .NET (332)
Children categories
Markdown, as a lightweight markup language, is favored by programmers and technical document writers for its simplicity, readability, and clear syntax. However, in specific scenarios, there is often a need to convert Markdown documents into Word documents with rich formatting capabilities and control over the layout or to generate PDF files suitable for printing and easy viewing. This article is going to demonstrate how to convert Markdown content into Word documents or PDF files with Spire.Doc for .NET to meet various document processing requirements in different scenarios.
Install Spire.Doc for .NET
To begin with, you need to add the DLL files included in the Spire.Doc for.NET package as references in your .NET project. The DLL files can be either downloaded from this link or installed via NuGet.
PM> Install-Package Spire.Doc
Convert Markdown Files to Word Documents with C#
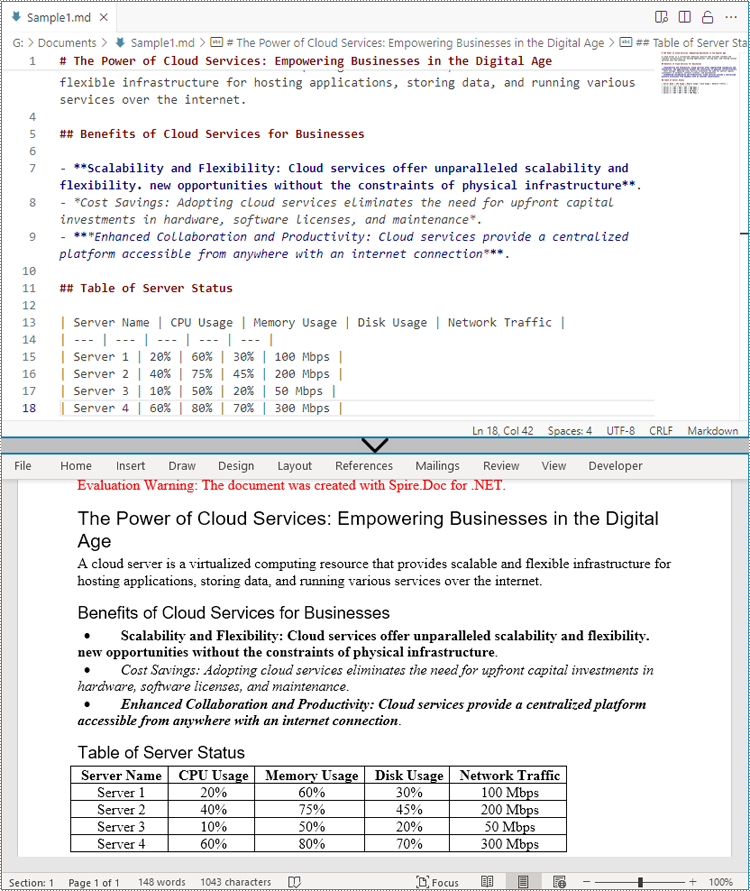
With Spire.Doc for .NET, we can load a Markdown file using Document.LoadFromFile(string fileName, FileFormat.Markdown) method and then convert it to other formats using Document.SaveToFile(string fileName, fileFormat FileFormat) method.
Since images in Markdown files are stored as links, directly converting a Markdown file to a Word document is suitable for Markdown files that do not contain images. If the file contains images, further processing of the images is required after conversion.
Here are the steps to convert a Markdown file to a Word document:
- Create an instance of Document class.
- Load a Markdown file using Document.LoadFromFile(string fileName, FileFormat.Markdown) method.
- Convert the file to a Word document and save it using Document.SaveToFile(string fileName, FileFormat.Docx) method.
- C#
using Spire.Doc;

namespace MdToDocx
{
    class Program
    {
        static void Main(string[] args)
        {
            // Create an object of Document class
            Document doc = new Document();

            // Load a Markdown file
            doc.LoadFromFile("Sample.md", FileFormat.Markdown);

            // Convert the Markdown file to a Word document
            doc.SaveToFile("MarkdownToWord.docx", FileFormat.Docx);
            doc.Close();
        }
    }
}
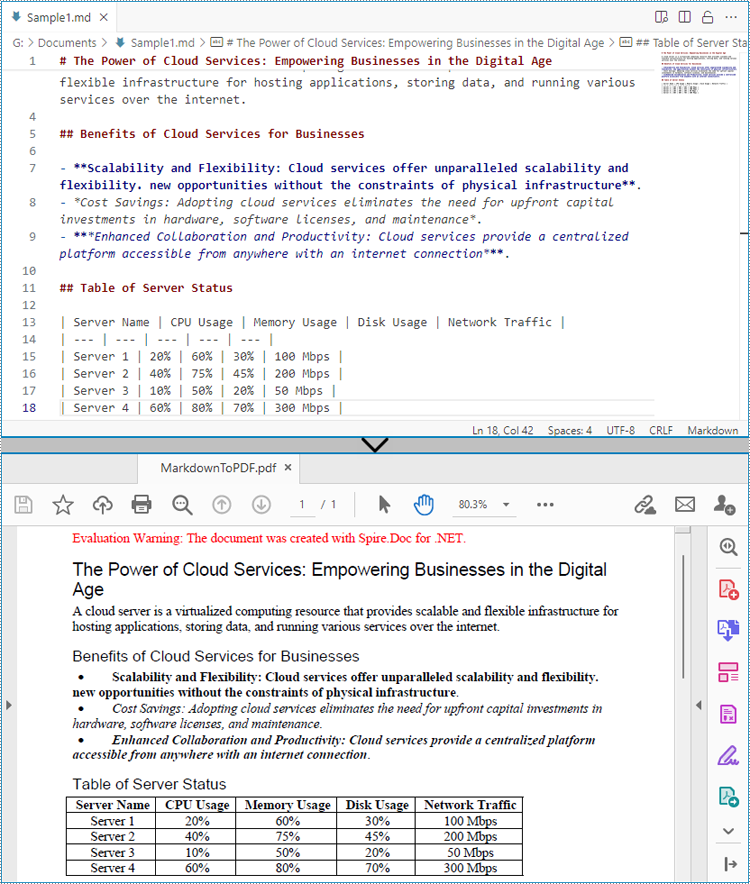
Convert Markdown Files to PDF Files with C#
We can also directly convert Markdown files to PDF files by using the FileFormat.PDF Enum as the parameter. Here are the steps to convert a Markdown file to a PDF file:
- Create an instance of Document class.
- Load a Markdown file using Document.LoadFromFile(string fileName, FileFormat.Markdown) method.
- Convert the file to a PDF file and save it using Document.SaveToFile(string fileName, FileFormat.Docx) method.
- C#
using Spire.Doc;

namespace MdToDocx
{
    class Program
    {
        static void Main(string[] args)
        {
            // Create an object of Document class
            Document doc = new Document();

            // Load a Markdown file
            doc.LoadFromFile("Sample.md", FileFormat.Markdown);

            // Convert the Markdown file to a PDF file
            doc.SaveToFile("MarkdownToPDF.pdf", FileFormat.PDF);
            doc.Close();
        }
    }
}
Apply for a Temporary License
If you'd like to remove the evaluation message from the generated documents, or to get rid of the function limitations, please request a 30-day trial license for yourself.
Adding gutters on Word document pages can enhance the professionalism and aesthetics of the document. Gutters not only make the document appear neater and more organized but also serve as a guide when printing the document, making it easier for readers to navigate and browse through the content. By adding gutters on the document pages, you can simulate the common binding line effect found in physical documents, giving the document a more printed quality. This article will explain how to use Spire.Doc for .NET to add gutters on Word document pages within a C# project.
- Add a Gutter at the Top of a Word Document Page using C#
- Add a Gutter at the Left of a Word Document Page using C#
Install Spire.Doc for .NET
To begin with, you need to add the DLL files included in the Spire.Doc for .NET package as references in your .NET project. The DLL files can be either downloaded from this link or installed via NuGet.
PM> Install-Package Spire.Doc
Add a Gutter at the Top of a Word Document Page using C#
To enable the top gutter on a page, you can set the section.PageSetup.IsTopGutter = true. The default gutter area displays blank without content, and this example also includes how to add text within the gutter area. Here are the detailed steps:
- Create a Document object.
- Load a document using the Document.LoadFromFile() method.
- Iterate through all sections of the document using a for loop over the Document.Sections collection.
- Set Section.PageSetup.IsTopGutter to true to display the gutter at the top of the page.
- Use the Section.PageSetup.Gutter property to set the width of the gutter.
- Call the custom AddTopGutterText() method to add text to the gutter area.
- Save the document using the Document.SaveToFile() method.
- C#
using Spire.Doc;
using Spire.Doc.Documents;
using Spire.Doc.Fields;
using Spire.Doc.Formatting;
using System.Drawing;
using System.Text;

namespace SpireDocDemo
{
	internal class Program
	{
		static void Main(string[] args)
		{
			// Create a document object
			Document document = new Document();

			// Load the document
			document.LoadFromFile("Sample1.docx");

			// Iterate through all sections of the document
			for (int i = 0; i < document.Sections.Count; i++)
			{
				// Get the current section
				Section section = document.Sections[i];

				// Set whether to add a gutter at the top of the page to true
				section.PageSetup.IsTopGutter = true;

				// Set the width of the gutter to 100f
				section.PageSetup.Gutter = 100f;

				// Call a method to add text on the top gutter
				AddTopGutterText(section);
			}

			// Save the modified document to a file
			document.SaveToFile("Add Gutter Line at the Top of the Page.docx", FileFormat.Docx2016);

			// Release document resources
			document.Dispose();
		}
		// Method to add text on the top gutter
		static void AddTopGutterText(Section section)
		{
			// Get the header of the section
			HeaderFooter header = section.HeadersFooters.Header;

			// Set the width of the text box to the page width
			float width = section.PageSetup.PageSize.Width;

			// Set the height of the text box to 40
			float height = 40;

			// Add a text box in the header
			TextBox textBox = header.AddParagraph().AppendTextBox(width, height);

			// Set the text box without border
			textBox.Format.NoLine = true;

			// Set the vertical starting position of the text box to the top margin area
			textBox.VerticalOrigin = VerticalOrigin.TopMarginArea;

			// Set the vertical position of the text box
			textBox.VerticalPosition = 140;

			// Set the horizontal alignment of the text box to left
			textBox.HorizontalAlignment = ShapeHorizontalAlignment.Left;

			// Set the horizontal starting position of the text box to the left margin area
			textBox.HorizontalOrigin = HorizontalOrigin.LeftMarginArea;

			// Set the text anchor to bottom
			textBox.Format.TextAnchor = ShapeVerticalAlignment.Bottom;

			// Set the text wrapping style to in front of text
			textBox.Format.TextWrappingStyle = TextWrappingStyle.InFrontOfText;

			// Set the text wrapping type to both sides
			textBox.Format.TextWrappingType = TextWrappingType.Both;

			// Create a paragraph object
			Paragraph paragraph = new Paragraph(section.Document);

			// Set the paragraph to be horizontally centered
			paragraph.Format.HorizontalAlignment = HorizontalAlignment.Center;

			// Create a font object
			Font font = new Font("Times New Roman", 8);

			// Create a drawing object
			Graphics graphics = Graphics.FromImage(new Bitmap(1, 1));
			string text1 = " - ";
			SizeF size1 = graphics.MeasureString(text1, font);
			float textWidth1 = size1.Width / 96 * 72;
			int count = (int)(textBox.Width / textWidth1);
			StringBuilder stringBuilder = new StringBuilder();
			for (int i = 1; i < count; i++)
			{
				stringBuilder.Append(text1);
			}

			// Create a character format object
			CharacterFormat characterFormat = new CharacterFormat(section.Document);
			characterFormat.FontName = font.Name;
			characterFormat.FontSize = font.Size;
			TextRange textRange = paragraph.AppendText(stringBuilder.ToString());
			textRange.ApplyCharacterFormat(characterFormat);

			// Add the paragraph to the text box
			textBox.ChildObjects.Add(paragraph);
		}
	}
}

Add a Gutter at the Left of a Word Document Page using C#
To set the left-side gutter on the page, ensure that you set the Section.PageSetup.IsTopGutter property to false. Here are the detailed steps:
- Create a Document object.
- Load a document using the Document.LoadFromFile() method.
- Iterate through all sections of the document using a for loop over the Document.Sections collection.
- Set Section.PageSetup.IsTopGutter to false to display the gutter on the left side of the page.
- Use the Section.PageSetup.Gutter property to set the width of the gutter.
- Call the custom AddLeftGutterText() method to add text to the gutter area.
- Save the document using the Document.SaveToFile() method.
- C#
using Spire.Doc;
using Spire.Doc.Documents;
using Spire.Doc.Fields;
using Spire.Doc.Formatting;
using System.Drawing;
using System.Text;

namespace SpireDocDemo
{
	internal class Program
	{
		static void Main(string[] args)
		{
			// Create a document object
			Document document = new Document();

			// Load the document
			document.LoadFromFile("Sample1.docx");

			// Iterate through all sections of the document
			for (int i = 0; i < document.Sections.Count; i++)
			{
				// Get the current section
				Section section = document.Sections[i];

				// Set whether to add a gutter at the top of the page to false, it will be added to the left side of the page
				section.PageSetup.IsTopGutter = false;

				// Set the width of the gutter to 100f
				section.PageSetup.Gutter = 100f;

				// Call a method to add text on the left gutter
				AddLeftGutterText(section);
			}

			// Save the modified document to a file
			document.SaveToFile("Add Gutter Line on the Left Side of the Page.docx", FileFormat.Docx2016);

			// Release document resources
			document.Dispose();
		}
		// Method to add text on the left gutter
		static void AddLeftGutterText(Section section)
		{
			// Get the header of the section
			HeaderFooter header = section.HeadersFooters.Header;

			// Set the width of the text box to 40
			float width = 40;

			// Get the page height
			float height = section.PageSetup.PageSize.Height;

			// Add a text box in the header
			TextBox textBox = header.AddParagraph().AppendTextBox(width, height);

			// Set the text box without border
			textBox.Format.NoLine = true;

			// Set the text direction in the text box from right to left
			textBox.Format.LayoutFlowAlt = TextDirection.RightToLeft;

			// Set the horizontal starting position of the text box
			textBox.HorizontalOrigin = HorizontalOrigin.LeftMarginArea;

			// Set the horizontal position of the text box
			textBox.HorizontalPosition = 140;

			// Set the vertical alignment of the text box to top
			textBox.VerticalAlignment = ShapeVerticalAlignment.Top;

			// Set the vertical starting position of the text box to the top margin area
			textBox.VerticalOrigin = VerticalOrigin.TopMarginArea;

			// Set the text anchor to top
			textBox.Format.TextAnchor = ShapeVerticalAlignment.Top;

			// Set the text wrapping style to in front of text
			textBox.Format.TextWrappingStyle = TextWrappingStyle.InFrontOfText;

			// Set the text wrapping type to both sides
			textBox.Format.TextWrappingType = TextWrappingType.Both;

			// Create a paragraph object
			Paragraph paragraph = new Paragraph(section.Document);

			// Set the paragraph to be horizontally centered
			paragraph.Format.HorizontalAlignment = HorizontalAlignment.Center;

			// Create a font object
			Font font = new Font("Times New Roman", 8);

			// Create a drawing object
			Graphics graphics = Graphics.FromImage(new Bitmap(1, 1));
			string text1 = " - ";

			// Measure the size of the text
			SizeF size1 = graphics.MeasureString(text1, font);
			float textWidth1 = size1.Width / 96 * 72;

			int count = (int)(textBox.Height / textWidth1);
			StringBuilder stringBuilder = new StringBuilder();
			for (int i = 1; i < count; i++)
			{
				stringBuilder.Append(text1);
			}

			// Create a character format object
			CharacterFormat characterFormat = new CharacterFormat(section.Document);
			characterFormat.FontName = font.Name;
			characterFormat.FontSize = font.Size;
			TextRange textRange = paragraph.AppendText(stringBuilder.ToString());
			textRange.ApplyCharacterFormat(characterFormat);

			// Add the paragraph to the text box
			textBox.ChildObjects.Add(paragraph);
		}
	}
}
Apply for a Temporary License
If you'd like to remove the evaluation message from the generated documents, or to get rid of the function limitations, please request a 30-day trial license for yourself.
C#: Add, Modify, or Remove Footers in PowerPoint Documents
2024-03-22 01:37:59 Written by support iceblueAdding, modifying, and removing footers in a PowerPoint document is crucial for enhancing the professionalism and readability of a presentation. By adding footers, you can include key information such as presentation titles, authors, dates, or page numbers, which helps the audience better understand the content. Modifying footers allows you to update information, making it more attractive and practical. Additionally, removing footers is also necessary, especially in certain situations such as when specific information is not required to be displayed at the bottom of each page for a particular occasion. In this article, you will learn how to add, modify, or remove footers in PowerPoint documents in C# using Spire.Presentation for .NET.
- C# Add Footers in PowerPoint Documents
- C# Modify Footers in PowerPoint Documents
- C# Remove Footers in PowerPoint Documents
Install Spire.Presentation for .NET
To begin with, you need to add the DLL files included in the Spire.Presentation for.NET package as references in your .NET project. The DLL files can be either downloaded from this link or installed via NuGet.
PM> Install-Package Spire.Presentation
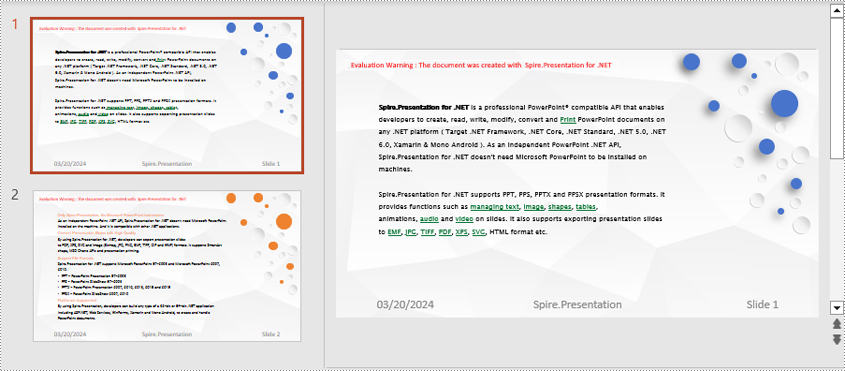
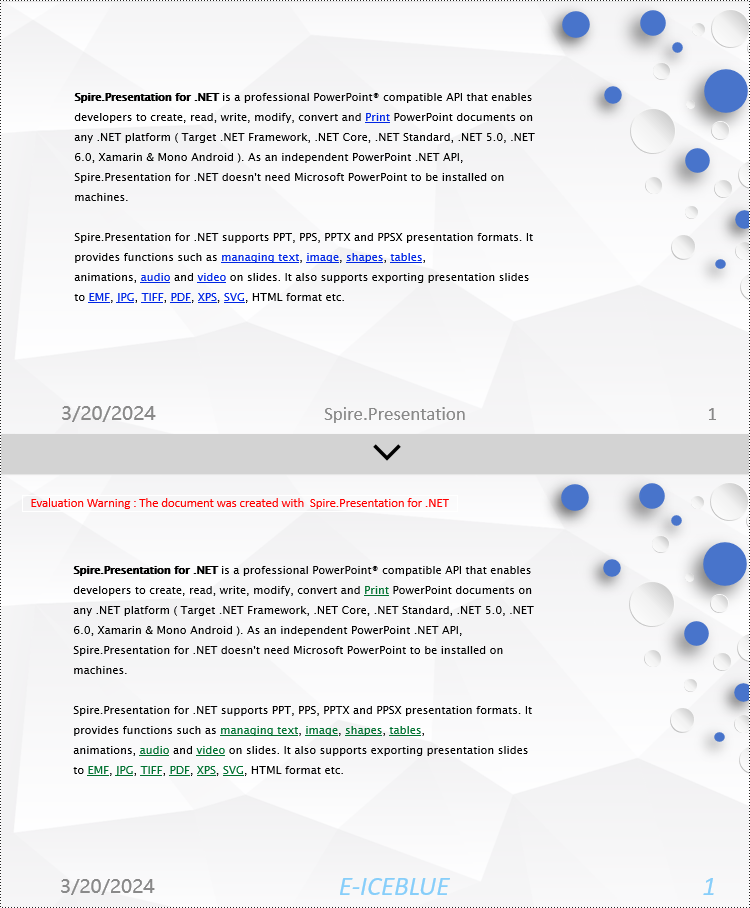
C# Add Footers in PowerPoint Documents
Spire.Presentation enables the addition of footer, slide number, and date placeholders at the bottom of PowerPoint document pages to uniformly add the same footer content across all pages. Here are the detailed steps:
- Create a Presentation object.
- Load a PowerPoint document using the lisentation.LoadFromFile() method.
- Set Presentation.FooterVisible = true to make the footer visible and set the footer text.
- Set Presentation.SlideNumberVisible = true to make slide numbers visible, then iterate through each slide, check for the existence of a slide number placeholder, and modify the text to "Slide X" format if found.
- Set Presentation.DateTimeVisible = true to make date and time visible.
- Use the Presentation.SetDateTime() method to set the date format.
- Save the document using the Presentation.SaveToFile() method.
- C#
using Spire.Presentation;

namespace SpirePresentationDemo
{
    internal class Program
    {
        static void Main(string[] args)
        {
            // Create a Presentation object
            Presentation presentation = new Presentation();

            // Load the presentation from a file
            presentation.LoadFromFile("Sample1.pptx");

            // Set the footer visible
            presentation.FooterVisible = true;

            // Set the footer text to "Spire.Presentation"
            presentation.SetFooterText("Spire.Presentation");

            // Set slide number visible
            presentation.SlideNumberVisible = true;

            // Iterate through each slide in the presentation
            foreach (ISlide slide in presentation.Slides)
            {
                foreach (IShape shape in slide.Shapes)
                {
                    if (shape.Placeholder != null)
                    {
                        // If it is a slide number placeholder
                        if (shape.Placeholder.Type.Equals(PlaceholderType.SlideNumber))
                        {
                            TextParagraph textParagraph = (shape as IAutoShape).TextFrame.TextRange.Paragraph;
                            String text = textParagraph.Text;

                            // Modify the slide number text to "Slide X"
                            textParagraph.Text = "Slide " + text;
                        }
                    }
                }
            }

            // Set date time visible
            presentation.DateTimeVisible = true;

            // Set date time format
            presentation.SetDateTime(DateTime.Now, "MM/dd/yyyy");

            // Save the modified presentation to a file
            presentation.SaveToFile("AddFooter.pptx", FileFormat.Pptx2016);

            // Dispose of the Presentation object resources
            presentation.Dispose();
        }
    }
}
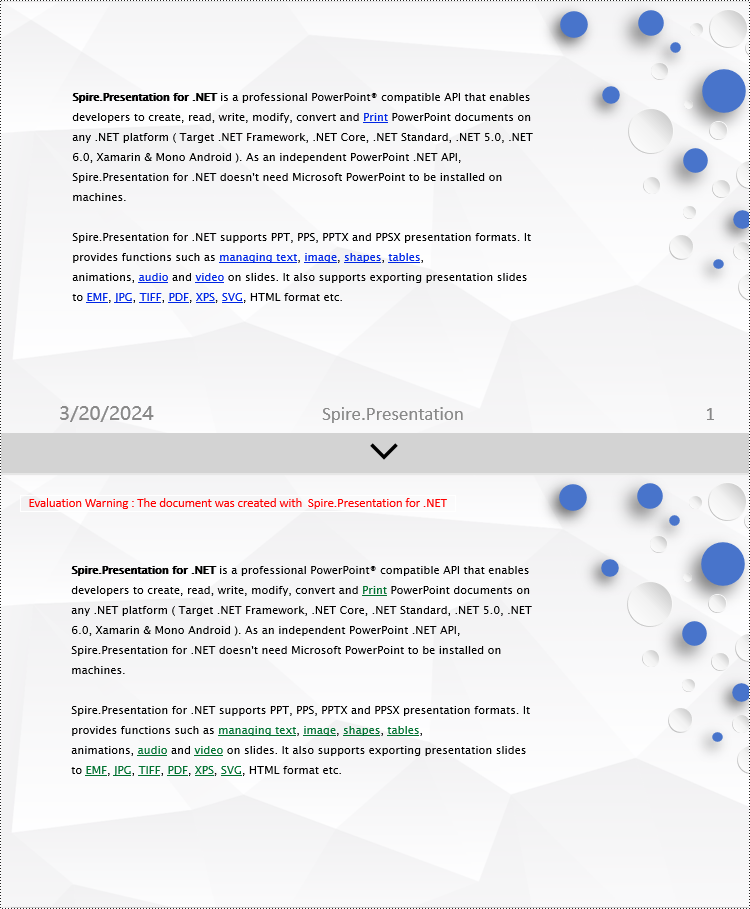
C# Modify Footers in PowerPoint Documents
To modify footers in a PowerPoint document, you first need to individually inspect the shapes on each slide, identify footer placeholders, page number placeholders, etc., and then set specific content and formats for each type of placeholder. Here are the detailed steps:
- Create a Presentation object.
- Load a PowerPoint document using the Presentation.LoadFromFile() method.
- Use the Presentation.Slides[index] property to retrieve a slide.
- Use a for loop to iterate through the shapes on the slide, individually checking each shape to determine if it is a placeholder for a footer, page number, etc., and then modify its content or format accordingly.
- Save the document using the Presentation.SaveToFile() method.
- C#
using Spire.Presentation;

namespace SpirePresentationDemo
{
    internal class Program
    {
        static void Main(string[] args)
        {
            // Create a Presentation object
            Presentation presentation = new Presentation();

            // Load the presentation from a file
            presentation.LoadFromFile("Sample2.pptx");

            // Get the first slide
            ISlide slide = presentation.Slides[0];

            // Iterate through shapes in the slide
            for (int i = 0; i < slide.Shapes.Count; i++)
            {
                // Check if the shape is a placeholder
                if (slide.Shapes[i].Placeholder != null)
                {
                    // Get the placeholder type
                    PlaceholderType type = slide.Shapes[i].Placeholder.Type;

                    // If it is a footer placeholder
                    if (type == PlaceholderType.Footer)
                    {
                        // Convert the shape to IAutoShape type
                        IAutoShape autoShape = (IAutoShape)slide.Shapes[i];

                        // Set the text content to "E-ICEBLUE"
                        autoShape.TextFrame.Text = "E-ICEBLUE";

                        // Modify the text font
                        ChangeFont1(autoShape.TextFrame.Paragraphs[0]);
                    }
                    // If it is a slide number placeholder
                    if (type == PlaceholderType.SlideNumber)
                    {
                        // Convert the shape to IAutoShape type
                        IAutoShape autoShape = (IAutoShape)slide.Shapes[i];

                        // Modify the text font
                        ChangeFont1(autoShape.TextFrame.Paragraphs[0]);
                    }
                }
            }

            // Save the modified presentation to a file
            presentation.SaveToFile("ModifyFooter.pptx", FileFormat.Pptx2016);

            // Dispose of the Presentation object resources
            presentation.Dispose();
        }
       static void ChangeFont1(TextParagraph paragraph)
        {
            // Iterate through each text range in the paragraph
            foreach (TextRange textRange in paragraph.TextRanges)
            {
                // Set the text style to italic
                textRange.IsItalic = TriState.True;

                // Set the text font
                textRange.EastAsianFont = new TextFont("Times New Roman");

                // Set the text font size to 34
                textRange.FontHeight = 34;

                // Set the text color
                textRange.Fill.FillType = Spire.Presentation.Drawing.FillFormatType.Solid;
                textRange.Fill.SolidColor.Color = System.Drawing.Color.LightSkyBlue;
            }
        }
   }
}
C# Remove Footers in PowerPoint Documents
To remove footers from a PowerPoint document, you first need to locate footer placeholders, page number placeholders, date placeholders, etc., within the slides, and then remove them from the collection of shapes on the slide. Here are the detailed steps:
- Create a Presentation object.
- Load a PowerPoint document using the Presentation.LoadFromFile() method.
- Use the Presentation.Slides[index] property to retrieve a slide.
- Use a for loop to iterate through the shapes on the slide, check if it is a placeholder, and if it is a footer placeholder, page number placeholder, date placeholder, remove it from the slide.
- Save the document using the Presentation.SaveToFile() method.
- C#
using Spire.Presentation;

namespace SpirePresentationDemo
{
    internal class Program
    {
        static void Main(string[] args)
        {
            // Create a Presentation object
            Presentation presentation = new Presentation();

            // Load the presentation from a file
            presentation.LoadFromFile("Sample2.pptx");

            // Get the first slide
            ISlide slide = presentation.Slides[0];

            // Iterate through shapes in the slide in reverse order
            for (int i = slide.Shapes.Count - 1; i >= 0; i--)
            {
                // Check if the shape is a placeholder
                if (slide.Shapes[i].Placeholder != null)
                {
                    // Get the placeholder type
                    PlaceholderType type = slide.Shapes[i].Placeholder.Type;

                    // If it is a footer placeholder, slide number placeholder, or date placeholder
                    if (type == PlaceholderType.Footer || type == PlaceholderType.SlideNumber || type == PlaceholderType.DateAndTime)
                    {
                        // Remove it from the slide
                        slide.Shapes.RemoveAt(i);
                    }
                }
            }

            // Save the modified presentation to a file
            presentation.SaveToFile("RemoveFooter.pptx", FileFormat.Pptx2016);

            // Dispose of the Presentation object resources
            presentation.Dispose();
        }
    }
}
Apply for a Temporary License
If you'd like to remove the evaluation message from the generated documents, or to get rid of the function limitations, please request a 30-day trial license for yourself.
